

 Thanks:
  Likes:
  Needs Pictures:
  Picture(s) thanks:
Results 1 to 7 of 7
Thread: Small Blade Sharpening Jig
-
20th March 2024, 04:57 PM #1
 Novice


- Join Date
- Aug 2021
- Location
- Riddells Creek
- Posts
- 11
 Small Blade Sharpening Jig
I built a Veritas inspired small blade sharping jig.
It works with 12mm ground rod that I have on my bench grinder set up.
With some scrap aluminium, two magnets and a few hours it was done.
First I drilled two 25mm holes (to suit the magnets) in 4mm aluminium with a spade bit and then cut to size with a jigsaw.
.IMG_3630.jpgIMG_3631.jpg
The aluminium edges were filed with a body file - they are fast, clean and don't clog up - unlike normal files. The other item below is the adjustable plate that supports the blade.
IMG_3632.jpgIMG_3633.jpg
The two magnets are epoxy glued in one at a time to avoid them jumping out with magnetic attraction. Also discovered magnets can be broken.
12mm rod mounting blocks are attached and adjustment screw added.
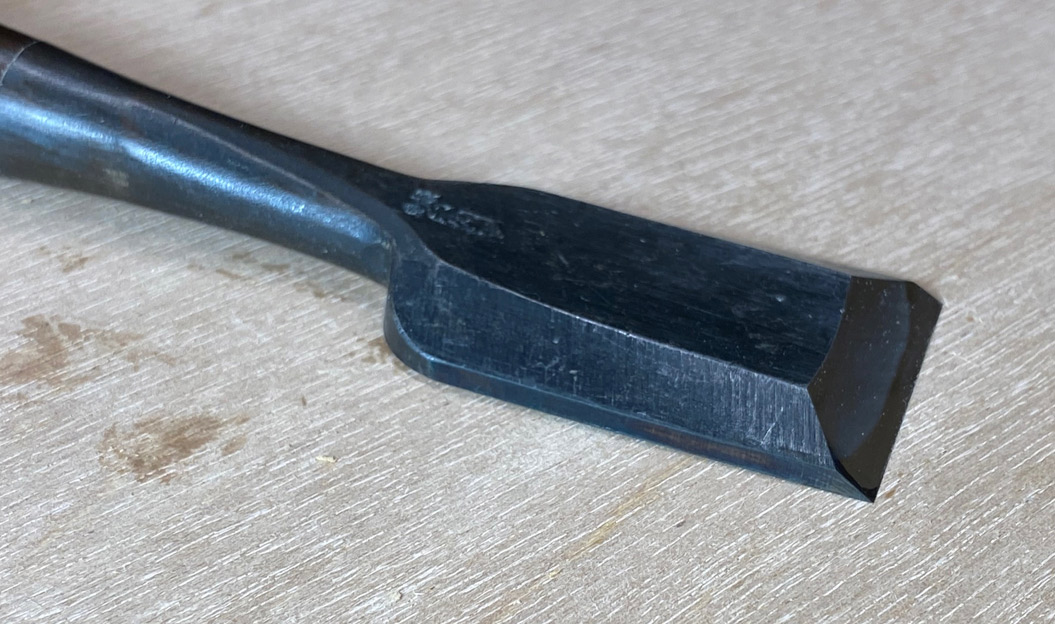
The old Titan chisel is ground and ready for work!
IMG_3638.jpg
IMG_3636.jpg
IMG_3635.jpg
-
20th March 2024 04:57 PM # ADSGoogle Adsense Advertisement
- Join Date
- Always
- Location
- Advertising world
- Posts
- Many
-
21st March 2024, 07:56 AM #2
GOLD MEMBER

- Join Date
- Oct 2018
- Location
- Dandenong Ranges
- Posts
- 1,893
Hi JM. Very clever jig. I have done this freehand but your bevels look much nicer.
-
21st March 2024, 04:04 PM #3
Novice
- Join Date
- Aug 2021
- Location
- Riddells Creek
- Posts
- 11
Hi Mountain Ash
I was also looking at Linear Bearing Blocks that you could mount attachments to with the four mounting holes - possibly another 4mm Aluminium plate with 20 smaller magnets to hold flat knives and the like.
Cost for the block is $5.92.
Linear Bearing Block.png
-
21st March 2024, 05:09 PM #4
Be inspired. Be creative. Be bold.
- Join Date
- Apr 2001
- Location
- Perth
- Posts
- 10,826
Hi Jono
I used this method, utilising the Veritas small plane jig and a bench grinder with the Tormek BGM-100 guide, in 2010 ...
https://www.inthewoodshop.com/ShopMa...ailchisel.html

This was great for grinding the shoulders of chisels and made a great set of Stanley 750s ...

More recently I came up with a less complicated method for converting bench chisels for dovetailing ...
https://www.inthewoodshop.com/ShopMa...ilChisels.html
This involved a simple guide on a belt sander, which re-angled the sides ...

Good for dovetailing ...
Regards from Perth
DerekVisit www.inthewoodshop.com for tutorials on constructing handtools, handtool reviews, and my trials and tribulations with furniture builds.
-
21st March 2024, 06:32 PM #5
Novice
- Join Date
- Aug 2021
- Location
- Riddells Creek
- Posts
- 11
Hi Derek,
I was searching the internet for information on dovetail chisels and did end up on your web site. I actually did not know about the Veritas jig and the Tormek rest until then... I could not find the Veritas jig for sale and the Tormek is around $100 I think.
CNC online shops sell all sorts of parts, brackets and 12mm rod - this led me to DIY my grinder set up - at low cost - my 12mm rod rest is not as easily adjusted as the Tormek with screw but the T slot aluminium works fine.
Ideally the grinding stone diameter should be larger than the grinder motor body diameter so you can flip the chisel and use the same stone.
I like the belt sander improvement
-
21st March 2024, 07:07 PM #6
Be inspired. Be creative. Be bold.
- Join Date
- Apr 2001
- Location
- Perth
- Posts
- 10,826
Jono, I omitted to compliment you on your version. My apology. Actually think that your blade holder would be better than the Veritas here as the magnets are stronger.
Regards from Perth
DerekVisit www.inthewoodshop.com for tutorials on constructing handtools, handtool reviews, and my trials and tribulations with furniture builds.
-
21st March 2024, 11:10 PM #7
GOLD MEMBER
- Join Date
- Mar 2010
- Location
- US
- Posts
- 3,132
Very good result! It's hard to get much past 8" on wheels without getting into some danger or high cost. Originally Posted by Jono M

I grind the bevels freehand on an 8" contact wheel on a belt grinder, but it's not really that important as the learning curve is maybe steep at first, the chance of skin removal early on is pretty high and everything with a contact wheel and belt and drive is getting expensive.

 Reply With Quote
Similar Threads
-
Saw blade sharpening
By sailor in forum TABLE SAWS & COMBINATIONSReplies: 2Last Post: 15th August 2009, 11:14 PM -
Blade Sharpening
By John Saxton in forum SHARPENINGReplies: 9Last Post: 17th February 2009, 10:04 PM -
Blade Sharpening
By Carry Pine in forum TABLE SAWS & COMBINATIONSReplies: 21Last Post: 13th August 2008, 09:44 PM -
blade sharpening
By orraloon in forum BANDSAWSReplies: 4Last Post: 23rd September 2007, 07:07 PM -
Blade sharpening
By Auzzie turner in forum BANDSAWSReplies: 11Last Post: 17th September 2006, 11:55 AM
