

 Thanks: 0
 Likes: 0
 Needs Pictures: 0
 Picture(s) thanks: 0
Results 1 to 15 of 29
Thread: wooden dado planes
-
10th December 2005, 12:54 AM #1
 Banned


- Join Date
- Apr 2005
- Location
- kyogle N.S.W
- Age
- 50
- Posts
- 4,844
 wooden dado planes
Hello,
I bought another Beech dado plane from the markets. Cuts a groove cross grain 7/8" wide. They've got a double nicker blade at front, that scores the wood first, then the blade that cuts the dado. Its skewed, which cuts cross grain better.
I like to share the process of making it work. And discuss it. Like to here others experiences with them etc. Any thoughts, ideas, whatever.....it gets a bit lonely in an all girl house ! Christ, all our pets are girls too. :eek: Not that woodworking is for blokes only. Just, my girls definetly arn't into it, thats all.
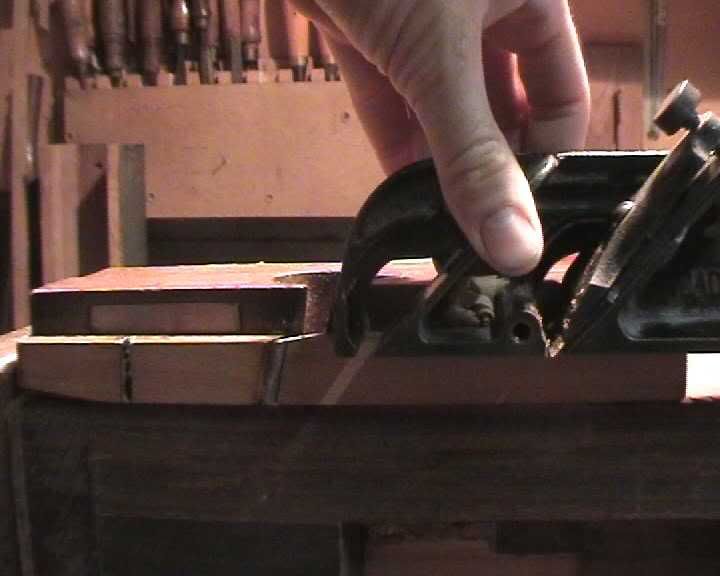
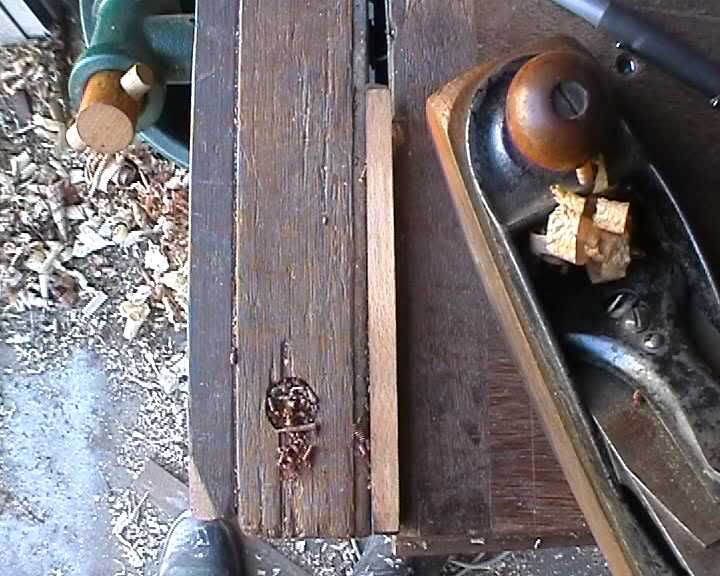
This is how I got it from the markets. $20 I paid for it. The problem with them, being wood, is usually that their all warped or twisted out of square. When that happens their useless.
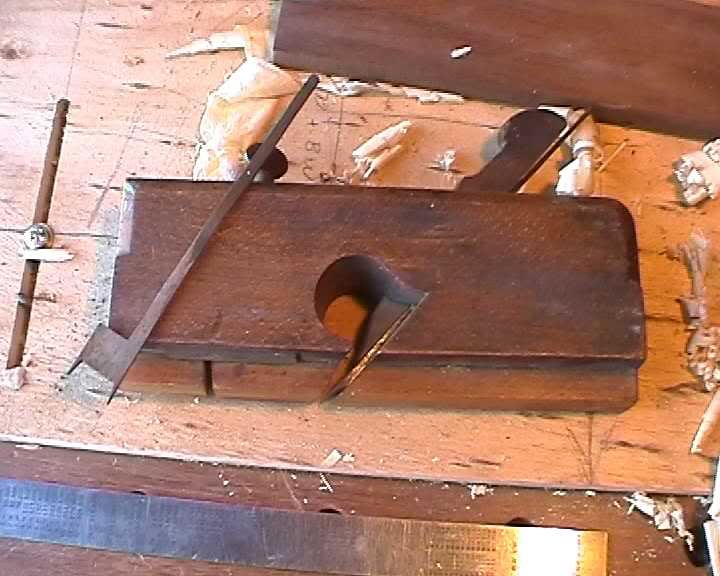
Its got a depth adjustment plate. And you can see, a part of the leading corner of the body's fallen off. Shouldn't affect its performance too much.
I ran the side face through the jointer. Then, with the plane in the vise a squared up the edge with a rebate plane. I would have done the edge through the jointer as well, except my jointer fence wasn't set square, and the rebate plane was ready to go, so I used it instead.
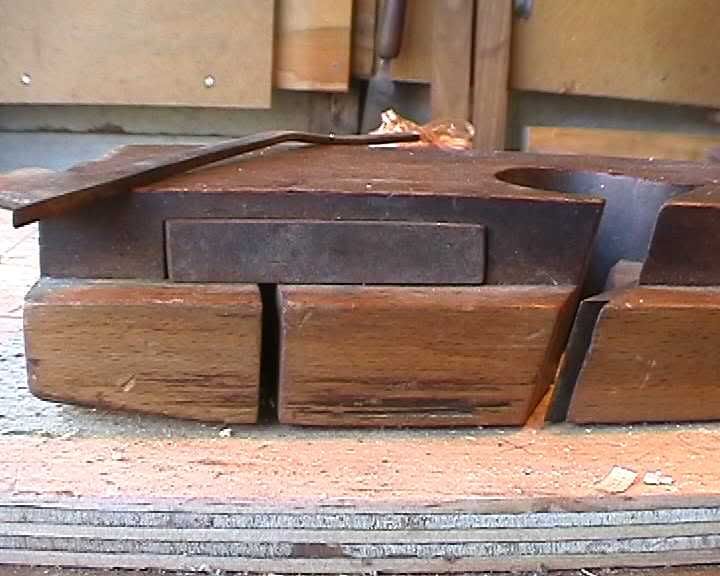
I forgot to take these photo's while I was doing it. So I just went out now to the shed to take them. So, they probably look a bit staged. Anycase, my next step was to make the inside face (in the planes rebate), parallel to the main face. This has to be fixed, or now doubt the plane will bind in use. Basically what your doing, to fix this parallel problem, is making the width of your cut smaller. 7/8" is the origional cut. Well, it won't cut that any more ; 2mm less after its squared up. Just have to accept it.
This should clarify what I'm saying. first picture shows how I scribing a line parallel. And second sort of shows how I used a rebate plane to plane up right onto this scribed line. So its all parallel now.
Now, that the plane body was trued up, I went about fixing the blades to the new dimensions. Since the body's set to cut smaller dado's now, the blade will have to be ground thinner to accomidate. The same story with the nicker blade.
There's a lot of little jobs, and I'd be here forever describing all of them. So, I'll just paste in a few of the important pictures.
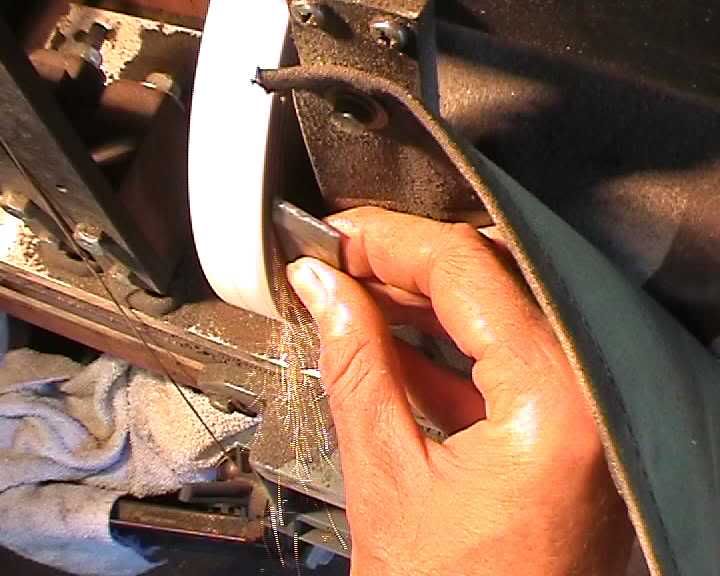
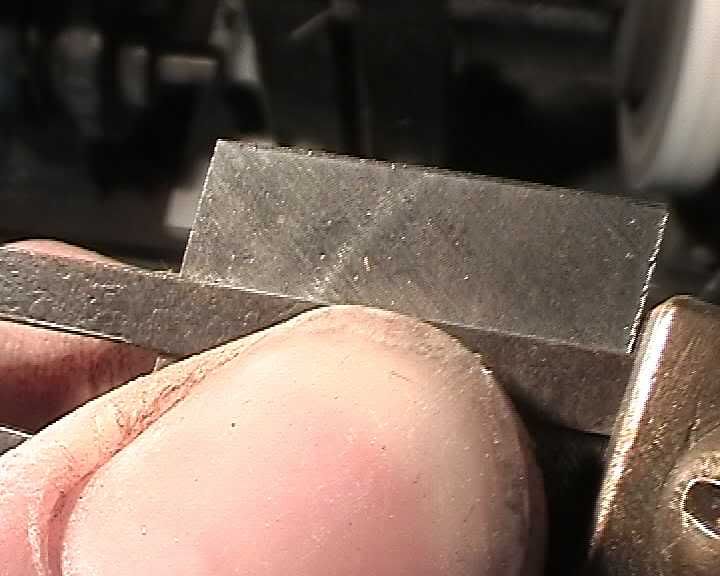
To grind the width of the blade smaller, I just use the side of a grinder. Just grind and check how it lines up in the plane body, grind and check on and on until the width of the blade is right on,,,or just slightly wider than the plane bodies width. Important thing to remember here, was to not grind square. You want the edge of the blade ground a few degrees off, to ensure the back of the blade, never pretrudes out the side of the plane, else the blade will force the plane body off your work.
Can see in this picture how I hold it off square a touch. Not so important with nicker though, since its not wedged skewed.
Here's grinding the skew blade. The angle on the blade will be pretty close to the angle you want anyway. So, its a good starting point. I set a sliding T-bevel to existing angle. Then with a pencil mark a line at this angle where you intend to grind straight. See, often you need to grind off defects in old blades. In this case, there was a couple of rust pits and a small chip on one corner I wanted out of the picture. So, I marked a line past them.
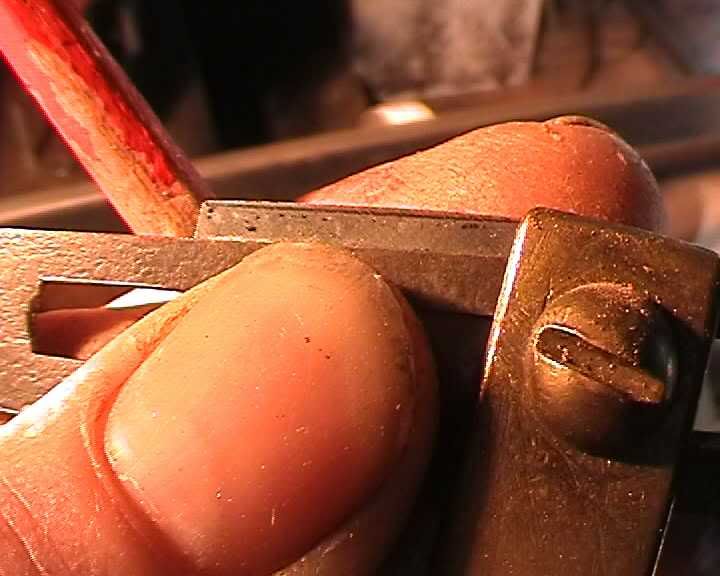
Then took the blade straight into a square dressed grinder and nibbled up to the line.
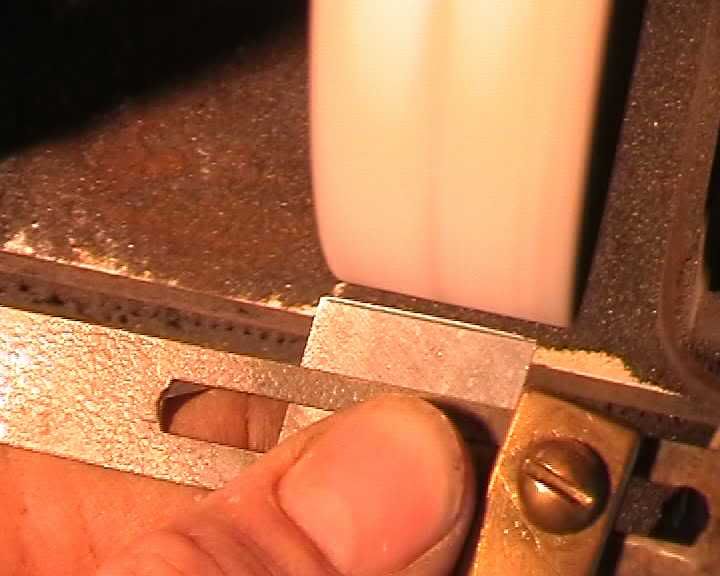
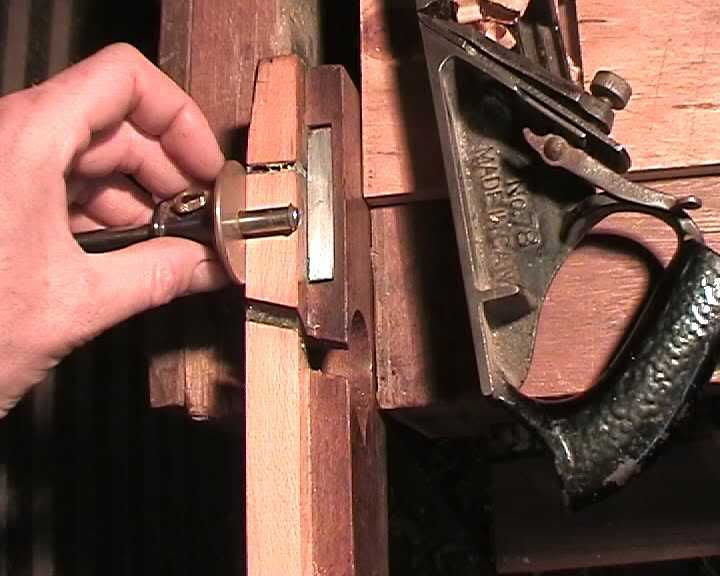
Now, I check this angle, by wedging the blade back in the body, and sighting down the nose. The blades gota be peaking out the same amount along every part of the sole, whilst the sides of the blade are flush to both the main and rebate sides. If the angles wrong, I would adjust the T-bevel slightly and regrind the edge slightly.....It doesn't have to be completely exact. Usually a little play on the planes bed accomidates for little errors. I just had to be patient.
Once the angles been finalised, I finish off the rest of the sharpening. ie. Flatterning back, grinding bevel. Honing it all real sharp. Same with the double nickers.
Here's another problem to address. Seems to happen a lot with wooden planes. The wedges are warped. The blades gota be well fixed right at the wedge tip. See the daylight. If I don't fix this, the blade will flex too much and chatter. ...Can sort of see the bow in the wedge, in this second photo.
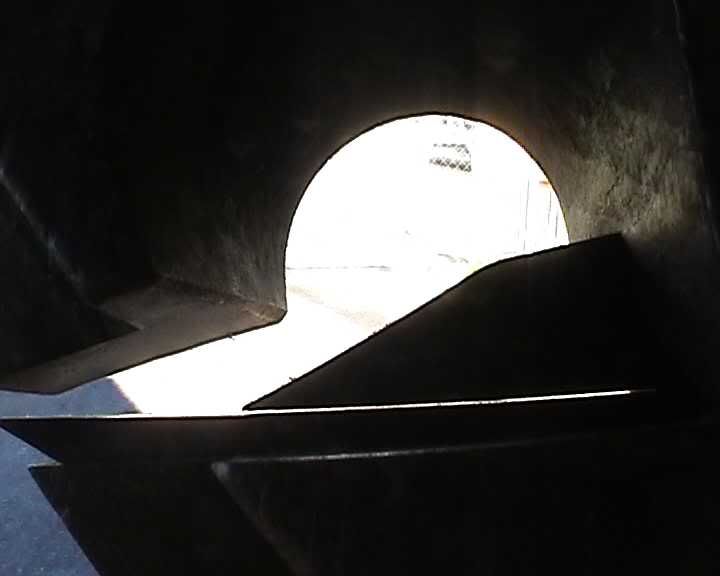
To fix, I just ran a line a line along one side of the wedge. Then planed up to the line, slowly. Frequent stoping to check progress is important. I didn't want to plane too far. Just keep making small adjustments until the daylight disappears, and the wedge snuggly holds the blade, most importantly right at the very tip. I found I can test this by just trying to wriggle the blade about, or pressing at the bevel with a stick. You don't want any movement.
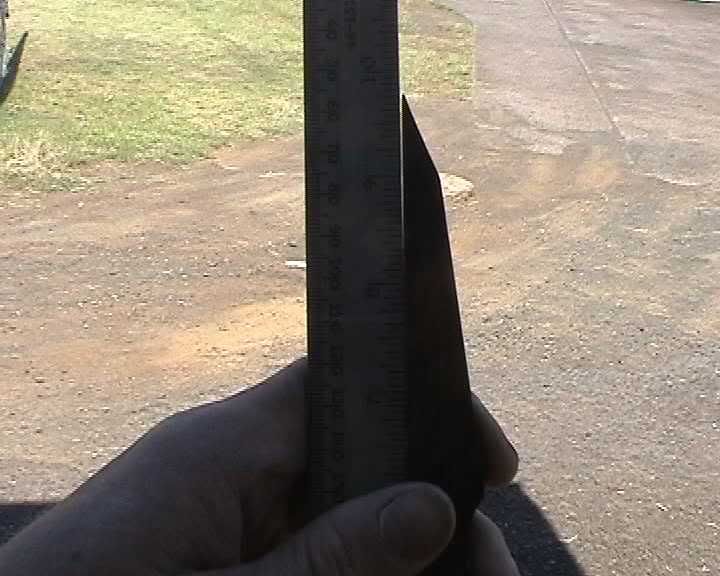
And here it is in use......They cut very quickly cross grain. With pine, its like spreading warm butter. And fast to set up. You just clamp down a battern and run the plane along that. First few passes should be as steady as possible. You want those nickers to cut a good crisp line. After you've dropped the cut a bit, you can plane without the battern. But I like to keep it in place to help keep the plane vertical.
You just wind the depth stop to depth you like.
Actually is one of those few woodworking jobs that is done quicker by hand than by powered routers, in my opinion.
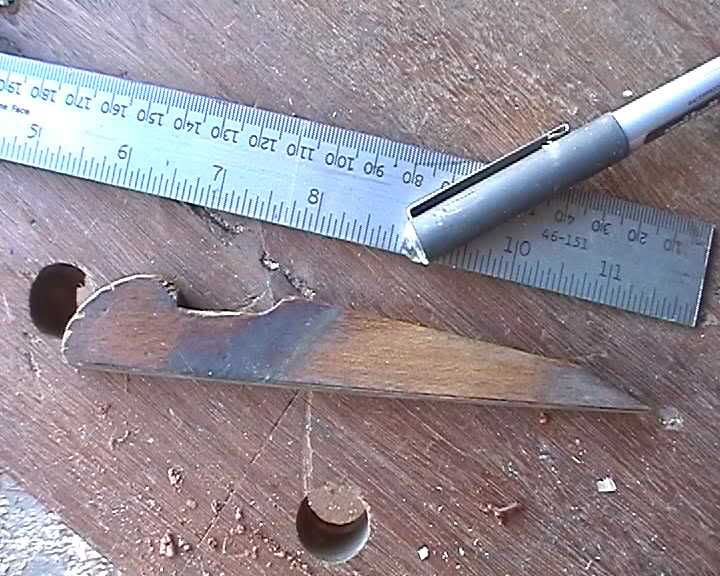
In this picture I've just used my circular saw guide for a battern, cause it was handy. And I've done it the wrong way. I should have the plane on the other side so the depth stop will hit my stock and not the guide. Keen to see if my new plane worked you see.
<div><img src="http://i33.photobucket.com/albums/d74/apricotripper/woodendadoplane16.jpg" border="0" alt="" /><br />
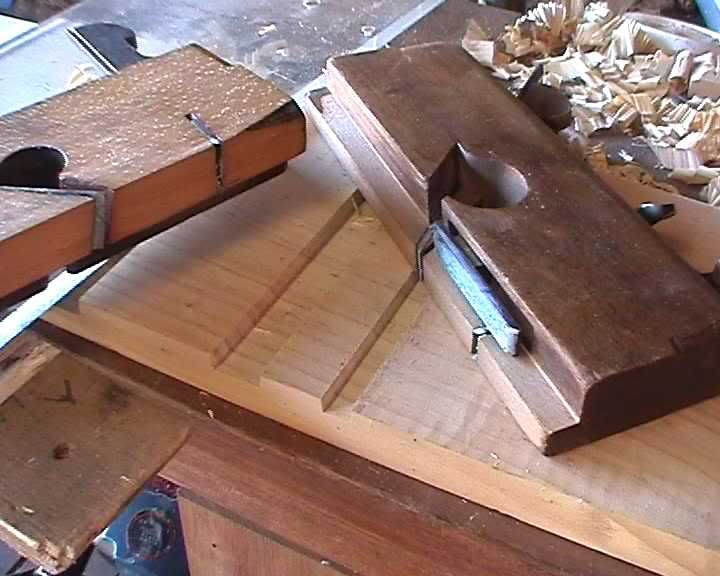
Shows my other 1/2" (well, more like 12mm) dado plane. It has a different orientation. They come left and right handed. Not entirely shore which is which. Guessing my 7/8" is left handed and the 1/2" (on right) is right handed cause the depth stop is on the right, like all combination planes. Bloody right handers. Rule the world don't you
Phew !!! Thats the longest post I've ever done. Won't do that again in a hurry. I've got broadband now thankfully. But, seriously like to here your thoughts. I've been wanting to get Stanley 39 versions. Never tired the steel ones. What are they like to use ?
Last edited by JDarvall; 10th December 2005 at 01:08 AM. Reason: put wrong picture in.
-
10th December 2005 12:54 AM # ADSGoogle Adsense Advertisement
- Join Date
- Always
- Location
- Advertising world
- Age
- 2010
- Posts
- Many
-
10th December 2005, 01:02 PM #2
Senior Member
- Join Date
- May 2005
- Location
- Forest Grove, Oregon USA
- Posts
- 496
Hey Jake...looking great, as usual!
The 39s [I have a 1/2" and a 7/8"--had a 3/8" but it walked away] are not as pleasant to hold as a woodie.
They work equally as well and are of course less an issue to rehab than a faithfully used woodie. Could be because they were less used!
The main problem in holding them is the front hand has no real comfortable place to hold on. For just a couple, it's fine. After that or in hard wood it can actually become painful [to a degree].
Take care, Mike...but once again, great job showing what to do with one of the plentiful woodies!
-
10th December 2005, 01:23 PM #3
Be inspired. Be creative. Be bold.
- Join Date
- Apr 2001
- Location
- Perth
- Posts
- 10,824
Jake
Looking good, as usual. I don't have any comments at this time - touch of flu and I can't think too straight (of course no one notices anything different ) - so just my encouragement. I will get back to you later. I am pondering something similar at this time, that being how to turn an old and dilapidated skew rebate woodie into a dovetail plane (for sliding dovetails). All ideas welcome.
Regards from Perth
Derek
-
10th December 2005, 07:52 PM #4
hardly human

- Join Date
- Jun 2005
- Location
- Sydney
- Posts
- 3,096
Jake, you are giving me an education here! Thanks. "Jakes online workshop" strikes again. Good stuff.
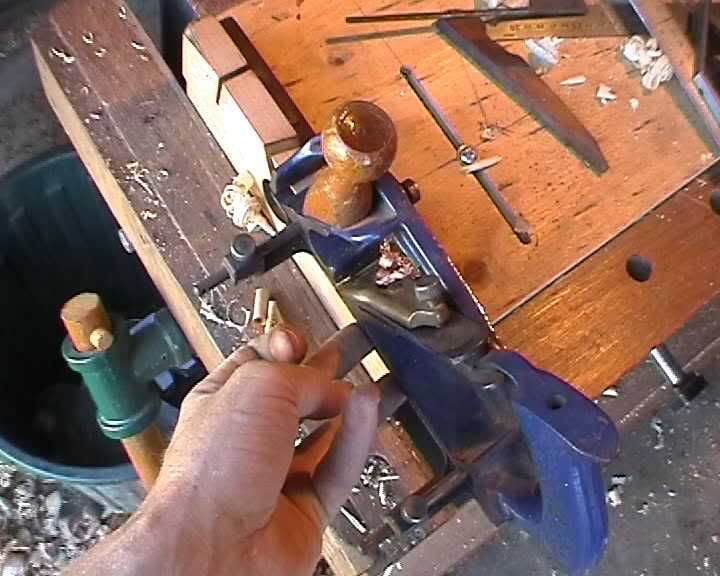
Hey, in photo 4, whats the marking gauge you using, is it a Veritas - and what do you think of it?
You lurve that new digi camera don't ya!
-
10th December 2005, 09:01 PM #5

Super Moderator
Dodgy brother
- Join Date
- May 2004
- Location
- Pakenham, outer Melb SE suburb, Vic
- Age
- 54
- Posts
- 4,158
Thanks Jake, LOVE these threads of yours, velly educational

Great pics also, that camera's a ripper.
Is that a white wheel on yer grinder, or is it just the light?
Cheers..................Sean
The beatings will continue until morale improves.
-
11th December 2005, 12:57 AM #6
Banned
- Join Date
- Apr 2005
- Location
- kyogle N.S.W
- Age
- 50
- Posts
- 4,844
Ta fellas. Just got back from work.
I was thrilled about getting this one going, I had to tell someone. ....and you guys, well, you know how to push my buttons. .....yeh, I love that camera and all the attention it brings ...seriously, its interesting how it manages to pick up such incredible detail. I mean, you can see all the small dings in my tools, stuff I rarely notice,,,,and the crap under my fingernails too
Mike.... What tools don't you have ? makes me jealous... thanks for the info on the stanley 39's. Interesting point about front hand. I've been trying to get one from E-bay for a few months now. I've noticed most of the old tools up for auction origionate in your country. See, its the postage that stopping me from upping my bid. Something like $30US for postage to Australia. And tools like the stanley 39 seem to rarely appear from Australian sellers. Oh well. Show us a picture of your tool shelves one day eh.
Derek, good luck with your flu and thinking straight.
A co-incidence, I've been wondering about making sliding dovetails as well. Though not as far to consider a skewed blade. Their quite nice those joints. Your idea sounds difficult though. I remember vaguely some kind of dovetailing tool made by stanley in that blood and gore site, and that it was very difficult to use, or something like that. Maybe, you could get an idea from there. ?? ... Get well soon, eh. Lots of Vitamin C, they say, right. Apparently, from what I've heard, the stuff is only effective once you have the flu. Doesn't help prevent getting it in the first place...Sorry, thats got nothing to do with woodwork.
Hey ya Clinton. Yes I love that camera. Glad your getting something out of my ravings. I'm trying to learn stuff too you see. By throwing details out, hopefully people throw stuff back and teach me something. one thing leads to the next.
Anyway, the veritas gauge. It works quite well. I've got a couple. Have to focus hard on keeping the fence tight to wood though. Personally, the fence feels too small.Sometimes quite a lot of resistance develops, causing the fence to move more than the cutter; twisting and making a mess. So, thats really the only critisism I've got for it. The fence isn't wide enough, IMO. Though, I have addressed that problem...... I modified one a couple of years ago:eek: , added on a wider face (don't tell veritas ) ...show you a picture if you like.
.....though, I really like the concept behind japanese marking guages. You know how their cutters angle out slightly, that tends to draw the fence in to your stock, so you don't waver. I like their wider fences as well. Don't own one, but I like the concept.
Hi, sean. Thanks. The wheels white alright. Aluminium oxide I think they call it. Was 8", but after all the dressing its about 7" now.
-
11th December 2005, 06:05 AM #7
Senior Member
- Join Date
- May 2005
- Location
- Forest Grove, Oregon USA
- Posts
- 496
Hey Jake, trust me...I've sold off a whole lot of tools lately and the shelves, cupboards and drawers are looking a bit thin!Mike.... What tools don't you have ? makes me jealous... thanks for the info on the stanley 39's. Interesting point about front hand. I've been trying to get one from E-bay for a few months now. I've noticed most of the old tools up for auction origionate in your country. See, its the postage that stopping me from upping my bid. Something like $30US for postage to Australia. And tools like the stanley 39 seem to rarely appear from Australian sellers. Oh well. Show us a picture of your tool shelves one day eh.
But the 39s are still here--as is everything in the bottom drawer of my bench. Hollows and Rounds, chamfer, beaders, #78, moving fillester [which isn't in this pic] and a couple molding planes. The wood dado is gone, but all is is there.

The top drawer is pretty much the same:

The middle drawer has been decimated as I have sold off more than half the bench planes. Still have these though, as they are handy for coopered doors and such.
First, is a user made pattern maker's plane with interchangable soles of different radii [seen in the background]. It has Marples cast blades and is 12" long. The smaller one is a Preston pattern maker's, also with interchangable soles seen behind it.


Then there are other assorted other tools, the chisels and such.

But there are bunches more--just a whole lot less than there were. And hand saws? Well, I admit to being a bit of a collector. So I won't bore you with the ones I don't use. These are just the fuller sized ones I do use.

Completely bored yet? Here's the latest endeavor. I have begun making handsaws to sell. Here are two. One a DT saw, reusing old steel and has a Zebrano handle.

The other uses new steel for the blade and is nearing completion. It's a tenon saw. The handle is based upon a Harvey Peace design. This saw needs the handle shaped, drilled, brass back attached, etc. It has a 12" blade and will have 3 1/2" below the brass back.

Take care. Mike
-
11th December 2005, 06:34 AM #8
SENIOR MEMBER
- Join Date
- Nov 2004
- Location
- Mount Hutton N.S.W
- Age
- 59
- Posts
- 632
hey mike
you sure have some nice saws i collect them as well great set up that dt looks tops
greg
-
11th December 2005, 08:29 AM #9
Producer of fine shavings
- Join Date
- Oct 2004
- Location
- Melbourne
- Posts
- 945
Awesome post jake, you are an inspiration mate!
You can never have enough planes, that is why Mr Stanley invented the 1/2s
-
11th December 2005, 09:04 AM #10
Senior Member
- Join Date
- May 2005
- Location
- Forest Grove, Oregon USA
- Posts
- 496
He is an inspiration. Even these tired eyes light up when I see a post of Jake's like this one.
Sorry about makin' ya blush Jake, but tis true and more people should follow your example of rehabbing these old planes.
And actually, though I've sold off many of my planes, they are being replaced by previously unloved woodies for the most part. Cost effective and with but a bit of care they out-perform many a steel one.
Take care and keep it up Jake.
Mike
-
11th December 2005, 09:41 AM #11
Banned
- Join Date
- Apr 2005
- Location
- kyogle N.S.W
- Age
- 50
- Posts
- 4,844
Never !! Fascinated actually. I've never really spent much time in anothers workshop. Only a passing glance once. Thank you so much for sharing those pictures. Very interesting photos; all of them. And nice saws alright. Originally Posted by MikeW
Do you know much about about stanley 289's. That skewed bladed version of the stanley 78. Its another plane I've been trying to get.
Jake
-
11th December 2005, 10:20 AM #12
Senior Member
- Join Date
- May 2005
- Location
- Forest Grove, Oregon USA
- Posts
- 496
Hi Jake, not much on the 289, other than I'd always wanted one. Instead I picked up a moving fillester and find the need for the 289 non-existent <g>.
And seeing how it wasn't included in the previous pics, here it is:


Very good user. And of course, the wood has a warmth in use unlike a metal plane, doesn't need waxed and is a snap to adjust. This is one made by John Tabor, in the mid 1800s if I remember correctly.
Take care, Mike
-
11th December 2005, 02:20 PM #13
Banned
- Join Date
- Apr 2005
- Location
- kyogle N.S.W
- Age
- 50
- Posts
- 4,844
Mike,,,,That looks like a beauty, alright. The nicker looks interesting. Guessing its easier to set than the nickers held by a wedge, since it can only go up and down. No sideways play, yes ? Like that spacious looking shaving hole too. Can see lovely looking curlying speghetti's pealing out of there. Can see what you mean, how this plane would be more than enough.
Might be a stupid question. Probably is, but what does the word 'fillester' describe. I mean, how does a fillester plane differ to a rebate plane. Is it just an old lost term of a particular cut, or do 'fillester' planes have skewed irons, whilst rebate planes don't ? Never really found out.
Another question. Have you ever used these fillester planes for cutting tennon's ? I mean, I don't see any reason why one couldn't cut a tennon without a tennon saw (and avoid all the cleanups that follow) by just cutting accross grain off the end of your stock using a fillister type plane.
I mean, I could probably do the same thing with that 7/8" dado plane of mine, by just clamping on a fence....... figuring it could be good because the nickers really leave lovely crisp shoulder lines.....with a jig like that circular saw guide I used above, with quite a wide fence, there would be enough support for the sole even for cutting the cheeks of small tenons. ie. no balancing act. The sole would be supported on the fence while cutting a small tenon.
..... its just I find this dado plane easier to use than the tennon saw, and there shouldn't be any need to use a shoulder plane on end grain to fix little errors like you might need to do after using tenon saw (end grains hard to work too, eh). The fence would be fixed all the time, so you could do all 4 sides of your tennon with the same setting.
Might be another reason to own one. Any case, I'll definetly look out for one. Should be cheaper than a 289 as well.
....I don't know how clear my ravings are... I can get a picture if that helps.
One more question. That scratch tool I saw in one of your draws. New looking one. Veritas ?How well do they work accross grain ? Neat enough ? or do they tear at the wood fibres too much ?
-
11th December 2005, 02:28 PM #14
Banned
- Join Date
- Apr 2005
- Location
- kyogle N.S.W
- Age
- 50
- Posts
- 4,844
Derek, you probably saw it already.....that sliding dovetail plane called the #444. Blood and gore site.
I don't fully understand how it works. I'm thinking the only way to cut down at that angle(instead of straight down) is for the plane to run along a batton, and for the blade to be lowered into it, somehow ?
Jake
-
11th December 2005, 04:58 PM #15
Senior Member
- Join Date
- May 2005
- Location
- Forest Grove, Oregon USA
- Posts
- 496
That would be yes, and no. It really only has one locked-in position. The knicker is a sliding dovetail. Once it wears down one side or the other needs filed at the proper angle to allow it to slide down further--easier of course than it sounds. Originally Posted by apricotripper
Correct--rebates typically do not have skewed irons. Here's a bit of a definition from a couple sources: Originally Posted by apricotripper
Rebate planes cut simple steps for lapped joints or wide grooves to receive another piece of wood.
Fillister planes are rebate planes with built-in guides that determined the width and depth of the step. They devloped for making the rabbet on the outer edge of a sash bar to hold the glass and the putty. A moving fillister simply is one with a movable botom fence to determine the width, while a fillister only has a depth stop.
Yep. On wide tenons they work fine. On narrow ones it is too easy to rock the plane. But saw skills are easy to develop. As one gains the skills, just cut wide and use a rasp to take it down the rest of the way. Faster than a plane and one can see the work easier. Originally Posted by apricotripper
Well, that is a reason to own and use fine toothed saws Originally Posted by apricotripper
. Very easy to cut new teeth into a boot sale saw after filing/grinding [carefully] the teeth off. Sharpened and set properly, a tenon saw will leave a perfect shoulder. After that, it is just practice.
And then there is also a technique where one leaves the last several passes on the board with the tenon when one is smoothing it. Once the tenon is cut, take the last passes with the smoothing plane. That way any little fuzzines from the saw during the start should be cleaned up.
Oh you communicate perfectly clear--or else I'm just as tweaked 'cause I do understand Originally Posted by apricotripper
Good eyes! Yep, it's the Veritas. I've only used it on well behaved wood such as Mahogany and Teak. For those jobs I did, it worked fine. The steel is a little soft on the steel that ships. After a board I would hone them really quick and use the previous board to set it back up for consistency. Originally Posted by apricotripper
I made a new profile out of an old English hand saw and it lasted better--but some of them have plain hard teeth. I just sharpened my 3 1/2 point rip tonight for an up coming job and man, talk about hard steel!
But since those jobs I picked up a set of side and center beads so the Veritas sits unloved, waiting for the odd profile. It is a simple design that works really well. That was another tool I'd thought about getting forever, a Stanley 66. But the Veritas works well enough, so why?
Well, I've just came back in from the shop and should make something to eat I suppose.
Take care, Mike


 Reply With Quote


Similar Threads
-
old wooden moulding planes
By JDarvall in forum HOMEMADE TOOLS AND JIGS ETC.Replies: 21Last Post: 27th May 2005, 02:02 AM -
Help - Restoring Old Wooden Hand Planes
By nix in forum HAND TOOLS - UNPOWEREDReplies: 2Last Post: 23rd June 2004, 12:10 AM -
Old wooden planes
By Matto in forum HAND TOOLS - UNPOWEREDReplies: 2Last Post: 1st May 2004, 04:42 AM -
Wooden planes
By Arron in forum HAND TOOLS - UNPOWEREDReplies: 2Last Post: 14th November 2003, 01:28 PM
