

 Thanks: 0
 Likes: 0
 Needs Pictures: 0
 Picture(s) thanks: 0
Results 1 to 7 of 7
Thread: A new angle on a scratch stock
-
10th December 2009, 03:31 AM #1
 Be inspired. Be creative. Be bold.


- Join Date
- Apr 2001
- Location
- Perth
- Posts
- 10,826
 A new angle on a scratch stock
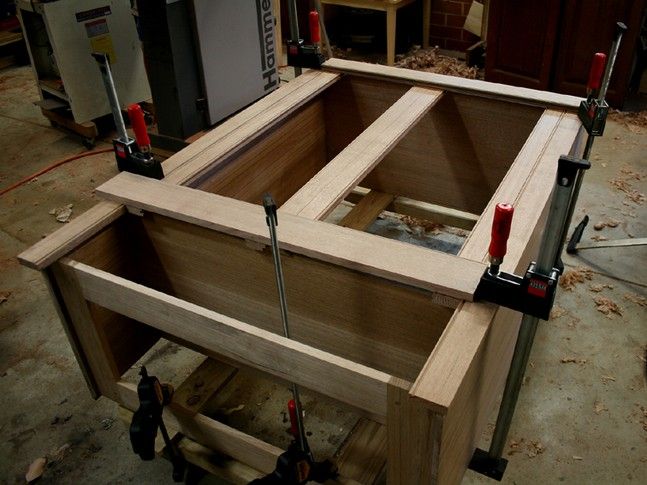
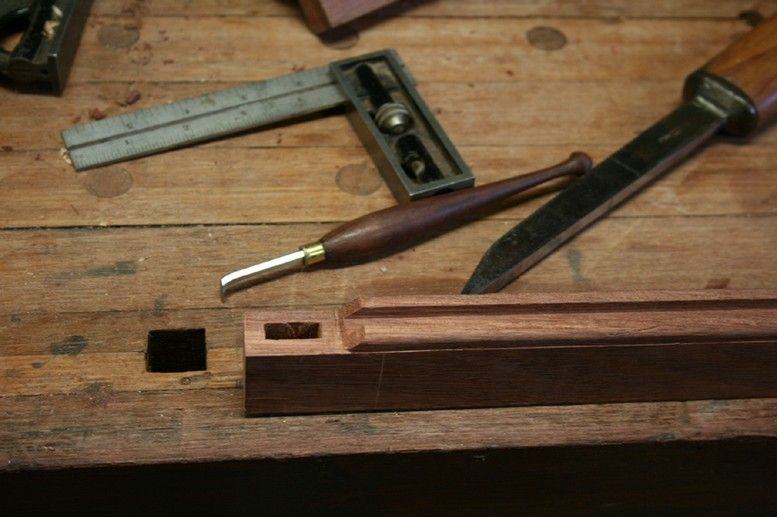
This post is a report on using a scratch stock in a new way (for me), but also serves as a way of updating the progress on a wardrobe I am building. I have previously shown the dovetailing of the carcass, particularly the sliding dovetails. I have also posted on the blind mortice and tenons for the lower divider. I will shortly post on the drawing boring that was used there.
I am now at the stage of building the face frame and door frames from the wardrobe. The carcass is dovetailed at the top side, and has two dividers connected with sliding dovetails. The top divider is solid as it forms the floor of the wardrobe, while the lower divider is a mortice-and-tenoned frame (to minimise movement) that will support a large drawer.
Today I had a couple of hours free, so I concentrated on applying the beading to the frame and, especially the doors.
First I added beads to the face frame (where the side frame meets the door stile) and then the inside edges of the door frame.
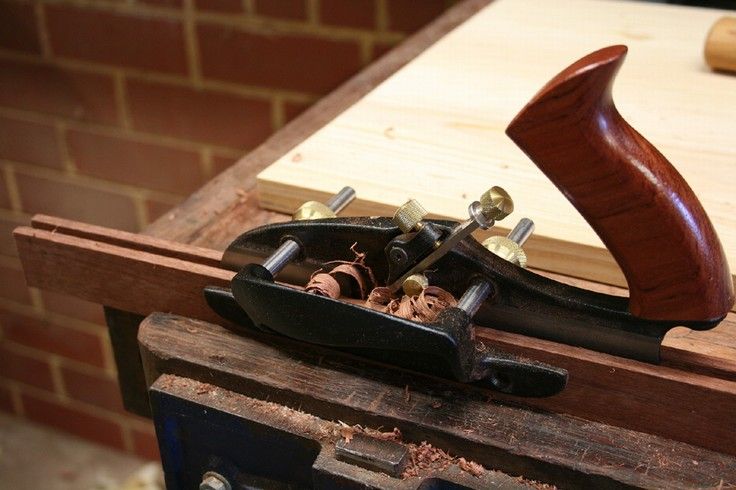
I used the Stanley #45 combo plane on the face frame. This worked pretty well, but the #45 is limited to straight grained wood. It does not like any reversing grain as there is no support for the blade.
The key to successful planing with the #45 is to choose your boards carefully, and to use a very sharp blade.
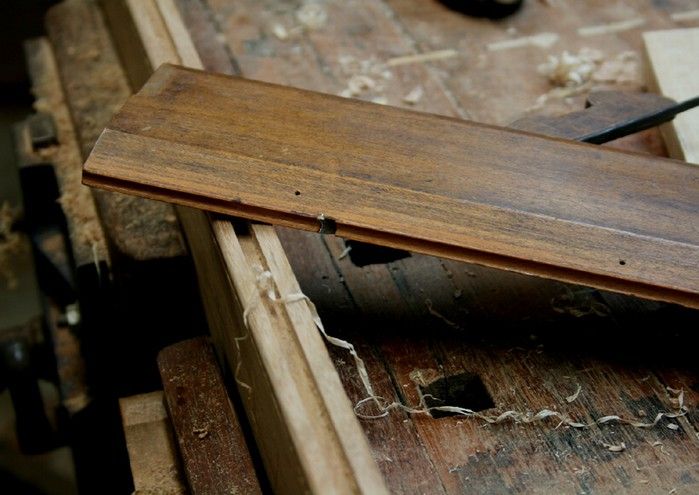
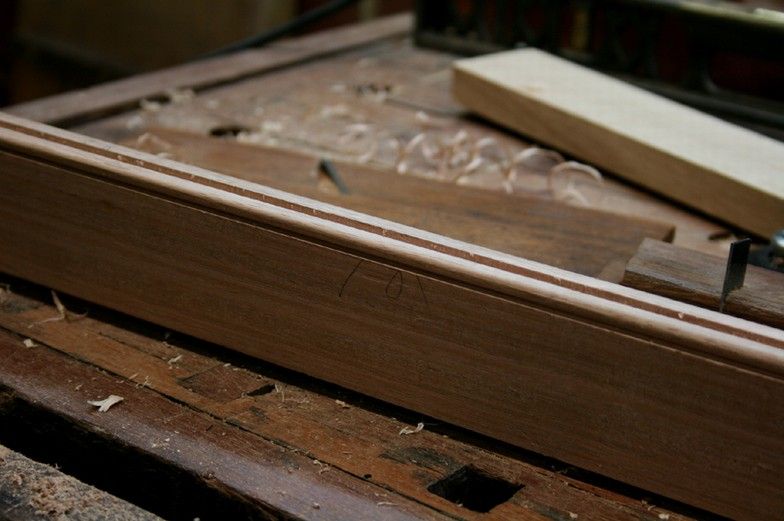
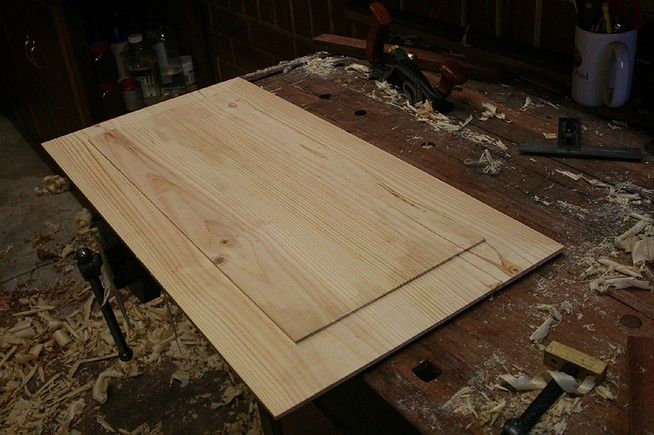
Here is an up-to-date picture of the work all pieces are loose as they have just had beads added.
Here is the upper edge of the intersection of the doors. You can see the rebate that allows one door to lock on the other.

After using the #45 on the face frame, I realised that it would be difficult to do so on the door sections as the Tasmanian Oak had more reversing grain than I was comfortable with, and I did not want to take a chance of tearout. I had already had a little on the face frame, but managed to repair it, fortunately.
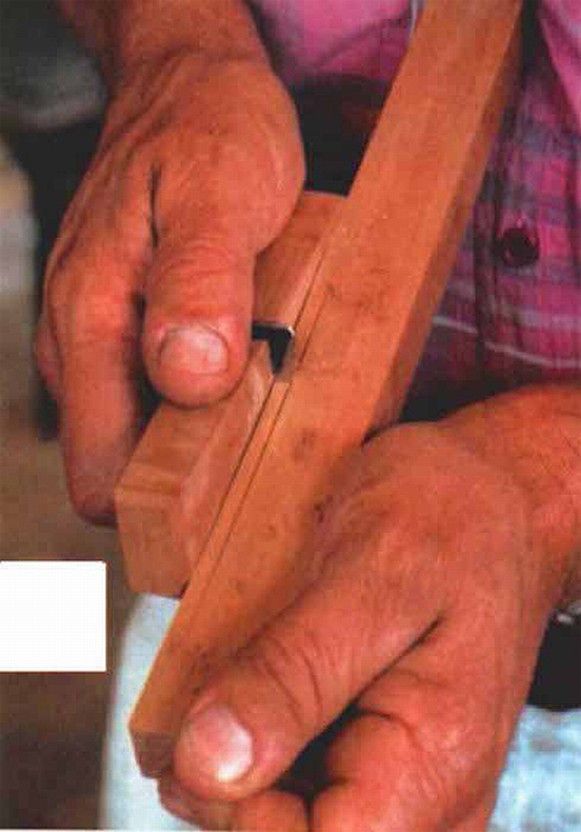
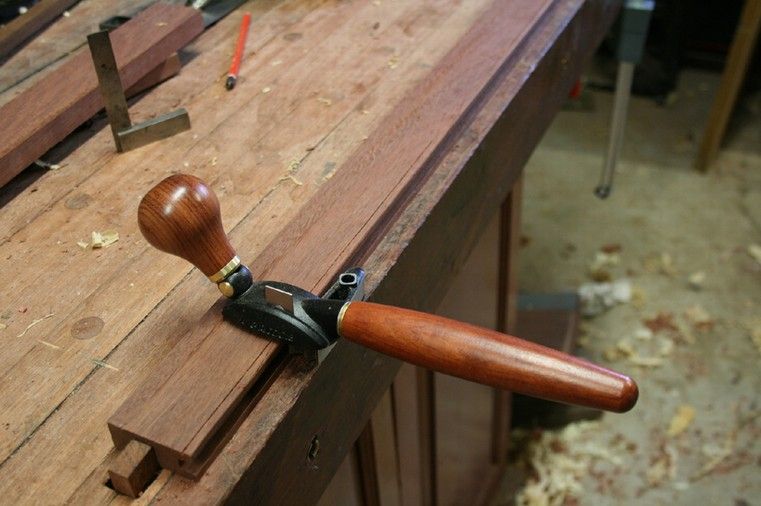
So I decided to use a beader to create the edge detail. I chose to use a scratch stocks as I needed to file a piece of bandsaw blade into the profile of the #45 beading blade. The scratch stock design I most like is that of Garrett Hack. It is simple to make just hammer a blade into a kerf cut into a block of wood. And I like the long fence that can be created with this design.
Here is Garrett using his scratch stock ..
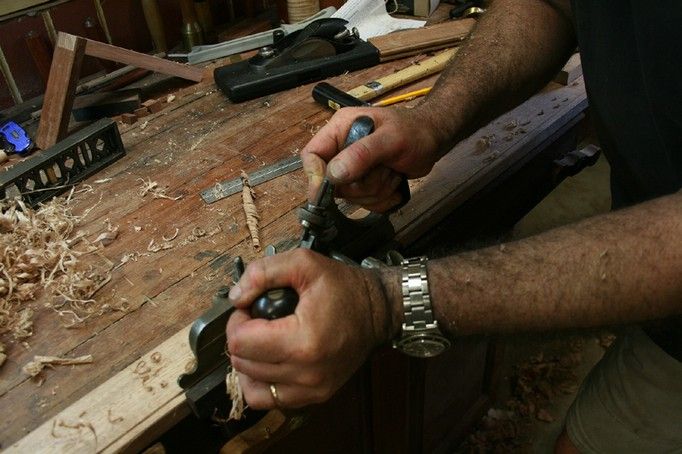
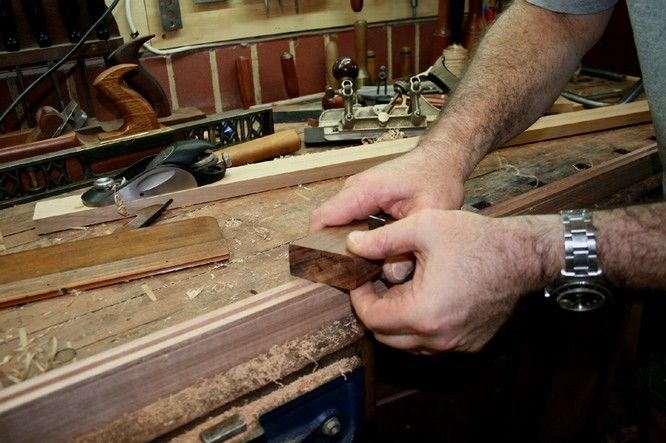
Now this is where it got interesting for me. I have used this style of scratch stock on a number occasions, and always held it and seen it held by others in the manner in the picture. The method is to either clamp or hold the work piece and run the scraper blade along the top, with the fence running along the side. This works quite well, but there is always a danger of digging the blade in as it is difficult to control the downforce in a sensitive manner.
I was busily trying to clamp a piece in position when it occurred to me that I could turn the board on its side and run the fence on the top and the blade on the side effectively reversing the positions that Garret uses. The advantage here would be that pressing the fence down would be more stabile that pressing it laterally, and that then I could better control the angle at which the blade scraped.
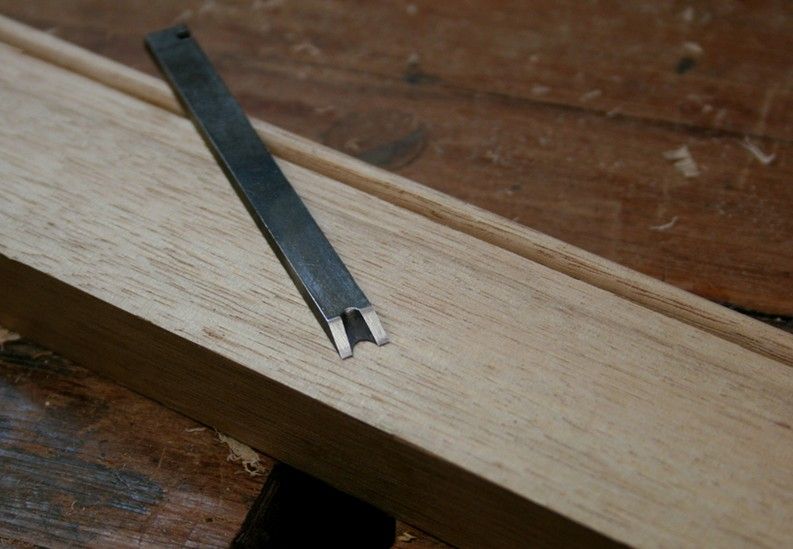
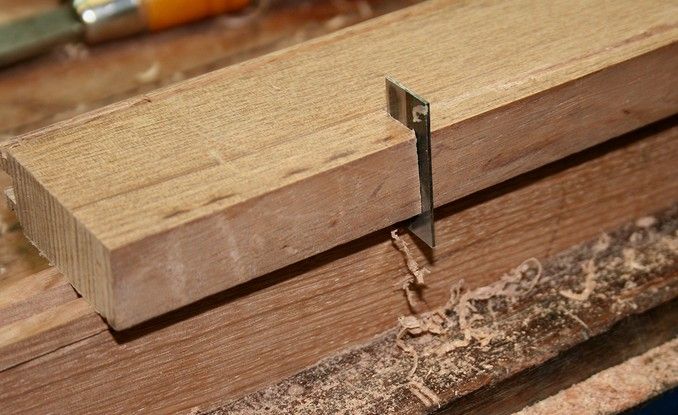
Here is the scratch stock I started with. You can see the start of the bead along the side ..
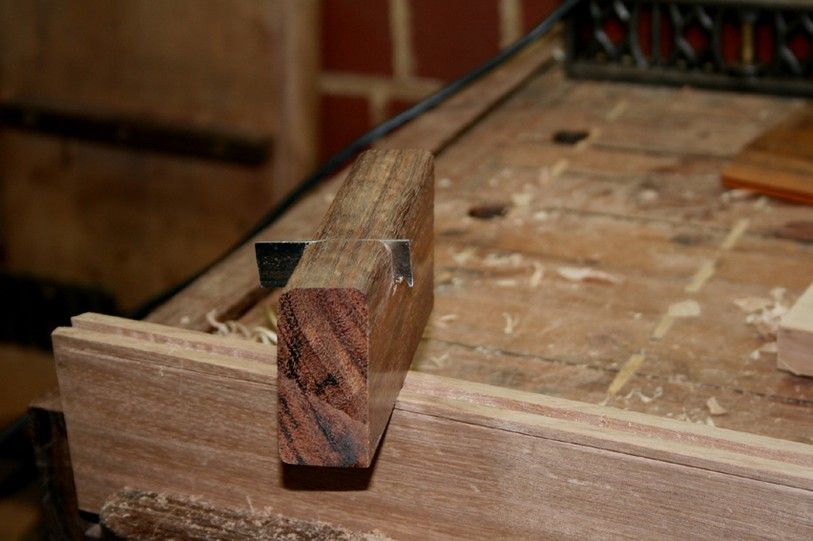
And here is being used and a more defined bead emerging ..
I found that there was considerably more control with the scratch stock oriented this way. It was now a simple matter to turn the blade for the optimal scraping angle. It was easier to apply light pressure, or heavy preassure .. as needed.
Two additional tasks were, firstly, to use a block plane to remove the waste at the edge (saving extra shaping with the scratch stock) ..
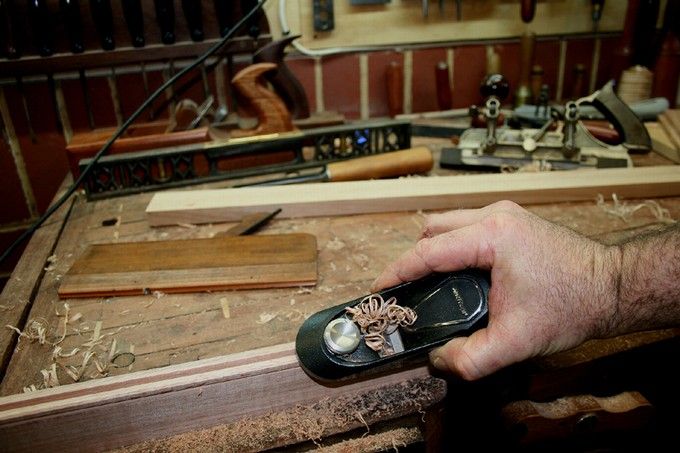
Secondly, I used a Round plane to smoothen and straighten the round bead
The original scratch stocks blade grew blunt. It was old had been used on several projects. I sharpened it, but it would no longer fit firmly in the kerf. I decided to build another.
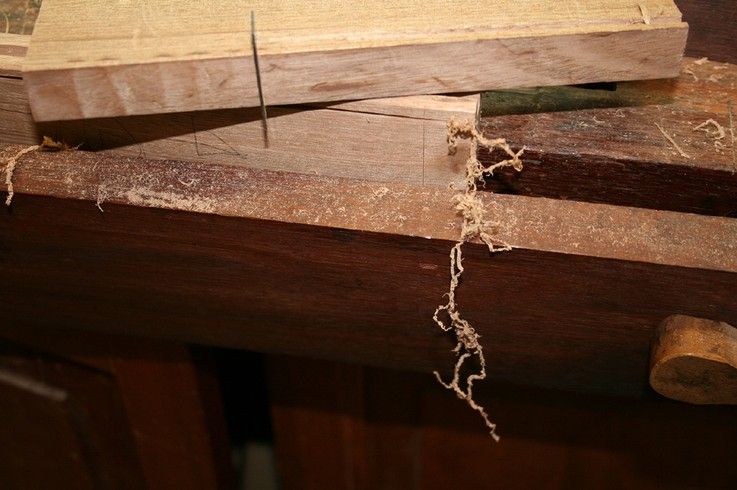
I marvelled at how cleanly it cut. There is a shaving peeping down.
Here is another shot of the shavings .. long and stringy
 Visit www.inthewoodshop.com for tutorials on constructing handtools, handtool reviews, and my trials and tribulations with furniture builds.
-
10th December 2009 03:31 AM # ADSGoogle Adsense Advertisement
- Join Date
- Always
- Location
- Advertising world
- Posts
- Many
-
10th December 2009, 03:32 AM #2
Be inspired. Be creative. Be bold.
- Join Date
- Apr 2001
- Location
- Perth
- Posts
- 10,826
Another picture of the blade ..
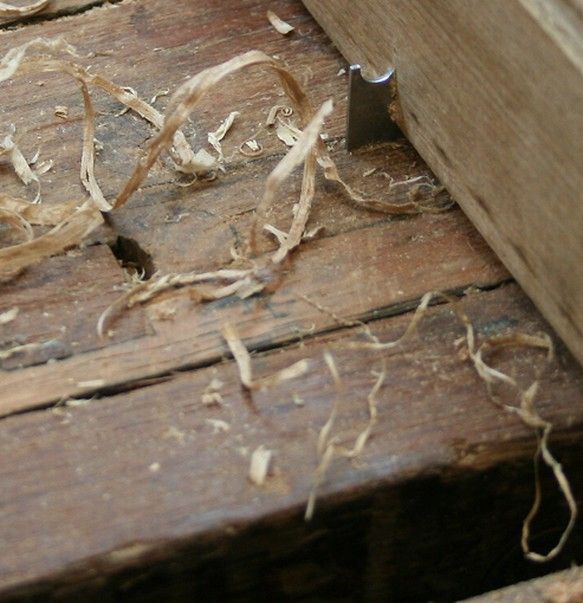
A final picture ..
Now on to morticing and tenoning the door frames.
Regards from Perth
DerekVisit www.inthewoodshop.com for tutorials on constructing handtools, handtool reviews, and my trials and tribulations with furniture builds.
-
10th December 2009, 08:05 AM #3
GOLD MEMBER
- Join Date
- Jun 2007
- Location
- North Of The Boarder
- Age
- 68
- Posts
- 16,794
Damn good show

-
10th December 2009, 05:31 PM #4
Senior Member
- Join Date
- May 2006
- Location
- Geraldton WA
- Posts
- 148
Nice work Derek.
I had often thought about making one of Garrett's scratch blocks but my concerns were...
* how to cut a kerf thin enough for a bandsaw blade,
* how do you get the blade back to where it was if you have to sharpen it mid job, and
* how to keep the blade from trying to escape when working woods such as Jarrah.
I would be interested in your thoughts on these.
I have a nice set of planes but a Stanley 45 is definitely not on the current list.
I have thought of modifying a cheap wooden marking gauge or taking advantage of the Australian dollar and buying the Veritas beading tool.
I think the Veritas would be be one of those tools I buy because it looks so nice that I want one rather than being the cheapest and effective way of doing the job.
Regards,
Chris
-
11th December 2009, 02:21 AM #5
Skwair2rownd
- Join Date
- Nov 2007
- Location
- Dundowran Beach
- Age
- 76
- Posts
- 19,922

I don't, and never have, done any of that kind of work so I am always mightely impressed by tnose who do. Wonderful Derek,bloody wonderful.
-
11th December 2009, 02:35 AM #6
Be inspired. Be creative. Be bold.
- Join Date
- Apr 2001
- Location
- Perth
- Posts
- 10,826
This is the type of frame-and-panel I will end with ..

Some images from this piece ...

There is a great article on my website (by Sean Hughto) on its construction - all done by hand. Making a Frame and Panel Door
Regards from Perth
DerekVisit www.inthewoodshop.com for tutorials on constructing handtools, handtool reviews, and my trials and tribulations with furniture builds.
-
11th December 2009, 09:16 AM #7
GOLD MEMBER
- Join Date
- Mar 2004
- Location
- Brisbane (western suburbs)
- Age
- 77
- Posts
- 12,132
Polie, scratch stocks have to be one of the simplest & easiest tools to make -there is no need for anything elaborate, just an L-shaped bit of wood with a saw kerf down the middle, and a couple of small bolts works a treat. Wing nuts are optional as their convenience is often outweighed by getting under your fingers! I have about half a dozen because either I couldn't find the last one, or I needed a particular size to do a job. The LV ripoff looks more interesting & works ok, but is no better than the other crude things made from bits of scrap. Originally Posted by Polie

I don't think you could get anything simpler than the slotted screw driven into a piece of scrap (centre of pic). The slot faces down and you file a bit of a rounded profile inside the head - takes 2 minutes to make & works amazingly well.
The bead doesn't have to be perfect, just consistent. You cannot tell if a bead is a perfect half circle or not. A few licks of sandpaper make it look very professional. The only time I really fuss about the cutter is when I'm matching it to an existing profile or a router cutter, for example when I want to extend a profile from a straight section into a curved one, or other places a router can't go.
Not being a purist, I often let the router do the heavy lifting, then detail & finish with a scratch stock. The slight imperfections you get with scratch stocks give it the 'hand made' look which is especially useful when making missing bits for old stuff.
The small scratch stock with the blued cutter was used to make a bead on the plinth of my recently-finished maple desk. I cut the cove with a router, then set the sctatch stock & added the bead - took all of 10 minutes to make the full profile.
I'm a great fan of scratch stocks... IW
IW


 Reply With Quote


Similar Threads
-
Cutter angle for a 12-060 low angle block plane
By scoobs6170 in forum HAND TOOLS - UNPOWEREDReplies: 3Last Post: 22nd February 2009, 09:46 AM -
Having trouble understanding low-angle vs high angle planes
By wsal in forum HAND TOOLS - UNPOWEREDReplies: 4Last Post: 2nd December 2008, 12:04 AM -
Low angle vs. High angle Planing
By silentC in forum HAND TOOLS - UNPOWEREDReplies: 68Last Post: 1st November 2006, 03:56 PM -
Head Stock & Tail Stock extention plates
By Babytoolman in forum WOODTURNING - GENERALReplies: 0Last Post: 25th December 2005, 11:37 AM -
Spokeshaves - Low Angle or not low angle, that is the question
By Slavo in forum HAND TOOLS - UNPOWEREDReplies: 10Last Post: 6th June 2005, 09:36 AM
