

 Thanks: 0
 Likes: 0
 Needs Pictures: 0
 Picture(s) thanks: 0
Results 1 to 15 of 15
-
28th June 2009, 08:40 PM #1
 Be inspired. Be creative. Be bold.


- Join Date
- Apr 2001
- Location
- Perth
- Posts
- 10,827
 The Brese Small Smoother Kit - Final Build Session
This is the third and concluding build session. For reference to the previous two sessions, there is now a copy of past posts on my website: http://www.inthewoodshop.com/ToolRev...ootherKit.html
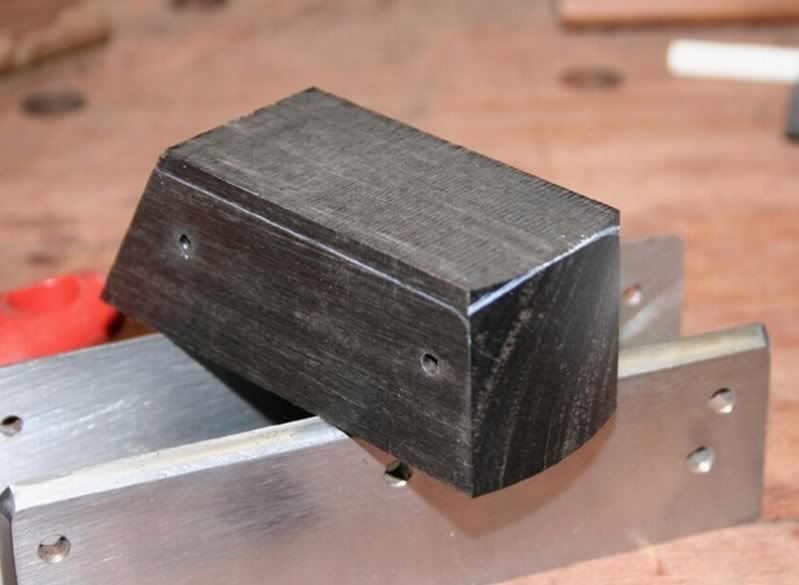
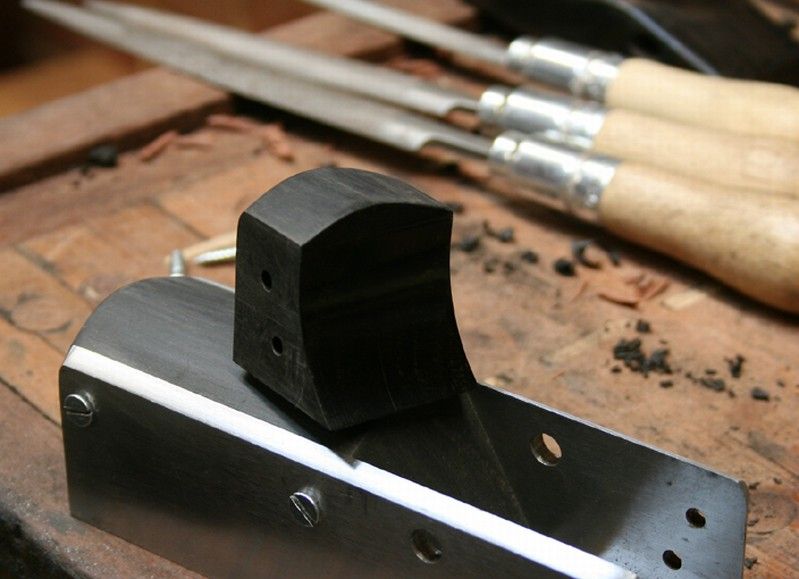
We left off with the ebony infill partially cut to fit the plane shell

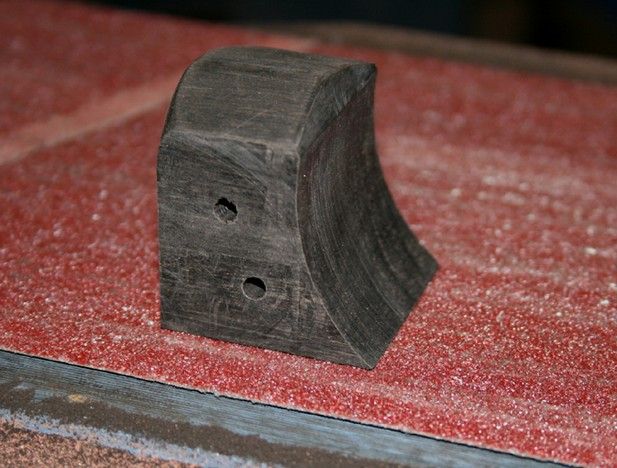
Shaping the front infill
Time to shape the upper side of the infills.
This began by creating a template out of 3mm ply.
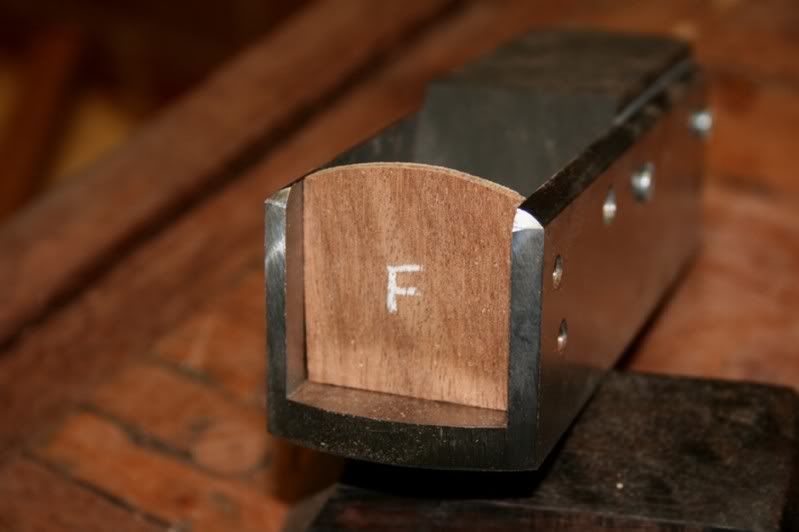
This was transferred to the front infill, which was then shaped with rasps.
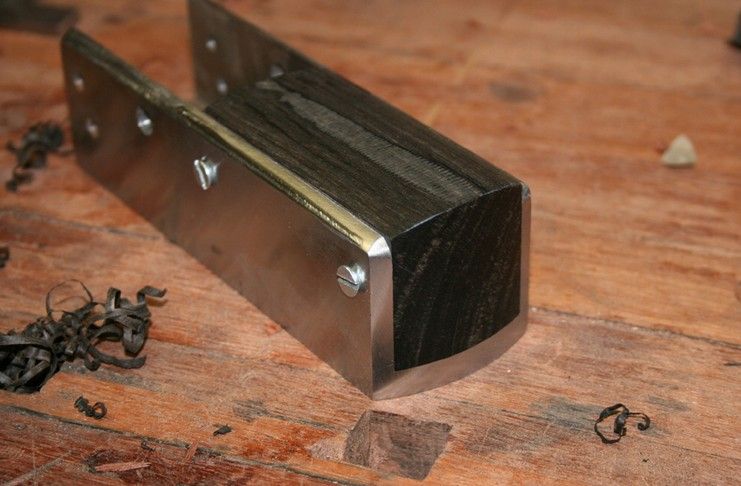
The reason for shaping the infill outside the plane shell, rather than both at the same time, was that I needed to remove a fair amount of waste from the wood, and it was not efficient to use a file.
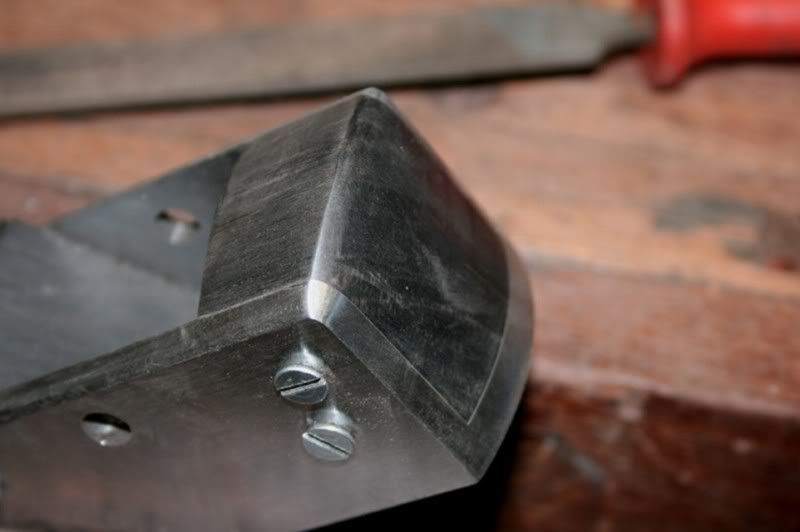
Both could be shaped together once the infill was close to the edge of the side wall. This became important at that point since I wanted to reshape the bevel (at the top of the wall)
into a curve that flowed into the infill. This was not only for aesthetic reasons, but also for comfort when pushing the plane.
The other reason for shaping the front infill separately was that it needed to be removed to add the internal camber (which was important to aid shaving flow with a 60 degree bed).
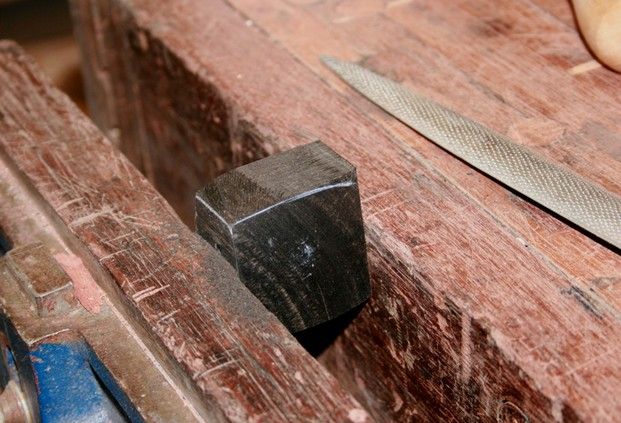
One more item to finish the front infill. Mark out the bevel ..
.. and shape with a file. This will be fine tuned later on.
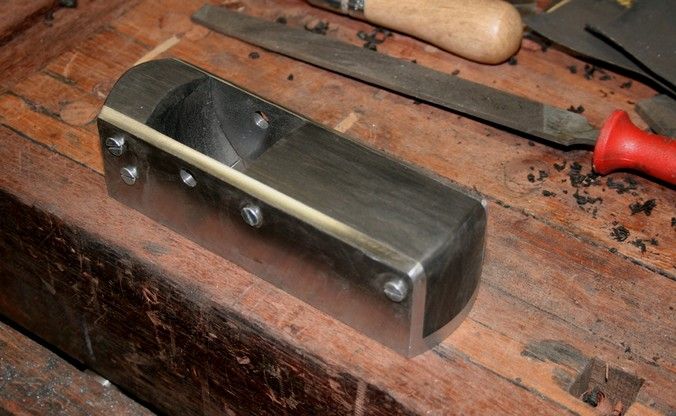
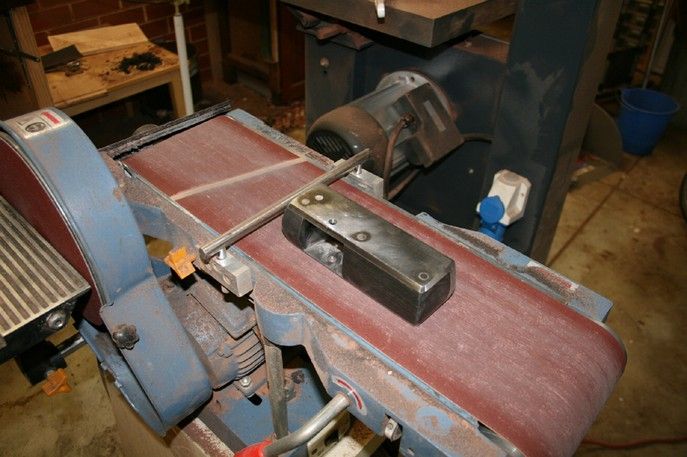
Remove and camber the front infill on the end of the belt sander. This was taken to about 30 degrees (probably a little less).
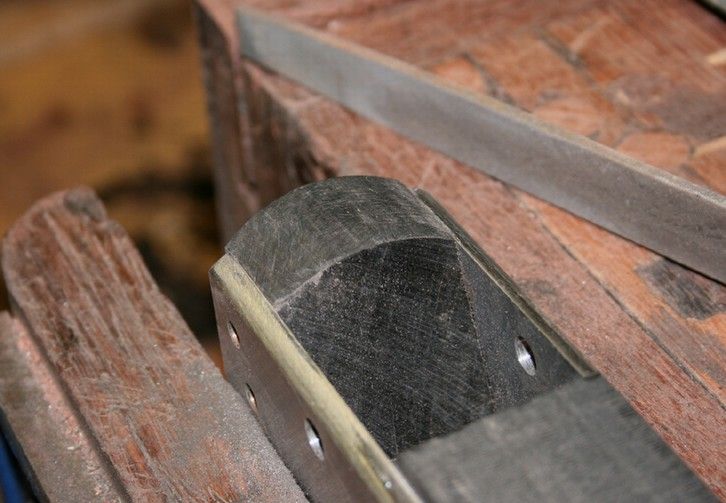
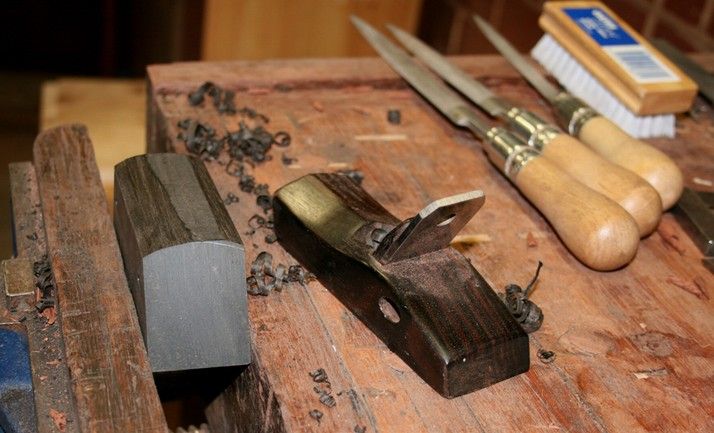
Shaping the rear infill
The strategy altered slightly for the rear infill ..
This was easier to shape with a small high angle Mujingfang smoother.
 Visit www.inthewoodshop.com for tutorials on constructing handtools, handtool reviews, and my trials and tribulations with furniture builds.
-
28th June 2009 08:40 PM # ADSGoogle Adsense Advertisement
- Join Date
- Always
- Location
- Advertising world
- Posts
- Many
-
28th June 2009, 08:42 PM #2
Be inspired. Be creative. Be bold.
- Join Date
- Apr 2001
- Location
- Perth
- Posts
- 10,827
So we get to the point where the infills are shaped and ready for finishing ..
Finishing
I have not worked with ebony before and was not sure how to finish it. I was not sure whether to use an oil or wax, although I was sure that a wax would obscure any figure since this has been my experience when using it with dark woods. With dark woods I prefer to use shellac and/or wax. I did ask the advice of the forum they were mixed in their recommendations.
Wayne Anderson wrote to me to say he used Minwax Antique Oil.
I had a look on a luthiers forum to see what they were using for fret boards, and discovered many were not using any finish at all since ebony has a tight grain and polishes up well with high grits.
So I decided to do a little research (again).
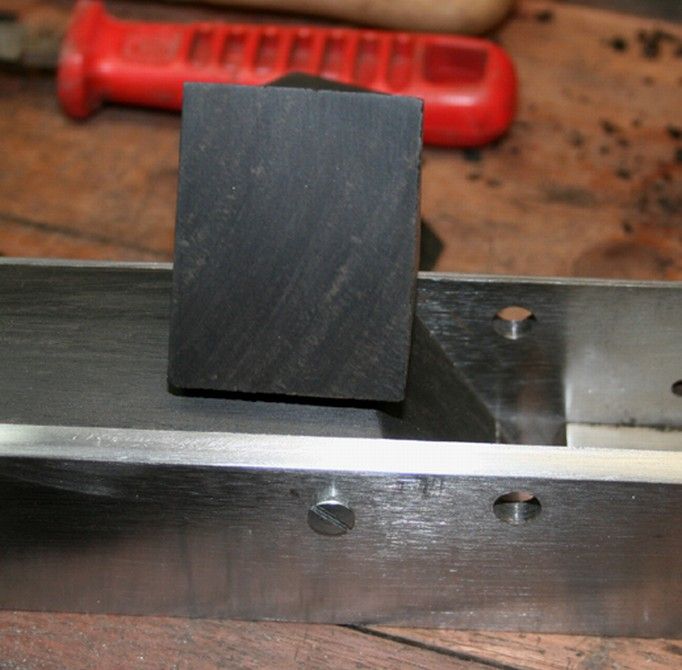
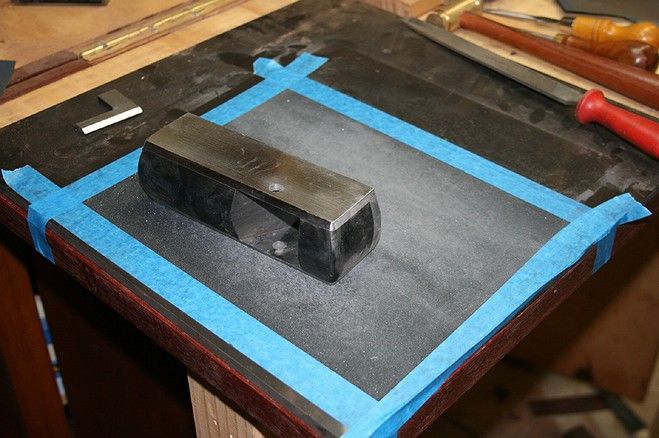
Here is a piece of ebony sanded to 240 grit, which is the current level of the infill:
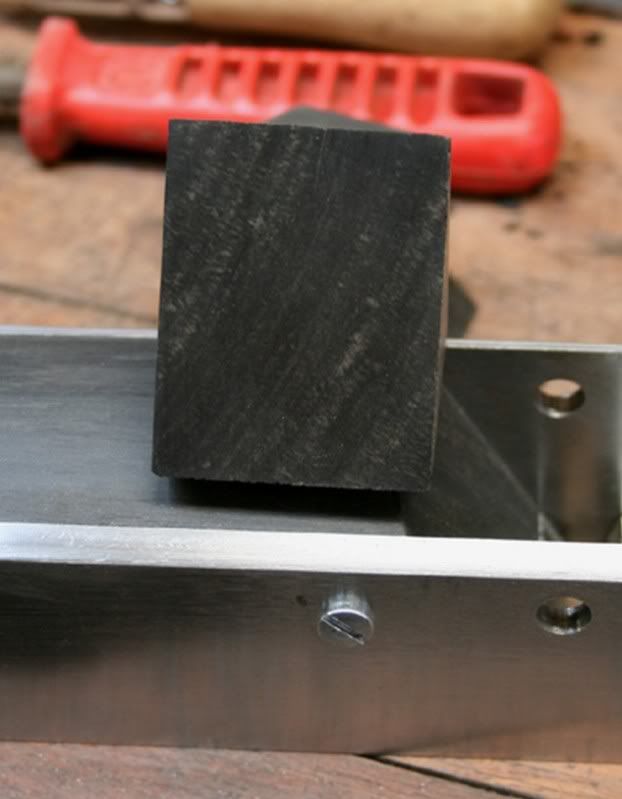
This was now sanded through 400-800-1200 grits:
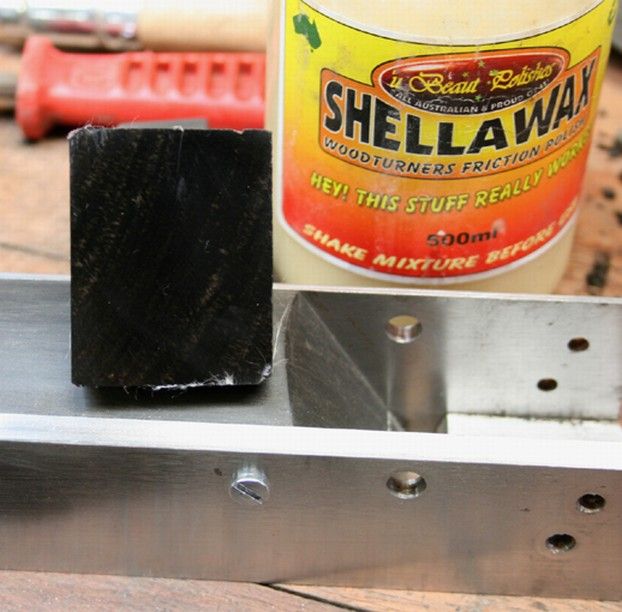
Now this surface was buffed with Shellawax (a mixture of blond shellac and hard wax):
The wood was sanded through the grits back to 1200, and this time was buffed with wax:
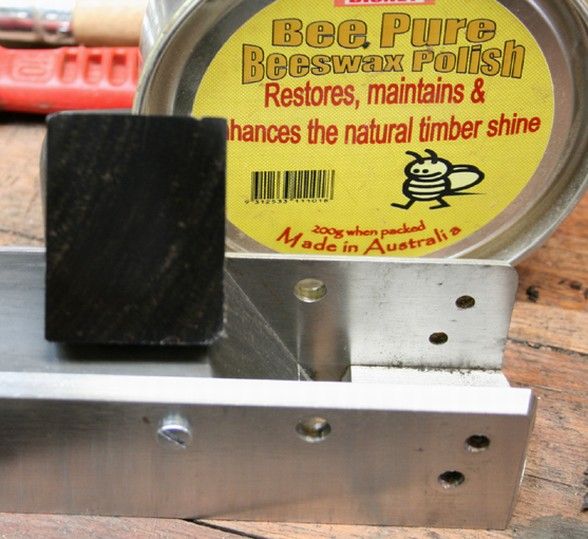
Mmmm my vote goes to sanding. Nevertheless, I like the hard, smooth finish of Shellawax and used this on the inside of the front infill. That should aid in ejecting shavings.
Fixing the infills
Ron supplied two-pack gel Cyanoacrylate (superglue).
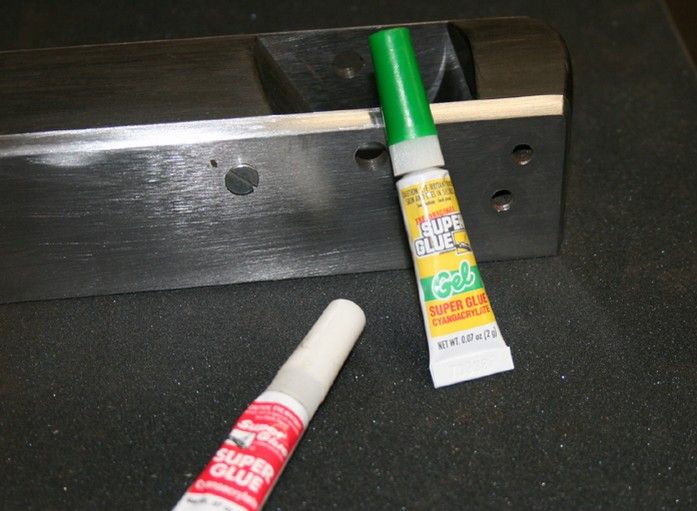
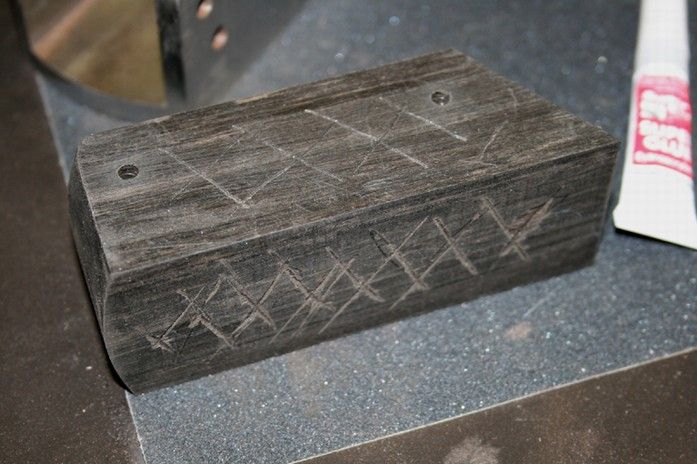
From what I can ascertain, epoxy is not the glue of choice for ebony cyanoacrylate is the recommended way to go. No special preparation is required, such as wiping down with acetone, since ebony is very dry, but I did score the surfaces of both infill and steel shell to create a key.
The infills were glued in and the screws were inserted tightly. The gel has a little open time, so this was a comfortable process. I added a little gel into the screw holes as well.
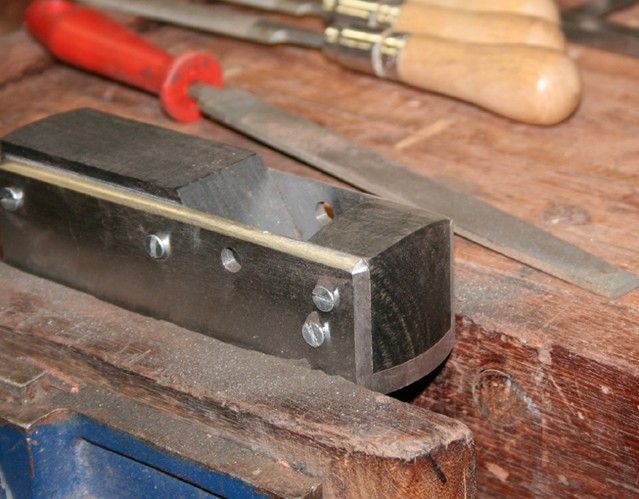
Once dry the screws were files down ..
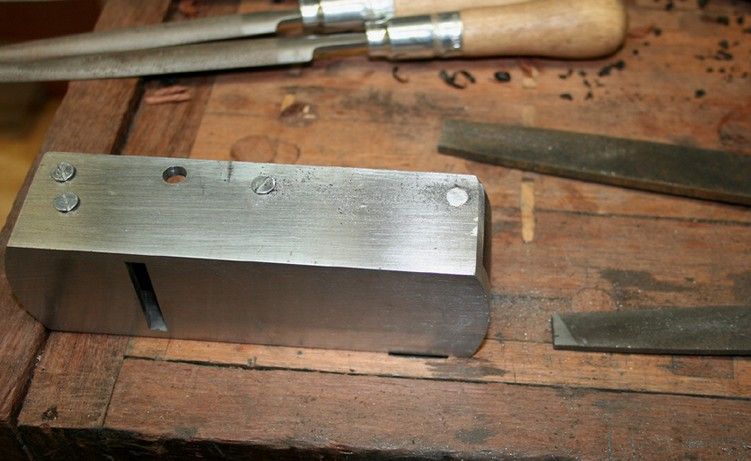
Well they started out this way. Then I began to get impatient as this was slow work .. and unnecessary I decided that the beltsander would do the basic work much more quickly.
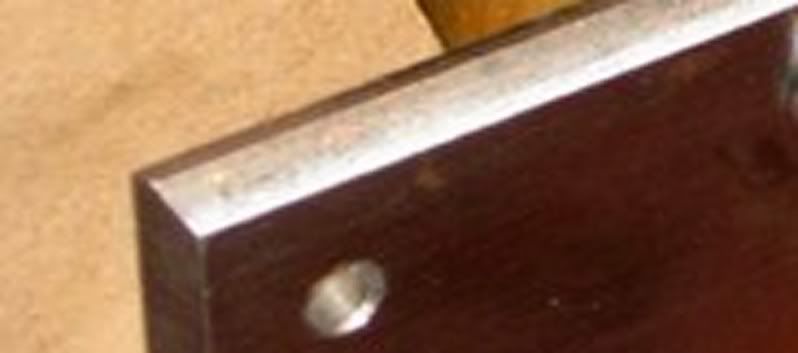
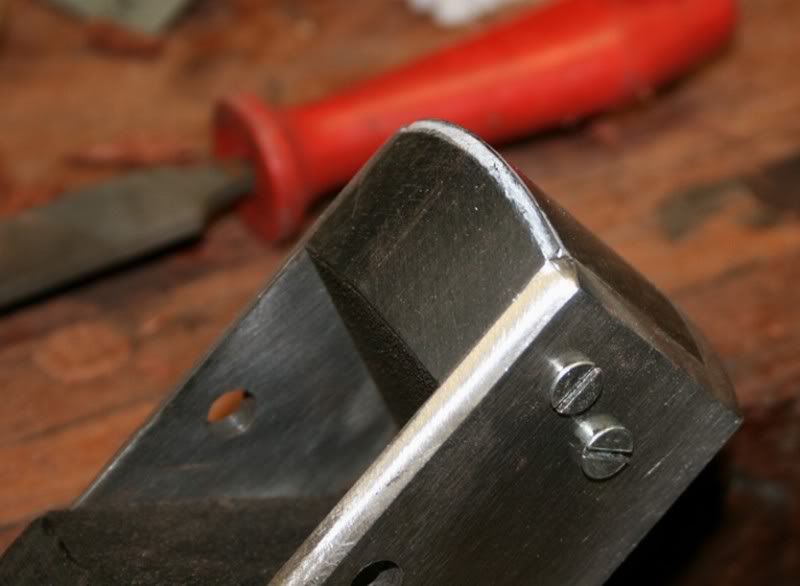
This was finished by hand on 240- then 400 grit. I would have preferred 360 grit as the finish since I did not want too much shine not only would shiny sides show fingerprints, but I wanted a matt contrast to the upper edge, which I planned to finish to a mirror shine.
In sanding the sides I discovered one more feature that spoke to the precise machining that Ron did on this plane. The screws that hold the lever cap were sanded flush with the sides. When I later removed them they had been sanded evenly, that is, they were the same height along their sides. This pointed to the screw holes being drilled in a perfect vertical.
Tuning the bed
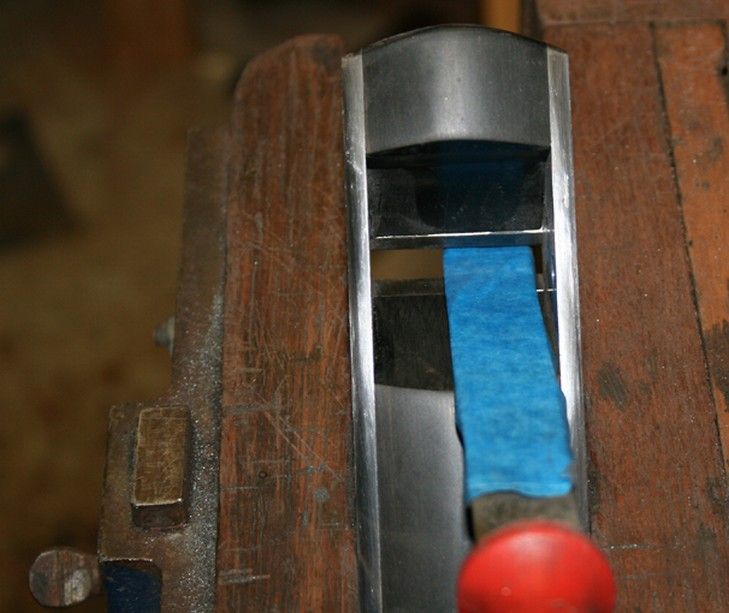
The bed needed to be tuned. Although careful shaping of the rear infill had achieved a near perfect fit at the junction of the bed and steel mouth support, this needed to be absolutely perfect to optimum performance. To achieve this I first used a flat file to scrape the bed flat to the support (stopping when I began to raise a wire edge)
 Visit www.inthewoodshop.com for tutorials on constructing handtools, handtool reviews, and my trials and tribulations with furniture builds.
-
28th June 2009, 08:43 PM #3
Be inspired. Be creative. Be bold.
- Join Date
- Apr 2001
- Location
- Perth
- Posts
- 10,827
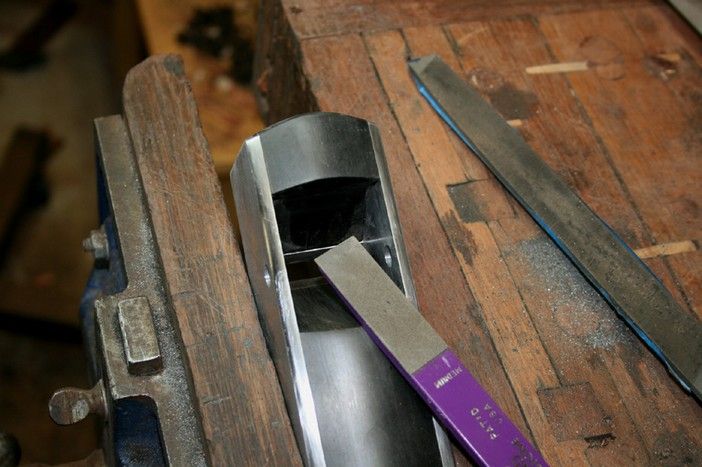
.. and then smoothed it with a medium diamond file (325 grit) ..
The final lap
OK, we are almost done. Time now to finish the wood.
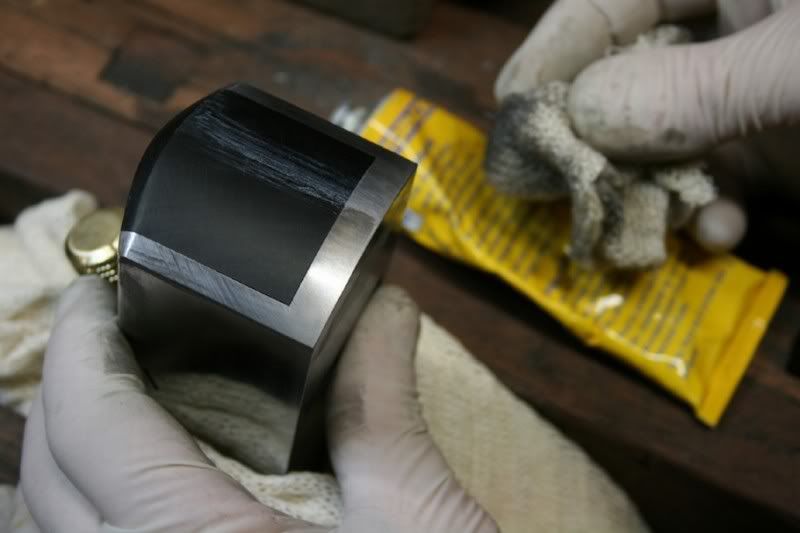
First I used sandpaper to smooth the upper radius of the sidewalls and the infill, running through 400 800 and 1200 grit.
Then I brought out the Secret Weapon! I had this idea Tormek honing paste.
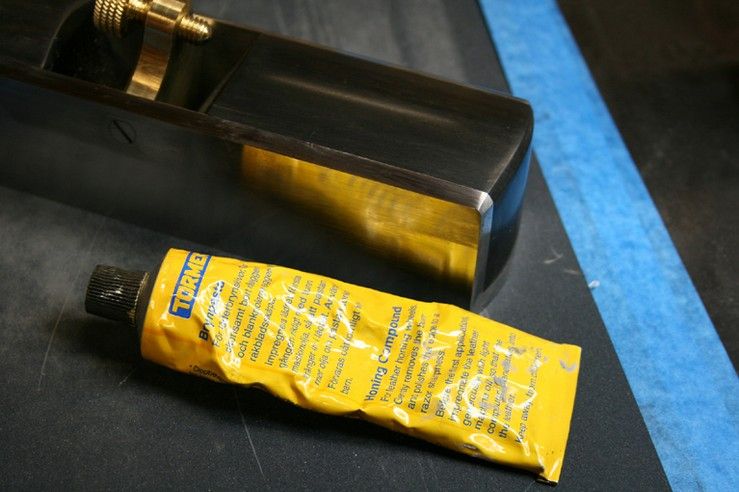
And you know what .. it worked! It not only created a mirror edge for the steel, but it took the ebony to a whole new level. The wood looked like it had been burnished. It was just the way I wanted natural wood with a shine.
Fitting it all together
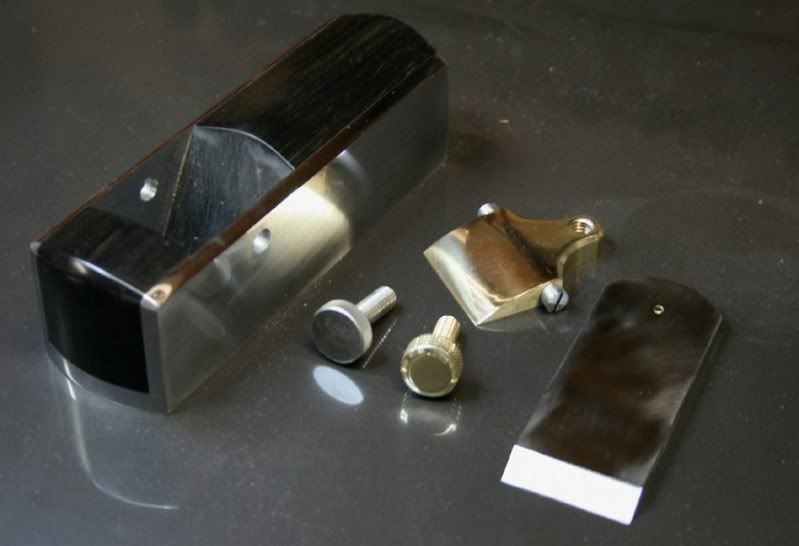
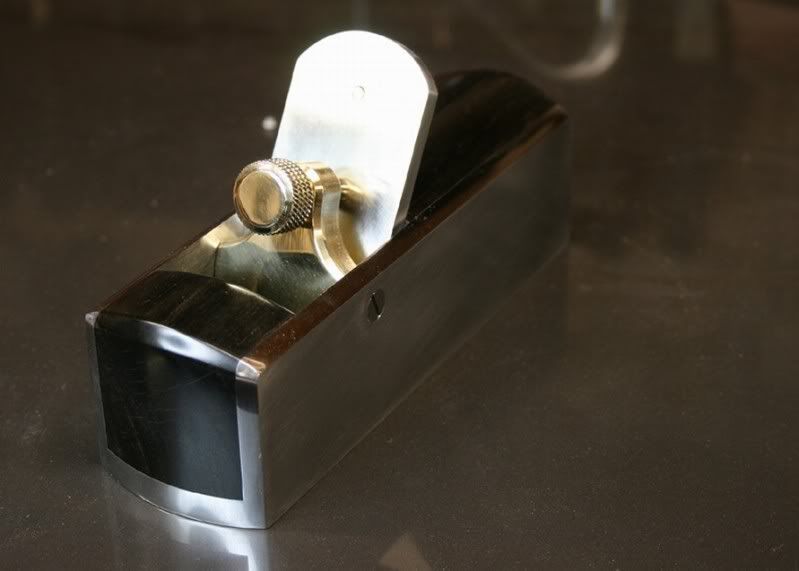
After the second build session I asked Ron if he could supply a brass lever cap screw. I thought that this would be a better look than the steel one that came with the kit. Ron knew exactly what was wanted, a smaller version of the ones that Johnny Kleso (aka Rarebear) custom builds for the large smoothers. It arrived last night.
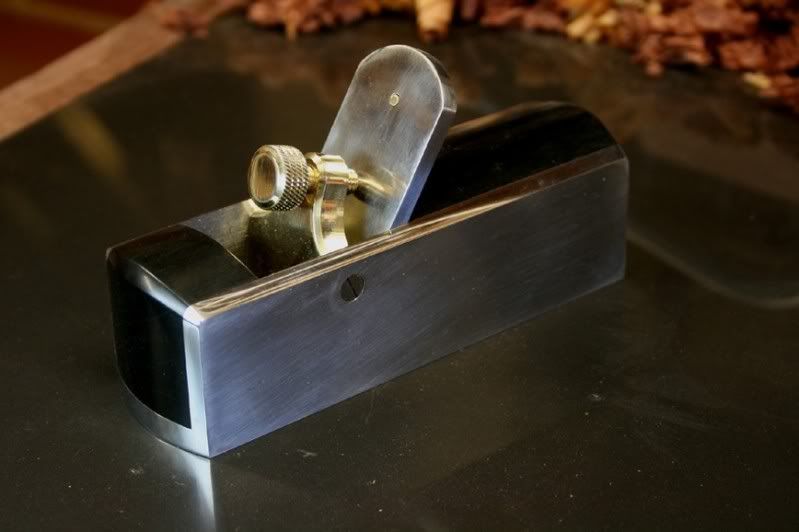
So here are all the pieces ..
And finally
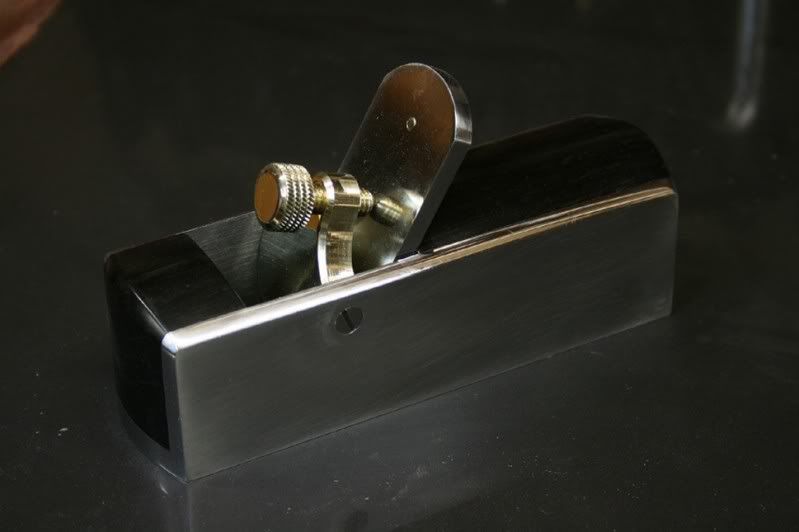

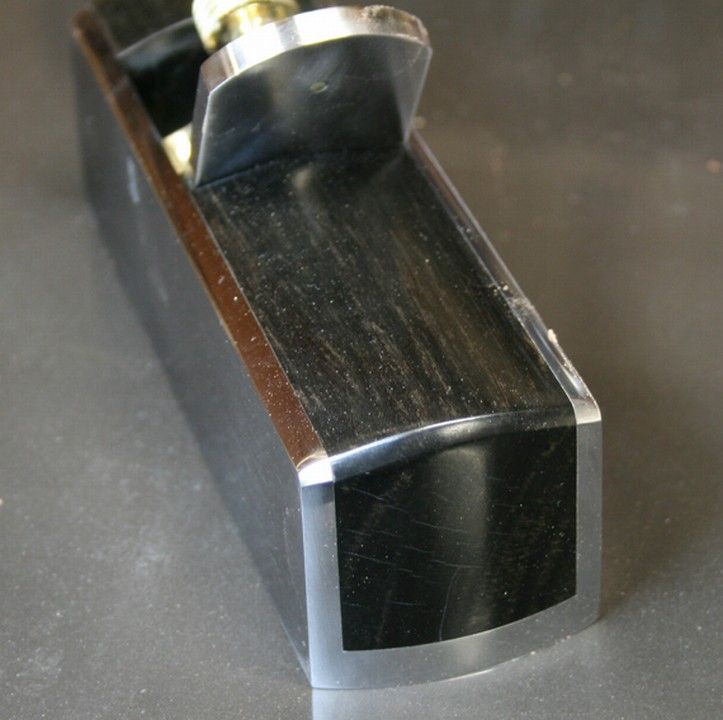
A comment on the "figure" shown here. This is more a function of the light when taking photos. In actual use, the wood is black with the faintest visible amount of grain coming through. There is also apparent (in the imgs) some checking (or what looks like checking). I don't recall this from before. I suspect that it may be the consequence of the heat generated while grinding the screws flat. In any even it cannot be seen under normal inspection. The finish on the plane is just wonderful and I am very pleased with it.
Putting the plane to work
In the hand the plane has great heft and great authority. It is remarkably heavy for its small size (all 6 1/2" or about 16.5mm).
The infill is also comfortable. All corners have either been softened or rounded. I am pleased I went to the effort to round the top - inspite of this creating a great deal more work - and I wonder how comfortable it can be to have a flat top (like the Holtey).
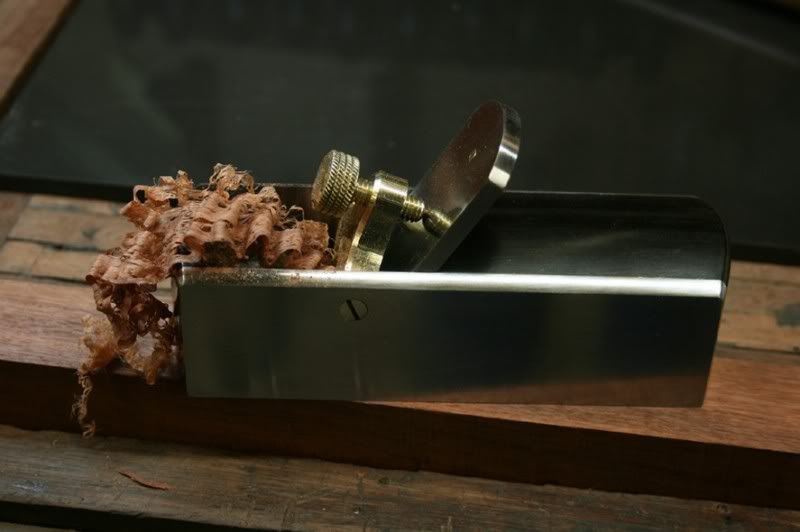
The plane makes fine shavings .. a little too fine perhaps.
The mouth is still very tight. I measured it at .05mm (or .019). A 60 degree smoother does not really need a fine mouth, but there are some benefits for really cranky grain and so I decided to keep it at this stage - it is easier to open later. Keep in mind that this smoother is aimed at small areas of work on woods with difficult grain.
I get good shavings, but they are a little striated at this stage. The blade is sharp and smooth. I hollow ground it on my Tormek and then honed it through 1000, 5000 and 12000 Shaptons front and back. I usually associate striated shavings as a result of a blade that is not truly sharp. What I think is occurring at this point is that the front of the mouth needs to be smoother it was only finished with a coarse file. It is too late to do this today. I will use diamond files to smooth it off tomorrow.
What do you think?
Anyway, here are shavings. The plane left a wonderful finish in both jarrah (which I was able to plane both with and against the grain without tearout, and also cherry.
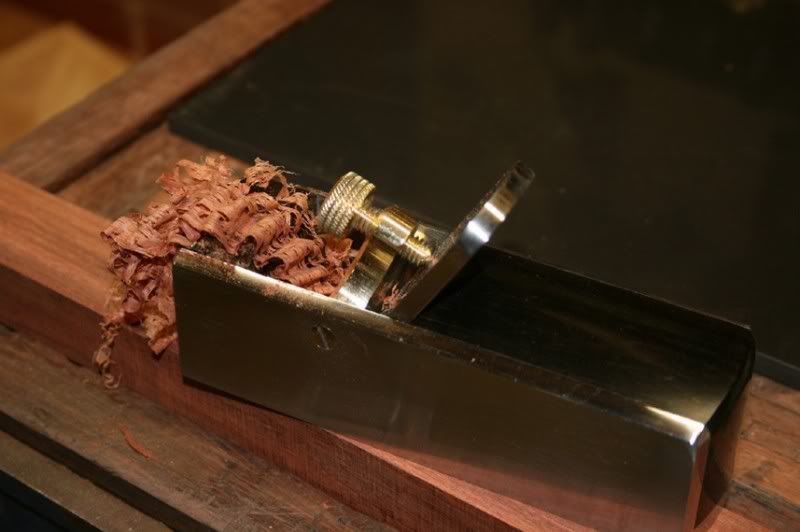
Next morning. I have managed to complete a little tuning of the plane. This consisted of opening the mouth fractionally. It is still a very small .10mm wide (about .025"). I also made sure that there were no burrs left on the mouth from doing so.
The result was a significant improvement in the quality and flow of the shavings. I was able to obtain full width shavings in she-oak ...

Planing some interlinked jarrah was completed without any tearout, so I turned the board around and planed into the grain. This was also managed without tearout ...Visit www.inthewoodshop.com for tutorials on constructing handtools, handtool reviews, and my trials and tribulations with furniture builds.
-
28th June 2009, 08:44 PM #4
Be inspired. Be creative. Be bold.
- Join Date
- Apr 2001
- Location
- Perth
- Posts
- 10,827

Now doubt I shall continue to fine tune this plane as it gets used, and I feel that there is better performance still to come.
Thank you Ron for such a great plane.
Regards from Perth
DerekVisit www.inthewoodshop.com for tutorials on constructing handtools, handtool reviews, and my trials and tribulations with furniture builds.
-
29th June 2009, 02:54 AM #5
 Fossil Member
- Join Date
- Jan 2005
- Location
- Perth
- Posts
- 1,181
Hi Derek,
Magnificent work. The Ebony came up beautifully, like black steel. The brass lever cap screw does look better than the steel one I reckon, good choice.
No tearout with or against the grain on Sheoak and Jarrah, I'm impressed. I know you have some very wild grain test pieces in your shed that have tested the aray of other planes you have on the shelf.
Thanks for sharing, like all the photos. One more project ticked off the list.
Cheers
Pops
-
29th June 2009, 03:30 AM #6
GOLD MEMBER
- Join Date
- Jun 2008
- Location
- Victoria, Australia
- Age
- 74
- Posts
- 6,132
Hi Derek,
Beautiful work, the black ebony and steel really works well together. I like the use of the Tormek paste to polish the ebony, that must be hard stuff.
There is something about making your own tools that is particularly satisfying, especially when they look as good as this one does.
Congratulations.
Regards
Ray
-
29th June 2009, 03:49 PM #7
SENIOR MEMBER
- Join Date
- Oct 2008
- Location
- Perth
- Posts
- 966
That's a cracker Derek!
-
29th June 2009, 04:09 PM #8
GOLD MEMBER
- Join Date
- Mar 2005
- Location
- In the shed, Melbourne
- Age
- 52
- Posts
- 6,883
Flamin' brilliant Derek!

How long did you spend just looking at the plane from all angles when you had finished it?
-
29th June 2009, 04:14 PM #9
Be inspired. Be creative. Be bold.
- Join Date
- Apr 2001
- Location
- Perth
- Posts
- 10,827
That plane is so difficult to photgraph. The combination of silver and black confuses the camera (Canon D4000), and I lack the skills to do it justice. I tried from every angle to capture what I can see in person. None of the images do it justice. Sorry.
Regards from Perth
DerekVisit www.inthewoodshop.com for tutorials on constructing handtools, handtool reviews, and my trials and tribulations with furniture builds.
-
29th June 2009, 04:16 PM #10
Moderate Moderater
- Join Date
- Feb 2006
- Location
- Lindfield N.S.W.
- Age
- 62
- Posts
- 5,643
Very nice plane Derek. thanks for sharing the journey with us.
Cheers
Jeremy
If it were done when 'tis done, then 'twere well it were done quickly
-
2nd July 2009, 12:32 AM #11
SENIOR MEMBER
- Join Date
- May 2007
- Location
- Melbourne
- Age
- 58
- Posts
- 832
Simply stuning. May it serve you well.
Thanks for sharing the process of both the build and the tuning.
All the best
Kevin
-
2nd July 2009, 10:35 AM #12
Deceased
- Join Date
- Aug 2008
- Location
- Bundaberg Queensland.
- Age
- 76
- Posts
- 372
Derek's small smoother.
It was good to follow your progress in making this plane .Lloyd.
-
2nd July 2009, 10:49 AM #13
Senior Member
- Join Date
- Dec 2008
- Location
- Hunter Valley
- Posts
- 298
Who says call the craftmen are gone??
Breathless with admiration, green with envy.
Congratulations!
-
2nd July 2009, 11:04 AM #14
Senior Member
- Join Date
- May 2008
- Location
- Vermont, VIC
- Posts
- 238

G'day Derek,
From the 1st photo,
to the final photo, Originally Posted by derekcohen

I cannot see any marks left from the screws that hold the ebony infill to the plane's metal body. Originally Posted by derekcohen

Truly a work of art.
Thanks for documenting and sharing.
Cheers
GUNN
-
2nd July 2009, 11:39 AM #15
 Senior Member
- Join Date
- Nov 2007
- Location
- Townsville
- Age
- 40
- Posts
- 375
This is just an absolutely beautiful piece of craftsmanship Derek!! I love that plane, it looks so wicked
Keep up the good work mate 
Now who says that looking at a thread like this with wonderful in-line big pictures isn't the way to go!! Cheers,
Will


 Reply With Quote


Similar Threads
-
Brese Small Smoother Build, Session Two
By derekcohen in forum HAND TOOLS - UNPOWEREDReplies: 5Last Post: 17th June 2009, 07:25 PM -
Brese Small Smoother Kit - beginnings
By derekcohen in forum HAND TOOLS - UNPOWEREDReplies: 12Last Post: 31st May 2009, 07:21 AM -
Large Build Small motors...Will this work?
By boozeboy in forum CNC MachinesReplies: 11Last Post: 8th March 2009, 01:22 PM -
Small Shed WIP part 3 (final)
By greenie512 in forum WOODWORK PICSReplies: 4Last Post: 3rd September 2006, 10:11 PM
