

 Thanks:
  Likes:
  Needs Pictures:
  Picture(s) thanks:
Results 1 to 5 of 5
Thread: Henry Disston on Saws
-
12th April 2013, 08:56 AM #1
 GOLD MEMBER


- Join Date
- Dec 2007
- Location
- Melbourne
- Posts
- 3,277
 Henry Disston on Saws
[The following is text copied from a Disston publication: The Disston Saw, Tool and File Book, ©1921.]
Henry Disston on Saws
[The following is text copied from a Disston publication: The Disston Saw, Tool and File Book, ©1921.]
HOW TO CARE FOR SAWS, TOOLS, AND FILES
Although the preceding pages cover the most important questions in connection with the care of a saw-that is, they tell how to sharpen a saw-there are a few other things that a. tool user should know.
Moisture against a steel face, unless that face is well protected, means almost immediate rust. In order to keep a saw blade in the most perfect working condition, it must be entirely smooth on either side. Rust means pitting and, therefore, a rough surface. When you finish using a saw, rub it down with an oiled rag. Sperm oil is the best for this. In ease the saw has been slightly rusted it is well to rub the blade down first with fine emery cloth and then apply the oil.
Another important thing is the way edge tools are put away. Whether a saw is placed in a tool box or on a shelf, or hung from a nail or hook, always take care that the tooth edge is placed in such a position that no other tools will knock against the teeth and injure them. Ordinary precaution will protect the teeth so that they will stand up a normal length of time.
The manner in which tools are placed on the bench when not in actual use is extremely important. These tools should always be placed with the cutting edges away from the person using them. An axe or hatchet should never be left standing on the floor where the foot may accidentally strike it. A saw should never be hung from a bench where, the teeth can scratch a leg or knee.
When you are thru using a tool lay it down carefully. Do not drop it. A file, for instance, is an edge tool. Its teeth, to give the greatest efficiency, are very hard. When a man carelessly throws a file across his bench he is liable to break off the edges of several teeth. A good tool deserves good treatment and the more care you give it the better service it will give you.
Common sense will lay down for you most of the necessary rules for caring for your tools. Keep them in good working order, in a clean container or neatly arranged on hooks, and keep them in a dry place. If these instructions are followed out there should be no question of the tools losing their efficiency except as they wear out from old age.
All Disston Saws, Tools, and Files are guaranteed to be perfect in workmanship and material. But it is not to be expected that we can make a tool that will do good work when it is not properly used and cared for.
Nearly every day we hear from someone who has used one of our saws 20, 30, and up to 50 and 60 years. On the other hand, some saws, after being used for a few months, are returned to us as defective when they are perfect as far as workmanship and material are concerned, but have been made useless through abuse or lack of ordinary care.
Our main interest, naturally, is to have all our products give the maximum amount of service. Any saw or tool that is not absolutely up to Disston standard, we are only too glad to replace. But we ask the same consideration from the users of our products. Give them ordinary care; use them as they are intended to be used-and we know that the result will more than repay anyone for the little additional effort that is necessary.
Text from Henry Disston and Sons, Inc.,Lumberman Handbook,Published 1907.
HENRY DISSTON & SONS, INC.
SAW FILING
The demand for an article of instruction on saw filing having been demonstrated to us not only by personal inquiry and letter, but also by the return of fine quality saws, pronounced defective through a lack of knowledge of how to keep them in order, or by the use of extensively advertised so-called saw sets and other tools, which pull the saw blade apart or so distort it as to render it unfit for use-has led us to compile this book for gratuitous distribution for the enlightenment of the amateur and the improvement of the expert mechanic.
We will endeavor to give, in the following pages, such practical information as to the proper methods of keeping saws in order and of the tools with which to do so, that will overcome the above mentioned pit-falls to the proper working of the saw. We offer our wide experience and the reputation of our goods for the efficiency of this treatise, which has been gleaned from the most scientific saw makers and most practical saw filers in the world. While we admit there are other methods of putting saws in order, we claim our modes to be the easiest and equally or more effective.
We take occasion to thank our patrons for their appreciation of our products. The High Standard, which is the basis of our constantly increasing business, shall be maintained, and we trust thereby to retain their good will and increase our trade in future.
The following cuts are full size of the respective number of teeth and points per inch which they represent. It will be noticed that in one inch space there is one tooth less than there are points. Order all saws by the number of "POINTS" to the inch measuring from point to point of teeth.
Rip saw teeth are graduated from butt to point of blade, the narrow end being one point to the inch finer than at butt; the "POINTS" being measured at butt of blade.PRINCIPLE OF CONSTRUCTION
The saw is either reciprocating or continuous in action, the first being a flat blade and practically straight edge, making a plane cut, as from in hand, mill, jig and sash saws; the latter, either a circular or rotating disc, cutting in a plane at a right angle to its axis, a cylindrical or barrel shape with a convex edge cutting parallel to its axis, or a continuous ribbon or band running on two pulleys making a plain or curved cut with a straight edge parallel to their axis of rotation.
Practically speaking, the teeth are a series of knives set on a circular or straight line, each tooth cutting out its proportion of wood and prevented from cutting more by the teeth on either side of it. Each tooth should cut the same amount and carry out the chip or dust, dropping it below the material being sawed. Different kinds of wood require teeth varying in number, angle or pitch and style of filing.
The perfection of a saw is one that cuts the fastest and smoothest with the least expenditure of power; to do this, it is evident that each tooth should be constructed and dressed as to do an equal proportion of the work, for if any of the teeth are out of line or shape, they are not only useless themselves, but a disadvantage to the others. We find many good mechanics who frankly acknowledge that they never could file a saw satisfactorily; the probable reason is that they never studied the principle of the action or working of the tool. There is no reason why any man of ordinary mechanical ability should not be able to file, and keep his saw in order, but like all trades, it requires practice and study of the subject.
The following illustrations and explanations will greatly assist in the selection of a saw and show the best method of keeping it in proper working order. These should be carefully studied.
A saw tooth has two functions-paring and scraping. A slitting or ripping saw for wood should have its cutting edge at about right angles to the fibre of the wood, severing it in one place, the throat of tooth wedging out the piece. In a cross-cut wood saw, the cutting edge also strikes the fibre at right angles to its length, but severs it on each side from the main body before dislodging it.LAYING-OUT TEETH.
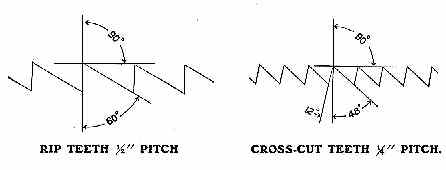
The following cuts show the method of laying-out Rip saw teeth and Cross-cut saw teeth, the angles for the teeth remaining the same as in these sketches for all sizes of teeth. It will be noted that the Rip saw tooth is made with a straight front, whilst the front of the Crosscut tooth is given a slight pitch or rake.Rip Saws
Fig. 1 is a four-point rip or slitting saw with the rake all in front, where the cutting duty is. This saw should be filed square across, filing one-half the teeth from each side after setting, which will give a slight bevel to the cutting edge of tooth, as it should be for soft wood; for medium hard woods a finer toothed saw with five points to the inch should be used and dressed in the same manner; for the very hardest and toughest cross-grained woods a still finer toothed saw is required, with the teeth filed slightly beveling, as ripping cross-grained stuff partakes a little of the nature of cross-cutting.
In all cases where ripping is done, the thrust of the saw should be on an angle of about 45 degrees to the material being cut, as shown in Fig. 2, this makes a shearing cut, an advantage that can be quickly demonstrated with an ordinary pocket knife cutting any piece of wood. For ripping thoroughly dry lumber, it will be found advantageous to use an extra thin back saw which will run without set.CROSS-CUT HAND SAWS
 In cross-cutting the fibre of the wood is severed twice-on each side of the saw-the thrust dislodging and carrying the dust out. Fig. 3 is a five-point peg tooth cross-cut saw with the rake on the soft wood side. For the same reason that the rip saw has the rake on front of the tooth, the cross-cut has it on the side, as that is where the cutting duty is. The bevel or fleam to teeth in Fig. 3 is about 45 degrees, while there is no pitch at all; the angle on each side being the same, forms the "peg tooth," which is best adapted to cutting soft, wet and fibrous woods. This style of tooth is principally used in Buck-saws.In all cases, the size and length of teeth depend largely upon the duty required; a long tooth has the demerit of being weak and liable to spring, but the merit of giving a greater clearance to the saw-dust. The throat space in front of each tooth must be large enough to contain the dust of that tooth from one stroke; the greater the feed, the deeper the dust chamber required, or, more teeth.
The first point to be observed in the selection of a saw is to see that it "hangs" right. Grasp it by the handle and hold it in position for working, to see if the handle fits the hand properly. These are points of great importance for comfort and utility. A handle should be symmetrical, and the lines as perfect as any drawing. Many handles are made of green wood; they soon shrink and become loose, the screws standing above the wood. We season our handle-wood three years before using. An unseasoned handle is liable to warp and throw the saw out of shape. The next thing in order is to try the blade by springing it, seeing that it bends regularly and evenly from point to butt in proportion as the width and gauge of the saw varies. If the blade is too heavy in comparison to the teeth, the saw will never give satisfaction, because it will require more labor to use it; the thinner you can get a stiff saw the better; it makes less kerf and takes less muscle to drive it. This principle applies to the well-ground saw. There is less friction on a narrow true saw than on a wide one; you will get a smaller portion of blade, but you will save much unnecessary labor at a very little loss of the width.
See that it is well set and sharpened and has a good crowning breast; place it at a distance from you and get a proper light on it, by which you can see if there is any imperfection in grinding or hammering. We should invariably make a cut before purchasing a saw, even if we had to carry a board to the hardware store. We set our saws on a stake or small anvil with a hammer; a highly tempered saw takes several blows, as it is apt to break by attempting to set it with but one blow. This is a severe test, and no tooth ought to break afterwards in setting, nor will it, if the mechanic adopts the proper method, The saw that is easily filed and set is easily made dull. We have frequent complaints about hard saws, though they are not as hard as we would make them if we dared; but we shall never be able to introduce a harder saw until the mechanic is educated to a more correct method of setting it. As a rule, saws are given more set than is necessary, and if more attention was paid to keeping points of teeth well sharpened, any well-made saw would run with very little set, and there would be fewer broken ones. The principal trouble is that too many try to get part of the set out of the body of the plate, whereas the whole of the set should be on the teeth. Setting below the root of the tooth distorts and strains the saw-plate, which may cause a full-tempered cast-steel blade to crack and eventually break at this spot; and it is always an injury to the saw, even if it does not crack or break.The teeth of a hand saw should be filed so true, that on holding it up to the eye and looking along its edge, it will show a central groove down which a fine needle will slide freely the entire length; this groove must be angular in shape and equal on each side, or the saw is not filed properly and will not run true.
Fig. 4 shows how the groove should appear on looking down the edge of the saw; the action should be such that the bottom of kerf will present the appearance as shown in Fig. 5, and not like Fig. 6; the cutting action is as shown in Fig. 7, the cutting being done with the outside of tooth, the fibre of the wood is severed in the two places and the wood is crumbled out from point to point by the thrust of the saw.The proper amount of bevel to give the teeth is very important, as is demonstrated by the above figures, for if too much bevel is given, the points will score so deeply that the fibres severed from the main body will not crumble out as severed, but be removed by continued rasping, particularly in hard woods, as they require less bevel, as well as pitch, than soft wood. 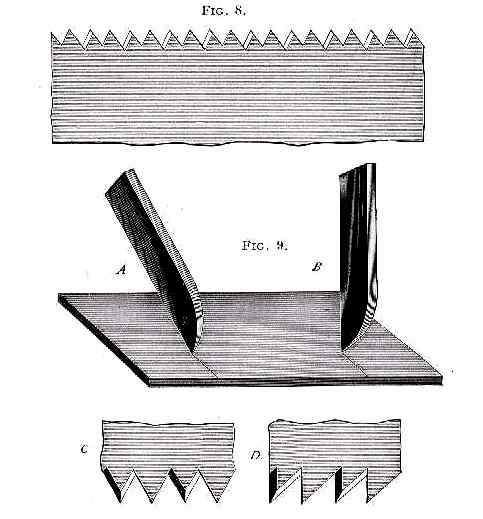
Fig. 8 shows a six-point cross-cut saw filed with a medium amount of bevel on front or face of tooth, and none on the back. This tooth is used in buck-saws, on hard wood, and for general sawing of woods of varying degrees of tenacity. This style of dressing is the best, but a number of saws each having teeth suited to its particular work, will be found more advantageous than trying to make one saw serve for all kinds of hand saw work.
We will now consider the cross-cut saw tooth, in regard to rake or pitch; this being one of the most important features, too much care cannot be taken to have the correct amount of pitch for the duty required. To illustrate this, Fig. 9 represents a board, across which we wish to make a deep mark or score with the point of a knife; suppose we hold the knife nearly perpendicular as at B, it is evident it will push harder and will not cut as smoothly as if it was inclined forward as at A; it follows then that the cutting edge of a cross-cut saw should incline forward as at C, rather than stand perpendicular as at D.Too much hook or pitch, and too heavy a set are very common faults, not only detrimental to good work but ruinous to the saw; the first by having a large amount of pitch, the saw takes hold so keenly that frequently it "hangs up" suddenly in the thrust-the result, a kinked or broken blade; the second, by having too much set, the strain caused by the additional and unnecessary amount of set is out of proportion to the strength of the blade, and is broken in the same manner. The most general amount of pitch used is 60 degrees, though this may be varied a little more or less to advantage, as occasion may demand. The next point to he considered is the bevel, or fleam, of the point. In Figs. 10, 11 and 12, the filer, as in all cases, files from the heel to the point, which is the only correct way. The file is supposed to be horizontal to the perpendicular of the side of saw, and on an angle of about 45 degrees longitudinally with the length, measuring from file line toward heel.

Fig. 10 is a five-and-a-half-point cross-cut saw showing the same amount of fleam front and back, this saw is best suited for work in soft wood, and where rapid, rather than fine work is required. A shows the position of the file, B an exaggerated view of shape of point, and C the shape of point.
Fig. 11 is a seven-point saw for medium hard woods, illustrated in same manner as Fig. 10. This tooth has less fleam on the back, which gives a shorter bevel to point, as at C.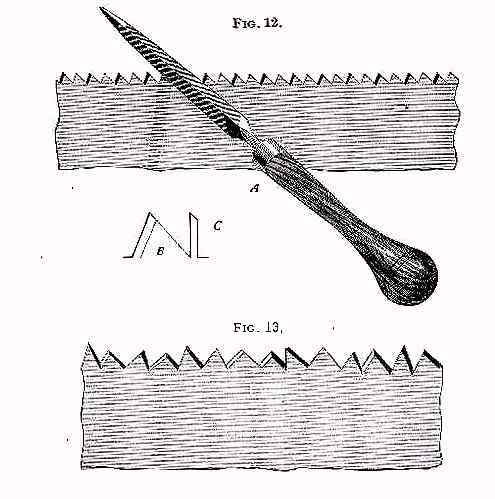
Fig. 12 is a still finer saw, having ten points to the inch. This saw has no fleam on back, the result being very noticeable at C and B. This style of point is for hard wood.
It will be seen that the bevel on the front of teeth in Figs. 10, 11 and 12 is the same, but the bevel of the point looking the length of saw is quite different, consequent upon the difference in the angles of the backs. [see footnote]
Fig. 13 is a representation of some of the saws we have seen; there are entirely too many such now in use, and we have no doubt their owners are shortening their lives in the use of them as well as those of the saws. To owners of such saws we say, take them to the factory and have them retoothed, or buy a new saw and take a fresh start, and steer clear of this style of filing.As we said in the preceding pages, and as will be seen by Figs. 10, 11 and 12, the filing should be done from the heel of saw toward the point. Many practical saw filers contend this is wrong, that the filing should be done from point of saw toward the handle, but the only support they have for their theory is that they do away with the feather edge that the filing from the heel of saw puts on the cutting face of tooth. The feather edge is no objection, as the main part of it is removed when the teeth are side-dressed after filing. Against the correctness of filing from point to handle may be cited the following objections:
Where a different angle of back is required (it being remembered that angle of face should be the same in nearly all cross-cut hand saws, and that angle of back governs angle of point), it will be found very difficult to obtain it without changing angle of face of tooth, and as the cutting duty is on the long side of face, any change is of course of great influence.
Again, (though we think the above argument sufficient) to file from point of saw, it is necessary to file with the teeth bent toward the operator; this will cause the saw to vibrate or chatter, which not only renders good, clean, even filing impossible, but breaks the teeth off the file.
In the preceding illustrations, we have only given the coarser saws that are in most general use, but the same principle of filing should be applied to the finer toothed saws regarding angles and pitch suitable for woods of different degrees of hardness, the only actual difference being that one saw has finer points, and they being finer, require a little more care and delicate touch in setting and filing.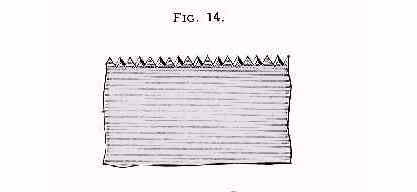 Fig. 14 is a section of an eleven-point saw suitable for the finer kinds of work on dry, soft woods. such as cutting mitres, dove-tailing, pattern work, etc.
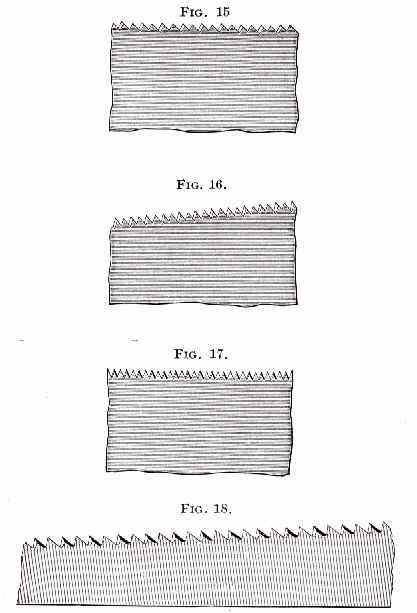 Fig. 15 shows a section of saw with same number of points as Fig. 14, but filed same as Fig. 12. This saw is for finer work, same as Fig. 14 only on the medium hard woods.
Fig. 16 is a still finer saw for fine work on the very hardest woods having same dress as Fig. 14.
Fig. 17 is the finest toothed saw of its kind that is made for wood. All the above mentioned saws in Figs. 14, 15, 16, and 17, are made especially hard and will not admit of setting, but being made thinner at the back, when properly filed, will cut clean and sweet. Teeth such as shown in Fig. 17 are used principally on Back Saws and smooth cutting hand saws. To maintain the original shape of these teeth use our cant safe back file.
Fig. 18 is a section of a pruning saw which differs from a cross-cut hand saw in being thicker, having a little more pitch to the teeth and being ground thinner on the back in proportion to its width. These, of course, are made for cross-cutting only, as there is not as great a variety in the work, nor as much difference in the woods to be sawed as to degrees of hardness, being used only as a pruning saw on fruit and shade trees, which are always practically green and comparatively soft.SETTING THE TEETH OF SAWS
This is an important part of the work of keeping a saw in order and should always be done after the teeth are jointed and before filing. In all cases the set should be perfectly uniform, as the good working of the saw depends as much on this as on the filing. Whether the saw is fine or coarse, the depth of set should not go, at the most, lower than half the length of the tooth, as it is certain to spring the body of saw if not break the tooth out. Soft, wet woods require more set as well as coarser teeth than dry, hard woods. For fine work on dry woods, either hard or soft, it is best to have a saw that is ground so thin on the back that it requires no set; such saws are made hard and will not stand setting, and an attempt to do so would surely break the teeth out.
WHAT CONSTITUTES HAND and RIP SAWS?
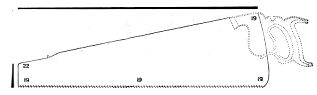
As a matter of interest it may be stated whilst there is a general understanding in the Hardware Trade that Handsaws are 26 inches long and Rip saws 28 inches long, this is not carried out by facts. There are a great many Rip saws made of shorter lengths, such as 22 and 24 inch, for the term "Rip" applies to shape and style of tooth only and not to the length of the saw. Likewise the Cross-cut or Cutting-off saws may be made in any length desired. As to the graduation of teeth in Rip Saws, the purpose of this is to enable the user to start the saw in the work more easily by commencing the cut with the end or point of blade where the teeth are somewhat finer than those at the butt.
PANEL SAW is a term commonly applied to any Hand Saw with cross-cutting teeth, shorter than 26 inches in length. It was formerly used in designating cross-cutting Hand Saws with fine teeth, of any length, but is now obsolete in that particular.
TENON SAW. Some mechanics apply this term to Panel Saws, though it more properly applies to a Back Saw.
BACK SAW, sometimes termed Tenon Saw, is used for fine bench work, pattern-makers, joiners, etc., and is also made in special lengths and widths for use in mitre-boxes for cutting moulding, etc.
The MITRE-BOX SAW has a peculiar shaped butt or heel, making the toothed edge two inches shorter than the full length of blade. The purpose of this is to prevent the "heel" from catching in the work.
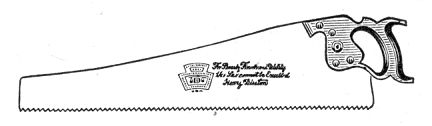
The "Nib" near the end of a handsaw has no practical use whatever, it merely serves to break the straight line of the back of blade and is an ornamentation only.
footnote:
Sharpening a crosscut saw with less fleam on the back of the tooth reduces the aggressiveness with which the saw cuts, resulting in a smoother cut. It is accomplished by tipping the file from its horizontal plane or tipping the saw from its vertical plane. This process of varying the fleam angle on the back of the saw tooth is alluded to in the above text, and it can be inferred from the illustrations by looking at the shadows cast upon the saw blade, but it is not described explicitly. Why it is glossed over in an otherwise thorough article is a little mysterious. It is rarely mentioned in any other saw filing texts, and it is never fully explained. Perhaps the theoretical benefit of reducing or eliminating fleam angle on the back of the tooth has not been borne out in practice, or the concept has become unknown to most saw filers over the last 100 years, as it is not commonly seen now. Another factor to consider is the widespread use of automated filing machines after WWII. These machines, such as the Foley Belsaw models, don't allow the file to be inclined horizontally, so sloping gullets aren't possible.
-
12th April 2013 08:56 AM # ADSGoogle Adsense Advertisement
- Join Date
- Always
- Location
- Advertising world
- Posts
- Many
-
12th April 2013, 08:58 AM #2
GOLD MEMBER
- Join Date
- Dec 2007
- Location
- Melbourne
- Posts
- 3,277
THE MAKING of DISSTON SAW HANDLES
LUMBERMAN HANDBOOK.
THE MAKING of
DISSTON SAW HANDLES.
All Disston handles are made of carefully selected lumber, thoroughly seasoned. This lumber is stored in large piles in the yard,
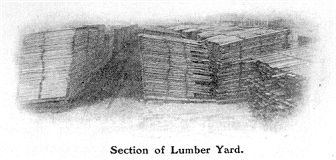
which well compares in size with many large commercial yards. It is air seasoned for at least three years and then receives the complete and final drying in the drying room, whence it passes to the planing machines, where it is planed down to an even thickness. It is next sawed into small pieces, generally of such size that two handles may be made from each of them. The markers then trace the shape of the handles with lead pencils around sheet steel patterns.
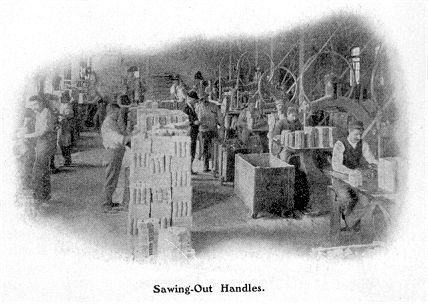
They are then cut out by the band saws, after which a hole is bored in the centre through which the jig saw enters and cuts out the centre piece. They are now sent to the "nosing" machine where the nose is shaped.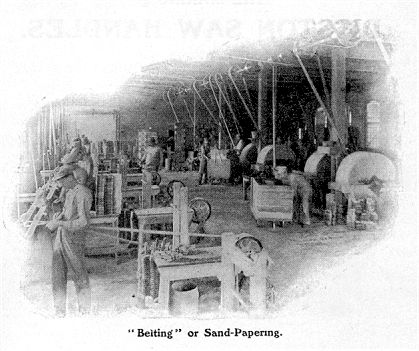 "Jimping" is the next operation. In this the roughly cut out handles are brought in contact with swiftly revolving cutters, and the edges are rounded. The handles now pass on to the filers, who work them into the finished shape. This is followed by "sand-papering" on belt machines.
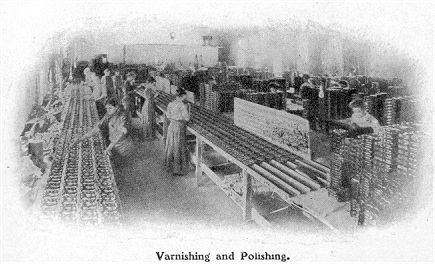
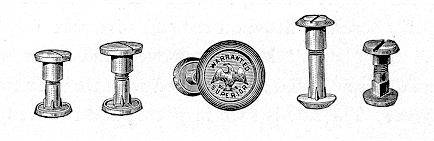
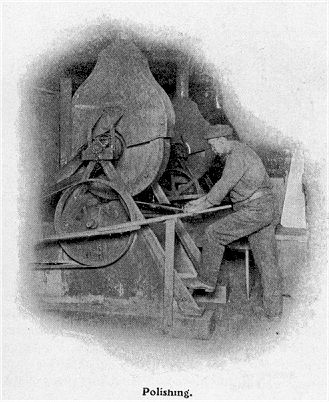
The next step is "varnishing," after which comes "slitting" as it is termed, or the process of sawing the slot in the handle in which the blade rests. In connection with this operation the handles are bored and countersunk for the bolts or screws.If the handle is to be "carved," that work is now done, then follows "polishing."
The woods used chiefly for making handles are beech, apple, cherry, walnut and other hard woods. Beech is the wood generally used, but apple is the favorite.
-
12th April 2013, 09:02 AM #3
GOLD MEMBER
- Join Date
- Dec 2007
- Location
- Melbourne
- Posts
- 3,277
Factory Tour
HENRY DISSTON & SONS, INC.
THE MAKING of the
DISSTON HAND SAW.
The operations required in the making of the DISSTON HAND SAW are both numerous and varied, to describe each would require considerable space, therefore the principal processes only will be taken up in their regular order. 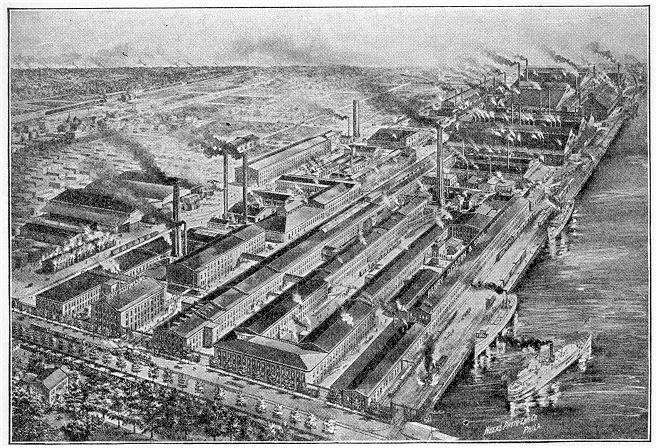
All Disston Saws and Tools are made throughout in the Disston Works, from the selecting and melting of the material itself to the finishing process; every operation being under the care of experienced superintendents and subjected to frequent inspection and tests. The Factory consists of fifty-four buildings; ground enclosed fifty acres, and there are 3,500 employees -- the Disston Saw Works, without exception, being the largest in the world and its production -- Quality and Quantity considered -- the FINEST and GREATEST. 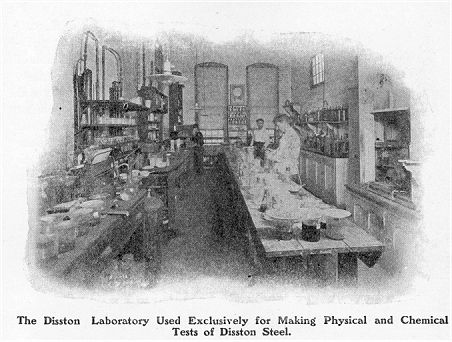
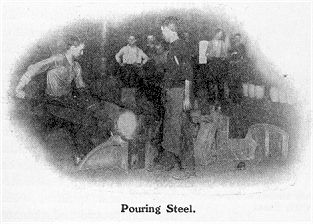
The DISSTON STEEL WORKS, which is part of the plant, is fully equipped with the latest appliances, machinery, etc., and has exceptional facilities for the making of CRUCIBLE STEEL peculiarly adapted for saw requirements. This is an important factor in the making and maintaining of HIGH QUALITY SAWS, for the steel is the foundation upon which rests all subsequent work. From the time saws were first made saw manufacturers had the greatest difficulty in obtaining steel of uniform quality, free from flaws and seams. This difficulty was overcome in the Disston Steel Works after years of careful study and costly experimenting. The Disston method of casting steel ingots not only does away with splitting, spalling and crumbling of teeth, but makes a hard, tough, elastic steel of the highest quality, which with the improved and patented processes of manufacturing and tempering guarantees the production of saws that for toughness, standing-up quality and uniformity of temper have never been equaled.
The Disston Saw Works was the first to manufacture saws from the raw material to the finished article. This, in fact, was the first successful Crucible Steel Melting Plant in America for saw steel, and in line with the making of progress, on April 24th, 1906, an Electric Furnace was installed in the Disston Steel Works and successfully operated for the melting of crucible steel, it also being the first of its kind in the United States. The material to be melted is carefully selected, of best quality, the various operations, from the melting to the rolling, are performed by men of long experience, and all steel is fully inspected before it is sent to the Saw Department, thus insuring the highest perfection.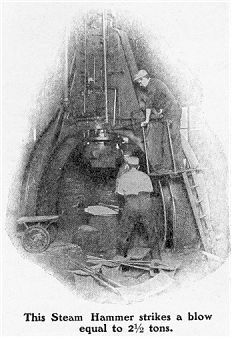


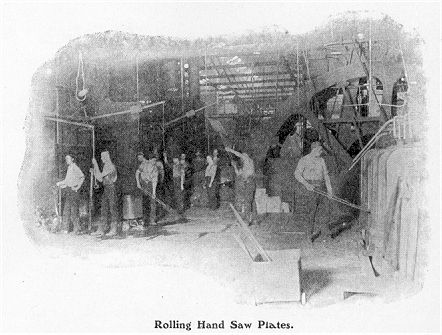
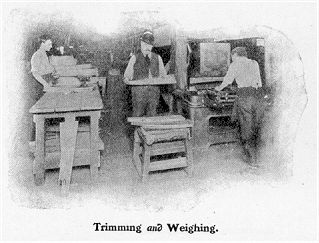
In the Saw Department the sheets of Crucible Steel, rolled to gauge, are trimmed under shears and cut into blanks for either straight or hollow-back saws as required. The blanks are now presumably of the same size and thickness, but to determine this, each blank is weighed, the heavier ones being used for saws with larger size teeth.The next operation is that of cutting the teeth, which is done on a machine of special design, the blanks being fed in by hand.
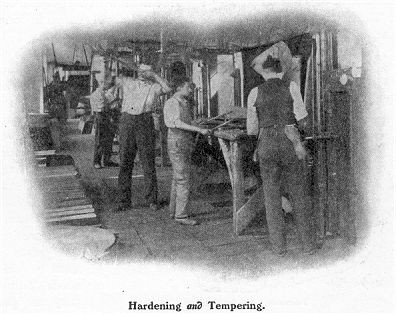
To the untrained eye the saw blade now looks as if it were ordinary material. The next step is an important one and is one of a series which helps to give character and value to the tool, i.e., the saw blades at this stage are in the soft state and must be ''Hardened." To do this they are placed in the hardening furnace, which is heated by the use of fuel oil. The saw blades in this furnace are heated to a certain temperature, then taken out and plunged edge first into a special hardening bath. This makes them extremely hard, in fact as hard as it is possible to make them and they must therefore be handled very carefully until properly tempered.
In order to make the saw blades so they can be used they must now be "Tempered," or a certain amount of this extreme hardness drawn according to the quality of saw desired, which is done by bringing them in contact with less heat than they were subjected to in the hardening furnace. This operation is a very delicate one.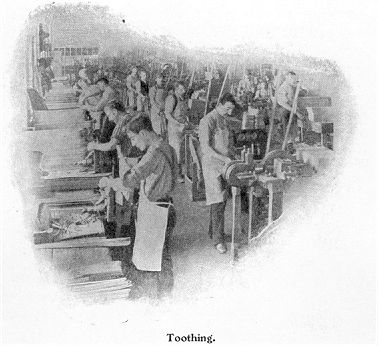
-
12th April 2013, 09:03 AM #4
GOLD MEMBER
- Join Date
- Dec 2007
- Location
- Melbourne
- Posts
- 3,277

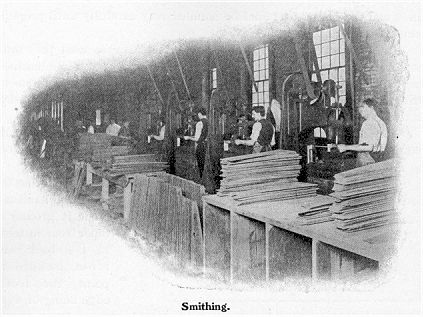
The next step is that of "Smithing." in this the blades are flattened and made perfectly straight, all inequalities being taken out by the skillful hammering of the mechanics.
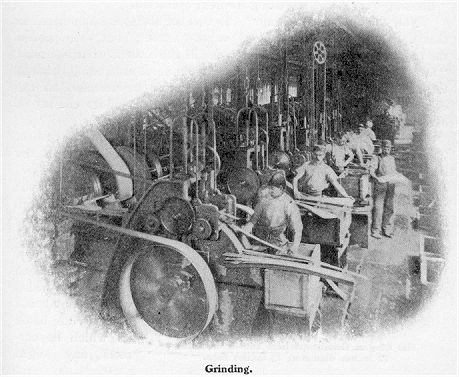
The blades are next "Ground" to gauge and to a taper so that the back will be thinner than the cutting edge. The back of the hand saw blade is ground to taper from the teeth to the back and from handle to point, the tooth-edge being of even thickness from end to end. A saw not ground to proper taper cannot be ranked as a high-class tool.
 After being ground they are returned to the smithers for "Looking-over" and preparing for next operation.
Now follows "Tensioning." In this the blades are hammered so that they shall not be too "fast" or too "loose;'' but shall possess the proper tension, spring or character. If the blade is what is termed "fast" the metal is too long on the edge and needs expanding through the centre, or, if too "loose" the metal must be stretched on the edge. A saw not properly tensioned will run out of its course, in other words it will not cut straight and true.
The blades are again passed to the grinder for the purpose of "Drawing" which is a finer process of grinding and prepares the surface to take the higher polish to be given by the "Glazing."
Now comes the Blocking," which is an important operation and requires the highest order of skill. Each blocker is provided with an anvil and lignum vitae block on which he corrects any slight irregularities that may have been developed by the previous processes. The blades then undergo the "Polishing" process, then through the important operation of "Stiffening." As to this latter, the different processes and hammering under which the blades have passed, has altered the arrangement of the molecules in the metal and in order to restore the desired qualities and spring they are stiffened in a special bath, which was originated and is known only to Disston. 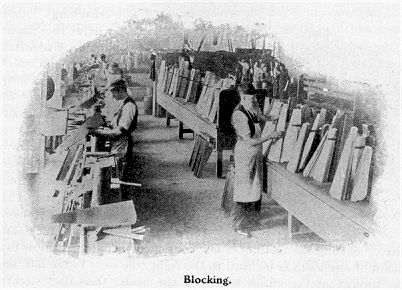
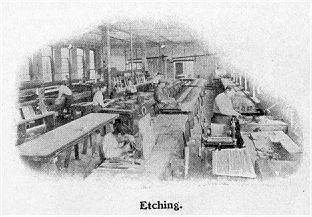
The blades now pass to the "Etching" room where the name, brand, trademark, etc., are put on. The next stage is ''Setting the Teeth." Each tooth is set by one or more strokes of a hammer; the experienced workman performing this work with wonderful accuracy and rapidity. Setting the teeth of a saw consists of bending them so that the point of one tooth is inclined to the right, the next to the left, and so on throughout the entire length of the blade, thus they slightly protrude beyond the side of the saw blade, which is necessary to obtain sufficient clearance for the body of the blade so it will not bind in the cut, the amount of set required being somewhat lessened by the special grinding which leaves the blade tapering from toothed edge to thin-back, though extra thin-back saws are made so they will run without any set, but these are particularly adapted for hard, dry, seasoned lumber. They are now ready for "Sharpening," which, as will be noticed, is done after setting so as to avoid injury to the teeth. Each saw is well sharpened and filed so true that on holding it up to the eye and looking along its edge it will show a central groove down which a fine needle will freely slide the entire length. In filing and sharpening, the teeth are given a certain amount of bevel, according to the class of work for which they are intended; saws for hard wood requiring less bevel as well as pitch than saws for cutting soft wood. 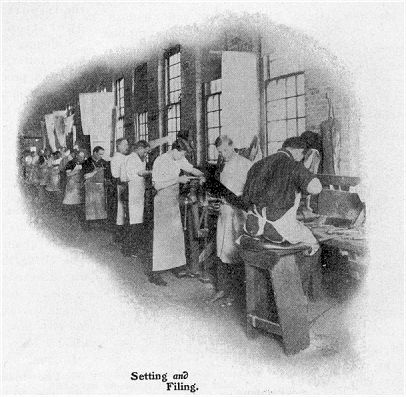
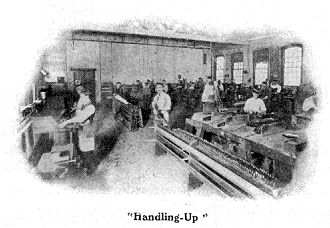
The next operation is "Handling-Up." Each handle for the Disston Hand Saws is separately slit, bored and fitted to its blade to insure the correct "hang" or pitch to the saw when entering the work. The completed handle is placed on the blade, holes marked with a punch, the handle is then removed, holes punched in blade, the handle replaced and bolted on. [For more about the making of saw handles, click here] The saw is now complete; subjected to examination for correctness in hang of handle, then fully inspected, cleaned, and is ready for packing. The making of the Disston High Grade Hand Saws from start to finish calls for the most careful workmanship and constant attention. At each stage of the work the saws are inspected amid the system for accomplishing this is so thorough that it is almost impossible for an inferior article to pass out of the works as a high grade and perfect tool. The brand "Disston" is reserved exclusively for the high-grade goods which are never sent out under any other brand.  "THE WORLD IS OUR MARKET""The growth and development of the saw business in the United States has been phenomenal, as now and for some years past there have been practically no saws of any foreign manufacture imported into the United States, whilst on the other hand the American-made goods are exported very largely to all parts of the civilized globe."
-
12th April 2013, 09:08 AM #5
GOLD MEMBER
- Join Date
- Dec 2007
- Location
- Melbourne
- Posts
- 3,277
How a saw cuts
[The following is text copied from a Disston publication: The Disston Saw, Tool and File Book, ©1921.]
HOW A SAW CUTS
An Explanation of the Construction and Operation of Hand Saws. Why cannot a board be cut by a blade with a knife edge when such a blade is used in the same manner as a saw?
Of course we understand that an instrument of this kind will sever exceedingly thin stock. But when it comes to a board of ordinary thickness, the knife edge will merely score to a certain depth. This depth depends upon the length of bevel. The thicker portion of the beveled edge, coming in contact with the sides of the scoring, prevents the blade from entering further. The blade merely glides back and forth. If additional pressure is applied in an effort to force the cutting edge further into the work, the friction becomes so great that the blade will be jammed or wedged in the board. The reason for this is, that there is no displacement of wood to allow the cutting edge to reach more of the wood continuously, or to allow the back of the blade to slide without binding.
Saw Action Similar to that of Chisel. The nearest approach to the cutting action of a saw is the action of a chisel. However, instead of cutting out small pieces of wood like sawdust, the chisel separates and removes a long shaving, by what may be appropriately termed "paring.'' or ''slitting." Its comparatively broad sharp edge separates the fibres of wood lengthwise with the grain and does not cut on the sides. The wedge-shaped end merely raises the shaving or chip and the chisel, pushed ahead, tears the fibre at the sides. The angle at which the chisel is held, the amount of bevel on the cutting edge, the pressure exerted, and the hardness of the stock are the factors which govern the thickness of the shaving.
The actions of both the knife and the chisel are employed in the cutting done by a cross-cut saw. A cross-cut saw moves successive pieces of material, not long shavings but small particles called sawdust, by scoring, cutting, and tearing.
The similarity comes to the rip saw in that its teeth are practically a series of small chisels.
The hand saw for cross grain cutting possesses practically V-shaped teeth. The teeth are set or bent over slightly to clear the body of the blade in the kerf. Although the back of each tooth is beveled as is the front, it is the outside edge of the front of the point that does the cutting.
How a Hand Saw for Crosscutting Cuts. Take a cross-cutting hand saw, properly set and sharpened, each tooth of uniform size, shape, set, and bevel. Make with this a light short cut across a smooth piece of lumber. One can see that the extreme points on both sides of the cutting width of the saw first made parallel scorings the width of the set. These scorings are similar to the line cutting of a knife across the face of the wood, thus starting the cut. Then as pressure is applied, the teeth enter deeper and deeper, gradually bringing into action the cutting edge on the outside front of the points. The forward motion of the blade causes the points and cutting edges to strike the fibre at a right angle to its length, severing it from the main body of wood on each side of the blade, and paring the ridge of wood between scorings. A continuation of the thrust pressure carries the teeth in farther until the full bite is taken. With the points scoring continuously on each stroke and the outside edge of the tooth cutting, the beveled front edge of each tooth performs its duty, chisel-like, of crumbling up and dislodging the upper portion of wood left between the cutters. At each thrust of the saw the pieces of wood are carried out of the kerf in the throats or gullets between the teeth, until finally the board is completely divided.
How a Rip Saw Cuts. The ripping of lumber, that is cutting or splitting it lengthwise with the grain, requires different action on the part of the saw tooth from cross-cutting. Consequently, the rip tooth is of another shape. Although a cross-cutting saw can rip lumber more easily than a rip saw can cut across the grain, the former operation would be slow and arduous work. The form of tooth in a cross-cutting saw does not properly sever the fibres in ripping because the line of the cutting edge runs with the fibre instead of across it. This being the case, the saw cannot cut freely nor entirely clear itself in the kerf. The rip saw tooth has a straight front. Its cutting edge strikes at practically a right angle to the fibre of the wood, but severs it at only one place- the front of the tooth wedging out the piece of wood.
This may be more clearly understood by making a direct comparison with the cross-cutting tooth. As previously stated, this scores with the point and cuts with the knife edge on the outside front. The rip tooth, with its straight front and cutting edge on top, strokes down. The comparatively wide cutting edge, cutting across the long fibres of wood, enters deeper and deeper. The wedgelike body of the tooth presses against the partially severed piece of wood until, unable to stand the strain, the fibres on the sides and bottom of the small section tear apart.
Piece after piece, each successive tooth cutting its portion of half the width of the kerf, is thus separated from the main body of the board and carried out in the gullets of the teeth at each thrust of the saw. In this manner, the rip saw practically chisels out the kerf in small sections, leading to a complete division of the board.
On a cross-cutting saw the pointed teeth, set alternately to right and left, leave a shallow groove, which runs along the' cutting edge from butt to point. This groove is deep enough to allow a needle to slide in it. This is not true with the rip saw. It will be noticed, on glancing down the cutting edge of the rip saw, that the square topped teeth extend entirely across and beyond either side of the blade. The inside of the tooth on the night barely overlaps the inside of the tooth on the left.
Only Small Part of Saw Tooth Actually Cuts. It is a common supposition that the entire tooth of a saw cuts. As a matter of fact, however, the actual cutting is done, with the cross-cut saw, by the points, and front cutting edges which extend only to where the right and left teeth overlap; and, with the rip saw, by the chisel-like edge of the teeth.
Because they are set alternately night and left, each tooth individually severs only half the width of the kerf. This division of duty by the numerous teeth in the hand saw makes possible the performance of quicker work, involving less effort and driving power than if the full width of kerf were cut by each tooth.
So it will seem that, no matter what sort of a saw, the cutting edge of each tooth makes an incision across the long wood fibre. Then the base of the tooth plows out the small pieces thus separated. This is done continuously with each stroke of the saw. The saw enters farther with each thrust, the kerf becomes deeper, until a complete separation of the board is accomplished.
Link to Source includes how to date your Disston, Disston & Son, Disston & Sons Saws by medallions and models.
Disstonian Institute.com -- Online Reference of Disston Saws


 Reply With Quote
Similar Threads
-
Henry Disston & Sons 1946 Mac Aurthur
By PeteOM in forum ANTIQUE AND COLLECTABLE TOOLSReplies: 6Last Post: 19th November 2012, 06:24 PM -
1850s Henry Disston handsaw - ebay
By TobyC in forum HAND TOOLS - UNPOWEREDReplies: 8Last Post: 20th August 2012, 02:24 PM -
disston saw set what saws????
By bluegum30 in forum HAND TOOLS - UNPOWEREDReplies: 14Last Post: 14th July 2010, 07:41 PM -
Henry Bros Saws
By Waldo in forum BANDSAWSReplies: 0Last Post: 27th May 2006, 10:53 AM -
Henry Bos Saws
By Strungout in forum WOODWORK - GENERALReplies: 0Last Post: 25th March 2005, 06:04 AM
