

 Thanks:
  Likes:
  Needs Pictures: 0
 Picture(s) thanks:
Results 1 to 11 of 11
-
6th September 2020, 02:41 PM #1
 GOLD MEMBER


- Join Date
- Oct 2013
- Location
- Perth, Australia
- Posts
- 1,813
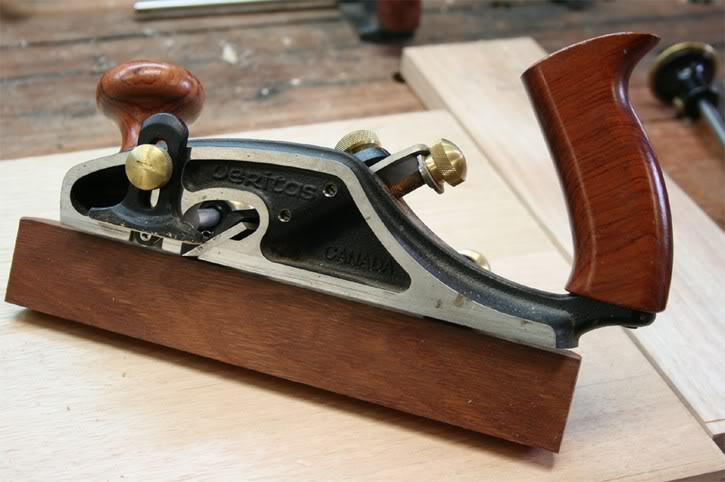
 Midadventures with the Veritas Skew Rabbet plane
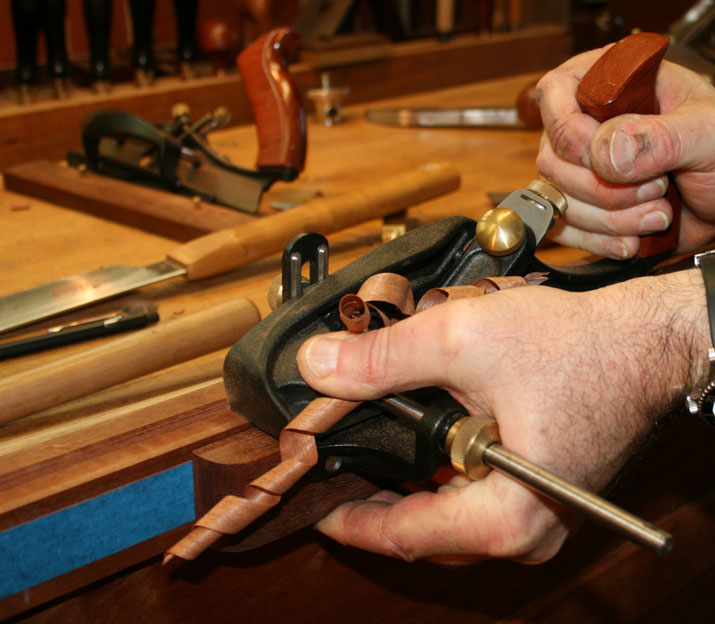
Spent the morning dialling in the Veritas Skew Rabbet plane for some joinery I need to do and while I'm very happy with it now it gave me pause for concern after my first pass.
Check out the difference between these two photos, I think they really demonstrate just how important setup is. Doesn't matter how good your tools are, if you can't set them up and use them correctly you'll have a bad time...
Don't laugh. This is pass one after my first crack at setup.

So many problems there. Tear out, an errant pass along the face of the board and marks galore from the depth stop. Oh and the depth stop moved or I didn't lock it down enough so I went too deep
I was actually going okay for the first mm or so and it looked great but then I broke through my gauge lines and started tearing out. This was my own fault, I couldn't get the nicker rotated and rather than persist with it I just went with knife lines. It only took a couple of minutes to get the nicker set in the end so that's on me.
The other problem is the sloping rebate which was because the blade wasn't protruding far enough to cut into the corners, I was able to correct this by eye for the second pass but I'll go back and move the set screws again which align the blade. Probably a bit of poor technique as well.
Then onto the depth stop scoring lines on the face of the board. Probably a bit of bad technique at play here but the edges of the stop are quite sharp so I'm going to hit them with a file which should minimise the issue. Never experienced it with my Stanley 78 which has the same style stop. Didn't help that I did the math wrong and set the stop too shallow initially which exaggerated the tear-out.
And here's the second pass with most of these issues rectified.

Still some minor slope but more technique than anything. And the stop made a little groove but I still haven't filed the stop and I'll be planing the face to clean up the tear-out so no big deal.
Anyway I thought I'd share and see if my assessments of the problem are correct, definitely always open to suggestions!
-
6th September 2020 02:41 PM # ADSGoogle Adsense Advertisement
- Join Date
- Always
- Location
- Advertising world
- Posts
- Many
-
6th September 2020, 08:52 PM #2
Senior Member
- Join Date
- May 2020
- Location
- Melbourne
- Posts
- 118
Hey Bueller,
Cool photos. Its interesting that you get the scratch marks with the depth stop. I was playing around with the skew rabbet plane on some pine the other day across grain. I didn't get any scratch marks from the depth stop. When you're using the plane are you always pushing the fence to the work piece? I think as long as the fence is always properly registered with the end grain, the cut will be square and depth gauge will be parallel to the board and not mar it.
Cheers, Bernard
-
6th September 2020, 09:53 PM #3
GOLD MEMBER
- Join Date
- Sep 2010
- Location
- Sydney
- Posts
- 1,983
Curious so went and got mine. Full disclosure hasn't seen any use though but have used a Stanley 78 and experienced some of these issues. But Yes most likely blind leading the preverbial
With the fence I removed it from the plane to have a feel of it. I can definitely feel a raised edge like a burr which could make that mark on the outer edge of the fence.
With the depth of the fence there is definitely a sweet spot where it's definitely on tight and I can push it with both thumbs and it won't move. Back it off a touch and it would move in use.
I had to go back to the instructions for the nicker. The nicker operates on a cam. So rotation of the nicker without releasing the cam won't work. The cam release is the straight slotted screw underneath the handle. Once released I could get the nicker in position. Fiddly but with practice most likely easier.
Have you got the blade sticking out slightly at the side- there is a video on the website that shows to set it up protruding about the width of a sheet of paper. Also is the blade in the plane straight when you look at the base as this could cause it not to be level.
I'll have a crack at using it and report back. I won't remove the burr on the fence to see what happens.
Rabbets by Hand - YouTube Chris Schwarz has taken the front knob off to help hold the plane properly
Take a photo of your plane so we can have a look at your setup?
-
6th September 2020, 09:59 PM #4
The Laird
- Join Date
- Jan 2007
- Location
- Katoomba NSW
- Posts
- 4,772
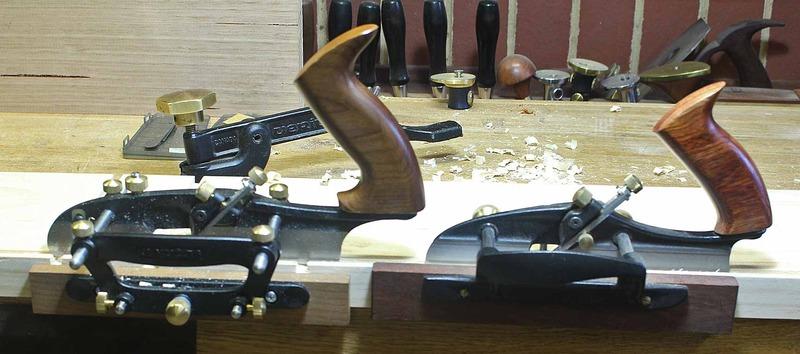
I agree with BZ. It looks like you are tilting the plane toward the workpiece. Causing the non right angle rebate and the depth stop dig in. Make sure the blade is as sharp as you can get it, then sharpen it a bit more. Let the blade do the cutting and just concentrate on your alignment. Practice your motion and alignment with the grain as it is a bit easier to push the plane. And you can fling off some cool spills with the skewed blade.
I have a Stanley 46 ( my all time favourite plane ) which is the older and more dignified version of the Veritas
-
8th September 2020, 10:08 PM #5
GOLD MEMBER
- Join Date
- Sep 2010
- Location
- Sydney
- Posts
- 1,983
Reporting back.
First day had a hard time following the instructions to set the plane. " They did it in the video - surely I should be able to do that." Nup.
Then got to the point where I had two tracks one from the knicker and one from the blade.
The photos show where I got to today. Crisp wall however some issues.
20200908_205501.jpg
20200908_205255.jpg
Entry point on the right is slightly wider by half a millimetre.
And a slope toward the edge. In correcting it I've over corrected and I've rubbed the fence on the wood.
More practice required
-
12th September 2020, 05:41 PM #6
GOLD MEMBER
- Join Date
- Sep 2010
- Location
- Sydney
- Posts
- 1,983
Reporting back again.
After reading the instructions again and resetting the position of blade and nicker to it all is well with the world.
Today I decided to have a crack at a raised panel type lid. 1st step a 9mm deep x4 mm wide resonate - all good on all 4 sides. A touch steppy where long side = short side but can be fixed.
Step 2 a 25 mm rebate X 5 strokes deep. All good.
Step 3 using shoulder plane with blade on an angle against 2nd rebate create the raised bit. For the most part this worked except next to the 2nd rebate where there is a little bit of a step in there. Any one successfully used a shoulder plane to do this. I can't see how I can get the corner of the blade either lined up or slightly proud off the side of the plane?
20200912_155653.jpg
20200912_155643.jpg
Now I know it's possible to do step 3 with the skew rabbet. Derek shows this on his website with and angled fence.
Interestingly he has stuck a piece of veneer to the underside of the depth gauge to stop it marking. By the way has anyone seen Derek? Its unusual that there be a Lee valley plane thread without him chiming in?
-
12th September 2020, 06:38 PM #7
GOLD MEMBER
- Join Date
- Feb 2016
- Location
- Canberra
- Posts
- 5,124
I love mine, but its a righty. Need a leftie to compliment it

-
12th September 2020, 07:17 PM #8
GOLD MEMBER
- Join Date
- Oct 2013
- Location
- Perth, Australia
- Posts
- 1,813
Having another crack with mine this weekend, want to get the bottom panel of my saw till ready for joinery. Thanks for all the advice!
And +1 on needing the lefty to complete the set.
-
13th September 2020, 11:18 AM #9
SENIOR MEMBER
- Join Date
- Sep 2009
- Location
- victor harbor sa
- Posts
- 315
Hi Bueller,
Are you starting your cut at the end near to you or the end further from you??
Graham.
-
13th September 2020, 12:28 PM #10
Be inspired. Be creative. Be bold.
- Join Date
- Apr 2001
- Location
- Perth
- Posts
- 10,820
Dan, you are making good progress. A moving filester (rebate plane) is tricky. There are a number of parts that need to all be working together: the nicker must be a smidgeon (actually, an �ultra� smideon aka poofteenth) past the blade, and the blade is aligned with the side of the body. This is to cut into the corner of the rebate and keep it square.
Of course, that is all well and good in theory, but often is tricky to set up, and must be corrected as early as possible, otherwise you plane a slope. To remove a slope, use a sharp cutting gauge. Perhaps also a shoulder plane.
Once the nicker is sorted, the next is the depth stop. The veneer in mine has long since peeled/worn off, and not been replaced. Keep the surface clean. More importantly, use less downforce. The depth stop should not be seen to be stopping the cut, but rather to warn you when you are close to or at the desired depth. Don�t force the last few strokes. Look at the line to which you are planing. You may want to finish the cut with a shoulder plane (these are the areas where I find a shoulder plane so useful).
How you hold and push the rebate plane is important. There are two features here: pushing the plane laterally against the workpiece, and pushing the plane forward. You do not push down. You push forward from behind the handle, using the heel of your hand. You push laterally inward with the palm of your hand resting against the blade area.
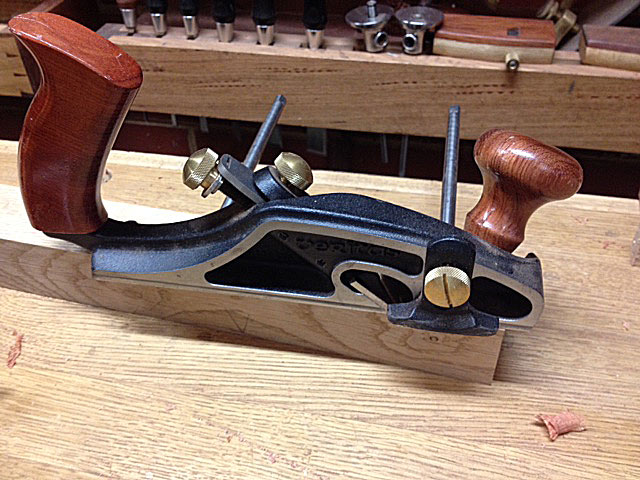
To do the latter, I long ago removed the knob from the skew rabbet plane ...

My thumb rests where the knob used to be and my palm against the blade area, which keeps the centre of effort low down and the plane balanced in the cut ..
There is no difference with other, similar planes ... such as a plough plane ...

The last bit is about maintaining the vertical. This is largely about developing a sense of vertical, but is aided hugely by having a deeper fence. Add a sub-fence to thevstock fence. As you may have noted, I have a few that can be changed out - for rebating square, panel raising, even dovetailing.

Olde, pre-knob removal set up ...
Keeping it all straight? I suspect the issue you show is down to the way you use your body. I usually start at the end and work back until the wall is established. I also set the plane to cut about 0.5mm from the line, which I mark with a cutting gauge. This allows me to see where I am cutting in relation to the line. It is okay to cut short of the line, but you do not want to go over it, and that can obscure what you are doing. I would rather finish to the line with a shoulder plane. A couple of swipes. That also allows one to even up the rebate, if needed.
The Skew Rabbet Plane has one weakness, in my experience: the knobs can slip. Consequently, I added slots for a screwdriver to mine ...
For the past couple if years I have instead used a pair of pliers with soft faces to avoid damaging the knurling (I purchased mine on eBay). A slight twist before you start is insurance.
Sharp blades!
Regards from Perth
DerekVisit www.inthewoodshop.com for tutorials on constructing handtools, handtool reviews, and my trials and tribulations with furniture builds.
-
26th September 2020, 09:31 PM #11
GOLD MEMBER
- Join Date
- Oct 2013
- Location
- Perth, Australia
- Posts
- 1,813
Checking in again after a bit of a break. I had another crack with the bottom panel of the till and hoo boy did it not go well. Combination of bad timber selection where the joinery lays and going against the grain half the time due to not having the leftie. I've ordered it and taken a break with some other stuff, I'll shorten the boards up by a couple of cm and try again. Not the end of the world! Actually means I can tighten up one of the looser joints on the first board I rabbeted.
Thought I'd stick my head in and say thanks for all the advice, will be back into it after I've got my confidence back and tackled round 3!


 Reply With Quote


Similar Threads
-
WANTED:VIC Right Hand Veritas Skew Rabbet Plane
By Bernard Zhang in forum WANTED & WANTED TO BUY - in AustraliaReplies: 2Last Post: 21st July 2020, 12:40 PM -
Combination plane v. Skew Rabbet planes (of the Veritas variety)
By woodPixel in forum HAND TOOLS - UNPOWEREDReplies: 12Last Post: 18th October 2019, 11:57 PM -
Veritas Skew Rabbet Plane fence moves
By section1 in forum HAND TOOLS - UNPOWEREDReplies: 2Last Post: 10th February 2013, 10:34 PM -
Veritas� Jack Rabbet Plane
By behai in forum HAND TOOLS - UNPOWEREDReplies: 7Last Post: 14th September 2012, 01:43 PM -
Veritas Skew Rabbet Planes
By John Saxton in forum HAND TOOLS - UNPOWEREDReplies: 21Last Post: 8th September 2009, 09:47 PM
