

 Thanks:
  Likes:
  Needs Pictures:
  Picture(s) thanks:
Results 1 to 13 of 13
Thread: Planing a sliding dovetail
-
17th September 2012, 04:18 AM #1
 Be inspired. Be creative. Be bold.


- Join Date
- Apr 2001
- Location
- Perth
- Posts
- 10,826
 Planing a sliding dovetail
I was chatting to Terry Gordon at the recent Perth Woodshow. He was demonstrating how he used a dado plane along with a Snipe Bill to create a female sliding dovetail. This looked very slow going to me.
Some years ago I built a plane to cut the male side of the joint.

The female side was sawn, a chisel used to roughly remove the waste, and a router plane cleaned up the remainder. There is a pictorial here:
http://www.inthewoodshop.com/Furnitu...lsbyhand1.html
The conversation with Terry re-kindled my interest in a plane to shape the female joint. I came away from the show with a purchase of his superb 1/2" dado plane (a review will come in the next couple of months).
A week or so after the show, Giuliano (Woodworking by Hand: A Female For The Dovetail Plane) posted his plane. This was a simple and excellent design, basically a dado plane. So rather than attempting to re-invent the wheel, I decided to make a version of this, which I gather is a design that goes back many years. Of course, I did want to stamp my own mark on the result, and decided that it also must fit in with the HNT Gordon dado plane.
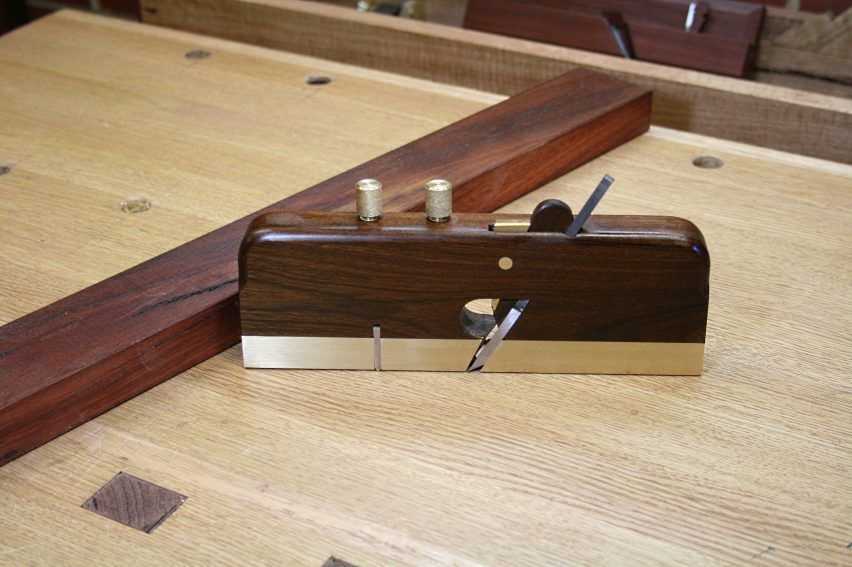
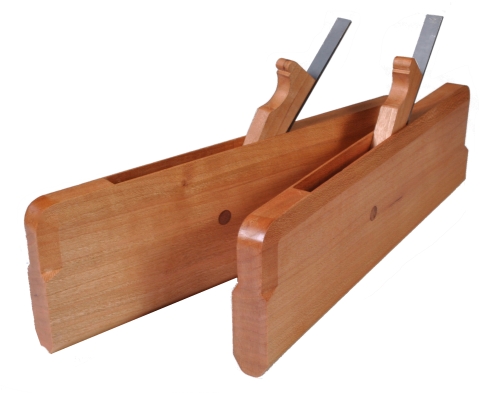
This was completed today ...
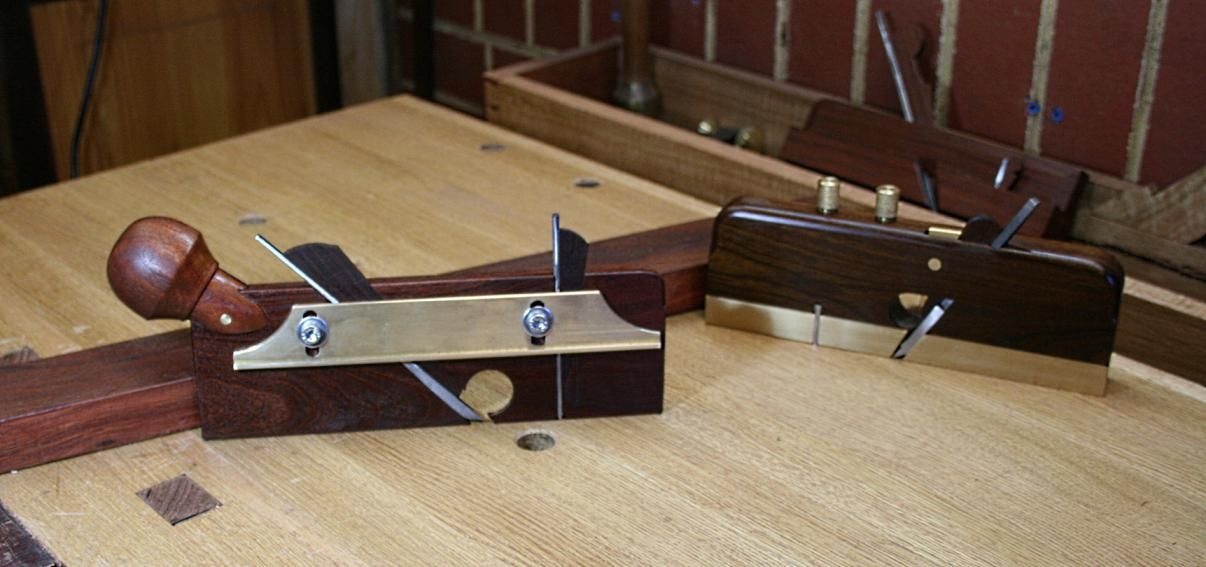
The plane is 9 1/4" long and 3" high. It s 1/2" thick at the wide (upper) section, and a touch under 1/4" wide at the lower section. The reason for the ball handle is that the thin body is too uncomfortable to grip as is. The added handle makes it very comfortable to push.
The rear side ..
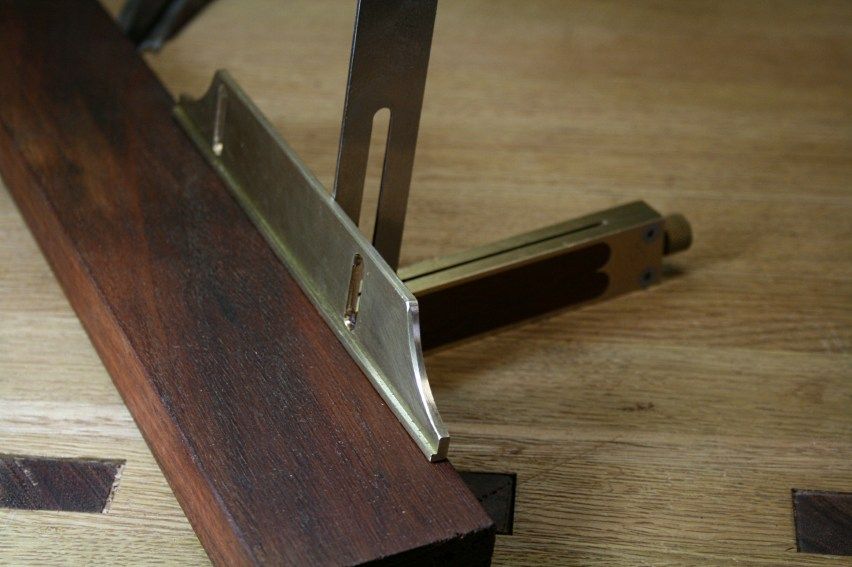
An integral part of the plane is the Jarrah guide. This is 24" long.
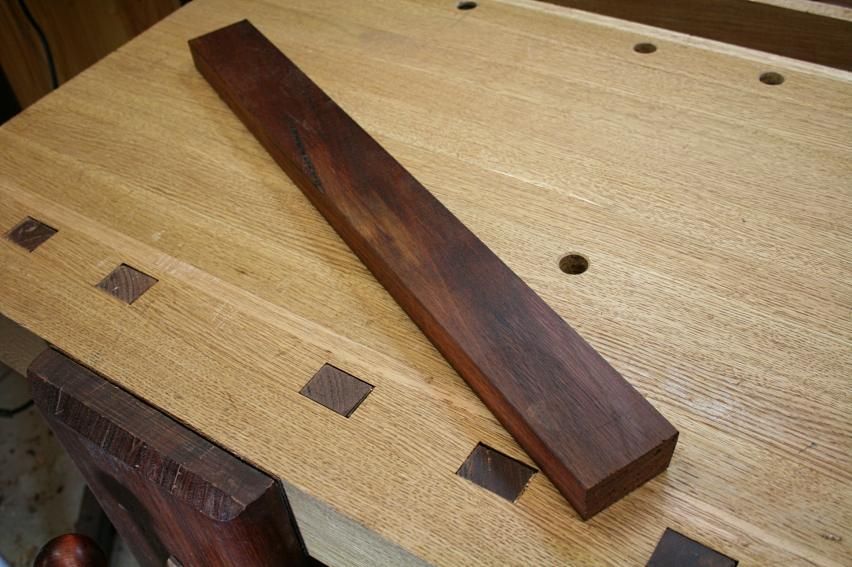
The underside has 240 grit sandpaper attached as non-slip.
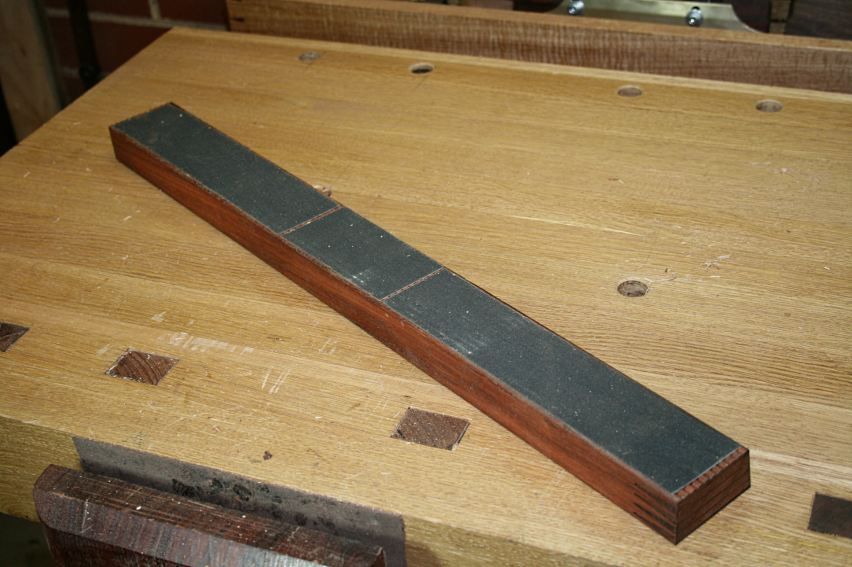
One side is 90 degrees (for the dado plane) and the other has a 1:6 slope (for the dovetail plane).

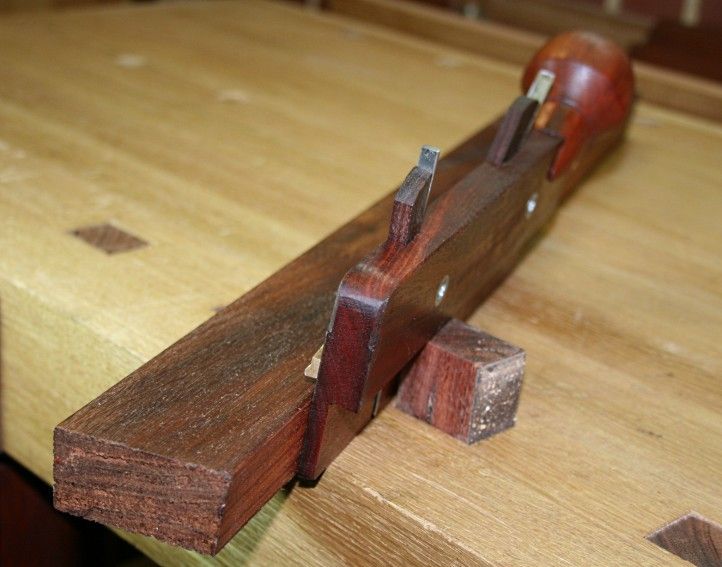
The dovetail plane runs along the guide and planes at an angle. However, unlike a dado plane, the blade on the dovetail plane is angled so that the lower edge cuts parallel to the surface.
 Visit www.inthewoodshop.com for tutorials on constructing handtools, handtool reviews, and my trials and tribulations with furniture builds.
-
17th September 2012 04:18 AM # ADSGoogle Adsense Advertisement
- Join Date
- Always
- Location
- Advertising world
- Posts
- Many
-
17th September 2012, 04:19 AM #2
Be inspired. Be creative. Be bold.
- Join Date
- Apr 2001
- Location
- Perth
- Posts
- 10,826
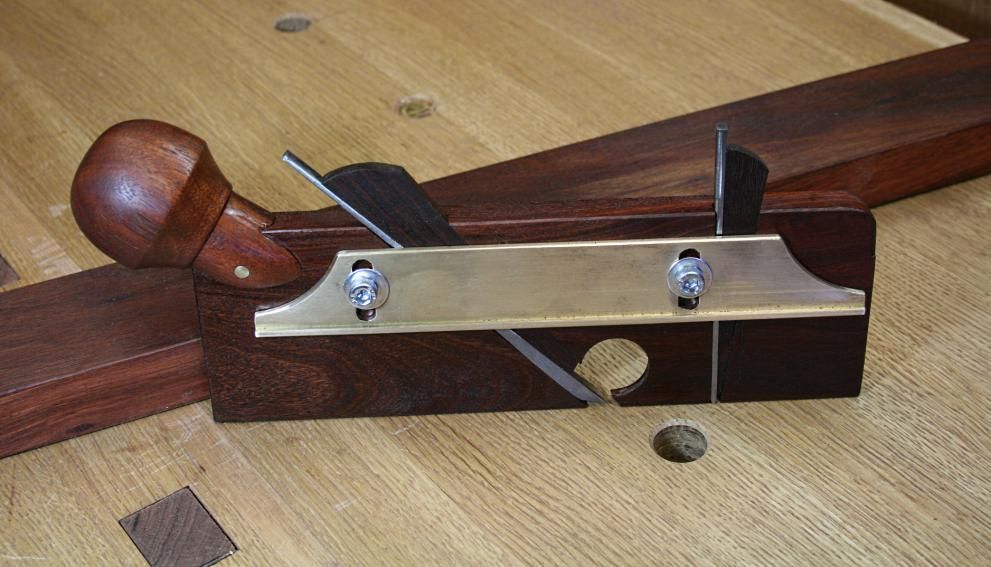
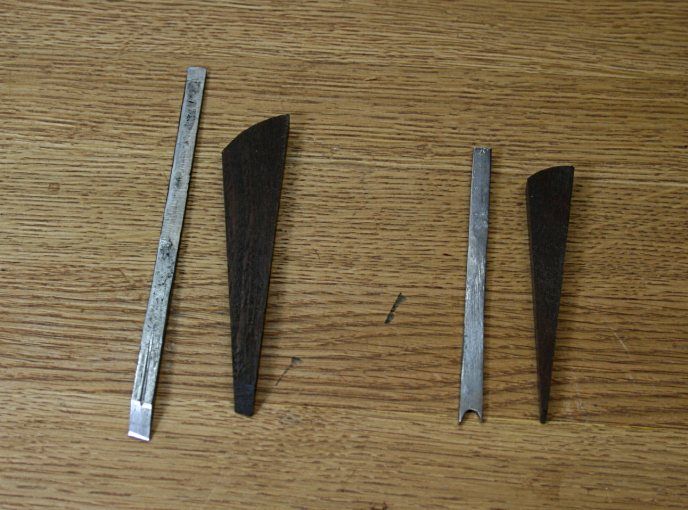
Here are a few construction details:
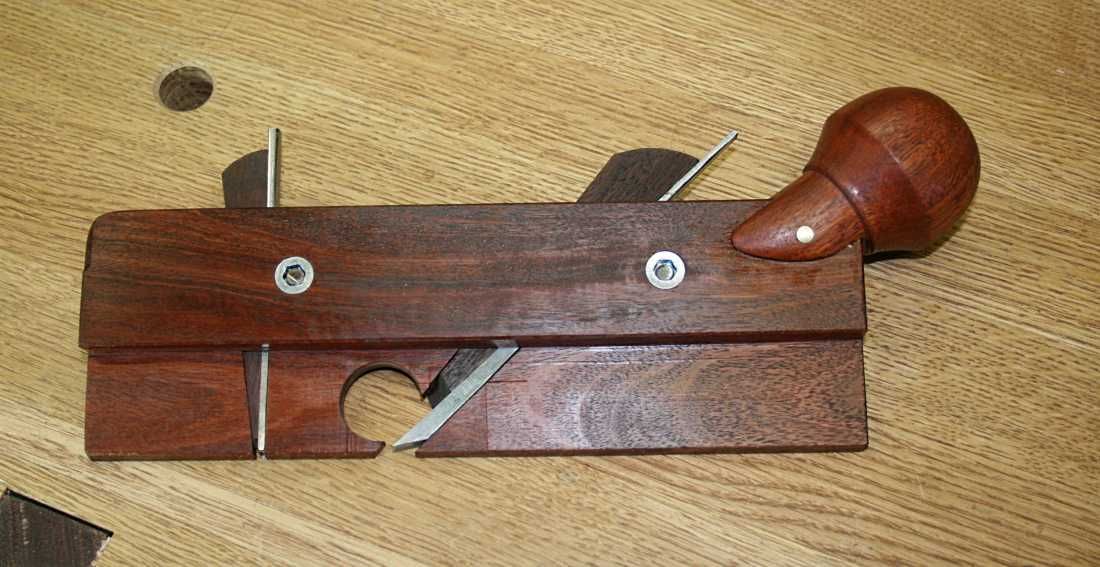
The body ...
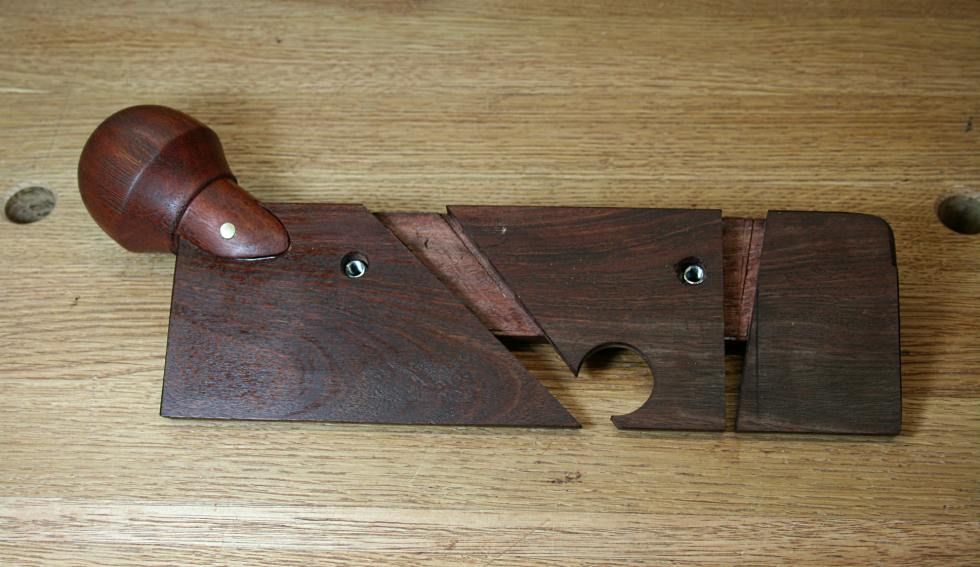
This is the main blade (on the left) with a double-sided nicker (on the right). Both are angled to fit the angled (1:6) sole.
The lower edge of the depth stop is angled to run along the top of the guide.
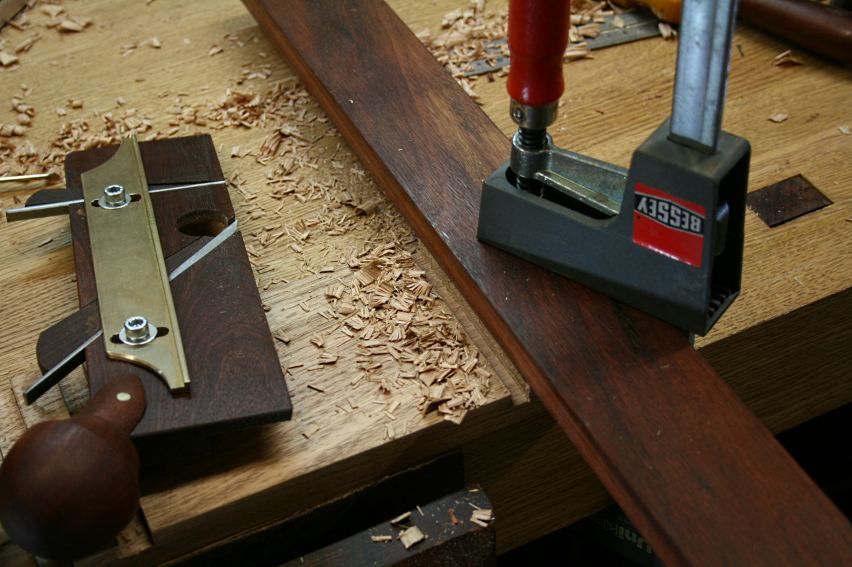
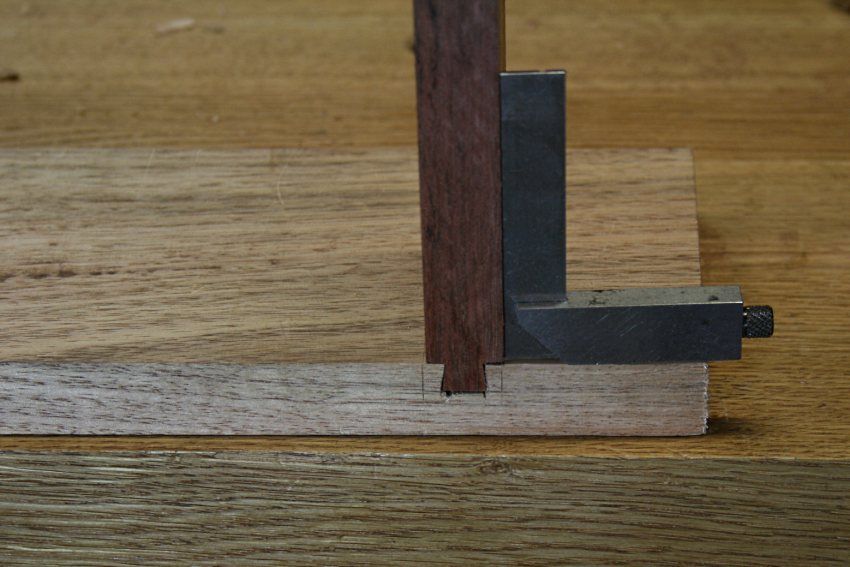
The basic method is shown here ..
I attempted two types of sliding dovetails for practice. The first was a half-dovetail. This has a taper on one side and is square on the other. It was made using the dovetail plane first, and then the dado plane.
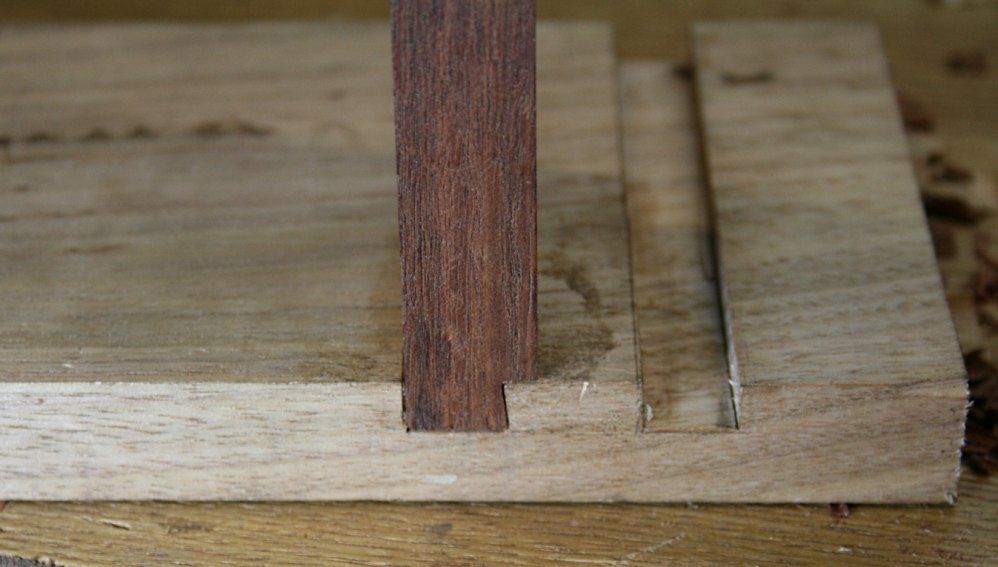
The other was a basic parallel double sided dovetail - a tapered version is made the same way. Here I was checking for accuracy. This was the result of the first effort ..
What do I think of the plane? Frankly, I am not sure whether I still prefer sawing/chiseling/routing. It's a new process and the set up is new. Time will tell.
Regards from Perth
DerekVisit www.inthewoodshop.com for tutorials on constructing handtools, handtool reviews, and my trials and tribulations with furniture builds.
-
17th September 2012, 06:48 AM #3
Senior Member
- Join Date
- Oct 2011
- Location
- Brisbane
- Posts
- 104
Another nice job Derek with excellent photos! Looks like a very handy tool you've made there.
Sooo... you probably don't need that big back-saw anymore?
-
17th September 2012, 10:05 AM #4
 GOLD MEMBER
- Join Date
- Mar 2004
- Location
- Brisbane (western suburbs)
- Age
- 77
- Posts
- 12,133
Nice little plane Derek, & well worth doing for the fun of the build, if nothing else.
I still think sawing the sides and removing the waste with chisels & router planes is at least as good an option, though it may well depend on the wood you are using. I made a couple of stopped dados using my 'new' saw yesterday, and was very pleased with how quick & accurate the process was. It wasn't a super-critical project (a new home for some of my wooden planes), so I decided to saw right on the scribe line, and fit "off saw". By good luck as much as good management, all 4 cuts were bang-on, and the corresponding shelf slid in very firmly, with no visible gaps anywhere. But then I was using Hoop pine and it was a relatively short dado (250mm), so there may be a diffent story to tell when I have to repeat the perfomance over 450mm or so in a more demanding wood!
Cheers,IW
-
17th September 2012, 10:48 AM #5
Be inspired. Be creative. Be bold.
- Join Date
- Apr 2001
- Location
- Perth
- Posts
- 10,826
Hi Ian
I guess After all the time it took to build and tune this plane to get it working correctly - it is a tricky little bugger - that I should be converted and converting others to the method. But I cannot. I am still more comfortable with a saw and chisel. It just emphasises the point that one does best with whatever is famliar.
That you sawed to the line was no luck, my friend!
Regards from Perth
DerekVisit www.inthewoodshop.com for tutorials on constructing handtools, handtool reviews, and my trials and tribulations with furniture builds.
-
17th September 2012, 08:00 PM #6
GOLD MEMBER
- Join Date
- Mar 2004
- Location
- Brisbane (western suburbs)
- Age
- 77
- Posts
- 12,133
Derek - yes indeed, what we grow used to is often hard to put aside, I'm afraid. If you had begun with one of these planes you would quite likely find the saw, chisel & router method cumbersome. It reminds me of back in the late 70s to early 80s, when everyone was raving about Japanese saws, and it seemed like if you weren't using them, you were missing out on all the fun. I tried them, at the insistence of a couple of my converted woodworking friends, but they just would not sing & dance for me the way I was assured they would, so I plodded on with my old-fashioned backsaws. With a growing family, and much to get done, I was probably far more interested in getting stuff made, back then, so I admit mastering new tools was a distraction. These days I can afford to indulge in a bit of tinkering, so I would probably persist a little longer. However, the moment seems to have passed, with Western style backsaws enjoying a big renaissance in the last decade or so. Another of life's little ironies..... Originally Posted by derekcohen

Whether or not you grow to love this plane, it will no doubt come in handy for clean-ups & tasks you haven't thought of yet (though it is a rather highly specialised tool), so I'm sure it won't just languish in the cupboard. And time spent satisfying curiosity is never wasted, is it?
Cheers,IW
-
18th September 2012, 11:07 AM #7
Senior Member
- Join Date
- Oct 2007
- Location
- Naples - Italy
- Age
- 57
- Posts
- 127
Hi Derek,
very nice your plane,too. Good idea the added handle!
Me too, I had to make several cuts before to find the right feeling with this plane. During these first cuts I understood that can be convenient to keep the female element slighty narrower and finally fit the joint by trimming the male with the correspondent plane.
The funny side of woodworking is the possibilty of the same result by different methods and I prefer, where possible, to use my favourite tools, the planes.
Giuliano
-
18th September 2012, 11:02 PM #8
GOLD MEMBER
- Join Date
- Feb 2003
- Location
- back in Alberta for a while
- Age
- 68
- Posts
- 12,006
Hi Derek
as usual an enjoyable post to read
and an interesting way of making the mortices.
how essential is the depth stop when it comes to keeping the blades in the plane body?regards from Alberta, Canada
ian
-
18th September 2012, 11:20 PM #9
Be inspired. Be creative. Be bold.
- Join Date
- Apr 2001
- Location
- Perth
- Posts
- 10,826
Hi Ian
The blades are very secure without the depth stop. The depth stop does make it easier to flush the sides of the blades against the body, which is necessary for a clean shoulder cut.
With a body as thin as this (1/4" in the lower half), there is no alternative. The lower body section is needed for registration with the guide - otherwise one could use a plough skate design (which will not work). The lower section is a fraction under 1/4" wide to ensure that it does not bind in the groove/dado.
Interestingly, I was doing an Internet search yesterday and came across pictures of Steve Knight's dovetail plane on the forum. You will notice that he did exactly the same with his blades (I had completely forgotten the details of his design until that point):

Steve's plane can be converted from male to female. I could not understand this before (since no one has reviewed it or explained how it works). Now I've worked it out. It looks like he has used this design for both sides, and then swaps around the fence. If not, then I have a plane to make a combined dovetail plane. Any thoughts?
Regards from Perth
DerekVisit www.inthewoodshop.com for tutorials on constructing handtools, handtool reviews, and my trials and tribulations with furniture builds.
-
18th September 2012, 11:39 PM #10
GOLD MEMBER
- Join Date
- Feb 2003
- Location
- back in Alberta for a while
- Age
- 68
- Posts
- 12,006
the open sided mortices piqued my interest as a possible way to build a traditional molding plane of a set of hollows and rounds. Originally Posted by derekcohen
The other potential option being to adopt the Krenov approach of sawing the sides off and creating the mortice by cutting the middle section to shape.
Steve's plane ??
Can I reserve my thoughts for now?regards from Alberta, Canada
ian
-
18th September 2012, 11:55 PM #11
Be inspired. Be creative. Be bold.
- Join Date
- Apr 2001
- Location
- Perth
- Posts
- 10,826
Hi Ian
Chris Wong at Time Warp Tool Works makes H & R planes like that ...
Link to his website: Time Warp Tool Works
Regards from Perth
DerekVisit www.inthewoodshop.com for tutorials on constructing handtools, handtool reviews, and my trials and tribulations with furniture builds.
-
19th September 2012, 01:01 AM #12
GOLD MEMBER
- Join Date
- Aug 2009
- Location
- Armadale Perth WA
- Age
- 55
- Posts
- 4,524
That could work for the smaller radiuses/radii ... but I'm thinking of the form of the wider planes and their irons ... a thinnish stem widening to the full width at the bottom ... I think the enclosed mortice must act against sideways and (?) twisting forces on the iron. Originally Posted by ian
An open mortice without say a screw-on plate or etc might allow the iron to pull sideways out of the plane body when it is cutting.

Paul
BUT ... you could make each plane and iron the full width of the profile from top to bottom ... hmmm ... not sure ... then the thinner continuous (wooden) section would have to support say a 3/4" or 1" wide arrangement with the blade and wedge forming the support between the main front and back sections.

-
19th September 2012, 04:22 AM #13
GOLD MEMBER
- Join Date
- Aug 2009
- Location
- Armadale Perth WA
- Age
- 55
- Posts
- 4,524
Originally Posted by derekcohen
Very nice ... good on them ...


 Reply With Quote


Similar Threads
-
What is wrong with my sliding dovetail???
By I_wanna_Shed in forum ROUTING FORUMReplies: 12Last Post: 28th August 2006, 09:20 PM -
Sliding Dovetail box
By Scally in forum BOX MAKINGReplies: 13Last Post: 12th May 2006, 12:28 AM -
A sliding dovetail study
By JDarvall in forum HAND TOOLS - UNPOWEREDReplies: 52Last Post: 5th January 2006, 02:58 PM -
Sliding Dovetail Lid - anyone know how?
By dan2004 in forum WOODWORK - GENERALReplies: 5Last Post: 3rd November 2004, 03:13 PM -
Sliding dovetail in slab table
By Suresh in forum WOODWORK - GENERALReplies: 2Last Post: 21st October 2004, 11:58 AM
