

 Thanks: 0
 Likes:
  Needs Pictures: 0
 Picture(s) thanks:
Results 1 to 10 of 10
Thread: Rehandling Japanese Oire Nomi II
-
29th March 2021, 02:34 AM #1
 Be inspired. Be creative. Be bold.


- Join Date
- Apr 2001
- Location
- Perth
- Posts
- 10,821
 Rehandling Japanese Oire Nomi II
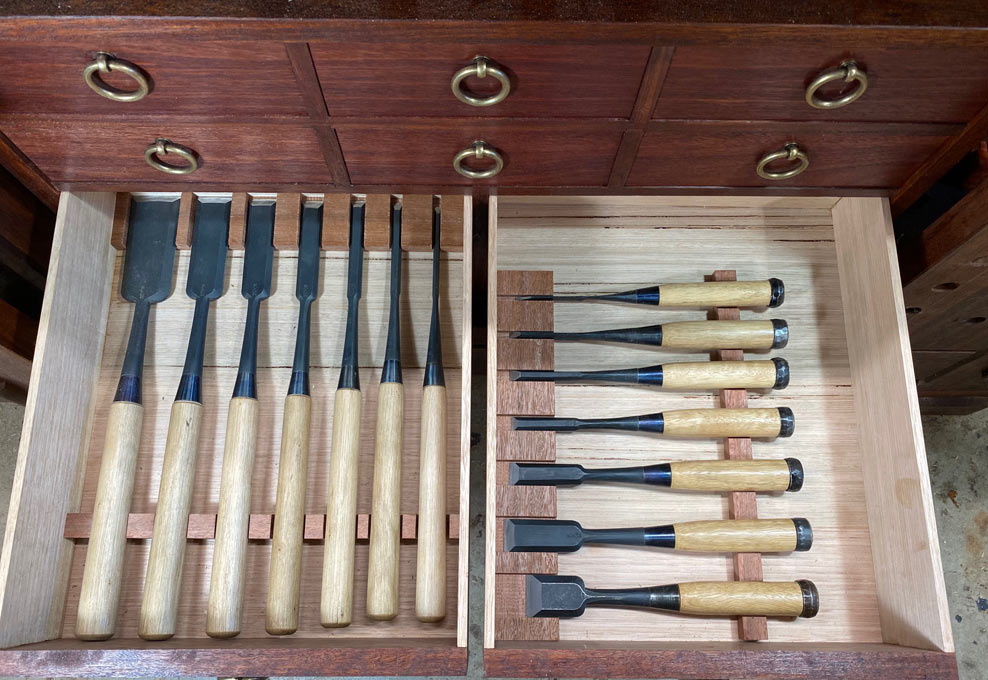
About 10 years or so ago, I was fortunate enough to purchase a set of Kiyohisa slicks from the maker, Watanabe Kiyoe, through So Yamashita (Japan-Tool.com). These have been incredible chisels and a joy to use when building furniture. As much art as tool.
Part of the motivation for this thread comes from the completion of the underbench cabinet. Here are the Kiyohisa slicks in a drawer (beginnings of fitting tools into the drawers) ...
Of course, over the years, I wished I have been able to order a set of Kiyohisa oire nomi (bench chisels). Not only were these very expensive several years ago, plus there was a wait list of several years, but Watanabe is no longer making chisels owing to ill health. The price of his tools has rocketed.
Over time I have managed to put together a collection of Kiyohisa oire nomi purchased individually. Hence the range of handles, below ...
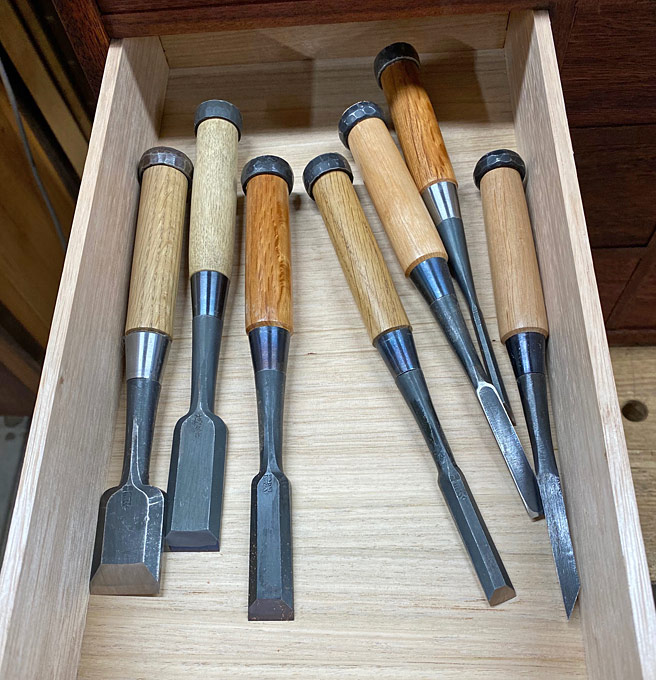
Handles and wood for handles
My plan was to change the handles - creating a unified appearance - but first I needed to find a suitable wood. The woods for Japanese oire nomi was discussed recently. Japanese White- or Red Oak is not available in Australia, and I really did not wish to use something that looked different. There are a number of Australian hardwoods that are suitable for chisel handles generally, but not in keeping with the look I wished to preserve. One choice I had was Beech (courtesy of an old jack plane).
(My iPhone camera seems to skew the hoops)
This is a nice look with excellent mechanical properties, and a gentle colour and grain. However, it did not quite lend itself to the colour and figure I was seeking to reproduce. I had already tried US White Oak, but found it too coarse grained.
In the end I plumped for Tasmanian Blue Gum, also known as Southern Blue Gum �
The colour of southern blue gum timber ranges from pale straw to brown, often with blue, green or grey tinges. Regrowth material can exhibit shades of pink. Sapwood is somewhat paler than the heartwood, but not always clearly demarcated. Growth rings are prominent on end sections. Grain is often interlocked with a medium and relatively even texture.
Gum, Southern Blue | WoodSolutions
With careful selection, it was possible to find sections with straightish grain and just a little � almost unnoticeable - grey-blue tinge here-and-there. I think that it did a good job of resembling Japanese White Oak in colour �
First Modification
The other factor was that I wanted to make the handles a little thicker, which would better fit my larger-than-average size hand. The typical oire nomi is 20mm across. I planned to make these 22-23mm across.
Second Modification
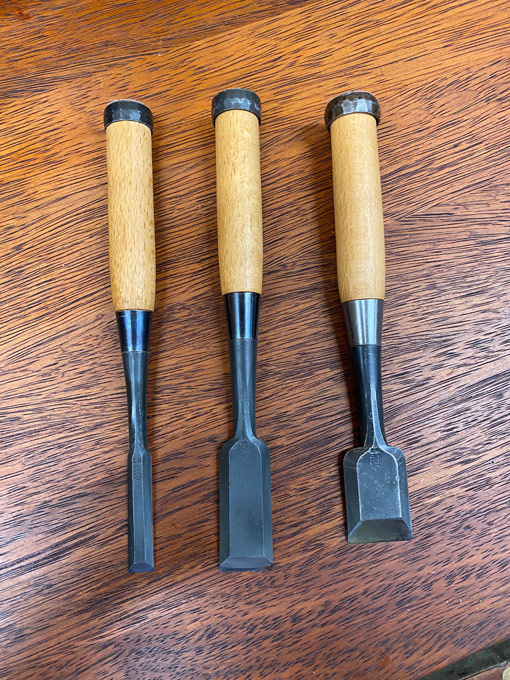
The wider handles led to a second modification, which involves setting the hoops differently. The ends of the handle were rebated on the lathe �

As a result of this, the hoops sit flatter on the handle. The two on the left are modified, and the two on the right are standard �
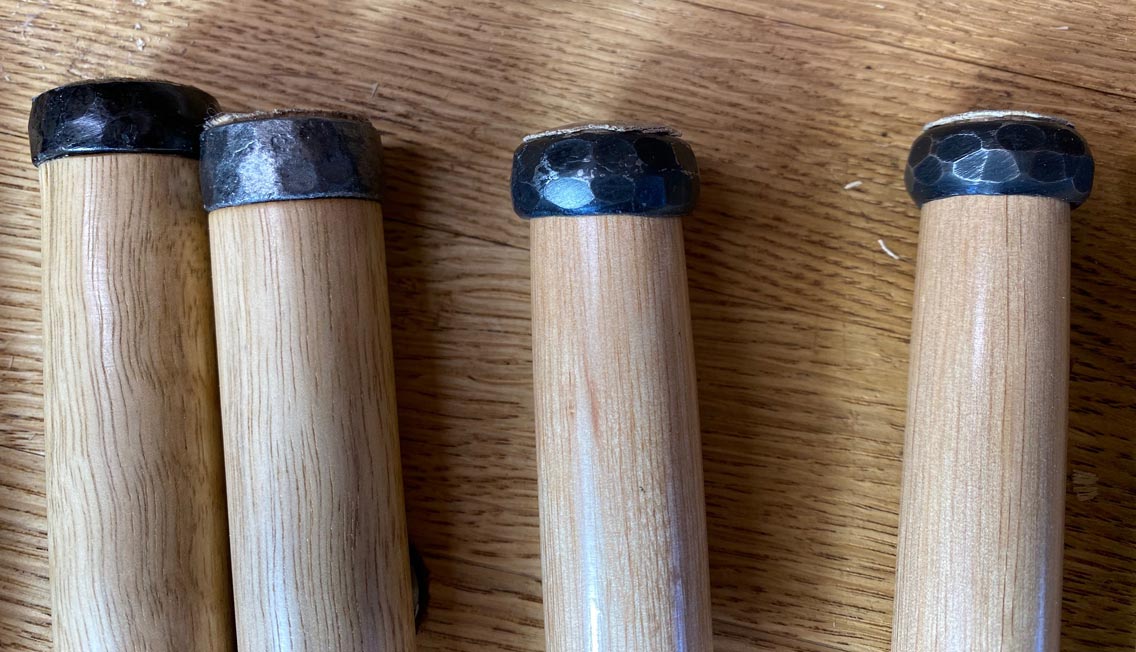
I like this effect. The handles are more comfortable to hold.
Each chisel was friction-sealed in buffing oil on the lathe, and then finished in Ubeaut Hard White Shellac.
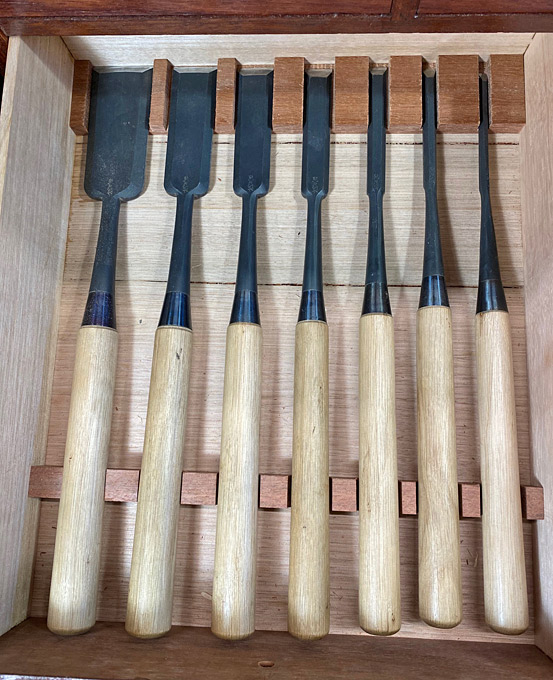
So, seven chisels in all. Seven new handles. Here is the completed set (30mm down to 3mm) �
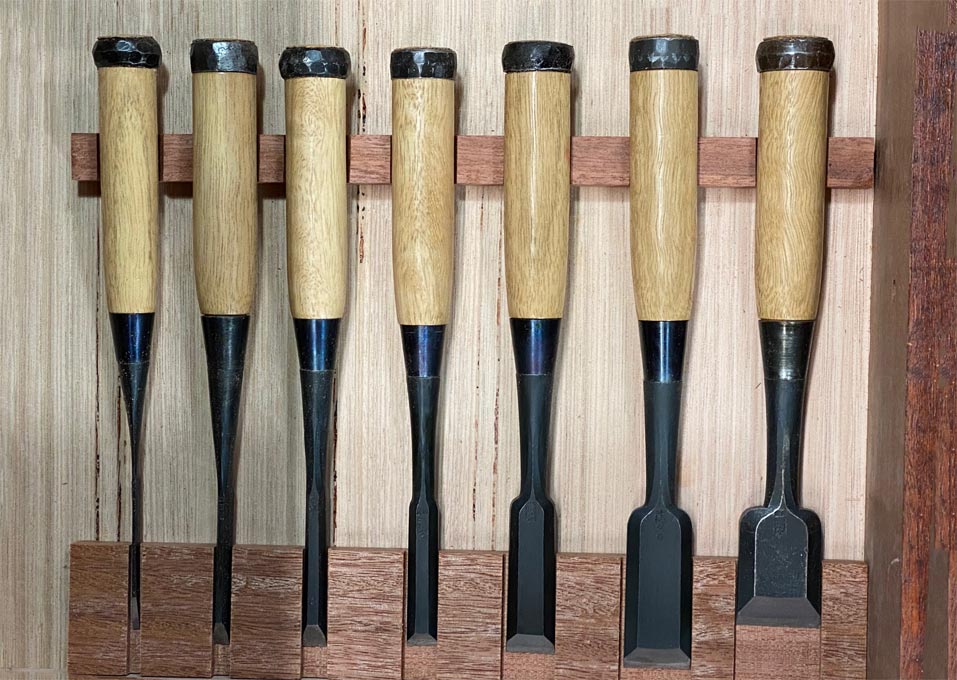
Nothing fitted yet. Just planning ...
Regards from Perth
Derek
Rebuilding a Kiyohisa Oire Nomi: http://www.inthewoodshop.com/ToolRes...aRebuild2.htmlVisit www.inthewoodshop.com for tutorials on constructing handtools, handtool reviews, and my trials and tribulations with furniture builds.
-
29th March 2021 02:34 AM # ADSGoogle Adsense Advertisement
- Join Date
- Always
- Location
- Advertising world
- Posts
- Many
-
29th March 2021, 12:27 PM #2
GOLD MEMBER
- Join Date
- Feb 2016
- Location
- Canberra
- Posts
- 5,125
Oh, they look very nice now.
I always thought WA sheoak would look good too.
Being a bit trendy, one could make bento-like trays for them to sit in and to remove from the drawers
-
30th March 2021, 12:14 PM #3
GOLD MEMBER
- Join Date
- Mar 2004
- Location
- Brisbane (western suburbs)
- Age
- 77
- Posts
- 12,124
Derek, some time ago I read a short discussion on the travails of fitting hoops on chisel handles, I think it was in Dick Lynch's Titan book (Titan also used Tasmanian blue-gum for their heavy chisels, as I'm sure you're aware). Anyway, the gist of it was the various attempts to find the best way to fit hoops so they didn't come loose & fall off. They tried pinning them, but that often led to splitting of the handles. They also tried making a distinct shoulder as you've done, but apparently they had trouble with the hoops splitting slivers off the shoulder (I guess chisels copped a real pounding back in the days of hardwood framing!). Their eventual 'solution' was to copy English firmer chisel handles and fit the hoops to a tapered handle (which iirc, is the way you showed in fitting hoops to some earlier Japanese chisels you re-handled?) but allow a goodly amount of wood above the hoop to be squashed over in use & lock the hoop on. The much thicker hoops on your chisels may not have the same edge-splitting effect, but I thought it was worth a mention.
Getting hoops to stay on chisels has bugged me for many years! At first I thought it was because I used brass. I used wood that I was sure was at or even below EMC & pounded the hoops on "real tight", only to be surprised & dismayed when many of the damned things fell off. I hypothesised that I was either stretching the brass beyond it's elastic limits so it was unable to cope with even very slight shrinkage or (more likely, I thought) the excessive tightness caused the wood fibres to crush beyond their elastic limit from a very small change in MC. So I tried a more softly-softly fit. Those hoops fell of even quicker! Then I tried steel hoops, with much the same result. This has happened to me with several different woods, so my current conclusion is it's just a combination of factors including the hard woods & the extreme humidity swings they've experienced, particularly over the last few years. Allowing a generous spigot of wood above the hoops & peening them over the hoop a bit has been partially successful, but the harder woods I favor for handles don't compress & bell over the hoops easily. This lot are Solomon Islands ebony, which makes very attractive handles, but it's up there with the super-hard woods & I was concerned at how well the hoops would hang on in the long term. SIE handles.jpg
They were done for someone else, and I haven't heard that there have been any problems so far, but a few of my own hoops have managed to come loose despite such treatment.
Cheers,IW
-
30th March 2021, 05:24 PM #4
Be inspired. Be creative. Be bold.
- Join Date
- Apr 2001
- Location
- Perth
- Posts
- 10,821
Ian, thanks muchly for your comments - I love it when there is something to discuss.
As mentioned in my post above, one of the main aims was to use a timber which closely resembled Japanese white oak. Japanese white oak is different from, say, US or European white oak in that it is much harder and more finely grained. So the search was on for an Australian hard wood which could be substituted. Our (yours and mine) favourite Sheoak (and other casuarinas) was out. Just too bright and extroverted!
I think that you can see that the use of Southern Blue Gum was pretty successful.
Now about those hoops.
Your comments are interesting, and my first reaction was to be a little alarmed at the possibility of the handle splitting. Then I remembered going through this internal dialogue with myself beforehand.
The first issue is that the ends of the hoops are not square. The ends of the hoops do not rest on the shoulder of the rebated end of the handle. Instead, the inside edges of a hoop is chamfered, and this taper allows it to rest along the shoulder rather than on the shoulder.

Secondly, the tenon is slightly oversized (as per usual), and the hoop needs to be hammered on, compressing the wood fibres to do so. This is done by planishing the wood with a domed hammer head. Once set, there is a friction fit along the insides, rather than relying on the ends.
Thirdly, the end of the handle is planished this time, forcing a layer over the end of the hoop. This is done for two reasons: one is to ensure that the hoop does not fall off; and the other is to soften the ends and protect the steel hoop. The hoop, of course, is there to prevent the handle splitting.
Lastly, it must understood that the hoop has been forced down and out of the way of the gennou, with which the chisel is used. One strokes the handle wood, and not the hoop, it self.
Regards from Perth
DerekVisit www.inthewoodshop.com for tutorials on constructing handtools, handtool reviews, and my trials and tribulations with furniture builds.
-
30th March 2021, 06:01 PM #5
GOLD MEMBER
- Join Date
- Aug 2011
- Location
- bilpin
- Posts
- 3,559
A small dob of weld on each side of the bottom edge of the ring. The weld burns into the timber a little and prevents the ring from slipping up.
-
30th March 2021, 06:36 PM #6
GOLD MEMBER
- Join Date
- Mar 2004
- Location
- Brisbane (western suburbs)
- Age
- 77
- Posts
- 12,124
Not so easy with brass rings, RN.... Originally Posted by rustynail


Also, given my welding skills (or rather lack thereof), I'd reckon there would be a couple of rather large & unsightly burn marks on my nice handles I reckon my old dad would be the first one to give it a try though, it's the sort of solution he seemed to like..
Derek, I didn't mean to alarm you, it was just that your choice of wood reminded me of Titan and their attempts to get hoops sorted out. I think the heavy chamfer inside the bottom of the your hoops should prevent the sort of chipping/splitting problem Titan had. As I said, some of their chisels copped a heck of a beating, I've seen many a Titan with utterly trashed handles. Can't understand why they weren't replaced long before they got into such a bad state, especially when Titan offered replacements at what seemed like reasonable prices for the times. Or if you were too broke/mean to spend money on new handles, a few minutes with a spokeshave & coarse file could've produced something better than a handful of splinters....
Cheers,IW
-
31st March 2021, 07:01 AM #7
GOLD MEMBER

- Join Date
- Oct 2018
- Location
- Dandenong Ranges
- Posts
- 1,892
Hi Ian. Probably for the same reason that one finds socket chisels with the end of the socket mushroomed over. It can be hard to find a "round tuit". Originally Posted by IanW

-
31st March 2021, 08:09 AM #8
GOLD MEMBER
- Join Date
- Nov 2011
- Location
- Melbourne
- Posts
- 7,013
Never ever owned or used a hoop chisel, but lol.
Could the hops be made undersized heated with a small Mac torch or what ever you have available, then seated on the chisel, and cooled in water, creating a shrink fit, just like the Black Smith�s back in your days [emoji6], did,fitting steel tires to cart wheels.
Yes granted there may be some scorched timber around the shoulder area.
But they may be only on the surface.
Cheers Matt.
-
31st March 2021, 08:59 AM #9
GOLD MEMBER
- Join Date
- Mar 2004
- Location
- Brisbane (western suburbs)
- Age
- 77
- Posts
- 12,124
Yeah MA, I thought of that little homily about people who live in glass houses beng careful about throwing rocks - just after I pressed 'send'. Originally Posted by Mountain Ash
Tuits of any shape can be a bit hard to find in my shed, too... 
Matt, I've actually seriously considered trying the wheelwright trick you describe. The steel doesn't have to be hot enough to burn the wood, the length of steel in a wheel tyre can give sufficient expansion at a temperature well short of scorching if everything is calculated just right. With a small thing like a hoop for a chisel handle the total amount of expansion won't be huge, & such a small object is going to cool rapidly so you'd need to be very slick tapping it down. It would take quite a few tries to figure out exactly what diameter to turn the spigot to to get a tight shrink-fit. I think a more practical way to get a "wheelwright's fit" might be to reverse the process, i.e. turn the handle leaving the spigot for the hoop comfortably oversize, then dry it to zero MC, quickly turn the spigot to a firm fit & tap the hoop on, then let the wood re-equilibrate & expand.
All in all, it's far too much mental effort & faffing about for what is really more of an irritation than a problem! Shhh! Don't tell anyone, but the simple remedy I apply is to use a bit of left-over epoxy (which you always have whenever you mix a batch), & just stick the offending hoop on. The epoxy gets brittle & the bond breaks pretty quickly, but with a bit of luck, by the time it does you have used the chisel enough to spread the top & retain the hoop mechanically.....
Cheers,IW
-
31st March 2021, 05:21 PM #10
Senior Member
- Join Date
- Sep 2012
- Location
- Jersey CI
- Posts
- 215
Japanese chisels.
Hi all,
i have a set of 10 Oire Suminagashi bench chisels in the original box. My father bought them
20 years or so and have never been used. They are truly beautiful, and have Red Oak handles.
They have the wood grained effect to the Jigane. I also have eight lyoroi cabinet chisels which
i often use. There is a video in Japanese which shows the making of a Japanese chisel which
is very interesting.
Martin.


 Reply With Quote

Similar Threads
-
Rebuilding a Kiyohisa oire nomi
By derekcohen in forum HAND TOOLS - UNPOWEREDReplies: 5Last Post: 24th January 2021, 03:35 AM -
Oire-nomi or umeki-nomi for small sizes
By cpolubin in forum JAPANESE HAND TOOLSReplies: 2Last Post: 27th June 2018, 09:16 PM -
New koyamaichis oire-nomi / sharpening.
By M.cedro in forum JAPANESE HAND TOOLSReplies: 9Last Post: 13th May 2015, 09:20 PM -
Ouchi oire-nomi
By M.cedro in forum JAPANESE HAND TOOLSReplies: 6Last Post: 7th March 2015, 08:19 AM
