

 Thanks: 0
 Likes:
  Needs Pictures: 0
 Picture(s) thanks: 0
Results 16 to 25 of 25
Thread: Stanley 386 jointer fence
-
2nd March 2013, 11:30 AM #16
 Senior Member


- Join Date
- Oct 2011
- Location
- Jimboomba. Qld
- Posts
- 437
 Hi Humphrey9999,
 Originally Posted by Humphrey9999

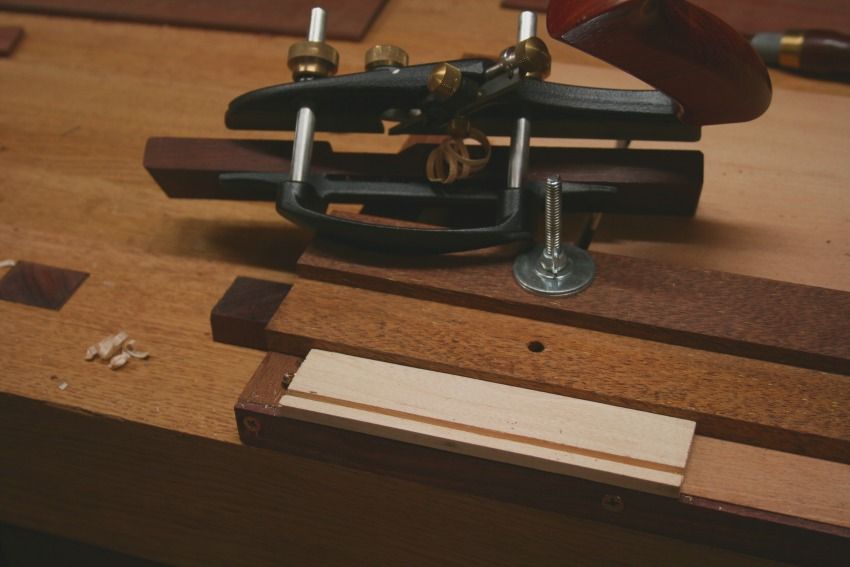
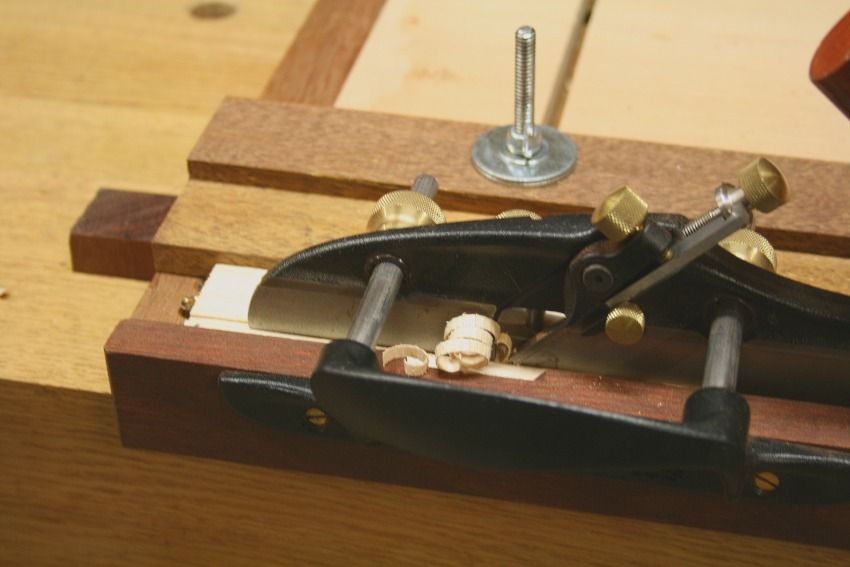
Here's a method you might like to try for straight shooting,
In most cases, whether Right or Left handed, the plane has a tendency to roll towards the body to compensate for this effect,
Curl the fingers on your leading hand around the sole, wedging them under the plane and against the side face where both surfaces meet, use upward pressure with the fingers to keep the plane flat at the same time put downward and slightly push away from the body pressure on the knob with your thumb to steady the fingers.
A point of interest is when it feels really uncomfortable and not flat that's about when it is right.
After a few goes the muscle memory takes over and you'll find shooting flat and straight is easy.
In fact it's hard to shoot uneven when you want to.
Sorry for the blurred pics they were takes with an unsteady hand.
Cheers
Steve
-
2nd March 2013 11:30 AM # ADSGoogle Adsense Advertisement
- Join Date
- Always
- Location
- Advertising world
- Posts
- Many
-
2nd March 2013, 12:45 PM #17
Senior Member
- Join Date
- Sep 2012
- Location
- Oz
- Posts
- 340
Steve, thanks heaps for going to the trouble. I copied your post including pics, (they're not that blurry), into a Word document for reference. Originally Posted by fineboxes
I'll give it a go shortly, with my #6. I don't have a [i]real[i] #7 jointer - too big for what I do.
This method could help a lot. Generally, I start off nice and square, but by the end of the board I'm on a slight angle. Lucky for me, much of my jointing is for edge-joining, so I place the two edges to be joined together in the vice and plane both simultaneously, so that even if I do go out of square, the boards join up well, as long as they're straight. (I picked this up from Alex Springall - credit where it's due.)
I'll still buy a jointer fence, though, but use it for a short time and then hopefully phase it out, after a lot more practice without it.
I appreciate the time and effort, Steve. Thanks again.
... Humphrey9999 (Another Steve)
-
2nd March 2013, 01:59 PM #18
Senior Member
- Join Date
- Oct 2011
- Location
- Jimboomba. Qld
- Posts
- 437
Pleasure..#6's are very nice to use as well.
Cheers
Steve
-
2nd March 2013, 05:41 PM #19
GOLD MEMBER
- Join Date
- Aug 2009
- Location
- Armadale Perth WA
- Age
- 55
- Posts
- 4,524
UK Alf (Cornish workshop) uses an indicator with plough planes to indicate vertical and amplify deviations.
The same idea could be used for jointing ...

Very interesting. I have only used a similar grip but thumb down at the bed-level as a fence and splinter-collector ... but thinking about it now I think it still helps with the levelling.Curl the fingers on your leading hand around the sole, wedging them under the plane and against the side face where both surfaces meet, use upward pressure with the fingers to keep the plane flat at the same time put downward and slightly push away from the body pressure on the knob with your thumb to steady the fingers.
Cheers,
Paul
-
2nd March 2013, 06:15 PM #20
Senior Member
- Join Date
- Sep 2012
- Location
- Oz
- Posts
- 340
Hey Paul. I like that indicator method. I considered taping a short straight-edge across my plane, for the same reason. Easier to see if it's horizontal. Haven't tried it yet, though. Originally Posted by pmcgee
I gave Steve's method a whirl this afternoon - planed two edges separately with my fingers wrapped around as a guide, then joined them. It works pretty well, feels a bit awkward at first, but I quickly got the feel of it.
I got a much better joint than usual, without clamping both pieces in the vice together while planing.
Thanks once again for the tip, Steve.
The result. Not perfect, but not too bad for a first attempt. Still needs more cleanup, I just ran it through the wide drum sander once afterwards. (Had to be gentle, the glue's only had 3 hours drying time.): -
Camphor Laurel joint.jpg
-
6th March 2013, 09:17 PM #21
Rank Beginner
- Join Date
- Jun 2011
- Location
- Melbourne
- Posts
- 484
Stanley 386 jointer fence
Ingenious!!! Originally Posted by pmcgee
That's why I love this forum...Cheers,
Eddie
-
6th March 2013, 09:35 PM #22
Be inspired. Be creative. Be bold.
- Join Date
- Apr 2001
- Location
- Perth
- Posts
- 10,826
A much better technique is to align the side of the work piece with the edge of the bench (this is a case when the bench edge much be square to the top!).
Ensure that the plough (or moving fillister) plane has a widish fence.
Then use the side of the bench as a guide for the fence ....
Sticks ..!
Regards from Perth
DerekVisit www.inthewoodshop.com for tutorials on constructing handtools, handtool reviews, and my trials and tribulations with furniture builds.
-
8th March 2013, 10:22 AM #23
Senior Member
- Join Date
- Sep 2012
- Location
- Oz
- Posts
- 340
Duly noted and filed for reference. Originally Posted by derekcohen

Good tip, Derek. Thanks.
-
8th March 2013, 12:03 PM #24
GOLD MEMBER
- Join Date
- Aug 2009
- Location
- Armadale Perth WA
- Age
- 55
- Posts
- 4,524
No doubt I should have said 'demonstrated' ... I'm pretty sure she doesn't do that on a 'daily' basis. Originally Posted by pmcgee
Paul
-
24th April 2013, 08:46 AM #25
New Member
- Join Date
- Apr 2013
- Location
- Planet Houston
- Posts
- 1
Had same issues os the OP as a newbie to hand planes and WW in general. fineboxes' method got me sorted and now it's a fun job not a dreaded nightmare!
Cheers to you sir and thanks for the tip!!


 Reply With Quote

Similar Threads
-
Jointer fence?
By Santalum in forum WOODWORK - GENERALReplies: 6Last Post: 4th February 2007, 06:10 AM -
Stanley 78 restored and new fence
By Bodgy in forum HAND TOOLS - UNPOWEREDReplies: 10Last Post: 28th March 2006, 02:10 PM -
LV Bevel Up Jointer Plane/Veritas Jointer Fence - Reviewed
By derekcohen in forum HAND TOOLS - UNPOWEREDReplies: 24Last Post: 14th January 2006, 06:09 AM -
Stanley 71 fence ???
By JDarvall in forum WOODWORK - GENERALReplies: 4Last Post: 16th December 2005, 06:45 PM -
Stanley #7 or #8 jointer
By Jarrah in forum HAND TOOLS - UNPOWEREDReplies: 11Last Post: 19th November 2004, 01:52 PM
