

 Thanks:
  Likes:
  Needs Pictures: 0
 Picture(s) thanks: 0
Results 1 to 15 of 46
Thread: A few Stanley 78 tips.
-
15th January 2006, 12:45 AM #1
 Banned


- Join Date
- Apr 2005
- Location
- kyogle N.S.W
- Age
- 50
- Posts
- 4,844
 A few Stanley 78 tips.
Hello.
I've been really getting into E-bay lately. Quite addicting really, isn't it ? ...I bought something the other day, which I think I got cheap, but I just didn't have the money for. And I ended up having to pay by credit, which I hate doing.
Sorry....what I do notice a lot is the number of stanley 78 rebate planes up for auction. There everywhere. Go quite cheap. And remembering how frustrating I found it trying to make my first one work, I thought maybe I should share a couple of tips I've learn't to make the bloody things work consistantly.
These idea's may already be well known. I don't know. But I'll throw them up here anyway. Discuss idea's with REAL people for a change instead of with my imaginary friends (I talk to myself A-lot. shhhhh )
)
There quite a good plane really, once you set the blade and knicker (spur) right. They can be used with or without a fence, but IMO, always use the fence. Give the plane ONE purpose only. Cut rebates with it, using the fence to rub the edge of your stock. Its always ready to go this way.
But, the main reason why I suggest you do fence work only, is because since the reference edge (edge of your wood where fence rubs) is isolated from the side of your rebate plane(the side with the spur), you can set the spur and blade corner to ensure a crisp, SQUARE shoulder is cut everytime.
See, if you didn't use the fence, like say when cleaning up a rebate, you MUST align the blade corner perfectly flush with the side of the body. A fraction in or out and it just won't work well enough. You'll end up cutting a shoulder thats prone to slant. Setting it right would have to be one of the hardest things to do. At least for me. I'll squint and squint and still stuff it up.
So stick to fence guidance IMO, which will permit you to set the spur and the blade corner so its obviously well outside the side of body, ensuring that the plane body will ALWAYS drop squarely. cause its set far enough out, that you can be certain that nothing will run foul of the shoulder your cutting,...
****************
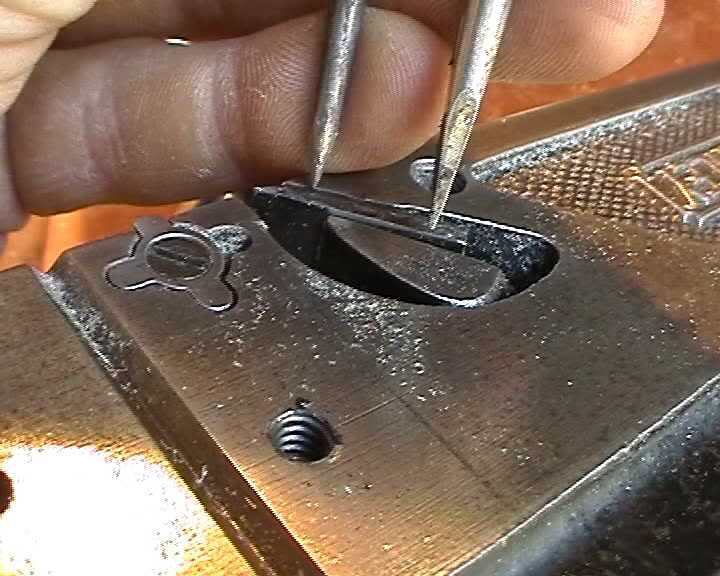
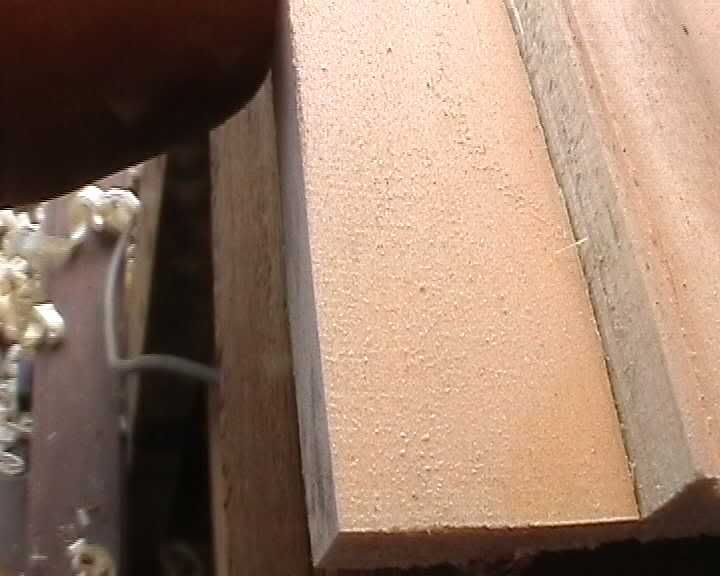
The first tip....The first thing to do after sharpening the spur, is to set it protruding out the side of the plane, like I was raving about above.
In this picture its peaking out, only just.(if you can see). Can peak it out further if like. (so you don't have to squint)
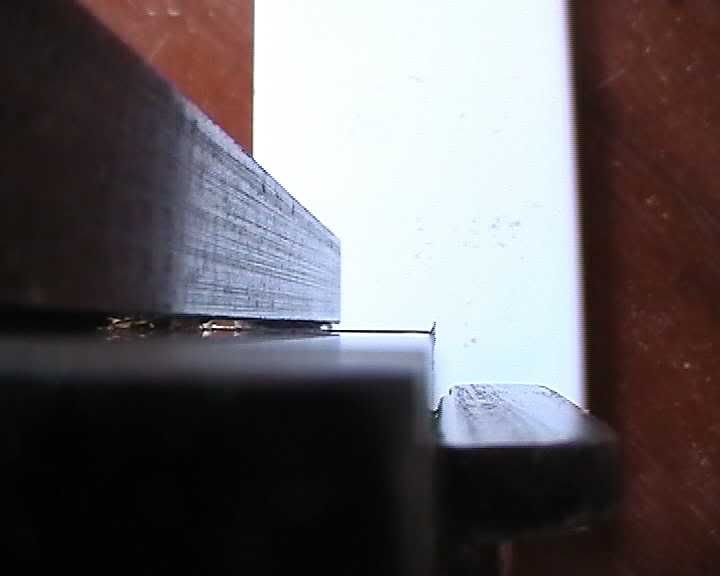
But, unfortunetly, I've noticed the recesses that hold the spur in 78's arn't cut well. They seem to seat the spur too flush to the side of the plane. So, you gota shim it.
What I do is cut a corner off an envelope. Just paper. Like this...
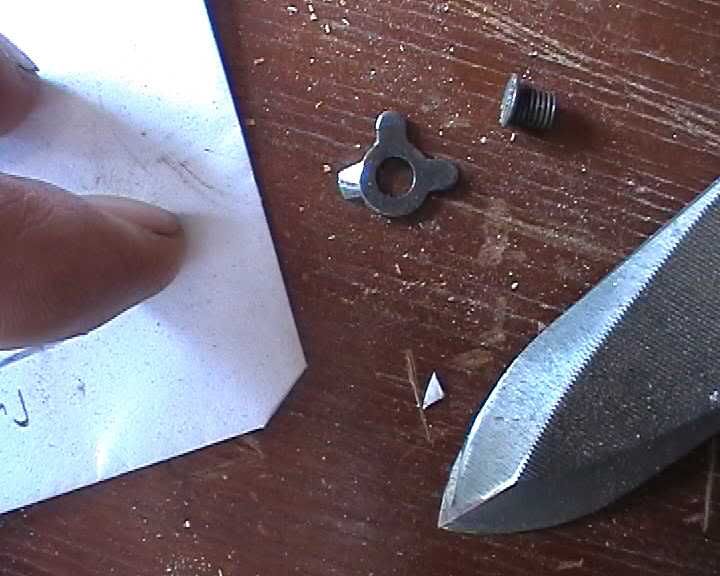
And place it riiiight theeerre. Don't forget to squint. So that when you bind the spur over the top of it, it'll protrude out further. May have to experiment with how many layers of paper. I've found I only need one corner of paper for it to set right, but I spose every planes different.
****************
The second Tip....Now that you've got the spur set well you gota sharpen the main blade.
Most blades are ground with the bevel running perpendicular to its sides. This again makes the 78 hard to setup IMO. Cause, not only do you have to ensure the blades edge is peaking the same amount past the sole, and that the very corner of the blade lines up well with the spur, BUT ALSO must ensure that the very corner of the blade protrudes out the FURTHIST. Or else some part of the blades side will rub the shoulder your cutting..etc......Its just too fiddly. And more painful squinting.
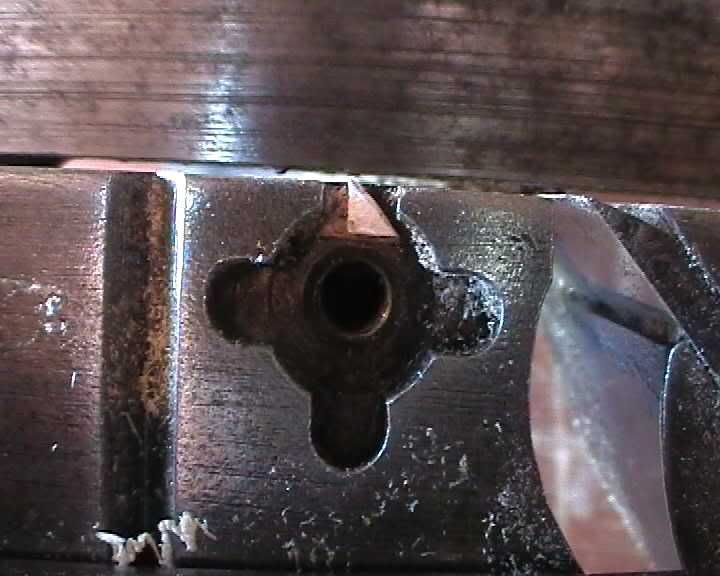
So I recomend, when you sharpen the blade, instead of grinding it square, grind it slightly skewed. Like this....
This way you've got more room to manuevere when setting blade. And you'll see, that alls well when you look at the side of the plane, that when the corner of the blade lines up with the spur, the rest of blade (further up) is sunken into the plane,,,definetly out of the way....
I've tried in this picture to show this. The right skrewdrivers pointing to a point on the blade that should be sunken further than the point I'm pointing at with me awl(left)....and its all become easier to do because of the slightly skewed blade.
*************
Third Tip...Getting a good start is important when its time to use it. Probably an obvious statement so this tip may not be very helpful.
But, what I like about the 78's bullnose bed, is not because you can put the blade on it, but because its a great spot to hold the front of the plane. You can wedge your thumb in there and pinch the body and fence tightly, right in close to the edge your planing which gives you great control. Like this...
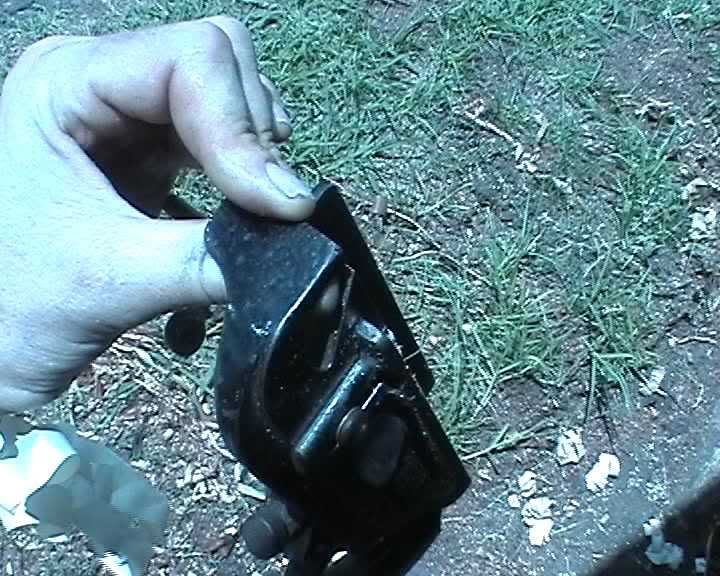
Also, personally, find it important to lean forward, so I can sight down the front of the body as I plane so I can watch how it sits...uno, to give you some feedback on how square your maintaining the cut.
Mouth cam, me drooling all over the camera
************
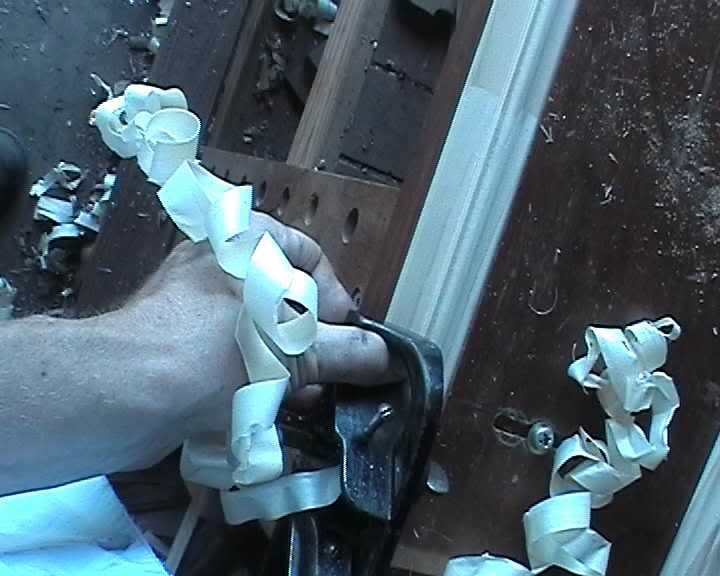
Forth tip.....You really need a means to support your work, such that nothing fouls the body and fence of the plane in use. i.e no clamps getting in the way.
This is the setup I use. It essentially means you don't need a vise to hand plane. It success is due mostly to this one thing......a pin. Its how they used to do it in the old days.
You don't need a vise, but it helps if you have one. Cause you can put the pin in a board thats held in the vise, allowing you to position the pin wherever you want easily.
Your work is pushed in tight against the pin as you plane, which stops it from lifting up and out. This combined with adequate support along its length means you can rebate even the very thinnest of work that extend the entire length of your bench.
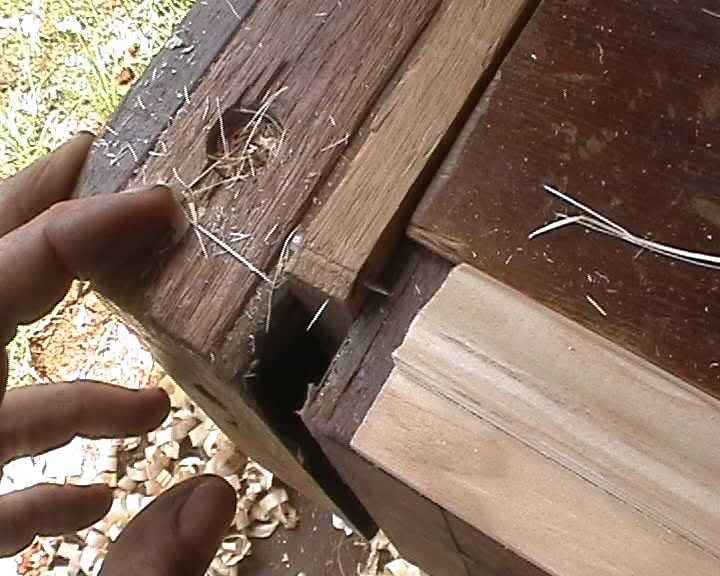
Here's what I did today. I've been rebating some crap finger jointed moulding for our laundry. See, the floor splash tiles sit over one half of the moulding, in the rebate. Hoping it will take the focus of my average tiling effort .

This setup works well for anything that has a fence. Ideal for me cause I have a lot of combination planes (stanley 45's etc)....but also works well with a fenced powered router...
I've had enough. Gota go to bed. Oh, just remembered, I gota put all these bloody pictures in place yet.
-
15th January 2006 12:45 AM # ADSGoogle Adsense Advertisement
- Join Date
- Always
- Location
- Advertising world
- Age
- 2010
- Posts
- Many
-
15th January 2006, 08:03 AM #2
Good Wood Ruined!
- Join Date
- Jan 2004
- Location
- Towradgi
- Posts
- 4,839
Jake, a fine tutorial of obscure Darkside methods, won by trial and error? But your missus will have issues with "Mouthcam"!
Keep up the good work and remember when you start argueing with yourself, then you are in trouble! Pat
Pat
Work is a necessary evil to be avoided. Mark Twain
-
15th January 2006, 08:39 AM #3
hardly human

- Join Date
- Jun 2005
- Location
- Sydney
- Posts
- 3,096
Great stuff Jake.
And don't worry about the talking to yourself thing - I find that at least the conversation is interesting, and the debates make it all the better.
-
15th January 2006, 09:17 AM #4
GOLD MEMBER
- Join Date
- Aug 2004
- Location
- Lost in Space
- Age
- 53
- Posts
- 2,406
Top STuff Jake
I really enjoyed that one
REgards lou
Just Do The Best You Can With What You HAve At The Time
-
15th January 2006, 11:39 AM #5
Senior Member
- Join Date
- May 2005
- Location
- Forest Grove, Oregon USA
- Posts
- 496
Great stuff again, Jake!
I really like the slight skew on the blade. I'll need to try it.
Take care, Mike
-
15th January 2006, 03:24 PM #6
Member
- Join Date
- Jul 2005
- Location
- Brisbane
- Age
- 56
- Posts
- 71
Yeah great article! I have 2 of the damn things (ebay and one that dad found in the shed). I found that the biggest problem was keeping the depth constant through the length of the board. Your ideas a well needed in my shed.
Cheers
Tim
-
15th January 2006, 08:13 PM #7
Ox and Herdsman Vanished
- Join Date
- May 2005
- Location
- Eden Hills, South Australia
- Age
- 63
- Posts
- 3,458
Some interesting points, and some very impressive microscopy, apricot.
Now I feel I should be cutting more rebates
Have a greeny
. . . oops, can't. Got to spread it around. Let me know when you're low on green...Those are my principles, and if you don't like them . . . well, I have others.
-
16th January 2006, 12:58 AM #8

Super Moderator
Dodgy brother
- Join Date
- May 2004
- Location
- Pakenham, outer Melb SE suburb, Vic
- Age
- 54
- Posts
- 4,158
Gday Jake, thanks for that
I bought a #78 at the market ($9) a few weeks back, so your post is excellent timing ! Mine's in pretty good shape, nicker intact, plenty of life in the blade, but minus fence and depth guage.
Any further tips and info most welcome.
If it's not too much trouble and you get a chance, I would also love a few closeup shots of the depth guage and fence on yours, so I can look at making them.
Quick question, with the skewed blade, I see your point about the blade corner being outermost, but doesn't the skewed blade then cut a rebate that gradually deepens more on the right, or am I missing something? :confused:
Cheers Jake.......................Sean
The beatings will continue until morale improves.
-
16th January 2006, 07:36 AM #9
Banned
- Join Date
- Apr 2005
- Location
- kyogle N.S.W
- Age
- 50
- Posts
- 4,844
Thanks everyone
Pat
Jake, a fine tutorial of obscure Darkside methods, won by trial and error? But your missus will have issues with "Mouthcam"!
Keep up the good work and remember when you start argueing with yourself, then you are in trouble!
yes, trial and a LOT of error. And it looks like I'm in trouble 
Clinton
And don't worry about the talking to yourself thing - I find that at least the conversation is interesting, and the debates make it all the better.
Fun alright, until I start agreeing with myself..:confused:
Scooter
I bought a #78 at the market ($9) a few weeks back, so your post is excellent timing ! Mine's in pretty good shape, nicker intact, plenty of life in the blade, but minus fence and depth guage.
Any further tips and info most welcome.
If it's not too much trouble and you get a chance, I would also love a few closeup shots of the depth guage and fence on yours, so I can look at making them.
Quick question, with the skewed blade, I see your point about the blade corner being outermost, but doesn't the skewed blade then cut a rebate that gradually deepens more on the right, or am I missing something? :confused:
For $9 sounds like you did well. I'd send you a fence, but I don't have any left. BUT, I do have a depth guage you can have. If you give me your address I'll send it. I don't have the bolt that affixes it though. If I remember correctly its an unusual thread. But don't quote me. Could always tap a regular thread over it and make a bolt to fit. I do that sometimes. Leave that to you. In anycase I'll get you that photo. Just need a little time. Don't think I've forgotten. I get to everything eventually.
Actually, if I remember right, there's a fence on E-bay right now. Might be a little too pricey. $20 ???. Maybee send him a message saying 'I'll give you $10 or whatever for it should he not sell it ? ' I've done that before and its worked.
Firstly, you don't have to skew the blade edge to make it work. I mean, its probably worth trying to make it work first with a regular square blade. You might have more luck than I. The same is true with all my tips. They work for me, but maybe not for others.
But the idea around skewing the blade edge is that, because theres a little play of the blade on the bed, you can twist it a bit here and there, so that the blade corner lines up to the spur AND the blade peaks equally out the sole WITH there being no fear the side of the blade protrudes, which is something that seemed to happen a lot to me.
I'd get it all lined up only to notice the blade side wasn't flush enough, which implied the risk that it rub against the shoulder I was cutting and taking it out of square.
Good to try and visualise what you want to happen, and grind the blade to remove the troublesome spots. I wouldn't hesitate taking to any part of the plane with files or grinders to improve it.
I'll get a few more photo's together this week some time and post them here. There's a couple of points I didn't mention about the spur etc as well. Gota go to work right now.
Seeya Sean
-
16th January 2006, 08:10 AM #10
Just some guy
- Join Date
- Jul 2003
- Location
- The Fabulous Gold-plated Coast.
- Age
- 69
- Posts
- 3,925
That's two greenies I need to fire your way when I am again able to.
Very nice sending the depth stop, and thanks again for sharing all of your hard work and insights.
Greg
-
16th January 2006, 09:03 AM #11
GOLD MEMBER
- Join Date
- Mar 2005
- Location
- In the shed, Melbourne
- Age
- 52
- Posts
- 6,883
G'day Apricotripper,
Always a great read and I get to learn something.
I have a 78 which was my grandads, minus the fence (and arms too I guess?) and nicker, so one day when I get around to finding the missing bits I'll be able to put your post into practice.
Keep it up.
-
16th January 2006, 11:30 PM #12
Producer of fine shavings
- Join Date
- Oct 2004
- Location
- Melbourne
- Posts
- 945
Great post jake, especially like your adjustable bench stop.
I definitely agree with you on the 78, its a great plane. I have found my 78 invaluable, I use it all the time and it was very easy to tune (mine didn't come with the spur).
I use it to cut rebates especially across grain and on short pieces, much safer and quicker than mucking around with a router. Also less chance of a stuff-up. Because I am missing the spur I occasionally need to clean up a rebate a little but that is also very quick.
I have managed to get good results without a depth stop, but I imagine the plane will be even easier to use without one.... I have bought another 78 recently with the stop, I'll see what that is like.
I think its one of those planes that having a couple setup to go can be very handy.
regards
MariosYou can never have enough planes, that is why Mr Stanley invented the 1/2s
-
17th January 2006, 10:53 PM #13
Super Moderator
Dodgy brother
- Join Date
- May 2004
- Location
- Pakenham, outer Melb SE suburb, Vic
- Age
- 54
- Posts
- 4,158
G'day Jake Originally Posted by apricotripper
Thanks for the offer of the depth guage, much appreciated, will PM you.
Hadn't thought of that approach with the Ebay fence, great idea.
Get you with the skewed blade idea, chewing it over today I was thinking of an alternative, where you could relieve the side of the blade slightly so the sharp end (sorry, tech terms used accidentally ) is still square to the sole and the shoulder not rubbing. Leave that to you though, I'm not as game as you with the file & grinder.
When I was mucking around with my #78, I laid the side flat on a piece of melamine to get the edge of the blade flush with the plane's side, I figured this would be the go, for the blade to be precisedly in line with the edge of the body. My musings are all theoretical, though, unlike you I haven't actually used mine yet, just shown it off and fiddled with it When I actually get to use it I'll note your experiences.
Further to your paper shim idea with the nicker, to make it easier to place, and given you cut the corner off an envelope, I thought you could maybe put the corner over the nicker when putting it back in, then snip/tear the outside off after the screw is tightened. Might be a little easer than placing in the nicker recess. Dunno, just theorising once again...
Enjoying this, talking about a plane I actually own and can identify with
Cheers Jake.......................Sean, rebate rebate
The beatings will continue until morale improves.
-
18th January 2006, 04:43 AM #14
Banned
- Join Date
- Apr 2005
- Location
- kyogle N.S.W
- Age
- 50
- Posts
- 4,844
Hi Scooter,
Get you with the skewed blade idea, chewing it over today I was thinking of an alternative, where you could relieve the side of the blade slightly so the sharp end (sorry, tech terms used accidentally ) is still square to the sole and the shoulder not rubbing. Leave that to you though, I'm not as game as you with the file & grinder.
No, Thats a great idea. I should have mentioned that earlier. Some might think the skewed edge a bit of a PIA.
Only concern, I guess, is to not relieve the side too much. Uno, grind just a little angle. Or else, latter in the blades life, uno, when you've re-sharpened it heaps that the blade corner may not slide accross enough to line up with the planes side...But, spose, thats easily fixed with the grinder too ...So, maybe just nibble away at the side, line it up in the plane for a check, nibble a bit more if you want etc. until your happy.
When I was mucking around with my #78, I laid the side flat on a piece of melamine to get the edge of the blade flush with the plane's side, I figured this would be the go, for the blade to be precisedly in line with the edge of the body. My musings are all theoretical, though, unlike you I haven't actually used mine yet, just shown it off and fiddled with it When I actually get to use it I'll note your experiences.
Good idea I think. But, this will only work IF the side/edge angle of the blade is exactly the same as the side/sole angle of the plane body(should be near 90 degree's) or else, the blade won't peak out evenly from the sole, which is very important too.
Did I describe that ok ? ...and making those angles the same is a bit too....uno, ' anal ' for me .....I find it much easier, to skew the blade edge (or your relief idea) so that I can just focus on two things while looking down the blade sole....ie. that the blade edge peaks out evenly from the sole,,,and 2,,,,that the blade corner lines up with the spur, which protrudes out the side a bit.
Further to your paper shim idea with the nicker, to make it easier to place, and given you cut the corner off an envelope, I thought you could maybe put the corner over the nicker when putting it back in, then snip/tear the outside off after the screw is tightened. Might be a little easer than placing in the nicker recess. Dunno, just theorising once again...
. Yep, why not ? Spose I just don't like running a knife along the steel body. Steel on steel means more sharpening. Gets a bit boring after a while
I should mention. You don't need a knicker for the plane to work when planing with grain (which I just noticed, mentioned in Marios post... Hi, Marios ! ) ....nickers really become useful for planing accross grain which you'll probably rarely do (?)...However, I have noticed, if you set the nicker up well, then it helps a with grain cut. Seems to cut a nicer looking shoulder, and also, I'm guessing it helps to keep the plane straight, cause the spurs always running in its own track. But its just something you've got to decide on personally, I'd say, from trial and error.
But, better to not use the nicker at all, if its not set up right. Spose, thats why they seem to look as though they've never been used, or are missing, whenever I come accross an old stanley 78. Most don't seem to bother with them. ???
Anyway, I gota go to work....again
-
18th January 2006, 01:09 PM #15
Banned
- Join Date
- Apr 2005
- Location
- kyogle N.S.W
- Age
- 50
- Posts
- 4,844
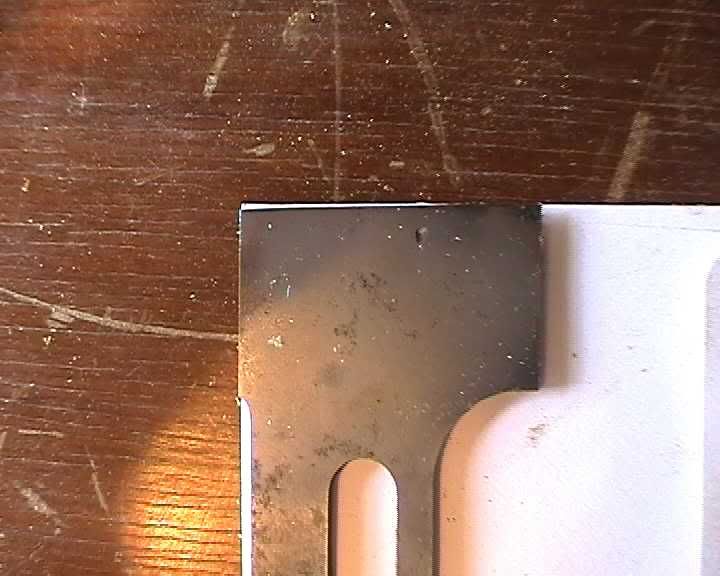
Here ya go. Couple of photo's of the fence, Sean. I should have taken them with a white background, but I spose you can still see enough. Runs on a bar....personally, I'd just go and buy the fence and bar setup. It seems easier that way. But you might have something up your slieve, eh ?
One thing I thinks worth mentioning about these 3-point spurs the 78's have. Well, there not the best design, IMO. Cause their not depth adjustable. Ideally you only need the spur to cut at a depth thats just slightly deeper than the following cut made by your main blade...
But, unfortunatly, you've got no choice about depth. Well you can grind it back to the depth you want, but the design doesn't really accomidate for wear to the spur. But then I spose, you can always switch to another of the spur's points. Generally its fine, especially if your working softwoods. Just a little annoying. Just a little bit.
I sent the depth stop away this afternoon. I had a look around, still couldn't find the thumb screw that comes with it.


 Reply With Quote


Similar Threads
-
History of Stanley/Bailey Bench Planes
By silentC in forum HAND TOOLS - UNPOWEREDReplies: 29Last Post: 1st December 2010, 08:27 PM -
Tuning a Stanley #140 Skew Block Plane
By derekcohen in forum HAND TOOLS - UNPOWEREDReplies: 28Last Post: 5th September 2006, 04:23 PM -
New Stanley Bedrock Planes
By matt1245 in forum HAND TOOLS - UNPOWEREDReplies: 46Last Post: 30th June 2005, 08:06 AM -
Stanley 5
By routermaniac in forum HOMEMADE TOOLS AND JIGS ETC.Replies: 1Last Post: 24th June 2005, 06:23 PM -
Stanley #62 (low angle jack) renovation (long)
By derekcohen in forum HAND TOOLS - UNPOWEREDReplies: 27Last Post: 3rd March 2005, 04:42 PM
