

 Thanks:
  Likes:
  Needs Pictures: 0
 Picture(s) thanks:
Results 1 to 15 of 31
Thread: New storage box for chisels
-
12th January 2022, 02:31 AM #1
 Be inspired. Be creative. Be bold.


- Join Date
- Apr 2001
- Location
- Perth
- Posts
- 10,826
 New storage box for chisels
A decade ago (!), while road testing the new Veritas chisels (then only O1 was available), I built a box partly to house them and partly to demonstrate them in use ...
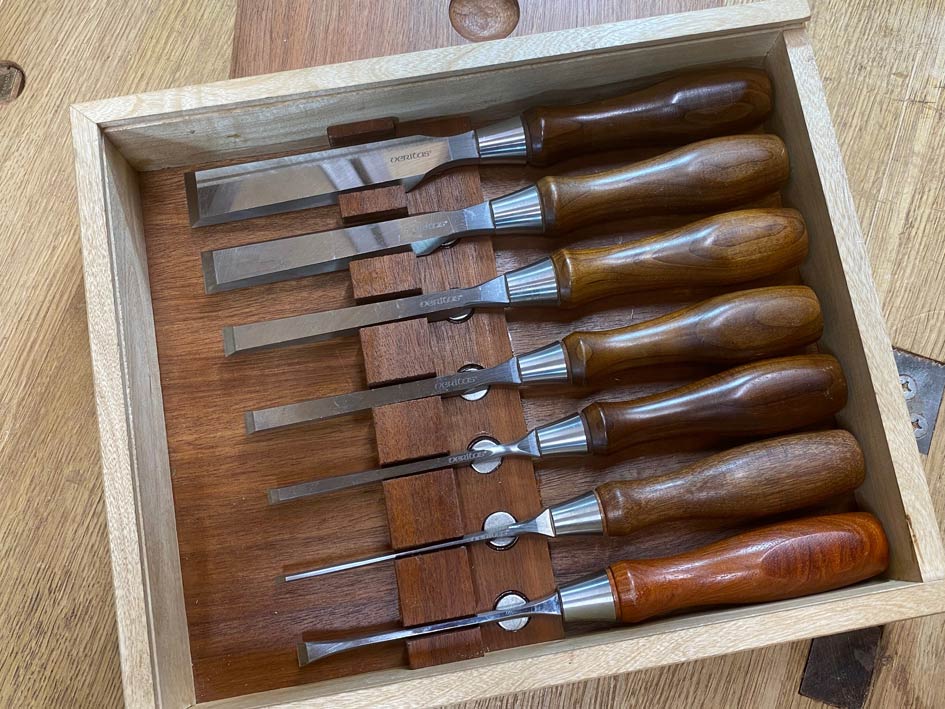
This coming weekend I shall be part of a dovetailing workshop, and decided that it was time to build a new box for these chisels. These are the chisels I use in demonstrations, such as wood shows.
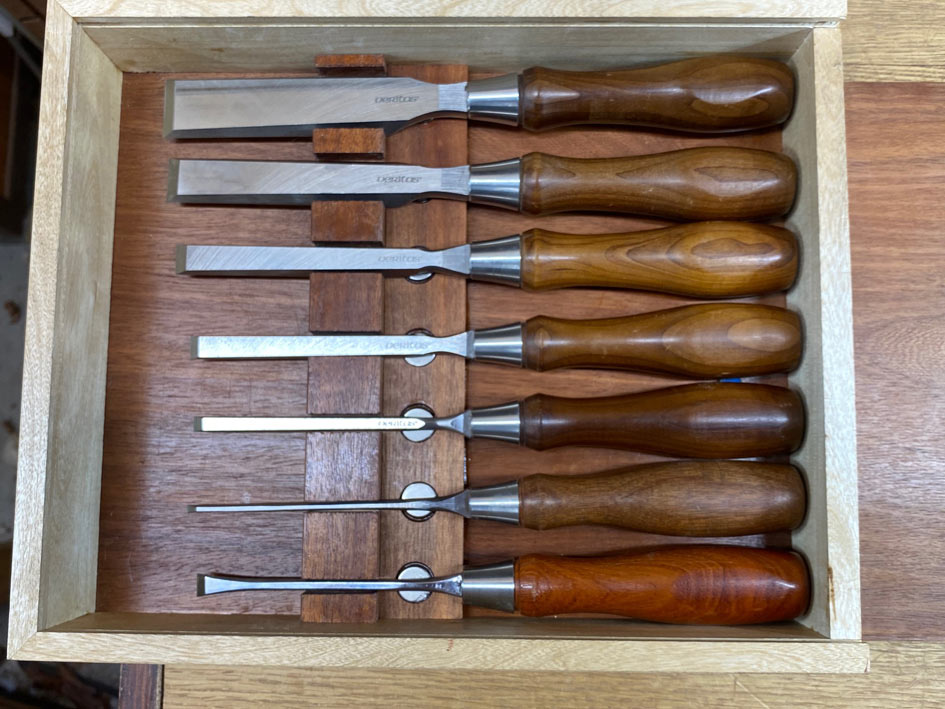
For one thing, the number has grown from 5 to 7 chisels (I had made a 1/8" from a spare pre-production 1/4" - this was before this size was available from Veritas - as well as a 3/8" fishtail chisel. At some stage Veritas will be producing their own version. I do not have any details).
A second factor was that I thought the existing box was a little OTT, and wanted something more subtle, and less in-your-face. The fact is that the joinery in the new box is far more demanding than the first box, but only those experienced might recognise this.
It has been a month or more since I have had any regular time in the workshop. My practice has been crazy busy, but now I have a few weeks leave. In particular, I had some time free yesterday and today. This has been therapeutic and fun. I hope others get something from the details here ....
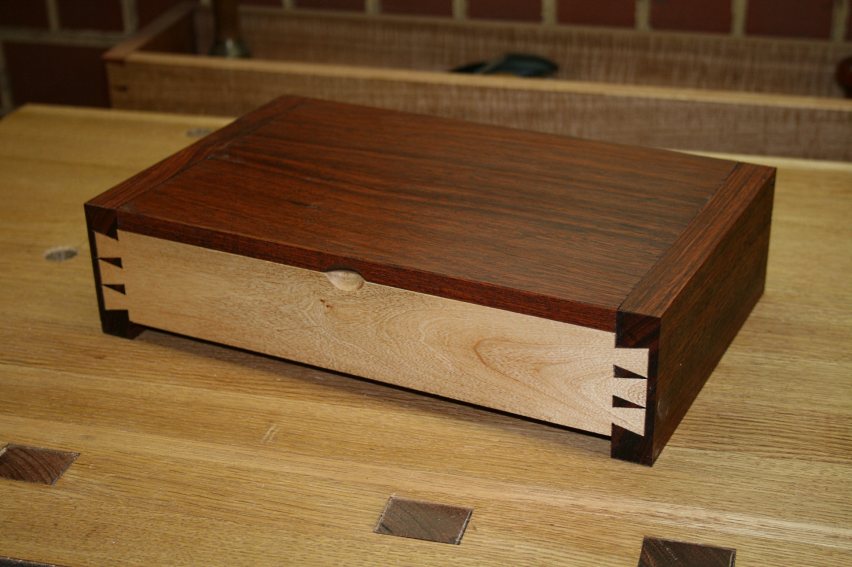
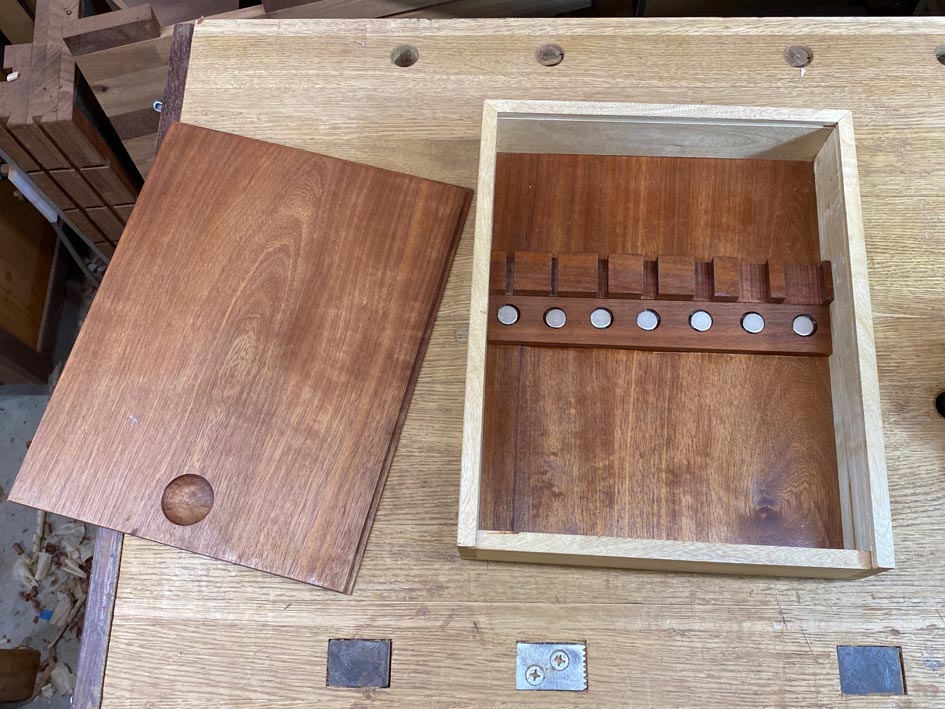
The light wood is Jacaranda (in both boxes), which is the last harvested from a tree on our property several years ago. It is softish, not so nice to saw and dovetail, but planes beautifully. The darker wood is Makore. Another wonderful wood to work with.
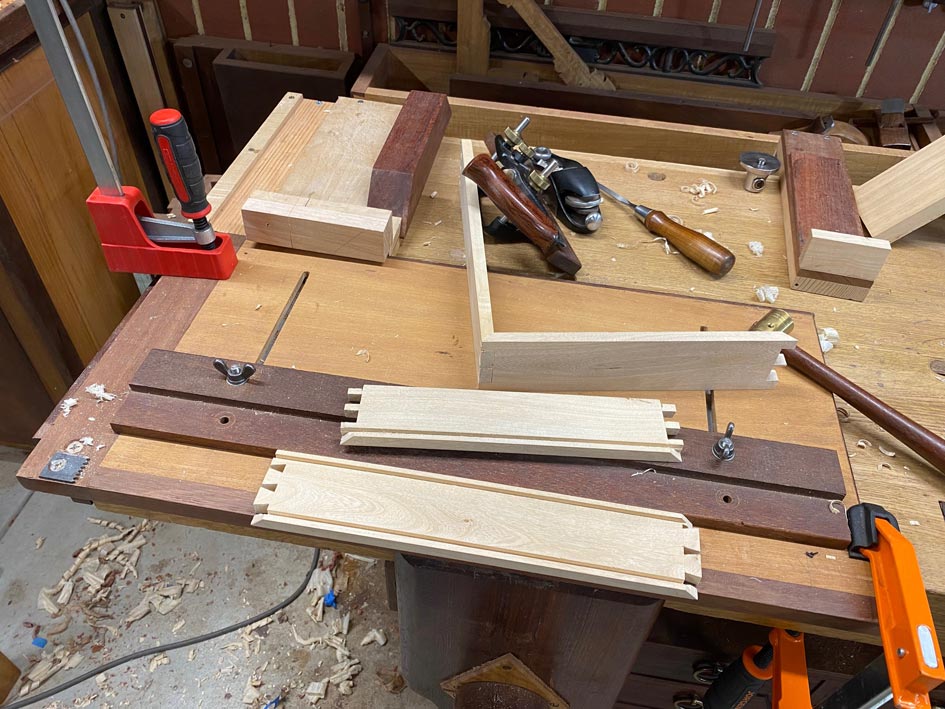
The construction of the box is mainly mitred through dovetails - all lower corners and the end upper corners. This makes it easier to plough through grooves for the base and top. The mitred corners are also, in my view, far more aesthetic, lending a balanced presentation from the top.
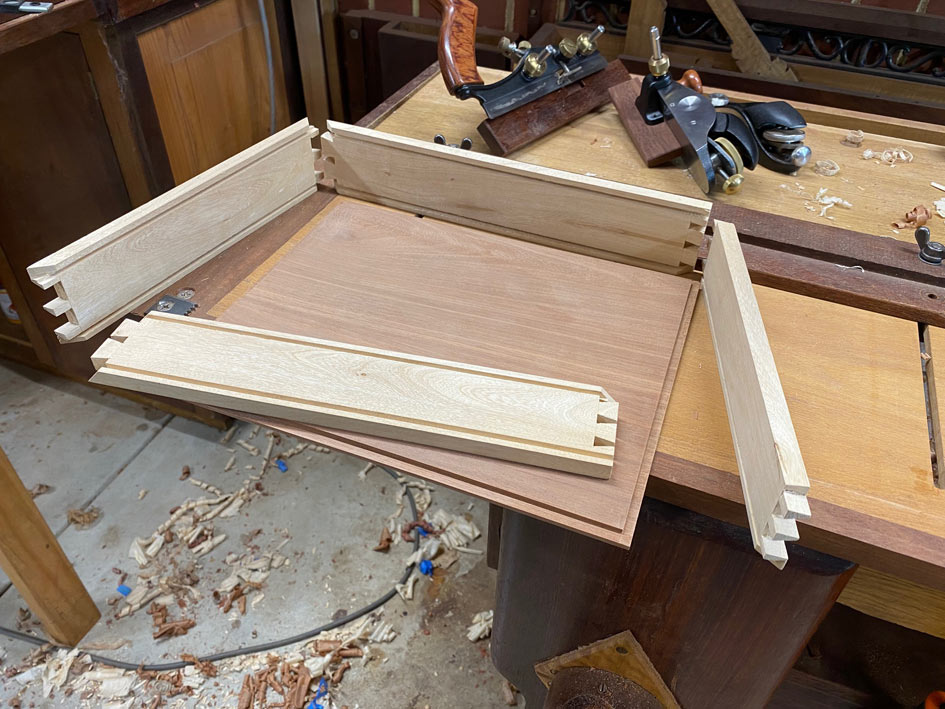
The sides are held in a sticking board when ploughing grooves with the Small Plow.
The rebates were planed with a skew block plane and then fine tuned with a rebate plane. This is the main use I find for rebate planes ...
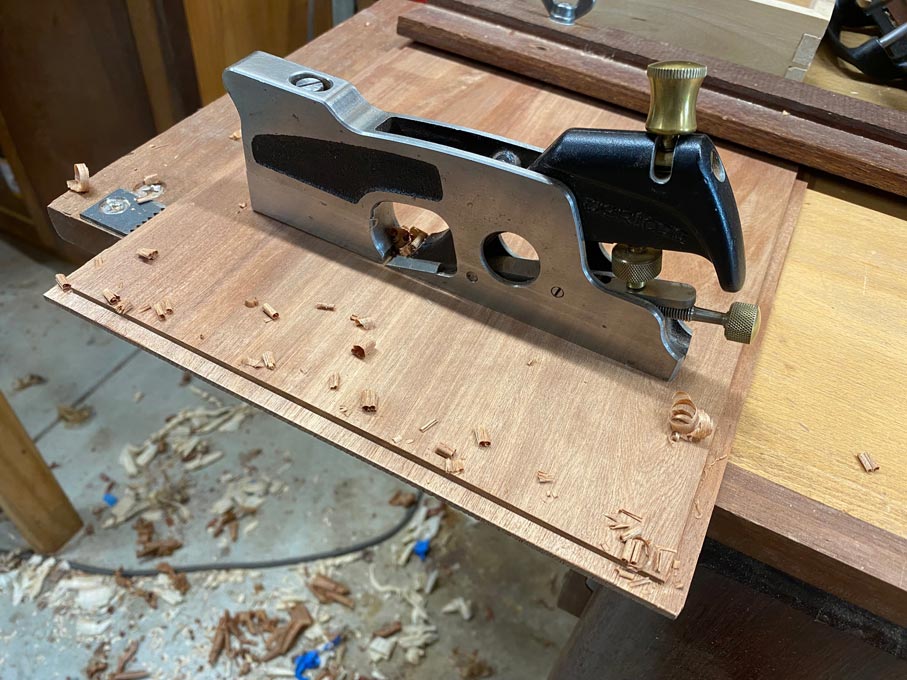
This is the underside ...
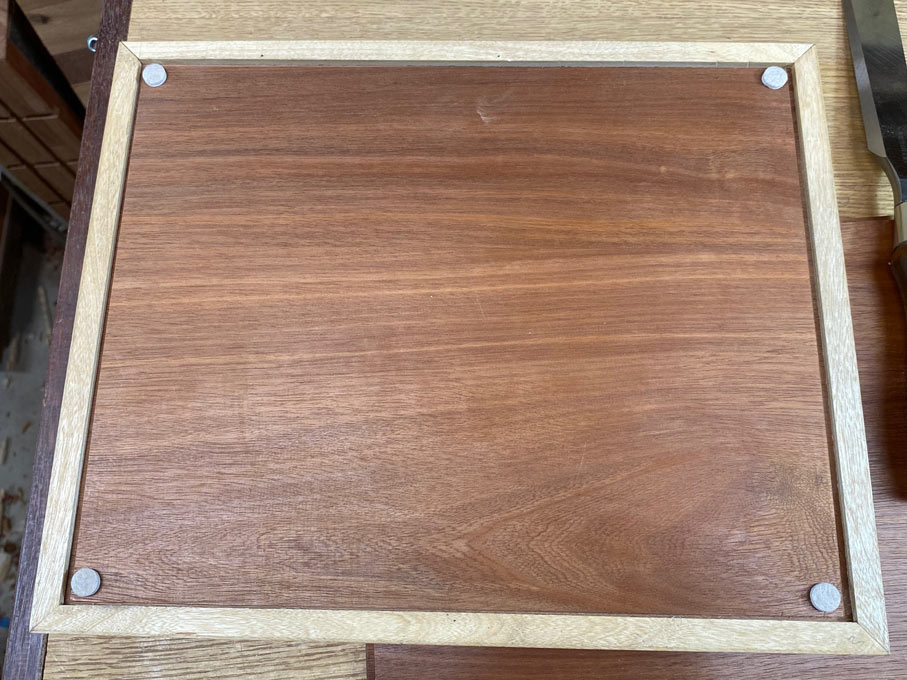
And from the upper side ...
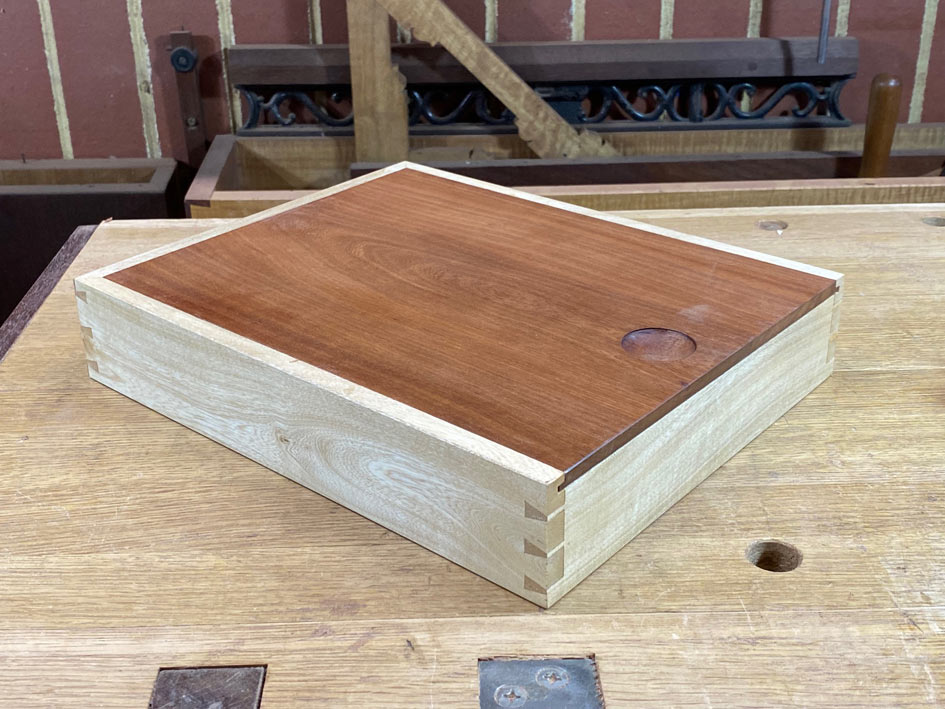
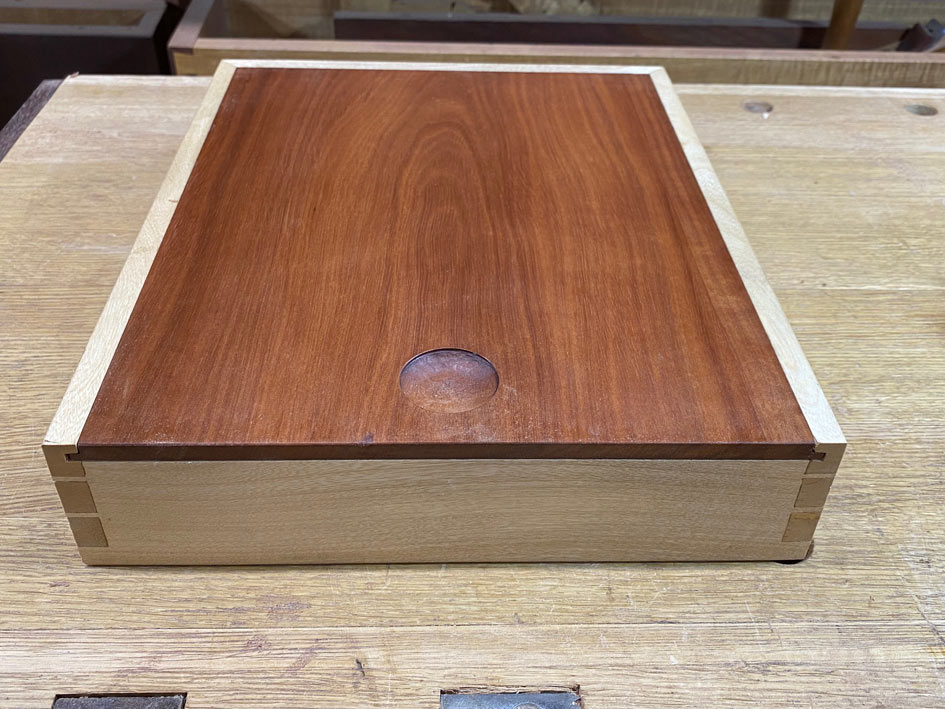
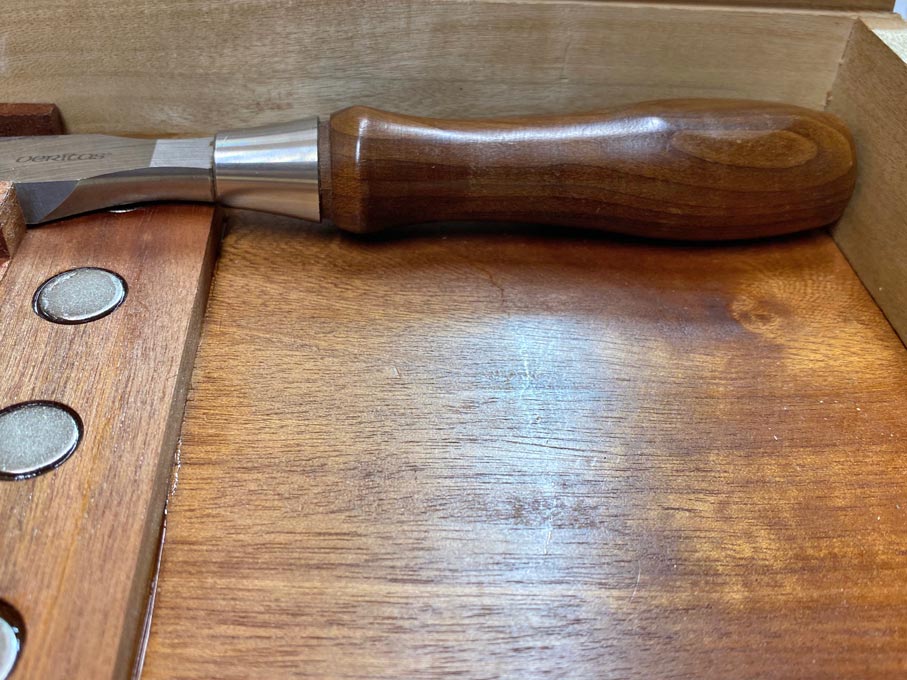
The finger depression was carved with chisels ...
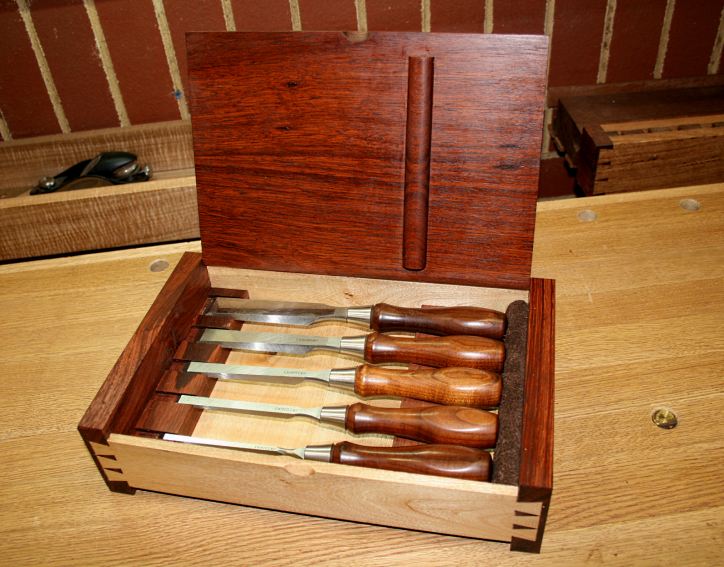
Inside the box, the chisels are held very firmly with a combination of rare earth magnets and individualised spaces for each chisel ..
The O1 Veritas chisels differ from the PM-V11 chisels in that their ferrules are square at the front, while the PM-V11 are curved (I do have a set of both, with the PM used in the workshop) ...
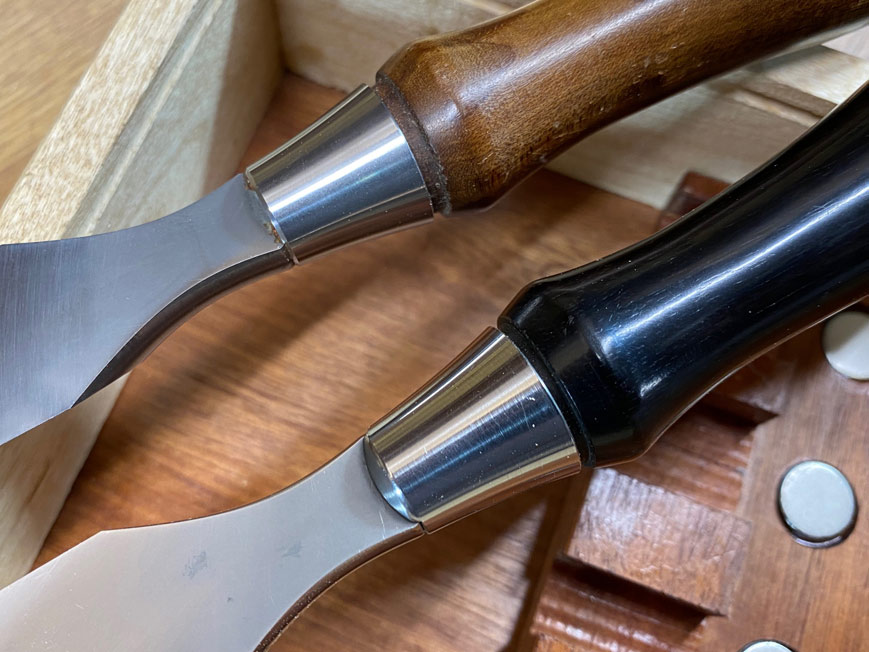
This square section enables the design to butt them fore- and aft. They cannot move about. Plus the magnets hold them firmly as well.
Regards from Perth
DerekVisit www.inthewoodshop.com for tutorials on constructing handtools, handtool reviews, and my trials and tribulations with furniture builds.
-
12th January 2022 02:31 AM # ADSGoogle Adsense Advertisement
- Join Date
- Always
- Location
- Advertising world
- Posts
- Many
-
12th January 2022, 09:07 AM #2
When the student is ready, the Teacher will appear
- Join Date
- Jan 2006
- Location
- Telegraph Point
- Posts
- 3,036
A nice result Derek
Thanks for sharing
Tom.... some old things are lovely
Warm still with the life of forgotten men who made them ........................D.H. Lawrence
https://thevillagewoodworker.blogspot.com/
-
12th January 2022, 09:11 AM #3
GOLD MEMBER
- Join Date
- Mar 2004
- Location
- Brisbane (western suburbs)
- Age
- 77
- Posts
- 12,132
Co-incidentally, I've just been making a small toolbox to house my miniature tools. As it's for a competition (the first one I've entered for at least 35 years!), I decided to mitre the corners on the through tails as you've done. With such short pieces I had to prepare the stock by hand & discovered (or really re-discovered, since I've done enough in the past & should know well enough!), how important it is to get the sides exactly the same thickness if you want to get those mitres together neatly without a struggle.
I quite like working with jacaranda - I wouldn't call it a soft wood, what grows around here is possibly a bit softer than American cherry, but all the stuff I've used has been very nice to use, it chisels crisply & planes very nicely, even the highly-figured crotch wood I used recently. But the wood I chose for my toolbox was not at all in this league, it was from the frame & panels of an old external cedar door: Raw material.jpg
The reason for my choice was because the theme of this competition includes using "sustainable, reclaimed or salvaged" Australian timbers, so this ought to fit the bill on two of the three counts (not sustainability - the giant old cedars were mostly slaughtered before I was born!). The door had been de-commissioned a very long time ago & probably not painted for its last 50 years of service. It looked like it had been an external door (& a large one!) to judge by the pattern of decay in the lower joints, so those several coats of crazed & shedding paint almost certainly have a high lead content. I planed them all round with a heavy set on my jack & carefully swept up the dust & shavings immediately. Here are later shavings from when I was preparing the pieces - This is about as rich as I've ever seen: Shavings.jpg
I'll do a full post on it when it's finished, but for the record, it was bl**dy awful stuff to work with!
Cedar has never been my favourite cabinet wood, just putting a tool down on it too heavily can leave a deep mark, and you need to use chisels sharpened with very shallow bevels or it crushes rather than cuts - particularly when it's been 100 years since any birds perched in the tree it came from. It has also been a year or more since I cut a set of dovetails in earnest so I suppose it's no surprise I made some of the worst-fitting dovetails I've done for 40 years! Fortunately, I started on the back & had a feeling it was not going to be easy, so I didn't cut the pin board to length. I sawed off the first mess & started over.
I got the box together eventually, but there were a couple of unacceptable gaps so I resorted to the Tage Frid trick of driving a carefully-matched slip into them. They planed off nicely & no-one but me will know, but I felt pretty cross with myself & wondered why it happened. My eyesight has deteriorated a bit more in the last 18 months, no doubt, and that may account for some of it, but I discovered something else was the likely culprit. I am trying to use the mini tools themselves to make as much of the toolbox as I can, to show they really do work:
Tools.jpg
(I realised too late I should have put the full-sized plough in the pic -without a scale it looks too much like a set of ordinary tools.)
Anyway, the saw I was using to cut the pins & sockets is a very small one & made from 0.010" plate with a spine that is in proportion & about 1/4 the weight of my regular dovetail saw (which is no monster). The 10 thou blade is so thin it almost falls through the wood, and just takes the path of least resistance following the softer parenchymal tissue between the coarser fibres (cedar is a rather coarse wood & it's always been a mystery to me why it polishes so beautifully). That makes it extremely difficult to start accurately on the end-grain & hard to keep on track without intense concentration. On the basis of that theory, I switched to my 'old faithful' regular D/T saw. Whether it was the more solid saw or the extra practice or because I was concentrating really hard I can't say for sure but the heavier saw followed the lines far more predictably & the situation improved dramatically..
I think all will be well in the end, the half-lapped D/Ts on the drawer are closer to my standards & will probably receive the closest scrutiny & the evidence of my incompetence on some of the through joints should be very hard to spot by the time I've got it polished up. Besides, the outer box is just to make a quick first impression, it's what's inside that is what the comp is about ("Tiny Treasures"). So I'm working hard on the internals right now. I'll do a separate post on it all when it's done & ready for the judges....

IanIW
-
12th January 2022, 09:48 AM #4
GOLD MEMBER

- Join Date
- Oct 2018
- Location
- Dandenong Ranges
- Posts
- 1,893
Hi Derek. Lovely box. What timbers did you make your chisel handles from?
-
12th January 2022, 12:54 PM #5
Be inspired. Be creative. Be bold.
- Join Date
- Apr 2001
- Location
- Perth
- Posts
- 10,826
MA, all production handles are made of Torrified Maple. Originally Posted by Mountain Ash

The two O1 chisels I modified come from pre-production stock, which was used for testing purposes. These have Bubinga handles. The 1/8" I sanded down and stained in an attempt to match the others. The fishtail is the original Bubinga pre-production handle.
My PM-V11 chisel handles are not standard, instead later turned from Ebony. I polished these with green compound!
This is a colour photo ...

Regards from Perth
DerekVisit www.inthewoodshop.com for tutorials on constructing handtools, handtool reviews, and my trials and tribulations with furniture builds.
-
12th January 2022, 03:02 PM #6
GOLD MEMBER
- Join Date
- Nov 2011
- Location
- Melbourne
- Posts
- 7,014
Derek,
Lovely boxes on both accounts, but I must say I actually really like your first box.
The second box is lovely, but I�m biased I like a bit of showing off , maybe because I�ve been looking at pics of Mr Studleyes tool chest of late.
Cheers Matt.
-
12th January 2022, 06:48 PM #7
Be inspired. Be creative. Be bold.
- Join Date
- Apr 2001
- Location
- Perth
- Posts
- 10,826
Matt, I am going to re-purpose that box. Perhaps for travel marking tools?
Regards from Perth
DerekVisit www.inthewoodshop.com for tutorials on constructing handtools, handtool reviews, and my trials and tribulations with furniture builds.
-
13th January 2022, 12:04 AM #8
GOLD MEMBER
- Join Date
- Oct 2018
- Location
- Dandenong Ranges
- Posts
- 1,893
Thanks Derek. I did have to look up what "torrified" was though! Never to old too learn something new, and that explains the darker look to the maple.
-
13th January 2022, 12:21 AM #9
Be inspired. Be creative. Be bold.
- Join Date
- Apr 2001
- Location
- Perth
- Posts
- 10,826
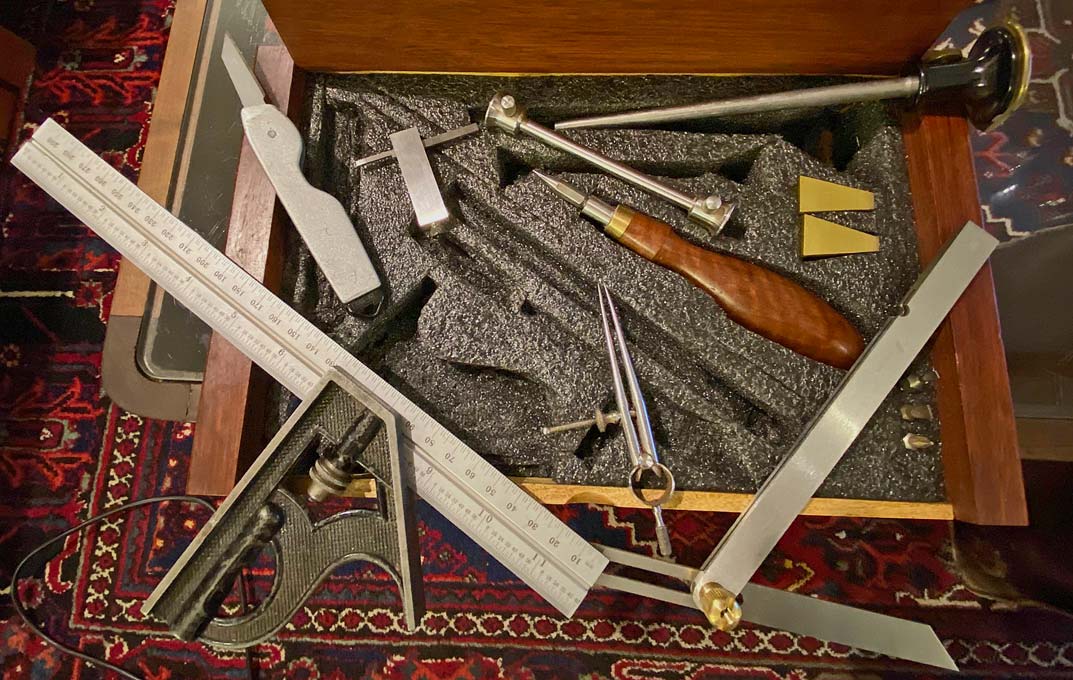
What to do with the first box?
Today I purchased some imitation Kaizen foam (cheap and not as good - from Bunnings), to try out this idea ....
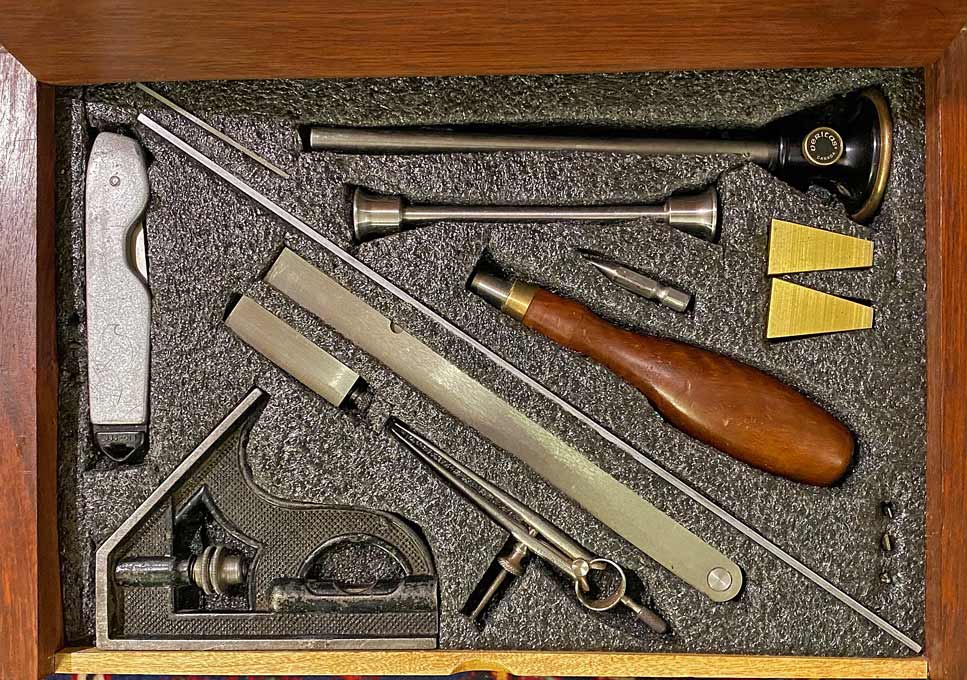
Stanley knife for scoring, Starrett 12"/300mm combo square, Starrett mini double square, Starrett small dividers, Shinwa sliding bevel, Veritas cutting gauges (mini and full size), dovetail gauges (5:1 and 7:1), and a driver holder with three driver bits and an awl.
Regards from Perth
DerekVisit www.inthewoodshop.com for tutorials on constructing handtools, handtool reviews, and my trials and tribulations with furniture builds.
-
16th January 2022, 11:42 AM #10
Intermediate Member
- Join Date
- Jan 2021
- Location
- Pascoe Vale, VIC
- Age
- 44
- Posts
- 49
Love both of the boxes, Derek. The 2nd one looks elegant, especially the carved finger pull!
Azahan
-
16th January 2022, 11:45 PM #11
Senior Member
- Join Date
- Oct 2019
- Location
- Brisbane
- Posts
- 141
Hi Derek, it's hard to choose between the two. Both of them look great.
Would you mind elaborating the above? Could it be, as alluded by Ian, that the mitre dovetail requires greater precision in the stock preparation? Originally Posted by derekcohen
Cheers,
Andy
-
17th January 2022, 01:07 AM #12
Be inspired. Be creative. Be bold.
- Join Date
- Apr 2001
- Location
- Perth
- Posts
- 10,826
Andy, the half blind dovetails in the first box look impressive because they have very pointy tails. But they are still just half blind dovetails and, because the tail is hidden inside a tail socket, these represent a joint in 1 Dimension.
Now you take a through dovetail. It is open on two sides. Both sides are open for scrutiny. Therefore I would refer to this as joinery in 2 Dimensions ..

The new box has mitred through dovetails, which are used to hide the grooves for the bottom and lid. The mitres add a big jump in complexity - a third dimension. Each of these sides must come together at the same time, otherwise these will be gaps. In other words, dovetails in 3 Dimensions.

Rob Cosman was asked to demonstrate a mitred through dovetail. He declined, saying that he had never made one. I understand and partly accept this. It is not a joint to teach beginners.
Then there is the finger pull for the top. That was hand carved ...
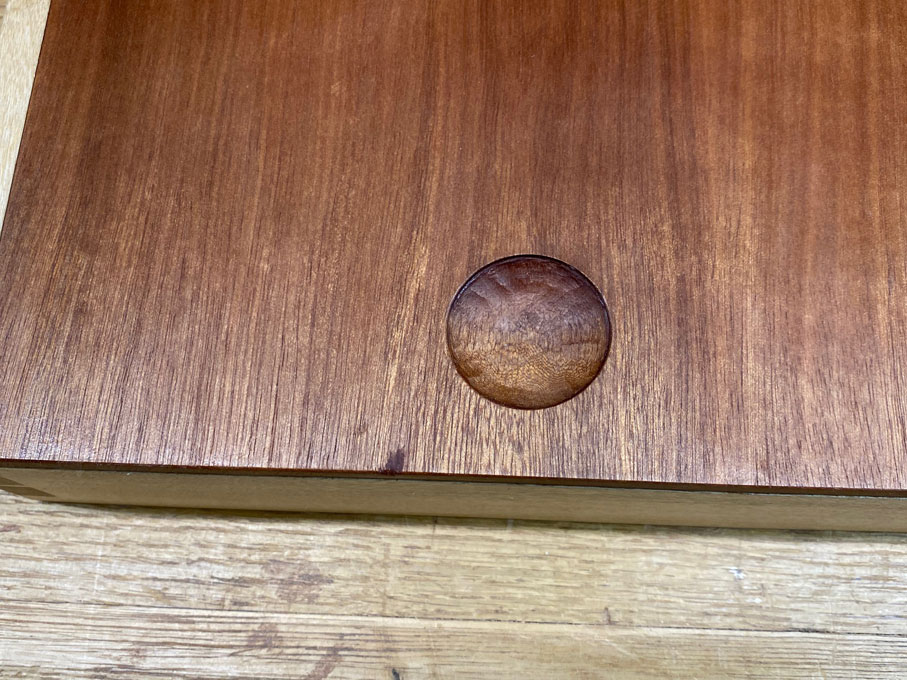
The hollow was created in the same way as Alan Peters demos here � just smaller

Regards from Perth
DerekVisit www.inthewoodshop.com for tutorials on constructing handtools, handtool reviews, and my trials and tribulations with furniture builds.
-
17th January 2022, 08:23 AM #13
GOLD MEMBER
- Join Date
- Mar 2004
- Location
- Brisbane (western suburbs)
- Age
- 77
- Posts
- 12,132
Derek, I haven't used mitred ends to cover lid grooves, I use them just to make visible corners neat and more frame-like, but of course now you mention it, covering the lid or bottom grooves is an obvious application! I guess that means making the starting half-pin a bit wider than I normally do but that's no problem, I tend to make my pins wider than you do, as I've mentioned before (because I've seen too many of those very fine pins broken off on old pieces). To cover any grooves I just use the traditional method of having the groove on the pin board bisect the first socket so it can be ploughed full-length. The groove on the tail board has to be stopped, which can be a bit fiddly on a small box, but now I have my tiny plough plane that just became a whole lot easier - I'm rather pleased with the little thing & can see it getting plenty of use in the future. And I've been thinking seriously about a half-size dovetail plane to go with the plough & mini router, to fill out the kit, but that might have to wait a while..
I don't find mitred corners adds too much sweat to through D/Ts (well, no more than any mitred corner which can sometimes cause one considerable angst if they choose not to cooperate!). What does tax my abilities is the full-blind D/T. So far, I've only done them a few times, with very long intervals in between, so each time has been like a first. I don't have any in-progress shots of doing a set (I vaguely remember you posted some pics a long time back, or was that someone else?), just a not very good pic of this 'document box' I made for my youngest daughter quite a while back: Box1.jpg
The heck of it is, if you get them right, there is absolutely no evidence of all that meticulous work on the finished piece! (From the outside - if you look at the corners of the lid you can see the 'stepped' & mitred pin that gives it away. I made it as a closed box & cut the lid off & it fried my brain trying to figure out how to lay out the pins so I could end up with a full mitre on lid & box parts when I cut the lid off. Next time, maybe!)
CheersIW
-
17th January 2022, 10:09 PM #14
Senior Member
- Join Date
- Oct 2019
- Location
- Brisbane
- Posts
- 141
Thanks for the thorough explanation and illustrations, Derek. I see where you are coming from now.
Ian, I wasn't aware of full blind D/T - had to google it. Seems complex but very clean when completed, almost a shame that the joint cannot be seen!
Cheers,
Andy
-
17th January 2022, 11:04 PM #15
Be inspired. Be creative. Be bold.
- Join Date
- Apr 2001
- Location
- Perth
- Posts
- 10,826
Ian, while making stopped grooves is doable - we've all done them - they are really inefficient and I imagine more in line with power tool thinking (power router). It is also a method that leaves one at the mercy of a dovetail vulnerable to damage (as there is little meat left). Making a through groove is more hand tool-orientated (plough plane), and stronger.Derek, I haven't used mitred ends to cover lid grooves, I use them just to make visible corners neat and more frame-like, but of course now you mention it, covering the lid or bottom grooves is an obvious application! I guess that means making the starting half-pin a bit wider than I normally do but that's no problem, I tend to make my pins wider than you do, as I've mentioned before (because I've seen too many of those very fine pins broken off on old pieces). To cover any grooves I just use the traditional method of having the groove on the pin board bisect the first socket so it can be ploughed full-length. The groove on the tail board has to be stopped, which can be a bit fiddly on a small box, but now I have my tiny plough plane that just became a whole lot easier - I'm rather pleased with the little thing & can see it getting plenty of use in the future. And I've been thinking seriously about a half-size dovetail plane to go with the plough & mini router, to fill out the kit, but that might have to wait a while..
I think that it is a joint we shy away from as it has more to do. But, like most things, it becomes easier with practice.
Regards from Perth
DerekVisit www.inthewoodshop.com for tutorials on constructing handtools, handtool reviews, and my trials and tribulations with furniture builds.


 Reply With Quote


Similar Threads
-
[WIP] Chisels, so many chisels - and questions about restoration
By Alkahestic in forum HAND TOOLS - UNPOWEREDReplies: 25Last Post: 19th April 2021, 03:56 AM -
WITHDRAWN: Berg chisels 1027 short chisels. 2 inch, 1 1/2 inches, 1 inch $85
By Pac man in forum WOODWORK - Tools & MachineryReplies: 0Last Post: 20th January 2021, 10:15 PM -
VICTORIA 4 Mortice chisels - 3 titan bevel edge chisels - 1 unused 7/8" titan firmer chisel
By mattocks in forum WOODWORK - Tools & MachineryReplies: 4Last Post: 18th August 2020, 07:02 PM -
Woodturning chisels, chisels, vises, planes, marking gauge, Yankee bits and more
By dubrosa22 in forum FOR SALE on eBay and external sites.Replies: 0Last Post: 14th October 2017, 09:46 AM -
Pen Kit Storage
By Pariss in forum WOODTURNING - PEN TURNINGReplies: 16Last Post: 4th August 2012, 07:46 PM
