

 Thanks: 0
 Likes: 0
 Needs Pictures: 0
 Picture(s) thanks: 0
Results 1 to 15 of 16
-
26th June 2011, 03:22 AM #1
 Be inspired. Be creative. Be bold.


- Join Date
- Apr 2001
- Location
- Perth
- Posts
- 10,824
 Taper grinding a dovetail saw a grand failure at the first attempt
I've had this on my mind for about a year, ever since I removed the set from a LN dovetail saw and used it sans set. I had filed off a little to reduce the rough kerf .. and just couldn't get the saw to cut in a straight line no matter how much I tweeked the remaining set. So I filed it all all .. and the saw cut straight as a die, and cleanly as one could with. However ... there is always a "however" ... the saw was hard to push. It would bind in the kerf (are we surprised?). This was easily fixed with a little wax to lubricate the steel, which is how I used it. What I find so appealing about this saw is that it will create a kerf just where the saw is placed .. you do not also have to account for the extra amount of wood removed by the set.
So I began to wonder about a dovetail saw that did not need any set. In other words a saw plate that was taper ground to avoid binding. A few months ago I read about Mike Wenzloff producing a tenon saw that was taper ground. Chris Schwarz was raving about it. Still, I have not read about a dovetail saw created this way.
The problem is that I am not a sawmaker. I have made a few saws, but that does not qualify me. Making a handle is the easy part. I can do a reasonable job of filing teeth (although you wouldn't believe this when you see the teeth that I filed in the saw to come!). The tough part is preparing a saw plate that is tapered. I do not have machining equipment. All I have is a beltsander!
Now I must warn all in advance that this was a failure. It was an experiment. I am hoping that we get some discussion going with the aim of improving the method. There is enough success here to see the benefits that may be gained.
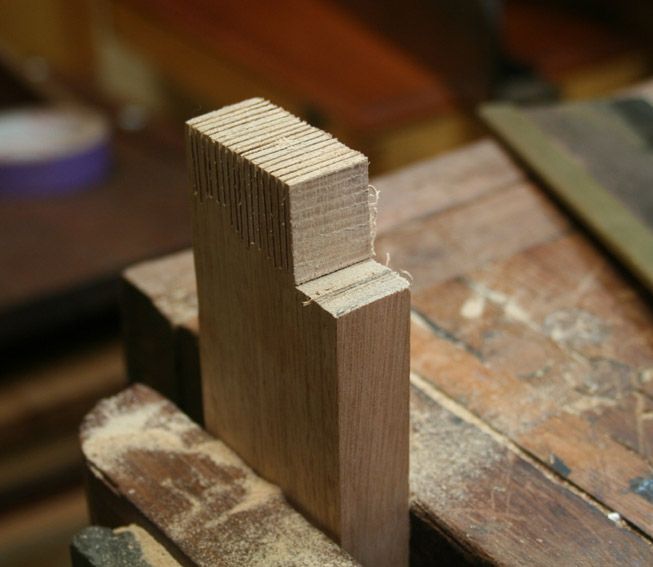
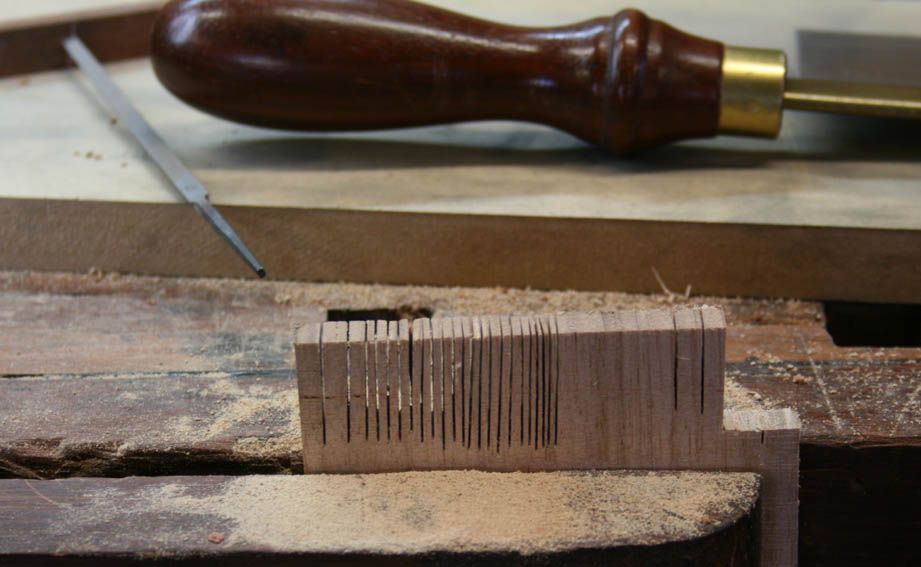
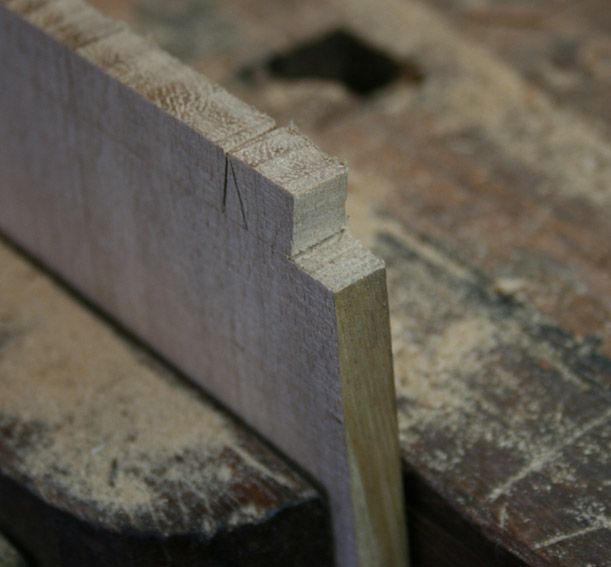
First some "before" pictures. The Guinea Pig was a Crown Gent Saw with an 8" long plate that was filed 18 tpi rip. I have had this saw about 10 years. It has not been used in half a dozen, but the teeth were reasonable. So I sawed these lines in 3/4" thick Tasmanian Oak ...
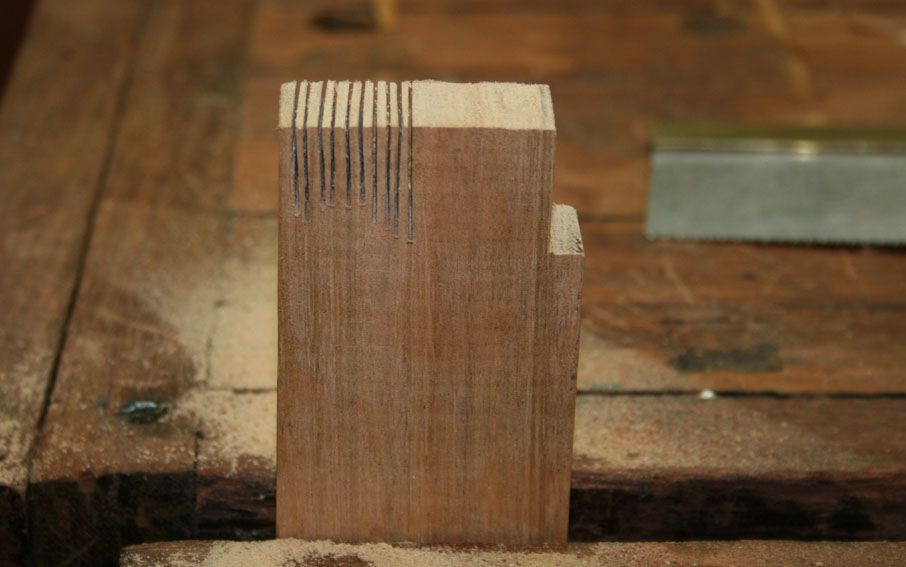
I sliced off a section at the end to reveal the kerf ..
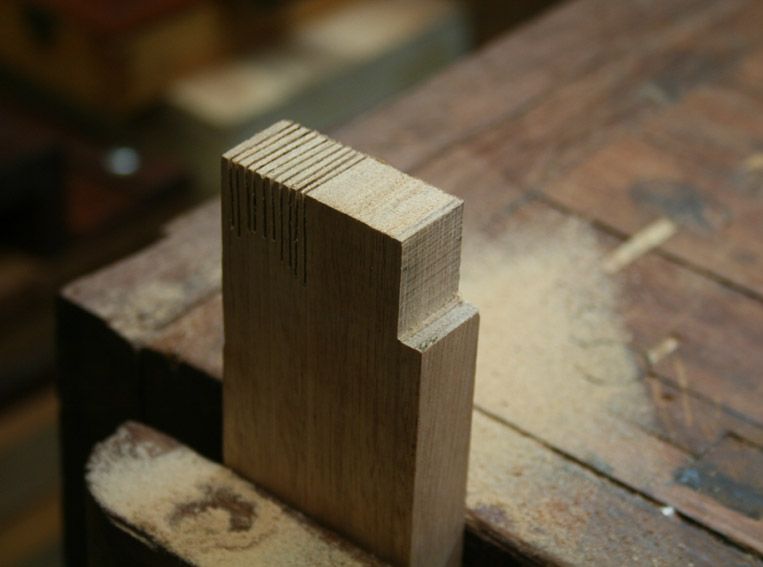
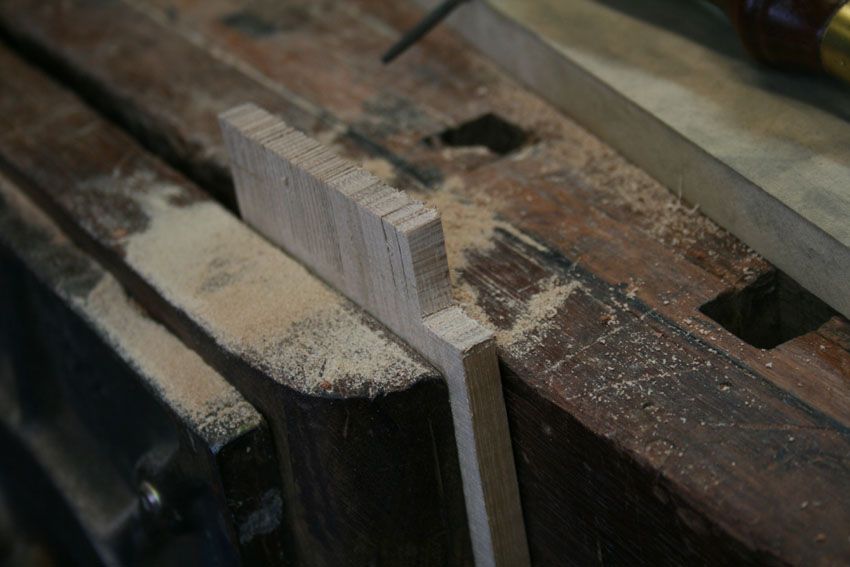
Next I carefully flattened the teeth with a gennou. Carefully tapped them down on the sawtable...

And then cut some more lines in the Tassie Oak ..
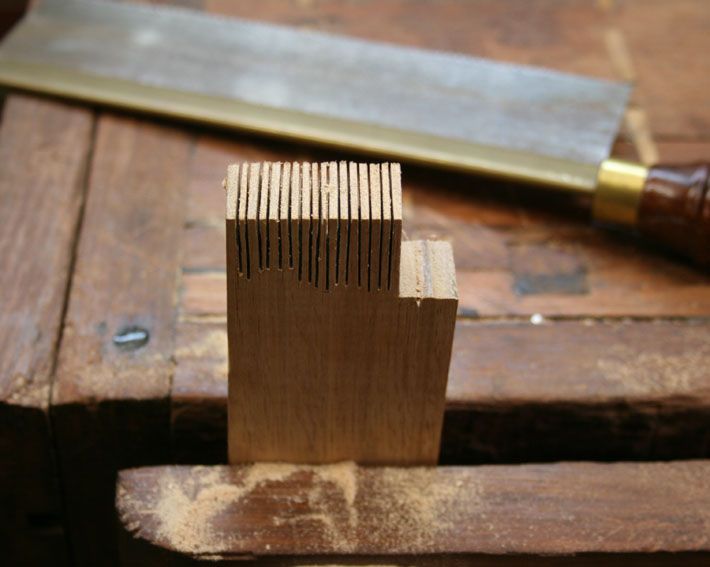
The kerfs are noticeably straighter and the kerf face is a little smoother.
The next stage was to taper grind the saw plate. What I did was to tape up a 1/4" from the teeth, then use my belt sander to grind back the steel for about 2". The belts I had are Zirconion Oxide in 120 grit and then 3M trizact belts to 600 grit. The plates were painted blue to monitor the grinding, cooled with a wet sponge if they became warm, and checked for thickness as we proceeded.

In the first picture (left) if the original thickness. On the right I am checking for progress - .001” is barely a start ..
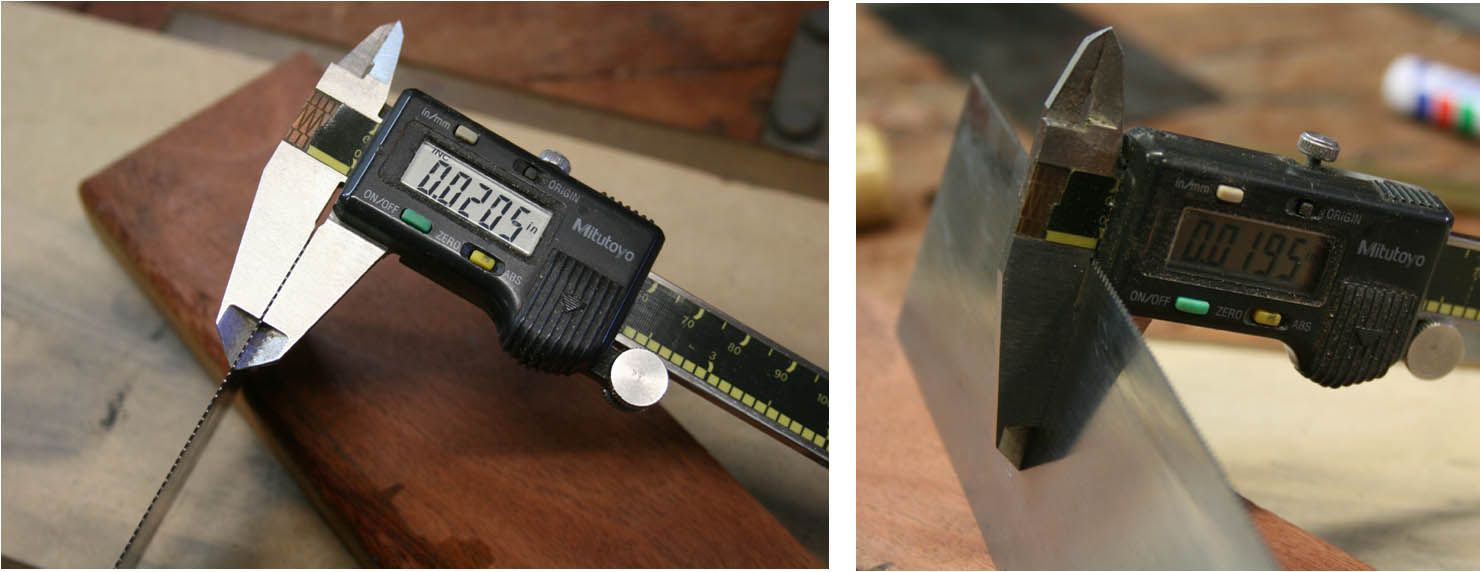
I ended up with a taper of .005” that started ¼” in from the teeth.
Promise not to wince at the teeth (I did warn you). I did them fast. There is a 10 degree rake. 18 tpi is hard on the eyes ...
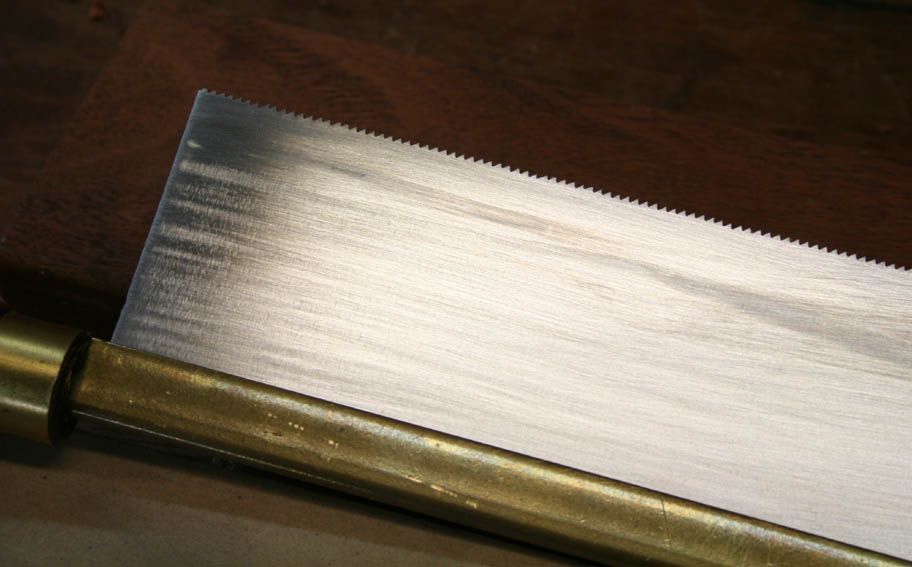
But they worked. Jointed, sharpened .. they cut well ..
At first it was a struggle. I thought that the wood was too thick. I resawed it to 3/8", which would be more typical for a saw with this configuration.
It cut really straight and with so much control that I was taking slices 1mm and under ...
And the kerf was as smooth as a baby's watsit .. at least as good as a tablesaw with it high toothed blade ...
I sawed a practice dovetail. The kerf was like from a japanese dozuki ..
At the end time I had to say it was a failure - the saw just did not cut smoothly. It felt like it was binding on the 1/4" around the tooth area. The effort started immediately and did not increase or decrease as the blade bit deeper. I will have to find a way to taper grind to the end of the plate.
Any ideas? Comments?
Regards from Perth
DerekVisit www.inthewoodshop.com for tutorials on constructing handtools, handtool reviews, and my trials and tribulations with furniture builds.
-
26th June 2011 03:22 AM # ADSGoogle Adsense Advertisement
- Join Date
- Always
- Location
- Advertising world
- Posts
- Many
-
26th June 2011, 11:32 AM #2
SENIOR MEMBER
- Join Date
- Jul 2008
- Location
- Aspley, Brisbane
- Age
- 46
- Posts
- 362
The fact that the saw binds from the start and the binding doesn't change throughout the duration of the cut gives me the impreasion the the problem lies in the filing of the teeth. I could be wrong though as I'm still learning to file saws.
Still a very interesting idea.
Regards,
Denim
-
26th June 2011, 12:58 PM #3
SENIOR MEMBER
- Join Date
- Jan 2008
- Location
- NSW southern Highlands
- Posts
- 548
Derek
I have only made one saw, so I am not saying in here this is how it should be done, but only what I did, which may be of benefit.
The saw I made is an 8" dovetail saw from 15 thou plate with 22 tpi filed rip and no set. The spine is heavy for a saw of this size & probably 3 or 4 times the weight of a Wenzlof or similar. From memory this was in the order of 50mm x 3mm brass strip which I annealed, then bent to form the spine.
The saw cuts very nicely and the finish is very close to a 150mm Nakaya saw that I also use. I haven't and wouldn't attempt to set such small teeth. The kerf clearance is created by the slight burr on the teeth which is left after sharpening. I find the saw good for what it was intended, i.e. for stuff up to 1/2" or so. It will cut thicker stuff but also starts to bind as the thickness increases, which I would expect.
I would think the only real benefit of tapered saw plate over the method I used, is the latter will start to bind as the burr on the teeth wears down and more frequent sharpening would be required for this, than would be necessary using tapered plate. So I suppose other than the satisfaction of making a tapered saw plate, the question is, is it worth the additional effort.
I look forward to the discussion.
Regards
-
26th June 2011, 02:30 PM #4
GOLD MEMBER
- Join Date
- Feb 2003
- Location
- back in Alberta for a while
- Age
- 68
- Posts
- 12,006
Derek
I think you've shown the cut quality obtainable with a western saw where the teeth have zero set.
However, to investigate a taper grind, the taper will need to start at the tooth line and progress smoothly across the saw plate. Done this way, and I'm not sure how you would do it with a belt sander, the cutting quality should remain constant as teh teeth are progressively resharpened.regards from Alberta, Canada
ian
-
26th June 2011, 03:02 PM #5
Be inspired. Be creative. Be bold.
- Join Date
- Apr 2001
- Location
- Perth
- Posts
- 10,824
Hi Ian
That's how I see it as well.
The successful part of this experiment was to demonstrate how great the saw cuts can be with zero set. Failure or success - depends how you look at it - is depicted by how NOT to taper grind.
What is needed ... desired ... is a way to taper grind in the average hobby workshop.
Still looking for ideas.
Regards from Perth
DerekVisit www.inthewoodshop.com for tutorials on constructing handtools, handtool reviews, and my trials and tribulations with furniture builds.
-
26th June 2011, 04:18 PM #6
GOLD MEMBER
- Join Date
- Feb 2003
- Location
- back in Alberta for a while
- Age
- 68
- Posts
- 12,006
Derek Originally Posted by derekcohen

maybe concentrate on achieving a hollow grind?
from the tooth line back say about an inch -- it will limit how many times teh saw can be sharpened, but for a dovetail saw this may not be much of an issue
failling that, a taper jig that progressively puts more of the saw plate thickness against the belt.
in principle the jig would be similar to those used to taper a work piece with a thicknesser
you could also use a bobbin sander and present the saw plate at 89° rather than the normal 90° (a belt sander on it's side would achieve the same orientation) -- I've seen a picture recently of a bobbin sander being used to thickness banding, the principle is the same for taper grindingregards from Alberta, Canada
ian
-
26th June 2011, 04:51 PM #7
Be inspired. Be creative. Be bold.
- Join Date
- Apr 2001
- Location
- Perth
- Posts
- 10,824
Hi Ian
I should refer to my grind as a "hollow" grind rather than a strict "taper" grind. I also assumed that relief would remove or reduce the need for set. What I concluded here - perhaps I was not clear enough - is that the taper needs to reach the end of the teeth. It is not enough to just releve the plate above the teeth.
Regards from Perth
DerekVisit www.inthewoodshop.com for tutorials on constructing handtools, handtool reviews, and my trials and tribulations with furniture builds.
-
26th June 2011, 05:25 PM #8
GOLD MEMBER
- Join Date
- Jun 2008
- Location
- Victoria, Australia
- Age
- 74
- Posts
- 6,132
Hi Derek,
Interesting experiment, the need for tapering all the way through the tooth line is an interesting result.
I haven't got the proper setup yet for the surface grinder, I need to make a support plate before I can give it a try.
Just one minor point, I wouldn't call it a "grand failure" I would call it a "grand first attempt"
Quoting Edison, "I have not failed. I have successfully found 1000 ways that do not work."
Look forward to the next experiment.
Regards
Ray
-
26th June 2011, 05:34 PM #9
Dances with splinters
- Join Date
- Jul 2005
- Location
- Oberon, NSW
- Age
- 63
- Posts
- 13,360
I can't help but wonder why the cheap, mass-produced zero-set japanese saws don't seem to show the same problems.
Or would it be that the pulling motion makes it harder to detect?
Just curious.
- Andy Mc
-
26th June 2011, 05:36 PM #10
GOLD MEMBER
- Join Date
- Oct 2007
- Location
- Yarram
- Age
- 63
- Posts
- 2,207
Was thinking the same thing, aren't the teeth faceted 3 ways Originally Posted by Skew ChiDAMN!!

-
26th June 2011, 11:58 PM #11
The rain is horizontal???
- Join Date
- Apr 2005
- Location
- Japan。
- Age
- 49
- Posts
- 1,622
Derek,
Nice try.
Just to shed some light on things, most of the hollow or taper 'ground' saws here either have a strip of full thickness at the teeth and a modicum of very regulated set or are fully tapered and have no set at all, set effectively created by the plate's profile.
The better saws that aren't completely hand made, they have a strip with set. My 2 current user ryoba are both strip with set, and very good saws.
The smaller one I'm using for joinery produces finish ready cuts provided I do my job right and has a polished strip with a hair of set on the teeth. More than 1/8" into the cut, it can't be steered any more, and the pull on the saw is very slight so it's not binding at all.
The slightly larger 240mm model has a 1/4" strip, burnished but not polished and a small set, as soon as you hit the hollowing, it can't be steered in the cut any more. Again, pull is all in the teeth, no binding until you hit the back teeth.
They're ground on large wheel grinders, held on a holder plate/board and moved along the grinder wheel lengthwise, and all done by hand for the most part.
The cheaper Silky saws Skew is talking about are done as a steel strip on a larger machine, and the taper is pretty heavy. These saws can usually be steered for quite a while longer, but they're all machine made so the cuts are good, but not glassy smooth.
I don't know how you're going to get it done at home, but starting with a heavy aluminium backing plate to back up the saw plate and suck away any heat might be a good place to look, and shouldn't be too expensive to play with.
Hope that helps,
Stu.
(Who's decided to just buy saws and use them. No time to make much of anything any more, so I need to spend what little time I have on things that Mrs. Schtoo can touch and identify with...)
-
27th June 2011, 01:08 AM #12
GOLD MEMBER
- Join Date
- Feb 2003
- Location
- back in Alberta for a while
- Age
- 68
- Posts
- 12,006
Hi Derek Originally Posted by derekcohen
please don't think I'm being smart, but I assumed that you had started the grind 6mm or so back from the teeth in order not to damage the teeth with the initial trials.
My expectation has always been that to work, the taper has to start at the tooth line.regards from Alberta, Canada
ian
-
27th June 2011, 10:25 AM #13
GOLD MEMBER
- Join Date
- Mar 2004
- Location
- Brisbane (western suburbs)
- Age
- 77
- Posts
- 12,126
Hmm - a number of things to ponder here.
While I have also toyed with the idea of tapering a d-tail saw, as we discussed in another recent thread, I'm still questioning in my own mind if we're not taking sledgehammers to nuts (or are we just nuts?).
When hand saws were used all-day, every day, taper-ground panel saws were as common as dirt, but taper-ground back saws seem to have been less common than rocking-horse poo. Why were they not made in quantity, if they are such a good idea? Did they put up with less than ideal tools, or did they know better how to set up their saws to do the jobs required?
In short, should we not be practising our setting & sharpening skills, rather than working on a perceived design flaw? I know the answer in my own case - despite all the practice I've had of late, getting a saw just-so is still more fluke than anything!
But keep at it, Ray & Derek - I'm following with great interest, & you are saving me lots of work & frustration.
Cheers,
BTW, Derek, with teeth as fine as 22 pi, any saw set will struggle to do the job - you simply cannot bend that 'top third' of the tooth consistently, if at all. Even on the finest setting my sets bend the teeth from the bottom of the gullet, for that sized tooth, which is not at all ideal, & makes even setting extremely difficult. So if you want to use very fine teeth, p'raps zero set & put up with the binding is the easier option.....
IW
-
29th June 2011, 02:36 PM #14
Novice
- Join Date
- May 2009
- Location
- Thames NZ
- Posts
- 12
Hi
Have stuff on order to try and make a backsaw instead of buying one so have been scouring the net so I have a rough idea of what to do in anticipation of the arrival of said stuff
In the process I have found a couple of internet sites with mention of taper grinding....although both are refering to hand saws, not back saws, but both have the same pattern of taper grinding
The first is from here
Taper Ground Saws- is that about, anyway?
There are two things I need to clear up first. First - setting the teeth on a saw widens the kerf the saw is cutting in, allowing the blade behind the teeth to work in the same kerf without binding. Second - the best way for sawmakers to guarantee their steel was flat is to grind it flat. Since they were grinding the steel anyway, an enterprising sawmaker thought to take that process yet a step further, and grind the saw so it's thicker near the cutting edge, and thinner nearer the opposite side. It's not evenly tapered across it's length, however... A diagram I saw of how the blades were taper ground looked something like this:

The lines show gradations in thickness - the thinner portion of the saw is on the upper left, nearest to the toe of the saw, while the thicker part is to the right, nearest where the handle would be. Note, this isn't exact since I'm going off of memory, and could have varied in different models of saws as well as from company to company.
Whether or not this helps the saw to cut is somewhat debatable. The idea is the taper would reduce binding problems with the saw. I believe the set of the teeth would far exceed any benefits to tapering of the blade. I can see how it could have benefits if the set was minimal, though - and it is a sign of the care for quality the sawmakers put into their product. In the end, I think that is the most important thing about a tapered saw blade.
Second one here
Making a new rip saw. - Saw Discussion Forums
-
30th June 2011, 02:38 PM #15
Novice
- Join Date
- May 2009
- Location
- Thames NZ
- Posts
- 12
Hi
Just had a look at Wenzloff site and they are now releasing a tapered backsaw based on the Diston model 77
https://www.wenzloffandsons.com/index.php
Cheers


 Reply With Quote


Similar Threads
-
Failure!!!
By artme in forum WOODTURNING - PEN TURNINGReplies: 25Last Post: 27th November 2009, 11:16 PM -
Succesful failure?
By BoomerangInfo in forum CASTING & STABILISATIONReplies: 5Last Post: 27th September 2009, 07:34 PM -
Box failure no 3
By jefferson in forum WOODTURNING CHALLENGEReplies: 10Last Post: 17th August 2009, 09:56 PM -
Which Grinding Wheel For Grinding Tungsten Electrodes
By Metal Head in forum WELDINGReplies: 14Last Post: 8th August 2009, 02:23 PM -
The only failure in life
By Cliff Rogers in forum NOTHING AT ALL TO DO WITH WOODWORKReplies: 30Last Post: 1st September 2006, 02:12 PM
