

 Thanks: 0
 Likes: 0
 Needs Pictures: 0
 Picture(s) thanks: 0
Results 1 to 4 of 4
Thread: Upgrading an OWT.
-
20th June 2011, 12:11 AM #1
 Be inspired. Be creative. Be bold.


- Join Date
- Apr 2001
- Location
- Perth
- Posts
- 10,826
 Upgrading an OWT.
When Lee Valley recently offered a range of narrower irons for the Large Router Plane, I bought them .. and then had a brainstorm.
Some while back I built an OWT (Old Woman's Tooth), a wooden router plane. I made an iron for this out of a hex key. This worked pretty well.
The article/pictorial is here: Old Woman’s Tooth (OWT)
This is a small router plane, just 6 1/2" along its length and 3"deep. This places it about in the middle of the small and large LV router planes.
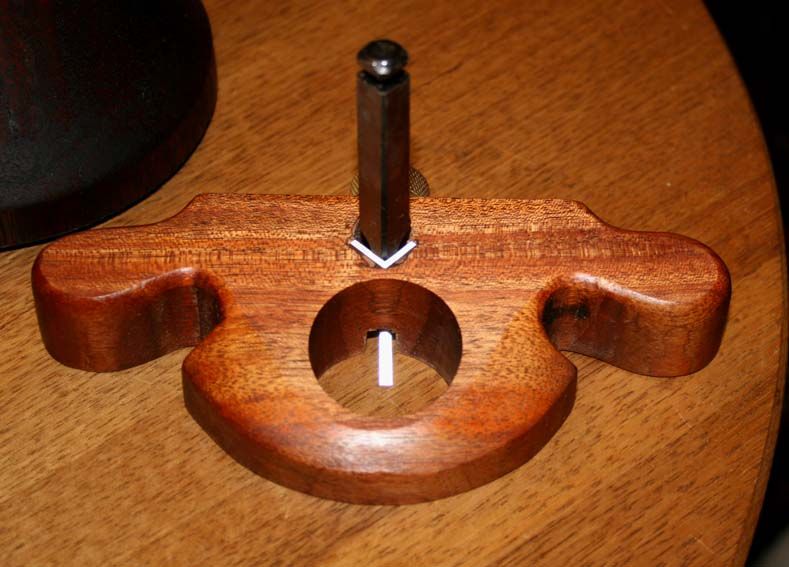
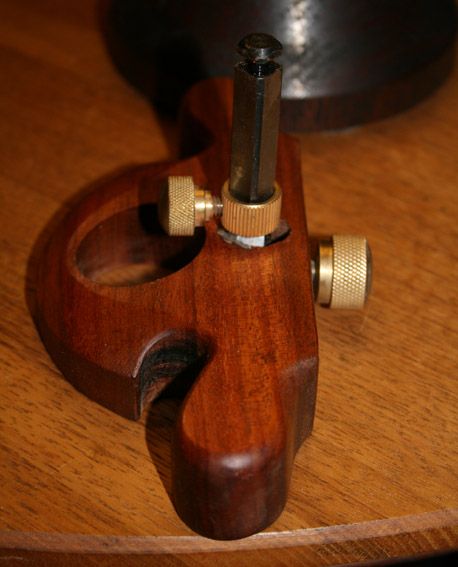
The OWT was intended for narrow blades, and I had planned to make more in the 1/16" - 1/8" range for use with inlay. However with the release of the new LV blades I decided to modify the OWT to use them instead.
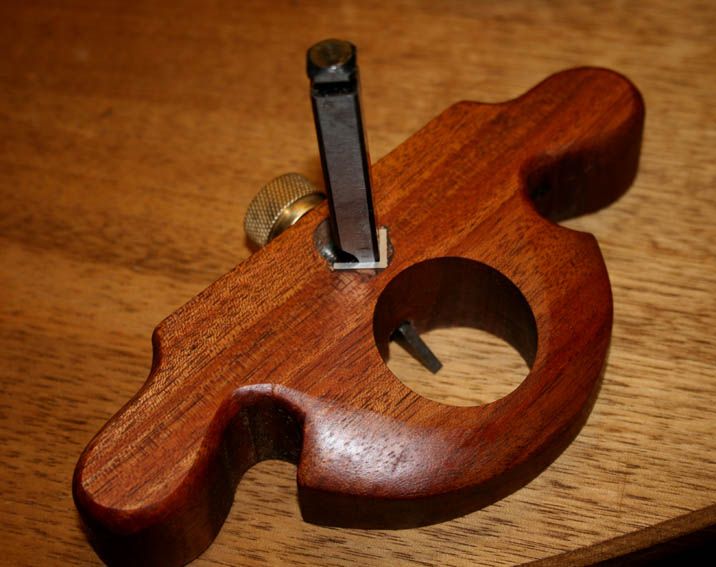
The modification is quite simple. Drill a hole, and drop in and epoxy a small section of aluminium angle to support the angled profile of the LV blade.
I have a screw pushing the blade against the aluminium section, but one could also use a wedge.
Wait ... there is more!
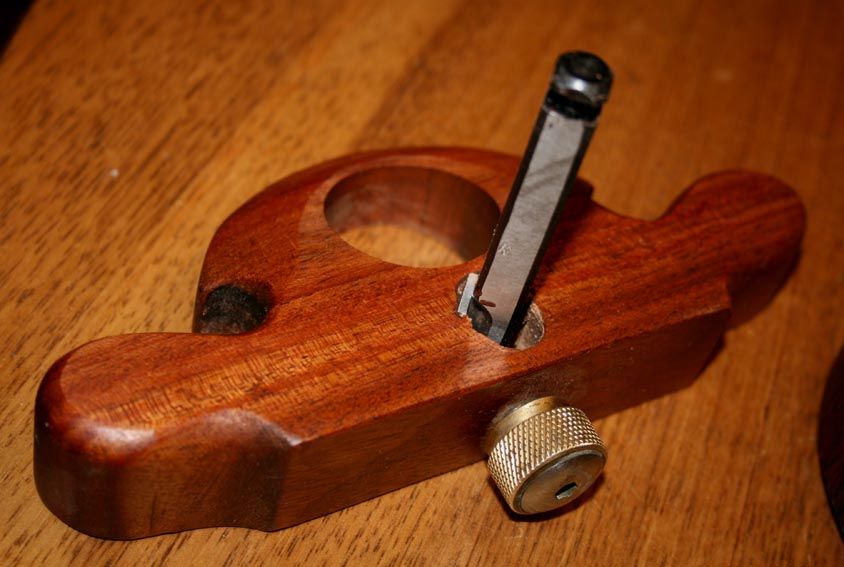
LV also recently replaced the depth stop on the Large Router Plane. This was something I had nagged them to do - I found the early split ring system fiddly and preferred the clamp on the LN version. Along the way I built my own depth stop, which is the version I showed LV.
Return to Shop Made Tools
LV came up with a better solution than mine, which I field tested for them. Excellent solution.
The replacement on the LV now freed up my shopmade version, and so I decided to add this to the OWT ...
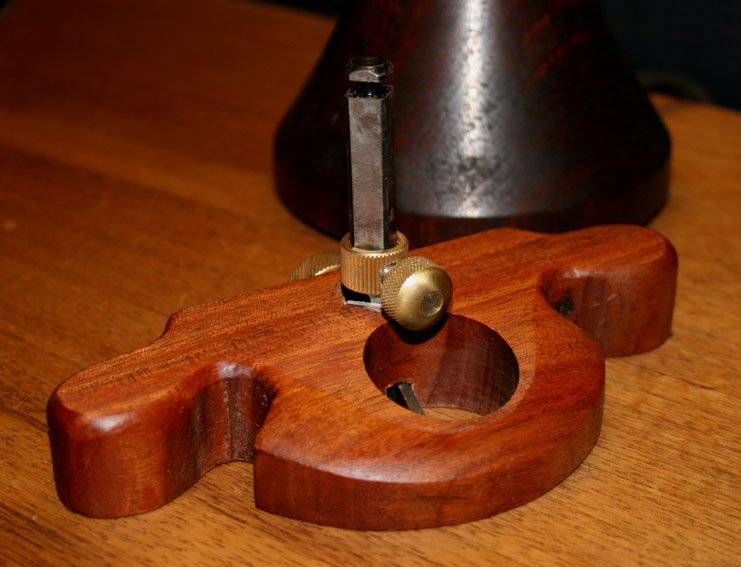
So there you are - if interested in building an OWT, consider using the LV or Stanley blades (which have the same profile).
Regards from Perth
DerekVisit www.inthewoodshop.com for tutorials on constructing handtools, handtool reviews, and my trials and tribulations with furniture builds.
-
20th June 2011 12:11 AM # ADSGoogle Adsense Advertisement
- Join Date
- Always
- Location
- Advertising world
- Posts
- Many
-
24th June 2011, 02:41 PM #2
Senior Member
- Join Date
- Apr 2010
- Location
- Adelaide
- Posts
- 191
Hi Derek,
Can you give us some more details about that hose fitting piece you turned into a tumb screw, I've been looking for them just at the local hardware stores and have not found anything that looks particularly suitable.
I take it you bought or grabbed the other heigh adjuster piece of another OWT...
Cheers
Simon
-
24th June 2011, 03:27 PM #3
Be inspired. Be creative. Be bold.
- Join Date
- Apr 2001
- Location
- Perth
- Posts
- 10,826
Hi Simon
I made the depth stop and the blade screw using similar techniques. The only items that I "borrowed" were the blade and the depth stop screw, both from LV. Look at hose-to-tap fittings for the brass connectors.
Link for making screws: MAKING LEVER CAPS AND LEVER CAP SCREWS IN THE BACKYARD
Link to pics on depth stops: Return to Shop Made Tools
Regards from Perth
DerekVisit www.inthewoodshop.com for tutorials on constructing handtools, handtool reviews, and my trials and tribulations with furniture builds.
-
24th June 2011, 07:16 PM #4
Mildly Moderate
- Join Date
- Nov 2007
- Location
- Albury Well Just Outside
- Posts
- 13,315
Interesting ideas, thank you for sharing.


 Reply With Quote
Similar Threads
-
upgrading.
By toby.1944@hotma in forum COMPUTERSReplies: 2Last Post: 17th August 2010, 11:18 PM -
lookning at upgrading
By weisyboy in forum WOODTURNING - GENERALReplies: 3Last Post: 13th September 2007, 06:48 PM -
Upgrading to the 2000
By Dion in forum TRITON / GMCReplies: 5Last Post: 20th July 2002, 11:29 PM
