

 Thanks:
  Likes:
  Needs Pictures: 0
 Picture(s) thanks:
Results 1 to 15 of 40
-
25th July 2019, 10:30 PM #1
 Member


- Join Date
- Aug 2016
- Location
- Ferny Hills
- Age
- 78
- Posts
- 94
 Zero Clearance insert for Minimax C26
Seeking help from any combination users, especially Minimax C26/C30, who have solved the issue of fitting a zero clearance insert.
Previously with my cabinet saw i found a zero clearance insert made cutting thin stock safer and easier.
With my C26 thin stock is often dropping through to the floor or getting caught on the blade and both destroying the thin stock and stalling the blade.
Any advice would be greatly appreciated.
Owen
-
25th July 2019 10:30 PM # ADSGoogle Adsense Advertisement
- Join Date
- Always
- Location
- Advertising world
- Age
- 2010
- Posts
- Many
-
26th July 2019, 12:23 AM #2
Be inspired. Be creative. Be bold.
- Join Date
- Apr 2001
- Location
- Perth
- Posts
- 10,824
Hi Owen
I built a ZCI for my Hammer K3. If no one comes along, this may work for you, or a modification. Shoot some pictures and post them here.
Regards from Perth
DerekVisit www.inthewoodshop.com for tutorials on constructing handtools, handtool reviews, and my trials and tribulations with furniture builds.
-
26th July 2019, 11:43 AM #3
GOLD MEMBER
- Join Date
- Jun 2005
- Location
- Helensburgh
- Posts
- 7,696
The link here will show how one was made for a K3 Hammer saw which I suspect is nowhere near the same but it shows the process,
CHRIS
-
26th July 2019, 12:32 PM #4
Be inspired. Be creative. Be bold.
- Join Date
- Apr 2001
- Location
- Perth
- Posts
- 10,824
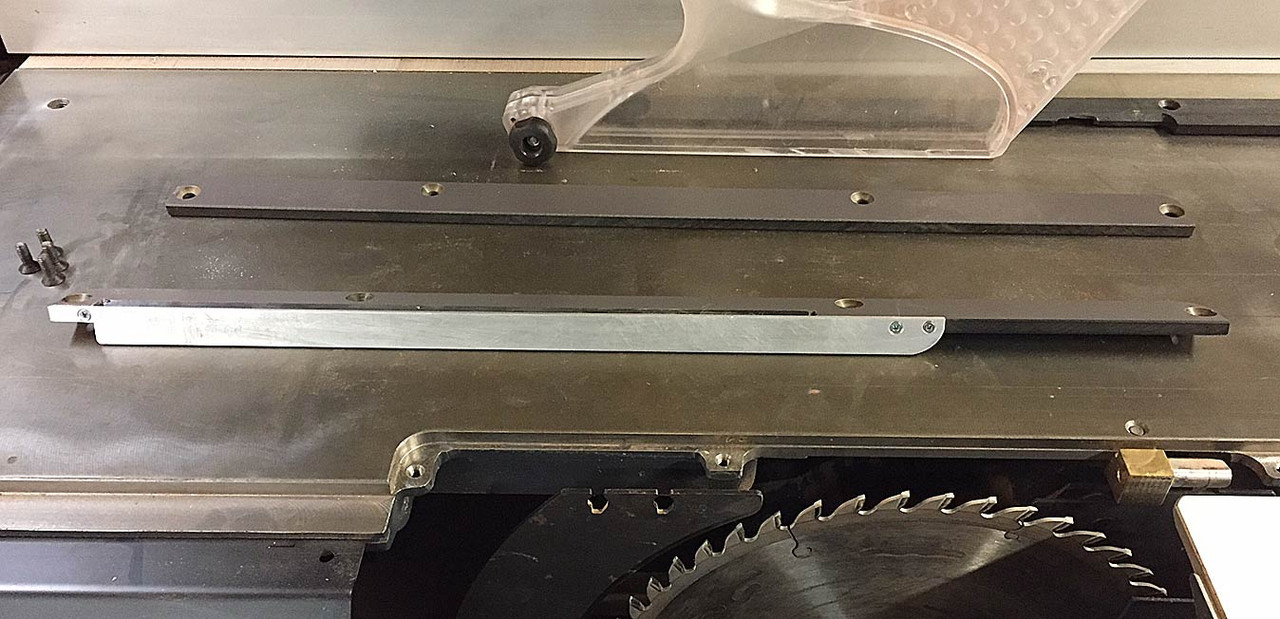
This is mine, built around the original insert. With rebates and recessed aluminium strip.

Regards from Perth
DerekVisit www.inthewoodshop.com for tutorials on constructing handtools, handtool reviews, and my trials and tribulations with furniture builds.
-
26th July 2019, 12:56 PM #5
Member
- Join Date
- Aug 2016
- Location
- Ferny Hills
- Age
- 78
- Posts
- 94
Thanks Derek for the pics, they give me ideas for how i might make one, unfortunately Minimax, in their "wisdom" have fixed the existing clearance insert to the table top from underneath which makes constructing a modification a pain.
Regards Owen
-
26th July 2019, 12:58 PM #6
Member
- Join Date
- Aug 2016
- Location
- Ferny Hills
- Age
- 78
- Posts
- 94
Thanks Chris for the link, it provides ideas for how i might make one, unfortunately Minimax, in their "wisdom" have fixed the existing clearance insert to the table top from underneath which makes constructing a modification a pain.
Regards Owen
-
26th July 2019, 04:39 PM #7
Senior Member
- Join Date
- Oct 2010
- Location
- Drouin Vic.
- Posts
- 166
Hi Owen,
I use a MiniMax SC-2 and have experienced the same issues. I made a ply replacement that was easy to fit and is held down by the original easy access screws from the top. However the ply infill beside the blade does break over time so I will now copy what Derek has done and see if I can use aluminum which will be stronger in the thin side section.
Cheers,
Paintman
-
26th July 2019, 07:15 PM #8
GOLD MEMBER
- Join Date
- Jun 2005
- Location
- Helensburgh
- Posts
- 7,696
Felder will supply a full insert fro the K3 which has to be cut by the blade in the same manner as a on a normal saw. It is meant for a Dado blade and when the blade is raised creates the kerf in the insert. Perhaps MM does the same or similar? It would be worth the ask. I used one for a normal blade but it has one big drawback and that is the blade cannot be tilted as that widens the original kerf, DAMHIKT.
 CHRIS
CHRIS
-
26th July 2019, 07:31 PM #9
Be inspired. Be creative. Be bold.
- Join Date
- Apr 2001
- Location
- Perth
- Posts
- 10,824
Hi Chris
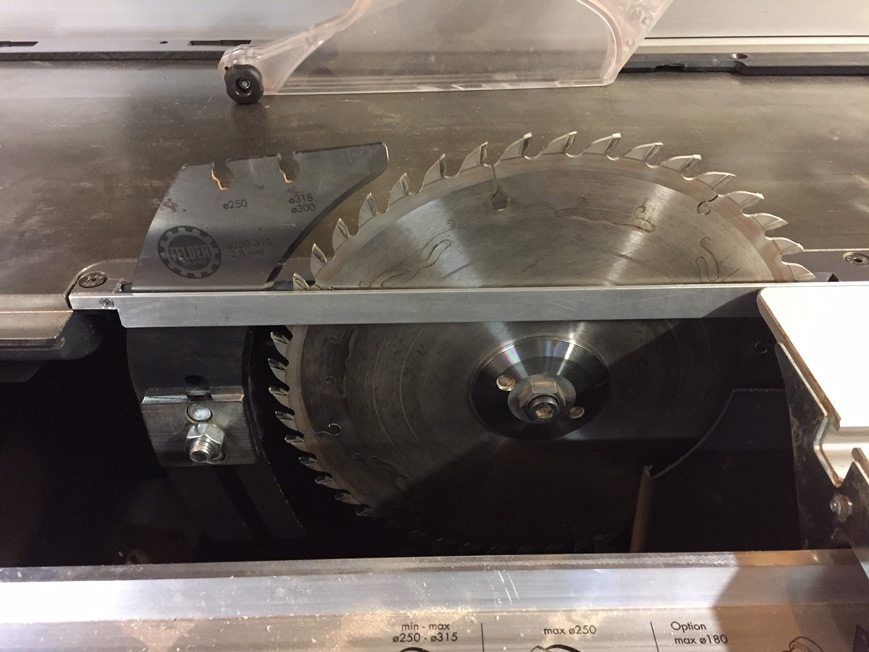
The dado blank insert is pictured above with the ZCI. For the K3, one requires 2 inserts: one for 90 degrees and another for 45 degrees. I cannot use the ZCI above for 45 degrees - if you look carefully you will see that it is chamfered on the inside. That was before I realised the aluminium would get in the way of the blade when angled. Fortunately, it is the slider side where the zero clearance is needed. The reason for aluminium is that I made one first from a dado insert, but the thin plastic remaining eventually snapped off. It is too fragile. The aluminium version has been going strong for several months.
Regards from Perth
DerekVisit www.inthewoodshop.com for tutorials on constructing handtools, handtool reviews, and my trials and tribulations with furniture builds.
-
26th July 2019, 11:50 PM #10
GOLD MEMBER
- Join Date
- Jun 2005
- Location
- Helensburgh
- Posts
- 7,696
Derek, I have found the way I use the saw it is the rip fence slide that eats the thin bits because I work from the slider for just about everything I do unless I have a (for me) particularly long rip.
CHRIS
-
26th July 2019, 11:56 PM #11
Be inspired. Be creative. Be bold.
- Join Date
- Apr 2001
- Location
- Perth
- Posts
- 10,824
Hi Chris
You are correct - I should have stated that it is OK that way when using the rip fence. As soon as my current project is done (got to finish this weekend to be in time for the Perth Woodshow furniture competition), then I have a bunch of tools to build or modify. Another ZCI will be made without the chamfer - good for ripping from the slider.
Regards from Perth
DerekVisit www.inthewoodshop.com for tutorials on constructing handtools, handtool reviews, and my trials and tribulations with furniture builds.
-
27th July 2019, 01:07 PM #12
GOLD MEMBER
- Join Date
- Jun 2005
- Location
- Helensburgh
- Posts
- 7,696
This may help, it is a deflector to go onto the rip fence side of the blade and is held by magnets. I have a PDF for making one, if you need it PM me but it doesn't look that hard. Deflector With Holding Magnets
CHRIS
-
27th July 2019, 11:00 PM #13
Member
- Join Date
- Aug 2016
- Location
- Ferny Hills
- Age
- 78
- Posts
- 94
Thanks Chris and Derek for your interest and advice, i have found a temporary solution by installing a false table top and fence. I will post pictures in a day or so. I still intend to build a 'proper' ZCI when i have the time to dismantle the machine to remove and refit the existing CI. Pictures added showing 1.cleat to fit factory fence, 2. false fence and table top, 3. cutting and 4. result. It achieves the objective of keeping the thin strips from falling to the floor or being chewed by or jamming the blade.Owen
20190728_140732 (2) (1280x643).jpg20190728_140654 (2) (1280x839).jpg20190728_141358 (1280x720).jpg20190728_141503 (2) (1280x815).jpg
-
29th July 2019, 05:44 PM #14
Senior Member
- Join Date
- Oct 2010
- Location
- Drouin Vic.
- Posts
- 166
Hi Owen,
I have now fitted my first attempt at the 4mm AL zero clearance plate and whilst it works fine I intend to make a larger version that enables the riving knife to be closer to the blade and to strengthen the rear section. I have removed the scoring blade for now and also fitted a new 250mm blade instead of the 300mm blade.
Cheers,
Paintman
-
29th July 2019, 06:38 PM #15
Member
- Join Date
- Aug 2016
- Location
- Ferny Hills
- Age
- 78
- Posts
- 94
Hi Paintman, That looks very effective, i just wish my existing clearance insert was mounted from the top like yours. I intend to try and make a wooden one but what i have made works for now. Owen

 Reply With Quote
Similar Threads
-
Zero clearance insert - Thin steel insert plate
By Fuzzie in forum GENERAL & SMALL MACHINERYReplies: 20Last Post: 15th March 2018, 11:11 AM -
Zero Clearance Insert
By spartan in forum HAND TOOLS - POWEREDReplies: 16Last Post: 9th July 2007, 11:00 PM -
Zero Clearance Insert
By rrich in forum SAFETYReplies: 4Last Post: 7th December 2006, 05:31 AM -
zero clearance insert
By tonysa in forum HAND TOOLS - POWEREDReplies: 5Last Post: 15th June 2006, 12:21 AM
