

 Thanks:
  Likes:
  Needs Pictures: 0
 Picture(s) thanks: 0
Results 1 to 15 of 26
Thread: Snipe saga
-
17th July 2016, 07:17 PM #1
 Senior Member


- Join Date
- Feb 2014
- Location
- Canberra, Australia
- Posts
- 370
 Snipe saga
I'm sure snipe comes up a lot in these forums, but I'm exasperated!
Firstly, here's over 10mm of thickness from a Brush Box board:
_shavings.jpg
I tried everything including lifting up on the board on the way in, pulling up on it on the way out.
I tried leading with a different sacrificial piece and chucking one through after it as well like in this video.
I tried making a sacrificial hardwood jig to carry the board through too and help bear the force consistently ...
_board.jpg
I think I'll just have to go buy more Brush Box and leave 4" each end and saw it off after thicknessing
Sounds wasteful, but look at that pile of shavings ... can't be worse than that.
-
17th July 2016 07:17 PM # ADSGoogle Adsense Advertisement
- Join Date
- Always
- Location
- Advertising world
- Posts
- Many
-
17th July 2016, 07:35 PM #2
GOLD MEMBER
- Join Date
- Mar 2008
- Location
- Townsville, Nth Qld
- Posts
- 4,236

The normal way of fixing snipe is to have the workpiece dead exactly parallel with the thicknesser table, on the infeed and outfeed. Use rolling supports to do this. I set my roller supports up with a long straight piece of aluminium rectangular square section. or a flat bit of timber, on the thicknesser table, and reaching both infeed and outfeed support rollers, so that everything is aligned
Using sacrifical pieces the same thickness, as the workpiece and about 6 inches long placed before and after the workpiece should always work, provided there is no gap between them.Tthere is no reason for snipe there with this method.
And make sure you have waxed and polished the thicknesser table under the bladesregards,
Dengy
-
17th July 2016, 07:44 PM #3
GOLD MEMBER
- Join Date
- Mar 2008
- Location
- Townsville, Nth Qld
- Posts
- 4,236
The way the video shows should lead to snipe on the trailing edge, as there is no support for the piece as it exits the thicknesser. You will notice it drops down, which is the cause of snipe in the trailing edge
regards,
Dengy
-
17th July 2016, 09:12 PM #4
Senior Member
- Join Date
- Feb 2014
- Location
- Canberra, Australia
- Posts
- 370
Thanks just watching this video on that - I use a door as a workbench so I'll have to think about how I might achieve dead level in/out feed. Originally Posted by Dengue

-
17th July 2016, 09:14 PM #5
GOLD MEMBER
- Join Date
- Oct 2014
- Location
- Caroline Springs, VIC
- Posts
- 1,645
The video of butt feeding stock through a thicknesser to reduce/eliminate snipe is a tried and proven method. You want to make sure that you don't just place the next board up against the previous board, make sure you actually apply considerable pressure hard against the previous board.
lifting the tail end of the board for infeed and outfeed also works to some extent. I do it always for the first piece and the last piece. Better yet, if you can physically bend the piece to the point of ALMOST breaking, this will apply alot of downwards force onto the table at the leading end of the board.
figure out the distance of snipe that your thicknesser does create, and then just add that much to each end of the boards when rough cutting to length. I add 50mm for my boards, but if I am rough cutting and I am going to end up with an offcut of 100mm, i just leave it a full 150mm longer overall.
-
17th July 2016, 09:20 PM #6
Senior Member
- Join Date
- Feb 2014
- Location
- Canberra, Australia
- Posts
- 370
I like this one too ... a full length table that goes through the thicknesser; that would work better with my bench setup.
https://www.youtube.com/watch?v=Eadz-uNuD-4
-
17th July 2016, 10:51 PM #7
GOLD MEMBER
- Join Date
- Feb 2003
- Location
- back in Alberta for a while
- Age
- 68
- Posts
- 12,006
the simple answer is to cut your wood to length after thicknessing
regards from Alberta, Canada
ian
-
18th July 2016, 01:22 AM #8
Senior Member
- Join Date
- Nov 2015
- Location
- Whangarei, New Zealand
- Age
- 70
- Posts
- 282
There are so many options for things to go wrong.
The infeed and outfeed tables need to be coplanar or you'll strike trouble.
I'm really not a friend of those built in rollers at the end of infeed/outfeed.
To work at all, the rollers need to be a tad higher than the table. So think
about the geometry of what happens when the leading edge of the stick
comes out of the machine and hits that roller ... lift. Similarly, when the
trailing end leaves the roller and drops down on the actual table.
I also think holding the timber steady and at the exact height of the table is
incredibly important, and will be made harder by those little rollers. A good
straight cast iron or milled aluminium table is going to be better.
The problem with free standing rollers is, every time you change the thickness
on the planer (assuming your planer lifts the lower table like most do) you need
to readjust the freestanding rollers, and you have to get them *precise*. Getting
a really good feel for holding the timber up as it comes out of the machine and
maintaining that height exactly as the trailing edge comes through worked for
me when I was working with a little Electra over-and-under machine.
If your machine has rollers opposing the knives, adjustment is also very important,
they must not be too high.
Press the stick down on the table as you feed in, lift to exactly the right height
as it comes out.
And, what Ian said: if you have trouble with snipe, allow for 50-60mm at either end
when you plane and cut to size after. That was also what I did at times when I
just could not manage to eliminate snipe.
I certainly find that having a bigger machine, a 15" planer with longer, solid extensions
either side has made it much easier to not struggle with snipe.
-
18th July 2016, 02:43 AM #9
Be inspired. Be creative. Be bold.
- Join Date
- Apr 2001
- Location
- Perth
- Posts
- 10,826
Not only must the in-/outfeed tables be coplanar, but they must remain so - that is, the weight of the boards must not cause the outfeed to drop or deflect (forcing the end of the boards to lift into the blades).
When I had this Delta, the outfeed caused snipe. This went away once the tables were made rigid through this modification ..
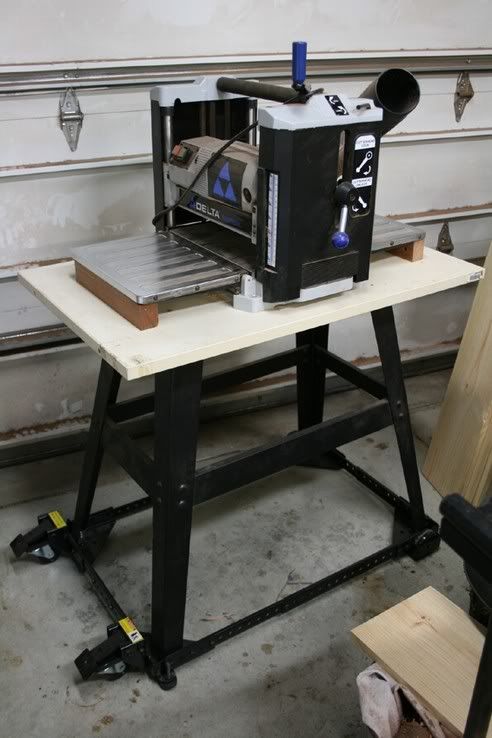
Hope this helps.
Regards from Perth
DerekVisit www.inthewoodshop.com for tutorials on constructing handtools, handtool reviews, and my trials and tribulations with furniture builds.
-
21st July 2016, 10:15 PM #10
Senior Member
- Join Date
- Feb 2014
- Location
- Canberra, Australia
- Posts
- 370
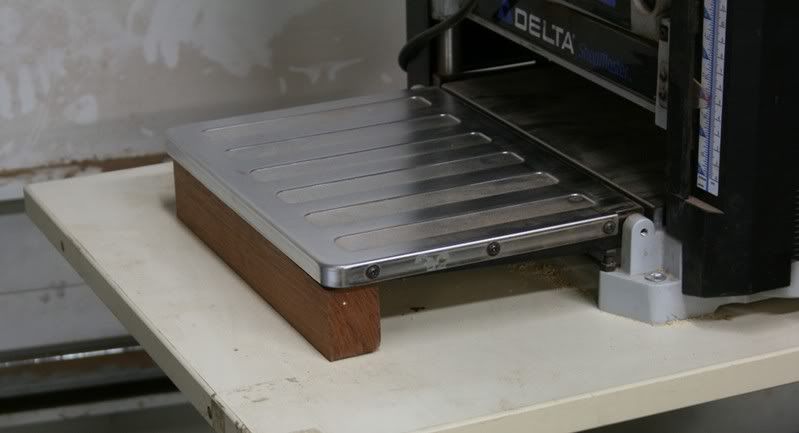
Any idea how to remove the infeed/outfeed tables altogether?
They're now redundant with my melamine bed, but I can't figure out how this hinge pin works and how to remove it:
hinge.jpg
This is a Ryobi AP13K
-
21st July 2016, 10:17 PM #11
Senior Member
- Join Date
- Feb 2014
- Location
- Canberra, Australia
- Posts
- 370
Thanks Derek, I'm setting up something similar but just using machinist's jacks under the melamine bed I now have running right through the thicknesser and then clamping down on them.
-
22nd July 2016, 03:42 AM #12
GOLD MEMBER
- Join Date
- Aug 2007
- Location
- St Georges Basin
- Posts
- 1,017
These days I'm using a lot of eucalyptus and find it is susceptible to tear out in the planer as well as the snipe problem. My own solution is to use a drum sander for the final few passes down to desired thickness, removes the snipe marks and tear outs.
-
22nd July 2016, 01:39 PM #13
Senior Member
- Join Date
- Nov 2015
- Location
- Whangarei, New Zealand
- Age
- 70
- Posts
- 282
If you're getting tear-out, most likely your blades are not quite up to sharpness and the feed is too aggressive (speed and thickness of cut).
I find if I take thin cuts and use the slow speed on the planer I get significantly fewer problems with tear-out, if any.
I also look very carefully so I cut with the grain rather than against it. ==> /////// and not ==>\\\\\\\\
Admittedly there are some sticks that you just can't do anything with other than plane them cross-grain by hand. The nicely featured wood
around knots can have grain running every which way.
-
22nd July 2016, 07:18 PM #14
Senior Member
- Join Date
- Feb 2014
- Location
- Canberra, Australia
- Posts
- 370
-
23rd July 2016, 05:37 PM #15
Senior Member
- Join Date
- Feb 2014
- Location
- Canberra, Australia
- Posts
- 370
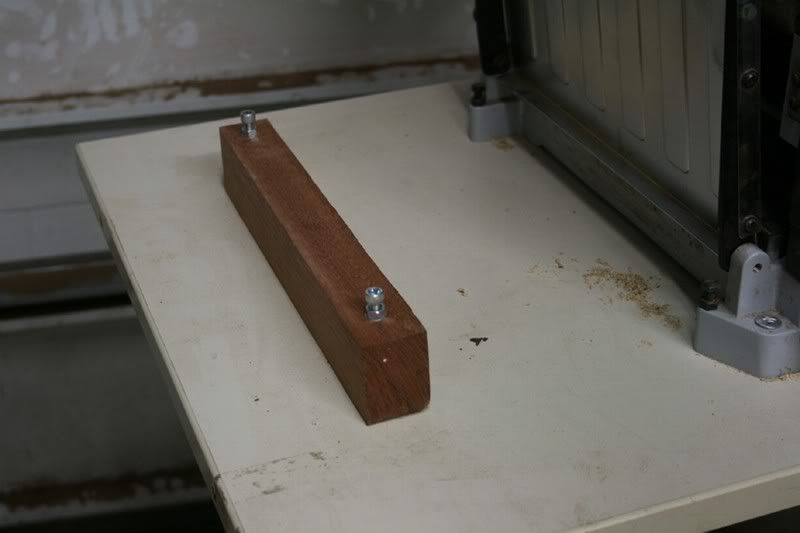
2400mm length of 16mm MDF with the ends raised a few mm above the thicknesser bed and clamped down in the middle so it's a bit bowed, mimicking manually pulling up on the board as has been suggested ... an improvement in a test piece with no snipe on the leading edge, some on the tailing ... but the brush box boards showed only some improvement with the snipe worse on the right side, could be the blades but most likely it's just going to be reeeally hard to calibrate the board to get consistent pressure in all axes, especially as the thicknesser has to be packed up and stowed after every weekend.
bed.jpg


 Reply With Quote


Similar Threads
-
Snipe with different materials?
By Lee roy in forum WOODWORK - GENERALReplies: 4Last Post: 24th July 2012, 11:37 AM -
Snipe from Thicknesser
By Black Bear in forum HINTS & TIPSReplies: 3Last Post: 3rd December 2009, 06:42 PM -
Jig to stop snipe
By boxers in forum HOMEMADE TOOLS AND JIGS ETC.Replies: 1Last Post: 9th March 2006, 09:54 PM -
Ryobi Snipe
By Purse in forum WOODWORK - GENERALReplies: 3Last Post: 1st February 2006, 07:51 PM -
Dreaded Snipe
By Barry F in forum WOODWORK - GENERALReplies: 3Last Post: 2nd September 2005, 08:48 PM
