

 Thanks:
  Likes:
  Needs Pictures: 0
 Picture(s) thanks: 0
Results 1 to 15 of 21
Thread: jeffwood table saw.
-
30th June 2013, 06:53 PM #1
 Member


- Join Date
- May 2011
- Location
- Redbank Plains QLD
- Posts
- 87
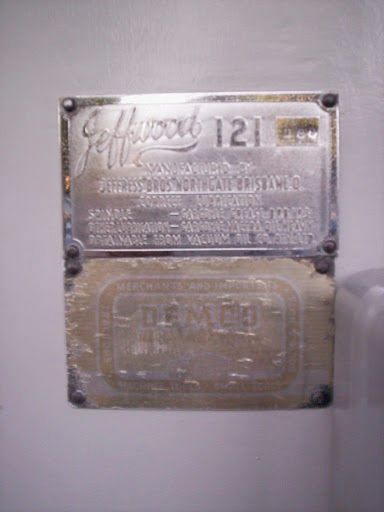
 jeffwood table saw.
To wet and cold to do any painting so I have started pulling table saw down. This is not tiltable.
020.jpg022.jpg023.jpg024.jpg
Looks like it should have a disc sanding attachment which would mount to the main shaft. I`m only guessing about this. hopefully someone can shed some light on this.
021.jpg
Also missing is I think a guard or spreader blade when the normal blade is mounted or something that mounts to the four bolts.
026.jpg025.jpg
regards Ross
-
30th June 2013 06:53 PM # ADSGoogle Adsense Advertisement
- Join Date
- Always
- Location
- Advertising world
- Posts
- Many
-
30th June 2013, 07:37 PM #2
Rusty doesn't mean its dead
- Join Date
- Dec 2010
- Location
- Melbourne, Australia.
- Posts
- 825
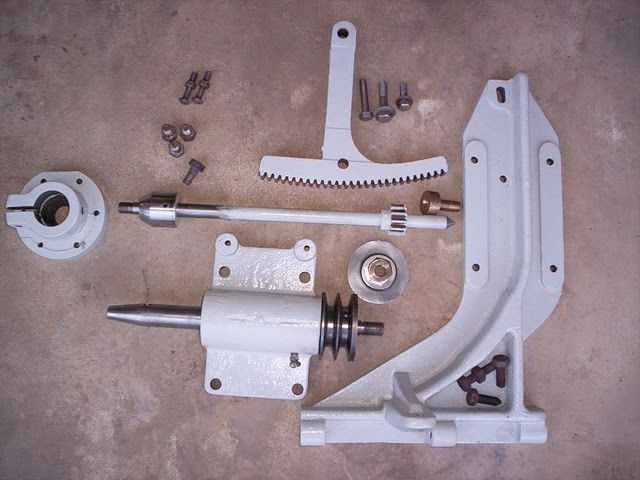
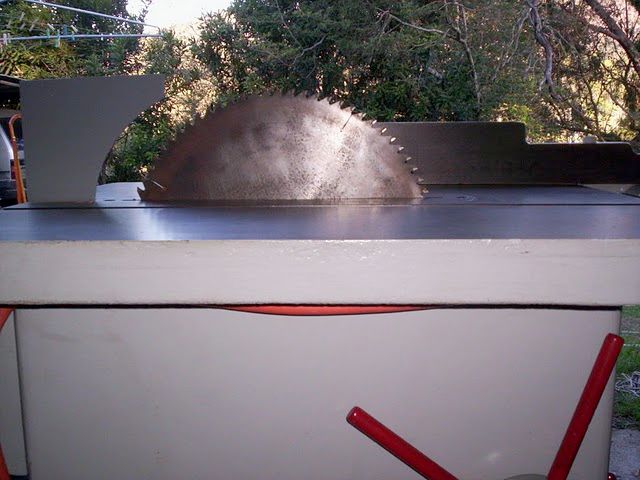
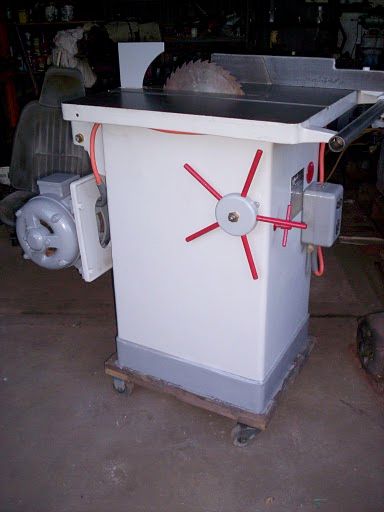
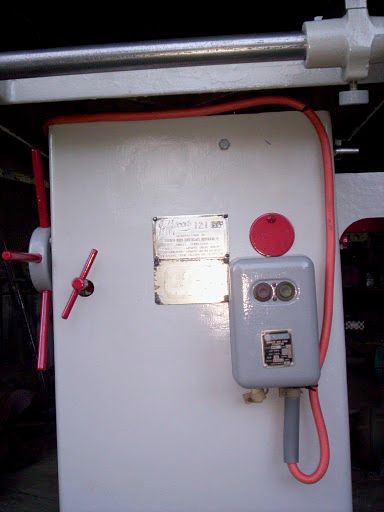
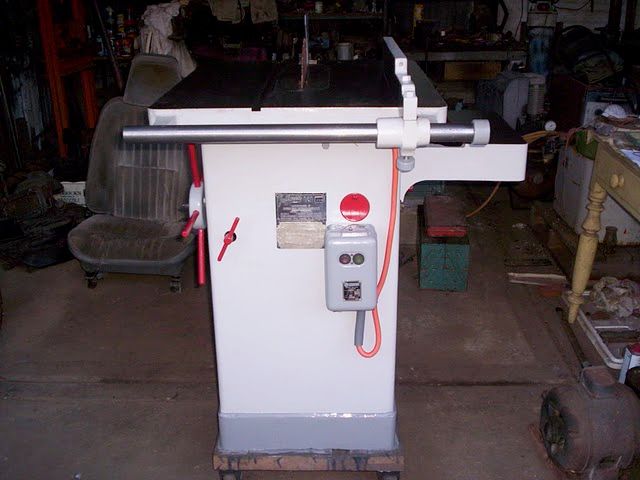
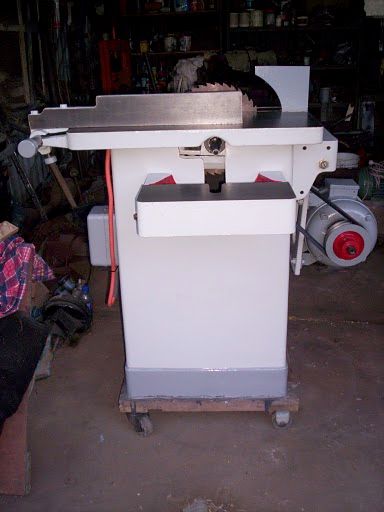
Ross, some one did a magnificent job on restoring one of these table saws and had it for sale a while back.
I hope they don't mind me putting up some Pic's, but it was a beautiful job and a lot of attention to detail, luck person that purchased it, there would be years of reliability, every thing was done, oh BTW the table to the side can also be used as a horizontal borer or doweling.
Melbourne Matty.
-
30th June 2013, 08:03 PM #3
Member
- Join Date
- May 2011
- Location
- Redbank Plains QLD
- Posts
- 87
Thanks Matty.
That helps heaps.
The spreader blade is what I thought.
Not sure what you mean about the side bit.
-
1st July 2013, 10:02 PM #4
Member
- Join Date
- May 2011
- Location
- Redbank Plains QLD
- Posts
- 87
-
2nd July 2013, 11:03 AM #5
Rusty doesn't mean its dead
- Join Date
- Dec 2010
- Location
- Melbourne, Australia.
- Posts
- 825
Ross, here are some pics with a similar set up from an C&H Alta combination machine with a horizontal boring attachment.. Originally Posted by 2blast67

Melbourne Matty.
-
2nd July 2013, 04:51 PM #6
Member
- Join Date
- May 2011
- Location
- Redbank Plains QLD
- Posts
- 87
Originally Posted by L.S.Barker1970
Thanks Matty
Thats what I had in mind. I had my doubts to this idea because I couldn`t see how you could control depth and squareness accurately and safely. But with the cutout on the bed made me think something must pass through it.
Ross
-
3rd July 2013, 06:04 PM #7
Member
- Join Date
- May 2011
- Location
- Redbank Plains QLD
- Posts
- 87
-
4th July 2013, 10:10 PM #8
Member
- Join Date
- May 2011
- Location
- Redbank Plains QLD
- Posts
- 87
-
9th July 2013, 12:12 AM #9
Member
- Join Date
- May 2011
- Location
- Redbank Plains QLD
- Posts
- 87
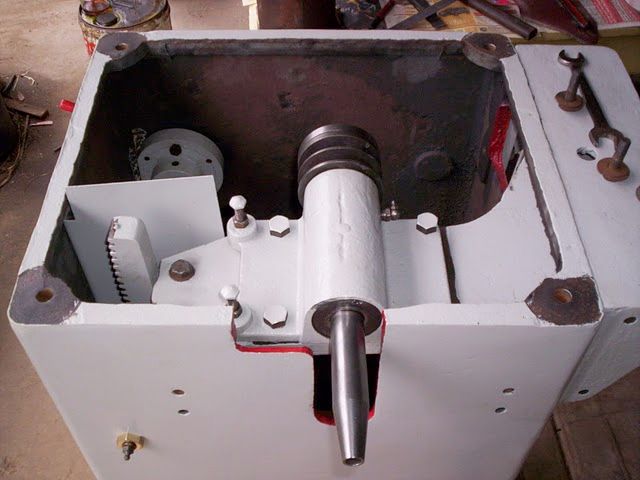
Starting to put everything back on.
This is the shaft for raising and lowering the saw blade.
Attachment 276082Attachment 276083Attachment 276084Attachment 276085
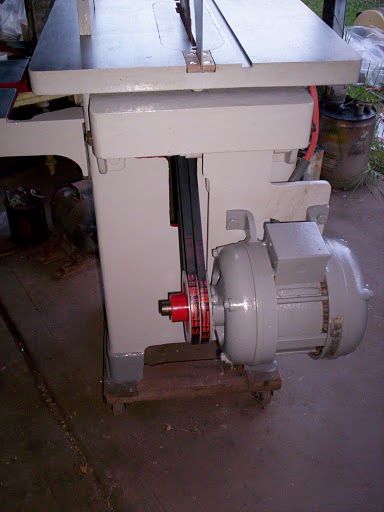
Motor mount plate fits to the cast frame in the above photo (with the four bolts) When the motor is fitted it acts like a counter weight for raising and lowering the blade.
Attachment 276086004.jpg
Front view
Attachment 276087
-
1st January 2016, 09:02 PM #10
New Member
- Join Date
- Apr 2013
- Location
- Toowoomba Qld
- Posts
- 7
I know this is an old thread but I just picked up a Jeffwood 121 table saw on Monday.
I am in the process of doing a restoration on it, not a full resto and paint, but restore it to a nice functioning table saw.
I have stripped it down, given everything a good clean and am servicing everything and putting it back together.
I can find hardly anything on these saws, even half the pictures in this thread don't work.
Can anyone shed any light on the spindle bearings ?
Are they easy enough to get replacements & easy enough to change ?
There is a cap on the non saw blade end of the spindle with 2 holes on the outer edge (can be seen in the pictures of the white one above) and its stamped LH so guessing its a left hand thread. Was planning to make a tool with 2 pins to drop into the holes and see if it wanted to open up for me. The bearings still feel okay but sound rather dry and at a minimum I would like to give them a good clean and re-grease them with the correct grease. If they can be bought cheap enough and easy enough I will probably just replace them as I dare say they are 65ish years old so could do with a freshen up.
Any help greatly appreciated.
Thanks
-
6th January 2016, 12:31 AM #11
New Member
- Join Date
- Apr 2013
- Location
- Toowoomba Qld
- Posts
- 7
Since no one else has I'll answer my own question in case anyone else up here looking for the answer also.
The spindle bearings are 6206 bearings, there are 2, one front, one back.
To strip the spindle down you remove the pulley off the front, its threaded on, right hand thread so lefty loose. There are then 2 bearing retainer caps, the one on the blade end of the spindle is right hand thread, the one on the back is left hand thread. One you have the pulley and those 2 bearing caps off its a nice easy press apart job.
My spindle has some busted threads and the pulley is not in great shape so I'll be replacing those so assembly may be a couple of weeks away, I'll post some pictures when its done.
Cheers
Wayne
-
2nd January 2017, 12:28 AM #12
New Member
- Join Date
- Apr 2013
- Location
- Toowoomba Qld
- Posts
- 7
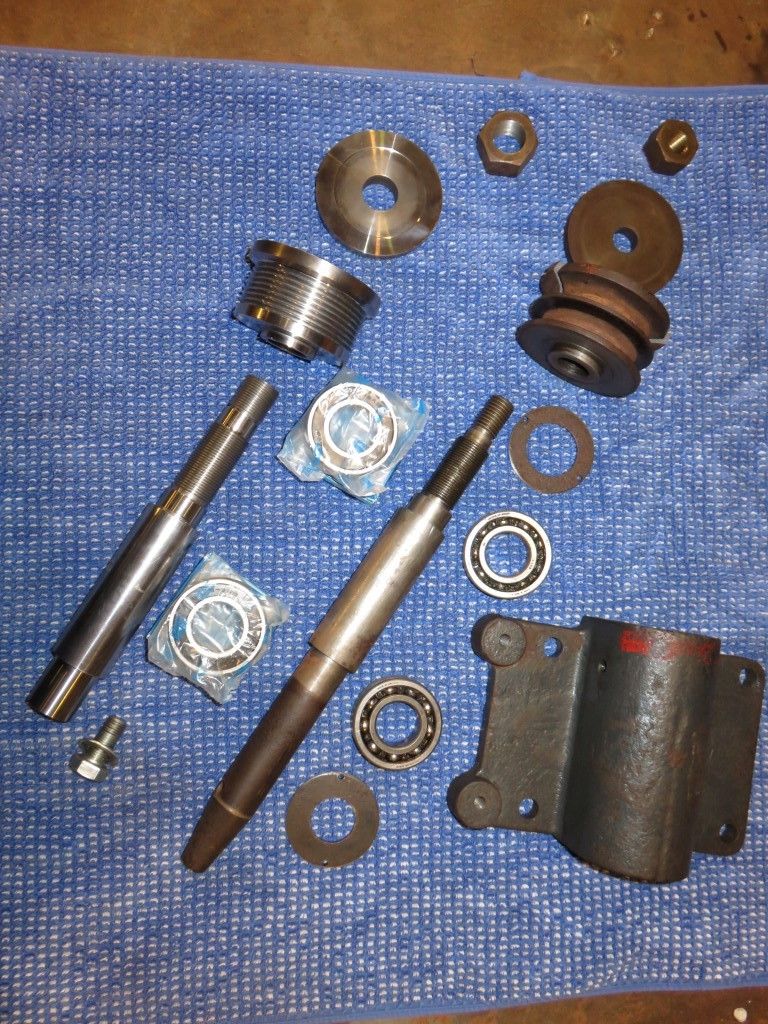
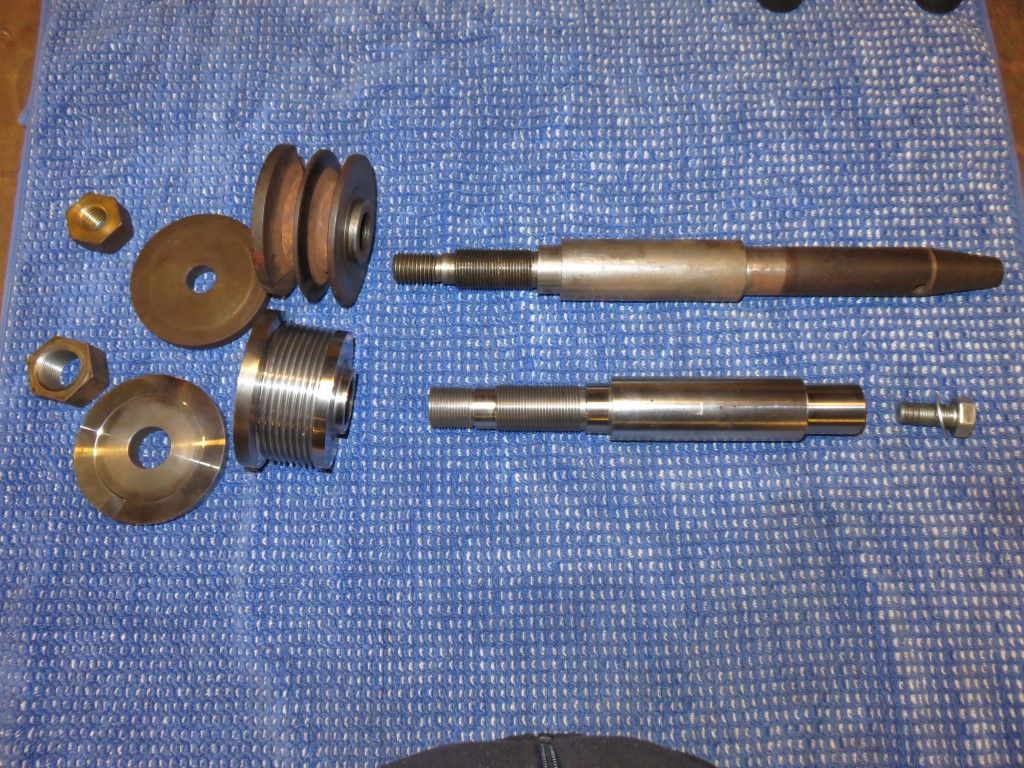
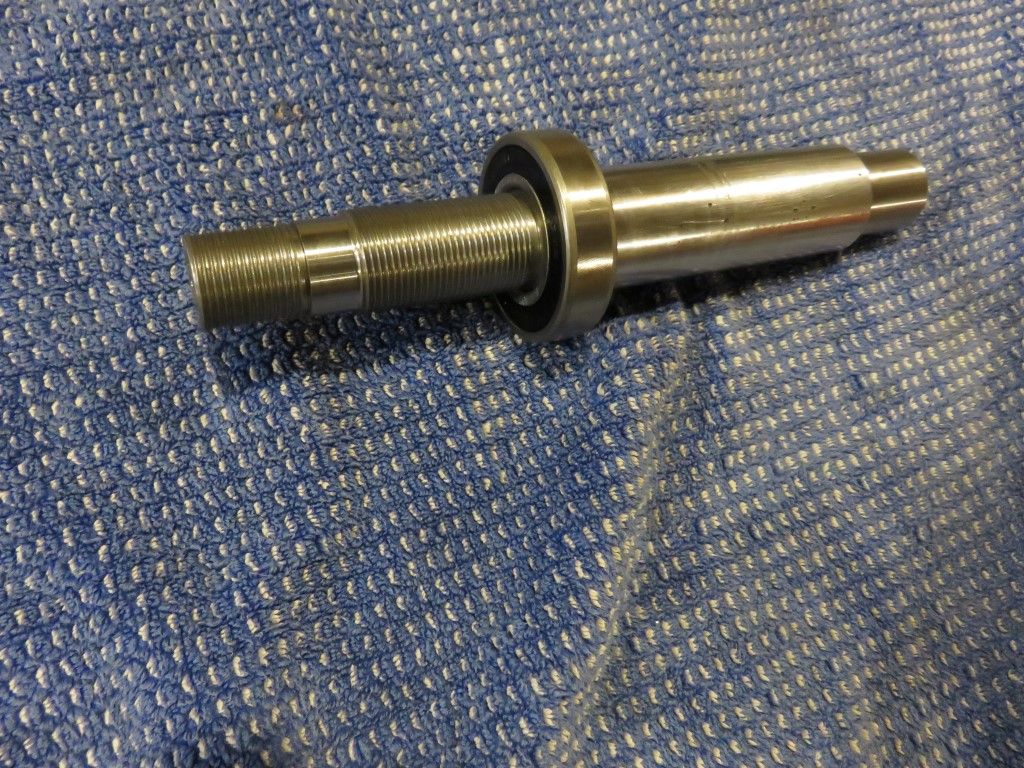
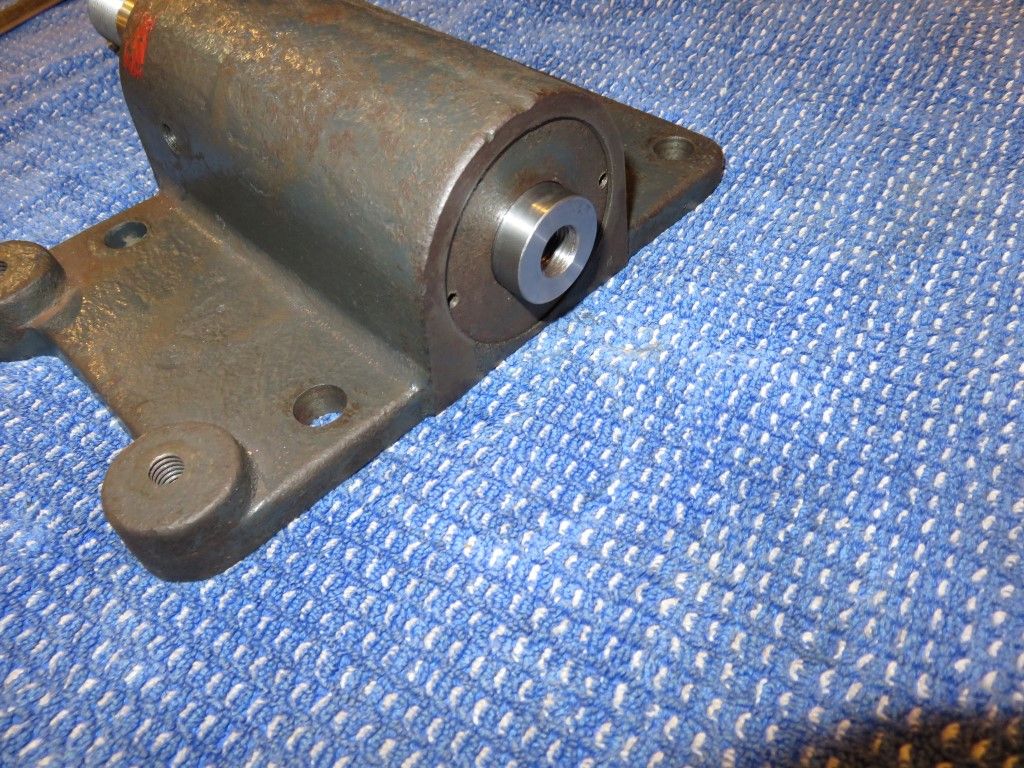
So realized the other day that I forgot to come back and post the update. Ended up making a new spindle.
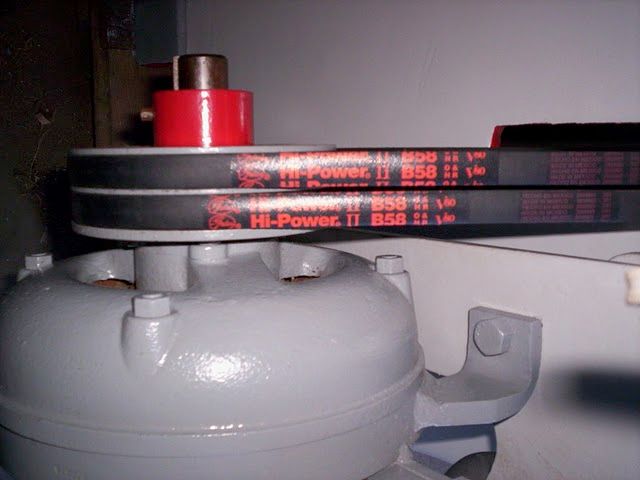
Changed from the 3/4" blade bore to 1" to match the newer blades. Went from twin V belts to a 8pk automotive style belt. Changed the back of the spindle to put accept a bolt to make tightening the blade easier and to give clearance as in the future I want to have a router table on the side where there was meant to be a horizontal borer or sander table.
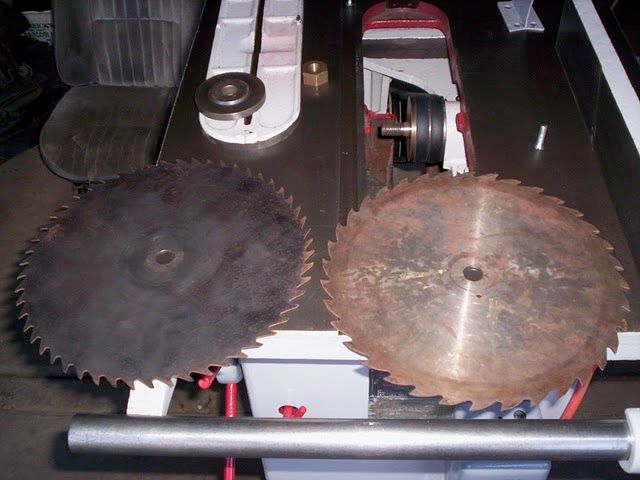
New spindle next to old one showing the layout
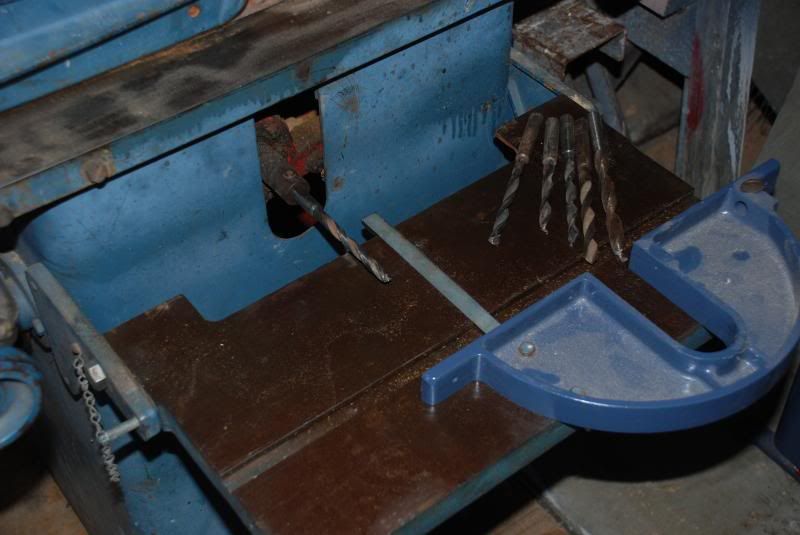
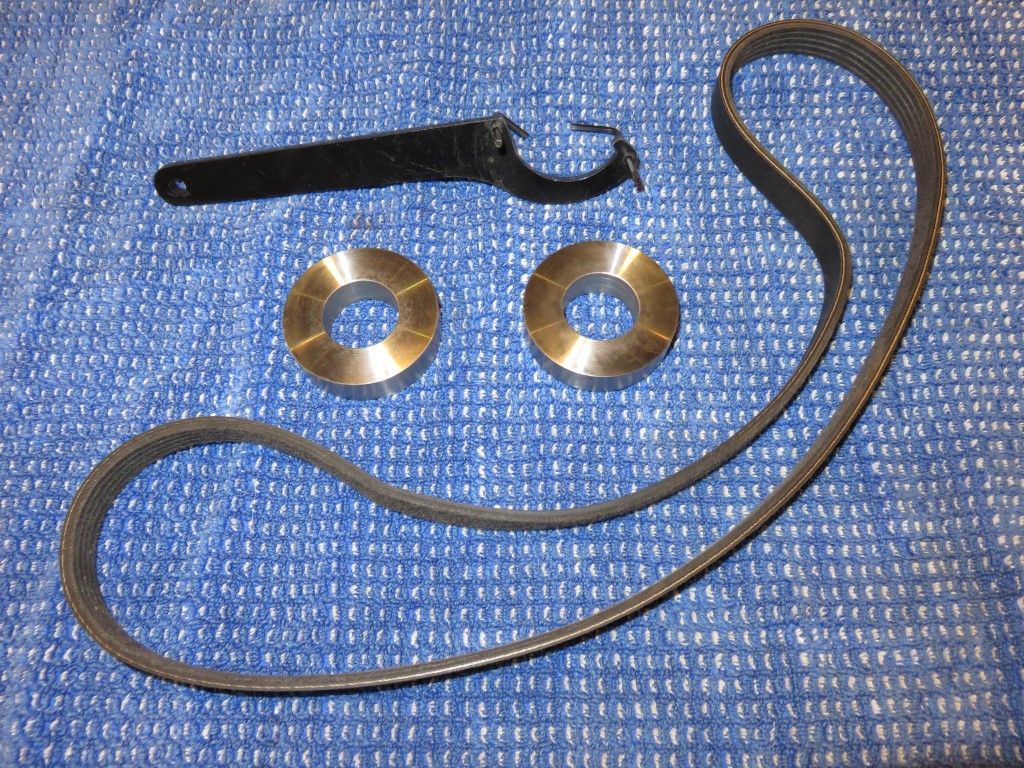
"Special" Tools that I used to put the whole lot back together, ER40 collet nut spanner drilled and 2 x allen keys for a makeshift pin spanner, 2 x dummy bearings / press plates, ID oversize and OD undersize to give clearance, belt to tighten the pulley.
Order or assembly ( or at least how I did it)
Press front bearing onto shaft
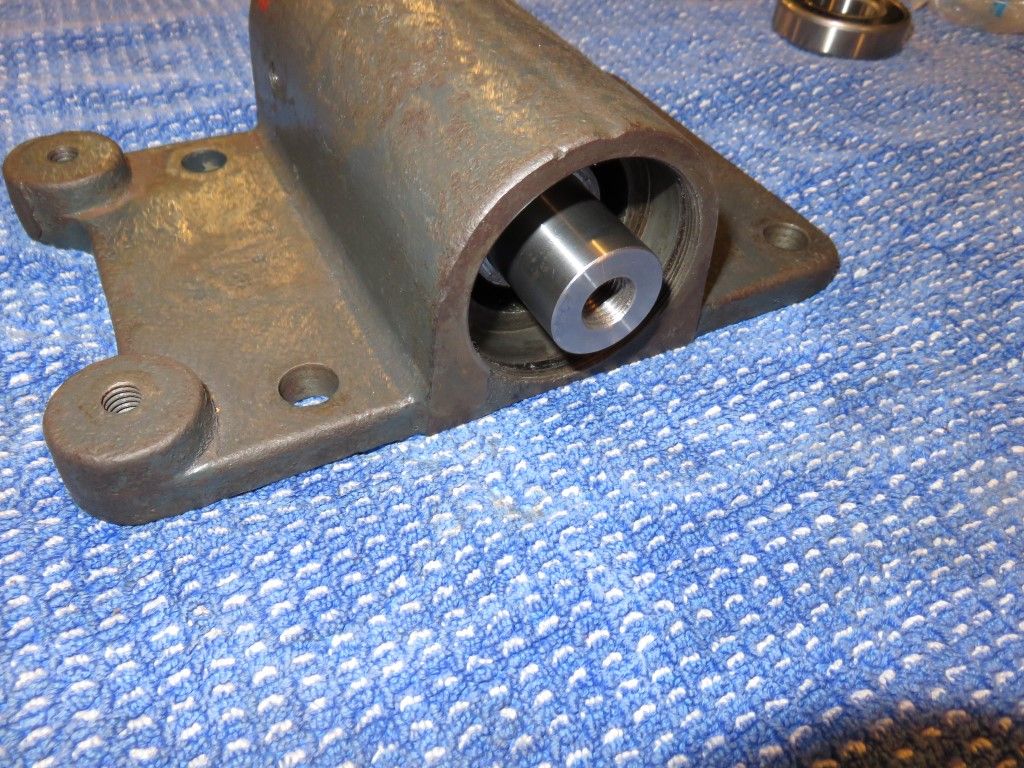
Press shaft from the front back into the housing
It's a little hard to see in this pic but the bearing space on the shaft goes deeper then on the housing, this means that the bearing will bottom out on the outer race before the inner race. Putting the bearing in is a press fit on both the housing and shaft, this means the bearing needs to be supported on both races, hence the tools shown above.
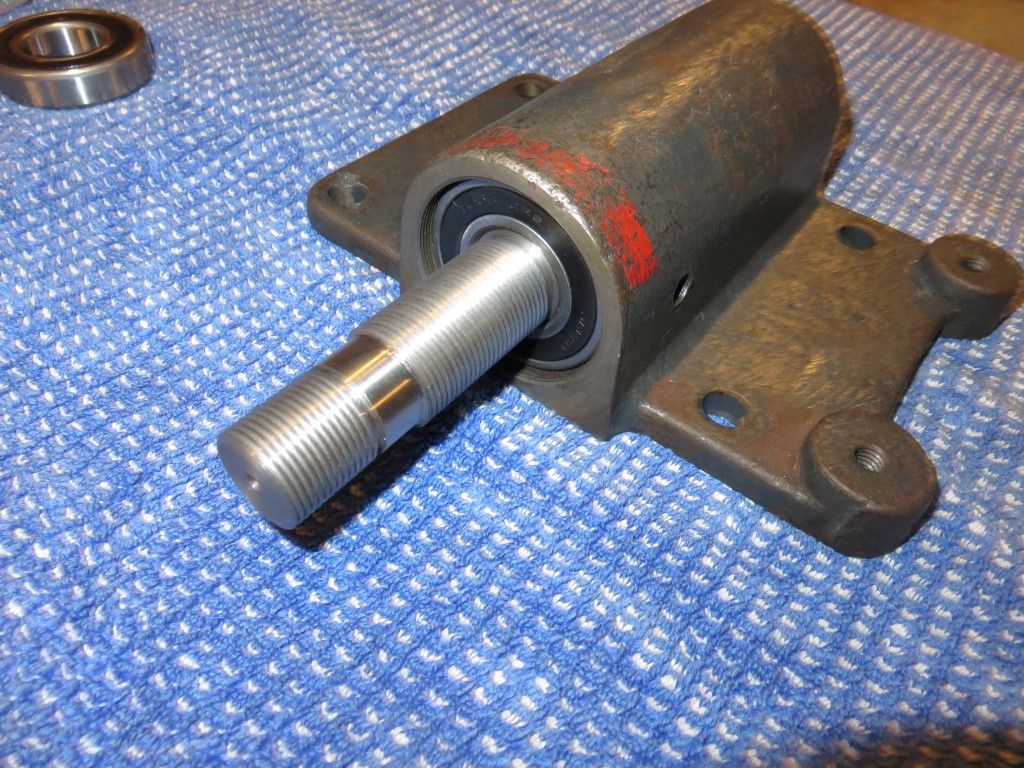
And the bearing in place
Back retainer cap back in place, mine had a slight cone shape, if you put them on the bench you should be able to pick it quite easy. You want it pushing against the outer bearing not the inner bearing.
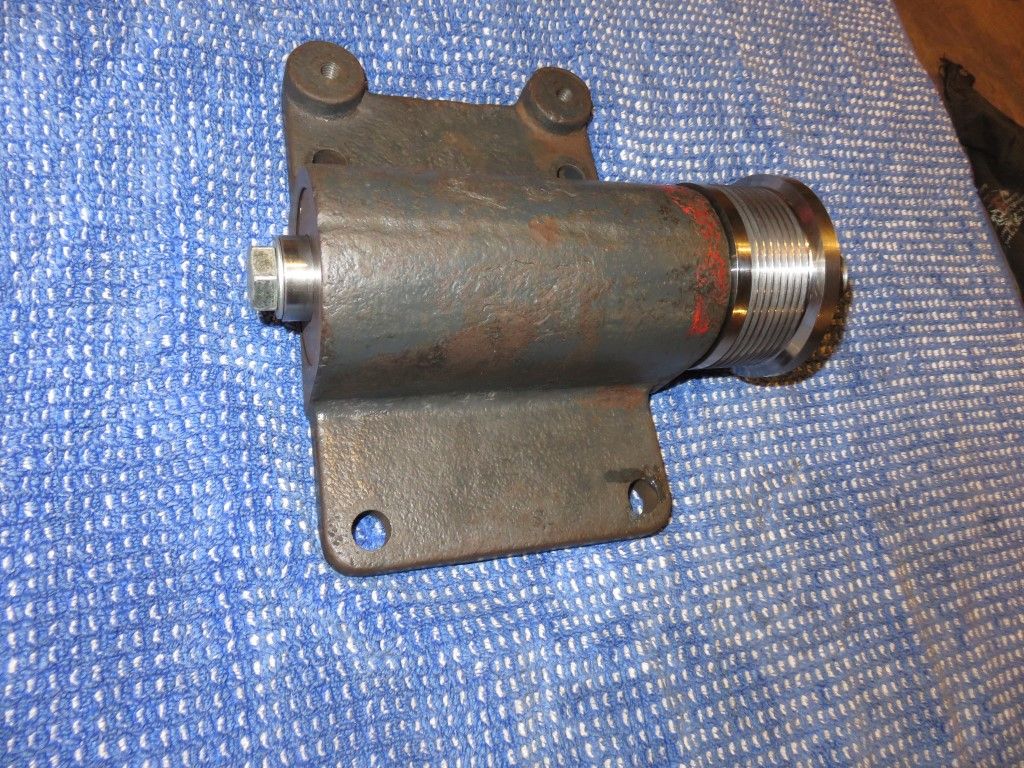
Front retainer cap in place and pulley ready to go on, note the boss on the back of the pulley, this locks the inner race of the front bearing to the spindle shaft.

And that hex drive on the end comes in handy here, the belt is used to grip the pulley, by pinching the belt over itself it tensions on the pulley and won't slip.
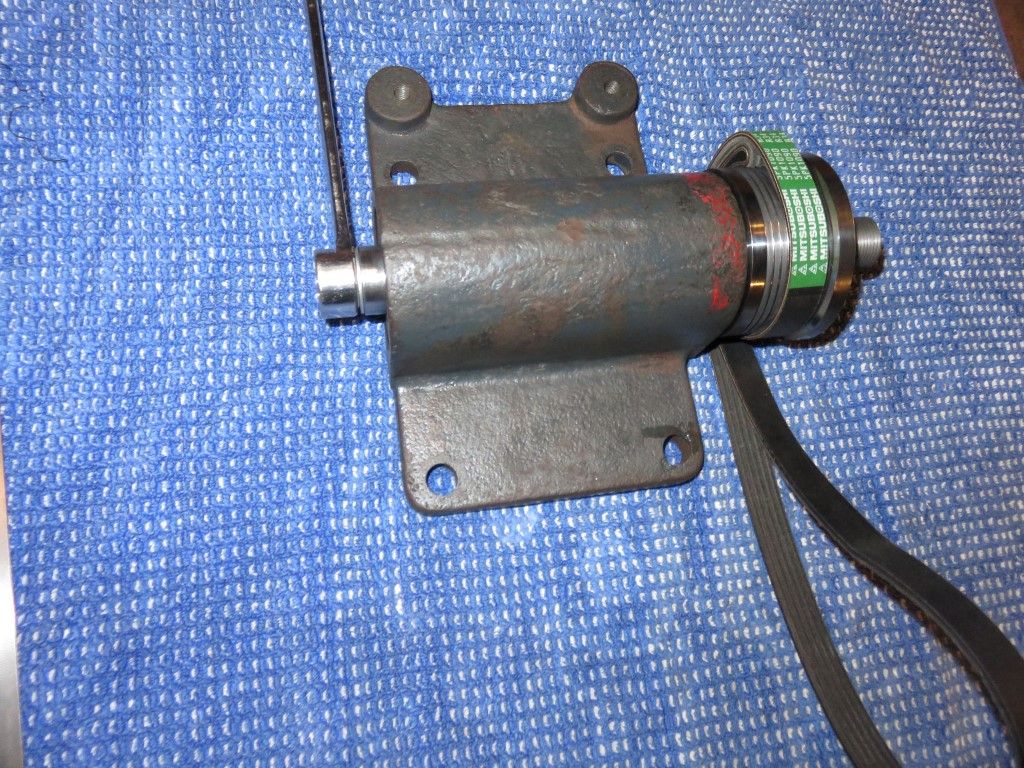
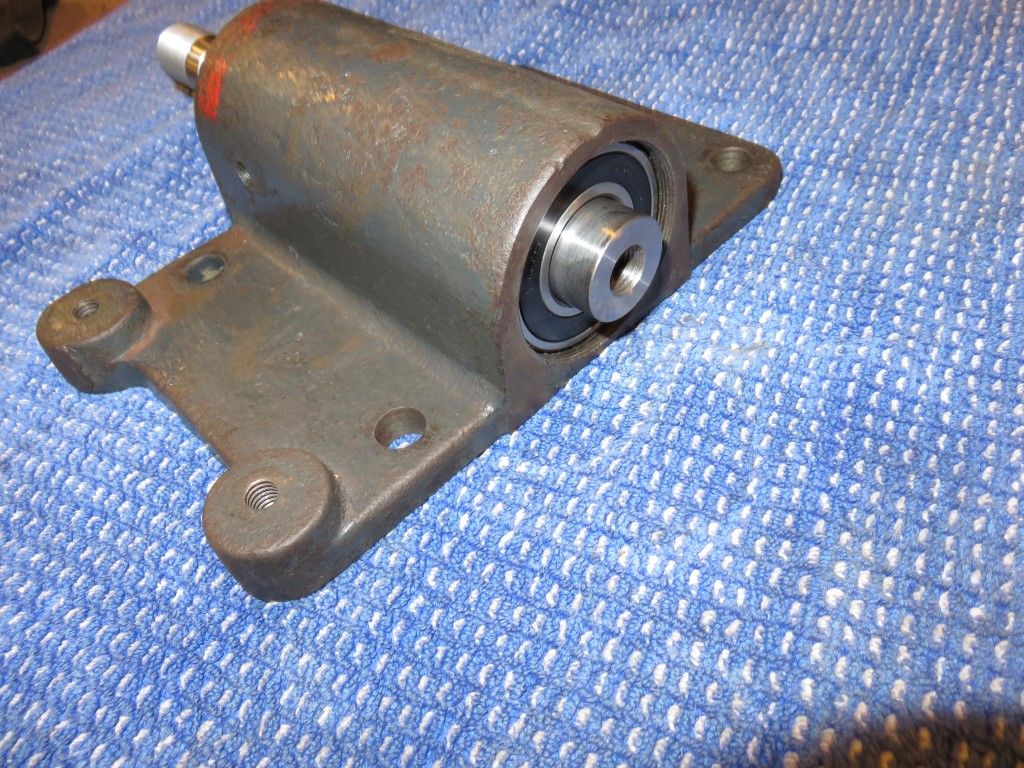
Finally the spindle assembly ready to go back in the saw

Hopefully this helps someone else that may have one of these saws.
Cheers
Wayne
-
2nd January 2017, 11:07 AM #13
 GOLD MEMBER
- Join Date
- May 2012
- Location
- Woodstock (Cowra)
- Age
- 74
- Posts
- 3,381
An excellent thread on your restoration work and very good modifications too.
I wish I had a decent table saw to play with.The person who never made a mistake never made anything
Cheers
Ray
-
2nd January 2017, 11:53 AM #14
GOLD MEMBER
- Join Date
- Jun 2005
- Location
- Townsville. Tropical Nth Qld.
- Posts
- 1,244
Wayne, things must be boring around this time of year for you as your posts are a year apart, LOL. Thanks for doing this as I may follow you and make a new shaft for mine. When I got my machine the face the blade pulls up against was a convex shape due to wear from previous owner and as I was in a hurry I just mounted the whole assembly between centres and refaced it to get me away. They only problem that I have had is trying to align the blade parallel to the mitre bar slot. When I pull it apart next, I will mount a couple of side adjusting screws, to make it easier. The only other mod I have done is replace the fence with one from a late model Hafco table saw. Good old machine. Thanks for the detailed story and photos.
Rgds,
Crocy.
-
2nd January 2017, 12:29 PM #15
Burnt Out Chip
- Join Date
- Feb 2009
- Location
- moonbi nsw Aus
- Age
- 69
- Posts
- 2,065
You just can't beat these solid old machines! They may be very basic but it means that they can be easily tidied up and they are away again for maybe another 50 years or so. I have a Jeffwood 12" Thicknesser of probably the same era. It came from south of Brissy. Sight unseen till it arrived. I just had to attach the 3 Ph plug and away it went. The only thing that happened after a couple of years was it started to trip the Earth Leakage breaker. Put new bearings in and.....it kept dropping the breaker. The problem ended up being the insulation cracking and exposing the wires that took power into the motor coils. I just opened up the motor and fished out the wires and slid plastic "spaghetti" over them reconnected the whole lot and it it runs again! The sugery was not easy with my big fat hands but perseverance paid off.
I also have a LS Barker/Macson Jointer 12" of similar age as well as an MBT Radial Arm Saw and a Sawmaster Radial Arm all of 50s vintage. As well as these old dears I have a SCM Panel Saw 1983 model with a 5.5 Hp 3 Ph motor that can take a 450mm blade and it tilts to 45�.
I had to replace the bearings in the main blade, make a riving knife and added a overhead guard with dust extraction.Just do it!
Kind regards Rod


 Reply With Quote


Similar Threads
-
Jeffwood 702 Thicknesser Information
By Fargo in forum JOINTERS, MOULDERS, THICKNESSERS, ETCReplies: 19Last Post: 12th February 2024, 06:17 AM -
Jeffwood 27" bandsaw restoration
By 2blast67 in forum ANTIQUE AND COLLECTABLE TOOLSReplies: 39Last Post: 5th August 2021, 11:10 PM -
Start of Jeffwood thicknesser restoration
By 2blast67 in forum ANTIQUE AND COLLECTABLE TOOLSReplies: 8Last Post: 15th April 2016, 11:55 AM -
Jeffwood Brochures
By 2blast67 in forum ANTIQUE AND COLLECTABLE TOOLSReplies: 1Last Post: 18th June 2013, 03:54 PM -
Jeffwood tenon machine
By 2blast67 in forum ANTIQUE AND COLLECTABLE TOOLSReplies: 5Last Post: 1st June 2013, 01:14 PM
