

 Thanks:
  Likes:
  Needs Pictures: 0
 Picture(s) thanks: 0
Results 1 to 15 of 59
-
2nd September 2015, 10:37 AM #1
 Rusty doesn't mean its dead


- Join Date
- Dec 2010
- Location
- Melbourne, Australia.
- Posts
- 825
 Waldown ?? You need a real drill press.
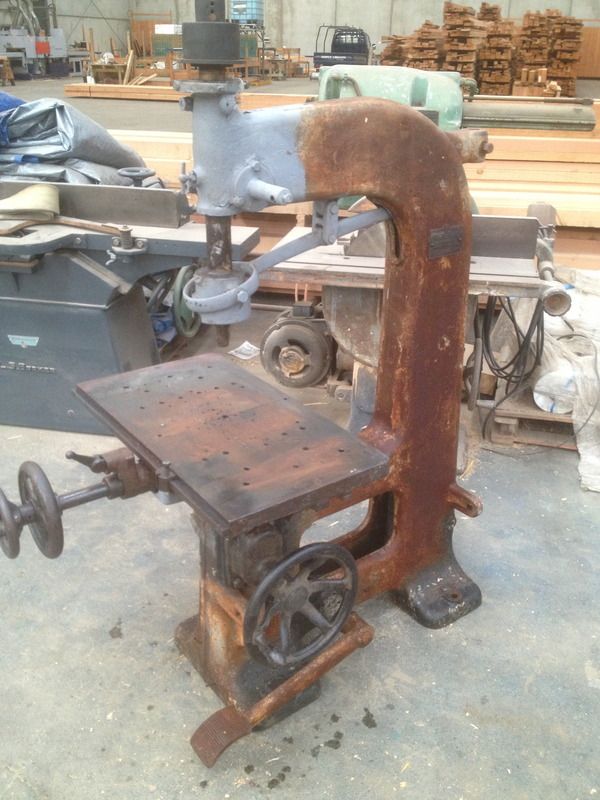
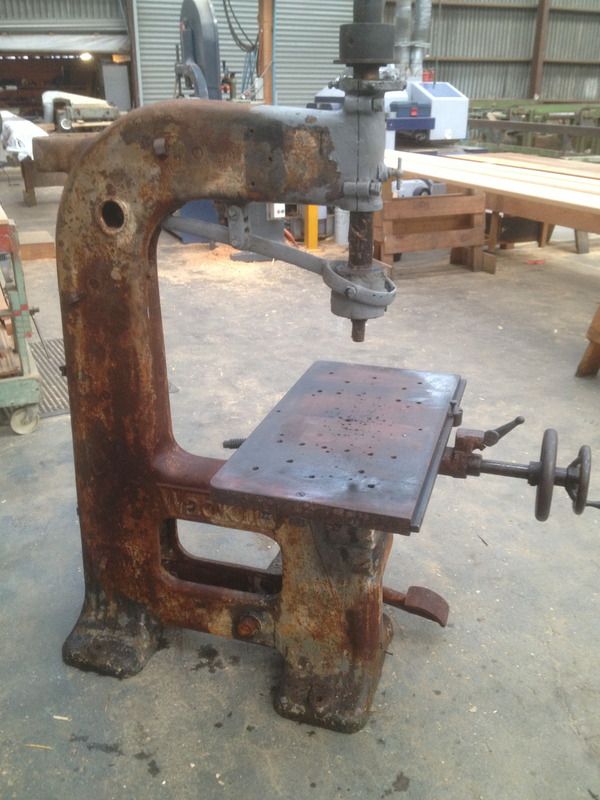
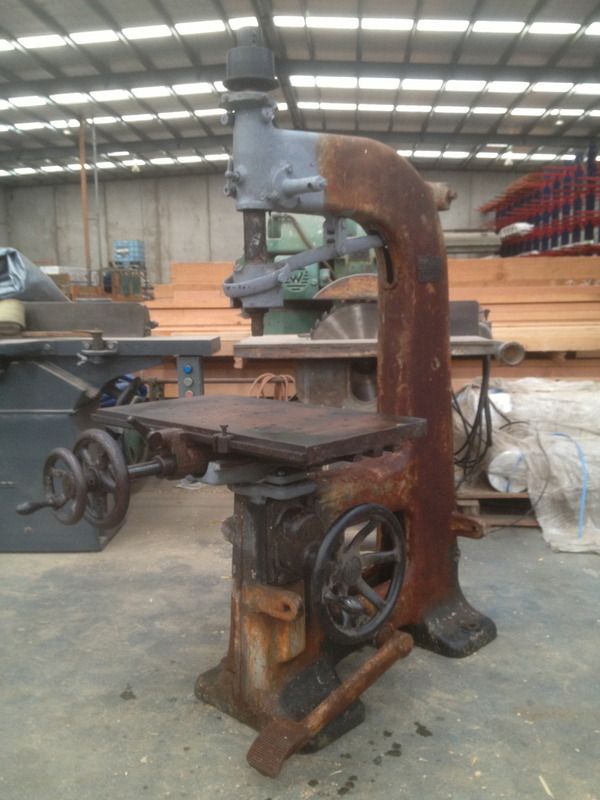
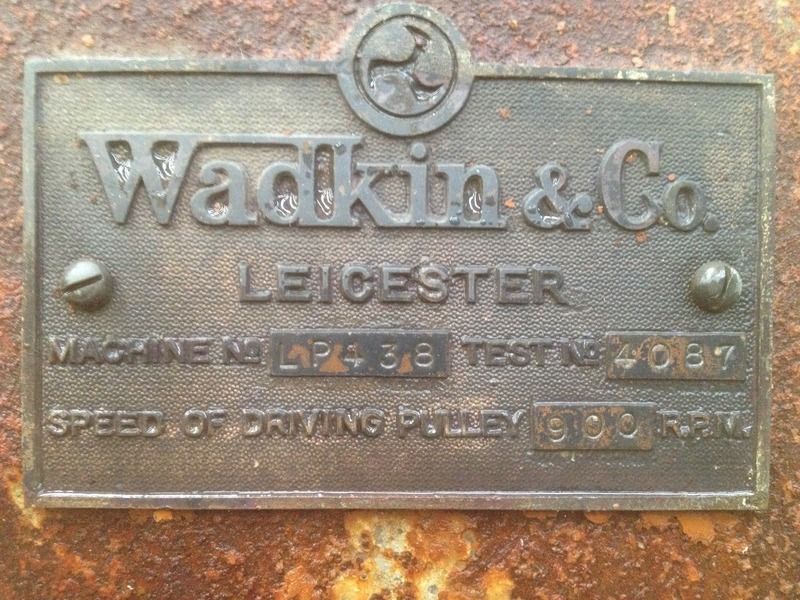
I purchased this Wadkin LP recently from a good friend, it had been in a fire out in one of his back sheds and he had lost the momentum to restore it as he has a lot on his plate.
Currently its has been sandblasted and is ready for powder coating today, but I thought I would at least kick of this post of with some before pic's as the after pic's are not far away.
Some major issues have been a large crack through the middle if the table (cracked when the fireies hosed the machine down with water) , bent traversing thread (sagged with the heat of the fire) and a bent Y arm holding the chuck spindle.
Here are some pics when I first got it .......
Melbourne Matty.
-
2nd September 2015 10:37 AM # ADSGoogle Adsense Advertisement
- Join Date
- Always
- Location
- Advertising world
- Posts
- Many
-
2nd September 2015, 08:10 PM #2
Senior Member
- Join Date
- Mar 2013
- Location
- Tasmania
- Posts
- 394
Got me interested. Can`t wait for next installment.
-
2nd September 2015, 09:49 PM #3
GOLD MEMBER
- Join Date
- Apr 2012
- Location
- Sydney
- Posts
- 1,503
That's a beast!
Looks belt driven. Does the foot lever raise and lower the drill?
-
3rd September 2015, 12:41 AM #4
Most Valued Member
- Join Date
- Aug 2010
- Location
- Horsham Victoria
- Posts
- 5,713
That is a beautiful looking piece
Dave TTC
Turning Wood Into Art
-
3rd September 2015, 09:32 AM #5
Rusty doesn't mean its dead
- Join Date
- Dec 2010
- Location
- Melbourne, Australia.
- Posts
- 825
Thanks Old Grain, more just as soon as I get near a computer to down load all these pic's ! Originally Posted by OldGrain

Yes it does, it has a side handle also but the previous owner took it of one day as he was using the foot pedal and it sconned him on the head poor fellow. Originally Posted by hiroller
-
3rd September 2015, 09:34 AM #6
Rusty doesn't mean its dead
- Join Date
- Dec 2010
- Location
- Melbourne, Australia.
- Posts
- 825
Thanks Dave, yes it even looks good in such bad condition, just imagine a coat of paint on the old girl !! Originally Posted by DaveTTC
Melbourne Matty
-
3rd September 2015, 10:02 AM #7
Senior Member
- Join Date
- Nov 2012
- Location
- Sydney
- Posts
- 266
Very nice Matty - that will look great restored.
Any thoughts on toolholding ? A chuck of some kind ?
Regards
John
-
3rd September 2015, 11:00 AM #8
Member
- Join Date
- Mar 2013
- Location
- Pembrokeshire, Wales
- Posts
- 61
Lovely machine Matty, love the concentric handles, that is a nice touch! Bit of a bugger about the table being cracked though, has it distorted at all?
-
3rd September 2015, 02:32 PM #9
Most Valued Member
- Join Date
- Aug 2010
- Location
- Horsham Victoria
- Posts
- 5,713
If you ever need it baby sat

Dave TTC
Turning Wood Into Art
-
3rd September 2015, 06:31 PM #10
Rusty doesn't mean its dead
- Join Date
- Dec 2010
- Location
- Melbourne, Australia.
- Posts
- 825
John, its funny you should ask, I am still waiting on a box of small parts from the Previous owner, and some where in there is the large chuck ! Originally Posted by jcge
I'll know more when it all comes together...
Melbourne Matty.
-
3rd September 2015, 06:33 PM #11
Most Valued Member
- Join Date
- Aug 2010
- Location
- Horsham Victoria
- Posts
- 5,713
Matty. Ate tou coming to the wood show next wrrk
Dave TTC
Turning Wood Into Art
-
3rd September 2015, 06:45 PM #12
Rusty doesn't mean its dead
- Join Date
- Dec 2010
- Location
- Melbourne, Australia.
- Posts
- 825
On the Forge.
Thanks Dave, thats a great offer ..lol Originally Posted by DaveTTC
I had better make sure its all cleaned up and going first, can't have this thing misbehaving on you !
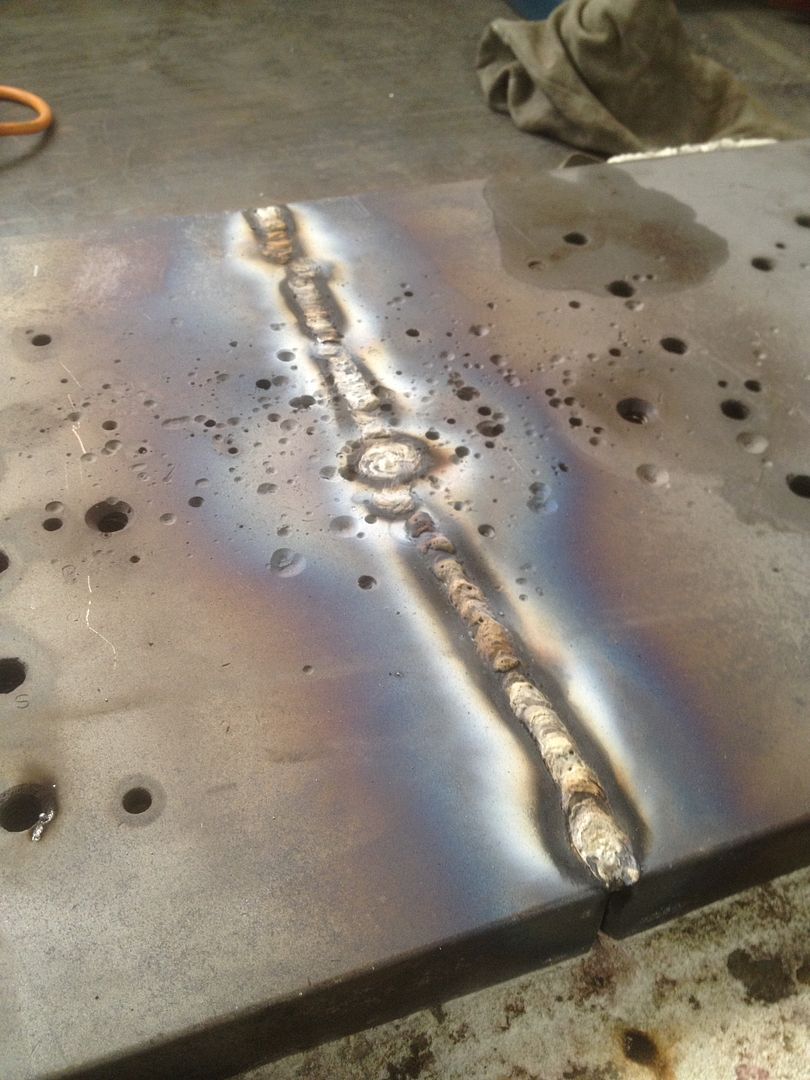
The first thing we got into was bending the lever fork back straight, being cast it could not be a cold bend like I did with the thread.
Rob (Auscab) came up with the suggestion of heating it up on his forge and so with the help of peter (lightwood) we pushed ahead and got this part red hot.
It was a cold winters night, and there's nothing like a warm forge and a few cleansing ail's whilst doing the job.
Once we had the part hot all it took was an F clamp and a flat steel bench to bring it back to shape.
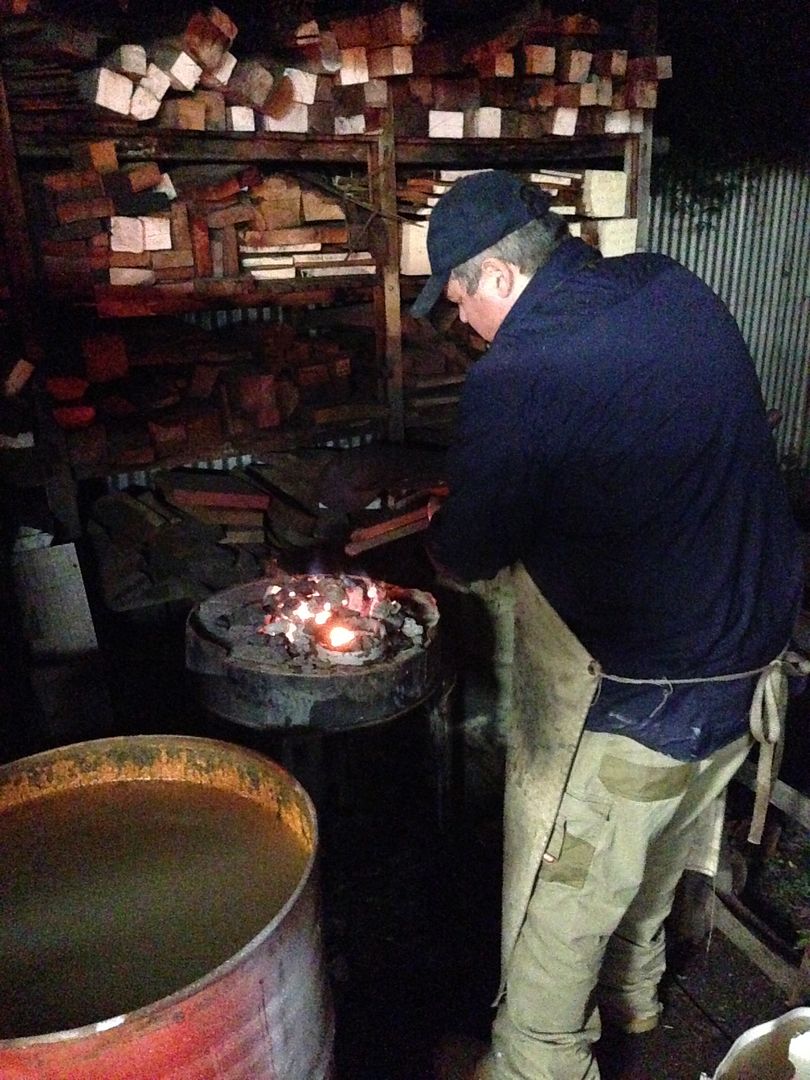
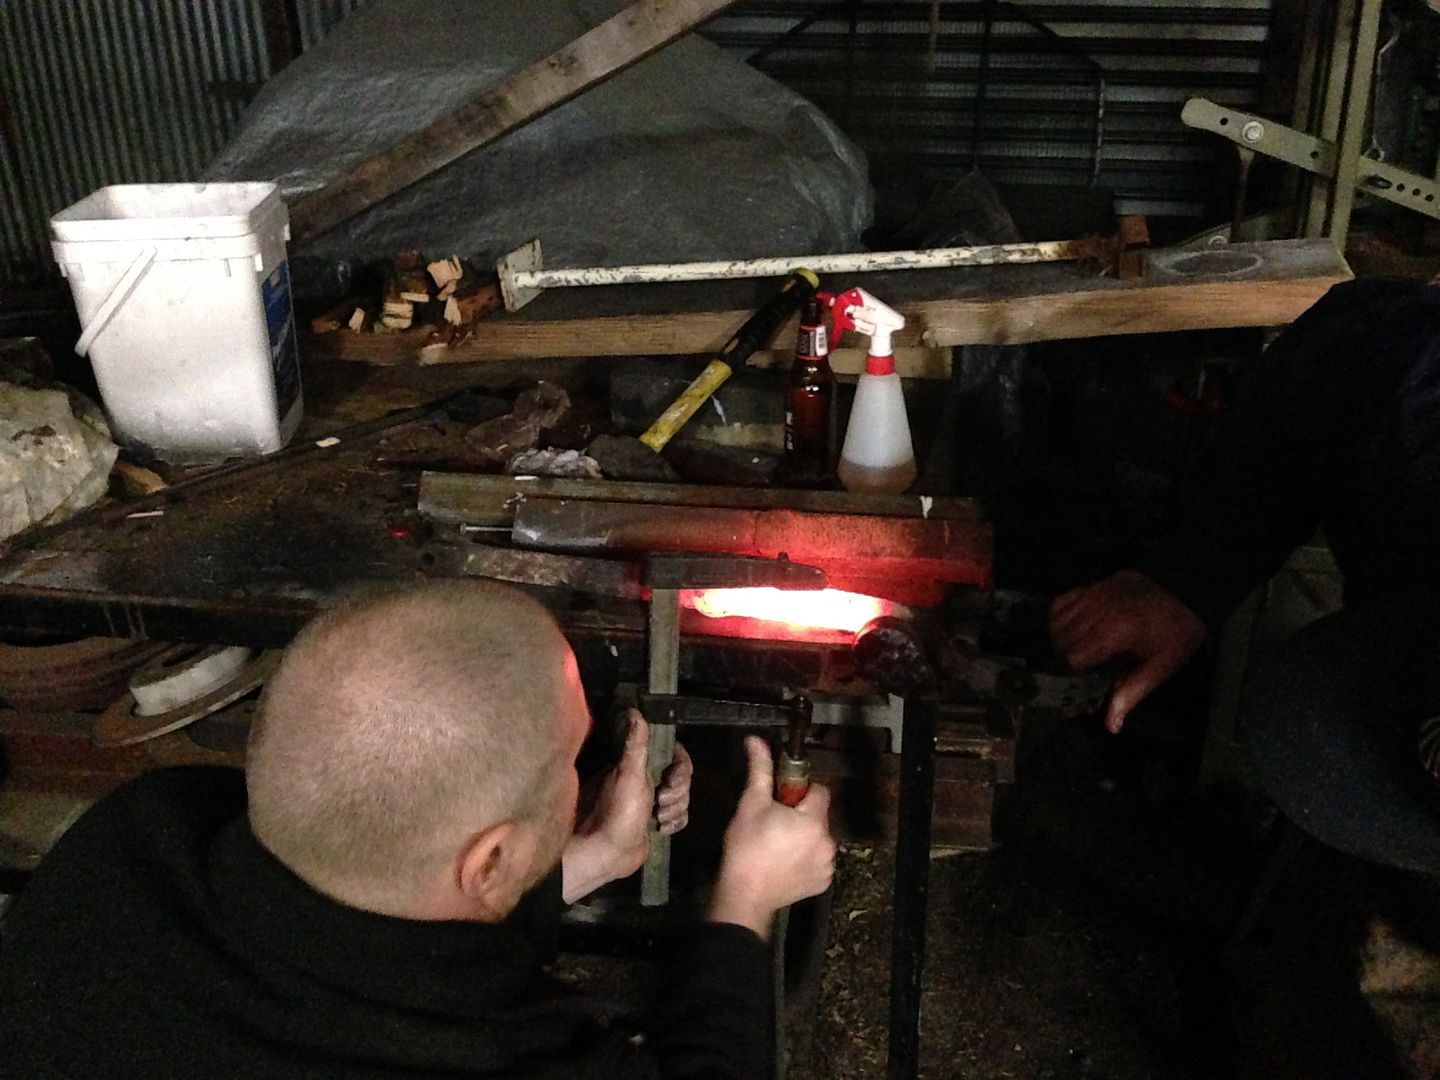
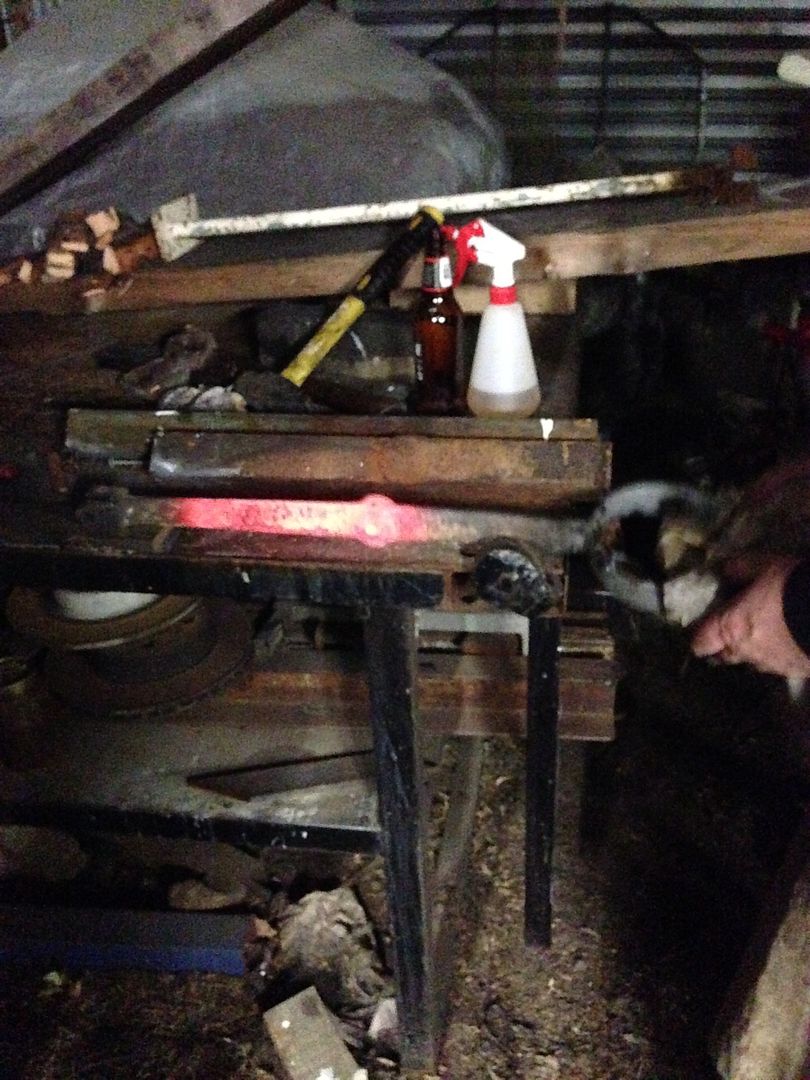
Melbourne Matty
-
3rd September 2015, 07:18 PM #13
Rusty doesn't mean its dead
- Join Date
- Dec 2010
- Location
- Melbourne, Australia.
- Posts
- 825
Welding Cast Iron.
Glad you asked Sion, the table was a bit of a bugger, but I managed to get a good job out of it in the end. Originally Posted by sion.dovey
Here is how I went about it step by step ....

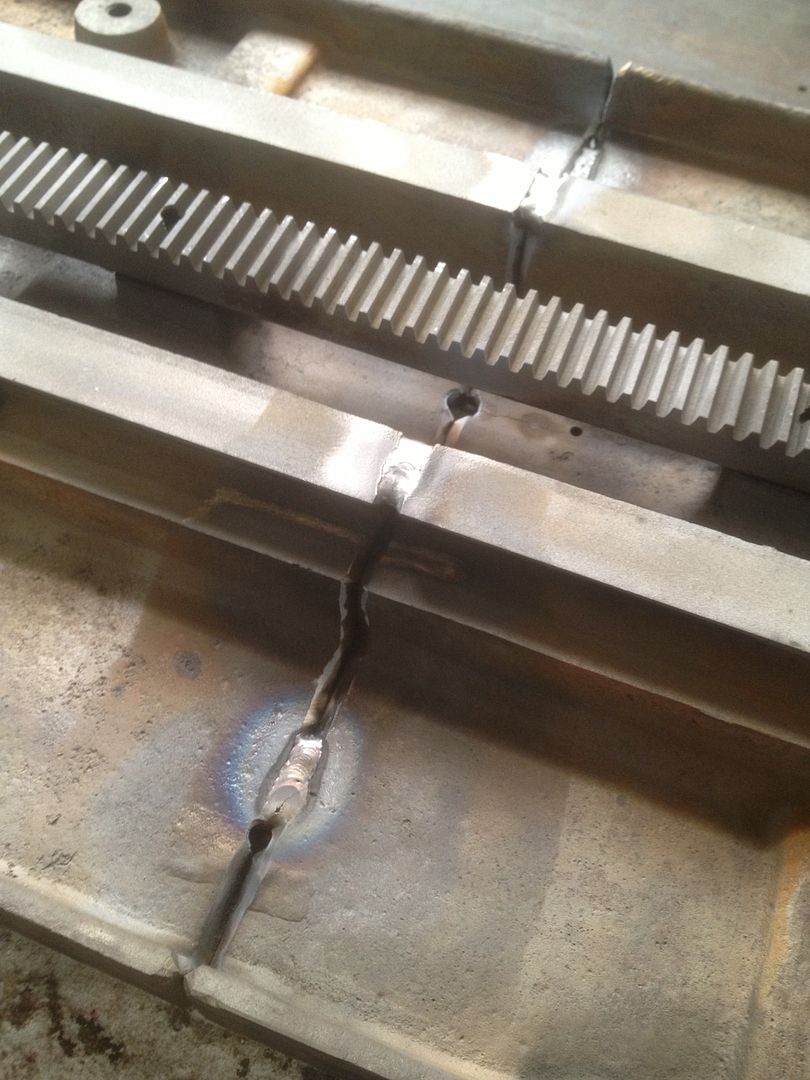
Here was the break, the previous owner was very upset with the fire crew because they hosed water over the machine when it was hot resulting in this crack right through the middle.
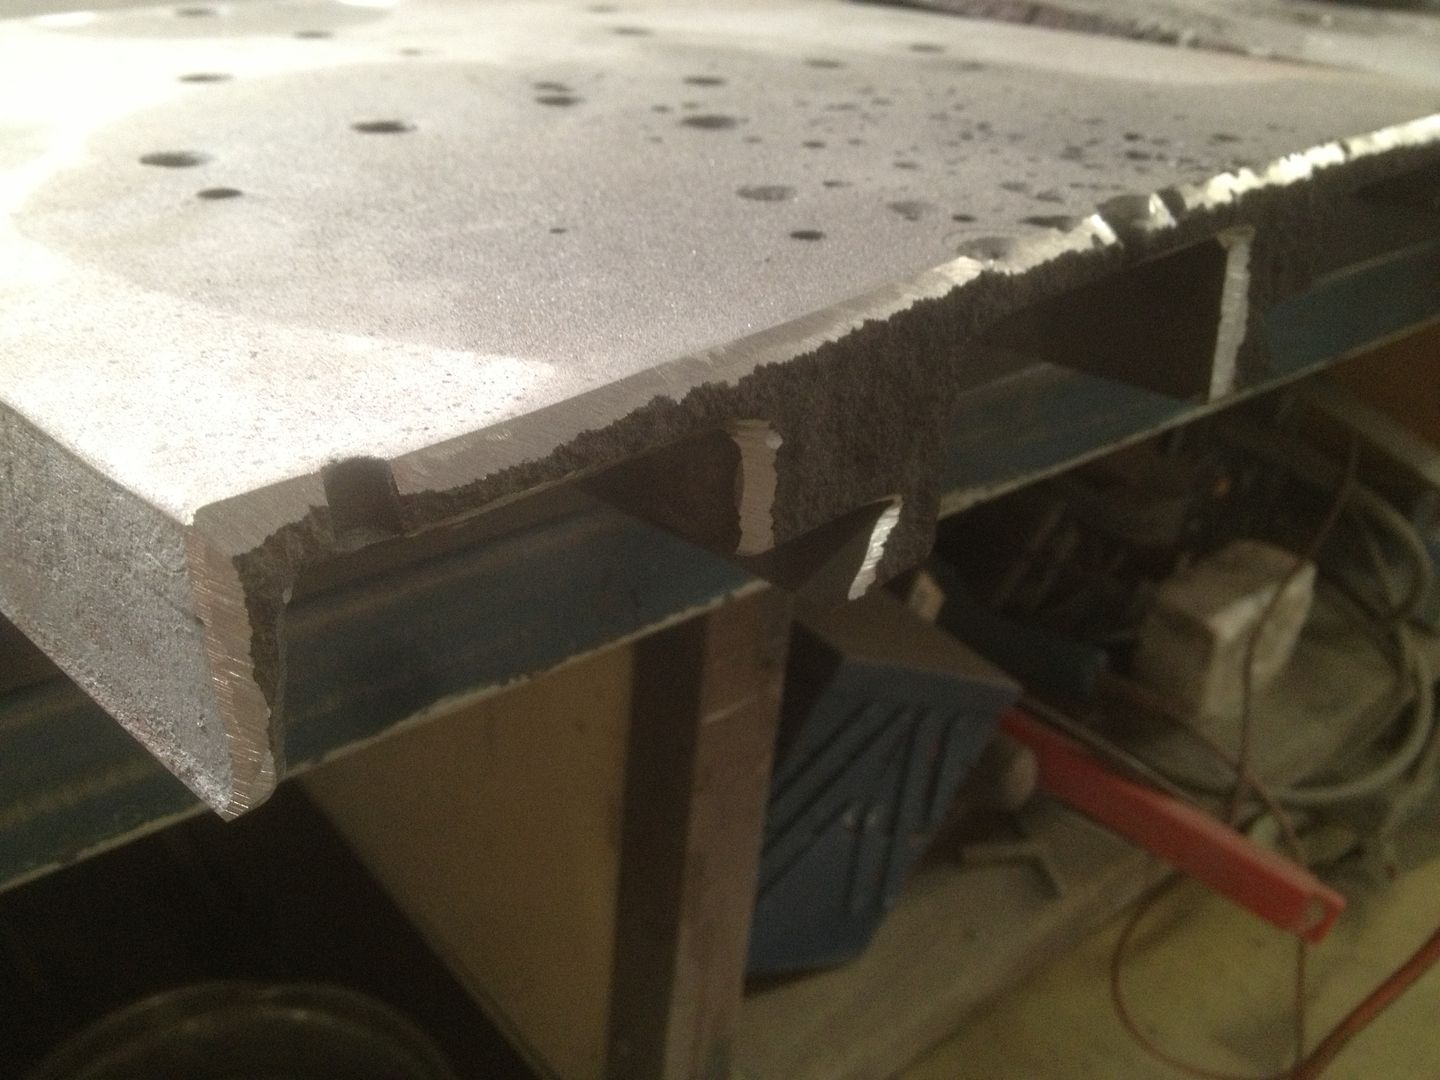
First step was to bevel of the join in order to open the area to be welded up and allow for better weld penetration.
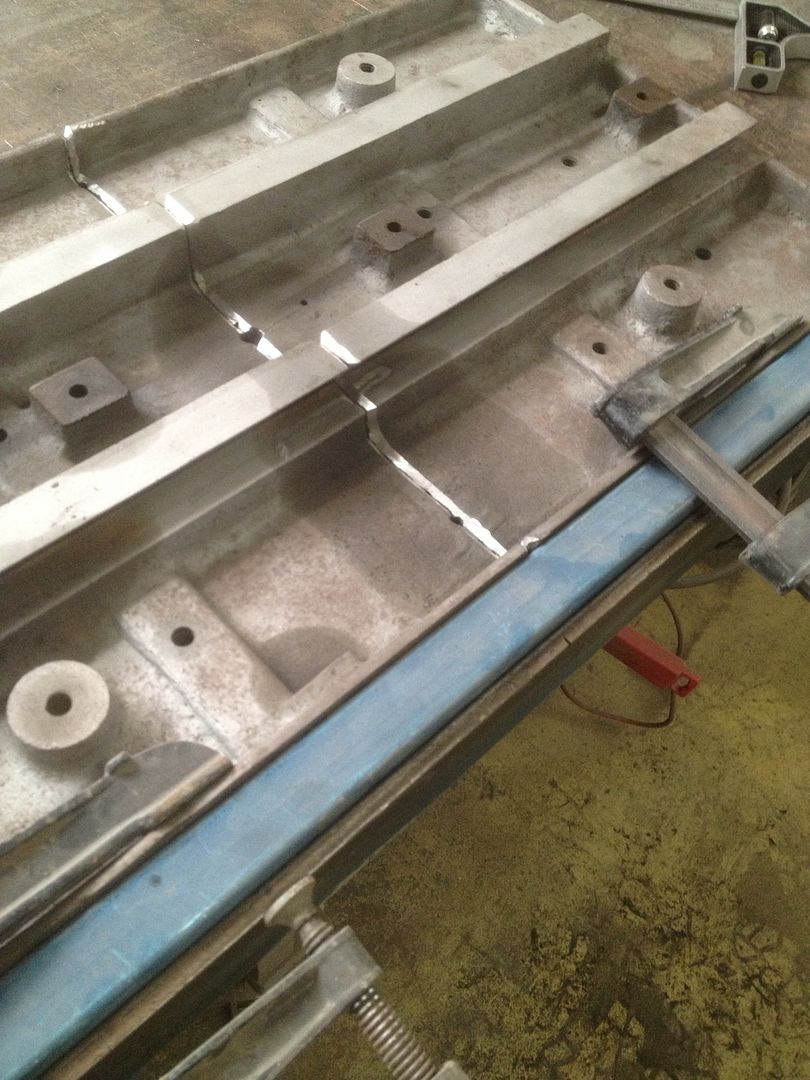
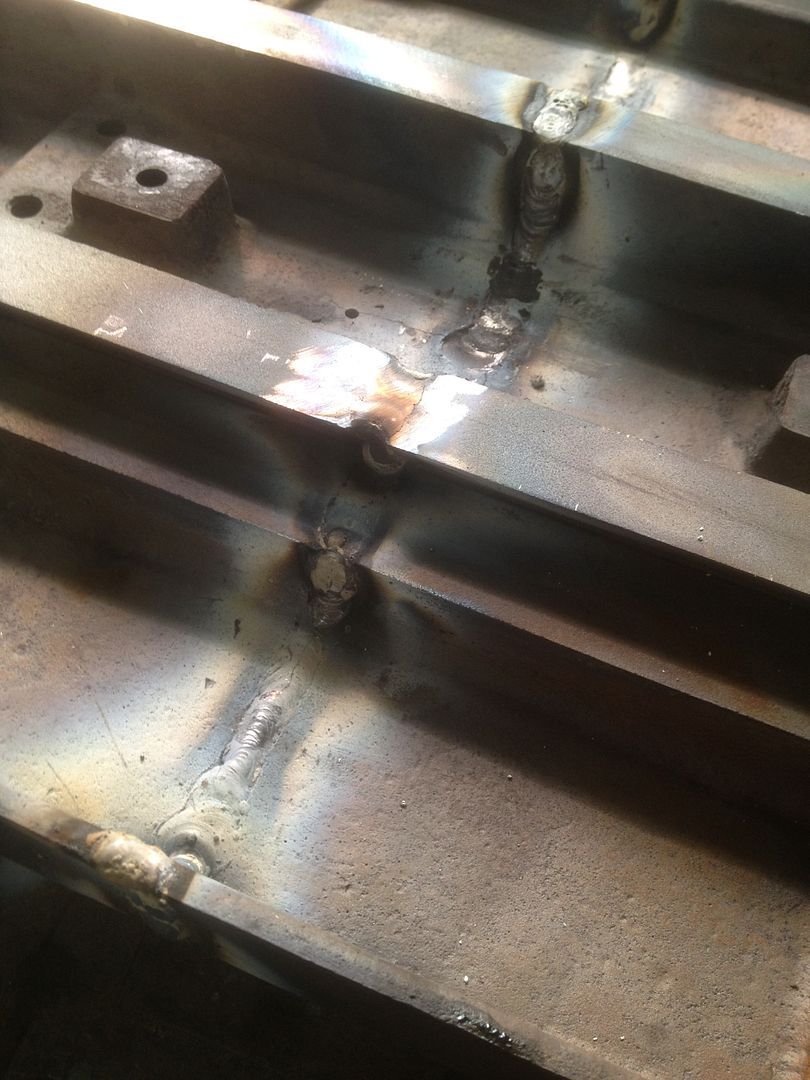
Then joining the two pieces back together and jigging up with clamps and straight edges to ensure a flat surface.
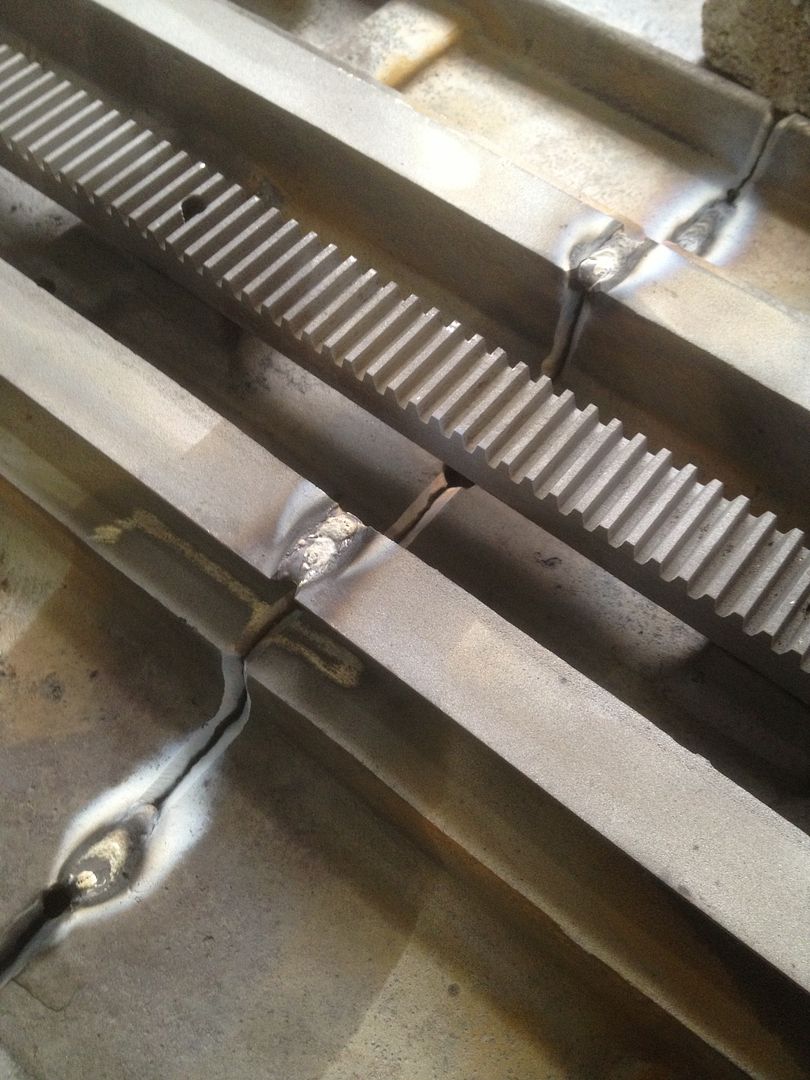
After pre heating the area some small Tac welds are done just to secure one side from movement.
Same process repeated on the other side so the welds pull the work evenly from both sides.
So proud ...lol
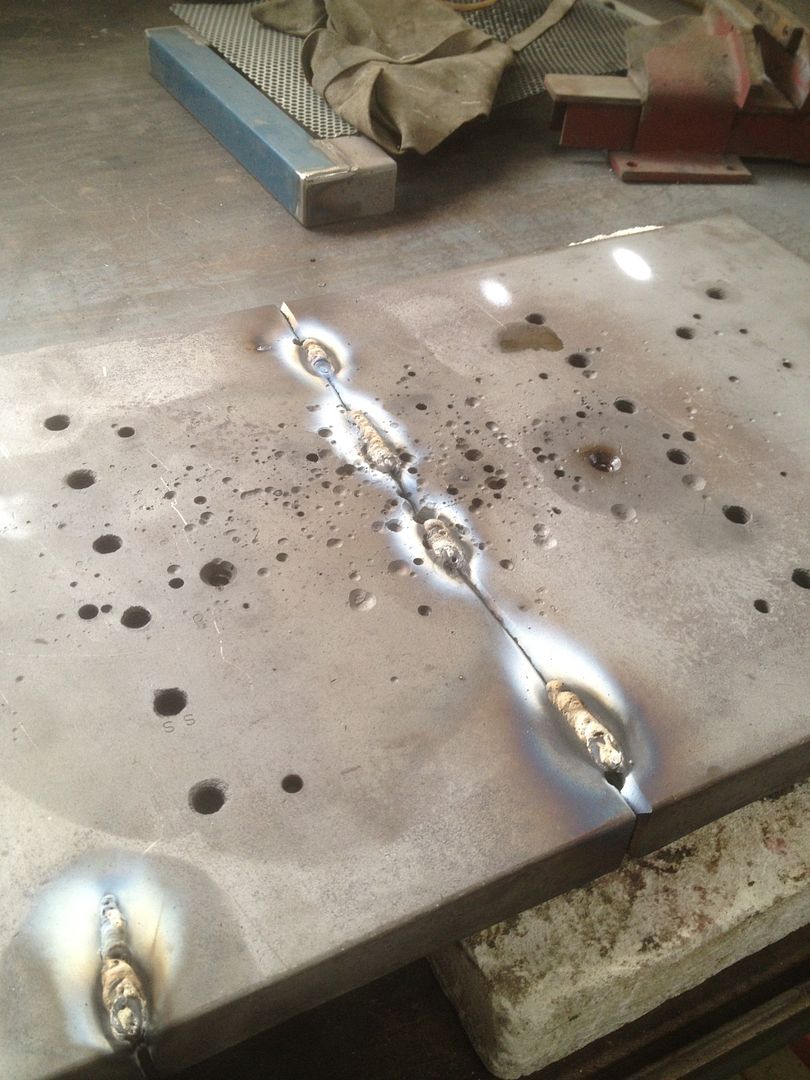
The under side cleaned up ready for more heat and longer bigger welds.
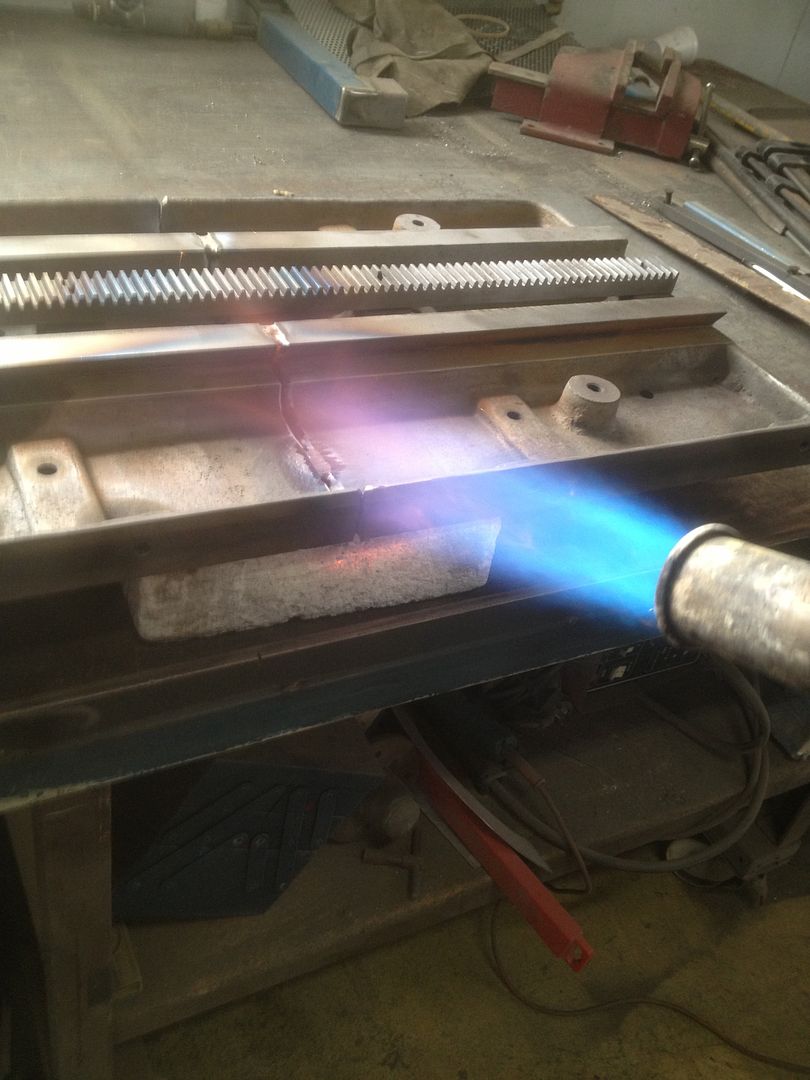
Did I Mention heat ? Plenty of it, its interesting to watch the cast sweat, blue is also a good colour to watch for a temperature.
Melbourne Matty.
-
3rd September 2015, 07:38 PM #14
Rusty doesn't mean its dead
- Join Date
- Dec 2010
- Location
- Melbourne, Australia.
- Posts
- 825
Welding Cast Iron, cont....
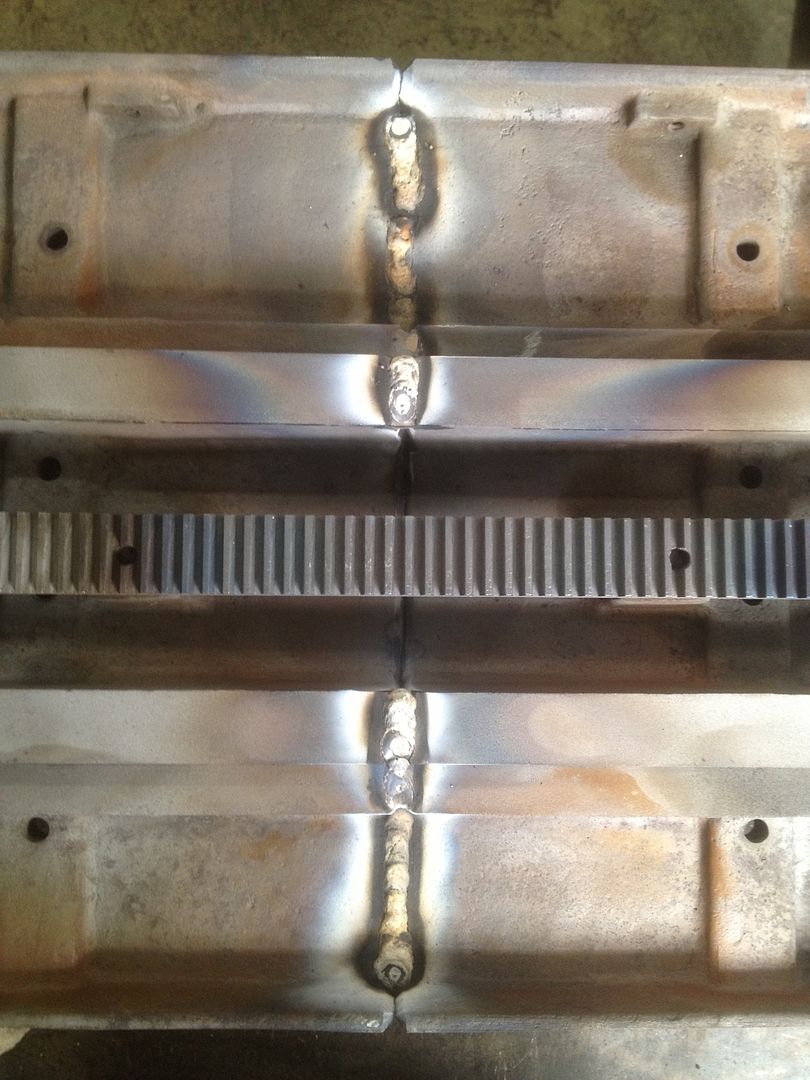
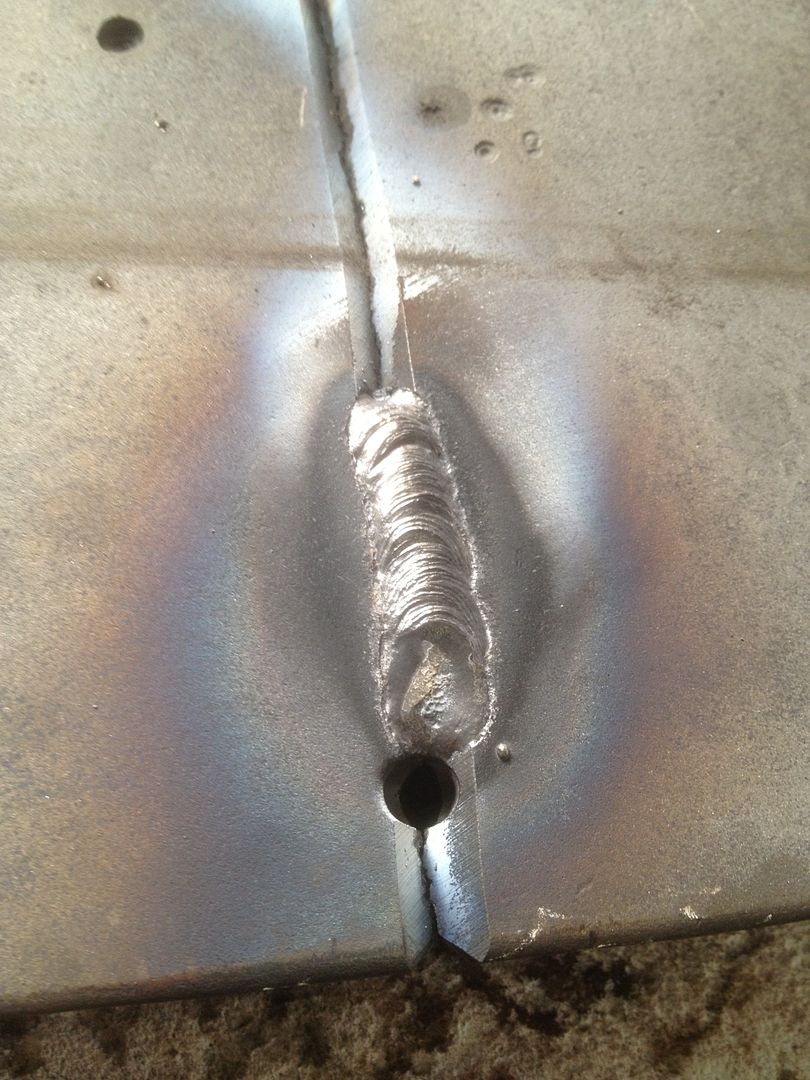
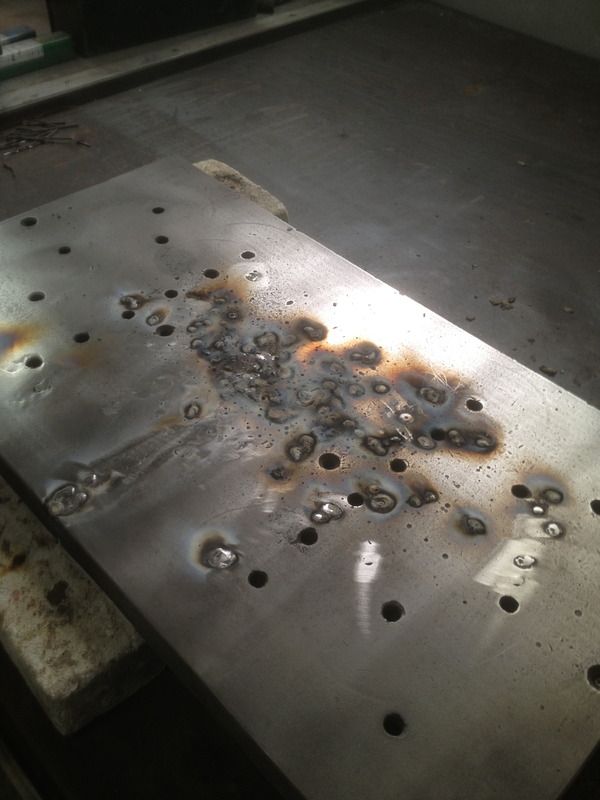
The Larger runs of weld on the underside of the top.
More heat, and the full welds done over the top, long duration welds, chewed through a heap of the nickel rods, not cheep.
Then ground down with an abrasive flap disk, grinding disc's are too harsh and can risk taking too much material out.
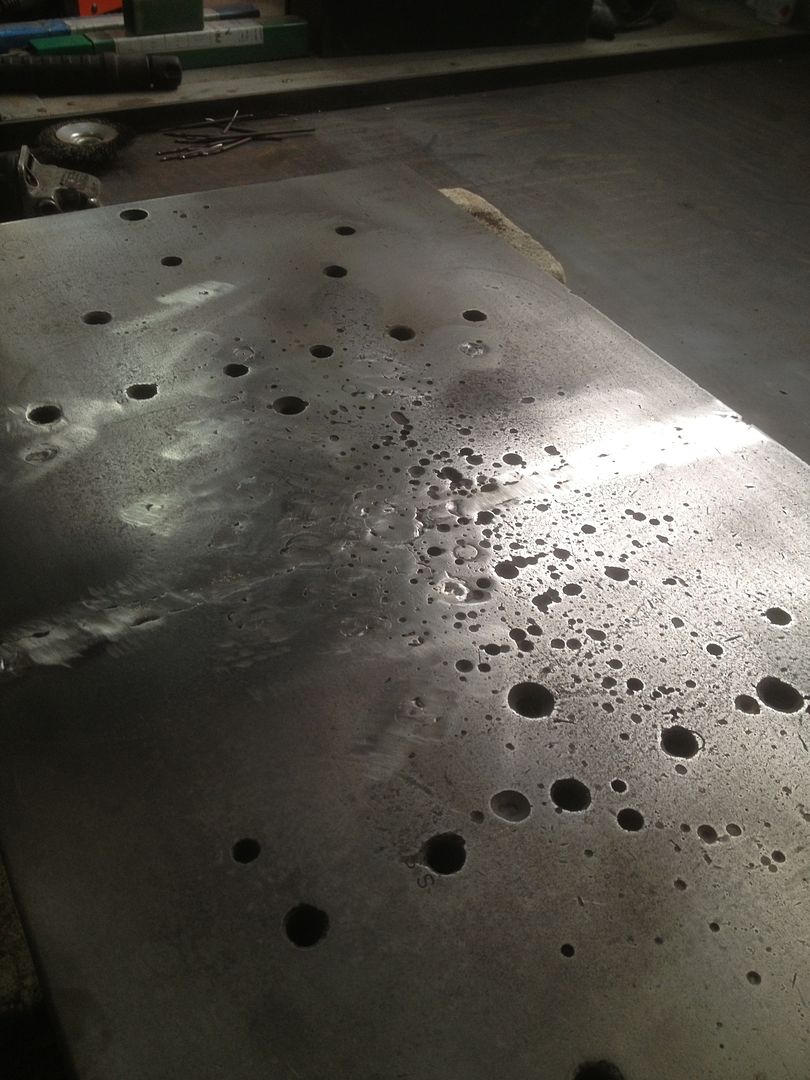
Being a drill press the holes in the top were shame full, I decided to fill them all up except the larger factory fixing holes, they stay.
The top looking better, a little more filling and grinding and possibly a surface grind or milled to finish.
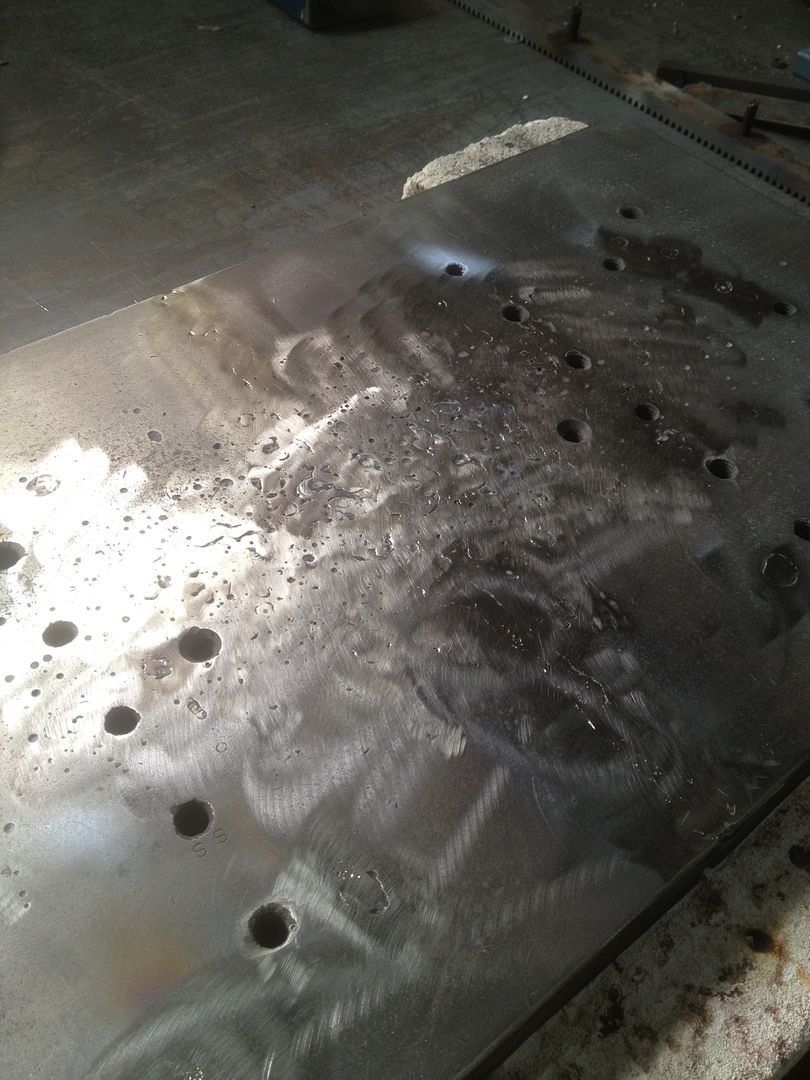
The finished weld on the underside, I will not be grinding this side flush, the welds are neat, and not really seen.
Melbourne Matty.
-
3rd September 2015, 09:51 PM #15
Senior Member
- Join Date
- Dec 2013
- Location
- Sydney
- Posts
- 139
Nice job! So you used TIG? Do you have a more complete description for the nickel rods? How hard is the weld compared to the original cast iron?
I have a couple of repairs coming up in cast iron, a Waldown drill table and a thread repair on the same machine, so keen to learn what I can from your experience.
Graham.


 Reply With Quote

Similar Threads
-
Help me get to know my new (old) Waldown drill press
By wsal in forum GENERAL & SMALL MACHINERYReplies: 13Last Post: 1st October 2014, 05:30 PM -
Waldown drill press
By eskimo in forum EBAY, GUMTREE, AMAZON (and other sale sites) Metalwork ONLYReplies: 1Last Post: 10th September 2014, 10:55 AM -
Waldown drill press
By camoz in forum ANTIQUE AND COLLECTABLE TOOLSReplies: 8Last Post: 26th January 2013, 10:15 PM -
Waldown Drill Press
By KevM in forum METALWORK FORUMReplies: 24Last Post: 1st September 2011, 01:31 AM -
Waldown drill press
By mikm in forum GENERAL & SMALL MACHINERYReplies: 5Last Post: 17th August 2009, 10:35 AM
