

 Thanks: 0
 Likes: 0
 Needs Pictures: 0
 Picture(s) thanks: 0
Results 16 to 30 of 54
Thread: Help needed in starting a clock
-
22nd February 2010, 09:02 AM #16
 I've got wood


- Join Date
- Feb 2008
- Location
- Deloraine Tasmania
- Age
- 59
- Posts
- 1,092

Coming along nicely Bob, i've always wanted to build 1 of these so i'm enjoying the show. keep them pics coming!

-
22nd February 2010 09:02 AM # ADSGoogle Adsense Advertisement
- Join Date
- Always
- Location
- Advertising world
- Age
- 2010
- Posts
- Many
-
22nd February 2010, 09:52 AM #17
Intermediate Member
- Join Date
- Nov 2009
- Location
- Mornington, Vic
- Age
- 66
- Posts
- 40
Hi steamboatbob, it's always good to get some advice and tips from others. Based on the examples of your work you are going to produce a quality item, keep the diary going, that in it's self is a task.
Dills.
-
23rd February 2010, 08:40 PM #18
Intermediate Member
- Join Date
- Nov 2009
- Location
- Ellenbrook
- Age
- 48
- Posts
- 45
Thanks for the kind words guys it really makes me proud (or in the wifes view it makes me full of myself
 )
)
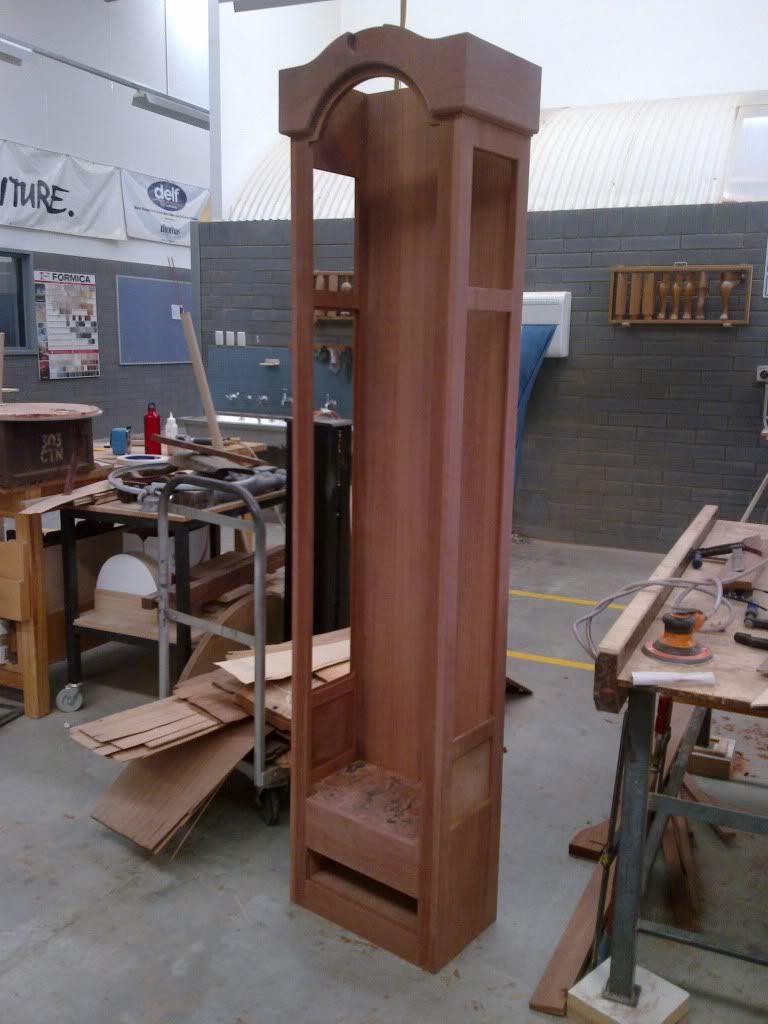
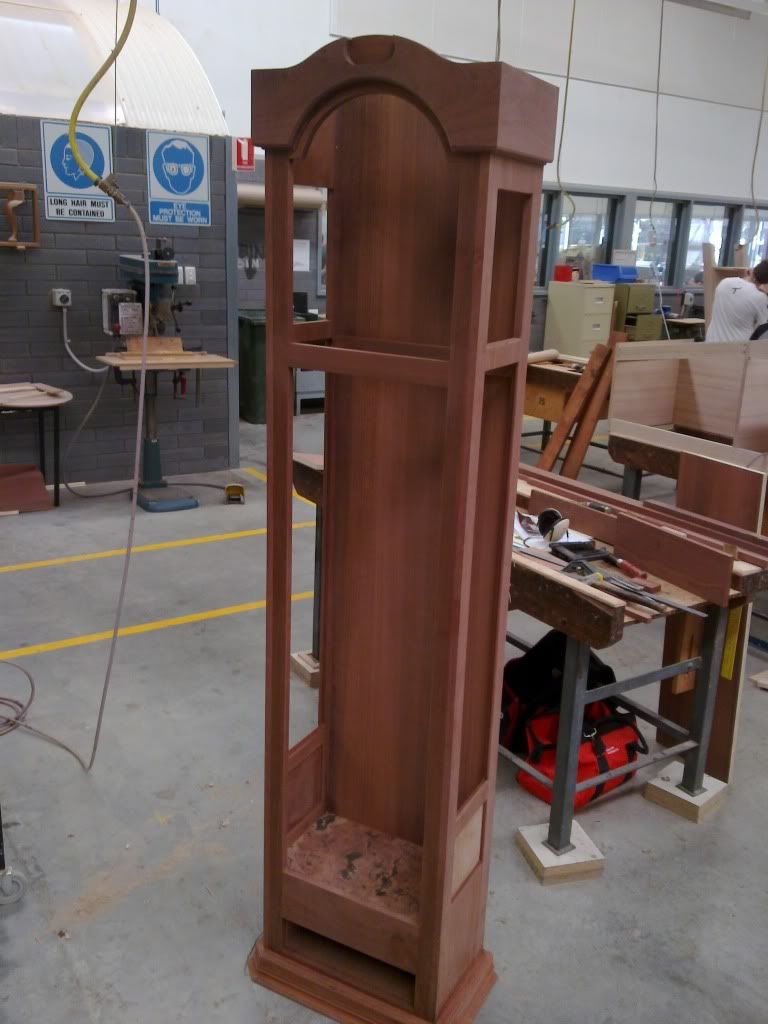
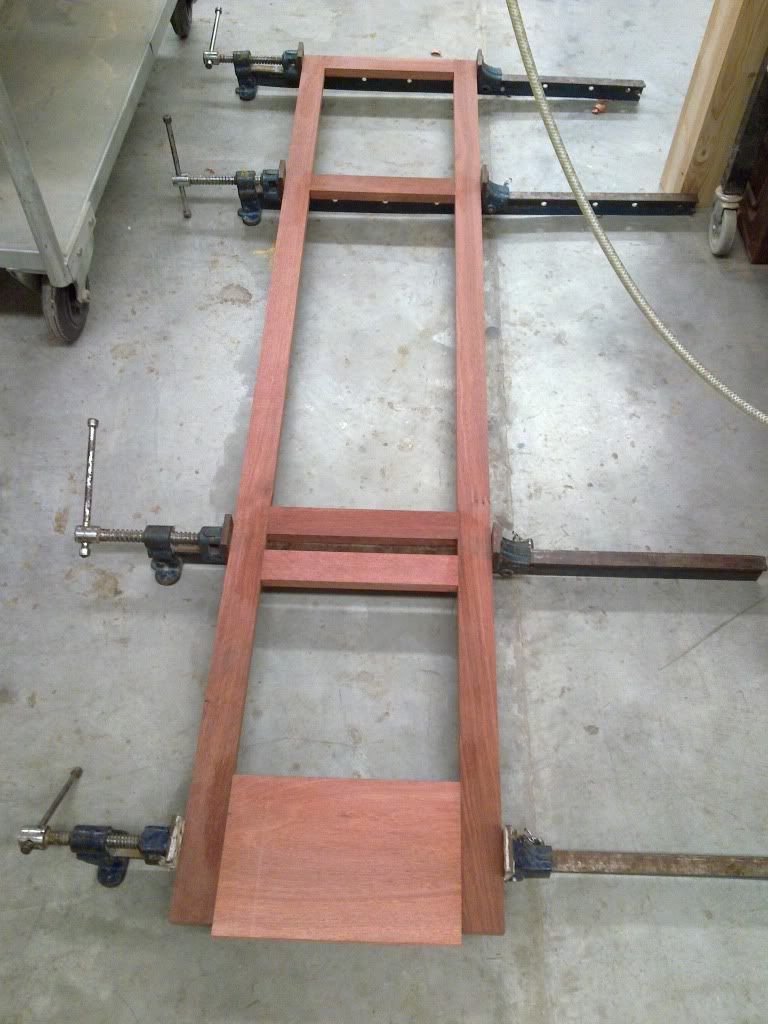
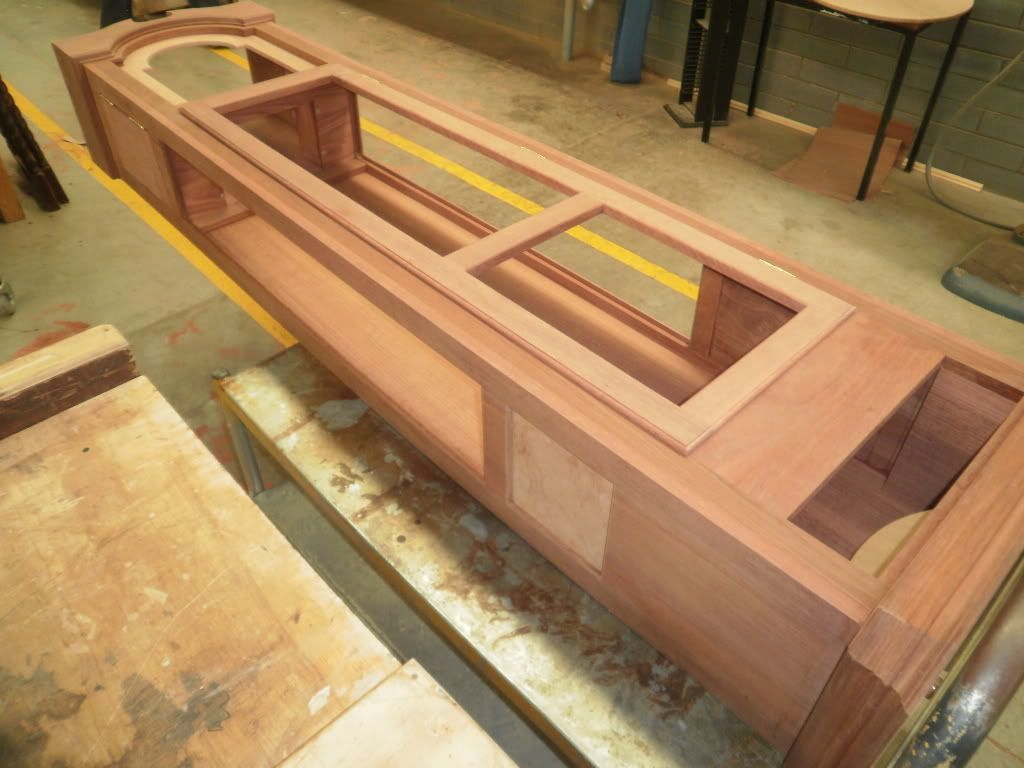
But back down to business today was very interesting i ended up sanding the frames down to a nice finish on the insides of the case, went down to 240 grit, so i would not have to struggle doing it later on when the case was together, but with that done I got into the swing of things by gluing the case front and sides together which is a mission to do by yourself (Helpful hint if you are doing the same size case at home it pays to have a mate around at this point to help move the case around)
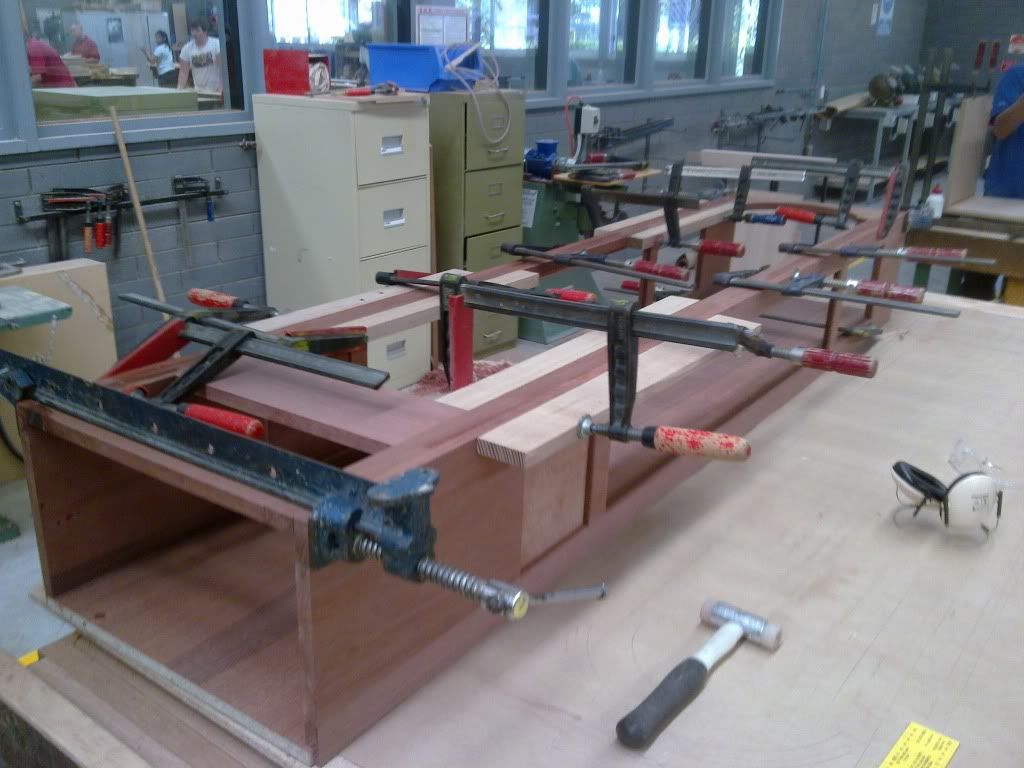
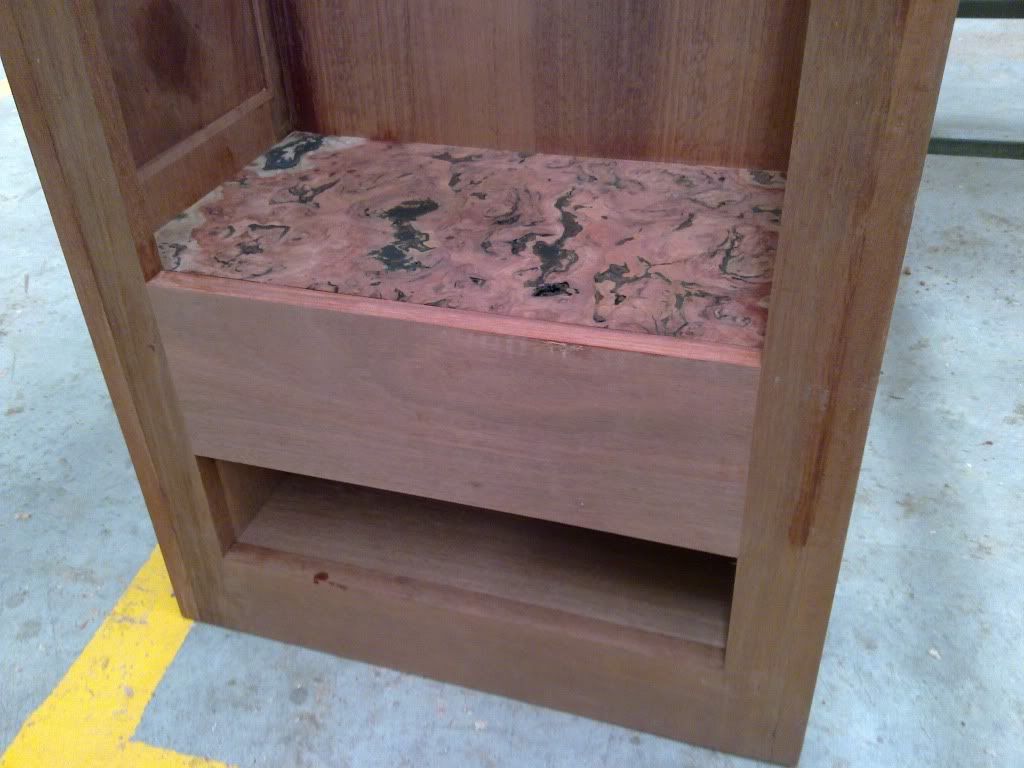
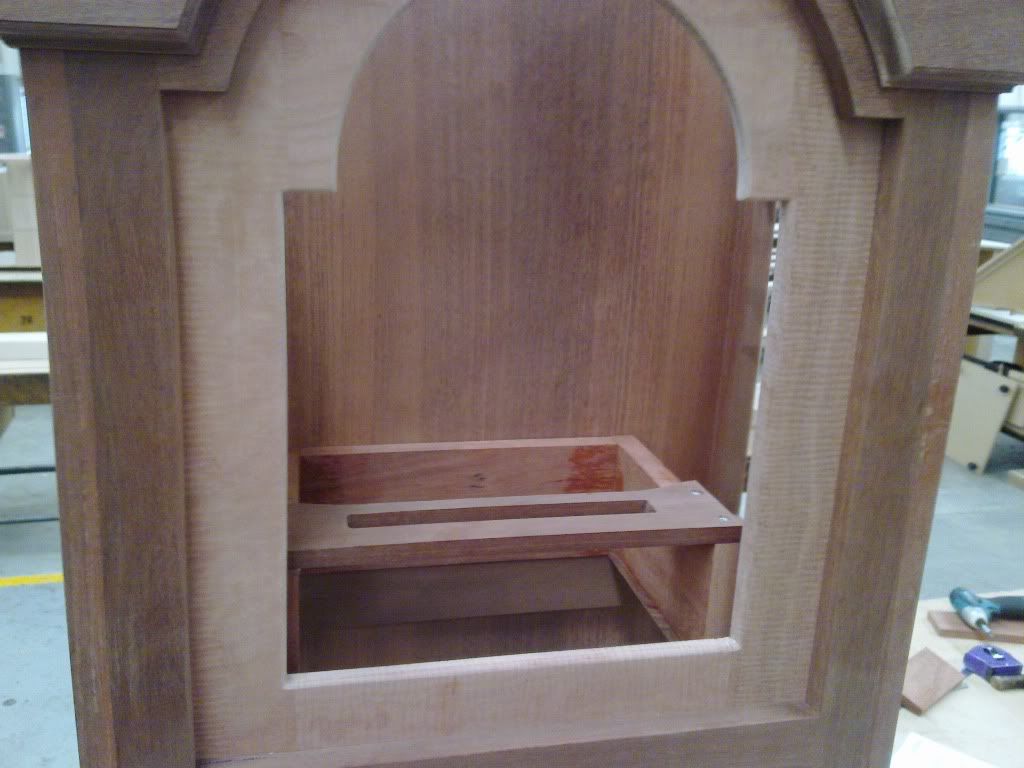
while this was drying in the clamps i set to making the base of the inside of the case with the burl i have been playing with which turned out a treat and also made up the draw section where the draw will slide into. After this was done i took the clamps off the frame and checked all my pieces that were cut to sixe by test fitting them and glued the draw base and frame base into place and glued the back inplace as well. the back is just a 19 mm thick piece of jarrah veneer on mdf. this is also screwed into the 2 bases as well but only glued into the frames.
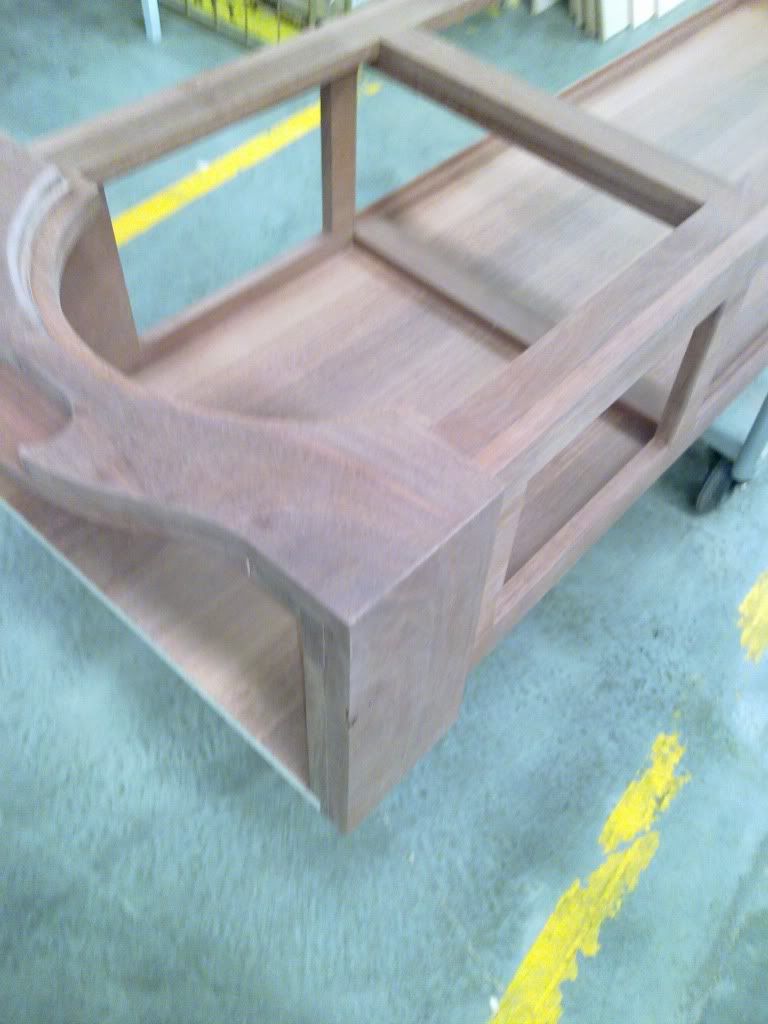
and here is a closeup of the burl in the frame showing a bit more detail as to the looks of it. this photo makes the front bit a little distorted and longer than it really is
-
3rd March 2010, 10:51 PM #19
Intermediate Member
- Join Date
- Nov 2009
- Location
- Ellenbrook
- Age
- 48
- Posts
- 45
Hi guys and girls
hmmm I posted here last night but cannot seem to see it so sorry if I double post by accident
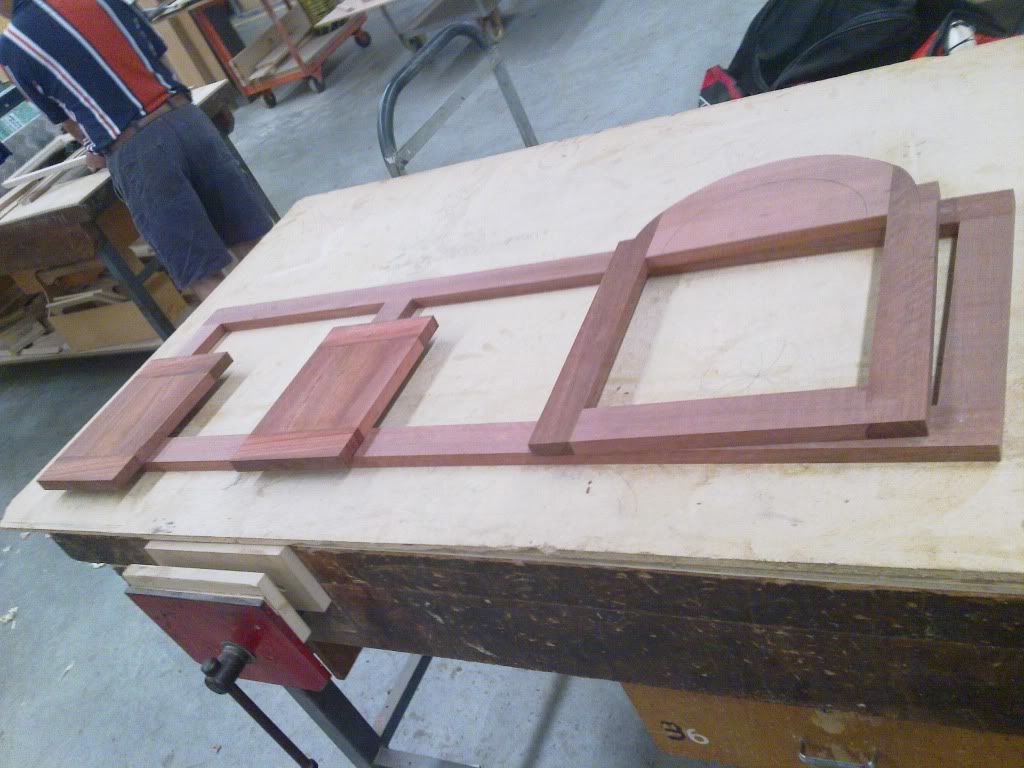
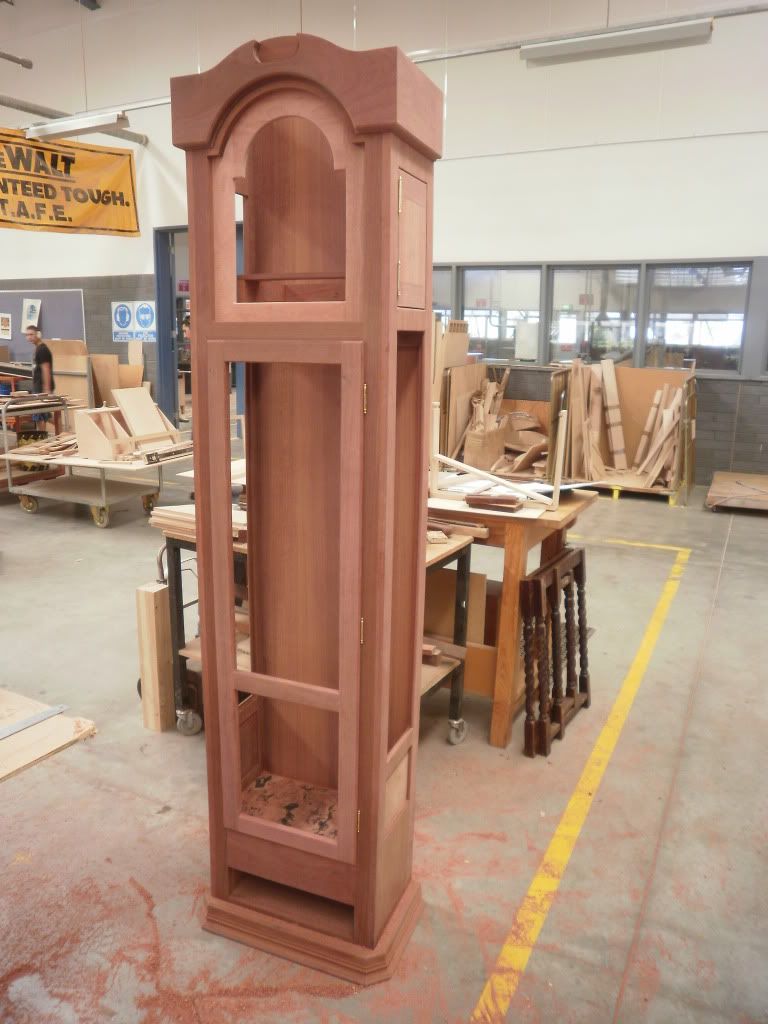
Well I ended up starting on the pelmet and lots of sanding and scrapingi just got the good ole orbital sander out to get rid of most of my machining marks to save me the trouble at a later date.
The pelmet was fairly easy i just used the jig I made last week and used an underbench router to carve it out then it was a simple case of routing the ogee moulding on the bottom of the pelmet and mitring it to fit the top of the case
Next week i will be working on the pelmet top section and the base I hope
here are the photos
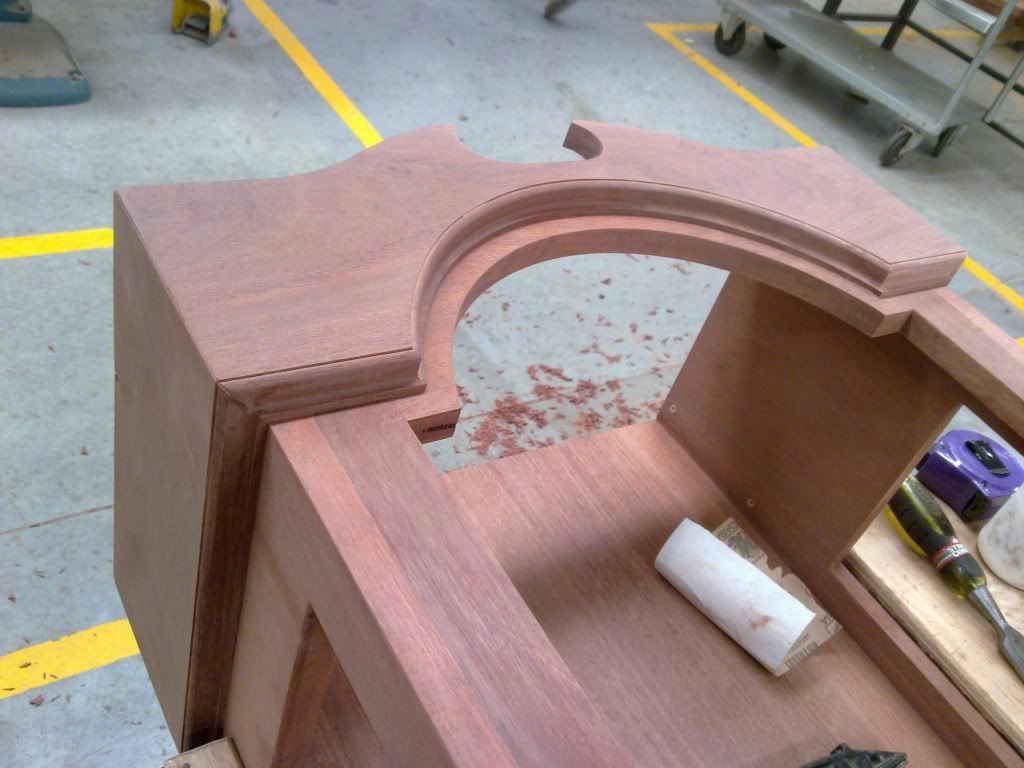
This photo shows the blanking piece i have put behind the pelmet to make my finial seem as if it was carved out of the timber rather than just glued in
-
6th March 2010, 09:20 AM #20
Intermediate Member
- Join Date
- Nov 2009
- Location
- Ellenbrook
- Age
- 48
- Posts
- 45
Oh well i gotta brag
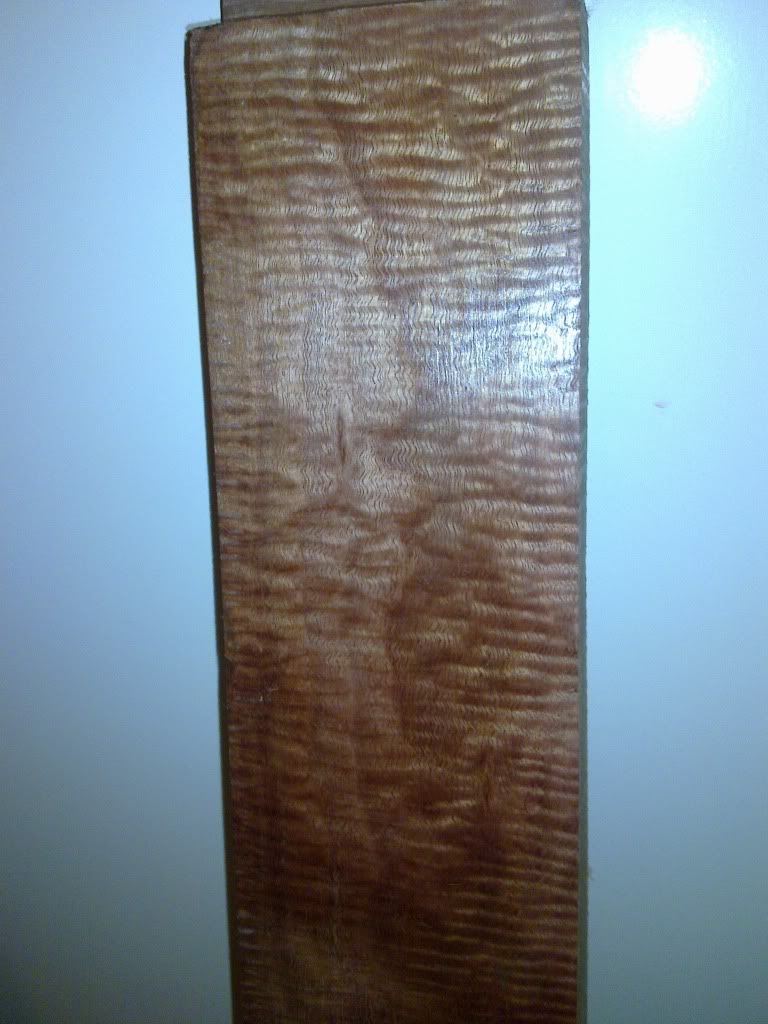
I went down to my local timber merchant who i must say is doing a stellar job in helping me with the timber side of things and got a big 70*50*1400 lump of jarrah for my base moulding and i noticed a very dusty 3M length of 90*30 jarrah that had a very nice grain to it damn was i in for a surprise as it was very rough sawn bent and twisted but i grabbed it anyways. he only charged me a fiver for it
i got back to my work and gave it a little plane with my hand planer and a quick lick with a very smooth belt sander and found out it was a beautiful piece of curly jarrah
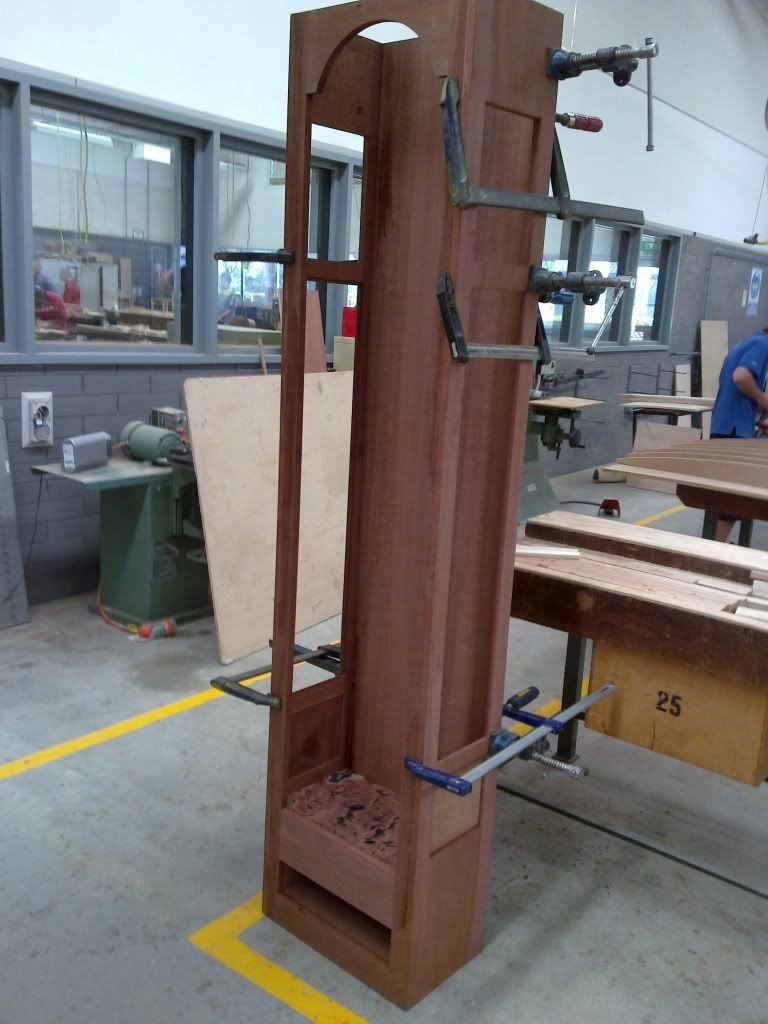
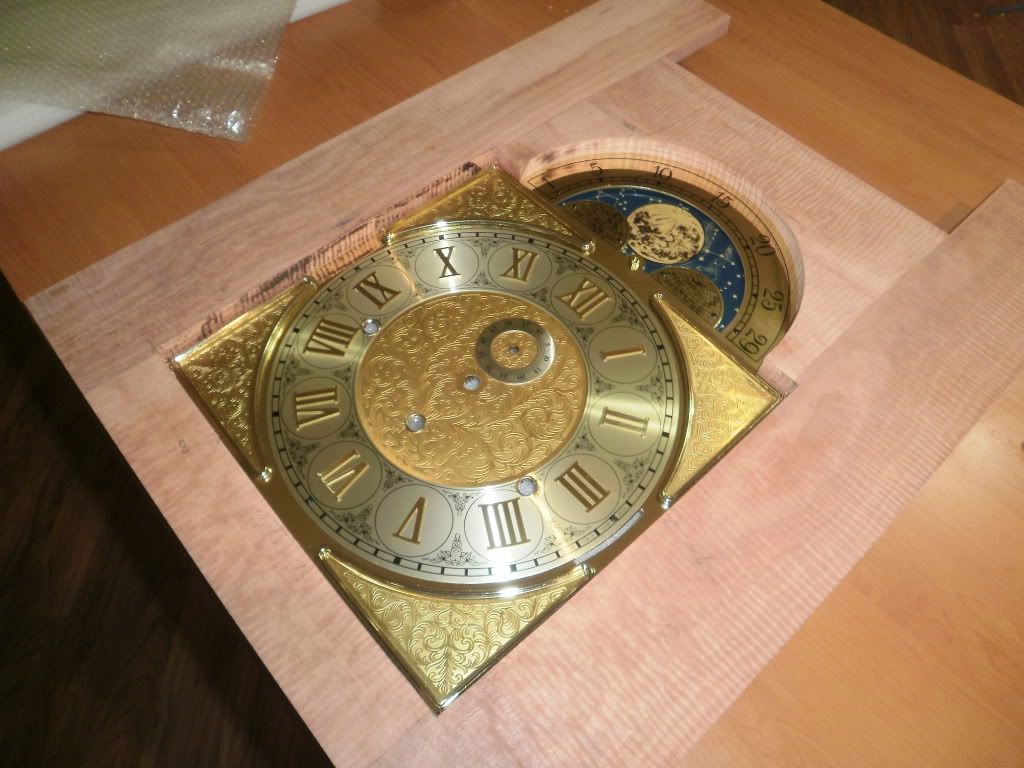
I got my bit for the Dial frame now")
and before you ask the bits in the photo's are polish grade atm sanded up to a 240 grit

-
10th March 2010, 12:29 AM #21
Intermediate Member
- Join Date
- Nov 2009
- Location
- Ellenbrook
- Age
- 48
- Posts
- 45
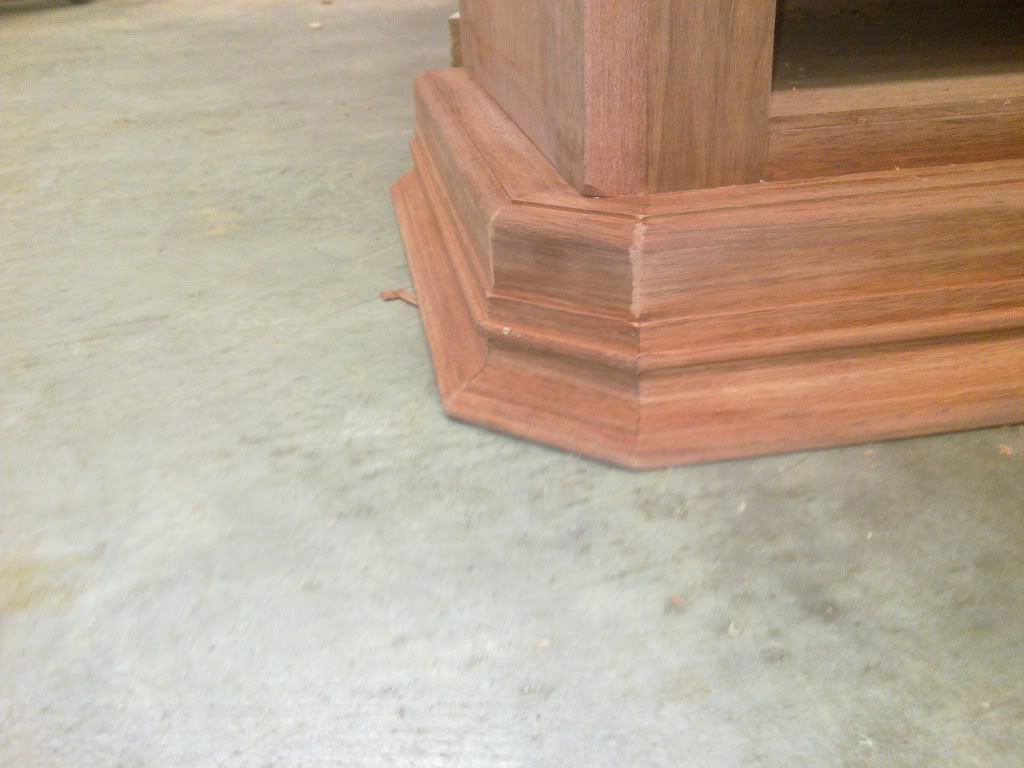
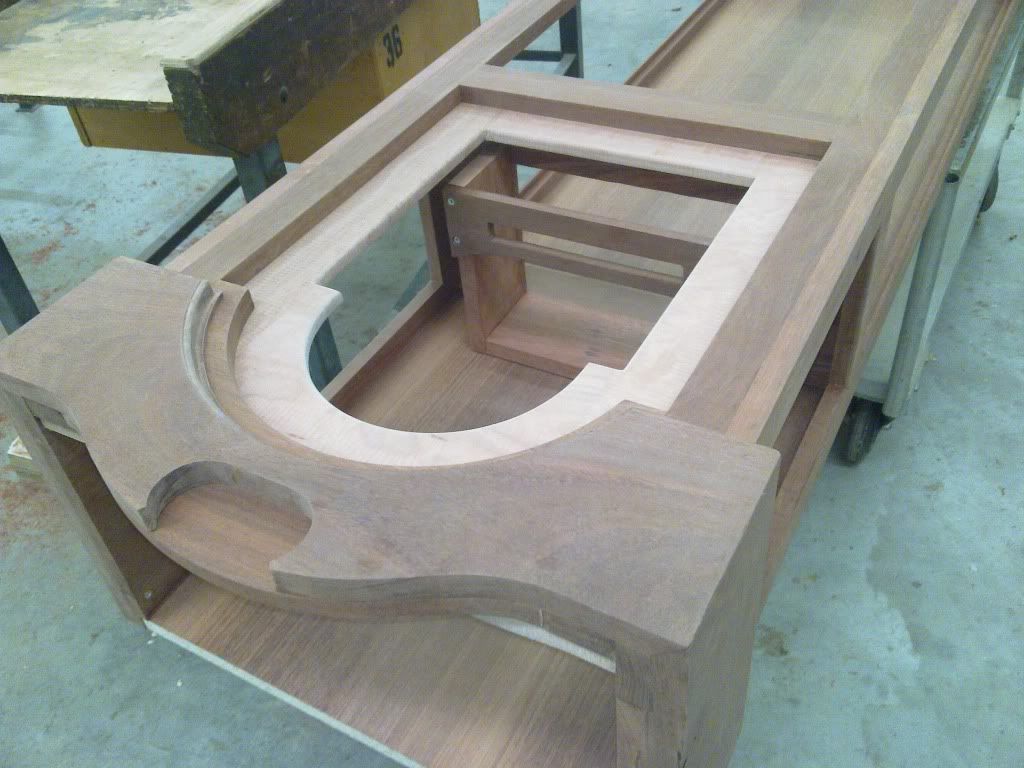
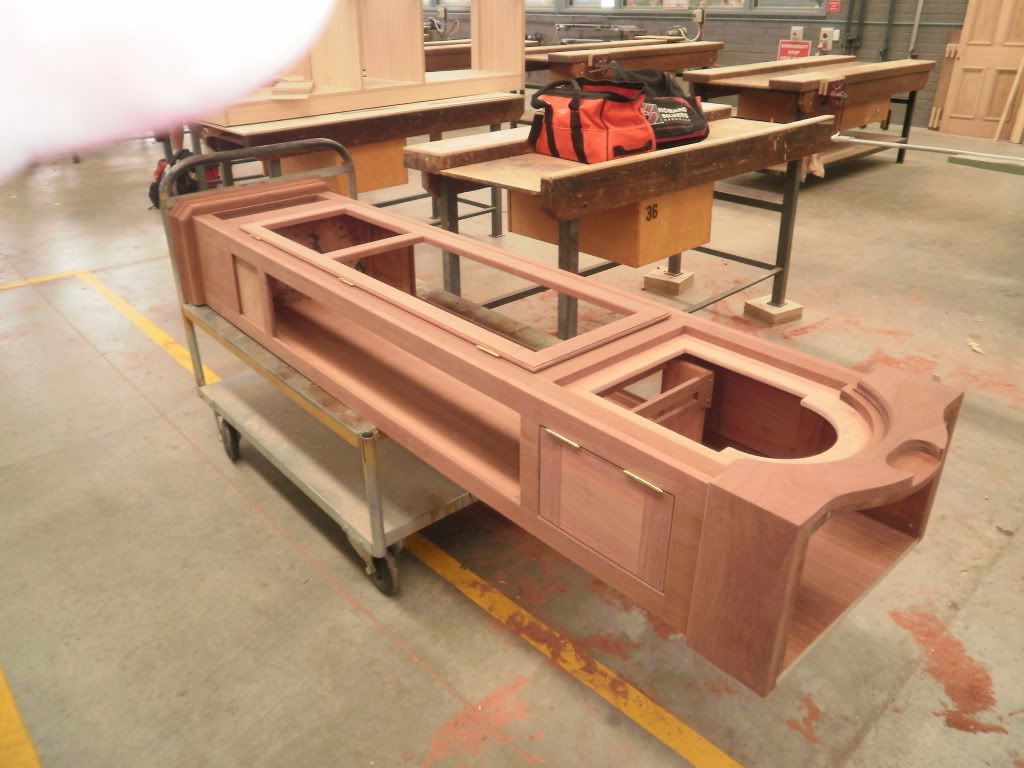
Well Guys today started out fairly well i just jumped on the spindle moulder and went through about 50 different sets of cutters trying to find a set that looked decent for my base moulding then it was the just spending time putting the 50*70 mm piece through a few times and it was all done then setting up the saw for my angles found it to be interesting fun to get tre right angle set then cut the base moulding down to size and glued pinned and screwed it on it sits about 10mm lower than the case so it needs a bit of strength in this area but i may have gone overboard the base will be completed later with a 20 mm thick foot at each front corner and a long piece at the back

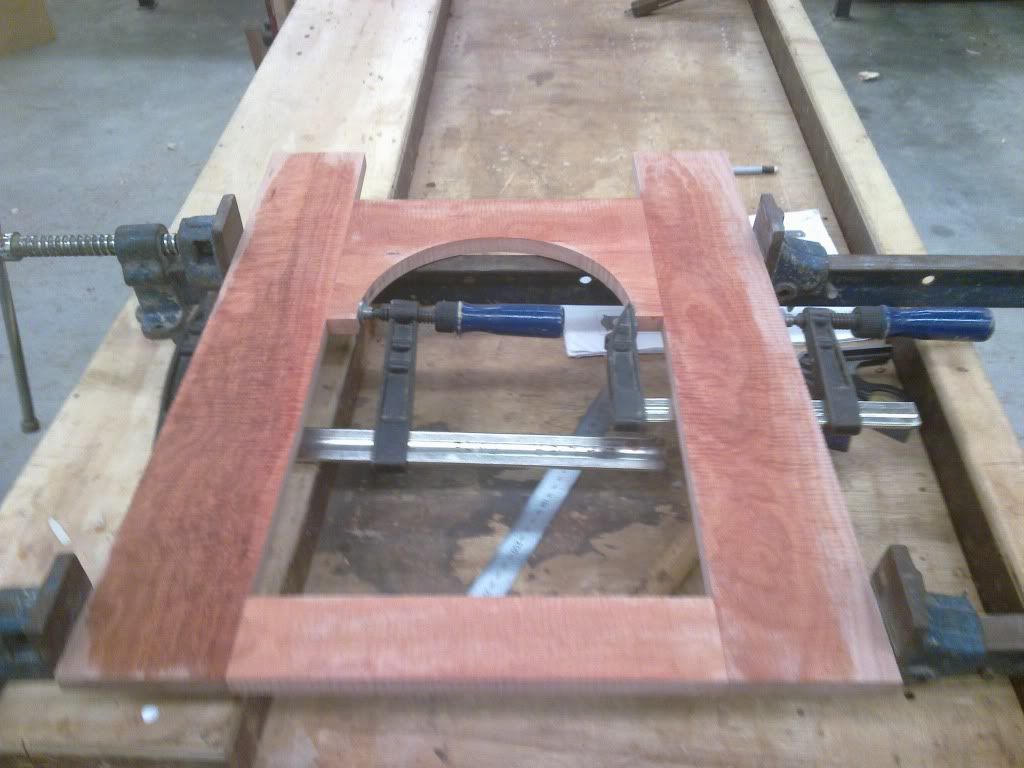
anyhow after that was all done i turned to the curly jarrah, I have decided to use this in my dial frame so i have cut it into 3 lengths of 600mm and 1 piece at 400mm i then cleaned it up thruough a surface planer and found it tore out very readily so went exceptionaly slow and it came out alright the thicknesser was another story even at its slowest speed it tore chunks out due to the grain so it was down to a number 7 plane for finishing. i then docked 1 of the 600 lengths in half and glued it together to make the dial frame top section and cut this to size after it dried and using a jig I madeused a linishing sander as i believed a rouer would have minced it just like the surface planer did then glued it all up after cutting to size, Just one note though, I have made the dial frame go the full internal width of the case as to make sure it is all parrallell when put together, after this was done that was the end of my day but i took the dial frame home to check it against my dial and sure enough the mesurements given to me by the plans were way off so next week i have to take 4mm off each side internally and 8 mm off the botom to make the face fit. The photo i have of the dial frame is pretty bad so i will fix that up soon
Cheers Guys
-
10th March 2010, 08:03 PM #22
Intermediate Member
- Join Date
- Nov 2009
- Location
- Ellenbrook
- Age
- 48
- Posts
- 45
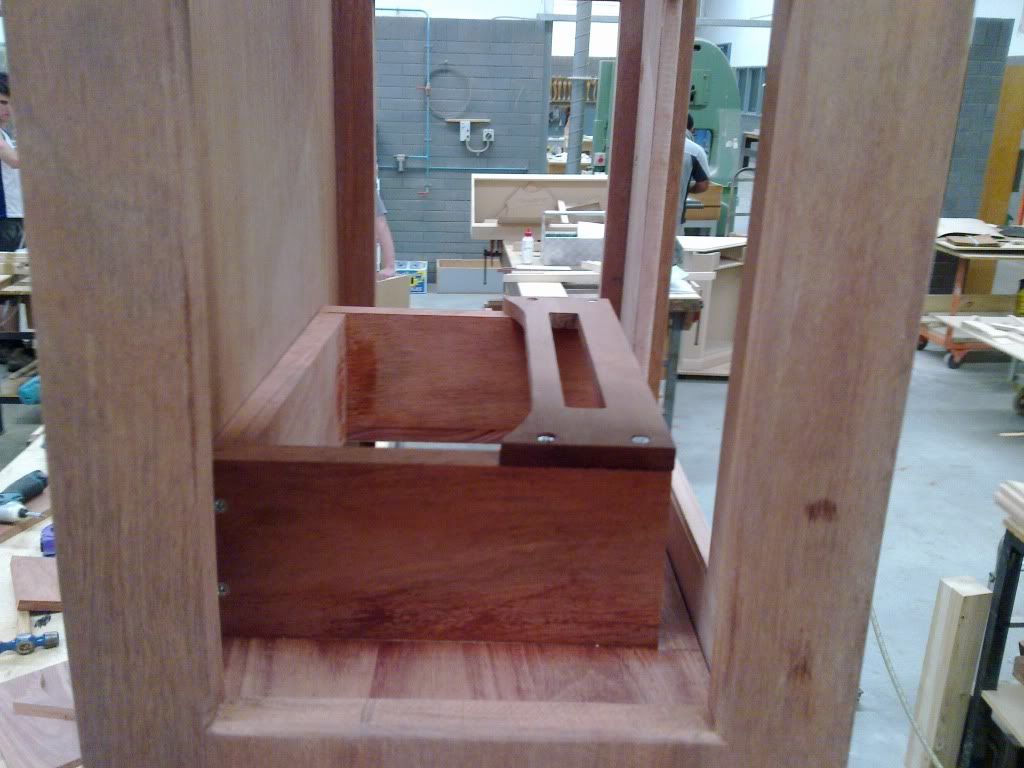
ok guys after taking my frame to work today and shaving a little bit out of the insides on the panel saw here it is i just need to sand out the burn marks , bring it down to 12mm and put a pencil round on the inside of the frame and recess the dial into the back so it sits flush (no not that much work at all)
just one quick question when working out the hight to put the mechanism mounting board is it wise to have it all connected up to get the measurements ???? (like have the face mounted on to the movement and mounted onto the dial frame ) and my other question at the moment is when installing the chimes is it best to leave that till last or does it need to be sorted out at a quicker time
-
16th March 2010, 10:23 PM #23
Intermediate Member
- Join Date
- Nov 2009
- Location
- Ellenbrook
- Age
- 48
- Posts
- 45
Well not much got done today guys i spent the first 2 hours of the day doing assignments and a test (well it is an apprenticeship
 )
)
and the rest of the day i finished off the dial frame by routing the back of it to make the face sit flush in the back of the frame and put a 6mm round on the inside of the frame to give it a nicer appearance and then sent it off to the polishing department.
unfortunately no photos were taken at this stage.
then I decided that instead of 1 complete door for the front I will split it up into 2 pieces at the bottom of the dial frame. So a new piece was slotted into the frame this is only screwed in atm and not glued it will be glued in at a later stage and it also hides my mounting blocks for the movement. Also i glued up a few boards to make the framework up for the mounting board
here are the photos of what has been done so far
-
17th March 2010, 12:06 AM #24
Intermediate Member
- Join Date
- Nov 2009
- Location
- Ellenbrook
- Age
- 48
- Posts
- 45
Also atm Guys i need a bit of a hand finding a polisher for this job I really want an A1 finish but as an apprentice can't afford that much but if anyone can steer me in the right direction of a very good polisher in Perth (Northern suburbs) just post here as i know the apprentice polishers at Tafe will not be able to do the job I want, I'll Give them the credit that they are learning but something like this I do not want Ruined by a crappy finish. (this is going on past experience)
Cheers Guys
-
18th March 2010, 09:47 PM #25
Intermediate Member
- Join Date
- Nov 2009
- Location
- Ellenbrook
- Age
- 48
- Posts
- 45
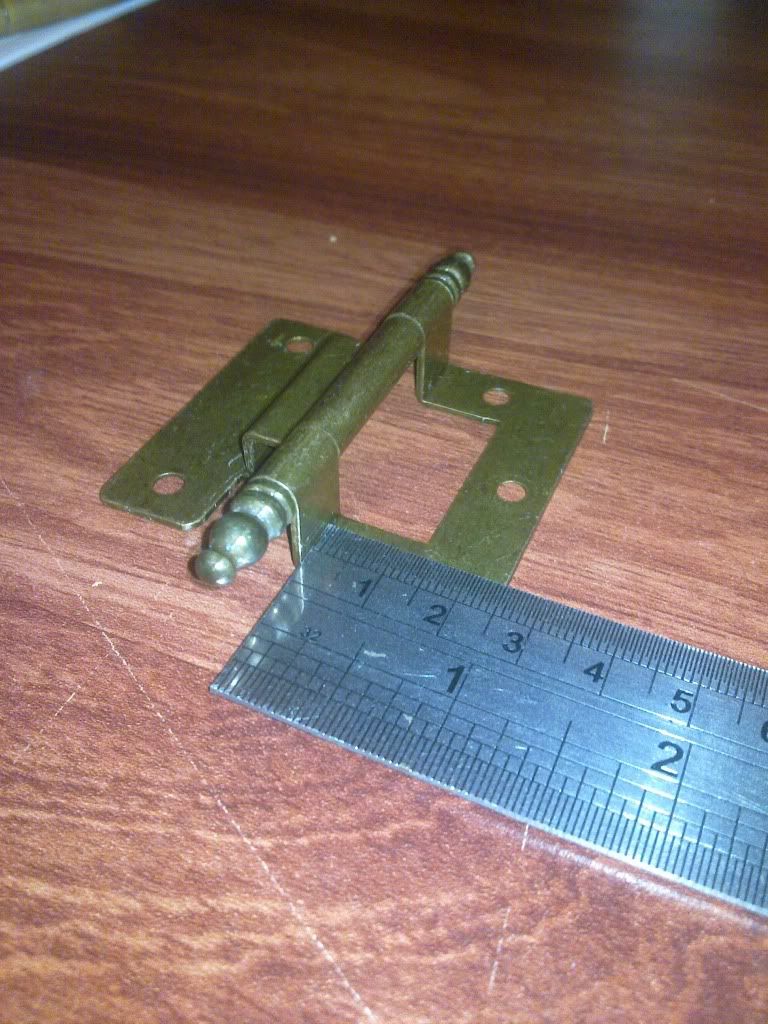
Hi guys
Just wondering if anyone knows where i can get hinges like the ones in the pic but the piece where the rule is needs to be 18-19 mm max and i also need 5 of them in polished brass. the problem with these ones is that they will hit the dial frame.
I dont mind buying stuff online so just a link to an online site or shop would be good I dont mind paying a bit of money for them as the will need to hold my 2 front doors on and the bottom one will hold quite a bit of weight when the glass is in there.
-
23rd March 2010, 09:16 PM #26
Intermediate Member
- Join Date
- Nov 2009
- Location
- Ellenbrook
- Age
- 48
- Posts
- 45
well a little luck came in from a deceased estate auction and i got some hinges to suit the doors
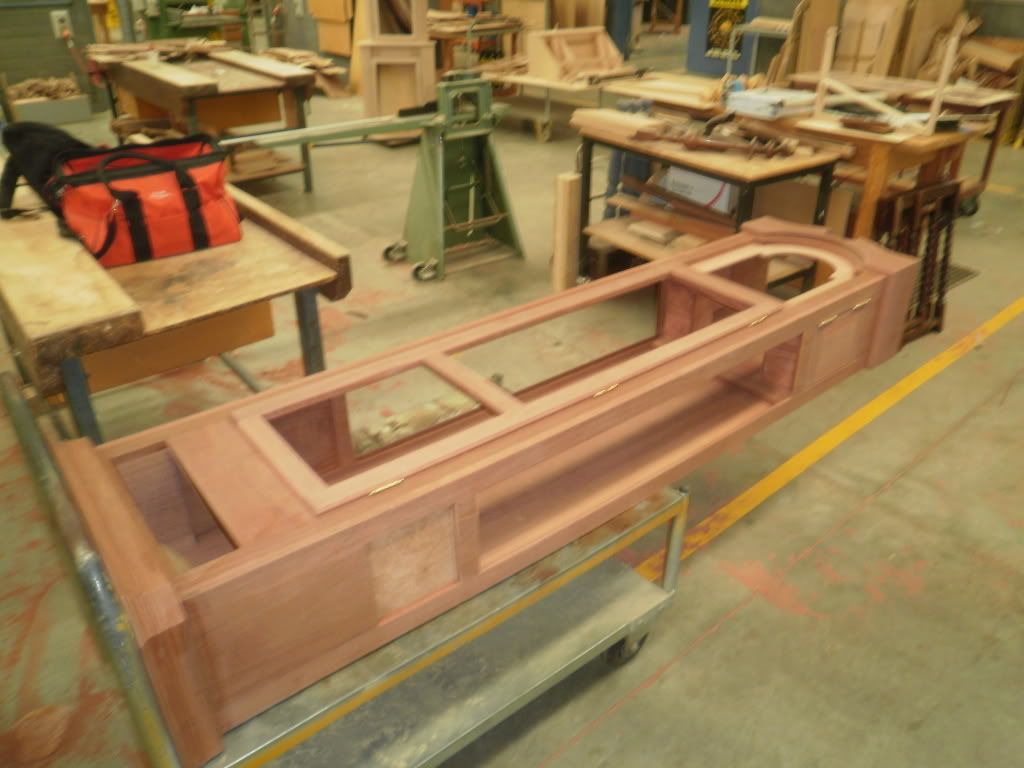
But enough of that, Today i definately accompished a lot, I started off where i finished last week and worked on the movement mounting boards and the the doors the mounting boards were quite easy and was just a case of cutting out a decent framework to hold the mechanism. The 2 front doors i made from 1 framework as seen here i just cut the frame at the two rails that are close together
the following pic is of all the doors done to a basic completion they still need to be routed and finished off the two side doors are just a solid framework that will be held in by a ball catch
and here are the rest of the photos of the work completed today
-
24th March 2010, 10:41 AM #27
Intermediate Member
- Join Date
- Apr 2009
- Location
- Palm Beach QLD
- Posts
- 23
 Help Needed Starting a clock
Wow.
Things look to be coming together really well.
Thanks for being so generous as to share your work with the forum members.
Its really great!
-
24th March 2010, 01:48 PM #28
Senior Member
- Join Date
- Jul 2008
- Location
- Sydney
- Posts
- 299
I agree, great stuff!!
love the shape of the clock as it comes together, particularly also the curly grain face plate.
If the hinges you got are similar to ones shown, they look great and really suit the clock.
Cheers
-
30th March 2010, 11:35 PM #29
Intermediate Member
- Join Date
- Nov 2009
- Location
- Ellenbrook
- Age
- 48
- Posts
- 45
Hi Guys and thanks for the comments
I must say this will be the last post for two weeks as tafe shuts it's doors for the school holidays but will be back into it on 20th April.
Did not seem to do much today except fiddle about with the doors the two top side doors were fited with a decorative banding (this is mostly to cover up a stuff up by yours truly by cutting the doors too small ) and routing and fitting the main door on the case the hinges I purchased through ebay were not really up to scratch But my lecturer, Murray had a nice set around so I grabbed some off him.
and the rest of the afternoon i was working on Jigs to make the curved top section of the case and for routing the door of the clock face.
-
31st March 2010, 07:17 AM #30
Skwair2rownd
- Join Date
- Nov 2007
- Location
- Dundowran Beach
- Age
- 76
- Posts
- 19,922

Don't often drop in here, but when I do I'm always surprised. This is a great Wip and the piece is looking reall tremendous.
Congratulations and keep up the great work>


 Reply With Quote
Similar Threads
-
Clock mouldings for old clock
By T5AUS in forum RESTORATIONReplies: 1Last Post: 8th September 2009, 11:23 PM -
Advice needed for first clock
By scorpio_oz in forum CLOCKSReplies: 3Last Post: 26th March 2009, 10:51 AM -
Style needed for a clock
By echnidna in forum WOODWORK - GENERALReplies: 9Last Post: 24th November 2005, 01:38 PM -
Starting out
By Kaivon772 in forum WOODTURNING - GENERALReplies: 6Last Post: 22nd July 2005, 01:04 PM
