

 Thanks: 0
 Likes: 0
 Needs Pictures: 0
 Picture(s) thanks: 0
Results 31 to 45 of 54
Thread: Help needed in starting a clock
-
31st March 2010, 08:08 AM #31
 GOLD MEMBER


- Join Date
- Jun 2007
- Location
- North Of The Boarder
- Age
- 68
- Posts
- 16,794

WOW a great insight into making the grandfather clock look forward to seeing the completed work. Well done on the wip.
-
31st March 2010 08:08 AM # ADSGoogle Adsense Advertisement
- Join Date
- Always
- Location
- Advertising world
- Age
- 2010
- Posts
- Many
-
31st March 2010, 10:46 PM #32
Intermediate Member
- Join Date
- Nov 2009
- Location
- Ellenbrook
- Age
- 48
- Posts
- 45
Well for now this has taken me 9 days and if you take away the 30 mins pack up time and setup time every week and a a bit less time off for other tafe stuff you could be up to this stage in 7 days working solid doing 8 hours a day with the right tools
Major Tools I have used in this build
Panel Saw
Rip Saw
Bench Planer
Thicknesser
Table Router
Trimer with various bits
Linishing sander
Wide Belt Sander (makes all the frames nice and flat)
Band Saw
Spindle moulder
Loads of clamps I have used up to 15 at the same time i mostly use sash clamps but F clamps are the other type i use of varying sizes
And the most used Tool I use is a disk sander ( I honestly would love to have a 1/2 sheet festo sander but this one does the trick but i have used the half sheet ones before and will swear by them)
So with a little time and effort you can do wonders.Last edited by steamboatbob; 31st March 2010 at 10:50 PM. Reason: missed out a tool or 2
-
20th April 2010, 09:04 PM #33
Intermediate Member
- Join Date
- Nov 2009
- Location
- Ellenbrook
- Age
- 48
- Posts
- 45
Well back to school today and boy what a trial that was
went to my timber guys out at hamilton sawmills in landsdale ( I really can't thank these guys enough for their help with odd bits and pieces i require ) and got myself some 50*150*1800 and some 25*200*2000 jarrah all was good got to tafe and started on my top moulding seemed easy enough but i was also forming the lid of my clock as well that was done by thicknessing one layer of 3 ply off to make it a little more flexible I made a former up and glued it all together in a vacume press so it was 9 mm thick after 3 sheets were glued together this was all glued in place and pinned on i will be screwing some glue block later on to give it more strength.
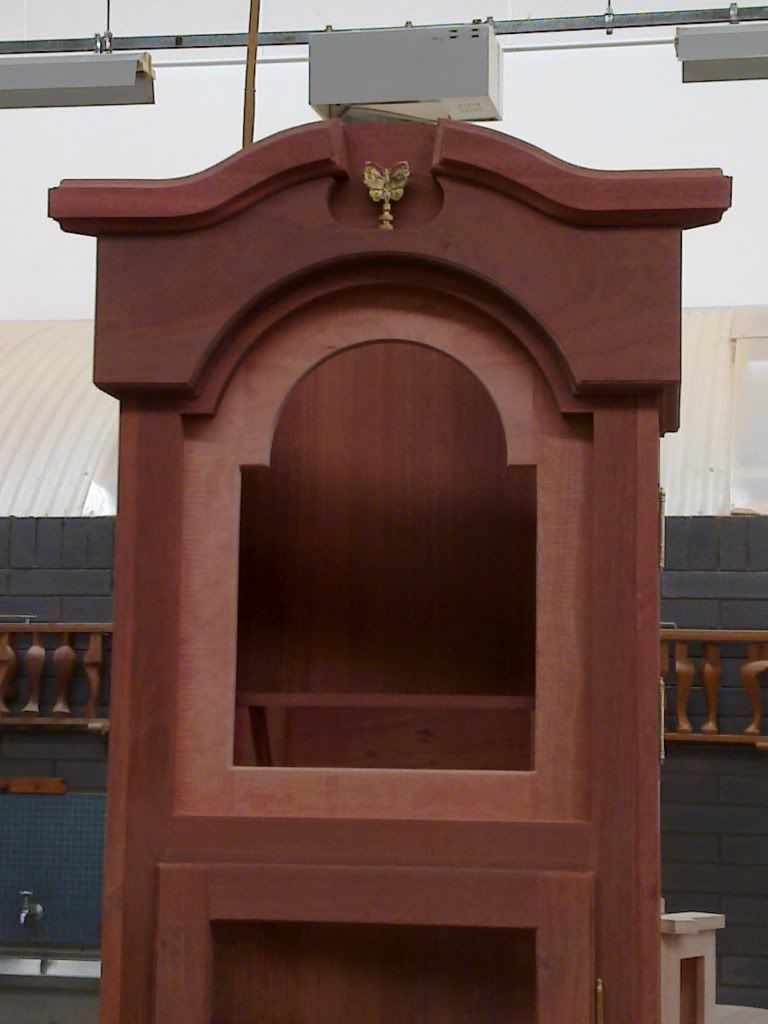
The top moulding was fairly easy i just made up a jig for the curve off the clock and used that to mark lines so i could bandsaw the scrap off and finished it off with a linishing sander. the section i have taken out was done with a radial arm saw and a very sharp chisel. it is 5mm thick in the rebated section to give the finial a solid back rather than hanging in the air like most clocks do and here is the result the top moulding is not stuck on in this picture as i still have to mitre it to size (take off around 30 mm either side), and the brass finial will be placed on a 20mm Tapered block to give it a little more height. if you wish me to post a particular view of the clock or part of in higher detail just let me know and i will get it done the next week i do envisage that the clock will be complete in 3 week without any unforseen things happening.
-
27th April 2010, 09:27 PM #34
Intermediate Member
- Join Date
- Nov 2009
- Location
- Ellenbrook
- Age
- 48
- Posts
- 45
Hi all
And another day in the life of an Apprentice
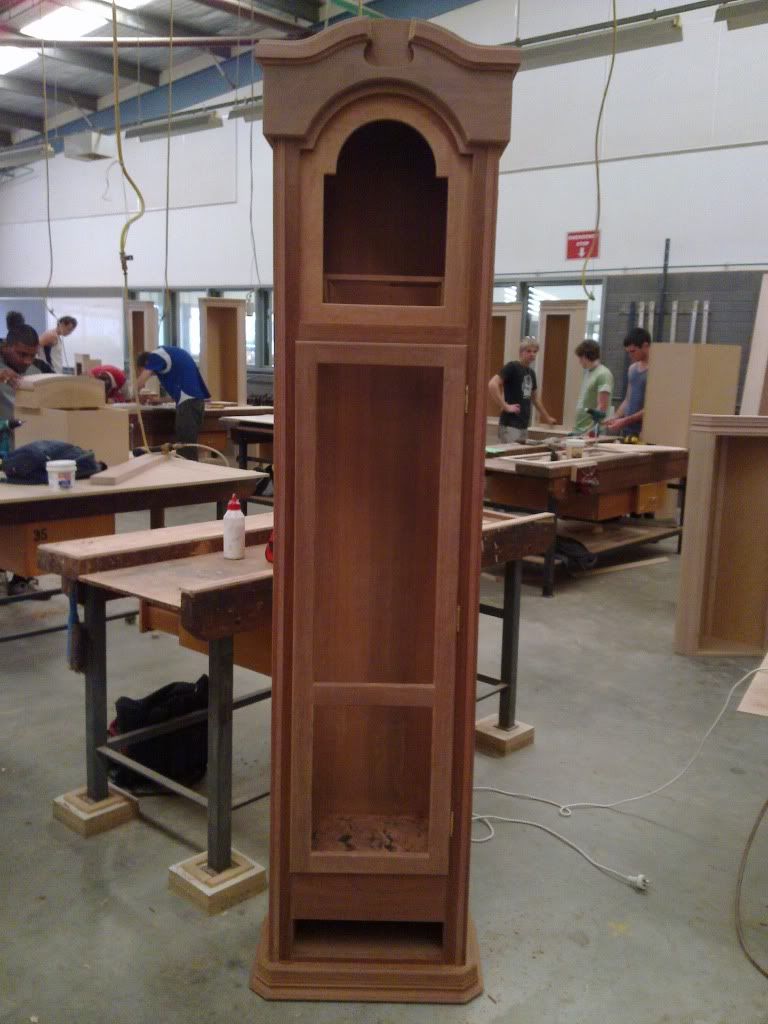
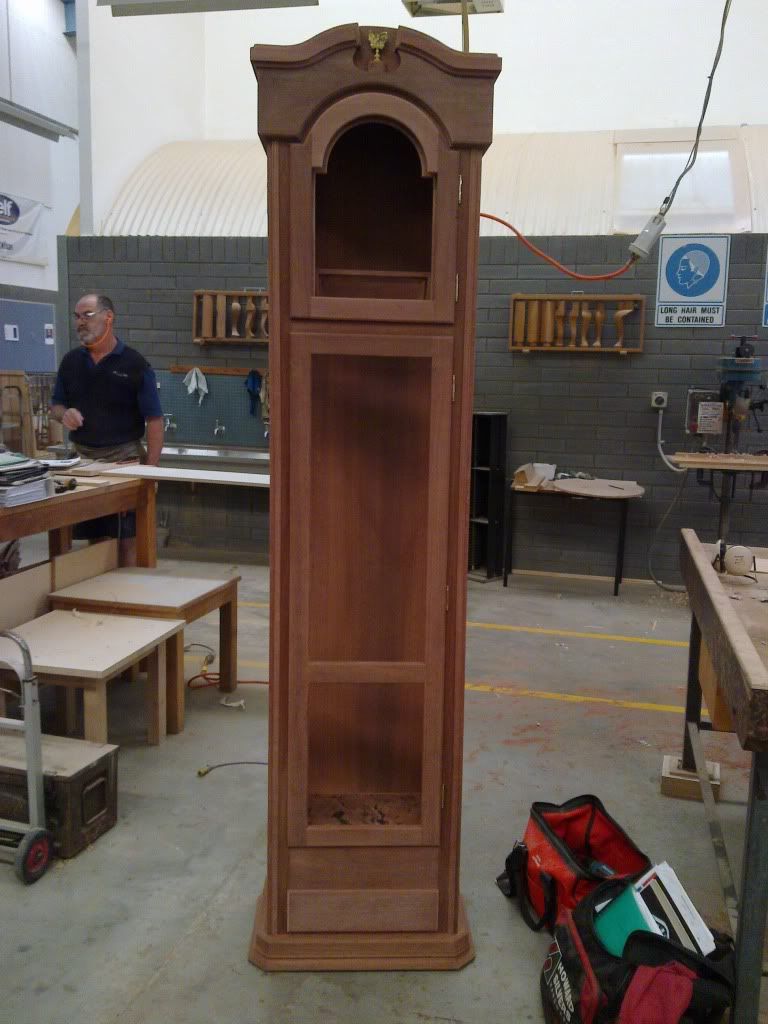
Not much happened today except finishing off the top pelmet and putting some beading on the front of the case to cover the join from the front frame and the side frames, also i made a jig up using a band saw, linishing sander and bobbin sander for the dial door which will be routed out next week, the rest of the day i spent sanding and scraping the case ready to be polished i must admit though the scraper makes a better finish of the jarrah than the 240 grit paper i was using, I think all up i spent 4 hours on cleaning up the case of a whole heap of marks.
But all that is left to do at the moment is make the Draw and finish the dial door and make some templates up for all the glass to go in and a lot more sanding.
but here it is at the moment
-
28th April 2010, 09:38 AM #35
I've got wood
- Join Date
- Feb 2008
- Location
- Deloraine Tasmania
- Age
- 59
- Posts
- 1,092
Coming along really nicely there Bob, the end of the road is in sight!

-
4th May 2010, 09:27 PM #36
Intermediate Member
- Join Date
- Nov 2009
- Location
- Ellenbrook
- Age
- 48
- Posts
- 45
Hi Guys
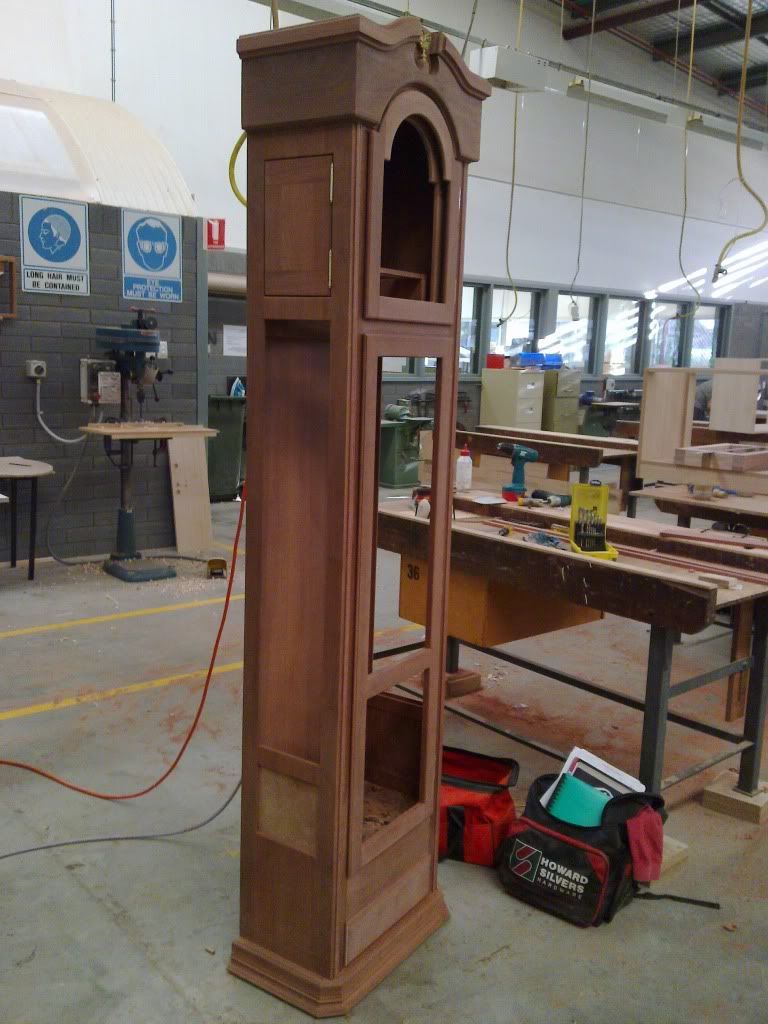
Getting down to the buisness end of things now. Well all I did today was make the draw and the top door and hang all the hinges and catches as well as a load of sanding, and still more sanding to do next week but this will be minor things to make it pretty.
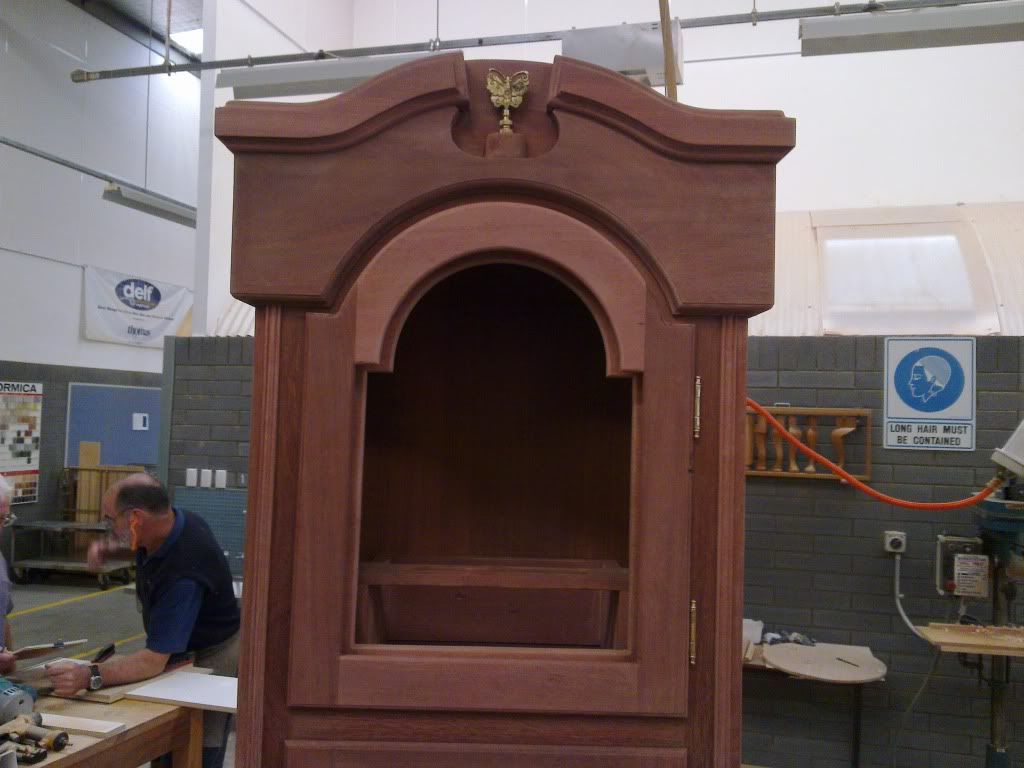
The top door was fairly easy as i had the jig made up for it so all i did was Jigsaw out the offcuts from the inside and put it on a small table router to make it nice and neat. then rebated and routed the edges and sanded the surfaces to come up nice. i used the same bit as the lower door a 5mm round which on the outer edge i stepped the round down to give a 2 mm lip and just a plain round on the inside of the door. the backs of the doors had a 10mm by 10mm square taken out of them to allow for glass and the hinges.
The other thing i made today was a little stand to place my finial on i just used a 40mm thick piece of jarrah and put a 19mm round on either side and cut it down to a 20*40 block, The finial was a great find as i really did not like the standard round finials you find in the clock websites so i found a website that sells Bedside Lamp toppers and they had a massive range of all different motifs available that fitted onto a M6 Thread.
Here is the top section fully completed for polishing
I also made the draw today nothing really too drastic about it as it is a standard dovetailed draw with a drawfront that matches the two doors the only different thing on this was a bookleaf veneered bottom to the draw wich my wife thinks it looks like the devil
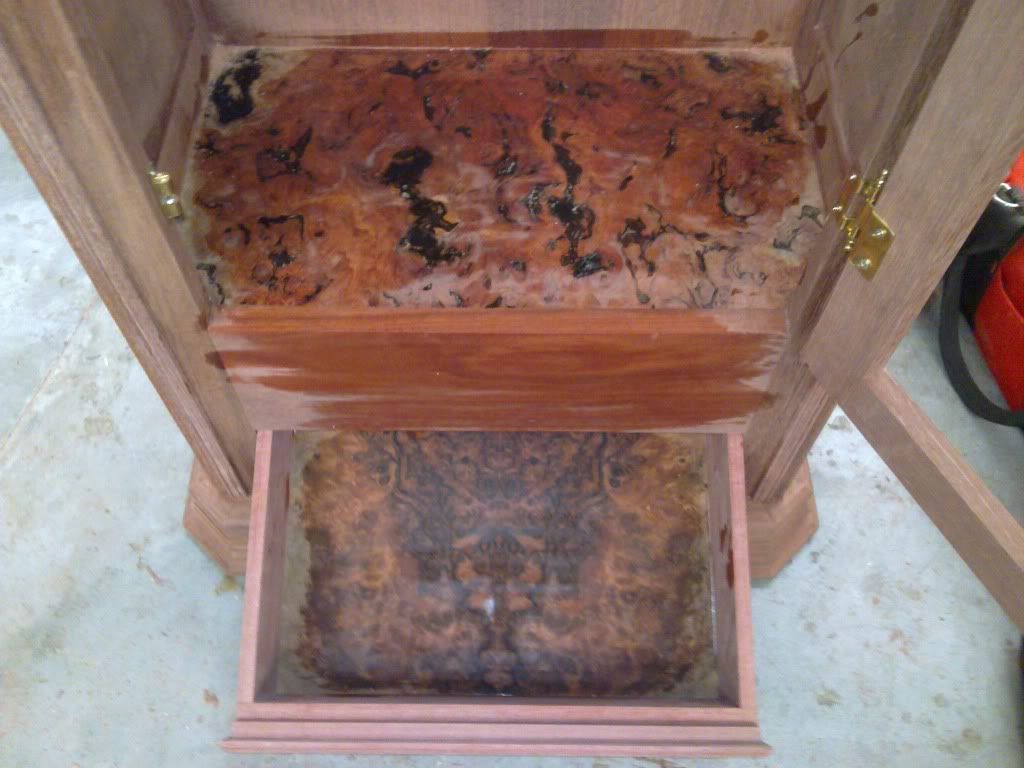
And Here it is ready for the polish shop i realised at this stage i still had not rebated the lower door for the glass so that will have to be done next week as well as a few bits of light sanding
-
5th May 2010, 09:05 AM #37
I've got wood
- Join Date
- Feb 2008
- Location
- Deloraine Tasmania
- Age
- 59
- Posts
- 1,092
wow that's an awesome looking project Bob, bet u must be feeling pretty proud now you are so close to finished. More power to ya!
-
5th May 2010, 05:54 PM #38
Intermediate Member
- Join Date
- Nov 2009
- Location
- Ellenbrook
- Age
- 48
- Posts
- 45
Totally proud mate i just cant wait to get it polished and get it home so i can install the movement in it

-
6th May 2010, 11:18 PM #39
Member
- Join Date
- Jan 2009
- Location
- Melbourne
- Posts
- 56
Congratulations Bob. It is a very nice clock and you have put together an informative WIP. Clock making is addictive. I am sure that you will now make more. Have you thought more of polishing it yourself? In an earlier post you were planning to have it done elsewhere. You should give it a try. To go this far and not complete it yourself may be something that you will regret later.
Peter
-
6th May 2010, 11:47 PM #40
Intermediate Member
- Join Date
- Nov 2009
- Location
- Ellenbrook
- Age
- 48
- Posts
- 45
In all honesty Pete L i would love to be able to polish this myself but ot home im hampered by the fact i have only a 3m*3m shed that is full of gardening and model boat gear and my work is not keen on letting me go for it so im kind of between a rock and a hard place there.
But if anyone wants a mature age apprentice in Perth who is about to finish his tafe and just wants to work with Solid Timber Furniture. give me a holler
But i have 8 weeks of tafe left so im going to try another project that i have in mind
-
9th May 2010, 10:27 PM #41
Senior Member
- Join Date
- Jul 2008
- Location
- Sydney
- Posts
- 299
SBBob
Great job...many your clock be in beat for at least the next century.
Cheers
-
11th May 2010, 08:51 PM #42
Intermediate Member
- Join Date
- Nov 2009
- Location
- Ellenbrook
- Age
- 48
- Posts
- 45
Thanks Guppy
I have put the clock in for polishing today opting for the dial frame (curly jarrah) and the burl in the base to be done in high gloss polish and the rest in a satin finish.
So i shall post a picture of it when it arrives at home which will not be for around 2 weeks
Cheers guys
Bob
-
27th May 2010, 08:31 PM #43
SENIOR MEMBER
- Join Date
- Oct 2006
- Location
- Townsville, Tropical North Qld.
- Age
- 76
- Posts
- 556
Hi Bob, hope you get an A+ for this assignment, it is a credit to you.
Looking forward to seeing the finished article.
Cheers, Ian"The common law of business balance prohibits paying a little and getting a lot.. it can't be done.
If you deal with the lowest bidder it is well to add something for the risk you run.
And if you do that, you will have enough to pay for something better"
-
3rd June 2010, 12:47 AM #44
Intermediate Member
- Join Date
- Nov 2009
- Location
- Ellenbrook
- Age
- 48
- Posts
- 45
All is good atm i have her home polished and im putting in the hardware but due to a computer meltdown over the week i really cannot post much but i will as soon as i canCheers Guys Bob
-
15th June 2010, 08:58 PM #45
Intermediate Member
- Join Date
- Nov 2009
- Location
- Ellenbrook
- Age
- 48
- Posts
- 45
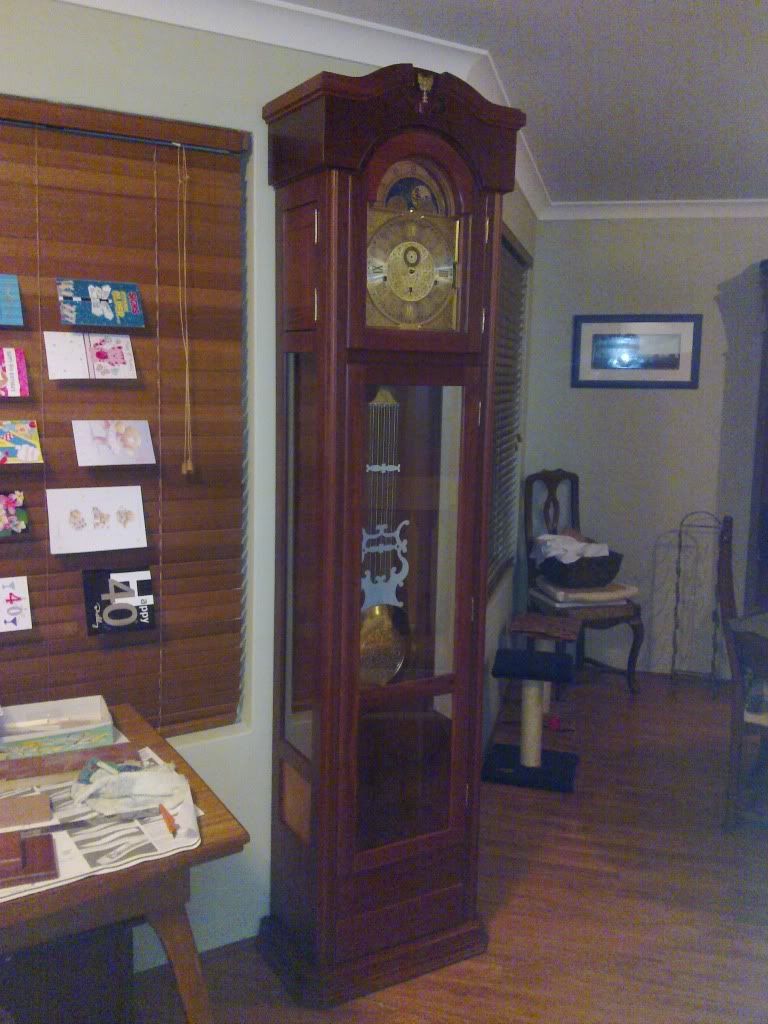
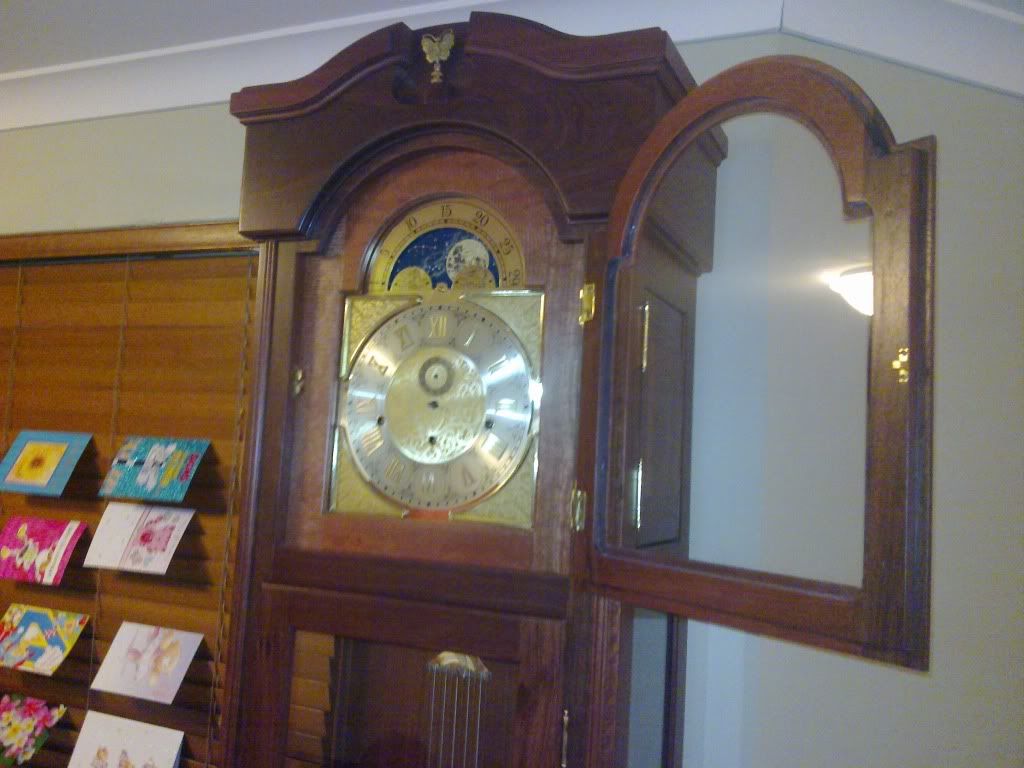
Well finally Im back and here are a few pictures of what i have done
the mechanism still is not fully installed due to a few bits missing out of the box (weight screws and 2 grommets off the hammers) but all will be good in time


 Reply With Quote

Similar Threads
-
Clock mouldings for old clock
By T5AUS in forum RESTORATIONReplies: 1Last Post: 8th September 2009, 11:23 PM -
Advice needed for first clock
By scorpio_oz in forum CLOCKSReplies: 3Last Post: 26th March 2009, 10:51 AM -
Style needed for a clock
By echnidna in forum WOODWORK - GENERALReplies: 9Last Post: 24th November 2005, 01:38 PM -
Starting out
By Kaivon772 in forum WOODTURNING - GENERALReplies: 6Last Post: 22nd July 2005, 01:04 PM
