

 Thanks:
  Likes:
  Needs Pictures:
  Picture(s) thanks:
Results 121 to 135 of 154
Thread: Waldos Grandfather clock
-
23rd October 2022, 09:22 PM #121
 Just some guy


- Join Date
- Jul 2003
- Location
- The Fabulous Gold-plated Coast.
- Age
- 69
- Posts
- 3,925

Waldo, thanks for this thread. We bought a circa 1720 movement from the UK which needs a case. As soon as I finish the house where the clock will live I think the case will be the first fine* furniture project in quite a while.
Still considering timber choices
* ie: not paint grade.
GregIt's all part of the service here at The House of Pain
-
23rd October 2022 09:22 PM # ADSGoogle Adsense Advertisement
- Join Date
- Always
- Location
- Advertising world
- Age
- 2010
- Posts
- Many
-
23rd October 2022, 09:32 PM #122
GOLD MEMBER
- Join Date
- Mar 2005
- Location
- In the shed, Melbourne
- Age
- 52
- Posts
- 6,883
A 1720 movement, now that would be nice!
-
24th October 2022, 08:33 PM #123
Just some guy
- Join Date
- Jul 2003
- Location
- The Fabulous Gold-plated Coast.
- Age
- 69
- Posts
- 3,925
Yeah, I think the date was wrong probably more like 1770ish.
We have to get it cleaned and serviced. Apparently there is a trusted clock restoration guy in Brisbane
GregIt's all part of the service here at The House of Pain
-
6th November 2022, 09:03 PM #124
GOLD MEMBER
- Join Date
- Mar 2005
- Location
- In the shed, Melbourne
- Age
- 52
- Posts
- 6,883
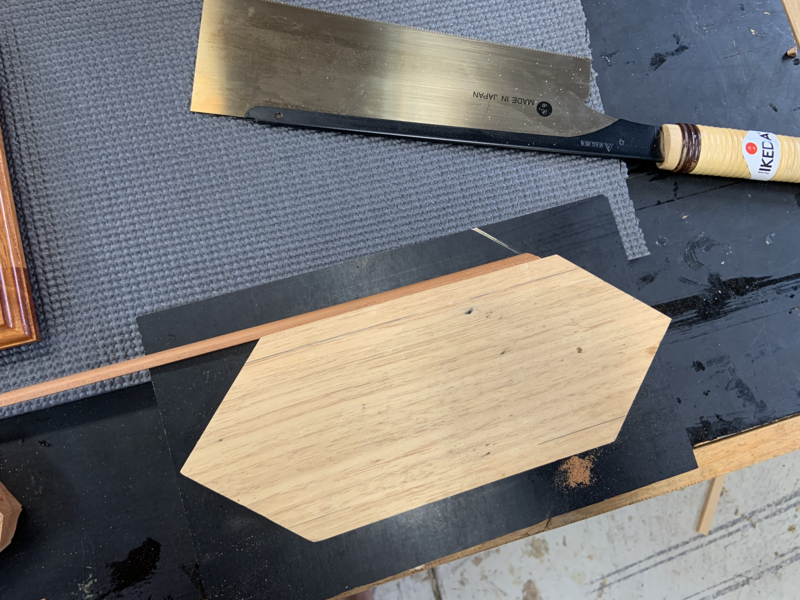
The back panel
The back panel is the last piece to be created.
Starting out as a 3.9m x 300m x 40mm board and docking it in half, the first step was to use the router sled to mill one side nice and flat so it could be dimensioned on the thicknesser and then run over my little Paul Call 6" jointer.
IMG_8318.jpg
Glue ups are the things I hate. Normally I use Titebond 3, and I thought I'd use it here (all the while I was thinking I should stick to hide glue), and the back of my mind idea is what I should have done. Part way through the glue up the Titebond started going off on me so that the dominoes had become stuck fast and after a lot of cursing and shouting in the shed I took a break, came back later with my dozuki to cut the dominoes and run the boards back through the tablesaw to get joined edges for a second glue up. This time around I used hide glue and I had much longer to get things right without the stress.
IMG_8424.jpg
Next step along with final dimensioning was to cut the slots for the screws to allow seasonal movement.
IMG_8427.jpg
I then grabbed my trusty sidekick and my son and I got the clock upright so that I could drill through from the pack panel into the clock sides where the screws would go. This gave me a chance to see how it was all coming together.
I couldn't get back far enough to take it one one shot as I had the kids bikes and mine right behind me.
IMG_8425.jpg IMG_8426.jpg
-
6th November 2022, 09:23 PM #125
GOLD MEMBER
- Join Date
- Mar 2005
- Location
- In the shed, Melbourne
- Age
- 52
- Posts
- 6,883
And so it begins
I love this part of any build, it's the bit I love after the initial selecting the timber for the grain and what pieces will be used for what, when you thinking about the colour, grain direction and any figure that might be running through it. I'm talking about oiling it, and for that my go to is the Maloof finish as it's idiot proof and comes up beautifully.
The components ready for oiling.
Attachment 518946
Oiling the components, not including the clock case took about 1.5 hours. A close up of one of the side doors showing the fiddleback running through the bottom stile.
Attachment 518947
The clock took me 3 hours.
Attachment 518948 Attachment 518949 Attachment 518950 Attachment 518951
One thing of when I get to the oiling stage of the things I'm making in the shed, SHMBO doesn't like her car to be in there because of the smell. That works for me as I don't have to move her car in and out and I don't have to worry about her car stirring any dust in the shed and settling on the grandfather clock as I'm in the process of oiling it. So now it's 6 weeks of oiling with one coat each weekend.
The are other little things to happen yet before I get to getting the clock in the house and installing the clock mechanism, but you're in for a little wait. I'm thinking I'l wait until after Christmas before I order the glass for the door, but I might give the mob who'll be cutting the glass to find out how long it would take and if I leave it until after Christmas, when do they reopen in the new year.
-
7th November 2022, 09:06 AM #126
GOLD MEMBER
- Join Date
- Aug 2005
- Location
- Queensland
- Posts
- 2,947
Looking great Chris.
You have created a piece of history, I hope you (somewhere) fully document the build and have it accessible to those who will inherit the clock.
I tried to have a look at the attachments in the above post, but they didnt open and sent me to a page which said invalid attachment and to contact the admin if I followed a valid link, this I have done.
Not sure what or where the problem is but I look forward to catching up these bits.Regards,
Bob
Absence of evidence is not evidence of absence.
-
28th January 2023, 05:34 PM #127
GOLD MEMBER
- Join Date
- Mar 2005
- Location
- In the shed, Melbourne
- Age
- 52
- Posts
- 6,883
The side doors (part 2)
With Christmas over and many hours of wipe on, wipe off and 6 coats later of Maloof's finish and then left to harden for few weeks, it's onto the side doors, to fit the escuteons, door handles, locks, brass grille and trim and fit the frame (?) to hold the grille in place.

First job was to install the escutcheons, then I could move onto fixing the grille in place. To cut the inner frame to fix the grille I made a simple jig.

With that done and spending about 15mins on each door to apply pressure until the hide glue had started to do it's thing. Next thing was to apply shellac.


With the door fittings all fitted, it was time to another test fit for the doors and see how it all looked. This was the time when I could see all the pre-planning of careful measurements (almost 3 years ago, or probably more) had paid off or not. My idea was to have the door knob line up vertically and centered to the height of the column cap, the escutcheon lined up to the centre of the door panel and to the bottom of the column cap. I didn't do too bad and wasn't far off on the three.


What wasn't evident in the initial fit, as I hadn't installed the striker plates to the carcass of the grandfather clock, which I soon found out when they were and in this final fit, was that the tongue didn't clear the striker plate by 3mm. So I needed to make some adjustments.
The easiest thing was to get some 3mm brass flat bar.


The grandfather clock components all oiled (took this photo before I'd finished the side doors) and finials test fitted so there was no force required to install them the upper crown moulding, how this fits and why will become evident soon.


The side doors installed.

Tomorrow with cooler weather (today's 36C) I'll glue in place the finial mounting plate. Then the next major step, once I get the glass for the door will be to fit it. Something I've never done and I'm be taking the traditional route to fit and fix the glass.
-
28th January 2023, 06:36 PM #128
GOLD MEMBER
- Join Date
- Oct 2011
- Location
- Gold Coast
- Age
- 53
- Posts
- 1,094
-
28th January 2023, 08:44 PM #129
GOLD MEMBER
- Join Date
- Mar 2005
- Location
- In the shed, Melbourne
- Age
- 52
- Posts
- 6,883
Thanks section1, I'm getting towards the end of the build now and while there have been a lot of stressful moments, I'm thoroughly enjoying this, even if Wongo has fallen to sleep after waiting 5 years now for me to finish.
-
28th January 2023, 09:26 PM #130
GOLD MEMBER
- Join Date
- Oct 2011
- Location
- Gold Coast
- Age
- 53
- Posts
- 1,094
I can fully understand why it's taking so long. There have been many of times I have purposefully delayed a build, not just to enjoy the process but to see if it would improve the quality of the build, and I cannot say that it has. You keep pacing yourself because it would be crying shame to stuff it up now so close to the finishing line.
-
28th January 2023, 11:13 PM #131
GOLD MEMBER
- Join Date
- Mar 2005
- Location
- In the shed, Melbourne
- Age
- 52
- Posts
- 6,883
section1, youre exactly right. Its never been a race and there have been moments when I I havent been happy with something. Ive totally redone the front door, the side doors and the crown split moulding twice each.
It slowed me down by getting things the way I wanted, but this is a build once and forever project to last beyond me. Other times a direction I was taking went a different route as I discovered more things.
-
29th January 2023, 10:01 AM #132
GOLD MEMBER
- Join Date
- Aug 2005
- Location
- Queensland
- Posts
- 2,947
As you are getting close to the end, just a reminder re stability, see post 53, it was a little while ago.
Regards,
Bob
Absence of evidence is not evidence of absence.
-
31st January 2023, 09:06 PM #133
GOLD MEMBER
- Join Date
- Mar 2005
- Location
- In the shed, Melbourne
- Age
- 52
- Posts
- 6,883
Clock stability
Bob, I remember that great suggestion of yours very well, and following it I made a compartment that will hold 10kg of gunshot, which I reckon will give the stability needed.
The compartment opens from the front with a panel that screws in. I've used many more screws to secure the compartment to the carcass than an engineer might advise on, but with the 10kg of weight it'll be holding I'd rather be safe than sorry. The view below is taken from the rear of the grandfather clock.

The gunshot cost me a fair bit, but the investment is worth it. My dear SHMBO will be making me a pouch out of a curtain fabric sample with a classical print that will be in keeping with the era and style of the clock, even though the pouch will never be seen it's the small details I'll know about which will also be documented in a book I'm going to do for my kids to look back on.

-
3rd February 2023, 10:34 AM #134
GOLD MEMBER
- Join Date
- Aug 2005
- Location
- Queensland
- Posts
- 2,947
Home stretch, good to see.
I think the idea of a book to document the build for posterity is an excellent idea which Im sure will be appreciated by your kids as well a the future admirers of your work.Regards,
Bob
Absence of evidence is not evidence of absence.
-
15th April 2023, 03:12 PM #135
GOLD MEMBER
- Join Date
- Mar 2005
- Location
- In the shed, Melbourne
- Age
- 52
- Posts
- 6,883
Door trim moulding
After receiving the glass from Varga Bros in Mitcham, it was time to get onto making the trim moulding to capture the glass in place. Originally I was going to use putty and add some coloured powder from Graeme Brown Antiques to colour the putty, but when I fitted the glass in place I wasn't confident that the putty would have enough hold with only 6mm from the surface of the door to the glass.


So I decided the best path was to make some trim moulding.
After getting the stock shaped on the spindle sander for the intermediate rail, it was time to shape the profile. For this I used a fine file and sandpaper.


The fidly part of this after running it through the bandsaw was to sneak up to my pencil mark to try and get the best fit I could. Before I glued this piece in with hide glue, I had previously applied the other trim moulding pieces and given a full day for each part to dry before glueing the next piece. I did this as I wanted to be sure that I'd get a secure bond.


I had some gaps in places, so to fill these I mixed the coloured powder I mentioned earlier to the putty and applied it where it was needed.


The door is almost complete now. One thing remains and that is to fix a plaque I'm having made which will be applied to the inside of the door on the floating panel, which will be my next update.


 Reply With Quote

Similar Threads
-
Grandfather Clock
By Chris Parks in forum CLOCKSReplies: 4Last Post: 10th June 2015, 12:01 PM -
Old grandfather clock
By artful bodger in forum CLOCKSReplies: 9Last Post: 16th October 2014, 10:12 AM -
Grandfather Clock
By Bill Lindsay in forum CLOCKSReplies: 6Last Post: 5th September 2010, 11:24 AM -
clock that looks like grandfather
By lonesomebob in forum CLOCKSReplies: 0Last Post: 3rd August 2008, 03:33 AM -
Looking for Grandfather Clock
By clock hunter in forum WOODWORK - GENERALReplies: 3Last Post: 7th June 2005, 11:37 AM
