

 Thanks: 0
 Likes:
  Needs Pictures: 0
 Picture(s) thanks: 0
Results 106 to 120 of 327
-
3rd August 2009, 07:05 AM #106
 SENIOR MEMBER


- Join Date
- Oct 2007
- Location
- Poland
- Age
- 67
- Posts
- 805

Today I've checked my last works with new criticism

Sheerclamps in stern area (from bulkhead no 4 to sternpost) were springing to stiff - sides midship were raked to outside and sides from bulkhead no 4 to sternpost were raked to inside - they needs to be vertical at all!!! I'm trying to do it properly wihout use boilig water for curving of battens... I've removed screws and bowed sheerclamps again bith 3 temporary crossbeams - sides looks better at present!


And one from plastic spring clamps demaged :
:

-
3rd August 2009 07:05 AM # ADSGoogle Adsense Advertisement
- Join Date
- Always
- Location
- Advertising world
- Age
- 2010
- Posts
- Many
-
3rd August 2009, 11:21 PM #107
SENIOR MEMBER
- Join Date
- Oct 2007
- Location
- Poland
- Age
- 67
- Posts
- 805
Thank you Michael for it!Howdy,
When capsizing BETH she comes up with the cockpit about half full of water.
This has two effects.
One is that the boat is quite low to the water .. so it is easy to slide in and also the centreboard is near the water surface when the boat is on its side.
The sides of the RAID have to be higher because of that self draining cockpit and the rowing function.
Which makes it a bigger climb to get in.
When you bring BEth upright too you let her sit sideways to the breeze and climb in so the sail will balance you for a moment. You have to focus on keeping the boat upright until you sheet in the mizzen (tight but not too tight - and she sits pointing into the wind so you can bail her.
MIK
Hoping than stability of righted Beth with half full of water is OK for ca 75kg man climbing on from side. I'm trust in your experience! Methode described above (bolded by me) sounds good!!! I need to try it and I will to excercise (practice) in it.
-
6th August 2009, 02:31 AM #108
SENIOR MEMBER
- Join Date
- Oct 2007
- Location
- Poland
- Age
- 67
- Posts
- 805
Hi m2c1Iw, Originally Posted by m2c1Iw

Since few days I had waterpomp demage at our house - just is OK...
...and
...my camera was taken for few days by my wife") ...
...
Centrecase of my Beth is almost fitted on place - I want to bond knees and centrecase today yet (possible to fit bulhead no 2 too) - will be no photos of it ...
...
-
7th August 2009, 05:27 AM #109
SENIOR MEMBER
- Join Date
- Oct 2007
- Location
- Poland
- Age
- 67
- Posts
- 805
First I've marked on temporary screws of sheerclamps and I've removed them - I needed space for bulkhaed no 2 fitting on. Originally Posted by robhosailor
Today (just lately! ) I've finally fitted centrecase and glued it on place! I didn't forgotten
  to drill two holes on bottom - they will be useful for cutting off slot for centrebord.
I've fitted bukhead no 2 - it's ready for glue!
I've fitted all knees on place and I've glued one of them - only for this one, glue from 100 ml epoxy resin made for centrecase, was enough.
Tomorrow morning I wish to glue on five leaved knees and bond bulkhaed no 2...
No photos from this day
-
7th August 2009, 10:23 PM #110
SENIOR MEMBER
- Join Date
- Oct 2007
- Location
- Poland
- Age
- 67
- Posts
- 805
Hi again,
Bulkhead no 2 (centrecase front bulkhead) just bonded and all knees bonded too.
It's all for this day - I'm going to folk music concert in Warsaw this evening!
No photos still - hoping than they will be tomorrow - as an illustration of what were made.
-
9th August 2009, 02:20 AM #111
SENIOR MEMBER
- Join Date
- Oct 2007
- Location
- Poland
- Age
- 67
- Posts
- 805
Hi, Originally Posted by robhosailor
Photos - Voila!
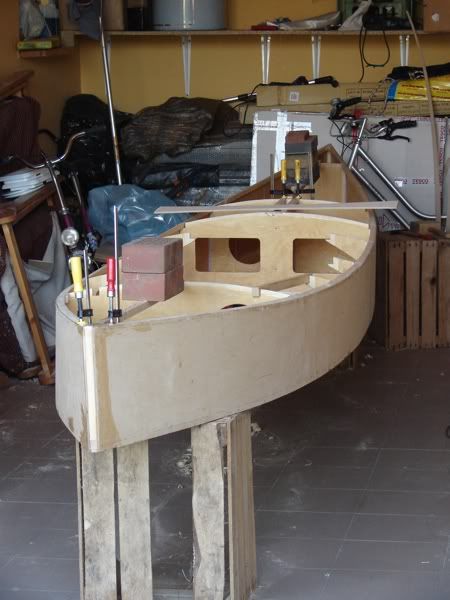
Centrecase, bulkhead no 2 and knees glued on their places!


Centrecase and bulkhead no 2 (front centrecase's bulkhead) fitted and glued on places. You can see centrecase's bedlogs glued on their places too. Centrecase's deck clamps temporary fitted.


Hoping to glue on sheerclamps on their places - today/tomorrow!
-
9th August 2009, 10:25 AM #112
Happily receives emails.
- Join Date
- Jul 2005
- Location
- 'Delaide, Australia
- Age
- 65
- Posts
- 8,138
It looks REALLY REALLY NICE. Great to have some detail assembly photos of a BETH too.
MIK
-
10th August 2009, 08:09 AM #113
SENIOR MEMBER
- Join Date
- Oct 2007
- Location
- Poland
- Age
- 67
- Posts
- 805
Thank you very much MIK. Originally Posted by Boatmik

Today I've glued sheerclamps on their places (they are nailed too - I'm not trust in my glueing work):
Port side sheerclamp glued on place. Preparing to glueing starboard side sheerclamp.

I've cutted off notches on port side's knees for carling - for cutting off knees needs to be clamped than they vibrating during cutting:

Sides verical are! :

More photos (as usually) there:
http://www.flickr.com/photos/robhosa...7618030604102/
-
12th August 2009, 06:43 AM #114
SENIOR MEMBER
- Join Date
- Oct 2007
- Location
- Poland
- Age
- 67
- Posts
- 805
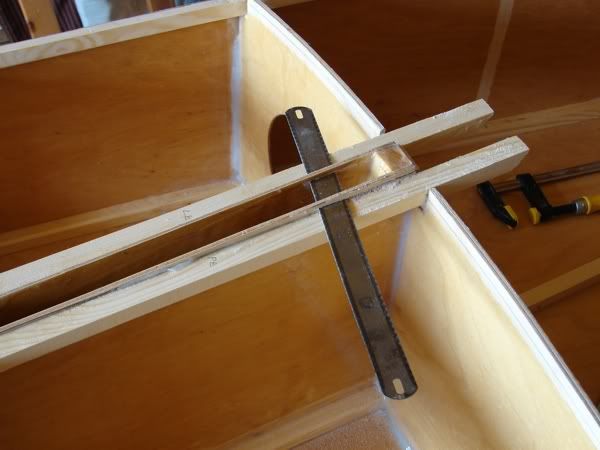
Today only few works and photos
Continueing of cutting off notches for carlin:
On starboard's knees - you can see temporary clamps against vibrations.

On bulkhead no 4...

...with temporary support for chiseling...

1/2"PVC tube showing future curvature of carlin - all looks OK


This is unconventional solution of sheerclamps and sternpost join detail - it's typical for MIK's designs - simple, easy to make and strong! It will be covered by deck.

Starting of beweling of sheerclamps for deck camber:

You can see 6mm plywod plug in notch - my error in cutting off bulkhead or bottom (?) - bulkhead no 4 is to narrow a bit - no problem at all, it will be filleted by epoxy...
-
12th August 2009, 10:34 AM #115
Grumpy old Bugga
- Join Date
- May 2003
- Location
- South Oz, the big smokey bit in the middle
- Age
- 67
- Posts
- 4,377
OMG

He's admitting to mistakes
I like the extra lumps of wood clamped on to dampen vibration, it's a solution that hadn't occurred to me. Anyone like to bet I won't remember it come the time I need it? (I've found you usually have to 'forget' a good idea about three times before you're allowed to use it for real )
)
Richard
-
13th August 2009, 10:01 AM #116
Happily receives emails.
- Join Date
- Jul 2005
- Location
- 'Delaide, Australia
- Age
- 65
- Posts
- 8,138
Hi Robert,
Have you had the feeling yet with building beth that sometimes it looks like the most beautiful thing on earth and then you look at it ten minutes later and it looks really ugly.
I went through endless changes from one to the other when I was building it.
Some great detail pics here - thanks so much! Best set of Beth construction pics in the world.
MIK
-
16th August 2009, 08:30 AM #117
SENIOR MEMBER
- Join Date
- Oct 2007
- Location
- Poland
- Age
- 67
- Posts
- 805
Hi MIK, Originally Posted by Boatmik
Beth is still beautiful, but my work is ugly sometimes (very often)
Thank you MIK - It's for followers and... for your pleasure especially Originally Posted by Boatmik
Richard, Originally Posted by Daddles;
It's for two basic reasons:
1. Nobody is perfect
2. Errare humanum est
...and new photos:
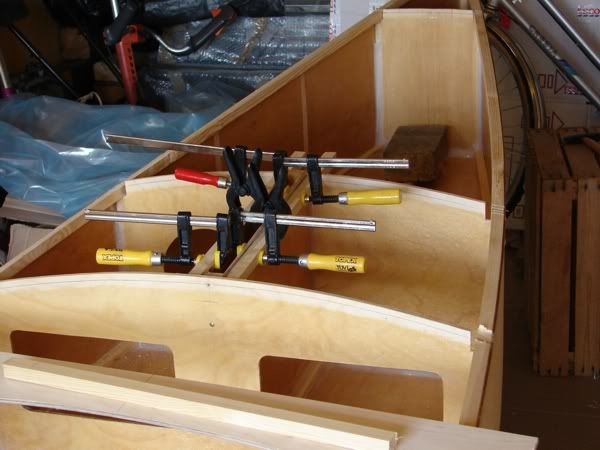
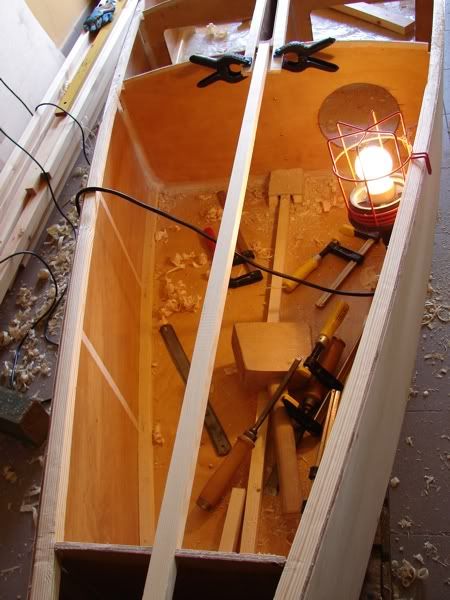
Beweling sheerclamps for deck camber


Fitting of bottom stiffeners


Glueing of bottom stiffeners
...to be continued...
-
16th August 2009, 08:44 AM #118
SENIOR MEMBER
- Join Date
- Oct 2007
- Location
- Poland
- Age
- 67
- Posts
- 805
...
Glueing of centrecase's deck clamps
Cutting off centrecase's extra material
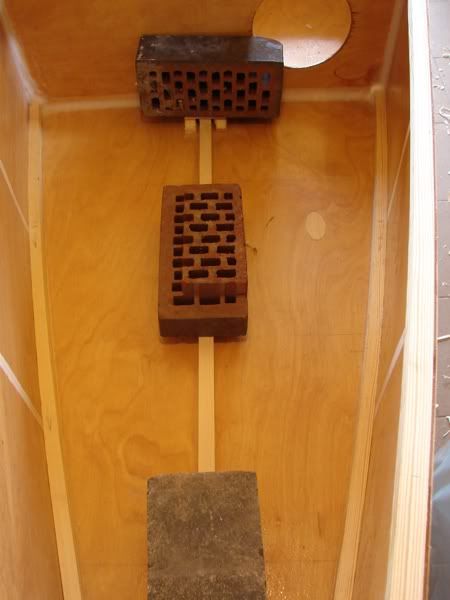
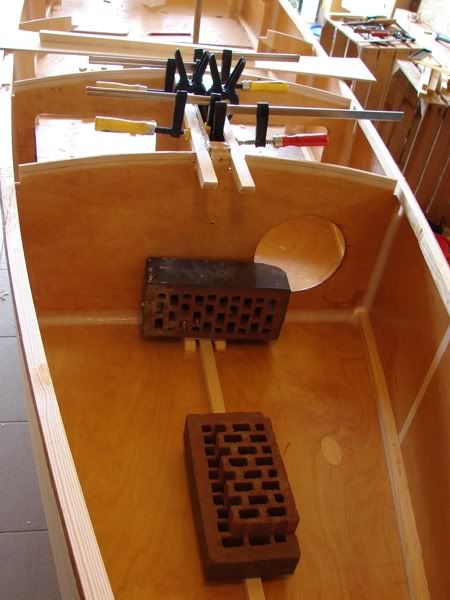
Fitting of Foredeck and Afterdeck stringers
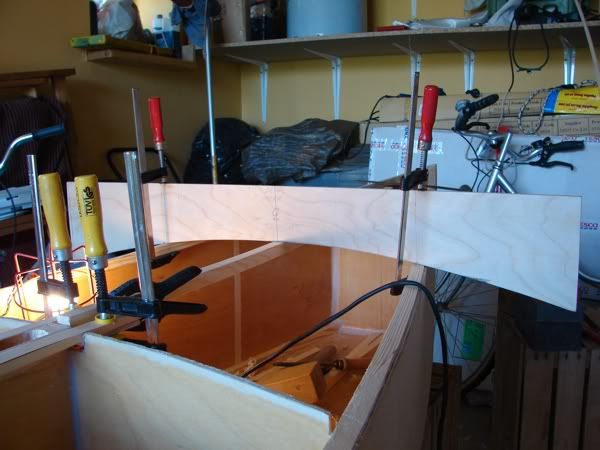
...using deck's camber teplate... (Foredeck stringer must be bowed down!)
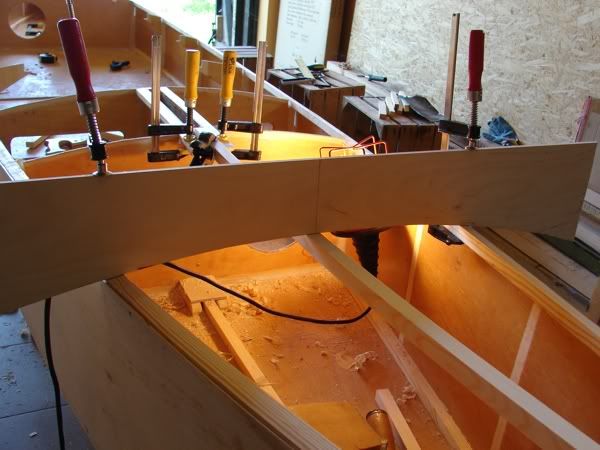
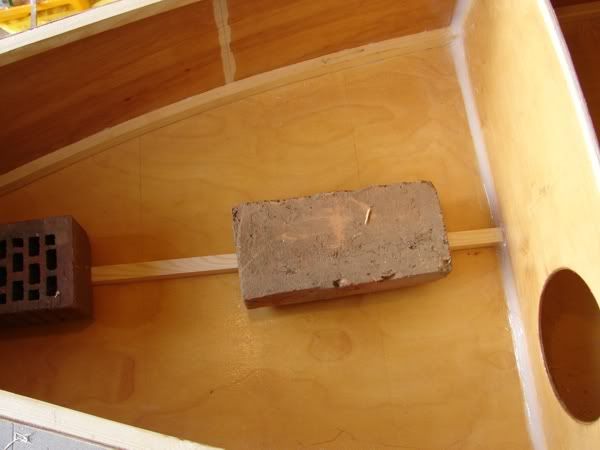
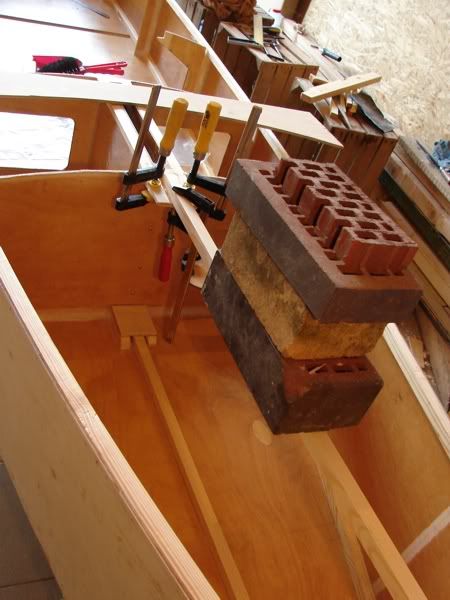
Glueing deck stringers! Risky business!!! Brics standing on stringers!!!

Unfortunatelly my account on flickr is limited - I have no sace for new photos...
http://www.flickr.com/photos/robhosa...7618030604102/
New photos uploaded on photobucket album:
http://s219.photobucket.com/albums/c...h%20-Yuanfen-/
-
16th August 2009, 08:52 AM #119
SENIOR MEMBER
- Join Date
- Jul 2008
- Location
- Fenwick, Michigan
- Age
- 75
- Posts
- 908
Robert,
I really enjoy seeing the pics of your progress. The boat looks great! What I want to know, though, is how do you keep things so neat? I seem to attract clutter just by walking through my work space and there you are assembling your hull in pristine conditions... How do you do it?
Seriously, your boat is looking great!
Bob
-
16th August 2009, 09:02 AM #120
SENIOR MEMBER
- Join Date
- Oct 2007
- Location
- Poland
- Age
- 67
- Posts
- 805
Thank you Bob Originally Posted by BobWes
...my photos in low density are!
...and I've swept garage and boat interior after beweling and before glueing stringers


 Reply With Quote


Similar Threads
-
Sailing - and swimming - with Beth/Canook
By outofthenorm in forum Michael Storer Wooden Boat PlansReplies: 3Last Post: 16th October 2008, 05:31 PM -
BETH - Sailing Canoe
By Boatmik in forum Michael Storer Wooden Boat PlansReplies: 7Last Post: 30th August 2008, 08:54 PM -
My new article about MIK's Beth sailing canoe
By robhosailor in forum Michael Storer Wooden Boat PlansReplies: 7Last Post: 18th April 2008, 05:19 PM -
Beth Sailing Canoe(materials) - few questions
By robhosailor in forum Michael Storer Wooden Boat PlansReplies: 18Last Post: 11th January 2008, 08:54 PM -
Beth Sailing Canoe - short cruising centreboard centreboard option?
By robhosailor in forum Michael Storer Wooden Boat PlansReplies: 4Last Post: 11th January 2008, 05:28 AM
