

 Thanks:
  Likes:
  Needs Pictures:
  Picture(s) thanks:
Results 1 to 4 of 4
-
22nd August 2016, 02:22 PM #1
 Happily receives emails.


- Join Date
- Jul 2005
- Location
- 'Delaide, Australia
- Age
- 65
- Posts
- 8,138
 Building photos for the TAAL Stand up Paddleboard.
Howdy All,
This is a prototype of a Stand Up Paddleboard we built in the last few months. There are lots of nice woodworking angles and tricks to the build.
Much of the structure was drawn from the Australian Scow Moth dinghies which allows really serious weight savings.
The moths are twice the width of a sup and three to four times the thickness but are built down to weights of less than 20kg.
With most SUPs coming in at around 10 to 16kg it looks like a well built wooden one can far exceed the weight savings.
The other aspect of this board is that most boards display their surfing heritage with very flat shapes.
This gives them great stability but results in a board that is harder paddling than it need be. Too much wetted surface and it hits the wrong numbers like prismatic coefficient (a measure of the volume in the middle compared to the ends.
Here we keep the ends well out of the water - more like a good rowboat - at the back of the board only the apex of the transom touches the water. But the volume is still there so if the board heels it contributes to stability.
And the numbers are correct for its speed like a good rowboat or kayak.
To the pics
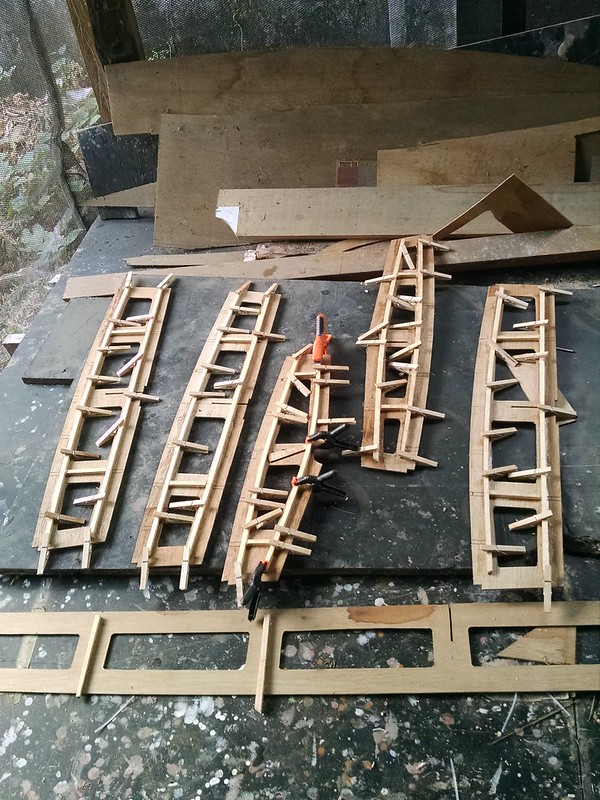
Bulkheads have tiny 8 x 8 frames. Note how the stringers will rest on top of the frames rather than the frames being cut for the stringers. If moths can go upwind in 25knots, jumping off waves and occasionally nosediving and be built of much thinner ply than most SUPs, then these boards will be VERY robust. The long piece is the centreline web that the frames slot into to create an accurate shape for the board outline.
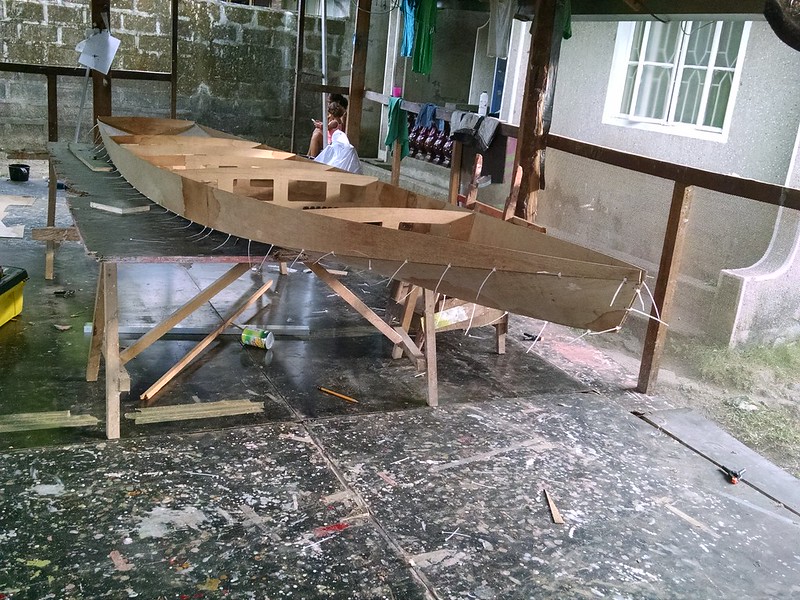
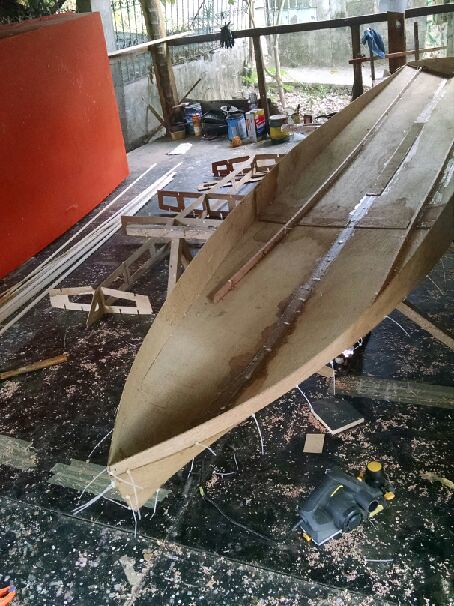
The hull panels are stitched together with cable ties as it is designed to not have much stress in the panels. you can see the butt strap joining the two bottom panels along the middle - this is the section that gives the board the normal stability. You can see the unusual transom - only the apex at the bottom will just touch the water. Or with a heavy paddler, there will not be much of it in the water.
Frames are dropped in to see the shape - purely so we can congratulate ourselves. Note hte lack of the centreline web.
Centre buttstrap is just nailed to something flat.
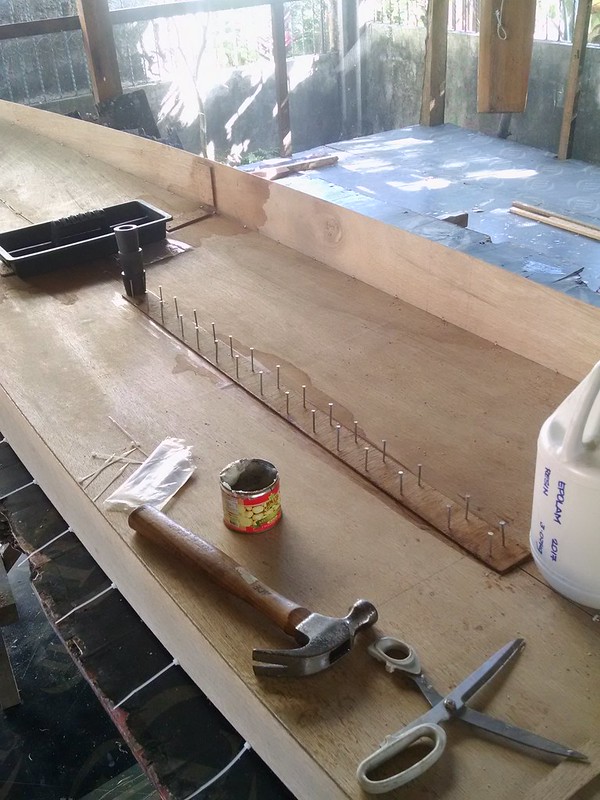
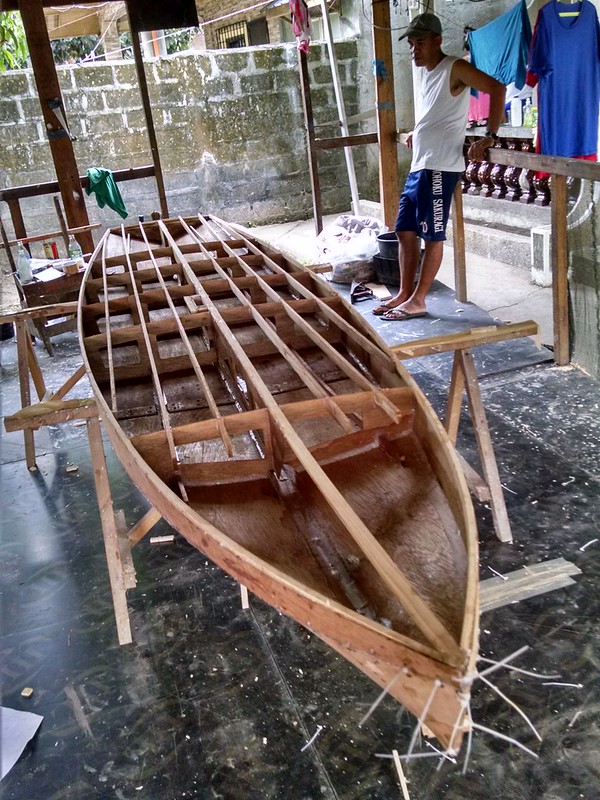
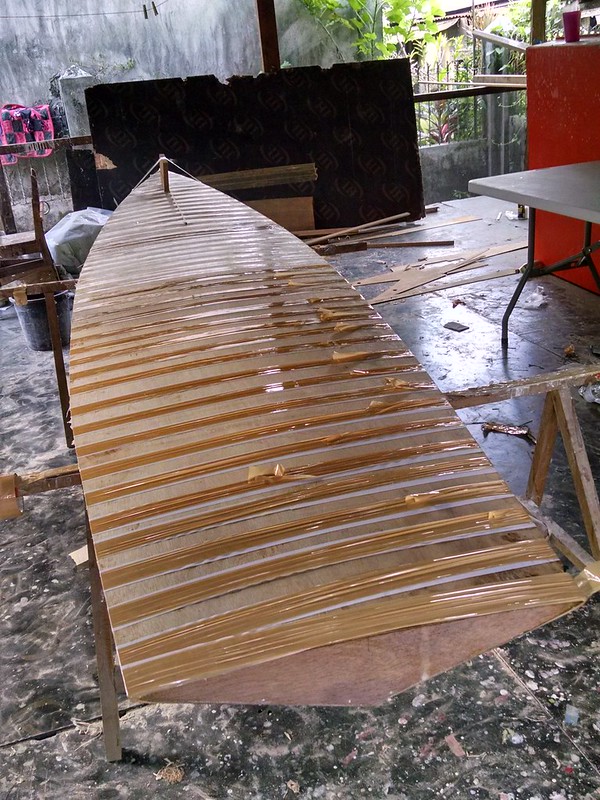
Bottom stringers are placed correctly by using the bulkheads and web placed in the boat temporarily. Any gaps are corrected and clamping pressure for the epoxy (only needs to be modest pressure unlike other glues - read their labels ) is provided by looping cable ties over the stringer and through the bottom.
Bulkheads and centreweb are glued in now. About to varnish the interior. When the deck substructure is bevelled or planed to shape it will reveal clean unvarnished wood for the bonding of the deck. Ply is all 3mm.
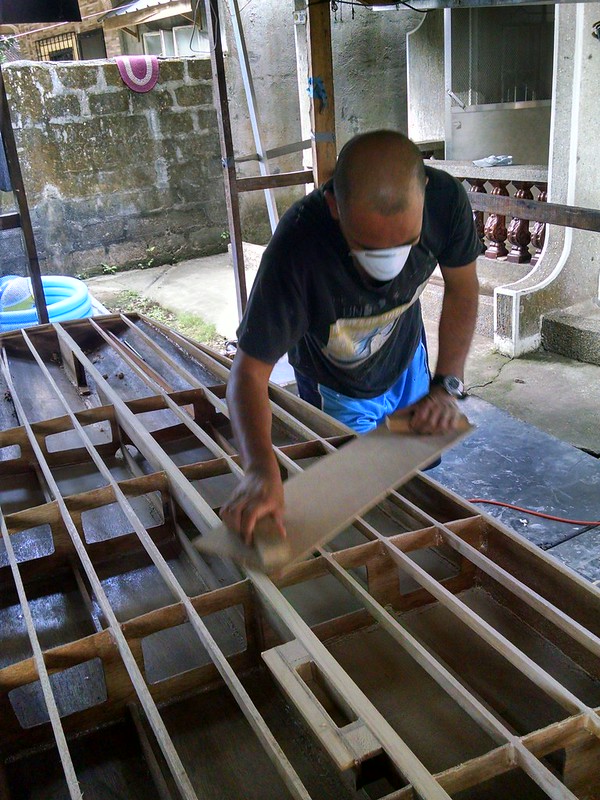
Torture board with 120 grit floor sanding paper is used to bring the deck stringers down to the correct curve. The correct curve is a template cut to match the segment of a circle - concave.
Traditionally the deck curve/camber was a very different curve and had to be calculated for each bulkhead. This was easy as you would normally make a jig and move it from bulkhead to bulkhead.
The reasons for this are historical and arcane.
A circle is better in many ways because you don't need to know the centreline of the template or the bulkhead - any part of the same circle will work.
The circle in this case is about a 25ft radius - too long to mark out on our workshop floor - but easy to draw the template in CAD and provide a neat drawing.
That might have been the reason for a straight radius not being normal.
I really don't like the most common traditional version of marking deck camber - it tends to be flatter in the middle of the deck and the camber piles up making the edges quite sloped. It is subtle and not at all as bad as it sounds ... but the idea of increasing the angle of the deck near the edge seems a bit nervewracking for this designer
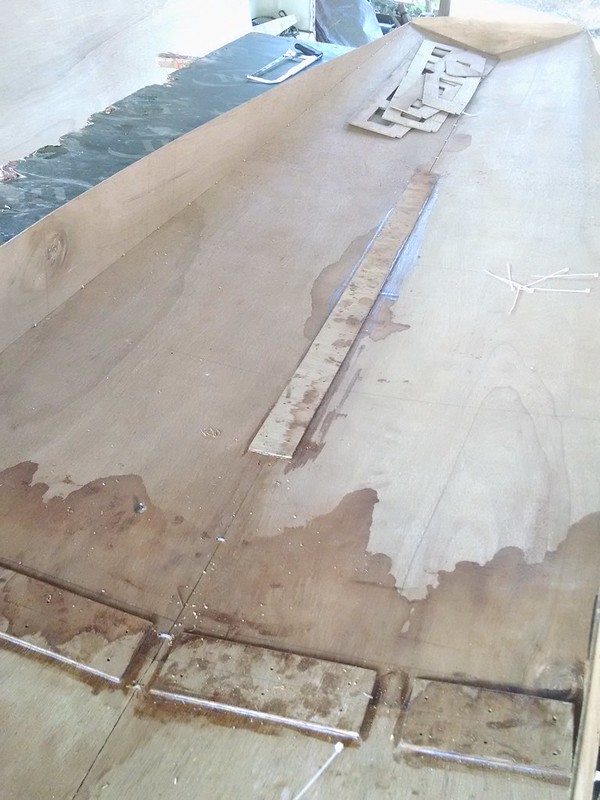
The deck join was done in situ because of the number of stringers we had to work between. It would be possible to lay it out from a drawing, but there would be risks if anything was out of place. The buttstraps can be 5 or 10mm away from structure without any risk of leaks. For thicker ply I accept up to 20mm gaps between buttstrap and the adjacent ply joining structure.
Here the non buttstrap part has been pulled back after checking it all fits - the two deck pieces are what is left after cutting everything else, so they need a bit of moving around to make sure they cover the "hole".
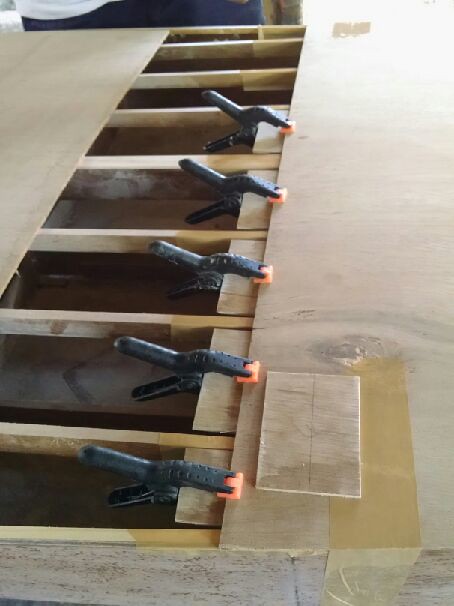
Again, because epoxy doesn't need high gluing pressures we can eliminate fastenings entirely. The packaging tape does leave a residue. It can be cleaned off the bottom and sides as they are already epoxy sealed. But over the deck with the naked ply the residue would be a disaster. We just put down paper strips.
One unseen detail is there is fibreglass under the deck - people vastly overestimate teh amount of glass necessary - we used 2oz glass (70gsm) and know it works reliably to deal with foot pressure. It was applied with epoxy and the underside of the deck sealed about a half hour or so before the deck went on. Very good to have some friends to help with spreading the glue on the deck substructure before the underside of the deck loses its tackyness. There is about a 3/4 hour window so not a huge panic.
Like everything do a dry run first to settle out the logistics.
Nonskid where needed using the "lost sugar" method and varnish (works with paint too)

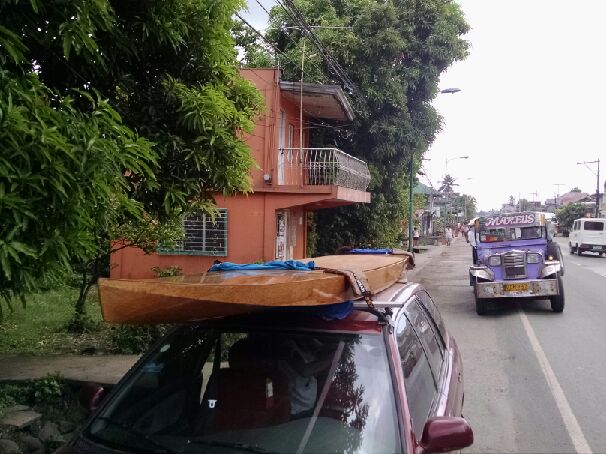
On the car roof - it really is a beautiful thing. One of the more beautiful things we have built. Yes, I live in the Philippines now. You can find the Storer Boat Plans group on FB.
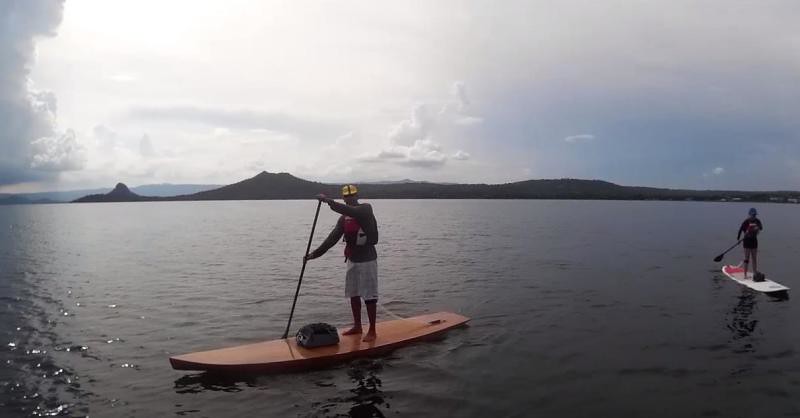
On the water with one of the main SUP instructors who declares it to be stable. He said it paddled nicely, until we realised that there was a huge clump of weed trapped against the fin. We cleaned that and there was no way I could keep up using one of the hire boards. Note the tiny little wake from the apex of the stern transom
The full set is available here on Flickr
Best wishes
MIKLast edited by Boatmik; 22nd August 2016 at 02:23 PM. Reason: typo
-
22nd August 2016 02:22 PM # ADSGoogle Adsense Advertisement
- Join Date
- Always
- Location
- Advertising world
- Age
- 2010
- Posts
- Many
-
25th August 2016, 12:30 AM #2
SENIOR MEMBER
- Join Date
- May 2008
- Location
- Portland, ME USA
- Posts
- 837
Looks really great. Very interested in this board.
-
4th September 2016, 01:18 PM #3
Happily receives emails.
- Join Date
- Jul 2005
- Location
- 'Delaide, Australia
- Age
- 65
- Posts
- 8,138
Christophe in NE USA is currently building one from the completed plans.
A few small errors but otherwise ok.
MIK
-
22nd September 2016, 11:33 AM #4
New Member
- Join Date
- Sep 2010
- Location
- Cool, Ca
- Posts
- 4
I hope to be building one or two of these SUP's this coming spring for the enjoyment of myself, my kids, and my grandchildren on the Central California Delta. I think it will be a great way to get them all on the water....thanks for making these designs!!! So far I have built 3 plywood boats, the first being your Eureka Canoe, so I am really looking forward to trying your SUP design! Originally Posted by Boatmik


 Reply With Quote
Similar Threads
-
paddleboard trailer
By WelderMick in forum TRAILERS & OTHER FABRICATED STUFFReplies: 18Last Post: 24th September 2013, 02:34 PM -
Building Designer? to check drawings before proceeding to engage Building Certifier
By Reno RSS Feed in forum GENERAL ODDS N SODSReplies: 0Last Post: 21st May 2013, 03:10 PM -
photos
By schaf in forum FORUMS INFO, HELP, DISCUSSION & FEEDBACKReplies: 2Last Post: 14th June 2008, 01:49 PM -
Gallery of stitch-and-glue building photos
By RossL in forum BOAT BUILDING / REPAIRINGReplies: 11Last Post: 12th February 2008, 04:26 PM -
Lathe Stand -- Building
By Simmering in forum WOODTURNING - GENERALReplies: 11Last Post: 17th January 2005, 02:52 AM
