

 Thanks: 0
 Likes: 0
 Needs Pictures: 0
 Picture(s) thanks: 0
Results 1 to 15 of 16
-
16th October 2010, 08:19 AM #1
 Senior Member


- Join Date
- Mar 2010
- Location
- Queenstown New Zealand
- Posts
- 382
 DIY PVC Buoyancy bags for Kayaks and Boats
It's possible to make custom buoyancy bags for kayaks and boats quite easily. The key is having the right glue. The right glue is "heat activated urethane/PVC glue". Down under it is called Bostik Unigrip 999, in the USA look for HH-66.
Problem is, it doesn't seem to be available retail down here, good thing is all PVC boat and truck tarpaulin makers will be using it or the equivalent, so go to your local PVC tarpaulin maker/upholsterer and buy half a tin from them. I wouldn't worry whether it's HR or HV unless you're making an inflatable boat that will stay outside in all weathers.
If you want to know why it's worth going to the trouble of getting this glue, watch them making the heavy PVC curtain sides for a big curtain sided truck. They sew seatbelt webbing to a patch of PVC with an industrial sewing machine, coat the other side of the PVC patch and the area on the main PVC fabric wiith this glue, let it dry, press the two together, go over it with a hair dryer, and voila, the patch is stuck on strongly enough to take tensioning down with one of those ratchet tensioning thingymies they use.
Inflation valves are easy, just get a couple of cheap swim wings and cut out the valves.

You might be able to get bigger ones, or extra screw on/off caps that let you deflate the bags more quickly, by buying/stealing and cutting up a cheap kids paddling pool. Might even be possible to buy these sort of fittings, but the swim wings are cheap and provide 4 valves a set.
PVC: 600g/m^2 (18oz/square yard?) or so is probably best, but you could go lightweight at 400g/m^2 or extra heavy duty at 1000g/m^2.
Cut out a rectangle, as long as you want the bag plus a little bit, width about 3 and a bit times the diameter you want plus a little bit extra. Decide where you want the valve, cut an appropriately sized hole there. Coat the nipple side of the material around the nipple, and the inside of the fabric around the hole. Let the glue dry, press the nipple through the hole, put it on a surface nipple up, then apply heat with a hair dryer. If you're the paranoid type, cut another slightly bigger circular patch of PVC with a hole in it and apply it in the same way to the inside.
Next, mask about 20mm inside from the edge of the fabric rectangle all the way around, apply glue, let it dry, fold the rectangle in half so glued surface meets glued surface, work your way around the edge, pressing the surfaces together and applying heat with the hair dryer till it's all glued together.
Make a disposable brush from a wooden icecream stick and a piece of loop velcro folded over the end and stapled on.
Main thing to avoid is thick goopy lumps of glue - try and get the spread reasonably even, and make sure the solvent is completedly evaporated before you apply any heat.
Tom Yost has quite a bit of information on working with PVC on his Folding Kayak Builders website.
Manufacturers websites and Tom's site mention taking lots of care cleaning the PVC with Methyl Ethyl Keytone (Nasty solvent, used for making methamphetamine amongst other things). Advice I have is don't bother, the glue sticks well anyway and solvent is more likely to weaken the fabric around the bonded area. When the glue is stuck, the two layers where it's bonded are stronger than the surrounding fabric.
Make up a football sized one first, inflate it and give it to the kids to kick around the yard. If it's still inflated a couple of days later, you can have confidence in your construction technique. While you're at it, make a couple of long narrow tubes, inflate them and give them to the kids to beat each other over the head with while they run up and down the hall.
It is important that bags are tied down well in the boat, it's only the part that is displacing water that is contributing to buoyancy. I once saw an 18ft fibreglass sloop with a steel swing keel go right to the bottom when it swamped, the buoyancy bags ripped out one by one. The buoyancy bags (and the skipper/crew) stayed on the surface but the boat didn't. One embarrassed sailing instructor ("I was only teaching them capsize recovery") when we picked them up.
I'd take the bags out of the boat between trips and store them inside (not wet, not in the sun, not somewhere where the PVC can freeze) With a bit of care they should last 3 seasons, I'd replace them after that.
Once you've tried a couple, have a go at custom shapes if it suits. If you need to attach straps to the bags, sew the straps to a piece of PVC, then glue it to the bag before you glue up the final seam around the outside.
It's possible to make bags with an opening that rolls up with velcro that holds the rolled seal shut, then you can combine gear storage and buoyancy.
This gives you an idea of the things you can make with PVC and this glue:

Ian
-
16th October 2010 08:19 AM # ADSGoogle Adsense Advertisement
- Join Date
- Always
- Location
- Advertising world
- Posts
- Many
-
16th October 2010, 09:10 AM #2
Apprentice (always something new)
- Join Date
- Jan 2009
- Location
- Valley of Virginia
- Posts
- 52
Great info. Thanks!
Mo Wetta - Mo Betta!
Larger sails, smaller boats!
-
16th October 2010, 09:51 AM #3
hardly human

- Join Date
- Jun 2005
- Location
- Sydney
- Posts
- 3,096
Thanks mate... just what is needed.
-
17th October 2010, 11:31 AM #4
SENIOR MEMBER
- Join Date
- Sep 2007
- Location
- Savannah GA USA
- Posts
- 583
Or find a boxed wine that you can drink, rinse out the empty bladders and Voila! Free flotation bladders.
I've not tested to failure but they seem to be pretty tough. The valves work great, too.The "Cosmos Mariner,"My Goat Island Skiff
http://s176.photobucket.com/albums/w168/MiddleAgesMan/
Starting the Simmons Sea Skiff 18
http://www.flickr.com/photos/37973275@N03/
-
17th October 2010, 03:04 PM #5
Senior Member
- Join Date
- Mar 2010
- Location
- Queenstown New Zealand
- Posts
- 382
It's only the part of the flotation that is displacing water that is contributing to holding the boat up, so I think the wine bladders stuffed in a space or in another bag and held in the boat will only displace about half as much water/be half as effective as a single larger bag held solidly in place/ inflated so it is putting pressure against its straps to hold it down. The wine bladders stuffed in a sack under the seat are likely to move up under buoyant pressure of water in the boat, and all the spaces between them will reduce their effectiveness. Originally Posted by MiddleAgesMan

An idea I have is to put say a piece of 100mm thick closed cell foam cut to exact size/shape in the bottom of the relevant part of the boat, then use a couple of larger inflated bag to hold it down. Should work like a raised/self draining floor in that part of the boat and the airbags on top will give heaps of reserve buoyancy. May try this idea in the part of my GIS between the middle and the front seat. Picture of this idea soon.
Ian
-
17th October 2010, 03:05 PM #6
Happily receives emails.
- Join Date
- Jul 2005
- Location
- 'Delaide, Australia
- Age
- 65
- Posts
- 8,138
This is great information! I guess you could make dry sacks too potentially.
To keep the flickr images in size ... on flickr click on the button above the photo saying
"Actions"
Then select "all sizes"
Then choose images that are 800 or less in width and you can right click the final image and choose "copy link" or "copy shortcut".
Flickr has made it a real pain to do this recently - it used to be much simpler
MIK
-
20th October 2010, 09:56 AM #7
Senior Member
- Join Date
- Mar 2010
- Location
- Queenstown New Zealand
- Posts
- 382
Yes, dry sacks are easy, I'll post a pattern soon. Originally Posted by Boatmik
Ian
-
21st October 2010, 09:34 PM #8
Happily receives emails.
- Join Date
- Jul 2005
- Location
- 'Delaide, Australia
- Age
- 65
- Posts
- 8,138
Thanks Ian,
Lots of people will be able to use it!
Cool.
MIK
-
22nd October 2010, 07:11 AM #9
SENIOR MEMBER
- Join Date
- Sep 2007
- Location
- Savannah GA USA
- Posts
- 583
I was a bit corn-fused when I first read your reply about the bladders but it suddenly dawned on me what you are saying and how right you are. Originally Posted by IanHowick
In my Simmons Sea Skiff there are 24 under-floor compartments along side the central under-floor stowage area which is accessed by three removable sections in the floor boards. The side compartments are only partly visible from above and are only accessible by kneeling down and reaching under the fixed floorboards.
When I was testing the bladders I blew one up fully and was only able to get it about half-way into the side compartment. There was no way to put two fully inflated bladders in each section because of their rounded shape. So I released the valve and shoved the bladder all the way in slowly, allowing air to escape, until it touched the side at which point I closed the valve. At this point is was a near perfect rectangular/cube-shaped mass of air. I then filled another bladder, left the valve open, and shoved it up against the first one, and then closed the valve. What I ended up with was probably 95-98 percent of the space occupied by the pair of sealed bladders. Only the outer edge retained the rounded shape.
There are two large flotation chambers at the very back, port and startboard of the motor well. The same technique could be used to fill those compartments with the small sealed air units. The trick is to use the valve to allow the bladders to assume straight sides instead of rounded sides, a condition which I believe you are describing above which leaves too much space outside the bladders.
I plan to test it at launch with the bladders under the floor only. My rough estimate tells me it will float the boat, with motor, battery and fuel tank, plus two smallish people or one size Extra-large (me!). If it is marginal I can easily add more bladders to the large compartments by the motor as well as up in the bow, under the foredeck.
I should have explained that the "sealed" compartments aft are not perfectly trustworthy. I am finding a few teaspoons of water in each, after a rain. I believe it is coming from an imperfect seal at the top, so they will be good unless breached or swamped. Filling them with the bladders would probably only be done if I was heading offshore for an all-day trip.The "Cosmos Mariner,"My Goat Island Skiff
http://s176.photobucket.com/albums/w168/MiddleAgesMan/
Starting the Simmons Sea Skiff 18
http://www.flickr.com/photos/37973275@N03/
-
22nd October 2010, 08:42 AM #10
Senior Member
- Join Date
- Mar 2010
- Location
- Queenstown New Zealand
- Posts
- 382
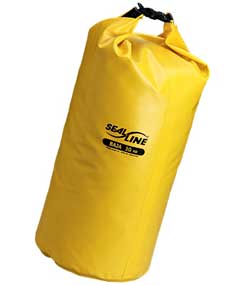
Dry Bags Pattern
Here is a pattern to make dry bags similar to the commercial ones.
You need PVC material 400 or 600g/sqm, glue (read comments in the first post regarding glue), a quick release friction buckle .
.
Make up the strap that attaches the buckle first, easiest is to cut out a strip of heavier PVC and glue it. (Raid the scrap bin at a PVC tarp maker, they will have lots of long narrow scraps of heavier material)
Next, glue the strap to the other side of the main material, turn it over, mask and then glue all the way down both sides of the main material, take the masking tape off. Once the glue is dry, fold the bottom half up, match up the glue lines, apply heat with a hair dryer and it's all done.
I also tried some out of light PVC coated nylon, I'd stick to the heavier PVC for ones tied down in the bilge of a boat, but the very lightweight ones held up surprisingly well for backpacking or for a sleeping bag that was going to stay in what should be a dry boat storage compartment.
You could get fancier and do a round bottom like the commercial ones, but this way works fine.
Ian
-
22nd October 2010, 04:23 PM #11
Happily receives emails.
- Join Date
- Jul 2005
- Location
- 'Delaide, Australia
- Age
- 65
- Posts
- 8,138
I think you have just earned your place in heaven!
MIK
-
7th November 2010, 06:08 PM #12
part time wood mangler and ukulele player
- Join Date
- Mar 2010
- Location
- Canberra
- Posts
- 115
The Australian (rather than Kiwi) equivalent is Bostik 1669 Heat-Activated Contact Adhesive
see https://www.woodworkforums.com/f34/vi...f-kayak-91184/
Now I just have to find some.
-
11th November 2010, 08:57 AM #13
Senior Member
- Join Date
- Mar 2010
- Location
- Queenstown New Zealand
- Posts
- 382
Good to get this info on what the equivalent products are around the world. I'd have a talk to a local upholsterer/pvc tarpaulin maker and see if you can buy the second half or third of a tin of glue. Make sure it's in a good container as it's quite volatile and it will all evaporate into a solid lump if the lid is not so tight. Originally Posted by titchtheclown
Ian
-
20th December 2010, 11:50 AM #14
hardly human
- Join Date
- Jun 2005
- Location
- Sydney
- Posts
- 3,096
bostik 1669 heat activated adhesive
after a lot of calls I've found a supplier of bostik 1669 heat activated glue so I can follow Ian's canoe floatation and drysak bag diy directions.
Chris from Griprite in Sydney supplies it for $48.75 + GST, delivered, for a 4Lt can.
I made a lot of calls about this, and had a major problem finding it. Finally I managed to be put through to the Sydney Bostic senior sales rep, who supplied the info off the top of his head.
A lot of poly tarp makers said that there was no pvc glue, and the only way to do it was to heat weld. ???
Anyway, i discounted using pvc pipe bond as it dries rigid, and the pvc pool liner glue is way too expensive.
If anyone wants to buy the leftovers (I don't think I'll be using all 4Lt), they are welcome to pm me.
Floatation bags, drysacks and stuff sacks for my 'hiking' pack (usually use garbage bags but they puncture and thats not cool when you rely on waterproofing to make your pack float and to keep your gear dry).... here I come.
Thanks Ian, this thread has massive value.
-
20th December 2010, 01:08 PM #15
Senior Member
- Join Date
- Jul 2006
- Location
- Portland, Oregon, USA
- Posts
- 334
Flotation Inspiration
After building the first GIS in the Americas... I was moved to write the following article for Duckworks. Sounds like there's enough new folks who haven't seen it before to drag it out of hibernation:
Duckworks Magazine

 Reply With Quote

Similar Threads
-
Duckflat Wooden Boats - Classic Boats and fittings auction
By Boatmik in forum MISC BOAT RELATED STUFFReplies: 30Last Post: 16th July 2012, 12:58 PM -
Wooden Kayaks
By whitewood in forum BOAT DESIGNS / PLANSReplies: 12Last Post: 6th April 2008, 11:22 PM -
David Payne's Kayaks
By TK1 in forum BOAT DESIGNS / PLANSReplies: 1Last Post: 26th August 2007, 01:33 PM -
Pygmy boats vs CLC kayaks
By TK1 in forum BOAT DESIGNS / PLANSReplies: 4Last Post: 16th May 2007, 12:12 PM
