

 Thanks:
  Likes:
  Needs Pictures: 0
 Picture(s) thanks:
Results 151 to 165 of 3347
-
22nd March 2009, 04:54 PM #151
 GOLD MEMBER


- Join Date
- Jan 2009
- Location
- Blaxland, Australia
- Age
- 65
- Posts
- 2,551

I found a fantastic excuse to avoid doing any resin work this arvo! It's cast iron, and noone can criticise me for it: even me :)))).
So what is this great excuse?
Tidying up!
I finally threw out a whole lot of rubbish, moved a few trip hazards, sorted out some stuff on the mill bench, vacuumed the floor and all benches, sanded off some resin off a few cleats that got in the way last time (that Permagrit block is like a magic wand...), and swabbed the bulkheads again, plus the "door" bench.
Look, here are some photos as proof! See?
1. Threw out the rubbish, moved the Superjaws and the bin, tidied up the bench and vacuumed the floor! (I had a temperature, I confess. ;) You can see one of the side panels on the right, drying off after one of its innumerable swabbings with meths. Quite a nice portrait of the Taig micro mill, centre stage. I need to cntre the table and but a bag over it to keep the dust off after its recent vacuuming :).
2. The main resining bench (the door with some pine boards and concrete underlay on it). Also moved the bench's support stands around 120 degress so that I don't keep tripping over the sticking-out feet. Ready to roll, I mean resin :).
It's a great relief to be able to move around the work unimpeded. Takes a lot of effort and breaks concetration, having to clamber over and dodge around things. Not to mention risks to self, work, and others straying past. Still a lot more stuff to get rid of before I consider this workspace 100 % properly usable, but it's much, much better than it was.
Nos all I have to do today is decide whether I'm going to go ahead and do the coating and glueing, or leave it until tomorrow. I'm inclined towards the latter: at this stage, with temperatures starting to drop, I would be dragging on rather late, judging from previous (and recent) experience. And it will give any airborne dust kicked up by my cleaning efforts a chance to drop out of the air but not onto wet resin. Another great excuse!
-
22nd March 2009 04:54 PM # ADSGoogle Adsense Advertisement
- Join Date
- Always
- Location
- Advertising world
- Age
- 2010
- Posts
- Many
-
23rd March 2009, 10:11 AM #152
GOLD MEMBER
- Join Date
- Jan 2009
- Location
- Blaxland, Australia
- Age
- 65
- Posts
- 2,551
Got the oil heater going after half an hour chasing out the resident spiders - and dust - with some kebab sticks (I am a friend to spiders :). Being on a thermostat it will take the edge off the air after running overnight. I'm happier raising the temperature this way than waving a 1600 W hot air gun around over the wet resin.
Also ticked off a few small items in the schedule by sanding the centrecase and rudder pieces, and selecting the outer (visible) surfaces for these structures. The centrecase ones are quite nice - the rudder ones are a bit boring. Maybe I'll stain the latter wood duck foot colour ;).
Have been pondering Chris' use of a flush trim bit on Trim, the protoype build of MIK's new design, the RAID41 expedition boat (see bottom of p. 25 approx of the "Solo 'Expedition' Sailboat" thread), I'm tempted to follow suit and use one of my ball-bearing FTBs on the hull bottom of "Wood Duck".
The lug sail and remaing paint just turned up from the Duckies courtesy of Aust Post. All nicely packed and safe. Thanks, Ted and Di :). Got the sail material spread out on the living room floor prior to rolling up in a 4m-long tube.
Now to see how the heater went last night, and haul the resin bottles out of the kitchen sink...
-
23rd March 2009, 04:21 PM #153
GOLD MEMBER
- Join Date
- Jan 2009
- Location
- Blaxland, Australia
- Age
- 65
- Posts
- 2,551
Full throttle! I think a had the resin a little bit too warm this time - it went off in the pot like a packet of crakers (as in fireworks, for those unfortunates who have been deprived of Guy Fawkes/cracker night). Fortunately, I managed to get the wetting coat onto the numerous cleats before the pot went off too far. Close run thing, though!
The gel time for the coats doesn't sem to have decreased much though - I'm back to the thumb-twiddling waiting game.
Top coat on the bulkheads. I left the side panels till later, as they are logistically a bit different from the smaller bulkead panels. I'm still having trouble with those pesky air bubbles: even using the locked roller and/or the foam brush, they persist. I guess this is just practice - so I'll persist ;).
I put a few drops of Feast Watson "maple" paint tint into the glue mix as an experiment to see if I could hide the medium grey of the HS filler.
After lunch was another story altogether - an unmitigated disaster :(...
First off was a mishap with teh resining bench - it collapsed, decanting its contents, including the the cleaned side panels and the tub of tinted resin, camera, tools, etc, onto the floor. In sorting all that out I unknowingly tipped the hardner container out, and by the time I found out about it, about 20 mls of resin had poured onto the floor. At least the tinted resin container landed butter side up, so none got spilt. Have to be thankful for small mercies.
Got as much of that sorted as I could, fixed up the bench, put everything back, quick check of the side panels, which seem to be OK but will need a thorough clean again.
I should have stopped there and sanded back later, but the resin coat on the bulkheads was starting to go off and I decided to push ahead. Got the glue mixed up, and the glue happily squeezed onto the cleats (great invention, the Storer/DF glueing bag :), then disaster really struck. The bag was starting to get rather warm - first off I'd mixed up too much glue. Flattenning out the bag helped dissipate the heat a bit, but this was to come back to haunt me. I then started to get confused with the carefully marked screw holes on the cleats and their supposed positions on the bulkhead panel.
After much swapping about, during which process the glued cleats got stuck all over the panel face, and the panel face kept coming incontatct with an now glue-covered working surface, I found that I'd been trying to put the stern transom bottom cleat on instead. Once that was sorted, I found the right cleat, started glueing that up, but the flattened bag had come unzipped, and of course even more glue got over me, and everything else. By this time the gloves ad been taken off, and I couldn't get new ones back on.
I've just got back up from cleaning the glue off the drill-driver, the cleats, the unsealed bulkhead face, me, and various other bits and pieces that were in the firing line. Had a fun time trying to steer the car without getting too much resin on the wheel, when picking our daughter up from shcool. Steering was OK - safe - but the wheel wassn't looking its best by the time we got home.
Not a happy start to the glueing up. Not happy at all :(((((.
I'm going to let everything cure up, then sand the glueing areas back and glue onto them, for the remaing two cleats. And sand the glue that I couldn't scrape off the stern transom cleat...
At least my snout is a little better.
-
23rd March 2009, 04:27 PM #154
GOLD MEMBER
- Join Date
- Jan 2009
- Location
- Blaxland, Australia
- Age
- 65
- Posts
- 2,551
Quick qery to MIK again in case he drops by - is the fold-over on the sails 40 or 50 mm (ambuguity between plans and instructions)? Or doesn't it matter?
Btw, won't be posting any disaster photos, at least not yet: I'm still nursing my wounded vanity.
-
23rd March 2009, 04:55 PM #155
GOLD MEMBER
- Join Date
- Jan 2009
- Location
- Blaxland, Australia
- Age
- 65
- Posts
- 2,551
At least the resin is powering along - I'll probably be able to sand it this evening. Another slight plus.
-
23rd March 2009, 06:44 PM #156
GOLD MEMBER
- Join Date
- Jan 2009
- Location
- Blaxland, Australia
- Age
- 65
- Posts
- 2,551
OK, some pictures of what not to do. Actually, the first three photos are before things went pear-shaped...
1. The glue-mix coloured a bit with FW Prooftint "maple":
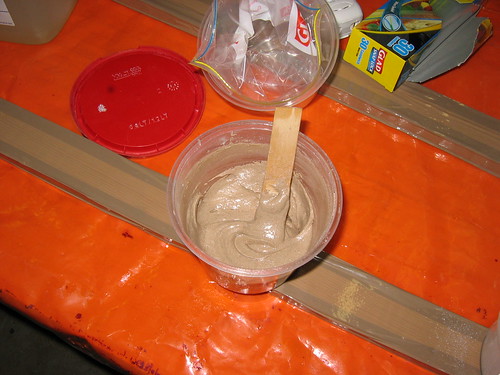
2. In the bag, zipped up and ready to glue
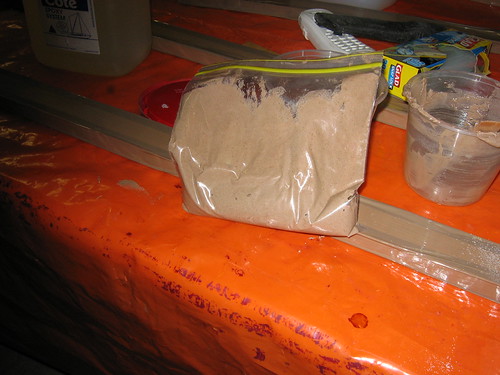
3. The glue-bag is very simple and easy to use. About 60 seconds away from disaster. You fool, it's the wrong cleat!

4. Comparison - the bow transom, and the mucked-up cockpit bulkhead
5. Port side, CB. Bother...
6. Centre, CB. Nice, innit?
7. Starboard side, CB. Almost wasn't a sq. in. that didn't have some form of muck on it...
8. Visible side of CB, sanded clean with 120 grit. Looks almost presentable here, but things will show up when the resin coats go on. Maybe I'll stain it...
The moral of the story is "Don't Panic", in big friendly letters on the cover (to quote the late Mr D. Adams).
It's rather small beer in the scheme of things, but it has had the unfortunate side effect of giving my already shaky self-confidence another knock sideways...
Maybe MIK will take pity on me if he happens to look at this thread again, and let me know about the sail margin... I'm off to try and find something - anything - to do that I can't muck up :(.Last edited by AlexN; 23rd March 2009 at 06:47 PM. Reason: The usual typos...
-
23rd March 2009, 07:50 PM #157
Happily receives emails.
- Join Date
- Jul 2005
- Location
- 'Delaide, Australia
- Age
- 65
- Posts
- 8,138
For some reason either the server or my internet connection is slow tonight.
I was trying to get the page to load and found you had been here at the same time.
40 or 50mm is fine. Just keep the double sided tape about 6mm from any edges that have to be sewn down to prevent the needle gumming up.
Michael
-
23rd March 2009, 09:20 PM #158
GOLD MEMBER
- Join Date
- Jan 2009
- Location
- Blaxland, Australia
- Age
- 65
- Posts
- 2,551
Thanks MIK
 . I now have two sails to play with... I'll be using the 9 mm Paskol tape per your suggestion - and it is indeed gummy! Never seen a stickier tape!
Been sorting through the damage from this arvo - it's not critical, but it is going to cost me in time and replacing the large amount of resin that I wasted. Live and learn, I dare say. I should have stopped after the fright I got when the bench collapsed!
The Brightside Yellow is just that! Very bright, very yellow, if the lid of the tin is anything to go by.
-
24th March 2009, 02:30 PM #159
Senior Member
- Join Date
- Mar 2008
- Location
- Rockhampton, Australia
- Posts
- 227
Hmmmm, another YELLOW duck....
 Nick
Nick
Fair Winds and Following Seas
------------------------------------------------------------
PD Racer #276 - "Duck's Nuts" - Oz MkII with Lug rig
Storer Eureka 155 - unnamed
-
24th March 2009, 02:31 PM #160
Happily receives emails.
- Join Date
- Jul 2005
- Location
- 'Delaide, Australia
- Age
- 65
- Posts
- 8,138
With the staining on the side of the centrecase ...
Once you epoxy it you will see the extent of the problem. Be aware it will appear 100 times worse in isolation on the part as opposed to being in amongst the other bits of the boat.
Boatbuilder's eye comes from us all having this over intimate inspection of every part as we make it.
Unavoidable. But parts don't exist in isolation and nobody will every look from 6 inches away. Also varnish is the best method of hiding things in the world! The boat becomes confusing and dazzling to the eye so all defects are lost.
Paint it and every bump and lump will show up.
MIK
-
24th March 2009, 06:39 PM #161
GOLD MEMBER
- Join Date
- Jan 2009
- Location
- Blaxland, Australia
- Age
- 65
- Posts
- 2,551
Today's another - and different - day :). Spent the morning and a bit of the afternoon removing most of yesterday's mis-applied resin and glue-mix. The Permagrit block came snorting to the rescue on the cleating - stripped off the coatings in a snap. Coarse side to gouge into the resin and flatten it, "fine" side to take it down to the wood, and 120 grit Sahara to clean things up. Sahara is self-cleaning when used on wood - but it doesn't seem to like green resin. Drilled out the resin from the various cleat screw holes and matched the bits onto partially driven screws. Relabelled to replace those sanded off... Also scratched up the glueing areas on the ply panels with sharp paper to give the glue a better key into the curing resin. Used the ROS on the panels, and cleaned 95 % of the glue "coating" off the messed-up bulkhead panel. That part won't be seen anyway: but I know that the glue isn't there ;). So now all the bulkhead parts for stern and bow are complete and ready to go.
With the heater running it has got quite warm, especially as the weather is warm too. I gather that we're in for a cold snap soon, though, in which case the warmed-up workshop will be a bonus :).
Going to change my approach to this part - mix less, do less - and do more, hopefully. I'd made a rod for my own back by driving too hard and mixing up too much stuff. Slow and steady for the moment, I think!
-
24th March 2009, 06:50 PM #162
GOLD MEMBER
- Join Date
- Jan 2009
- Location
- Blaxland, Australia
- Age
- 65
- Posts
- 2,551
Sorry to be so boring ;). I did think about staining the hull a number of tints in an attractive geometrical pattern, but chickened out when I saw how nice the Brightside yellow looked, and realised how little imagination I really had! Originally Posted by nickpullen

Or was it the other way round?
-
24th March 2009, 06:57 PM #163
GOLD MEMBER
- Join Date
- Jan 2009
- Location
- Blaxland, Australia
- Age
- 65
- Posts
- 2,551
I was always going to leave the centrecase as is (resin/varnish) and stain the rudder. But given your comments, I'll leave it (the rudder) severely alone, i.e., resin/varnish - or paint it yellow! Originally Posted by Boatmik
-
24th March 2009, 07:31 PM #164
GOLD MEMBER
- Join Date
- Jan 2009
- Location
- Blaxland, Australia
- Age
- 65
- Posts
- 2,551
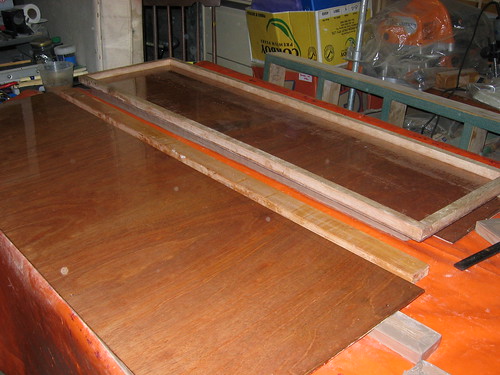
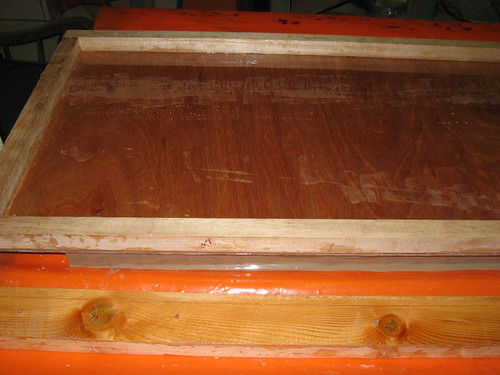
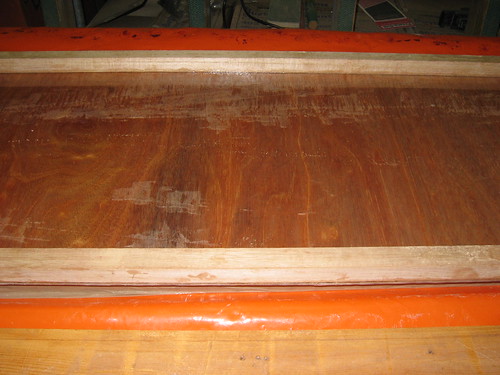
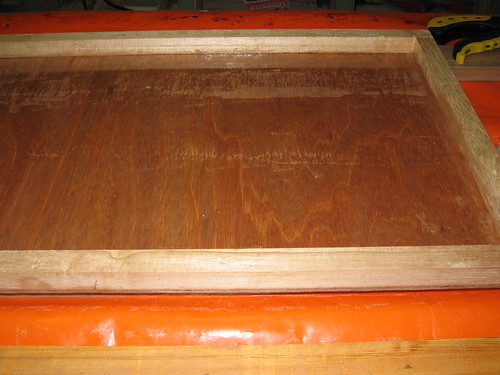
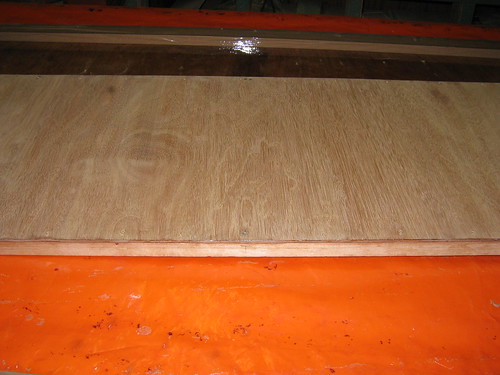
I've got cold feet! I can't bear to mess up the nice crisp-looking bulkheads. They look so nice, clean! So here is a photo while I try and pluck up the courage to make another dog's breakfast of it...
Resin from abandoned assembly sequence cleaned off. Darker spots in bow transom panel at front of photo are low spots that the sander didn't get. Grease/oil and poor cleaning before coating? Dark lines are from the vacuum cleaner's crevice tool.
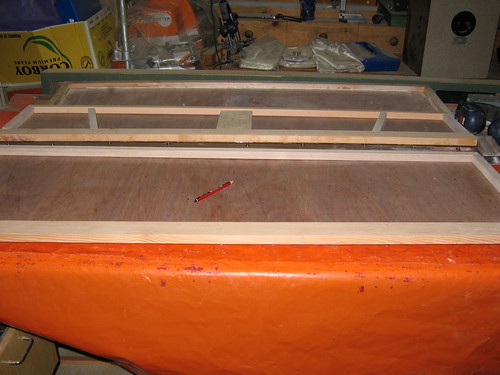
The cleaned-up cockpit bulkhead is lurking in the background, quietly growling and gnashing its teeth at me. The camera never lies (well, almost never) - the lighter patch is probably residual glue that I didn't manage to remove completely, although to look at it is seems clean. It isn't dust, because I vacuumed it. I'm getting getting too picky here, methinks.
-
24th March 2009, 09:03 PM #165
New Member
- Join Date
- Mar 2009
- Location
- South Africa
- Posts
- 2
 PD Lug rigg Hardware list ?
Yes,yes
I know I'am lazy, or, I'd rather spend time building than breaking my not so very "nautical head" trying to figure out how many of what do I need,
So if there is any good samaritans that wouldn,t mind compliling a small list of all the "not wood" items that go in to the lug rig I would apreciate it, and may be where and what it is used for it would be very nice.
Regards
Herco
Still going 3D x 2 this week


 Reply With Quote

Similar Threads
-
New Queensland PDRacer Build
By duncang in forum Michael Storer Wooden Boat PlansReplies: 71Last Post: 26th April 2012, 08:30 AM -
Oz PDR build in Adelaide - sexy black PDRacer
By m2c1Iw in forum Michael Storer Wooden Boat PlansReplies: 39Last Post: 27th April 2009, 06:30 PM -
OZ PDRacer - Dylan's build in the Philippines
By Boatmik in forum Michael Storer Wooden Boat PlansReplies: 16Last Post: 23rd February 2009, 05:50 PM -
Brisbane Timber and Working with Wood. Boatmik/PDRacer
By Boatmik in forum Michael Storer Wooden Boat PlansReplies: 1Last Post: 11th April 2007, 08:06 PM -
Flawed wood on the TS --DUCK!
By Robert WA in forum WOODWORK - GENERALReplies: 7Last Post: 19th February 2004, 11:42 AM
Tags for this Thread
balanced lug,
boatmik,
build,
dacron(tm),
douglas fir,
duck,
enamel,
epoxy resin,
fibreglass,
hoop pine,
interminable,
lug,
machinery,
materials,
michael,
oregon,
oz racer mk 2,
ozracer,
paint,
paulownia,
paulownia/glass mast,
pdracer,
plywood,
polytarp,
primers,
really simple sails,
sail-making,
sailmakers thread,
sanding,
storer,
sydney,
timber,
tools,
varnish,
verbose,
western red cedar,
wood,
wood duck,
wrc
