

 Thanks:
  Likes:
  Needs Pictures: 0
 Picture(s) thanks:
Results 181 to 195 of 3347
-
25th March 2009, 11:41 PM #181
 Timber Hoarder


- Join Date
- Sep 2002
- Location
- Minbun, FNQ, Australia
- Age
- 66
- Posts
- 12,881
 Welcome aboard, good first post, I hadn't heard of it either.
 Originally Posted by fatgal65

 Cliff.
If you find a post of mine that is missing a pic that you'd like to see, let me know & I'll see if I can find a copy.
-
25th March 2009 11:41 PM # ADSGoogle Adsense Advertisement
- Join Date
- Always
- Location
- Advertising world
- Age
- 2010
- Posts
- Many
-
26th March 2009, 08:39 AM #182
GOLD MEMBER
- Join Date
- Jan 2009
- Location
- Blaxland, Australia
- Age
- 65
- Posts
- 2,551
Thanks fatgal65. And echoing Cliff, great first post, and welcome!
Finding a local supplier is going to be the next challenge :). Probably Whitworth's, though.
Cheers,
Alex.
-
26th March 2009, 09:03 AM #183
Timber Hoarder
- Join Date
- Sep 2002
- Location
- Minbun, FNQ, Australia
- Age
- 66
- Posts
- 12,881
Try the paint supply places, we have a couple in Cairns that I reckon would be worth a look. Originally Posted by AlexN
Bunnies also have an aisle full of that sort of stuff.Cliff.
If you find a post of mine that is missing a pic that you'd like to see, let me know & I'll see if I can find a copy.
-
26th March 2009, 09:35 AM #184
GOLD MEMBER
- Join Date
- Jan 2009
- Location
- Blaxland, Australia
- Age
- 65
- Posts
- 2,551
Nearest Whitworth's don't have it, but the local hardware store around the corner does. Not sure why 3M flags it as a marine item when their page on it shows the stuff in a domestic painting situation. No argument about its marine use, though :). Thanks once again, fatgal65; and MIK, for putting me on to it.
-
26th March 2009, 10:26 AM #185
GOLD MEMBER
- Join Date
- Jan 2009
- Location
- Blaxland, Australia
- Age
- 65
- Posts
- 2,551
Hi Cliff, dried out yet? (!)
Bunnies have the 19 mm tape in their Paint Warren, $10 a roll. Just nipping down to get some (and some more spring clamps for the Goat :)...
-
26th March 2009, 11:19 AM #186
GOLD MEMBER
- Join Date
- Jan 2009
- Location
- Blaxland, Australia
- Age
- 65
- Posts
- 2,551
Hmmm...the Paint rabbit whom I spoke to on the phone must have been reading the wrong rack - it was $14/roll. Popped their big bag o' spring clamps up by $2.00 as well, but it's still a bargain for that.
-
26th March 2009, 04:25 PM #187
Happily receives emails.
- Join Date
- Jul 2005
- Location
- 'Delaide, Australia
- Age
- 65
- Posts
- 8,138
The 3M blue tape is the best ... but there are a number of copy products that are not too bad. All the same blue!
I have always been impressed by the performance of the original 3M products. They tend to be the most expensive in their class, but work every time.
MIK
-
26th March 2009, 04:43 PM #188
GOLD MEMBER
- Join Date
- Jan 2009
- Location
- Blaxland, Australia
- Age
- 65
- Posts
- 2,551
Another slow day today...
Last chance to check the side panels against each other, particularly the bottom curve and the matching of the critical points, frame positions and ends (transom positions). So I've been very slowly removing the build-up of resin on the bottom curve, that I should have removed at the time but forgot about (got distracted).
The little that I did yesterday must have been too much - been dragging around feeling quite weird most of the day. So weird that I bought a Bosch belt sander <gasp>. Not silly though, as it will be extremely useful, and not just for boat building :).
As sort-of promised, here's a link to a Flickr set. This is just the "Wood Duck" Flickr-hosted images - I haven't (re-)uploaded any of the Forum images to Flickr yet.
So what's next? Matchng up of the frame and CB reference lines on the side panels to see if they're sane or not. If not...?
-
26th March 2009, 04:51 PM #189
GOLD MEMBER
- Join Date
- Jan 2009
- Location
- Blaxland, Australia
- Age
- 65
- Posts
- 2,551
I swear by - not at ;) - 3M products: I always try to get 3M heavy duty clear packaging tape (437?) for work - it's tough, doesn't wrap around itself when off the roll, and it sticks! Just the thing for sending parcels overseas! I get rather annoyed when I can't find the same 3M tape at, e.g., Penfolds. I agree - they work every time. Originally Posted by Boatmik
Haven't got the blue tapes out of their wrappers yet, as am still feeling a bit woozy, and for the next few steps that I've planned I need to be quite a bit sharper (hence haven't gone back to the workshop since before lunch).
Cheers,
Alex.
-
27th March 2009, 09:42 PM #190
GOLD MEMBER
- Join Date
- Jan 2009
- Location
- Blaxland, Australia
- Age
- 65
- Posts
- 2,551
Another day of favouring the nose and keeping out of the workshop until relatively late in the day.
I actually did quite a bit when I actually got into the workshop: I'm finding that a less frenetic and more disciplined, measured approach is paying off here. As it should, of course. I'm still not quite sure how I got into the tangle with the cockpit bulkhead, but lack of planning and trying to do to much were largely contributory, I think.
I re-measured the major resistration lines on the side panels and redid the marks so that they all matched up for both panels. After sorting out the lines for one panel (the one that showed the least errors!), it was a process of juggling the panels back and forth and side to side until the (sanded) bottom curves matched, with each end also matching. Once I had them set, I used some of the highly versatile blue tape and taped them together to prevent further float and loss of alignment (all too easy!). After that it was a simple if rather tedious matter of (carefully) turning the sides over and over until the markings on the less accurate panel stopped moving. In one instance there was an error in the "more" accurate panel, which had to be corrected then the other panel re-matched. The sheer curves were then sanded very, very slowly with the Permagrit sheet (not the block) to remove the resin blobs, with the tape remaining on the bottom curve but removed (of course) on the sheer.
Once happy with that, I separated the panels: while doing so the tackiness, thickness and texture of the tape suddenly reminded of the "Tamiya tape" masking tape as used by aircraft modellers (flying and static). I reckon it's more or less the same sort of stuff, only blue instead of fawn, and lots cheaper! You wouldn't want to pay Tamiya prices for the amount of tape which I went on to use next!
Because I will be glueing the pieces onto the side panels "blind", I decided to mask beyond the glue lines (remember what happened with the cockpit bulkhead - actually, I'd rather not!), and used one line of 19 mm and one of 25 mm tape (see photos). It's probably more than I'm going to need, but I'd rather not have to be scrapiing glue off where I don't need to be (see also the preceding "before, during and after" photos of the stern transom). Did the sheer and bottom curves on both panels while I was at it, and fount the tape to be quite bendy - within limits. I did the last line (sheer curve) in one piece of tape - less wasteful, and quicker, too :).
That sorted, I took the screws out of the chinelogs where I had left them as markers and for safe keeping, made a final check of their positions, then inserted them all by hand along the curve length. That done, the panels was turned over (carefully so as not to have the screws flying all over the workshop, never to be seen again) and the screws straightened and screwed through the panel with the (had) screwdriver, so that their tips projected sufficiently for me to be able to feel them through a layer of glue placed on the clamping element (sheer clamp or chinelog).
The final step for the evening was to set up a clamping system so that I can set the part in place using only two hands (what is all I got), fastening with the drill driver periodically. The photos will show this more elegantly than I can describe it. In fact, I'm going to put the photos up tomorrow some time, when I've made a sufficiently small and representative selection. The spring clamps in the photos are there in loco the screws of the actual glueing run. I did a quick run-through to test my setup, which required a few tweaks to become reasonably hitch free - but the addition of glue adds at least an order of magnitude of difficulty for me, I reckon, so I may be laughing on the other side of my face come the actual glueing. Should be better than the CB debacle, though.
Photos tomorrow.
-
28th March 2009, 10:08 AM #191
GOLD MEMBER
- Join Date
- Jan 2009
- Location
- Blaxland, Australia
- Age
- 65
- Posts
- 2,551
Photos:
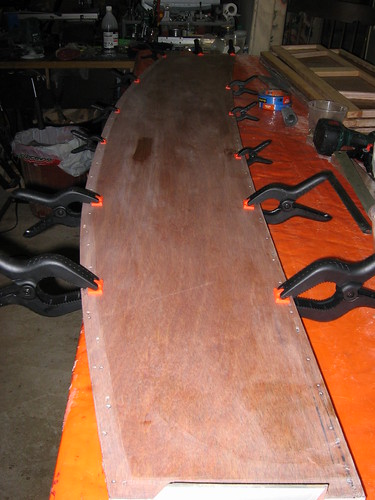
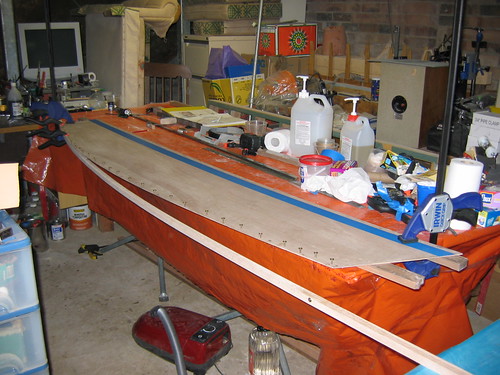
1. First attempt at aligning side panels for final checking. This didn't work too well when turning the panels over as the clamps still allowed the panels to slide relative to each other. I subsequently found a neat, if somewhat profligate, way around this :).
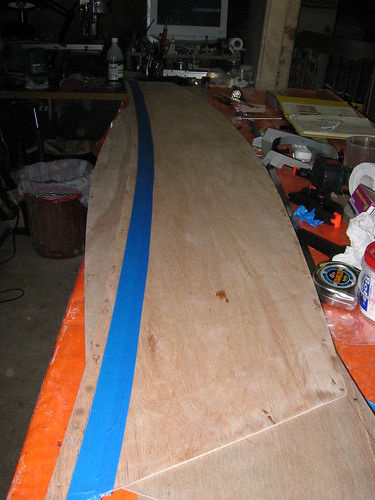
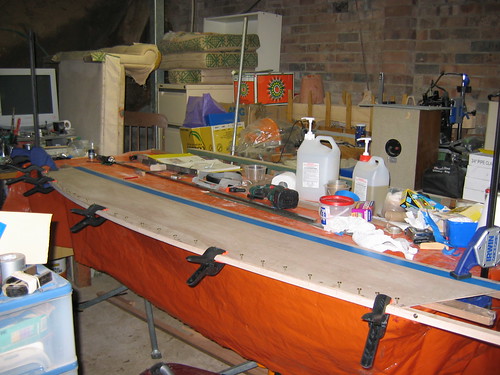
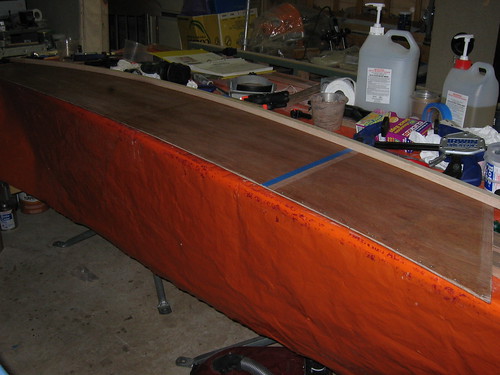
2. Another use for blue tape! Better than the spring clamps above - held the panels firmly so that they didn't move relative to each other when being turned over (and over and over...). The strange multiple-eyed beastie in the background of the photo is an LED torch reflecting the camera's flash back at it, in case you were wondering.

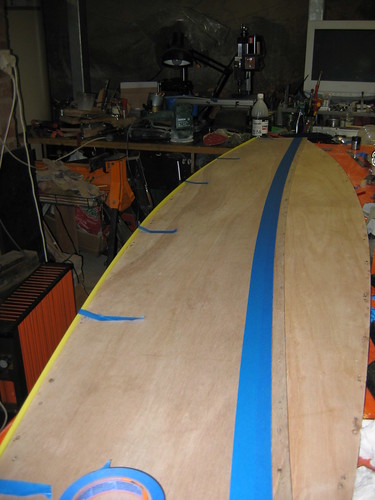
3. Starboard side panel, one run of tape. By this stage, all the resin patches had been sanded back flat with the rest of the panel

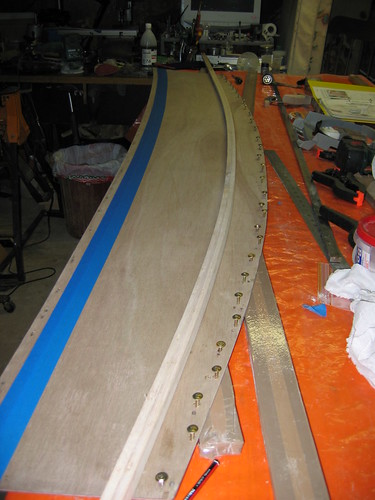
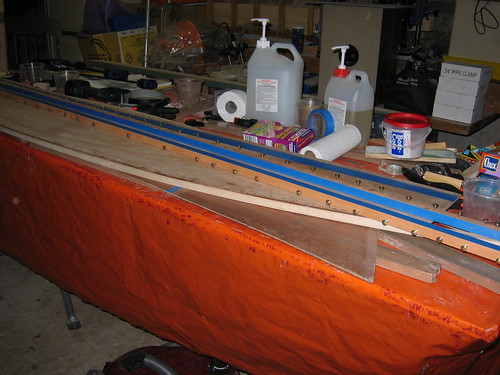
4. Sheer clamp mask, two runs of tape (port panel)
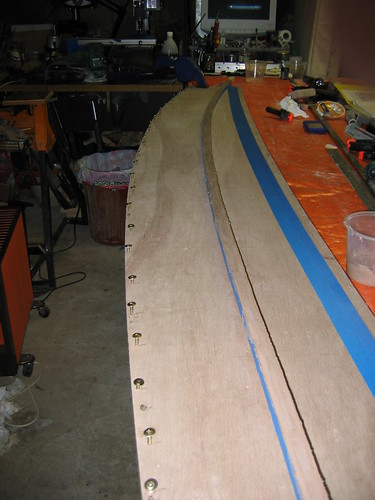
5. Measuring the bottom curve length: it's 2310 mm, +/- 1 mm. I wanted to see how much of the bottom sheet was going to be left over. Now I know :)...
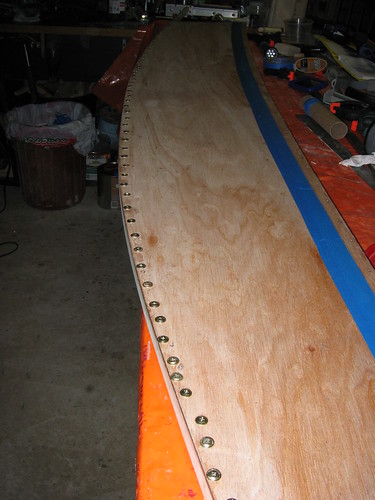
6. Port side panel, with chinelog for reference: screws firmly screwed in (by hand) after straightening.
7. First stage of setting up for glueing. So that's where those clamps (on the floor) got to! It's amazing what you can see in a more objective view, later!
8. Final stage of glueing dry run. Glueing sequence almost sorted in my head, but may change on the day! One thing that I've omitted is masking tape on the the surfaces of the chinelog(s) adjacent to the glueing surface(s). I will add this before disassembling the clamping system prior to glueing up - I need to flip the side to dry-brush a strip of resin onto the panel. Screws will have to come out first!
Not as many photos as last time :). I managed to be a bit more disciplined about this, but no doubt could have reduce the number still further. Coming up is the last major step before assembling something that starts to look like a 'Duck! Oh well, I'd better stop delaying ;)...
-
28th March 2009, 10:16 PM #192
GOLD MEMBER
- Join Date
- Jan 2009
- Location
- Blaxland, Australia
- Age
- 65
- Posts
- 2,551
I decided to dry brush the resin on to the chinelog glueing area, rather than dry brush it off, per the last two bulkheads. The extra tape also helped here when i actually needed to remove a slight excess on the second panel.
I mixed the resin, then poured it out on to a scrap piece of timber (see photo - some may recognise this as the piece of radiata used in my dremel router experiments :) and spread it out a bit with a plastic scraper. The brush was then lightly loaded from this thin pool, and brushed onto the chinelog glueing areas of both panels. Apart from the slightly excessive application on the second panel, this went like a charm. I then spent part of the long waiting time (it's a very thin resin layer, not much heat can build up) putting all the screws back in (I'd taken them out before dry-brushing).
Finally got it all done if not dusted (that's later ;). Screws are out and the chinelogs seem to have stuck! I'm going to attempt the sheer clamps tomorrow :).
Photos:
1. Piece of scrap timber being used to supply small amounts of resin for dry-brushing
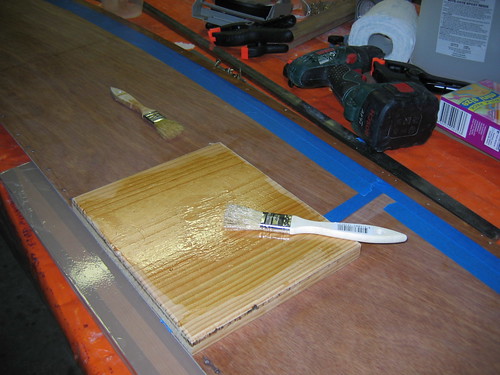
2. Results of dry-brushing: first panel

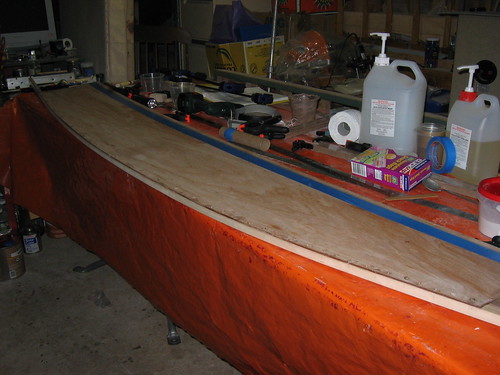
3. Ready to go at last! Screws in place, resin strip going off, panel clamped down and chinelog spread with glue mixture (BoteCote and high-strength filler powder).
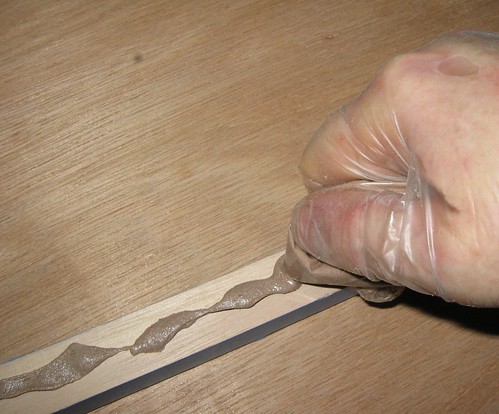
4. Applying glue using the bag. Holding camera in left hand and reaching across camrera to press button was tricky! The glue bead is also much more even, and I filled this bit in after taking the photo. I've switched to a smaller bag seeing that I'm making up less glue since the "fun" with the cockpit bulkhead.
5. Chinelog glued and fastened in place, awaiting cleanup

6 Excess glue cleaned off and tape removed
7. Added a lot more screws: the glue mix was a bit too dry, and the panel hadn't been pulled down hard enough onto the chinelog. Sequential undoing and redoing of screws plus interploating new ones achieved the desired effect.
8. Screws out! The working area really isn't as dingey as it looks! The flash is having a hard time coping in this and many other long shots down here. Shutter priority would be better, but too much shake; tripod would be even better but too inconvenient!
9. Setting up for the glueing on the sheer clamps: tape on surfaces adjacent to the glueing surface, as for the chinelogs. Guess what the stack of pipe clamps (upper right) is going to be used to help construct? Foils, of course :).
Note to MIK - this gives a good idea of what I was up to with the paint brush :).Last edited by AlexN; 29th March 2009 at 06:34 PM. Reason: Added photos
-
29th March 2009, 09:46 AM #193
Happily receives emails.
- Join Date
- Jul 2005
- Location
- 'Delaide, Australia
- Age
- 65
- Posts
- 8,138
Howdy Alex,
Not sure if you are doing the touching up to get the bits missed out in the corners or not.
In general as soon as there is a flat ply area I always use a roller, it is so much faster and saves quite a lot of epoxy.
However for framing .. as you say .. the brush is best, though I often put the 'pox on with a roller before making sure it is spread properly with a brush (ie into corners etc)
Not stipulating that my way is best of course ... discussion only!
Best wishes
Michael
-
29th March 2009, 05:02 PM #194
GOLD MEMBER
- Join Date
- Jan 2009
- Location
- Blaxland, Australia
- Age
- 65
- Posts
- 2,551
Hi MIK, thanks for the reasoned reasponse :). The bits were only missed in the sense that I decided to miss out on a fourth coat of epoxy on the side panels. As a result of this, I thought it best to put a pre-glueing line of fresh epoxy on the glueing areas (after roughing them up with some sandpaper first) in order to make the joints as I could. Not as strong as they would have been if integrated into the three coats wet-on-wet, but that wasn't possible the way that things panned out.
In fact, I would have wasted a third of a roller each time (assuming that the rolloer delaminated or I didn't clean it), since the width of the glueing area was that of the cleats, i.e., 19 mm. And it ws always going to be a slow process anyway ;).
The only times that I've not used the roller in this project have been when setting up thus for the "bendy bits". As you can appreciate, I didn't want the bendy bits to end up going "twoing" and returning to their pre-gluing stress-free shapes after removing the screws! The chinlelogs haven't (yet) - the sheer clamps might be another story (see next post :).
Cheers,
Alex.
-
29th March 2009, 07:56 PM #195
Happily receives emails.
- Join Date
- Jul 2005
- Location
- 'Delaide, Australia
- Age
- 65
- Posts
- 8,138
Just reviewing your pics .... I would use about half the number of screws. Would probably set up about 200 mm apart for the first couple and see if there was some ooze and adjust the spacing as required to make sure a little oozes out of the join.
Cheers .. great progress
Michael


 Reply With Quote

Similar Threads
-
New Queensland PDRacer Build
By duncang in forum Michael Storer Wooden Boat PlansReplies: 71Last Post: 26th April 2012, 08:30 AM -
Oz PDR build in Adelaide - sexy black PDRacer
By m2c1Iw in forum Michael Storer Wooden Boat PlansReplies: 39Last Post: 27th April 2009, 06:30 PM -
OZ PDRacer - Dylan's build in the Philippines
By Boatmik in forum Michael Storer Wooden Boat PlansReplies: 16Last Post: 23rd February 2009, 05:50 PM -
Brisbane Timber and Working with Wood. Boatmik/PDRacer
By Boatmik in forum Michael Storer Wooden Boat PlansReplies: 1Last Post: 11th April 2007, 08:06 PM -
Flawed wood on the TS --DUCK!
By Robert WA in forum WOODWORK - GENERALReplies: 7Last Post: 19th February 2004, 11:42 AM
Tags for this Thread
balanced lug,
boatmik,
build,
dacron(tm),
douglas fir,
duck,
enamel,
epoxy resin,
fibreglass,
hoop pine,
interminable,
lug,
machinery,
materials,
michael,
oregon,
oz racer mk 2,
ozracer,
paint,
paulownia,
paulownia/glass mast,
pdracer,
plywood,
polytarp,
primers,
really simple sails,
sail-making,
sailmakers thread,
sanding,
storer,
sydney,
timber,
tools,
varnish,
verbose,
western red cedar,
wood,
wood duck,
wrc
