

 Thanks:
  Likes:
  Needs Pictures: 0
 Picture(s) thanks:
Results 3,106 to 3,120 of 3347
-
19th March 2013, 11:40 AM #3106
 GOLD MEMBER


- Join Date
- Jan 2009
- Location
- Blaxland, Australia
- Age
- 65
- Posts
- 2,551
 Hmm... Sounds good :). That's much a much better idea than my own idea of glueing the roof to the boat and making a sort of Perttu's "Ocean Explorer" out of it, which I had been very idly pondering for my own amusement - I wouldn' t really do that, the roof is way too heavy! And it would look nothing like Perttu's elegantly-designed-and-built creation, either ;).
 Originally Posted by dkirtley

There will be plenty of room, as the maximum height will be 450 mm maximum (as an estimate sitting here). For wiggle-room (and wriggle-room) the other door can be opened as well, although that would require moving a whole lot of junk somewhere else... Originally Posted by Theodor
Cheers,
the alex.
I've been focussing a bit too much on the roof lately, and must apportion some more time to the CNC box, as there is a job requiring it that is breathing flames down my neck! Or will do, if I don't get it running soon! Less posting would be a good option here, too ;).
Here are some snaps left over from yesterday, and some form this morning's efforts so far:
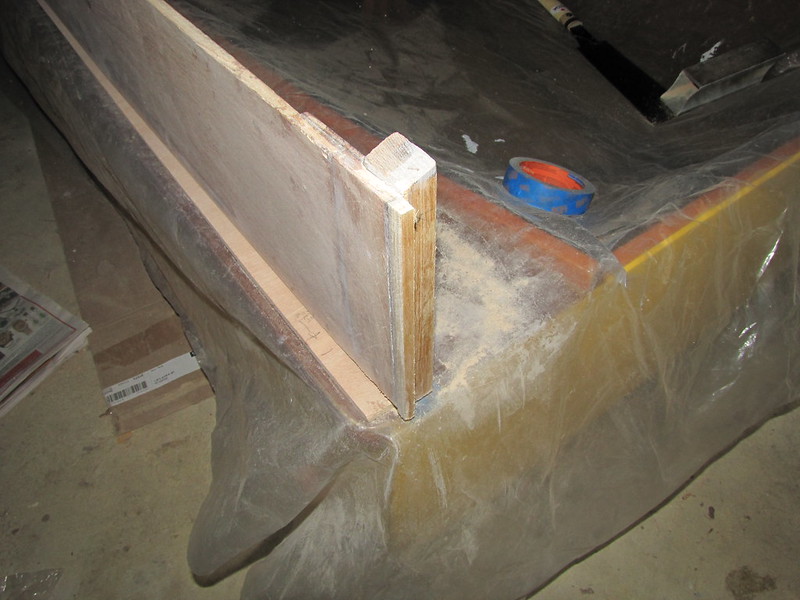
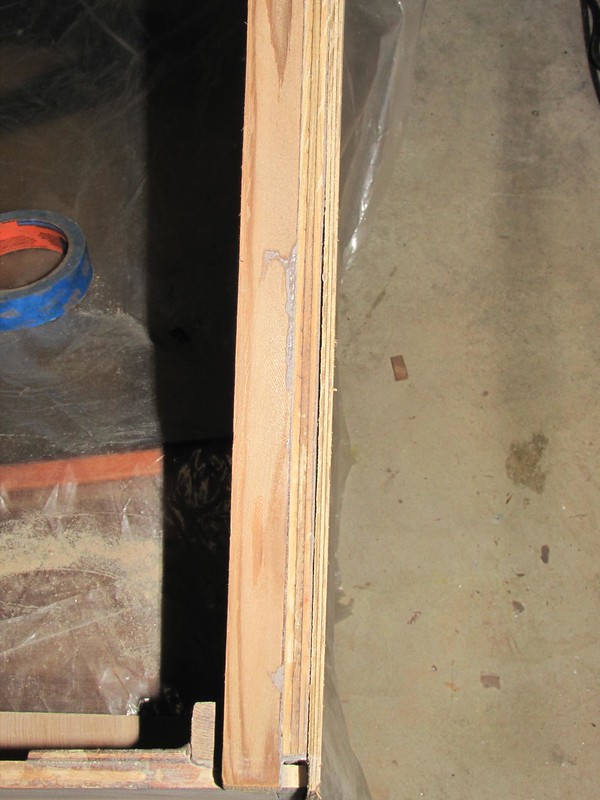
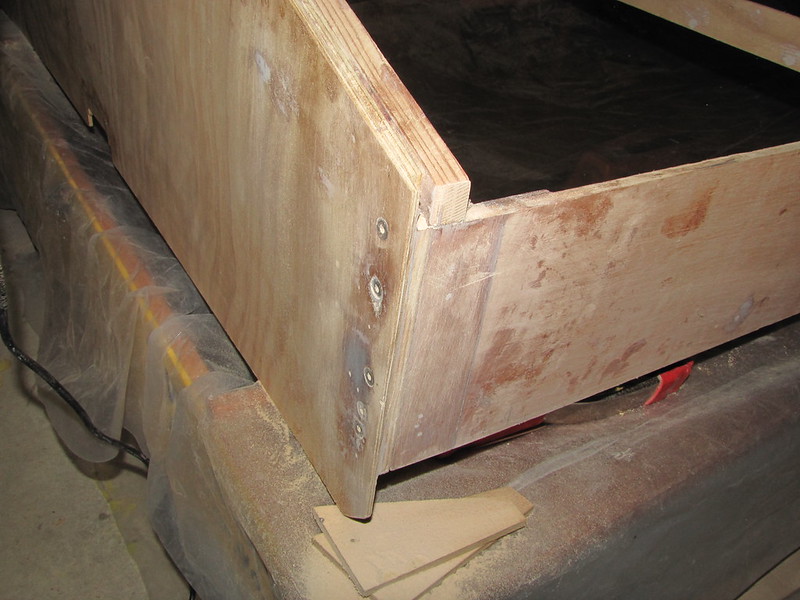
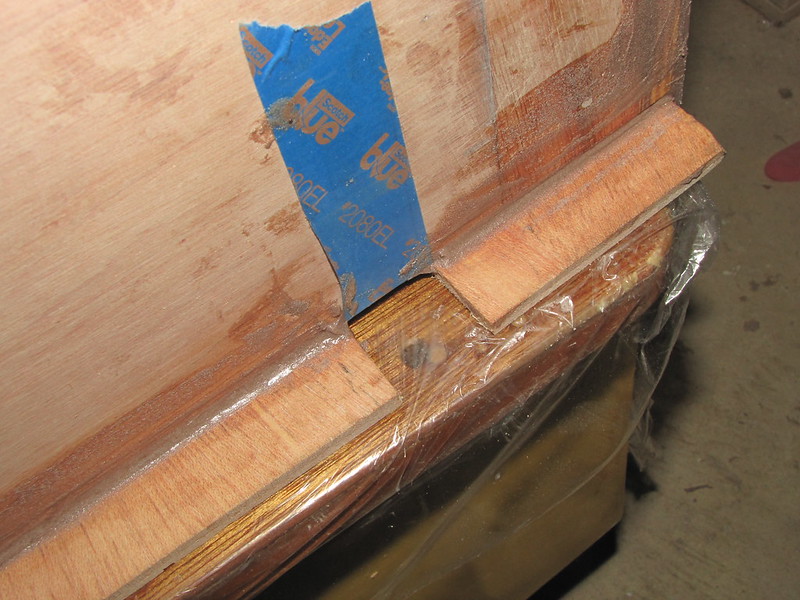
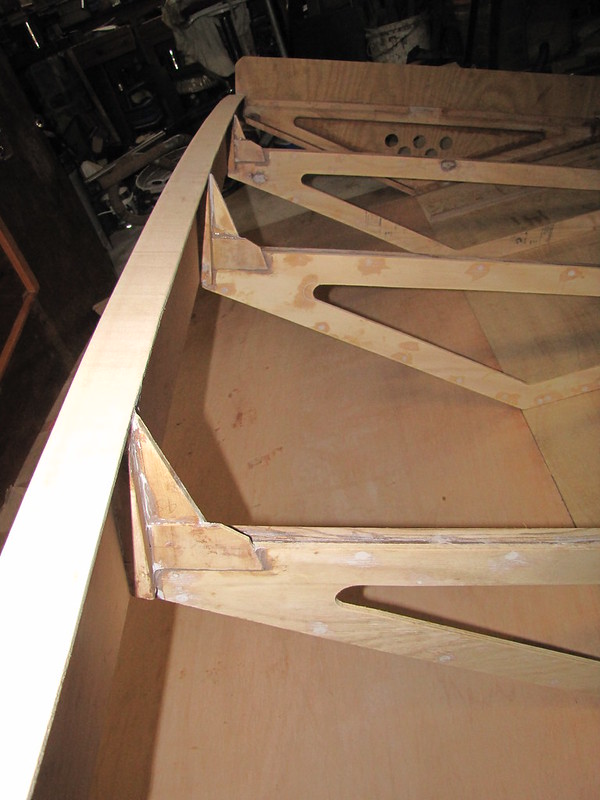
1. Glued together! As you can tell by the grubby paw-prints everywhere. The front and side panels are now attached to each other. The notch in the end-plate is where I filed away at it to get a proper right-angle for checking with the square; I'll finish off the filing when the glue has set. Note the cling-wrap: under all four corners, between the glue and the bendy-ply!
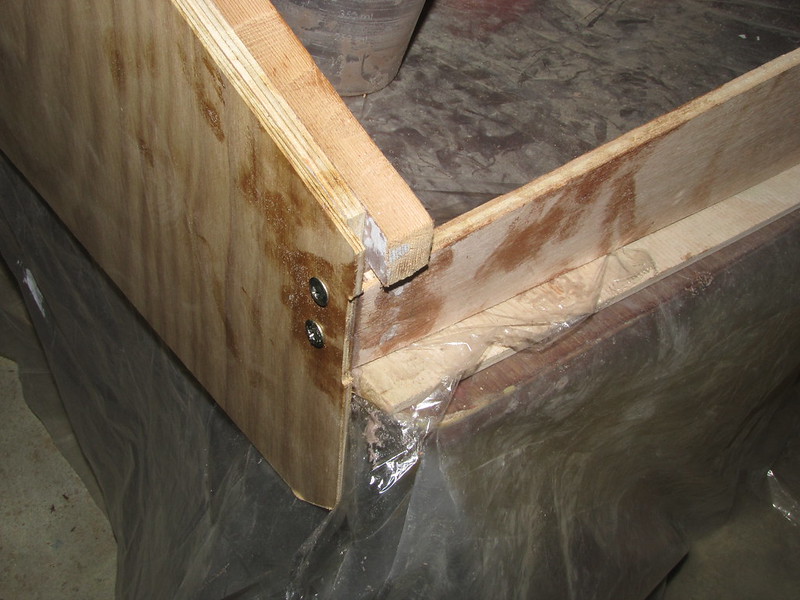
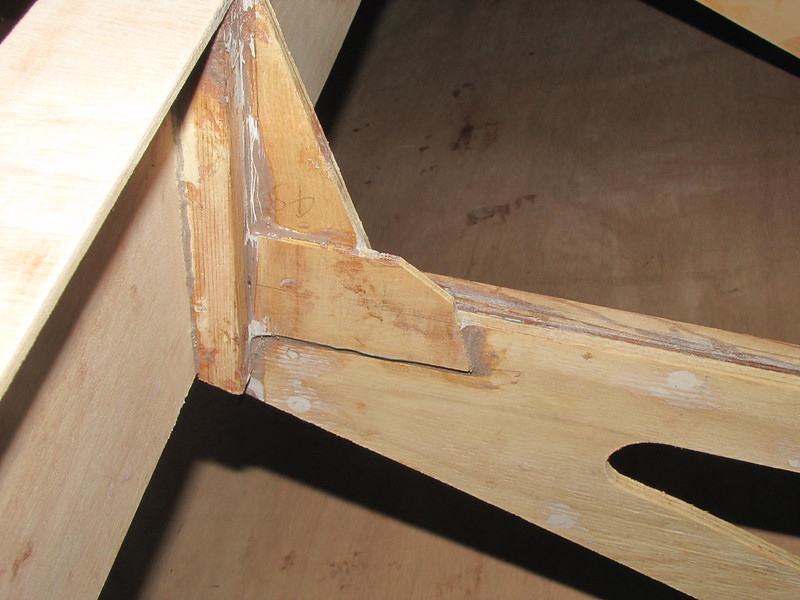
2. More grubbiness - and glue. The inside of the joint in the previous photo. The gap between the lower frame element and the short upright was filled in (and the area tidied up a bit) when the glue had started to gel beyond the fluid stage
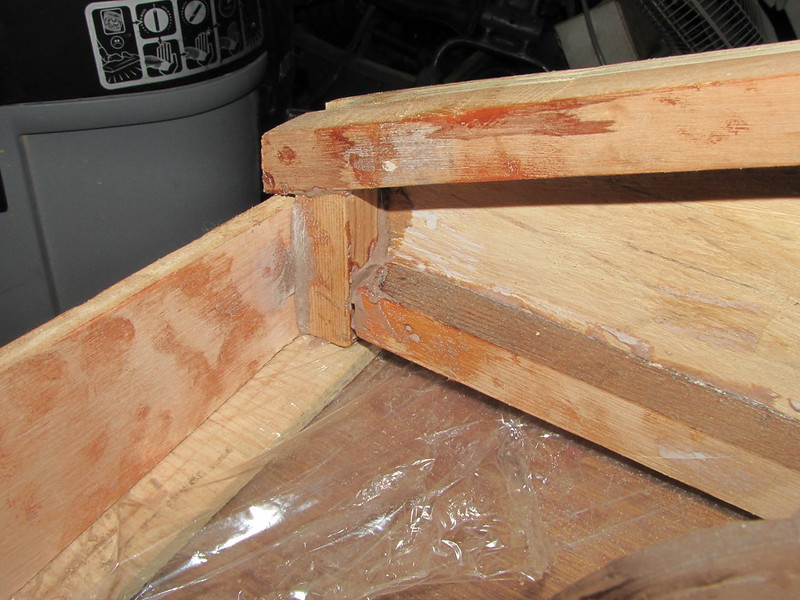
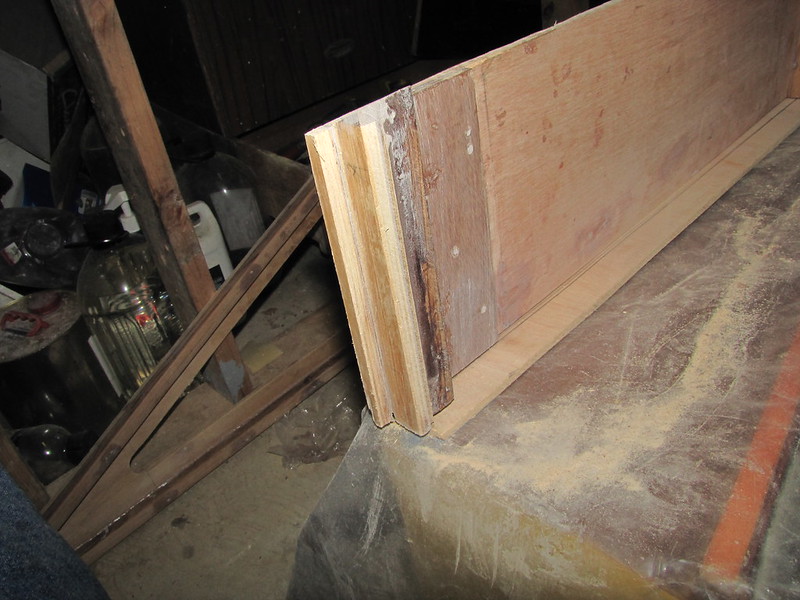
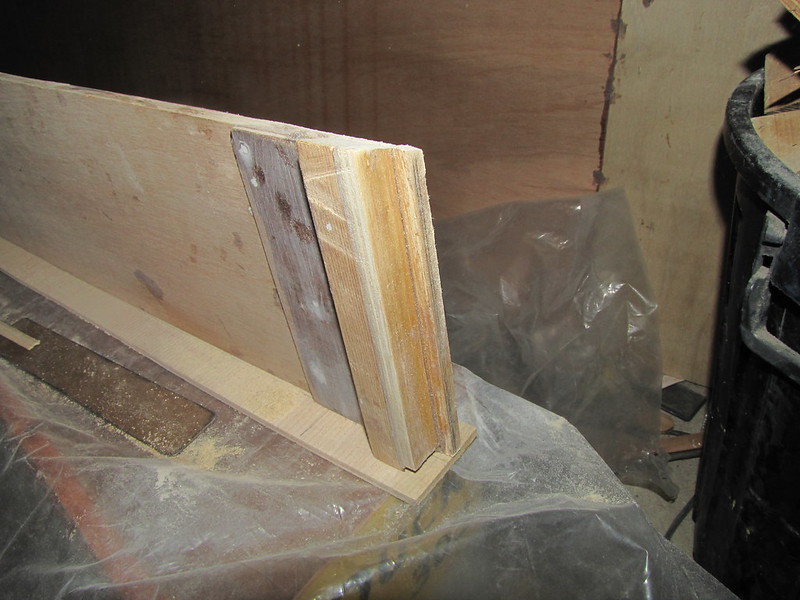
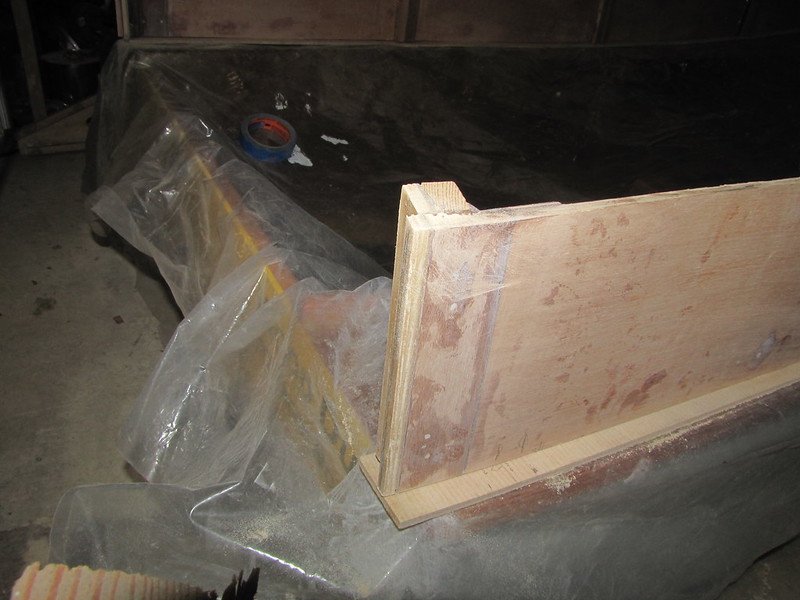
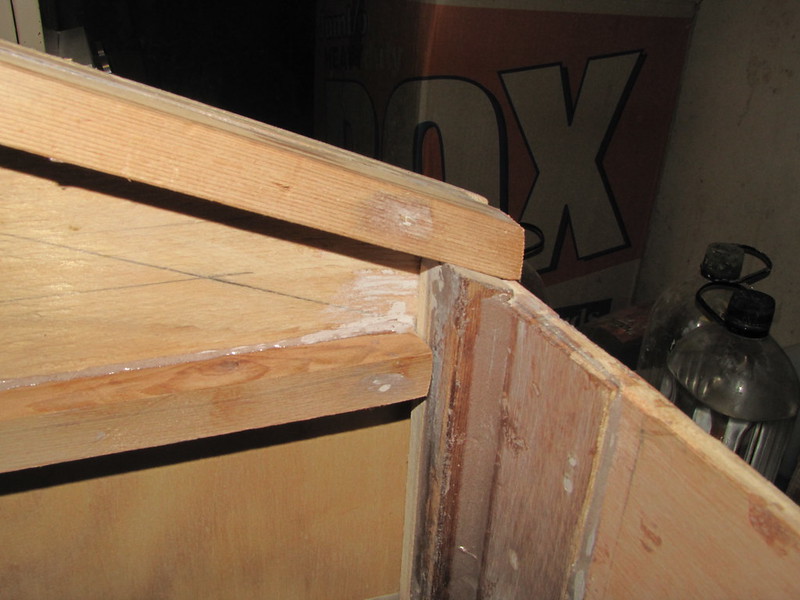
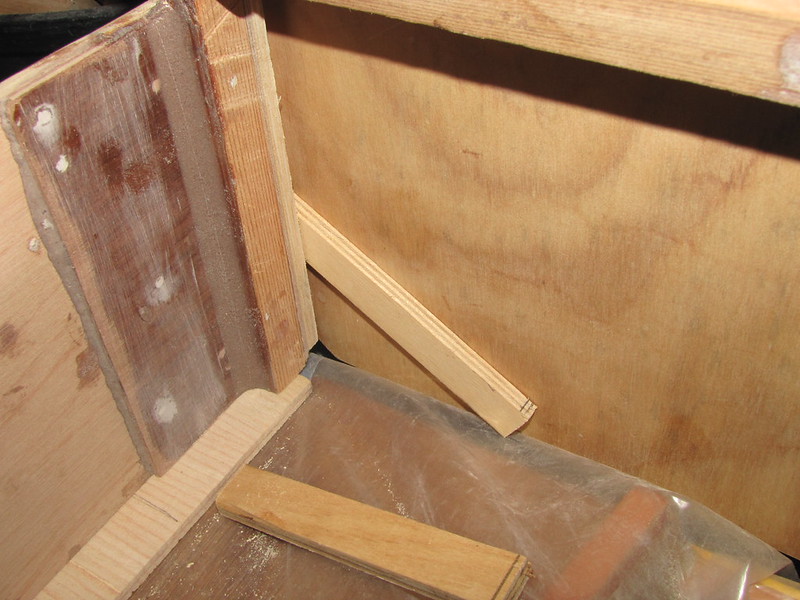
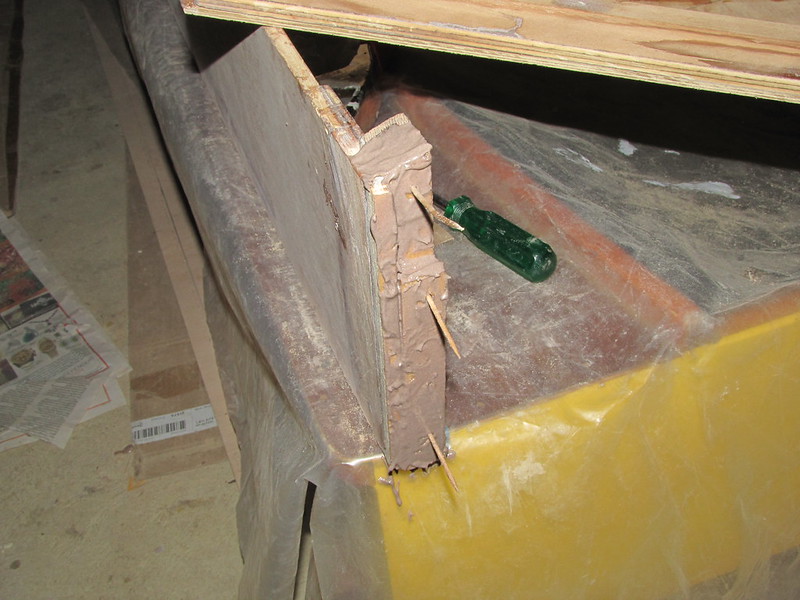
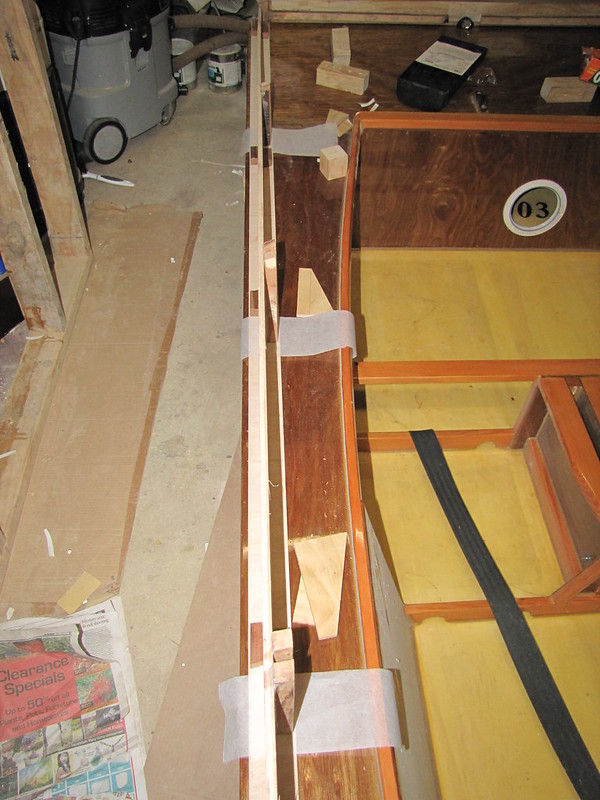
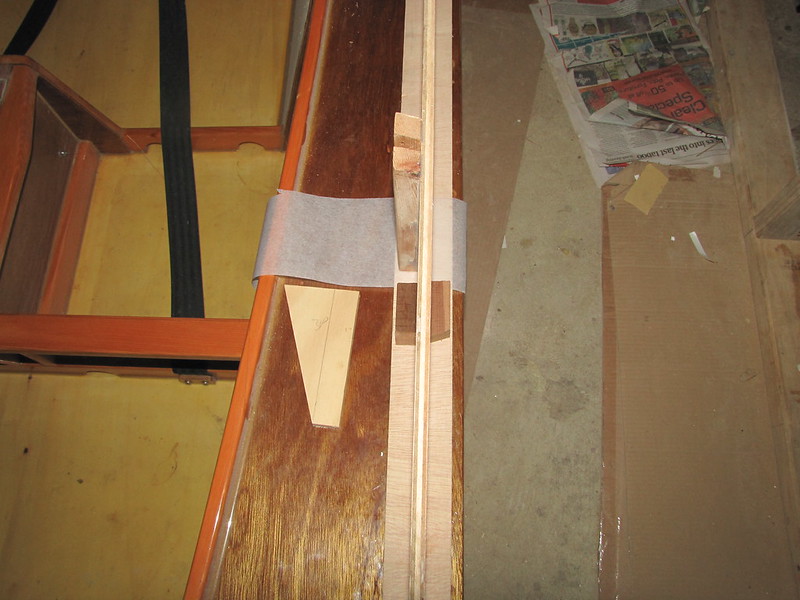
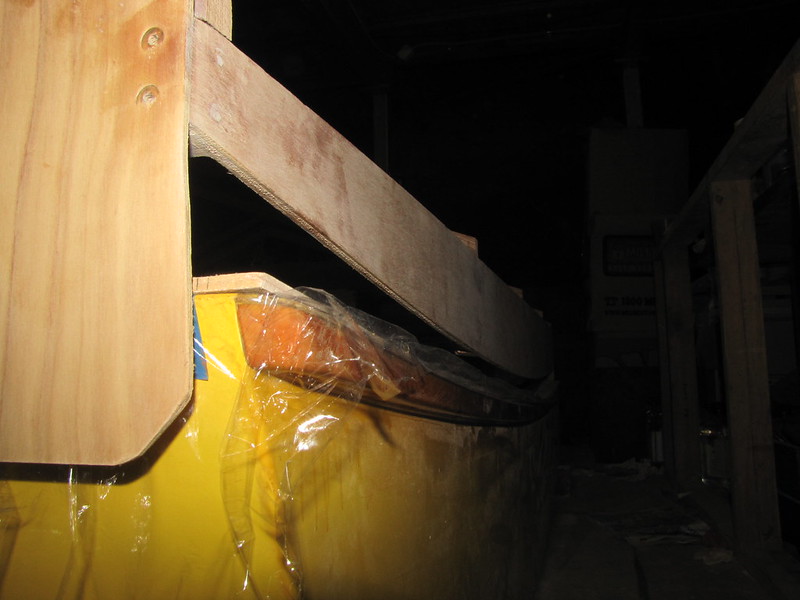
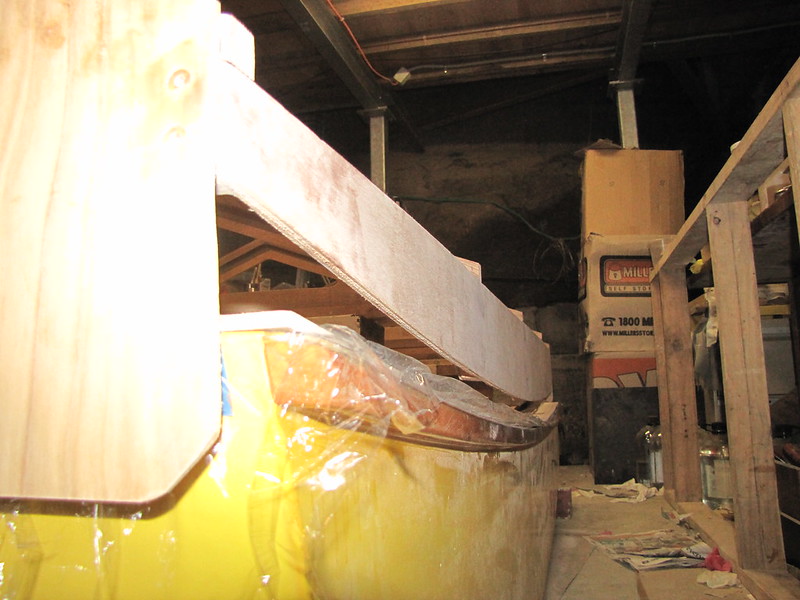
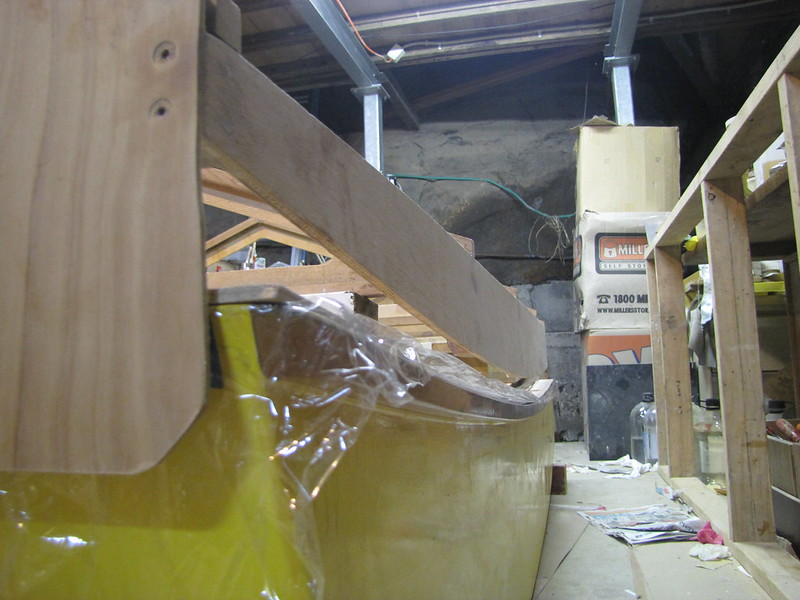
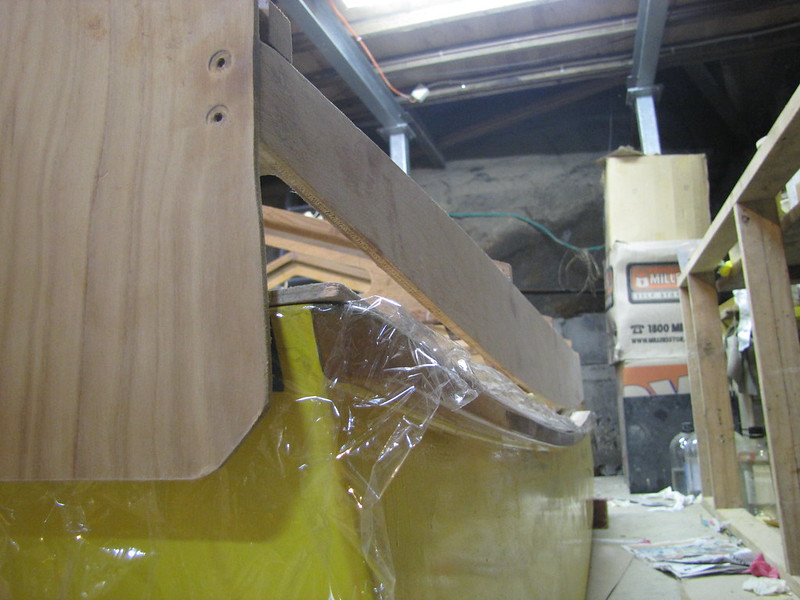
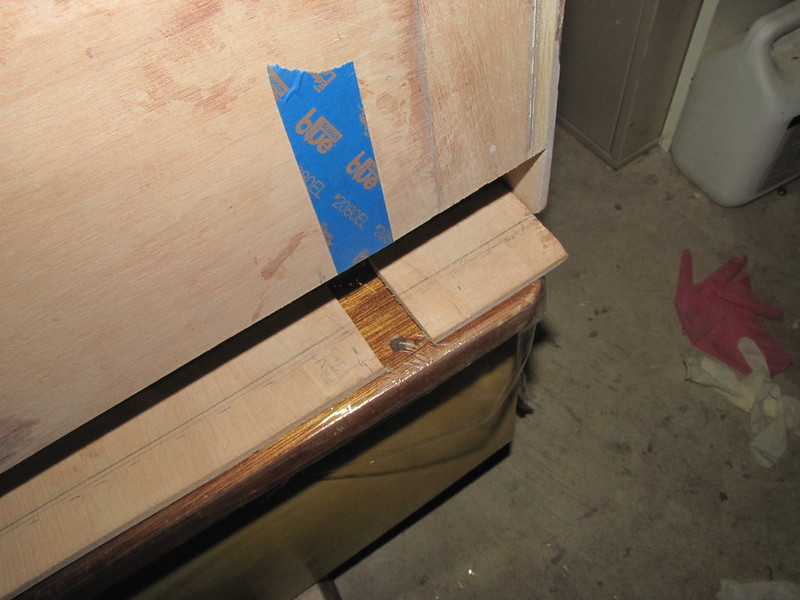
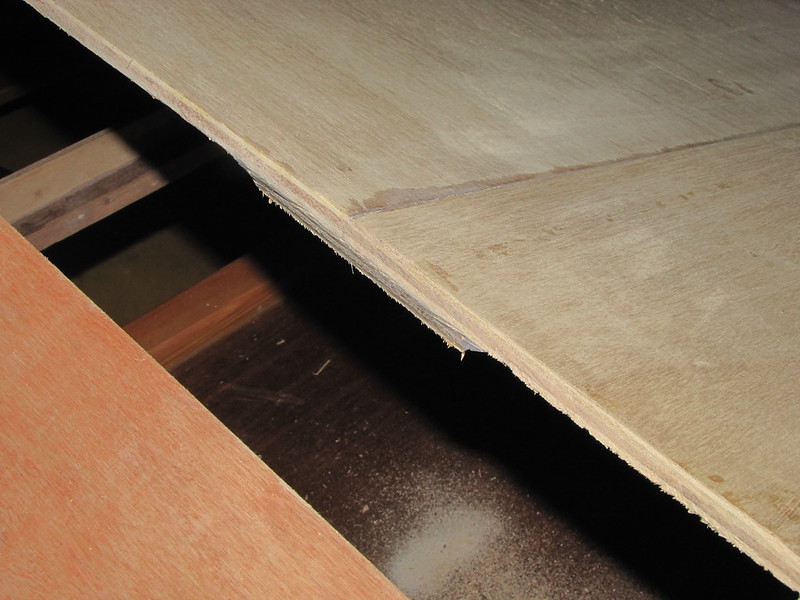
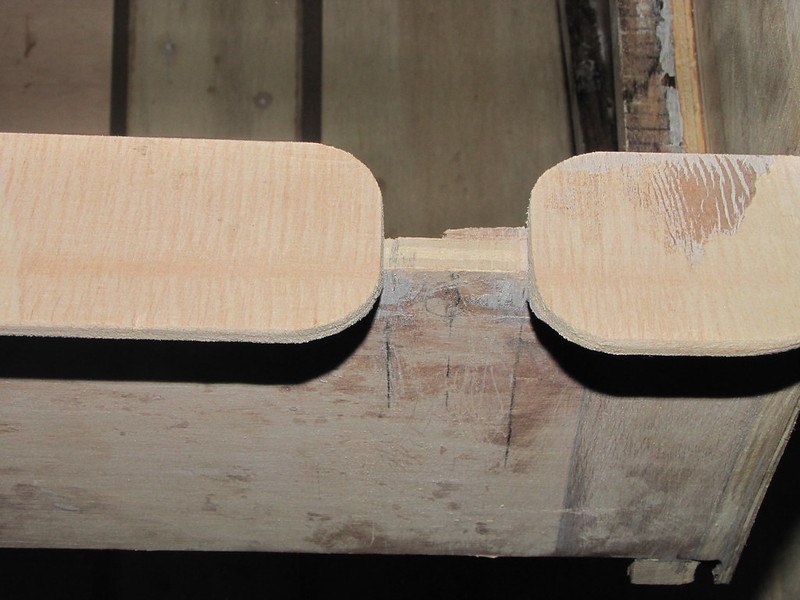
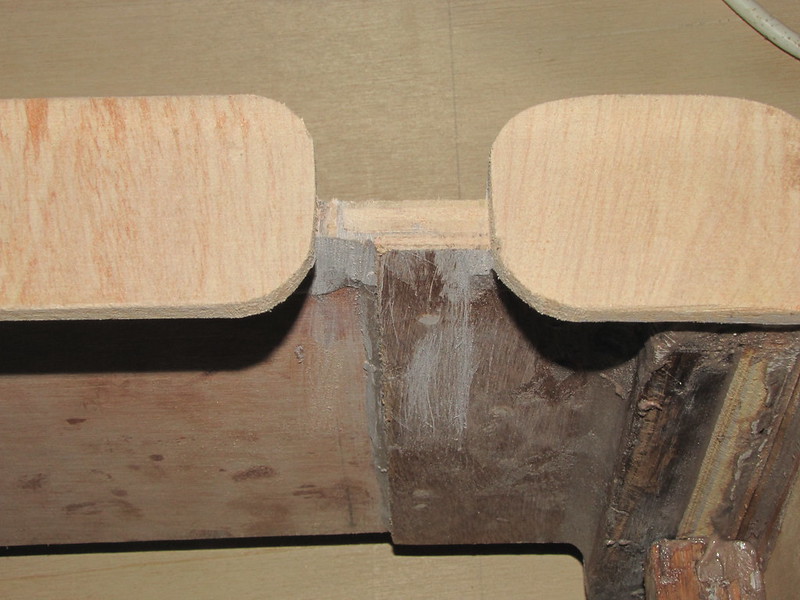
3. Hmm... This "Heath Robinson"-style construction is an attempt to increase the wriggle-room when putting the roof on the boat - by extending the aft end of the side-panels by 6 mm or so. Note that I cleaned the excess glue off before it set :)
4. More cobbling-together. This side needed extending by an extra 3 mm or so, being shorter than the other side by that much (or thereabouts) - see previous photos in this series. The excess glue seen here (and on the othe side panel end) was removed before it set, by using a tongue-depressor "chisel". It will look a whole lot better when I've got to it with a Perma-Grit block and some 80-grit sandpaper!
Those four were from yesterday. Here's this morning's lot:
5. Using aviation tin-snips to trim off a bit of ply before Perma-Gritting. The tins-snips worked a treat :)

6. Aft end of frame, port side. The glue and excess bits have been ground and sanded off
7. Inside area of previous photo
8. Inside aft end of starborad side panel, cleaned up
9. Outside of same area in previous photo, after clean-up. The scratches at the top of the side panel are from where I guided the Japanese cross-cut saw rather badly. I improved matters by changing position
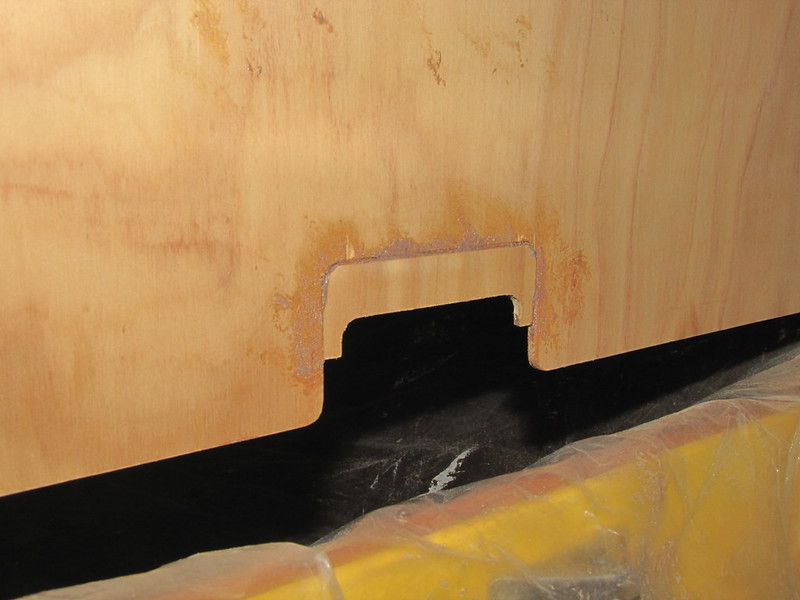
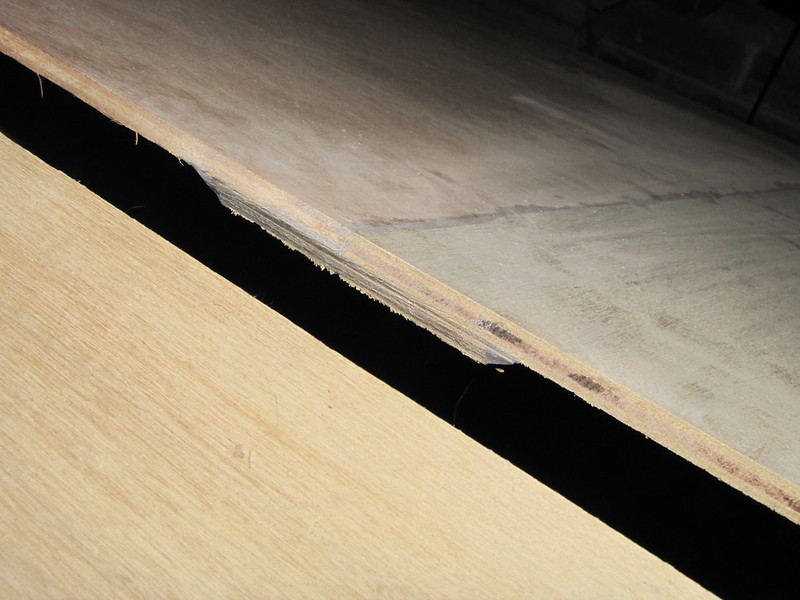
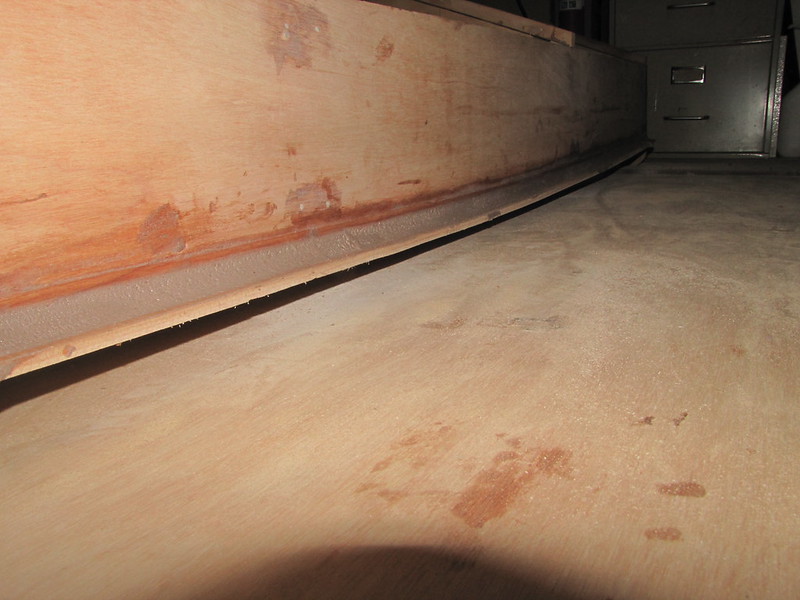
10. A really obvious view of one of the glue-voids between the aft former end-plate and the former frame. Happily, this will be sealed off with glue when the roof is installed
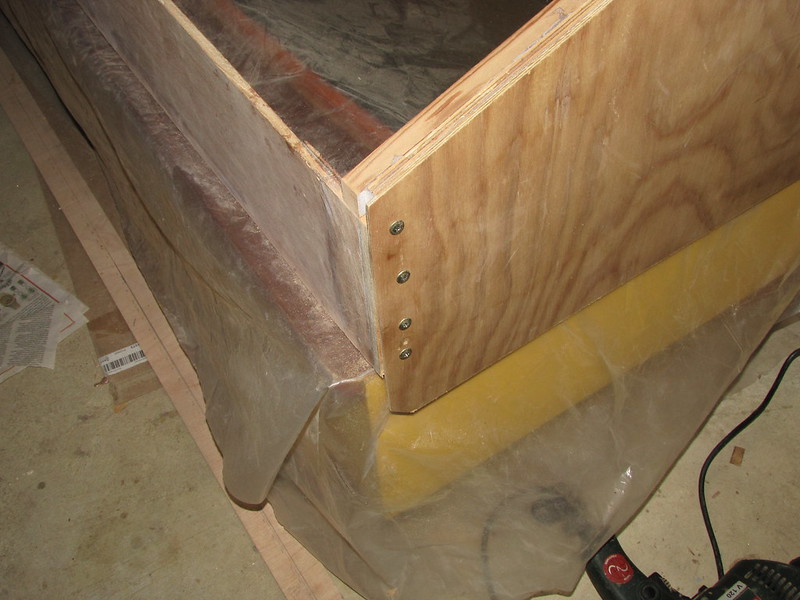
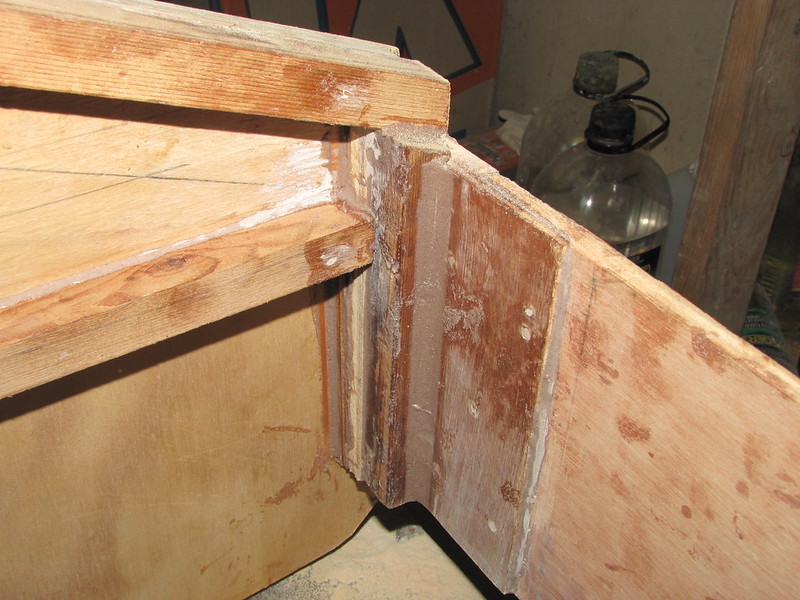
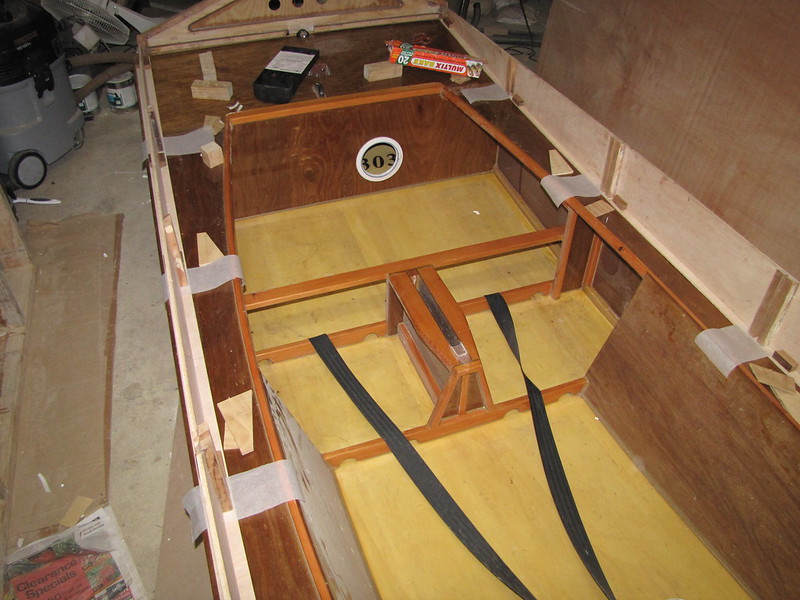
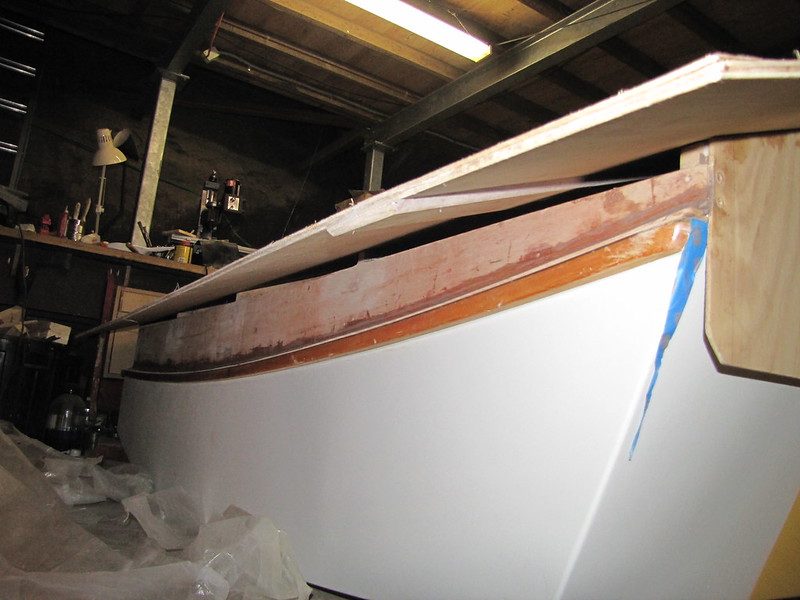
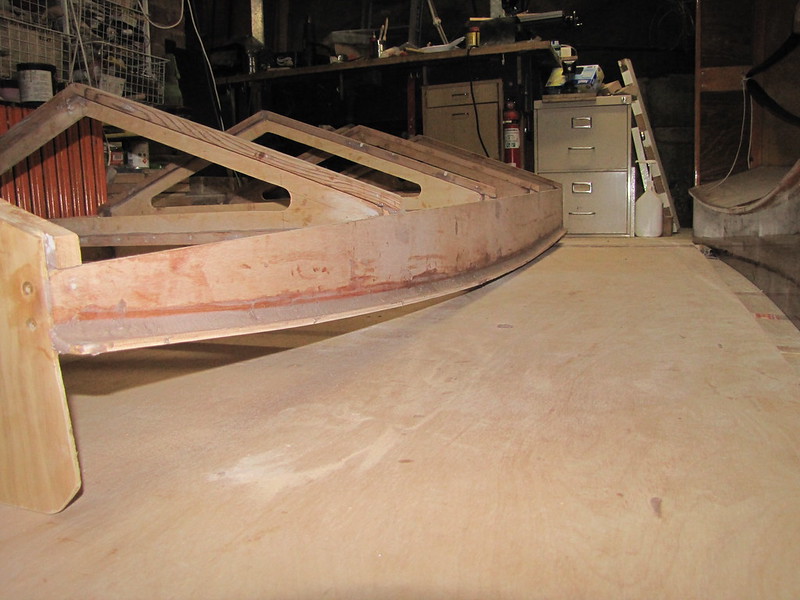
11. Snug as a bug in a rug :). The aft roof former assembly dry-fitted in the newly-cleaned-up sides. The side panels are now exactly the same length overall ;). Note the distinct gap between the stern transom top and the top edge of the gudgeon cutout...

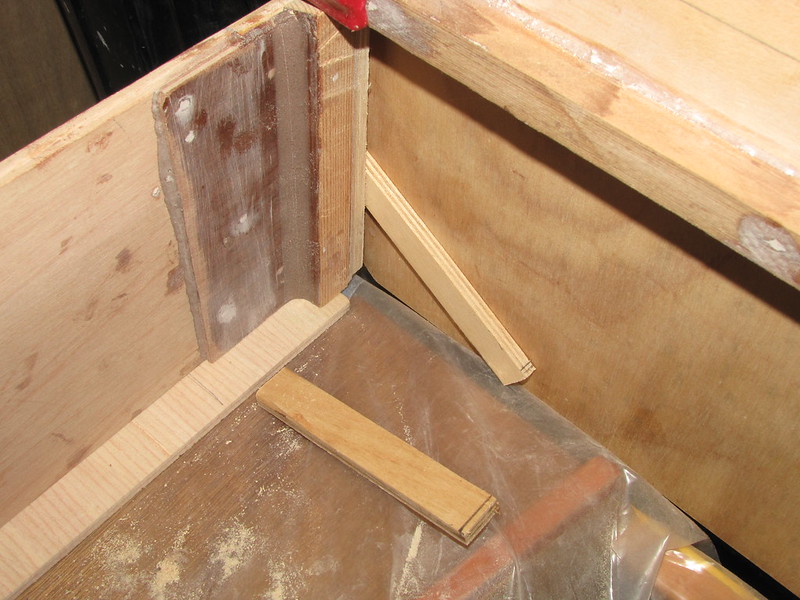
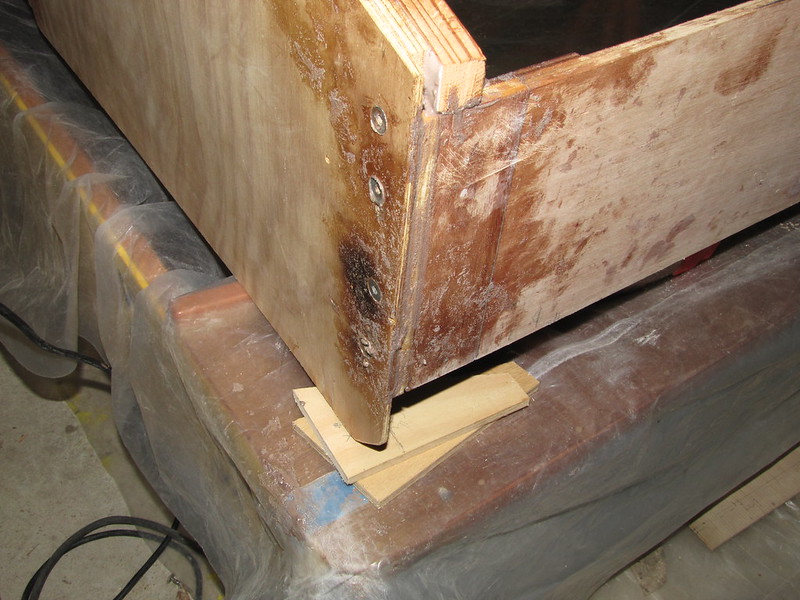
12. Inside view of the end former-side panel joint, port side: unglued as yet
Follow this link to my Flickr account
I'm hoping to get the frame glued up completely today, although I may not get the bendy-ply strips on. The rate-limiting step is going to be the cutting of the six support gussets: I don't want to glue the three internal formers without installing them at the same time.
-
19th March 2013 11:40 AM # ADSGoogle Adsense Advertisement
- Join Date
- Always
- Location
- Advertising world
- Age
- 2010
- Posts
- Many
-
19th March 2013, 10:26 PM #3107
GOLD MEMBER
- Join Date
- Jan 2009
- Location
- Blaxland, Australia
- Age
- 65
- Posts
- 2,551
Something is going terribly wrong with my typing, and my subsequent "proofreading". It's not just the tiny font/tiny text-fields in the FLickr uploader, as I'm making typing mistakes straight into the Forum's browser editor with a quite large 10 point font. It could be a result of doing things in too much of a hurry; or my eyesight is really going bad...
Anyway, I didn't get the intended glueing of the frame done today: there was a final (or what I hope is the final) "gotcha" at the stern ends of the side panels: I needed a couple of spacers to act as fillers to reduce the amount of glue and mess - and also for the assembly screws to bite into, rather than just air. The gudgeon-cutout insert was a really rapid piece of prototyping thanks to the various Perma-Grit tools. I know that I bang on an on and on about them on this thread, but for rapid shaping they can't be beaten. Not just composites (of which plywood is also an example, of course) and plastics, either, but plain timber as well. And they take a lot longer to wear out than sandpaper.
I could perhaps have squeezed in the glueing but decided against it, as I invariably make mistakes that have to be undone when I rush in such situations.
Here's some photos of what I did get done:
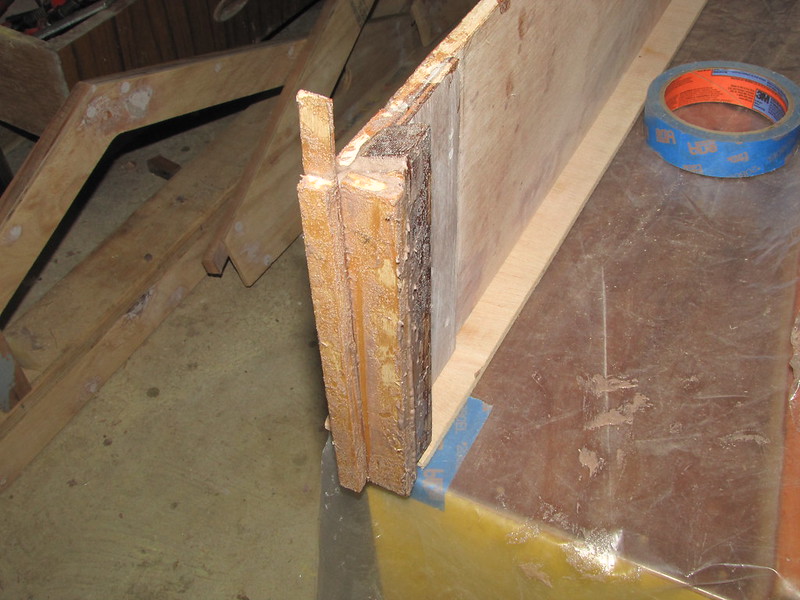
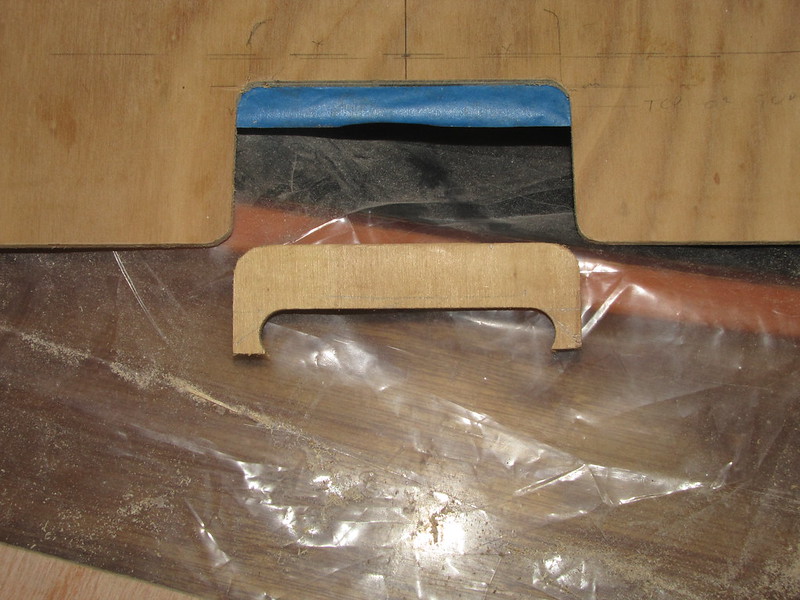
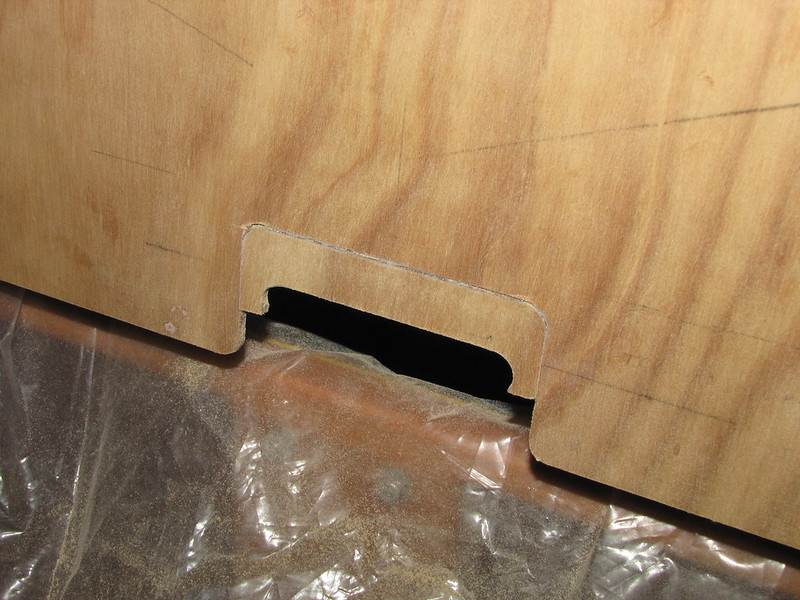
1. Test-fitting the insert for the gudgeon cutout. Something appears to be a bit wonky here - I think it's the original hole. Or camera-lens distortion. I'll have to do some measuring ;)
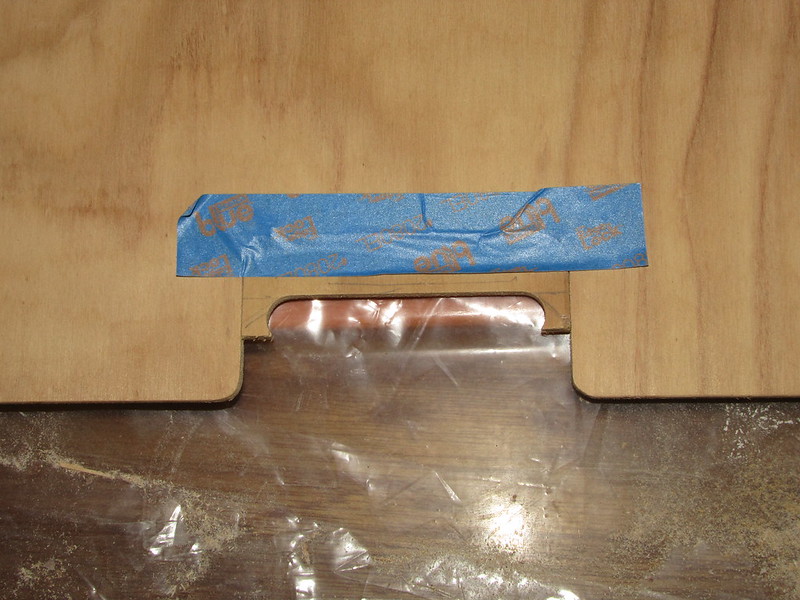
2. Gudgeon cutout insert from t'other side. Once the glue has hardened, I'll file off the little "legs" back to the cutout's sides, leaving nice rounded corners as with the original cutout. Or maybe even nicer :)
3. Gudgeon cutout insert before taping (back) and glueing in place. It took less than ten minutes to make this insert, using various Perma-Grit files and a coping saw
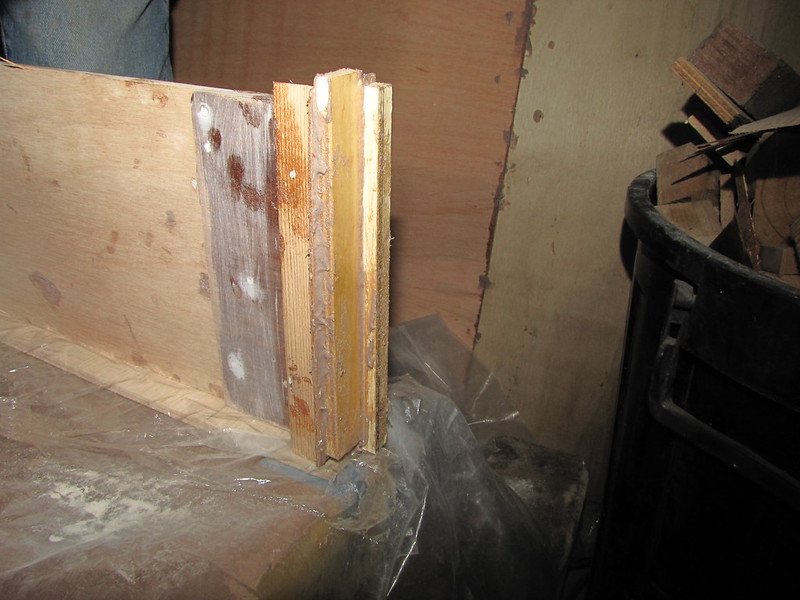
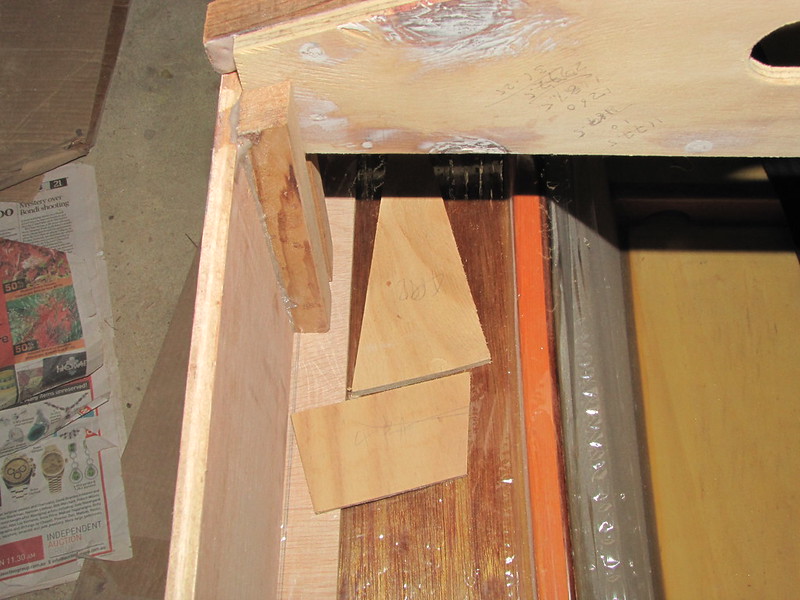
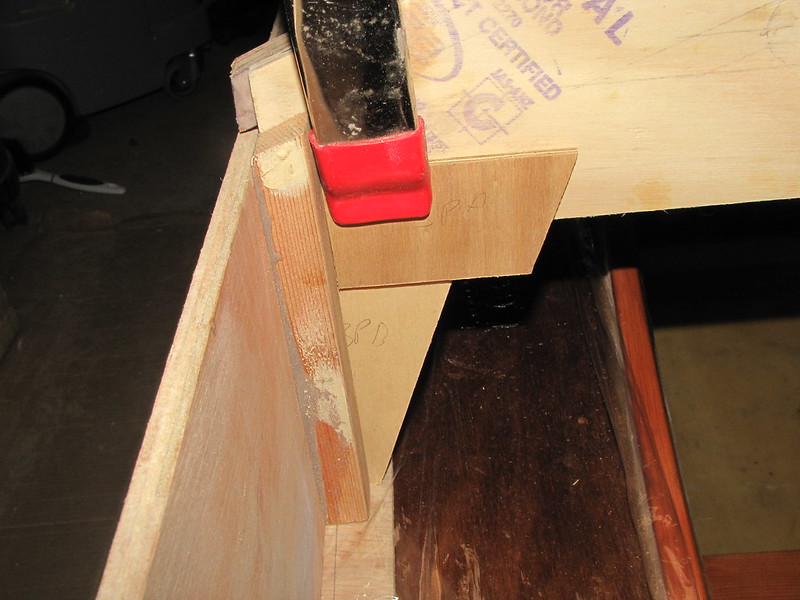
4. Starboard-side roof former support gussets: they're so small that they hardly seem worthwhile. Still, they might serve some purpose - other than filling in the gaps between the former locators that the formers themselves don't take up...
5. Port version of the "support" gussets. More like "decoration" or "fairy floss" than anything substantial
6. One more set of things for the stern roof former, and I had forgotten these until I test-clamped the former assembly back onto the side panels. I'll need these to support screws/reduce the amount of glue when finally assembling the side panels and rear former
7. Slightly larger version of previous photo; both snaps show the filler inserts for both sides. The port-side filler is going to need a slip of 1/64 " (0.4 mm) plywood to bulk things up a bit. Even so, the two side panels are exactly the same length ;)
Follow this link to my Flickr account...
That's it for this evening: I can hardly see straight (which may explain the bad typing, checking, etc.). More tomorrow - more glueing, hopefully ;).
-
21st March 2013, 11:03 PM #3108
GOLD MEMBER
- Join Date
- Jan 2009
- Location
- Blaxland, Australia
- Age
- 65
- Posts
- 2,551
I didn't put up a post of yesterday's conniptions, because I was actually too busy. The preparations for glueing the stern roof former into the frame took a lot longer than I was expecting, and nearly ended in tears. The glueing process certainly resulted in the air going a rather nasty blue shade, although the glueing was eventually completed. Added to which, I had a long evening rehearsal to attend and was too tired by the time I got home.
1. Dry-fitted stern roof former, port corner
2. Dry-fitted stern roof former, starboard corner

3. Cocktail stick alignment pins. In theory, this should have been a neat solution to the problem of the inserts not staying put before the hold-down screws were put in. Sadly, it was foul language before tea time after my limited store of patience ran out...
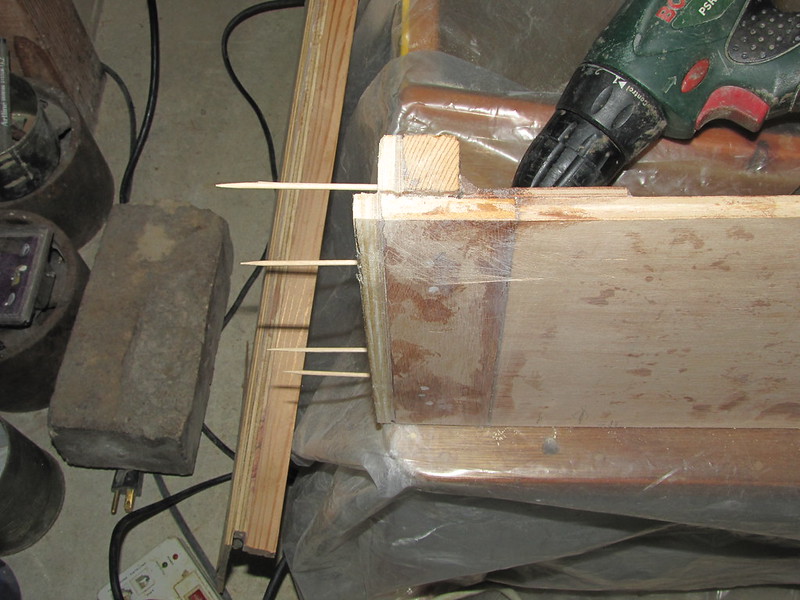
4. Port-side pins and multiple inserts: this was the particular case I was really hoping that this idea would work. The conclusion from the terrible mess that I got into was that the inserts should have been glued in place and left to set before the former was installed. I've come to grief on a number of occasions where I've tried to shoehorn several things into a glueing session at once. It's far better for me to go at a slower, more steady and methodical pace. You can see by the multiple holes in the piece of 1/64 " ply that I was already losing the plot quite some considerable...
5. Glue applied, inserts in position. This side wasn't as bad as what was to come, difficult though it was - it was the starboard side with its extreme cramped access that proved to very nearly be my, the joint's and the boat's undoing
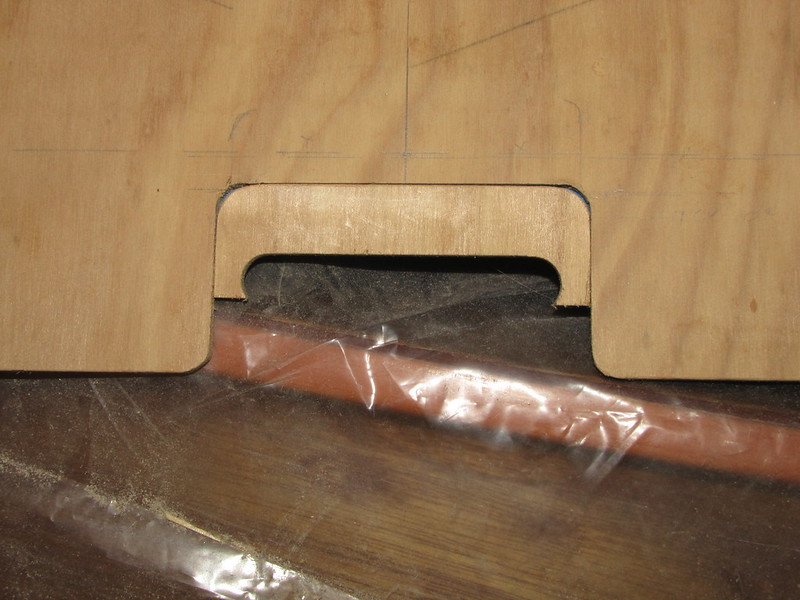
6. Outside of end panel, gudgeon cutout insert glued in place, tape removed. Some minor filling will be required, which can be done when I'm doing the multitude of screw holes and (rather deep) screw-head dents from the end-former installation
7. Inside of the gudgeon cutout insert after sanding, etc. When I put the frame down on its "feet" and looked at the cutout from outside, it was sitting on the gudgeon. This corresponds with the gudgeon-top location line on the inside - so I wasn't that far out. I must have forgotten what I'd done and confused which line my label on the end-plate was referring to. Some grinding with the flat and round Perma-Grit files provided some air and light 'twixt the twain. Final tidying up will be done on this once the "real" "legs and feet" for the portable boat-shed are installed and I can get a good view of what I am doing!

8. Port aft corner with screws and excess glue removed. I had been trying to use glue to repair a mistake where I sanded a bit too much off the edge of the end-plate. Note where I was driving screws in too hard. The "burn marks" around the bottom hole are exactly that - burn marks. this was from holding the "flame-thrower" rather too close to the screw for too long. Incidentally, the hot air blower dose make an excellent substitute for a soldering iron - it's quicker for me as I didn't have to track upstairs, get the soldering station, take it down to the workshop, wait for it to heat up, disassemble, move to the other side of the boat, reassemble, wait for it to heat up, etc. Just as long as you don't dwell too long in the one spot...

9. Internal side of the join. I'm not going to do too much cleaning-up of this and the one on the starboard side - the inevitable fillet will have to do ;). Happily, both corners are nice and square :)
10. Outside of starboard corner, before cleaning up. Note the even blacker burn mark - that screw was well-and-truly stuck fast. the base of the endplate is propped up on the hull so that I could hack away at the gudgeon cutout insert with my files
11. Starboard aft corner sanded clean: that looks a wee bit better
Follow this link to my Flickr account.
I have some more snaps from today, which I may post this evening - if not, then tomorrow morning. Having had such a bad time with the glueing yesterday, I ended up deciding fairly late in the day, after my more relaxed and cautious approach to things today, that I would glue the remaining roof formers and attendant gussets onto the frame tomorrow, when I would be less tired - and also have a clearer run at it, time-wise. You never know - I may have learnt something from yesterday's rather unpleasant glueing experience.
-
21st March 2013, 11:45 PM #3109
GOLD MEMBER
- Join Date
- Jan 2009
- Location
- Blaxland, Australia
- Age
- 65
- Posts
- 2,551
I decided to do the second post immediately, since the captions had already been (mostly) done and it was (mostly) a simple copy-and-paste matter. And it gives me a clear run for the morning.
1. Inside view of the gudgeon cutout insert after sanding clean, but before I got to the new top edge of the cutout with the various Perma-Grit files that I like to use...
2. Gudgeon cutout insert after a bit of rasping. There's about 1 mm clearance here now - sufficient for the time being. The edge will be sanded clean once I've put the "real" "legs" and "feet" on the endplates, and I've got the frame in a position where I can actually see what I'm doing! I'm surprised that the edge in this photo isn't worse than it is, given that I wasn't able to see what I was doing

3. Lots of cling film. I was going to use these pieces to keep the side-decks clean, but abandoned the idea after a bit of later fiddling proved them to be inconvenient
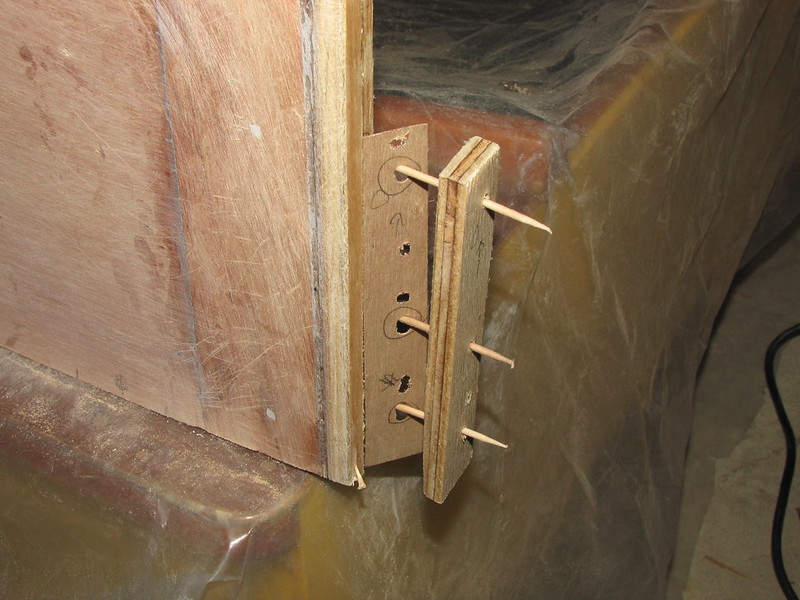
4. Support gusset gusset. The result of a quick bit of chopping up of the endplate centre-offcut with the Japanese saw. The upside-down scribbles of the not-yet-glued-in-place roof former are my workings-out of the positions of the tape-markers for the bendy-ply centrelines (36.25 mm <snigger ;>)
5. Support gusset gusset test fitted, held in place here with a spring clamp. Once the glue has been applied and set, I'll take off the sharp corner somehow. Note the pencilled labels so that I have less likelihood of getting them mixed up...
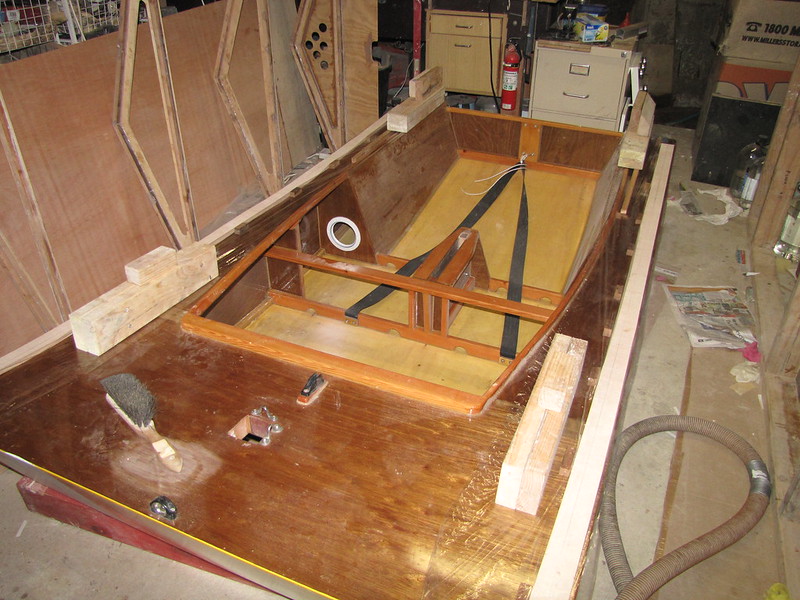
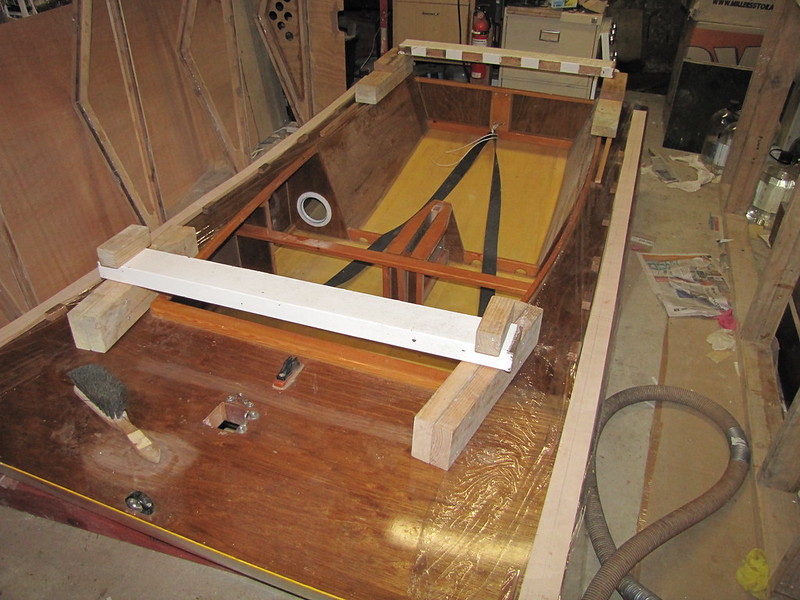
6. Another experiment. The ratchet strap, along with five others, was going to be used to keep the side-panels held in position for glueing, but I had another idea: the blocks that you can see along each side of the panels. I may, however, also drive some screws in through the side panels to clamp up the sides nice and tightly to the formers
7. Alignment idea - yet another in the "experimental" category. The cling wrap has gone; the bendy-ply "feet" have strips of double-sided tape to hold them securely to the side decks, per the port side; the side panels are held reasonably securely by pairs of blocks held down onto the bendy-ply with double-sided tape, per the starboard side. The black plastic thing with the white label is the packaging for the ratchet strap (and one of its siblings)
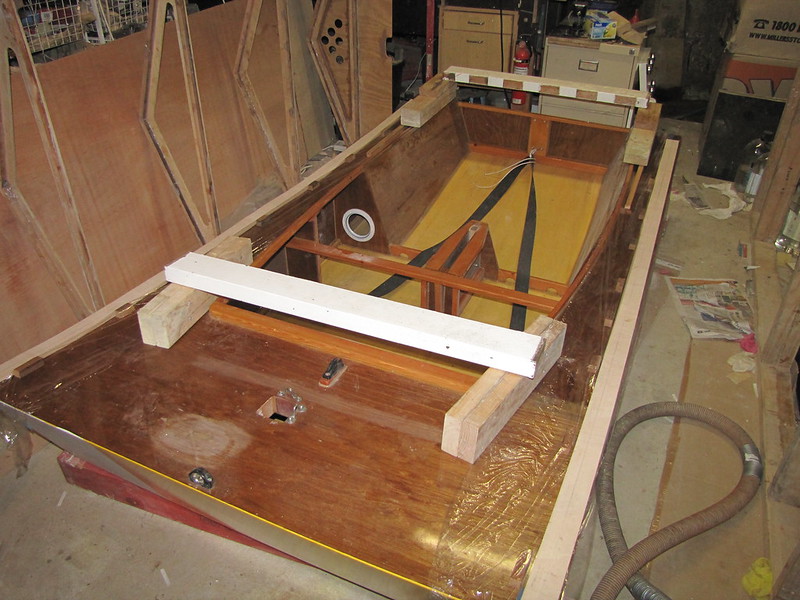
8. Bendy-ply with double-sided tape. The taped areas correspond to the locating blocks on the other side, approximately in the centres of the tape strips (on the other side of the bendy-ply ;). The pieces of tape backing are from the the tape on the locating blocks (already installed, of course)
9. Bendy-ply "feet" have been stuck down onto the side decks. Baking paper has taken the place of the cling film; smaller amounts of it, too. The middle piece on the starboard side has shifted position and will need to be moved back under the former locators. The paper is between the bendy-ply and the side panels
10. Overview of the side panel positioning. The next step is to glue the remaining three roof formers and their gussets in place
11. Close-up of location blocks and baking paper, looking aft. The baking paper is an attempt to protect the deck surfaces and bendy-ply from glue drips
Follow this link to my Flickr account
I'd be silly if I were to expect that the glueing session will go smoothly tomorrow, although I have done everything that I can up to this point to ensure that it does. I got rather rattled after yesterday's little glueing fracas, where I had also - so I thought - got everything sorted out before proceeding. Perhaps a few more checks will be good insurance against (near-)disaster.
-
22nd March 2013, 06:25 PM #3110
GOLD MEMBER
- Join Date
- Jan 2009
- Location
- Blaxland, Australia
- Age
- 65
- Posts
- 2,551
I've been pondering this suggestion a bit more - there is a slight snag in that the supports would have to be 200 % sure of staying upright and locked in, otherwise the weght of this monstrosity would no doubt crush the inhabitants to death, or at the very least leave them severely injured. Originally Posted by dkirtley
The idea itself is sound and interesting, though: in a less treed area, a thinner covering such as 3 mm ply, canvas, or possibly best of all, polytarp, would do the trick nicely :)
I did do some checks before glueing - and caught a few problems which were easily solved in a dry-fit but wouldn't have been once the glue had hit. Even so., I forgot to drill the pilot holes for the screws through the side panels into the former frames, and there was a made scramble to do that as I had already mixed up the glue when I discovered this. there was an even madder scramble when I found that in four out of six cases I hadn't removed the excess glue from the parts of the roof formers that sat on the former locators. In one case I had to remove the glue first before filling the stuff off. This is where the Perma-Grit files shine, as they dealt with the hardened and well-cured glue very quickly - and saved my bacon. In hindsight I could have bevelled the former locator edges to allow for the glue beads, which would have been even quicker - but I didn't think of that until I was typing the previous sentence ;).
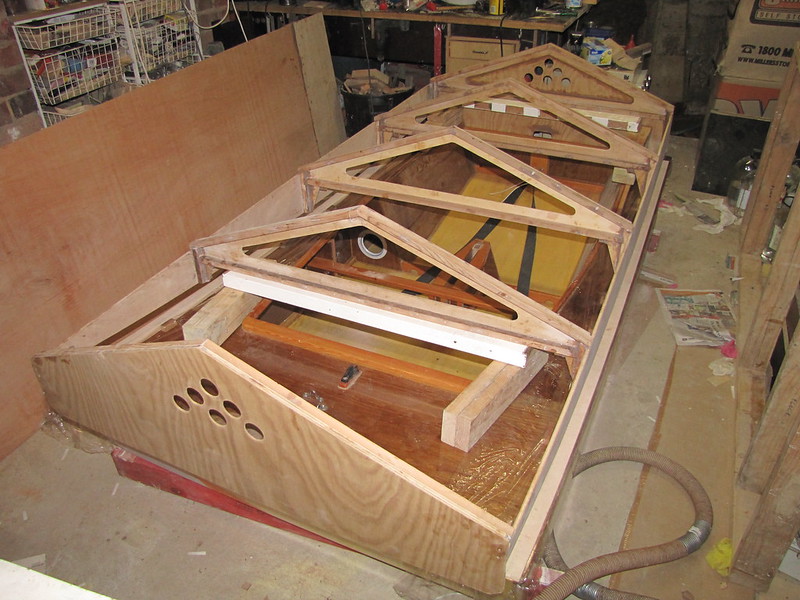
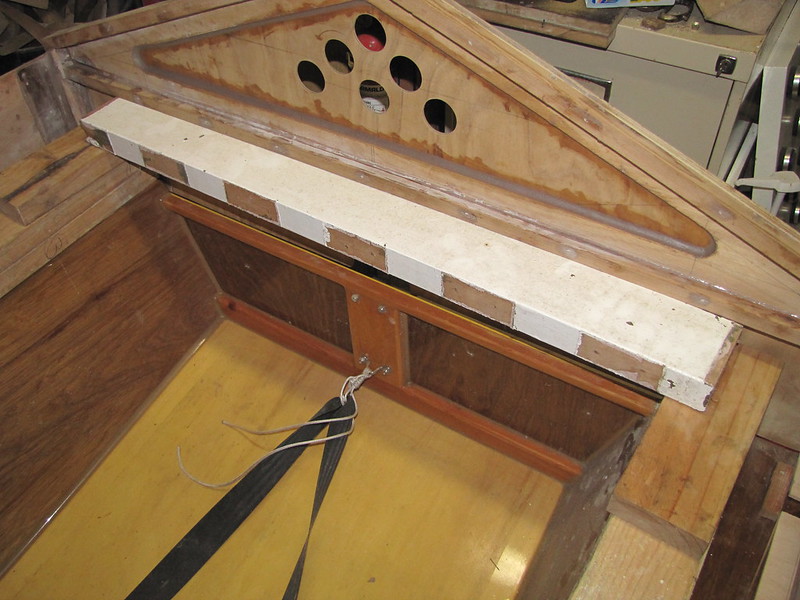
1. The bundle of 30 mm x 30 mm Meranti parts on the left are the "legs" and "feet" for the end-formers. The whole structure will rest on these when off the boat, so the glue-joints are really going to be tested pretty thoroughly
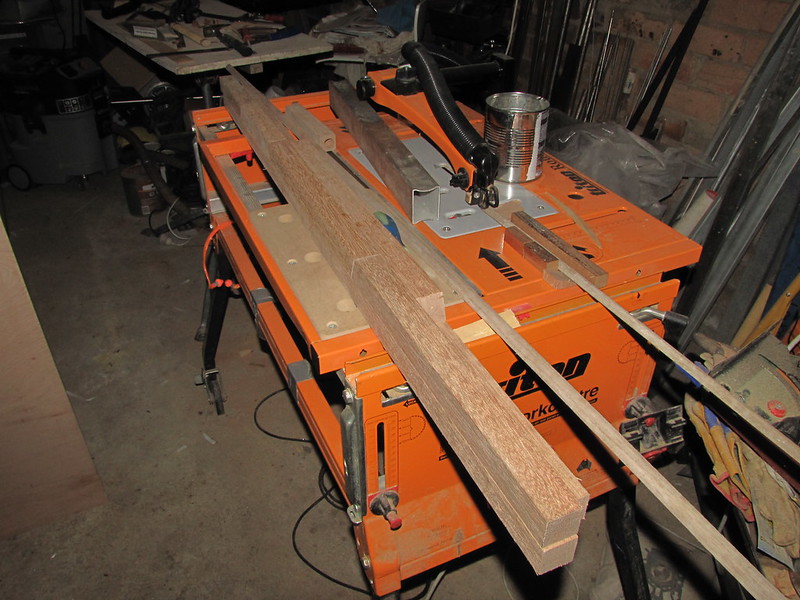
2. A slight tweak to the roof-peak filler cutting setup. I rearranged the wedges so that the moulding is held at the correct 40 degree angle, checked using the angle gauge
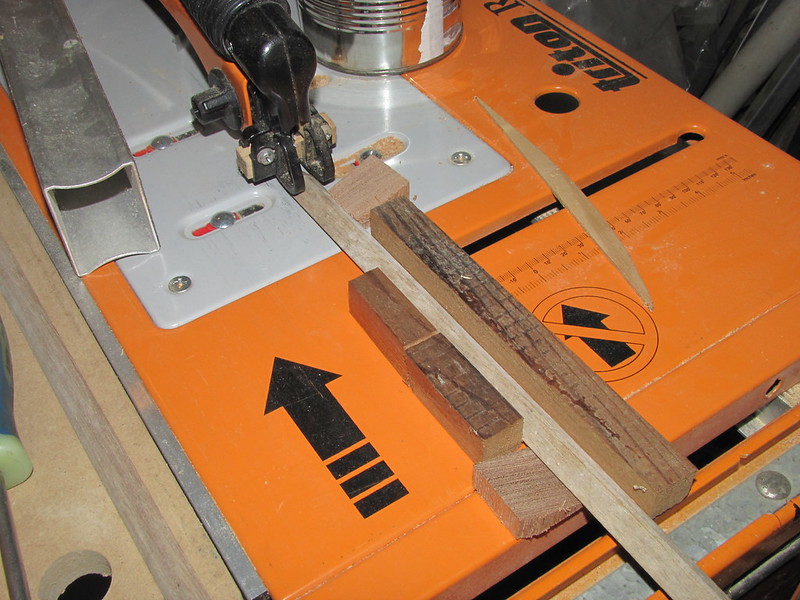
3. Always test-fit where practicable! Then double-check everything else, then double-check the test-fit!
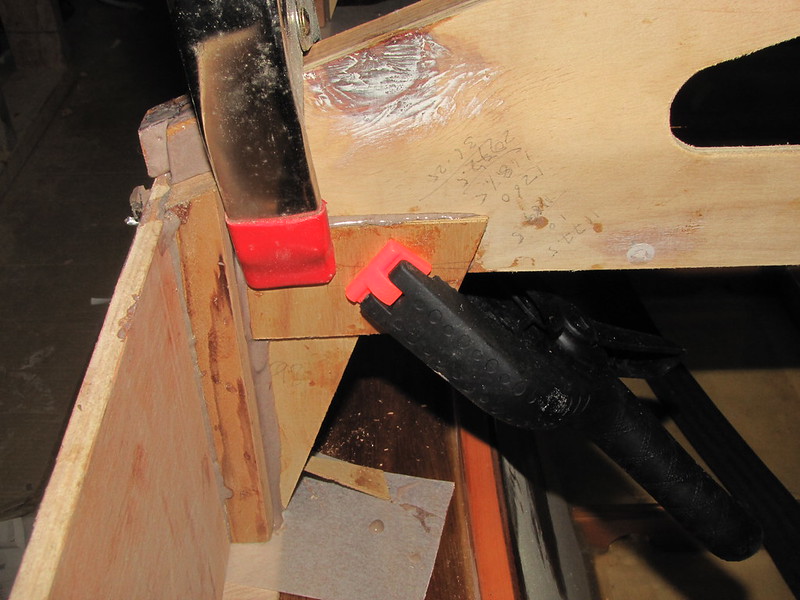
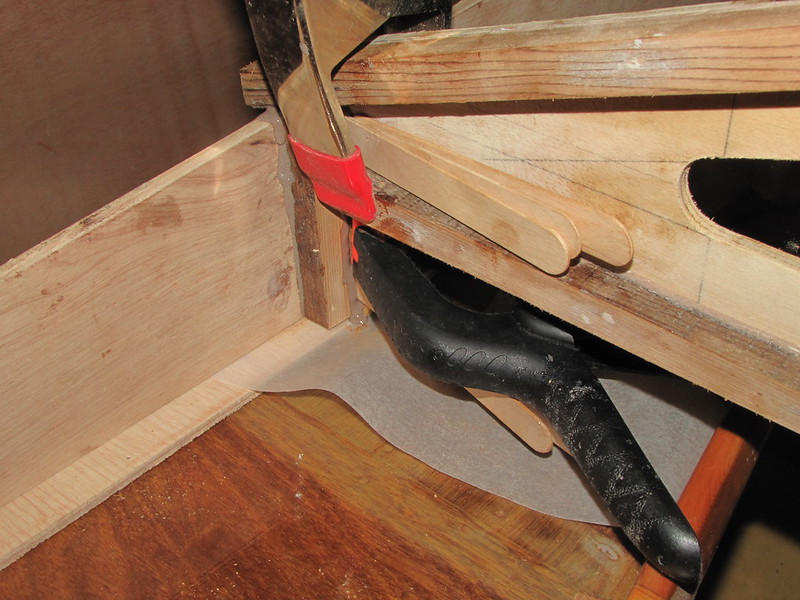
4. Pre-glueing dry-fit of the former and gussets. Note the little - but effective - offcut wedge
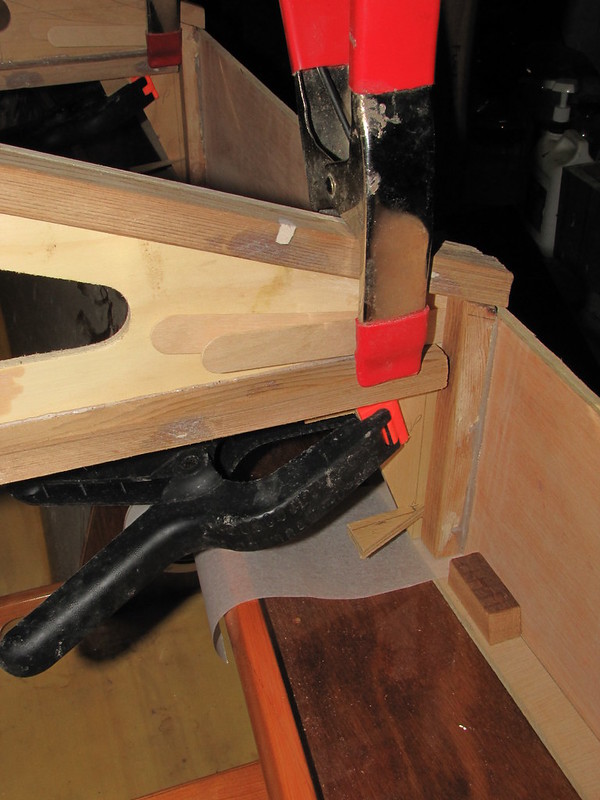
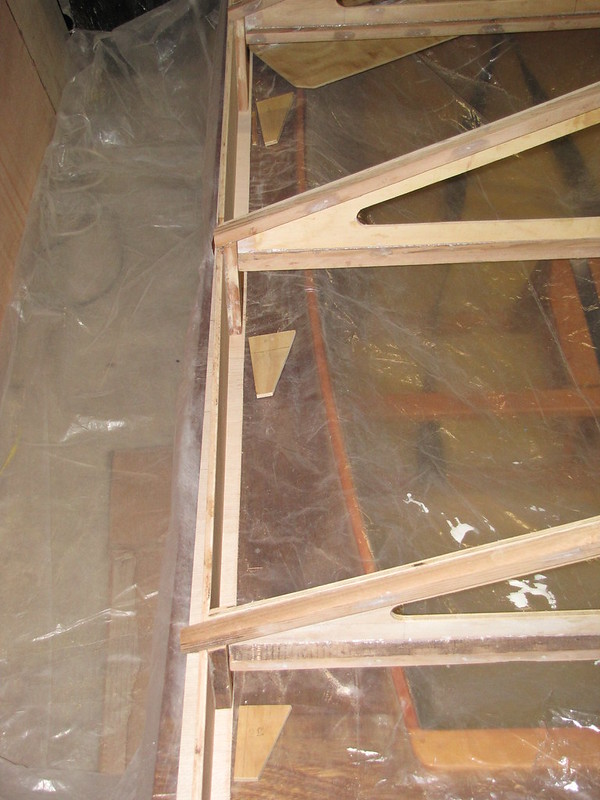
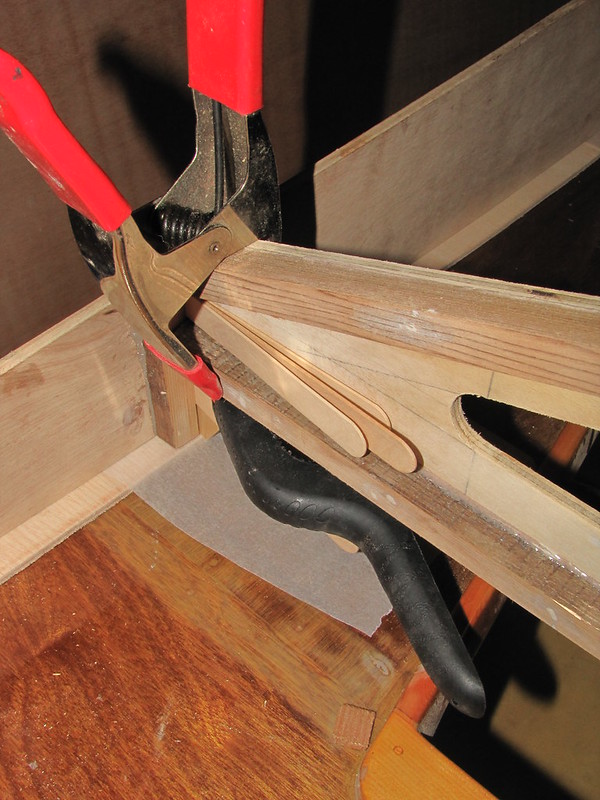
5. Three tongue depressors were needed to wedge the former in position here. The rest of the attachment points used little wedges that were offcuts from the gusset-cutting (see previous photo). For some reason I could only find five of them (there were six)
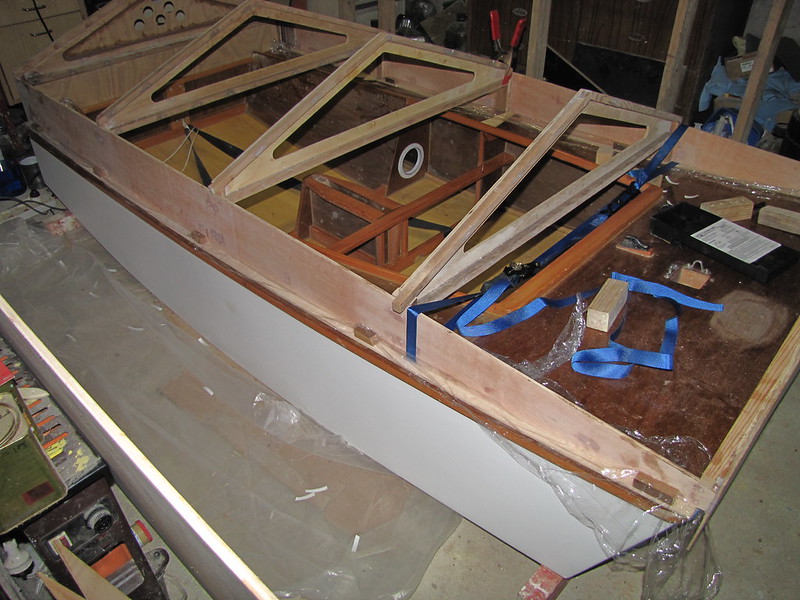
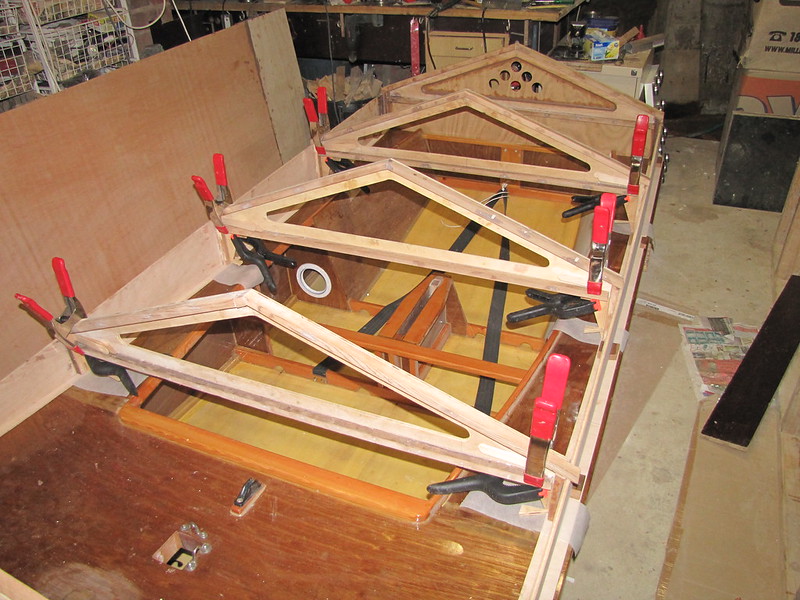
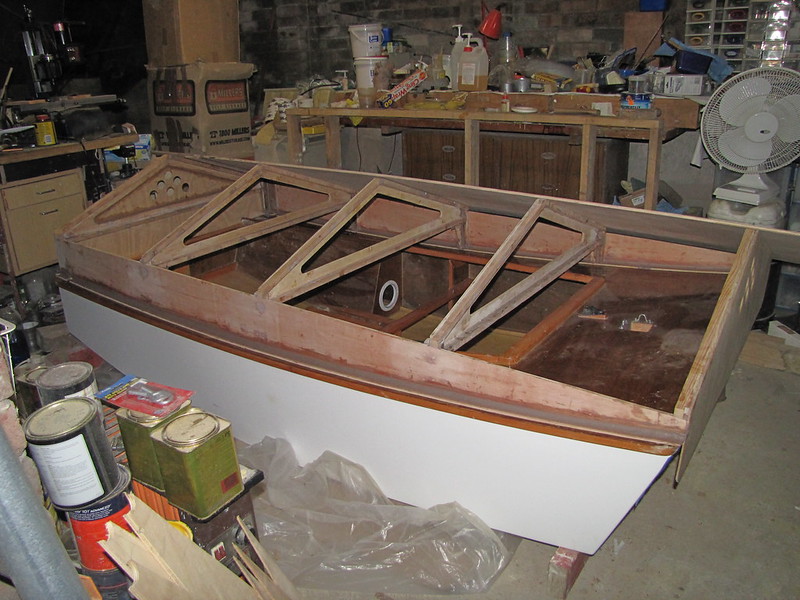
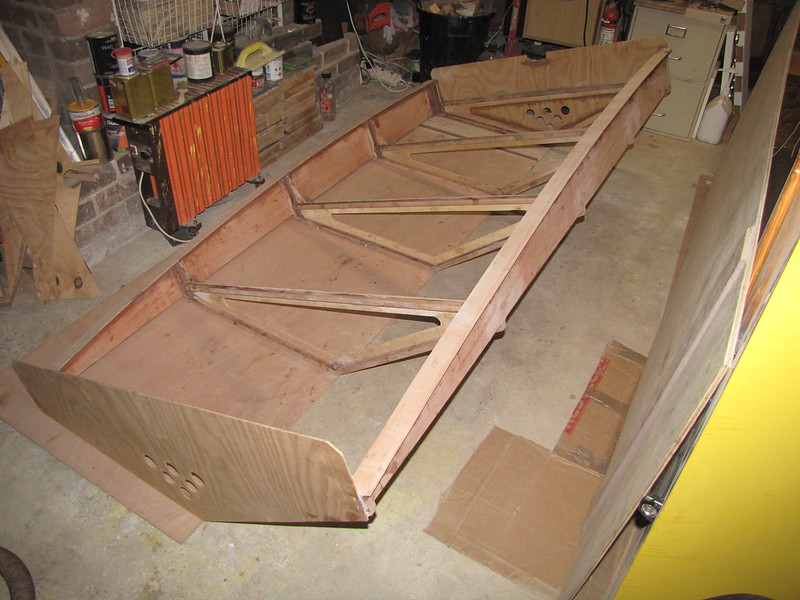
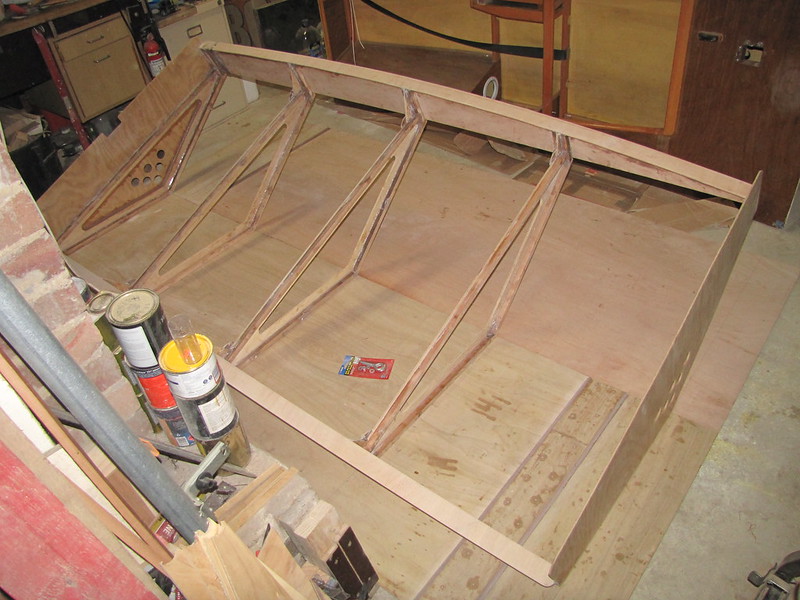
6. Frame all glued up! The buffered 10 g x 50 mm screws assisting in clamping the side panels to the roof formers can be seen along the outside face of the side panel here
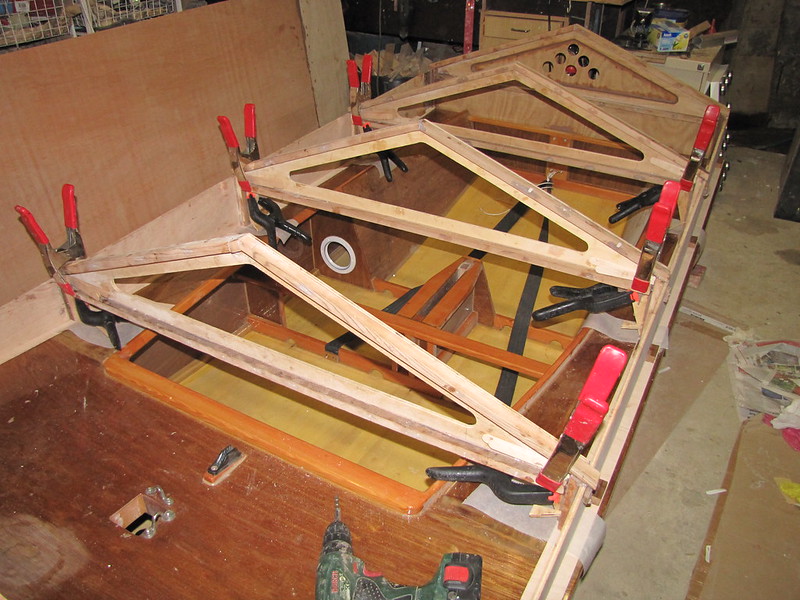
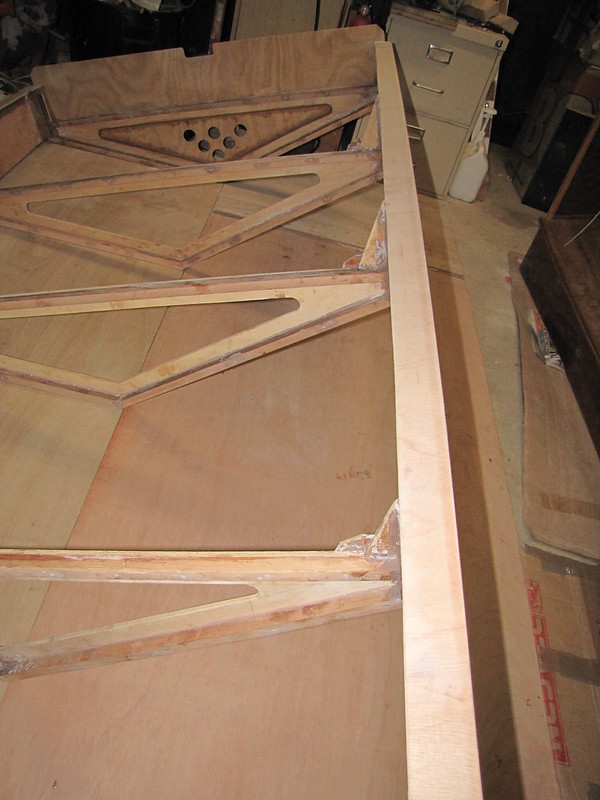
7. Gusset and gusset gusset on former "#4"; glue applied but still a bit too fluid to clean up yet
8. Glued frame viewed from the stern, looking forward. There is still a bit of filling to be done, removal of wedges, etc. Wedge-removal will probably mean simply cutting them off with a flush-cut saw and leaving the glued wedge pieces where they are, then filling in around them with glue
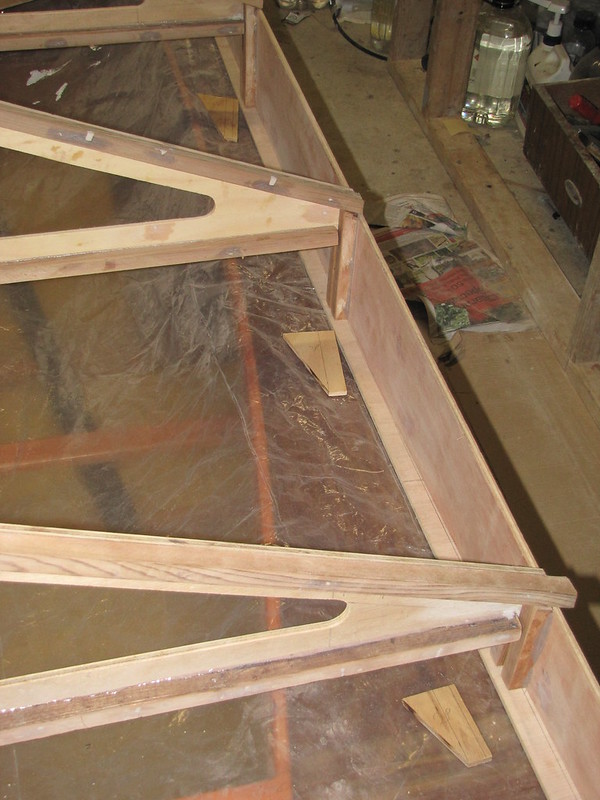
9. The three-stick wedge, holding the second roof former in place. The front former locator was glued on really crooked; the bottom only need two tongue depressors. The baking paper worked really well for catching the drips; I only needed to clean up a small amount of glue where I dropped a glue-covered object
Follow this link to my Flickr account,
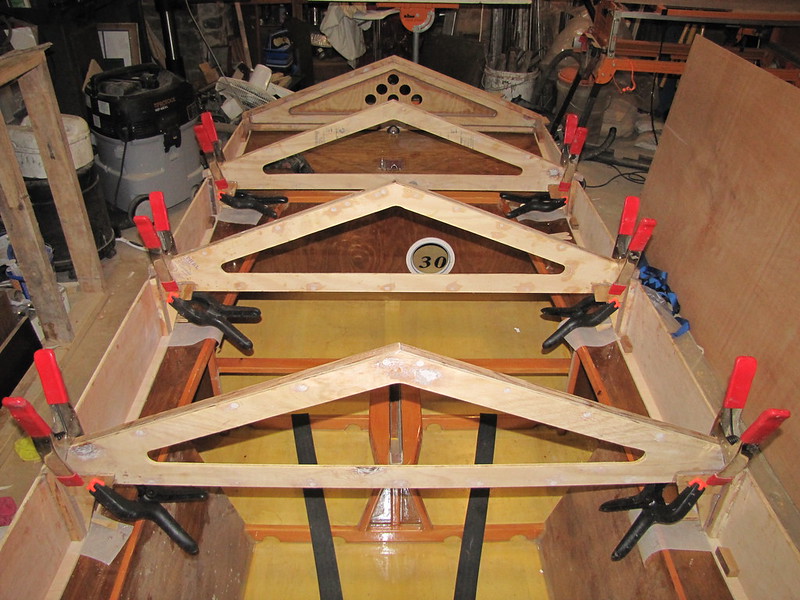
That's the frame pretty-well complete. Whew! I'll clean up the excess glue before it gels too much, and check the bendy-ply-mounted blocks - some of them had shifted and needed retaping at the end of the process. The remaining cracks and so forth will get filled in with glue tomorrow morning. The next thing is to glue the bendy-ply runners onto the side panels. I'm very glad that I decided not to do them in the same session as the three roof formers! I also need to remove the double-sided tape from the bendy-ply - fingers crossed that the tape hasn't decided to become permanently bonded with the ply, or I will have some pretty, new 3D GT stripes on the side decks.
In the manner of a postscript circa 10:45 pm, I didn't need to do much cleaning up of excess glue; and I did the filling of such voids as I could reasonably get at after removing the clamps and chopping away the wedges - and smoothed the results over with a meths-soaked glove - before going to bed. The glue had set well enough to allow me to remove the clamps, a six hour set (althgough it was still a bit soft. It was probably just as well that I did de-clamp the frame when I did as I had to lever out a couple of the black/orange plastic clamps, and would have had more difficulty doing so in the morning.
So: it's the glueing-on of the bendy-ply tomorrow - a procedure which is probably going to use quite a bit of glue, so it will be one strip at a time, with a break in between.
-
23rd March 2013, 05:28 PM #3111
GOLD MEMBER
- Join Date
- Jan 2009
- Location
- Blaxland, Australia
- Age
- 65
- Posts
- 2,551
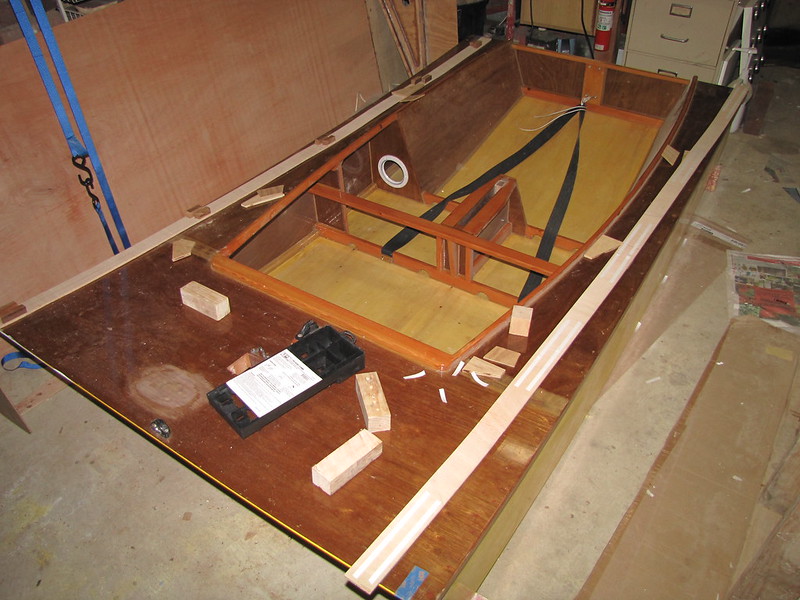
I sanded the side panels clean and got the frame off the boat first thing this morning. A bit of time was then spent cleaning up, including some glue drips on the boat which had escaped my attention - these came off with a very light touch with the 25 mm
screwdriverchisel. The 25 mm persuader was also used to (gently) lever off the bendy-ply strips from the side decks, a little bit at a time so as not to damage the plywood. The strips, happily, came off entirely unscathed :). A bit more filing/sanding of the frame to remove glue blobs and level off the bottom edges of the sides at the former locator stations followed. The bendy-ply strips were cut to clear the traveller-rope holes (and the traveller rope).
1. After the frame glue-up: now for some deck-clearing ;)
2. Bendy-ply strip re-blocked for the glueing process. The remaining block sitting against the side panel is about to be removed
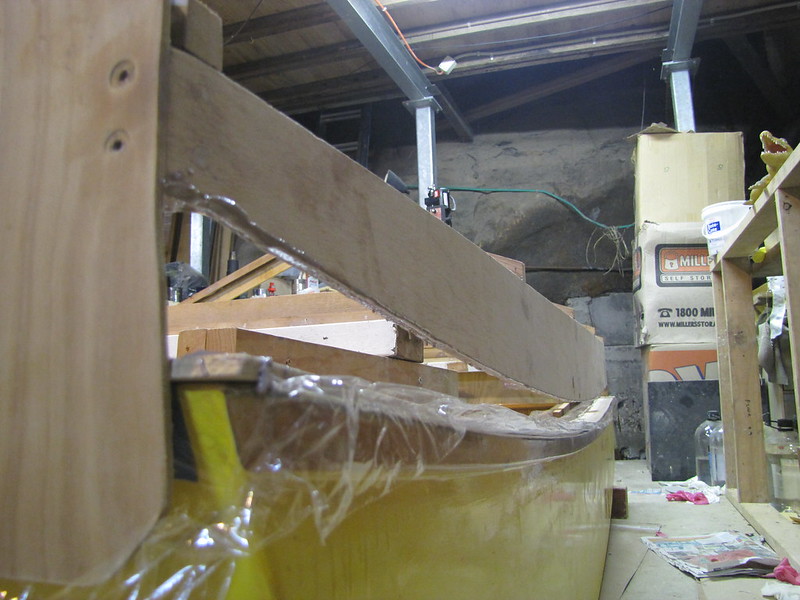
3. Frame off the boat, temporarily, while it gets a final glue-removal before putting its "skids" on
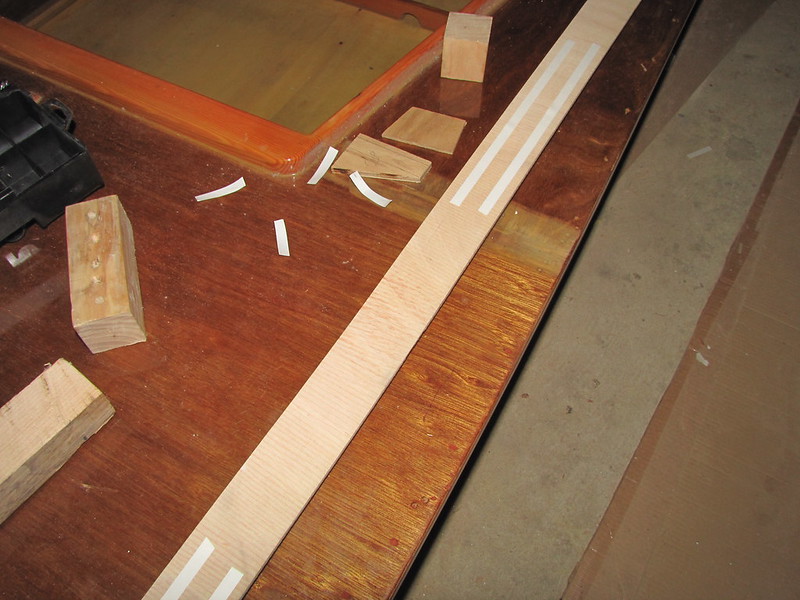
4. Bendy-ply strips in their final positions, each sitting on top of a length of cling film to protect the deck from the glue...
5. First version of skid-glueing supports. The idea is to suspend so that the bottom edges of the side panels are both free of obsrtuctions and allow ready access for applying the glue
6. "Skid"-glueing jig #2: the first version looked a bit wobbly, and I wanted something a lot more stable given that I was doing all of the handling by myself
7. "Skid"-glueing jig #3: This version was even more stable than its predecessor, having removed the loose small blocks
8. Frame sitting on its jig. The theory is that once the glue is applied, it should be relatively easy to simply remove one support (probably the front one), lower the end onto the bendy-ply, then repeat the process at the other end. The success of this operation also requires that the frame is reasonably well lined up over the alignment marks on the bendy-ply: once the frame is down, the marks will vanish completely under the glue ooze
9. View of the working area of the frame with respect to glueing the bendy-ply on
10. Slightly different exposure of previous view. Good view of the boat's sheer clamp, too :)
11. "Working" view of side-panel underside, taken without flash
12. Same view as preceeding, different focal plane. The kink in the front end-palte will be filed out once the "feet" and "legs" have been glued on
Follow this link to my Flickr account
More soon...
-
23rd March 2013, 06:01 PM #3112
GOLD MEMBER
- Join Date
- Jan 2009
- Location
- Blaxland, Australia
- Age
- 65
- Posts
- 2,551
Glueing session proper:
1. Traveller rope clearance cutout; side panel masked to reduce clean-up
2. Close-up of aft glue-application jig support. The bottom edge of the roof former is sitting on the large piece of white-painted wood
3. Close-up of forward glue-application jig support

4. Glue applied. I'm not going to bother with filling the holes in the forward endplate, as the "legs" will glue right over the top of them (I forgot and filled in the holes in the the rear endplate)
5. Glue applied: photo taken with flash
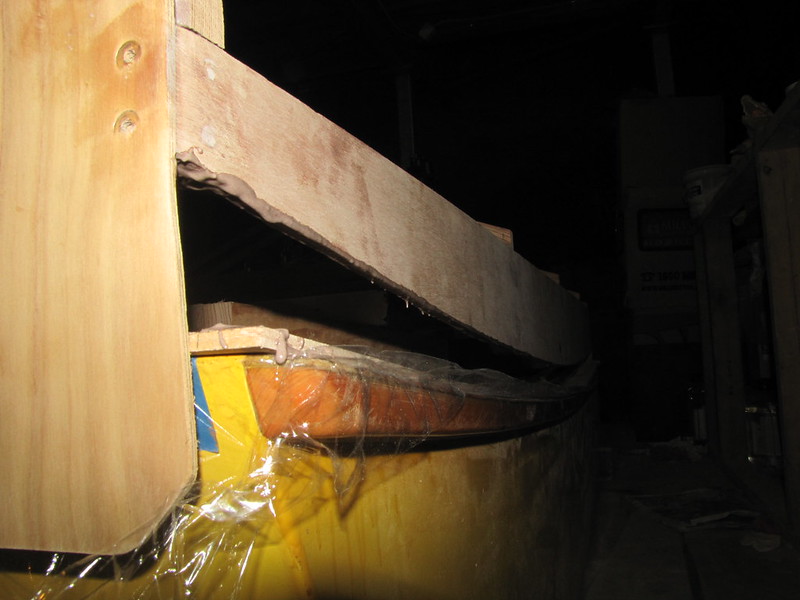
6. Glue drips from the application process. Not as many as I was expecting, but I had made the mixture slighlty thicker than I have been making recently. Some of it is directly under the side panel, so that's not a problem. Note that the outside edge of the cling film has rolled up on itself here
7. Forward support removed. The forward end of frame is now resting on the bendy-ply strips; the aft end is till up in the air and hasn't made contact with the bendy-ply yet. As you can see, the frame came down slightly off-target...
8. Rear support removed. The frame is now sitting with its glue-pad on the bendy-ply: in fact, all four edges have been filleted by the time that this photo was taken
9. More filleted bendy-ply, and some clean-up done with a meths-soaked piece of paper towel. I chose the cling film since it would have minimum impact on the bendy-ply, especially compared with the relatively thinck and crinkly clear plastic that I had been using previously
10. Glued-up traveller end of frame. This is going to need some work when the glue has set
11. Starboard traveller clearance area. Spot the mistake ;)

12. Yet another view of yet another fillet. Once the glue has set and I'm not likely to displace the "skids", I'll run a larger "impact absorbing" fillet along both edges of each side. I may actually use sanding filler for this as I have almost 4 kg of the stuff that is hanging around looking for something useful to do...
Follow this link to my Flickr account
Time to go and deal with the larger fillets...
-
23rd March 2013, 09:56 PM #3113
GOLD MEMBER
- Join Date
- Jan 2009
- Location
- Blaxland, Australia
- Age
- 65
- Posts
- 2,551
That's it for the frame. Second, larger fillets are in place. In the end there are three glueing sessions, not two: one for glueing the bendy-ply strips; and two for the fillets (a break for dinner half-way through).
1. Side panels glued to bendy-ply strips: initial fillet
2. Second, larger fillet over the top of the original. These used up a lot of glue... I tried mixing high-strength glue powder and sanding filler in the first of the (large) fillet mixtures, but with the sanding filler mixture caked, it didn't mix well, so I ended up using just the glue powder instead (the fillet in this photo is 100 % glue powder in BoteCote resin)

3. Front end, port side. A bit wobbly - this was touched up a bit after the photo was taken. Since the fillets are never going to be seen (the roof panels reach lower than the boat's decks) it didn't have to be super-neat in any case
4. Second fillet around the traveller rope clearance cutout; to be cleaned up...

Follow this link to my Flickr account
The next step is to test-fit the roof panels and trying to lift the monster, with the help of The Boss. I'll try a couple of ratchet straps first, rather than screws: if I'm not going to use the 9 mm ply, it would be better to not make further holes in it so that using it for something else is a bit easier. If we can lift it without too much effort, I'll glue on the end-palte stiffeners, then go ahead and pre-drill holes for screws, and install the roof one panel at a time (i.e., per session).
-
24th March 2013, 12:23 AM #3114
AJ
- Join Date
- Jun 2007
- Location
- Aberfoyle Park SA
- Age
- 63
- Posts
- 1,787
I obviously haven't been paying enough attention to the text, looking at the pictures instead.
("I only get it for the pictures, honest !..." )
I think 9mm roof panels will make it so heavy as to discourage use of the boat.
Sorry - should have spoken up long ago, but not paying enough attention..
Alan J
-
24th March 2013, 11:46 AM #3115
GOLD MEMBER
- Join Date
- Jan 2009
- Location
- Blaxland, Australia
- Age
- 65
- Posts
- 2,551
Moving along...
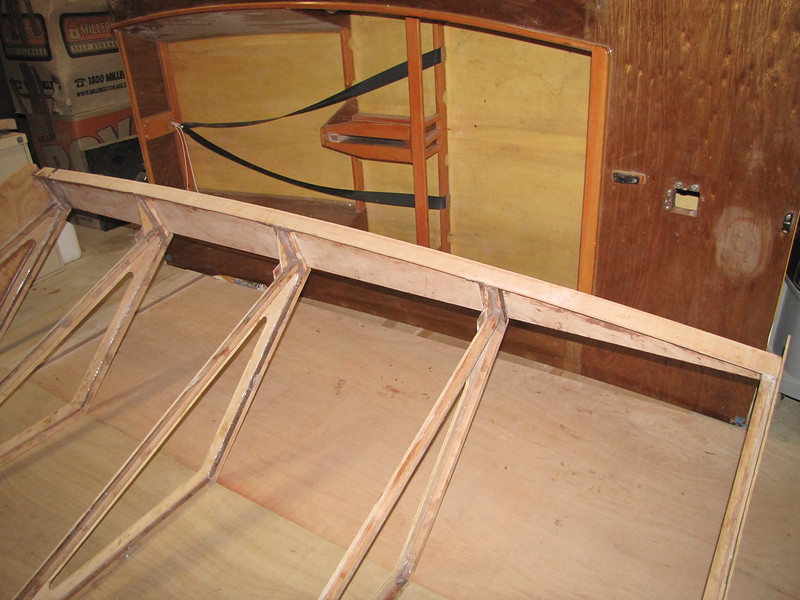
I just trial-fitted the roof panels for the first time. Results are mixed: on the positive side (and which is a real plus), the roof is going to be light enough for us to handle together I wouldn't even think of moving it by myself! On the negative side, dingbat here didn't check the relative heights of the formers before glueing them down, and as a result got a couple of them the wrong way round. This shouldn't have mattered if the formers were exactly symmetrical, but the way that I machined them, I cut them slightly off-centre - by 5 - 10 mm - so this means that they are "handed", and getting one or more the wrong way round means that some are either too high or too low, depending on one's perspective. Actually, if I do two on one side then by definition I have to do three on the other. Oh well...
Rather than shave three former sides down, I'll build two sides up with strips of ply - the effective difference is around 3-4 mm: the thickness of the last ply offcut that I have on hand from the 'Duck build, i.e., the one that I used as a template for machining the sheer-curve on the bottoms of the side panels. I can chop this up on the non-template side for pieces for the formers, leaving the machining template intact for use if necessary (although I can't think what I might use it for).
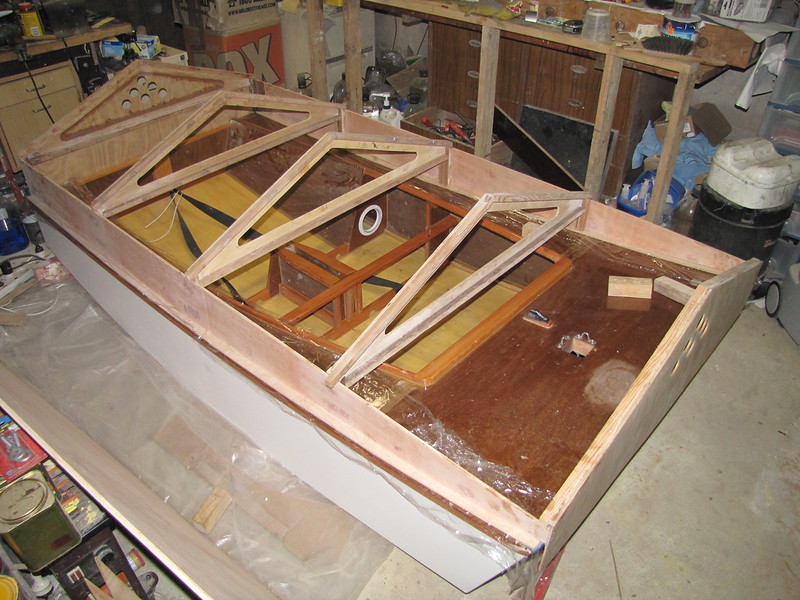
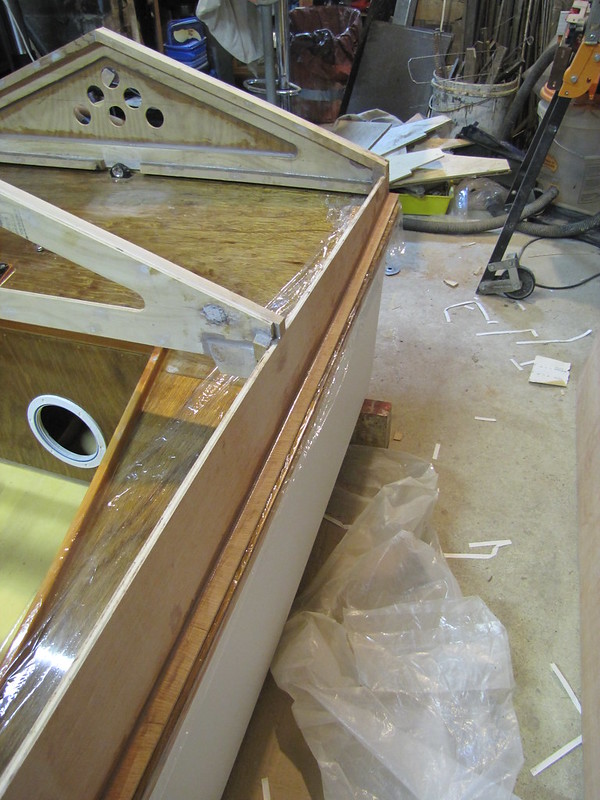
This is what the roof looks like in its early stages:
1. First trial fit, port-side roof panel
2. Port roof panel again
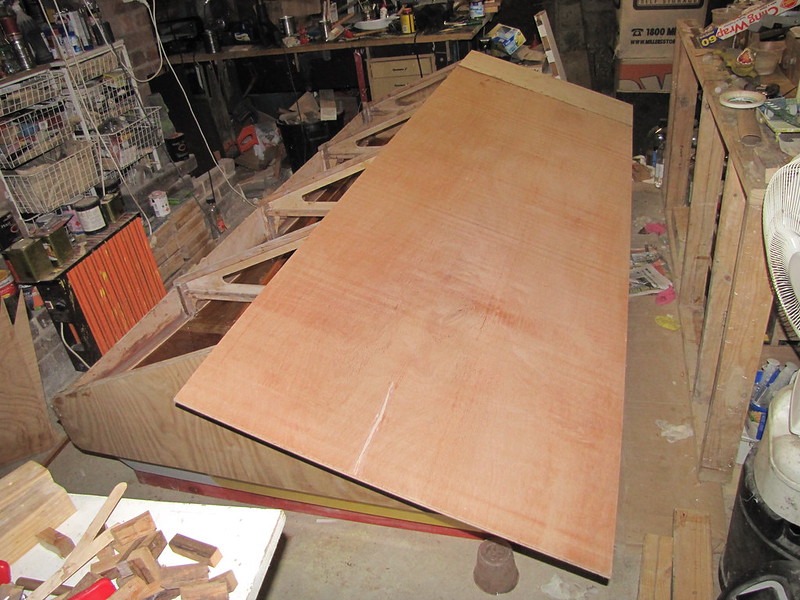
3. Starboard roof panel added, trial fit #1. It certainly looks like a roof...
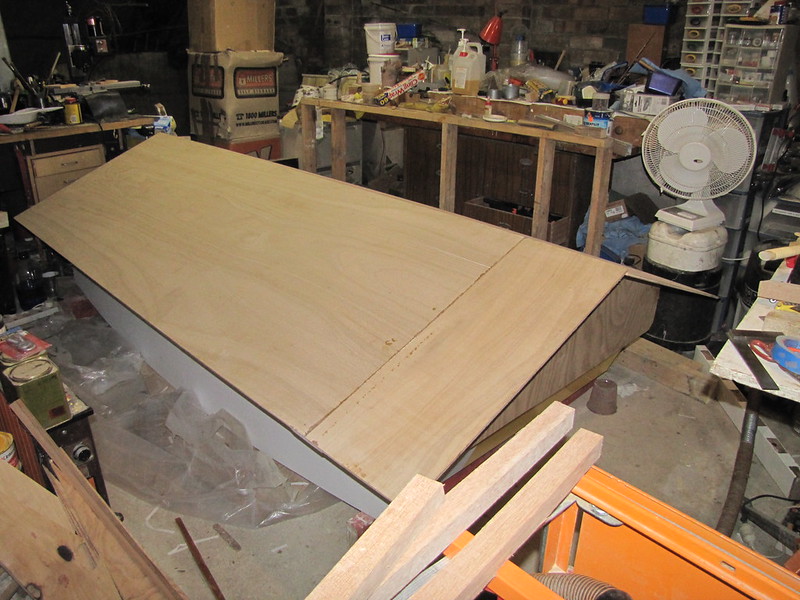
4. Both roof panels with Meranti ridge-fill strip. The latter is a bit hard to see here, but it's there, and it's 40-odd degrees ;). the machining jig worked very well - until I put the second piece of moulding through to get the require length(s), a nasty vibration set up, and the jig fell apart. That's merely a matter of resetting it, and I only need it to last for 600-or-so mm
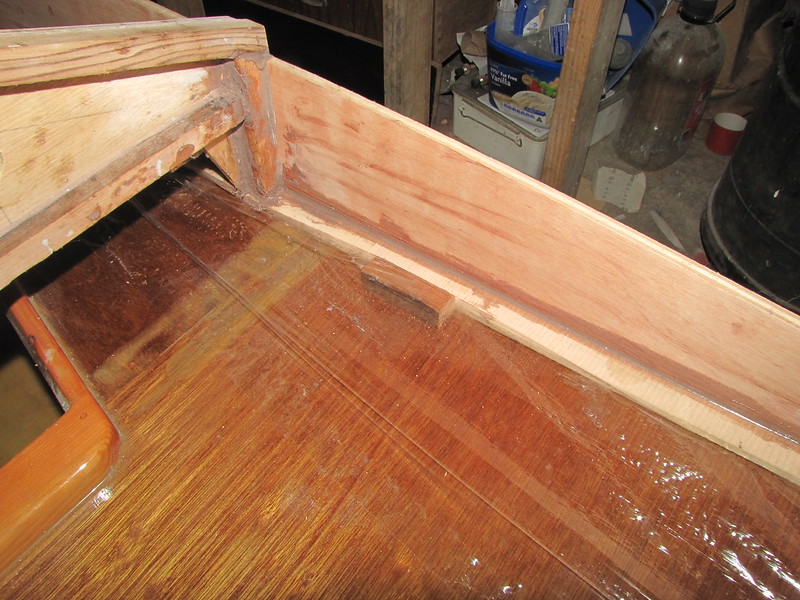
5. View of the side ventilation slots. That Norglass "PRi-COAT" primer/undercoat is *really good*. And I like the white too. I'm sitting here musing about how it would look like nice and glossy...but I'm not going to do anything about that for a while, and besides, I'd have to re-do the stencilling on the stern transom, leave the latter overpainted, or, possibly worst of all, mask over it before painting. Eek! If you look carefully you can see a bulge corresponding with the location of F1
6. The roof comes down over the ventilation slots, but doesn't come down below the deck as advertised/claimed in the previous post. I will have to shave away at the butt-strap ends at the ridge edges since they are obstructing the ply on the other side of the ridge-line

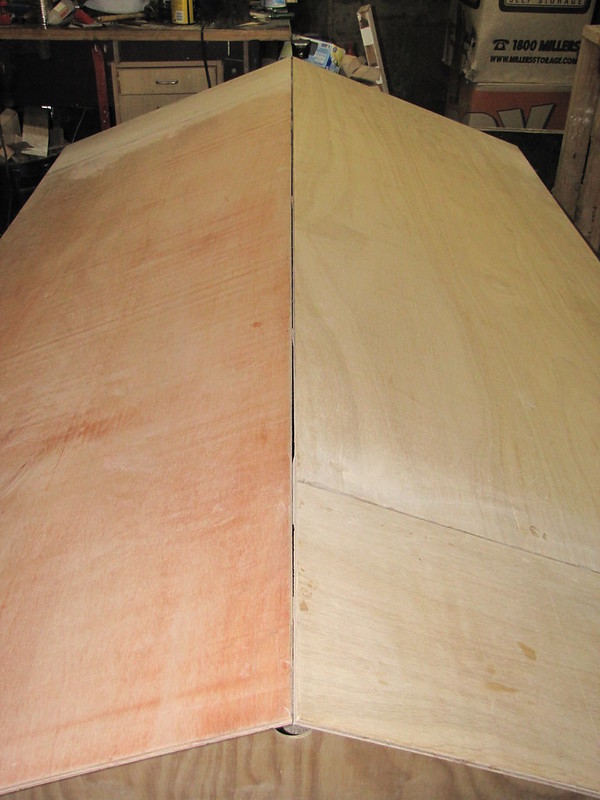
7. I switched the roof panels so that the factory-machined edges were together at the peak: my machined (on the table saw) edges had more kinks than Sid Snake...
Follow this link to my Flickr account, where you can see even more photos <gasp> than are in this over-provided thread. You can also see them "full size"...
Now that I'vve done the first fit and lifting tests (the latter by picking up the assembly carefully by the bottom edge of the front endplate), I'll banish the boat over to the side again so that I've got some room for glueing the roof. Having the roof panel(s) flat on the floor will help a bit in trouble-shooting and amending the disparate former heights.
Note to self - this is a warning for extra care when building the kayak...
-
24th March 2013, 05:54 PM #3116
GOLD MEMBER
- Join Date
- Jan 2009
- Location
- Blaxland, Australia
- Age
- 65
- Posts
- 2,551
G'day Alan, Originally Posted by b.o.a.t.
Thanks for the input . I have to confess that I've managed - so far - to keep the thickness of the roof panels carefully buried in the text. I had some quiet money on it being you who would be the first to comment it on it, though: and I was right
  .
.
The thickness was a bit of a puzzle for me: I vacillated between 6 and 9 mm ply for a while (note that I didn't go for 19 mm form-ply or 12 mm marine) and plumped, rather doubtfully still, for the 9. This was based on my memory of the ease with which a reasonably small branch (around 50 mm diameter) managed to punch through 4 mm ply; there is the potential for lots more branches in excess of that to come raining down, and wanted something to resist the previous type of damage. Mind you, anything too much bigger is not only going to squash the roof but the boat into the bargain!
I balanced branch-resistance against weight of roof, and the branch-resistance won. 6 mm might have had plenty of strength and elasticity, but it was the 9 mm that got the nod in the end. The Boss (with the Dreadful Dog in tow) and I just had a go with lifting the beast and while heavy, neither of us felt under undue strain from it - and lifting conditions for my end were obstructed by the milling bench, which made the operation more difficult. I actually asked The Boss whether she thought that roof was too heavy to be easily manageable, to which she replied "No" - and she is also the Health and Safety Manager in this neck o' the woods.
I was never intending to be handling the roof by myself, even if the roof panels had been 4 mm ply - but I definitely won't be manipulating the 9 mm version by myself! Fortunately, the frame itself is quite light (deliberately), and the distribution of the weight of the roof panels on the frame makes things a bit easier, T equalling rF, etc. The roof won't have to be carried more than the trailer's width away from the boat, so it won't have to be carried far at all. The Boss suggested trimming some of the eaves off the roof, but we'll see: I wanted to have a bit of overhang.
Someone else suggested "Colorbond" metal roofing panels, but I didn't much like that idea since the framing would probably have had to have been beefed up a bit for the roofing screws/nails and that in itself would have ended up making the thing heavier.
If we had clear sky overhead, I wouldn't have hesitated to go for 4 mm ply, but the vegetation here is very dense overstory.
Cheers,
Alex.
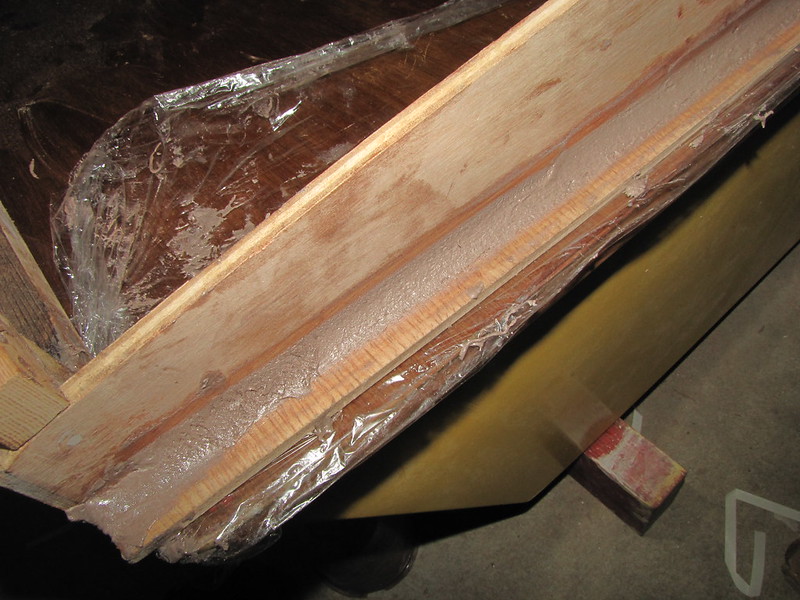
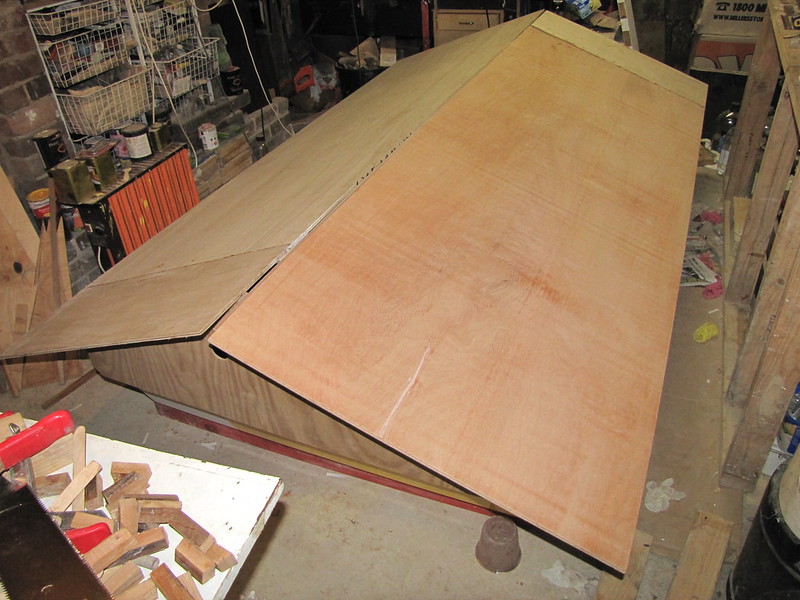
1. The roof panel slipped a bit when we lifted the structure, since neither panel is glued down - yet. The gap isn't really a roof ventilator. Note that the butt-straps and some sheet-extension overhang have been trimmed so that the fit along the leak is nice and snug - at least as far as the sheet edges are concerned. The frame heights are another matter entirely... Note the eye-bolts in the LH corner of the photo: these and a pair cribbed from the former painting tent will be attached to the side panels to allow the roof to be secured to the trailer. PS, note the "Jovian Red Spot" effect of the grain on the starboard panel
2 . Butt-strap end trimmed: a combination of Japanese cross-cut saw and Perma-Grit files
3. The trim-lines of the straps were cut with some relief, to keep them well and truly away from the sheet on the other side of the peak
4. The trimmed end of the other butt-strap. Note that the glue-lines between the joined sheets have also been sanded clean and flat
Follow this link to my Flickr account
I used up the very last pair of latex gloves on the final fillet run last night, so I will have to get another box before doing any more glueing. I've noticed that I have quite a high donning attrition rate with these items: either the gloves are too thin, my fingernails are too sharp, I don't know my own strength, I'm being too hasty, or I'm just plain clumsy... At any rate, I waste about one pair in three if I'm being careful: that's about twelve pairs per box of 100 gloves. Many of the glove-breaks occur when changing pairs to handle something that needs to remain clean - but also at times when putting gloves on at the beginning of a glueing session.
-
24th March 2013, 09:13 PM #3117
AJ
- Join Date
- Jun 2007
- Location
- Aberfoyle Park SA
- Age
- 63
- Posts
- 1,787
I was getting a similar attrition rate for latex.
I also found some chemicals seem to dissolve it awfully quickly.
(can't remember what it was now... polyester resin perhaps?)
Switched to nitrile after noting ambos & surgeons having done same.
Tougher stuff - never had a failure new (yet). But they weaken after several
wearings, especially if I sweat in them.
But even nitrile isn't proof against xylene based cement sealers...
-
24th March 2013, 09:14 PM #3118
AJ
- Join Date
- Jun 2007
- Location
- Aberfoyle Park SA
- Age
- 63
- Posts
- 1,787
As far as the 9mm ply goes, need to factor what weight of paint/sealers will be added to it?
-
24th March 2013, 10:00 PM #3119
GOLD MEMBER
- Join Date
- Jan 2009
- Location
- Blaxland, Australia
- Age
- 65
- Posts
- 2,551
No 'pox except for the glass tape (I found that I had some 50 mm tape left over from the chine repair) and resin along the peak; paints will just be VOC-solvent-based undercoat (Norglass PRi-COAT) and some VOC-solvent-based enamel (Weatherfast "Premium Enamel"). The number of coats will be the minimum amount to seal things off, possibly two of primer/undercoat and one or two (hopefully one) of enamel. For a rough (over?-)estimate of 50 % maximum flash-off from the paint, that would mean adding a minimum of a of a kilogram or so to the overall weight, given that the frame and inside surfaces of the roof panels are going to be painted as well as the outer surfaces. I may also run a coat of resin around the edges of the roof panels to seal the plies off before the undercoat, but not over the large surfaces. Originally Posted by b.o.a.t.
Thanks for the tip about the nitrile gloves. I don't mind if I use them only once - as long as I can use them once, not not-at-all!
Cheers,
Alex.
Here's some more snaps: the floor got a vacuuming after the boat was put back on her side:
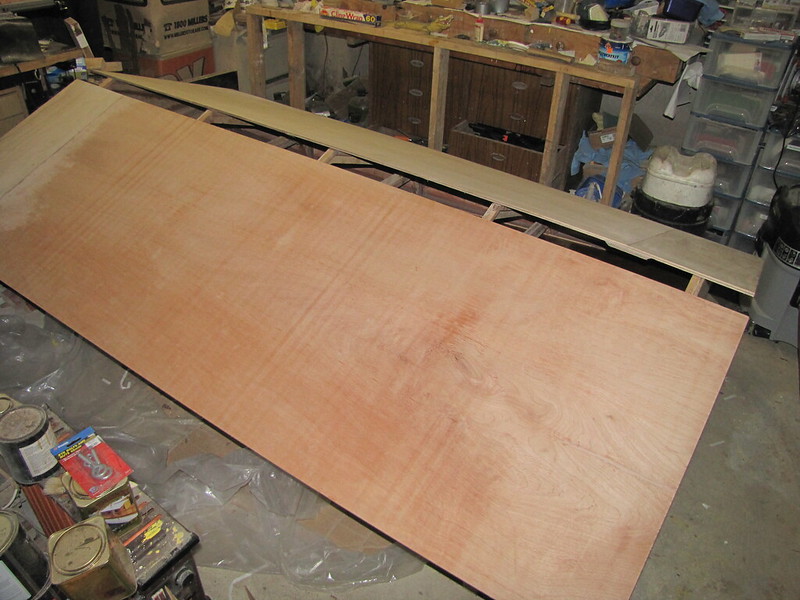
1. Port side of the frame sitting on the starboard roof panel

2. "Underside" view of frame and roof panel
3. Both roof panels down on the floor. The roof panels have been switched to their correct sides

4. Closer-up view of the upside-down starboard side panel and "skid". A bit of a different scene from last night! The "skids" will get a coat (or two) of BoteCote, and some 3 mm insertion-rubber pads - the latter to protect the side decks from the hard, scratchy resin. Even so, the "feet" will have to be watched for bits of gravel, sand, sticks, etc. - unless the endplates and my proposed endplate stiffeners support the "skids" above the ground - I haven't checked that yet
Follow this link to my Flickr account
I throttled back a bit today, after the last few hectic days of (for me) going flat out. I'll continue to ponder the idea of using thinner plywood, but I am inclined to proceed as planned. I may end up regretting that decision of course, in which case you can say "I told you so" to me as often as you like ;). The frame now needs a bit of filing/sanding to get rid of the worst of the off-target glue, and the rounding of the corners of the bendy-ply strips and the ply gusset gussets (which are more probably more properly called flanges). Then I'll tackle the interesting problem(s) presented by the varying roof former heights.
-
25th March 2013, 10:57 PM #3120
GOLD MEMBER
- Join Date
- Jan 2009
- Location
- Blaxland, Australia
- Age
- 65
- Posts
- 2,551
Today has been spent slowly working through the bits of cleaning up required on the frame, sorting out parts for the tie-down eyebolts (including raiding the old painting tent), and working out what I'm going to do with the mismatched roof former heights. The last of these was solved the most quickly of the lot, once I'd cleared the floor (by dint of moving the oil heater and other assorted objects around the corner).
All of the things that I have done today are independent of the plywood-thickness issue, which I am still pondering; ponder, ponder, ponder.
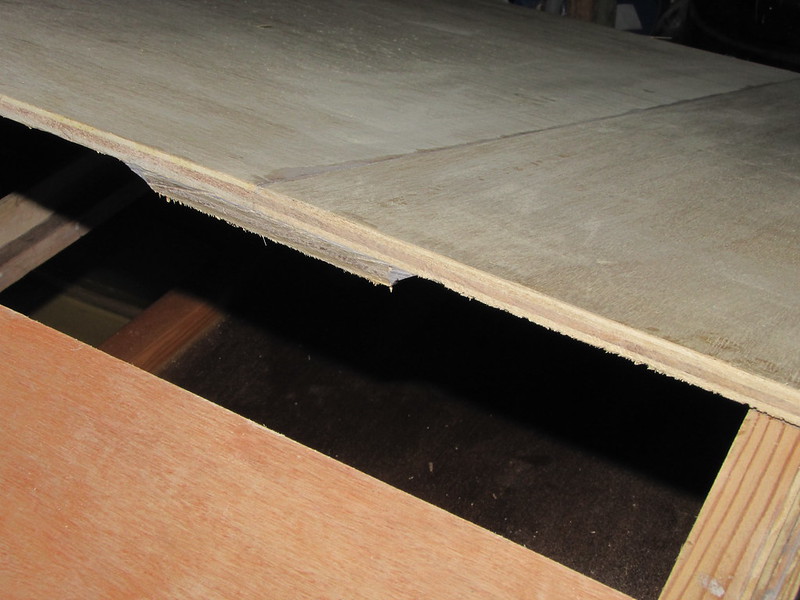
1. Roof frame sitting on its endplates. The lowest part of the side panels clear the floor by about 20 mm or so. The worst of the excess resin was cleaned up after taking this snap
2. Lowest side panel point - and floor. The floor here is actually the two roof panels. The dust is from the resin cleanup and the slight shaping of the former support flanges
3. A little bit more space: the old oil heater and assorted bits and pieces have been moved

4. Plenty of room to wander about now :). I should have done this long ago...
5. Inside view of the finalised gudgeon cutout, sanded flat on both sides and filed to shape. You can see that I didn't glue the insert quite square in the slot. I did try, and checked it a few times...

6. Outside view of the gudgeon cutout. It's a couple of mm higher (or lower ;) now, after final shaping

7. Gusset-flange corners on the starboard side (on both sides, in fact) have been filed down a bit
8. Starboard gusset-flanges from the other side
9. Close-up of one of the cleaner flanges
10. Corners of the "skids" rounded at the traveller-rope cutout, starboard side
11. "Skids" rounded at port-side traveller cutout: the flat, coarse Perma-Grit file and a small amount of elbow grease
12. Rounded traveller cutout corners have had their sharpish edges filed off at approx. 45 degrees. The same applies for all the edges on the bendy-ply strips. The "skids" are now ready for a coat of neat resin

Follow this link to my Flickr account
I did in fact paint some resin on the "skids" this evening, after dinner. I also did a few other things, including identifying which side of which formers need some spacers adding to them, which I will deal with tomorrow as it's getting a bit late here now.


 Reply With Quote
Similar Threads
-
New Queensland PDRacer Build
By duncang in forum Michael Storer Wooden Boat PlansReplies: 71Last Post: 26th April 2012, 08:30 AM -
Oz PDR build in Adelaide - sexy black PDRacer
By m2c1Iw in forum Michael Storer Wooden Boat PlansReplies: 39Last Post: 27th April 2009, 06:30 PM -
OZ PDRacer - Dylan's build in the Philippines
By Boatmik in forum Michael Storer Wooden Boat PlansReplies: 16Last Post: 23rd February 2009, 05:50 PM -
Brisbane Timber and Working with Wood. Boatmik/PDRacer
By Boatmik in forum Michael Storer Wooden Boat PlansReplies: 1Last Post: 11th April 2007, 08:06 PM -
Flawed wood on the TS --DUCK!
By Robert WA in forum WOODWORK - GENERALReplies: 7Last Post: 19th February 2004, 11:42 AM
Tags for this Thread
balanced lug,
boatmik,
build,
dacron(tm),
douglas fir,
duck,
enamel,
epoxy resin,
fibreglass,
hoop pine,
interminable,
lug,
machinery,
materials,
michael,
oregon,
oz racer mk 2,
ozracer,
paint,
paulownia,
paulownia/glass mast,
pdracer,
plywood,
polytarp,
primers,
really simple sails,
sail-making,
sailmakers thread,
sanding,
storer,
sydney,
timber,
tools,
varnish,
verbose,
western red cedar,
wood,
wood duck,
wrc
