

 Thanks:
  Likes:
  Needs Pictures: 0
 Picture(s) thanks:
Results 3,166 to 3,180 of 3347
-
18th April 2013, 11:29 PM #3166
 GOLD MEMBER


- Join Date
- Jan 2009
- Location
- Blaxland, Australia
- Age
- 65
- Posts
- 2,551

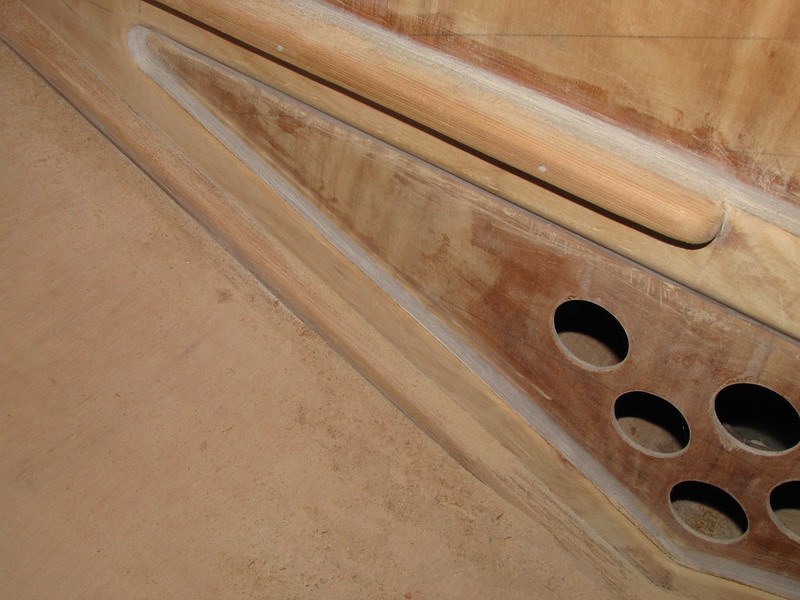
Some snaps from today:
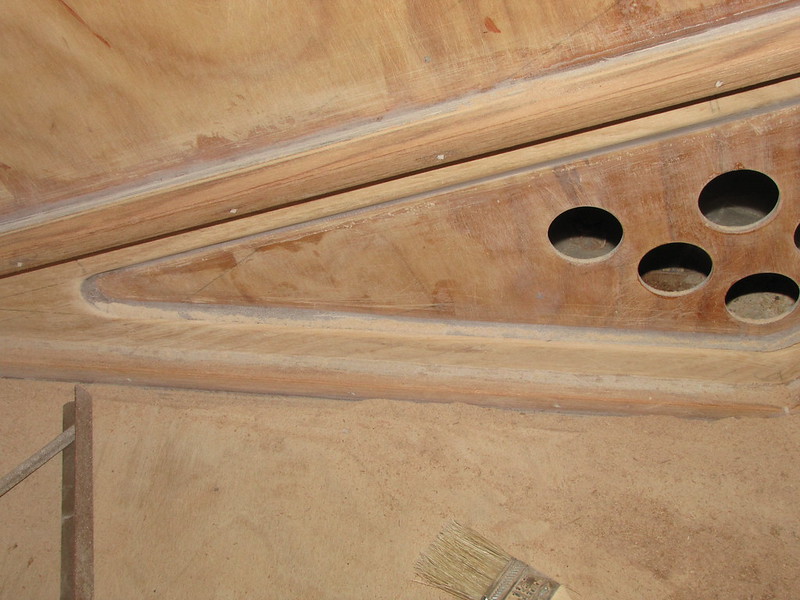
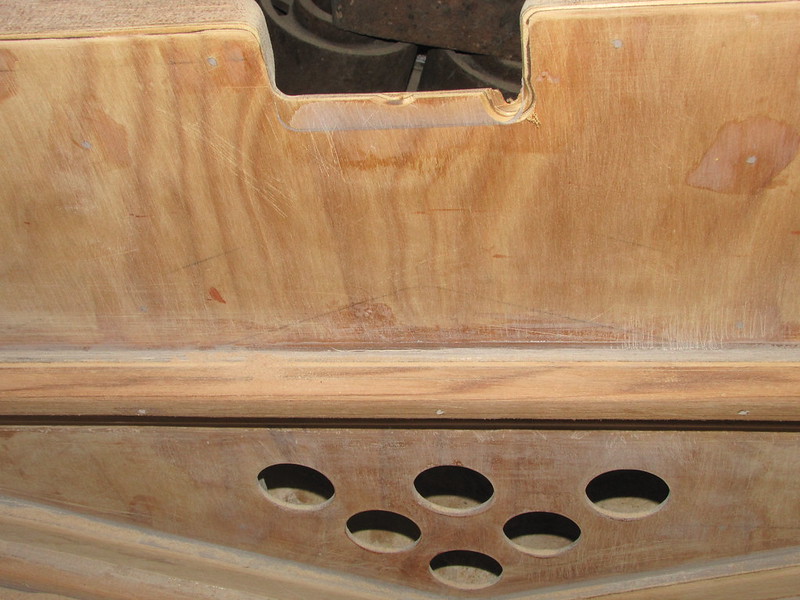
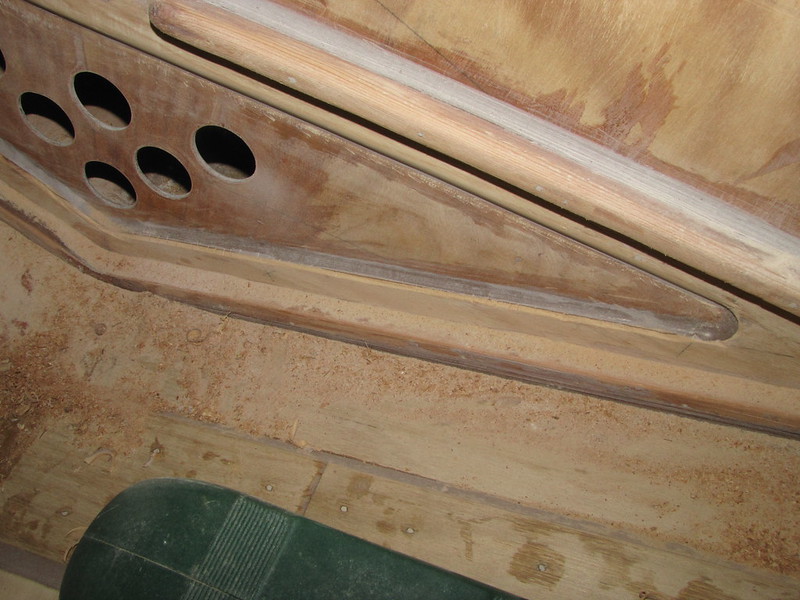
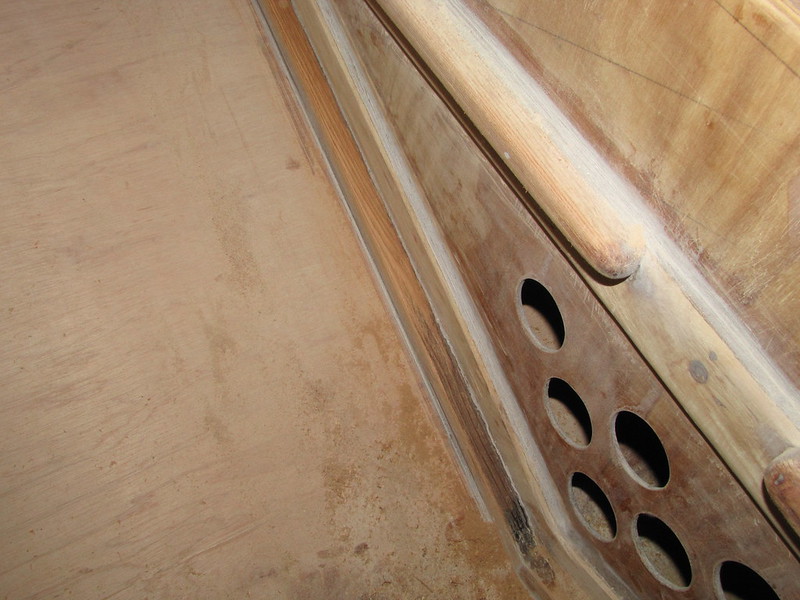
1. Gudgeon cutout, both foot-ends shaped

2. Another view of shaped foot-ends at gudgeon cutout
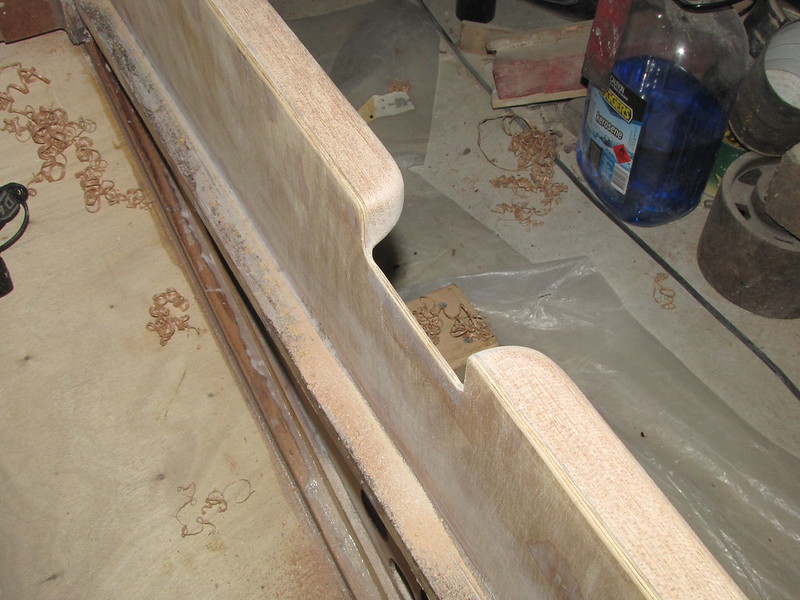
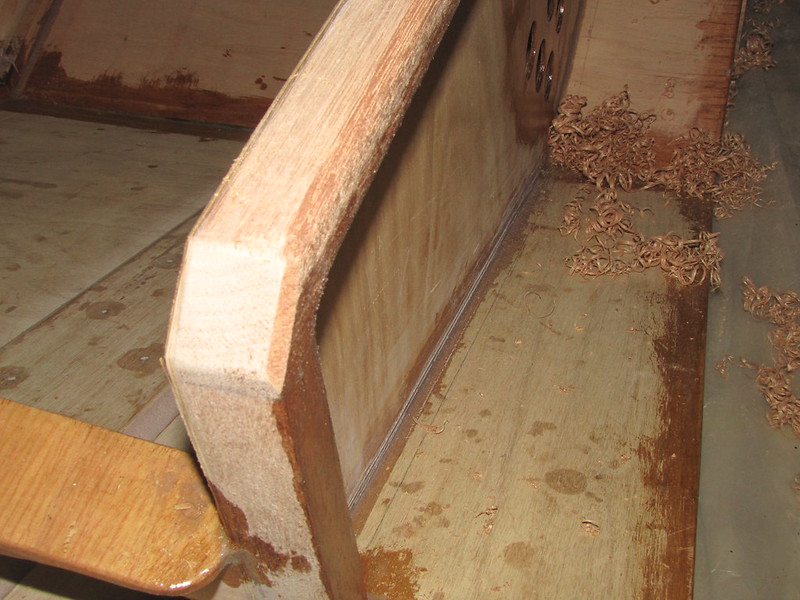
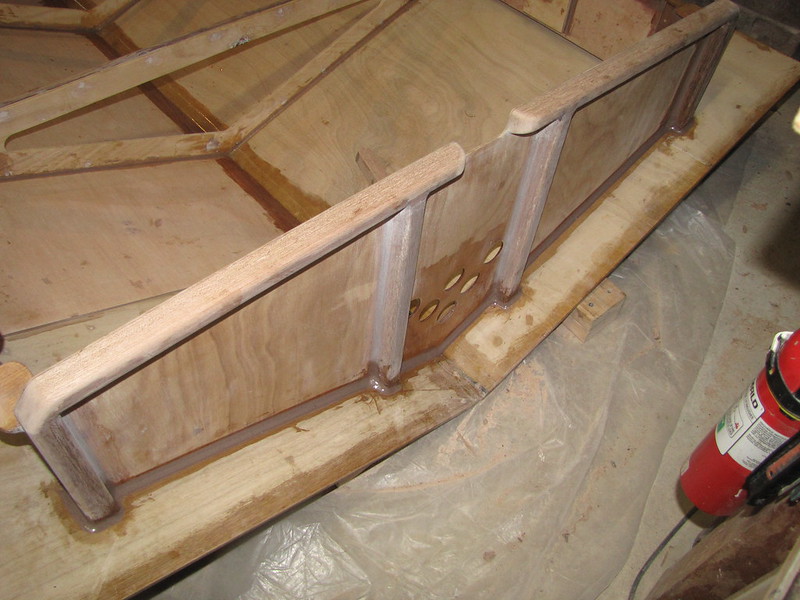
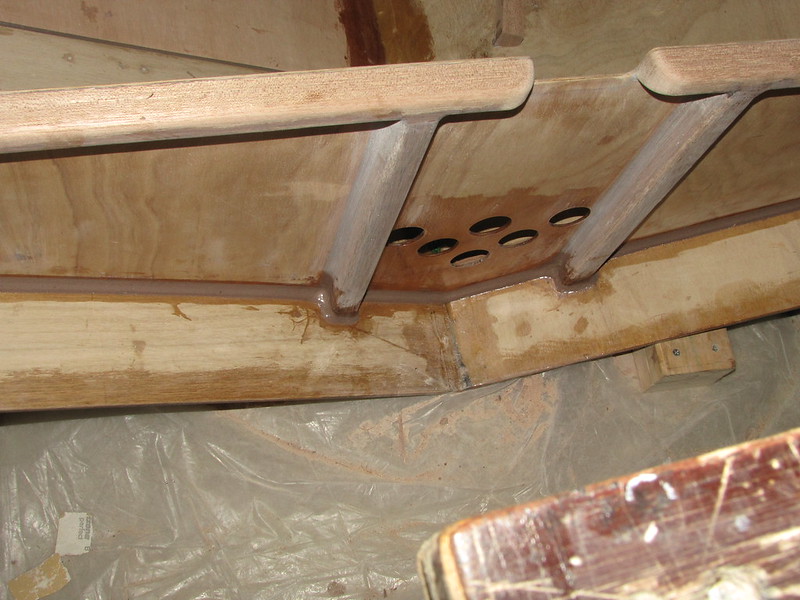
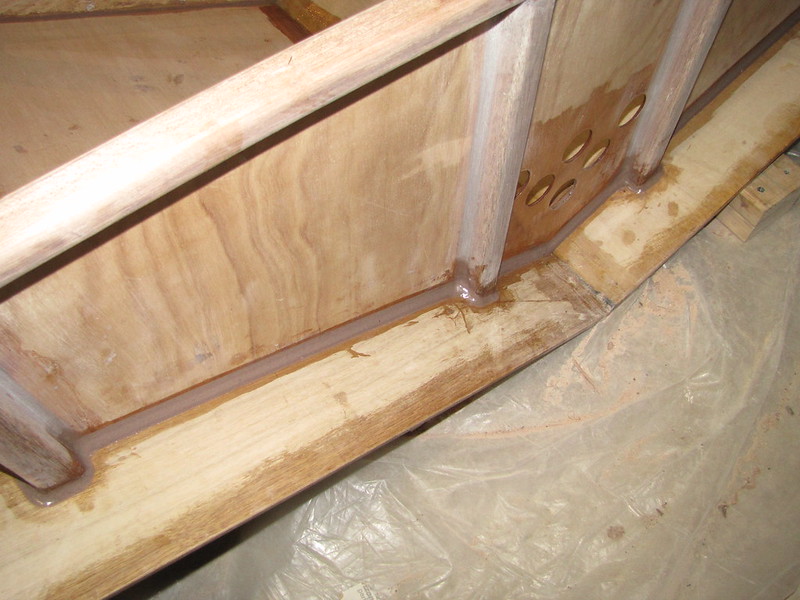
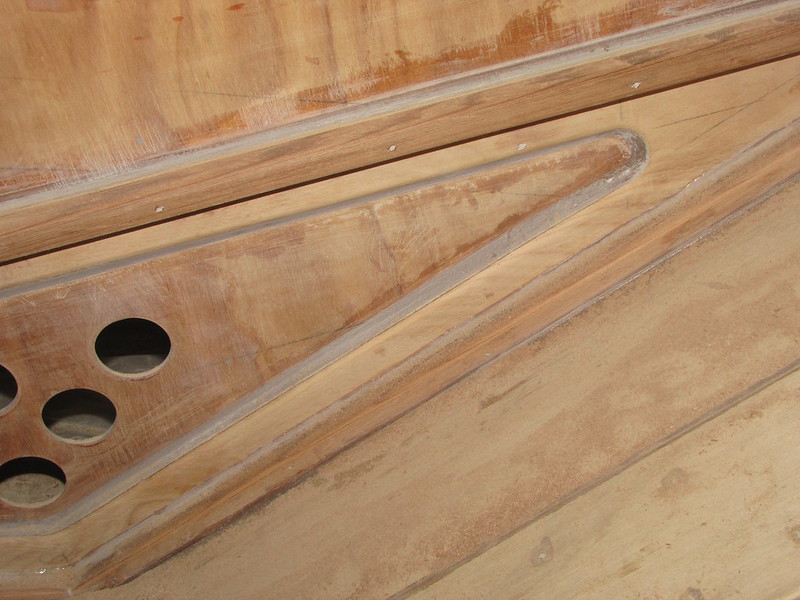
3. Rear end-plate feet from the side
4. Rear end-plate feet from below - a bit more tidying up to be done yet
5. Another rear-end-plate feet view. The free ends of the "feet" (toes?) could do with a bit of a chamfer towards the cutout: a bit hard with the thing upside down, but I'll try

6. Rear end-plate feet, viewed from rear looking forward, and from below (or from above, with the roof rotated 180 degrees into its working position ;)

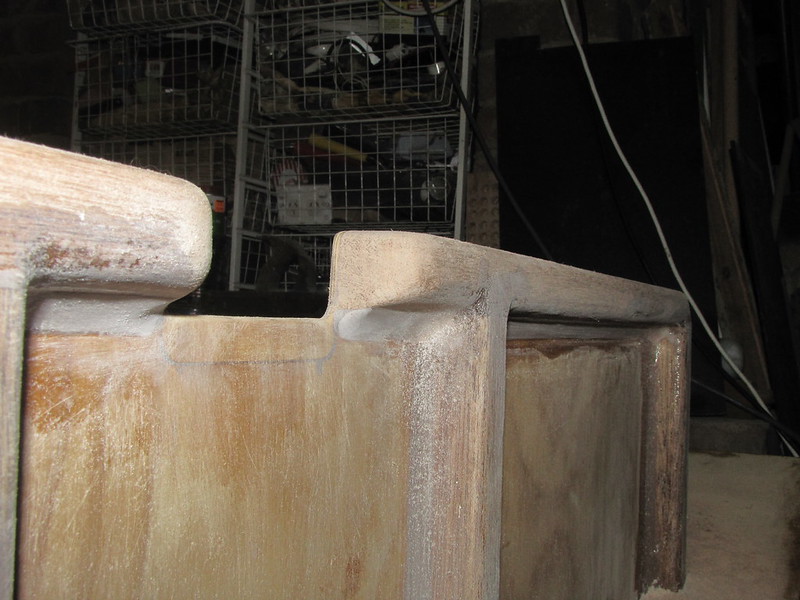
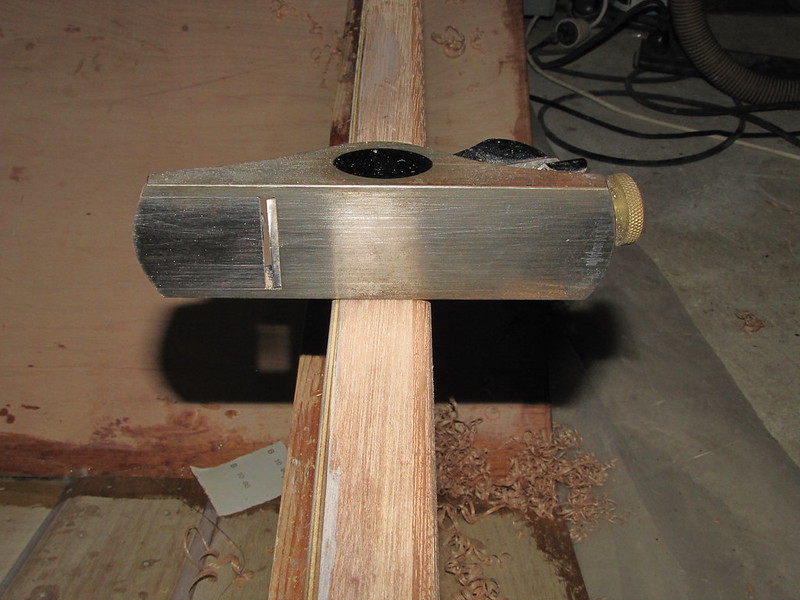
7. Starting the rounding process on the front end-plate foot: shaving a 45 degree bevel with the little Veritas block plane. The relatively coarse grain makes the cut look as though it isn't straight or sharp-edged, - but it is, statistically (and at better than the 5 % level ;)
8. Veritas block plane sitting on top of the round-over that it has just cut
9. Corner being shaped: a rather bad, blurry snap of the area of interest, but it gives something of an idea. The camera appears to have focused on the shavings instead...
10. Shaped corner. The sanding block was used to finish off the long round-over and round over the corners as well. 80-grit Wuerth sand-paper used. The camera focused where I meant it too this time, and not on the shavings

Follow this link to my Flickr account
More, later.
-
18th April 2013 11:29 PM # ADSGoogle Adsense Advertisement
- Join Date
- Always
- Location
- Advertising world
- Age
- 2010
- Posts
- Many
-
18th April 2013, 11:43 PM #3167
GOLD MEMBER
- Join Date
- Jan 2009
- Location
- Blaxland, Australia
- Age
- 65
- Posts
- 2,551
Some more snaps:
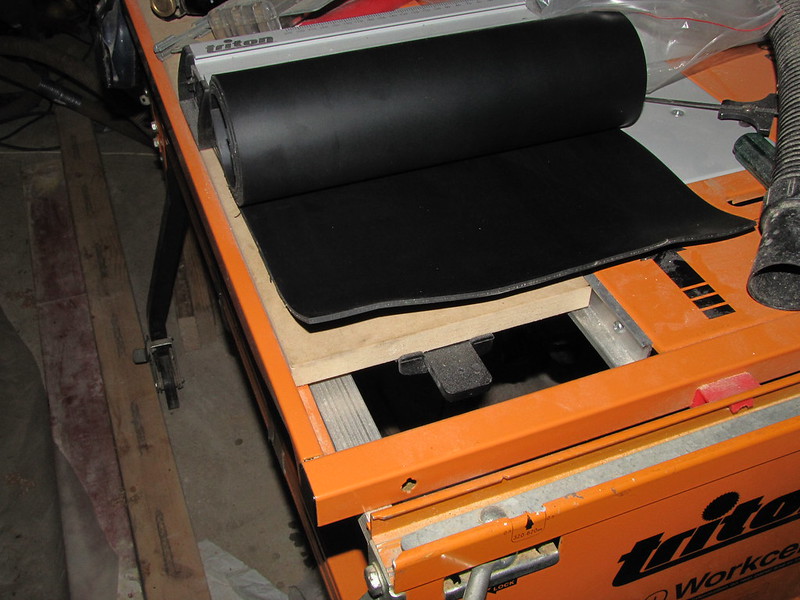
1. Roll of insertion rubber for the "feet". This stuff will be cut up into suitably-sized strips and glued to the various bits with contact adhesive

2. View of the insertion rubber edge, showing the cloth core
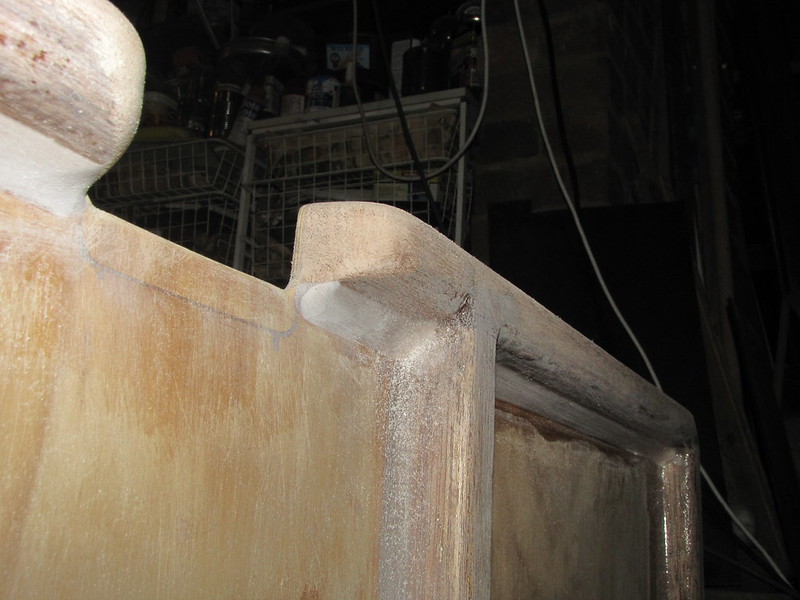
3. Starboard front corner of the roof, rounding-over complete. I vacuumed this entire region (end-plate and roof) not long after taking the photo
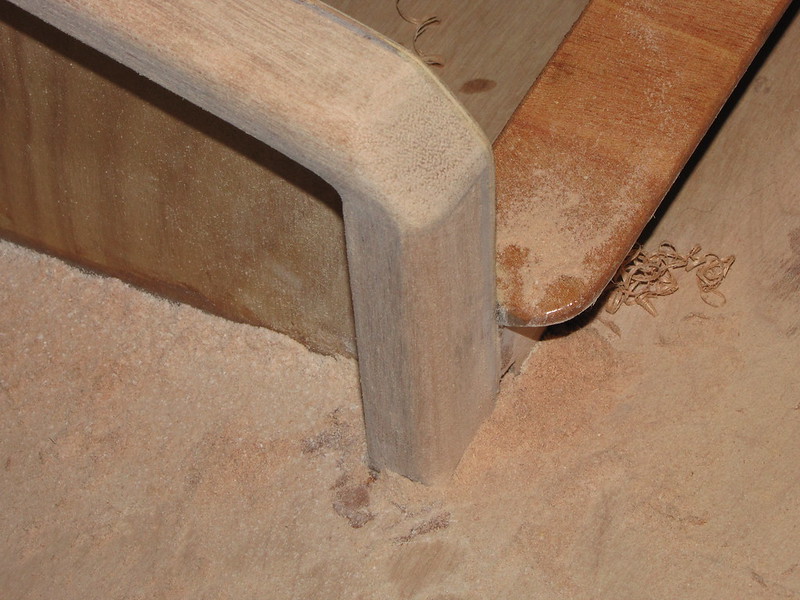
4. Central "leg" on front end-panel: I rounded over the upper corner of this in side view as well, before coating with epoxy. It has been sanded to remove the raised grain, at this point
5. Sanded front end-panel "sill", starboard side
6. Sanded front end-panel "sill", port side

Follow this link to my Flickr account
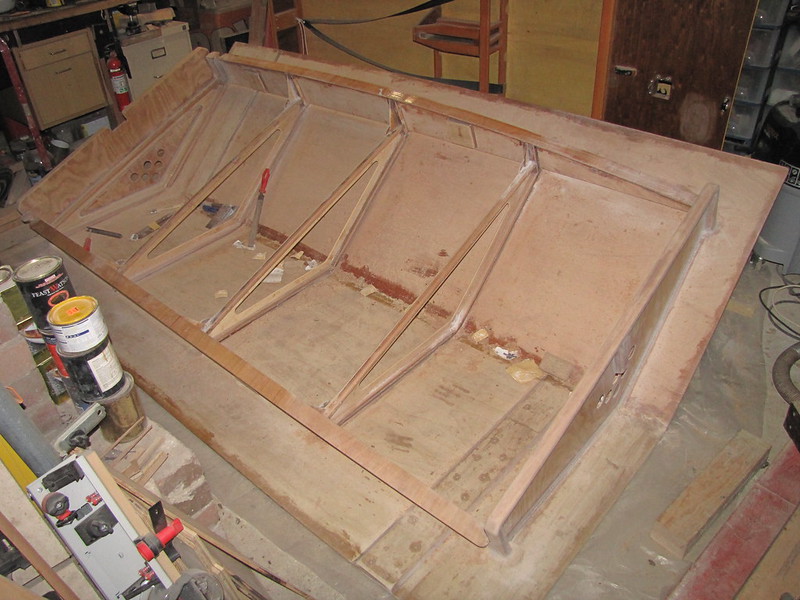
As will be obvious to those who have been following the 'Duckcote "development" for any length of time, I am having a bit of trouble seeing the wood for the trees. Things are at a stage where it seems to be a never-ending cycle of coat and sand, coat and sand, etc. In fact, I'm not exactly sure what I'm going to do next, and I am not exaggerating. If I force myself to think about it, it's going to be tidying up the external surfaces of the two end-plates for final epoxy coating - which means more sanding, which is probably why I'm having trouble thinking about it!
Speaking of sanding, I'm getting rather low on 80-grit: this structure, despite my protestations that it would get minimal sanding, is eating the stuff for breakfast, lunch and dinner - plus large snacks in between. It has done the same for resin and glue powder as well...
And speaking of resin, I'm going to coat the internal surfaces of the end-plates with epoxy as well as those on the outside, as they will be potentially getting rained on through the "birds holes". At this stage I've dispensed with the idea of the insect mesh - although I may have to rethink this if, as Theodor suggested when he was looking at the roof last week, a hive of bees settles in...
-
19th April 2013, 07:36 PM #3168
GOLD MEMBER
- Join Date
- Jan 2009
- Location
- Blaxland, Australia
- Age
- 65
- Posts
- 2,551
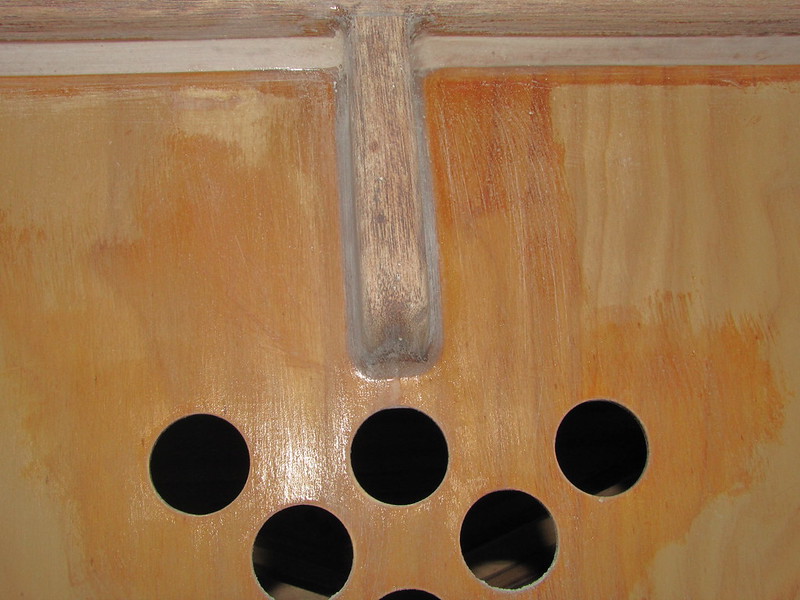
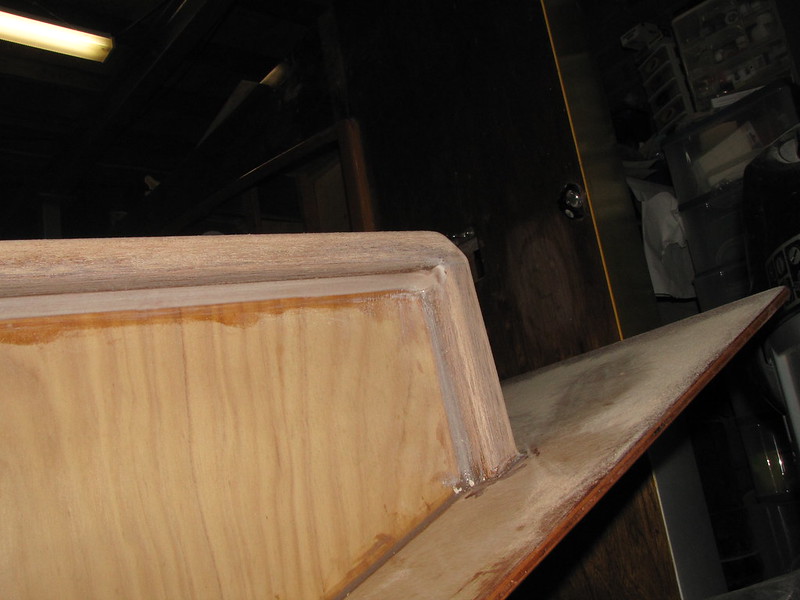
I realised after I'd finished fiddling with the previous post that the reason that I was finding it hard working out what to do next was that I had forgotten that I was going to put in a fillet on the outsides of the end-plates, between them and the roof - but part of the brain was obvious shouting for attention about these. This time I didn't rush - which made all the difference. Having said that, I didn't dawdle, either.
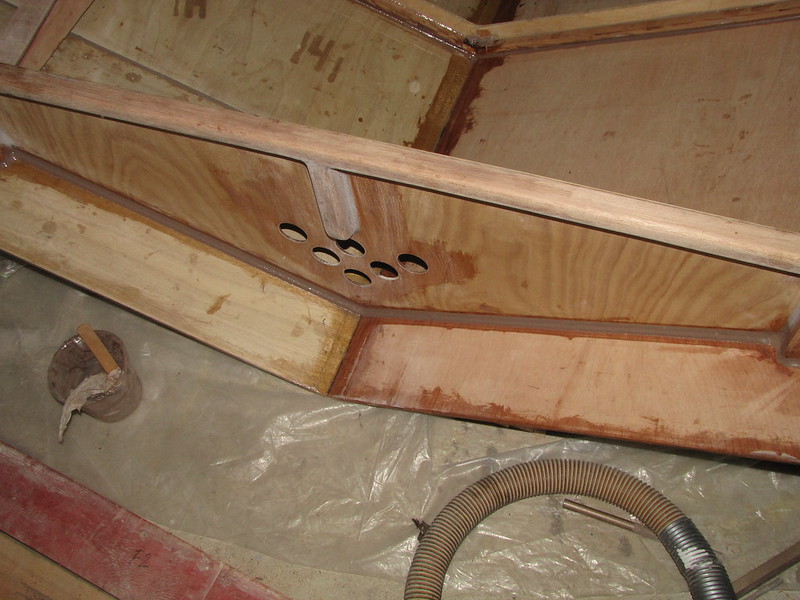
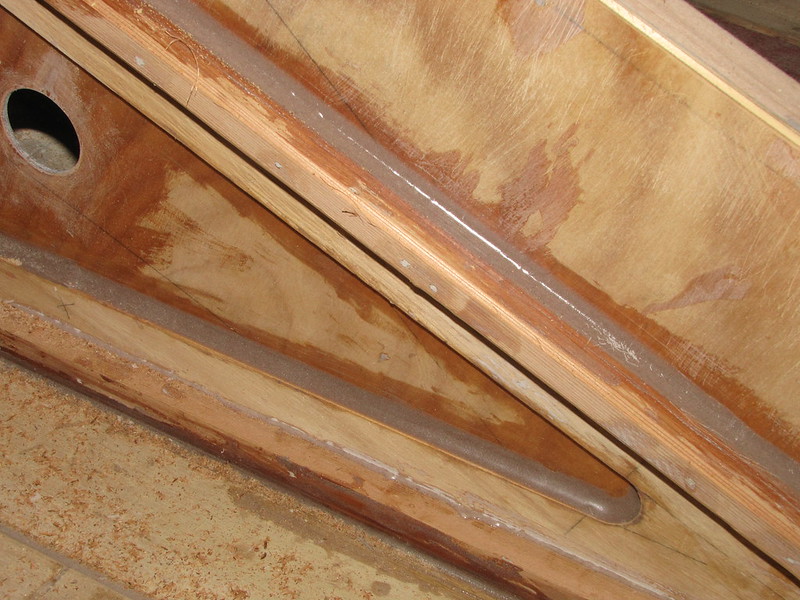
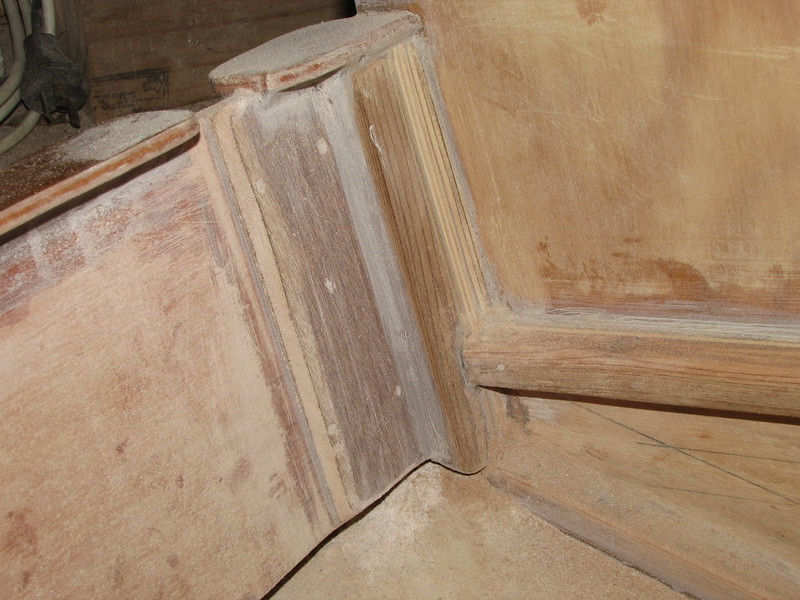
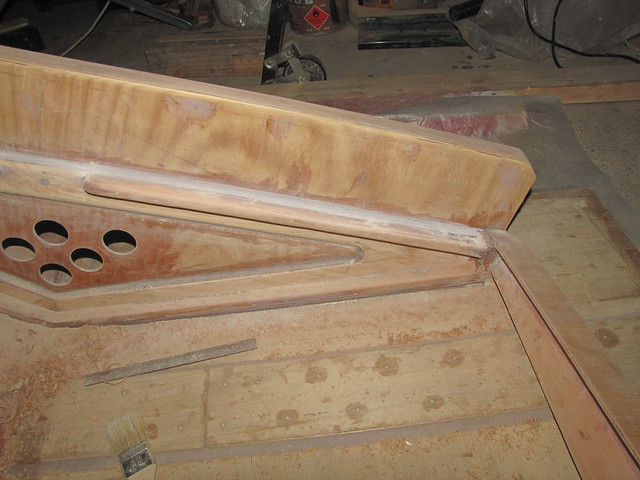
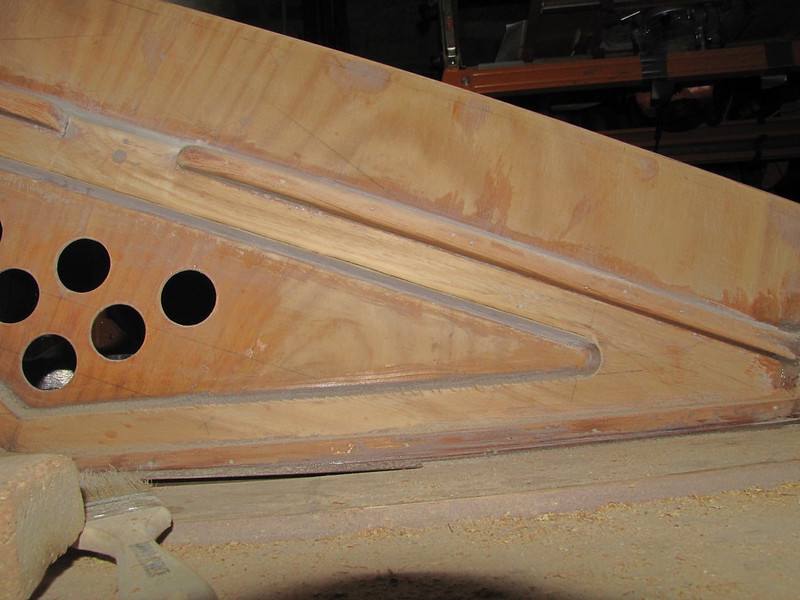
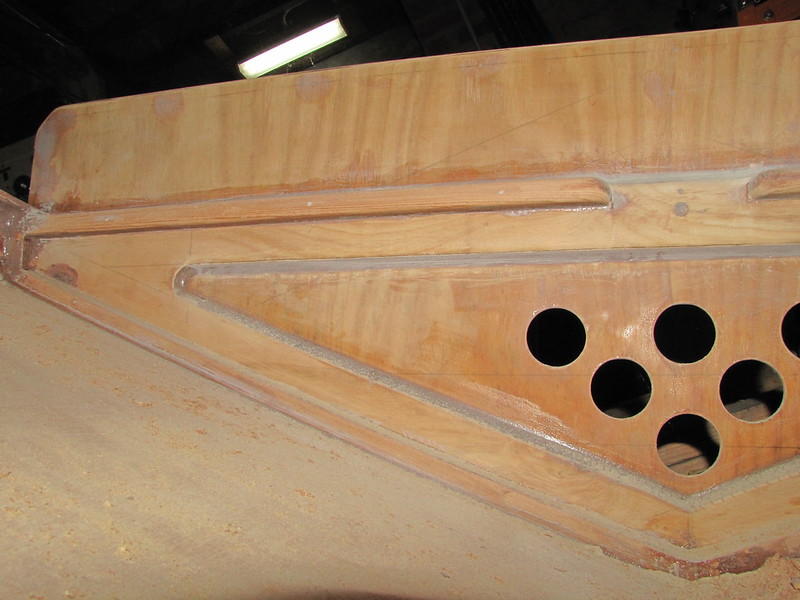
1. Final fillets! Running between the roof and the outer faces of the end-plates

2. Fillet shaped, awaiting cleanup. I left the glue for a couple of hours before tackling the task
3. Closer-up view of the fillet at the front peak. Carbon-fibre tow insert visible here, too...
4. Overview of cleaned-up front fillet. There will be minimal sanding required for these as I was ultra careful with the cleanup and smoothing this time. I allowed a large block of time for this so that I wouldn't feel rushed
5. Front panel: outer starboard "leg" faired in

6. Starboard side-view of front fillet

7. Cleaned-up fillet at the roof peak (front end-plate)
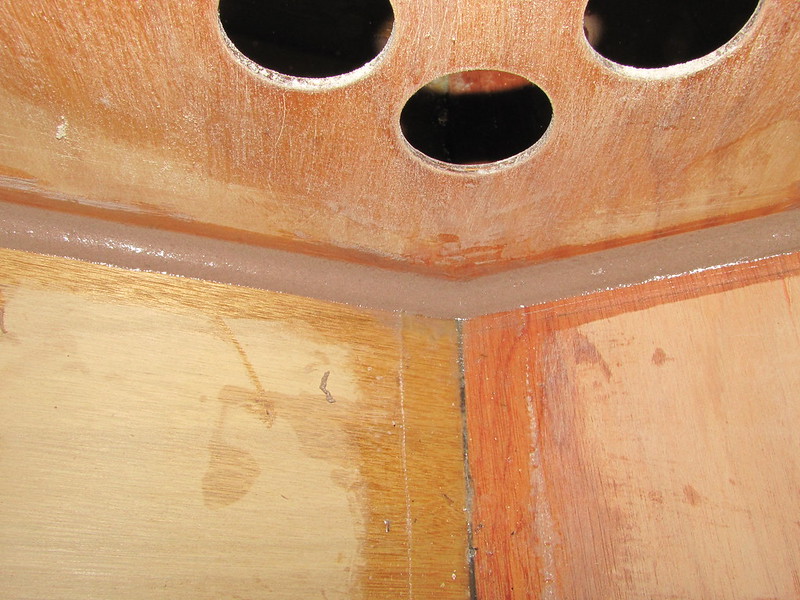
8. Port side roof fillet, front end-plate
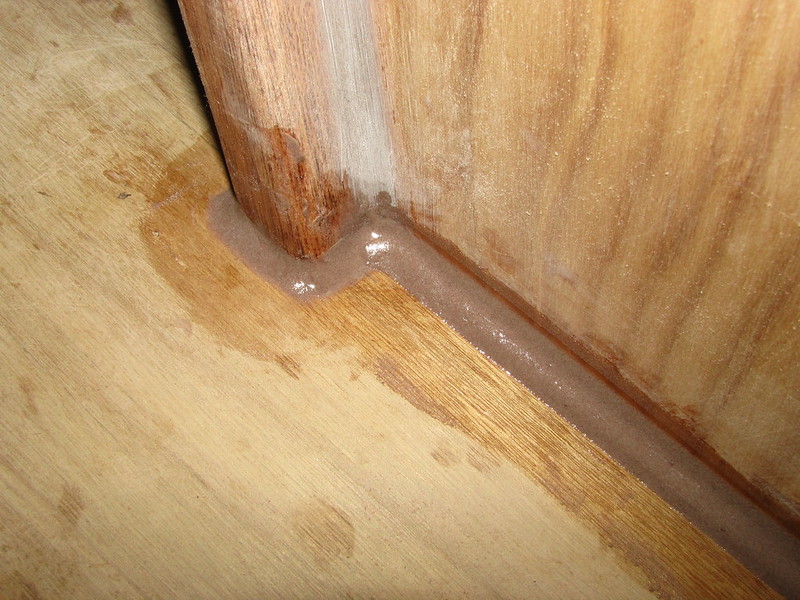
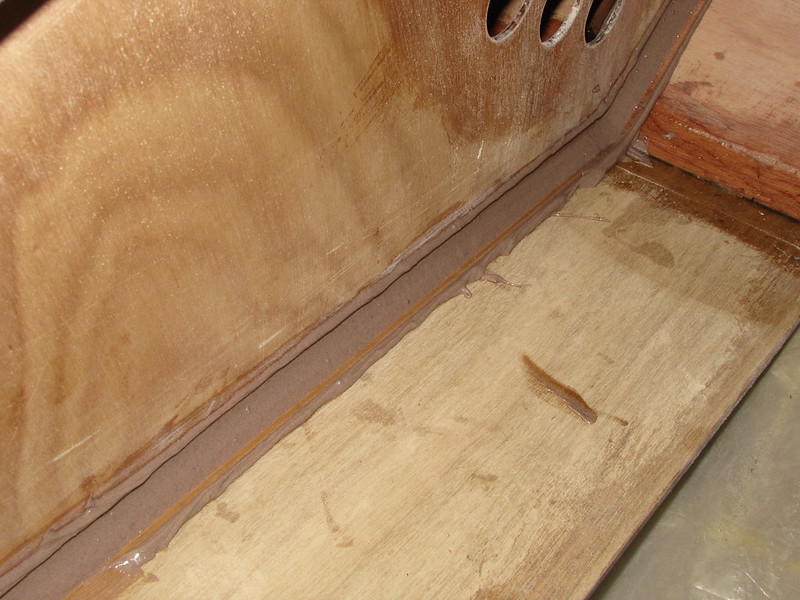
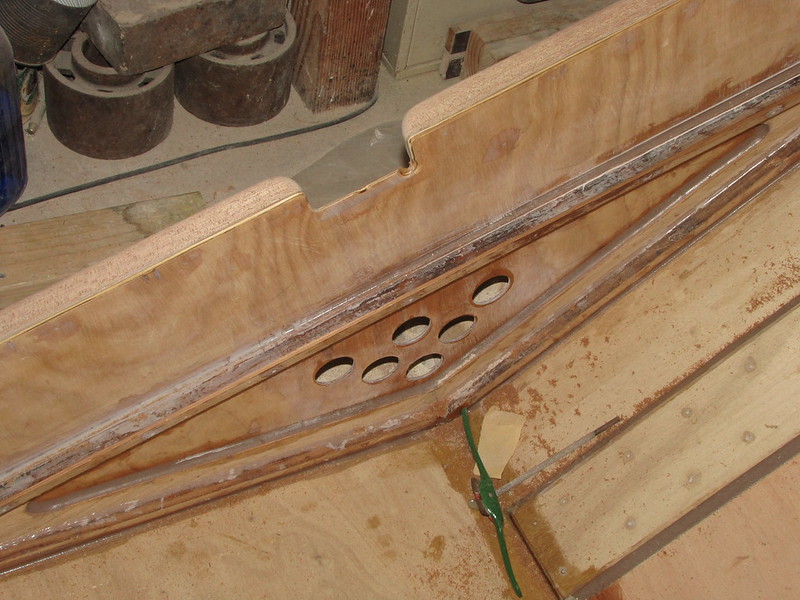
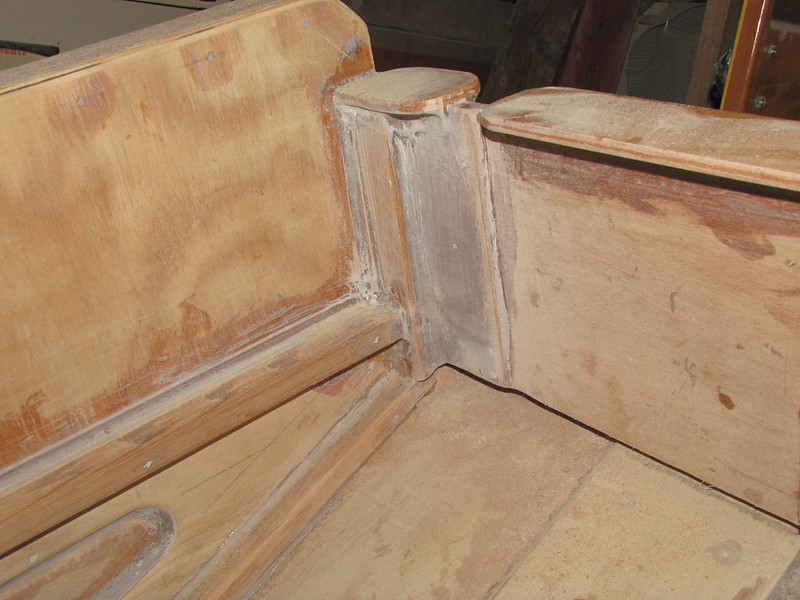
9. Fillet between the two inner "legs", rear end-plate
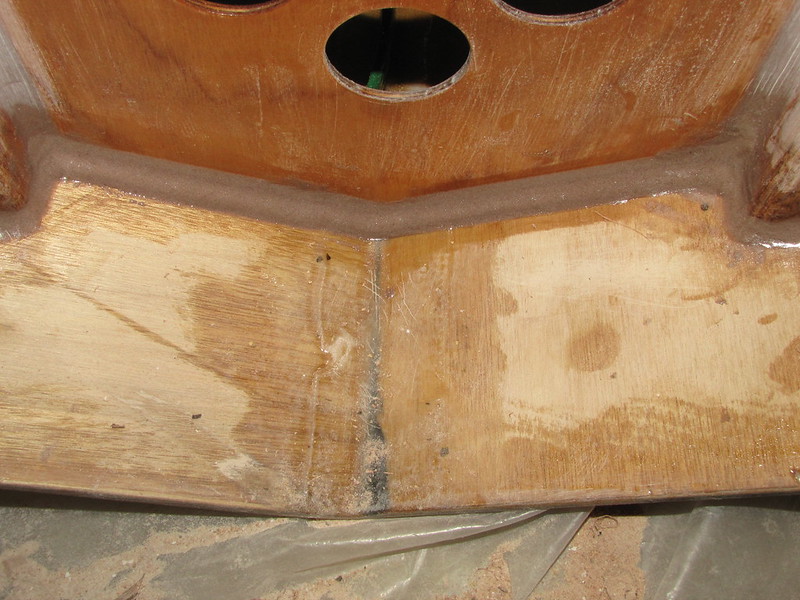
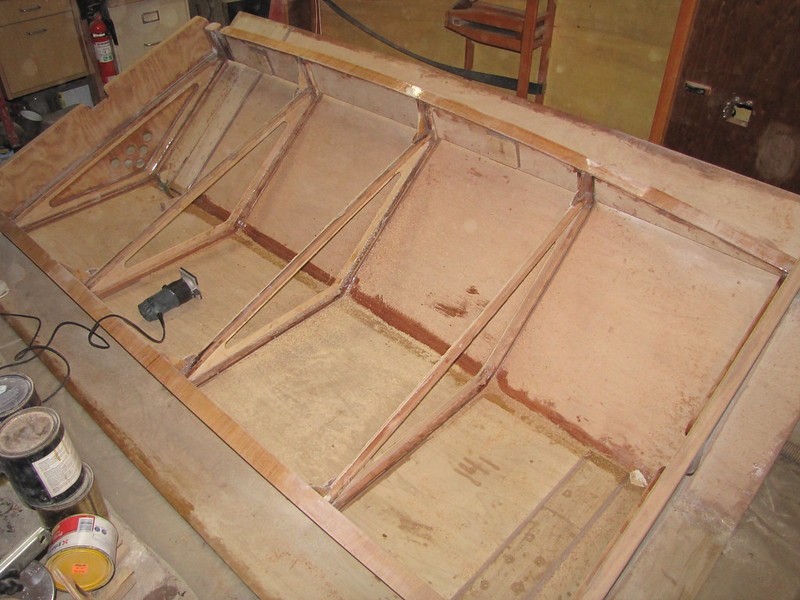
10. Overview of the rear end-plate
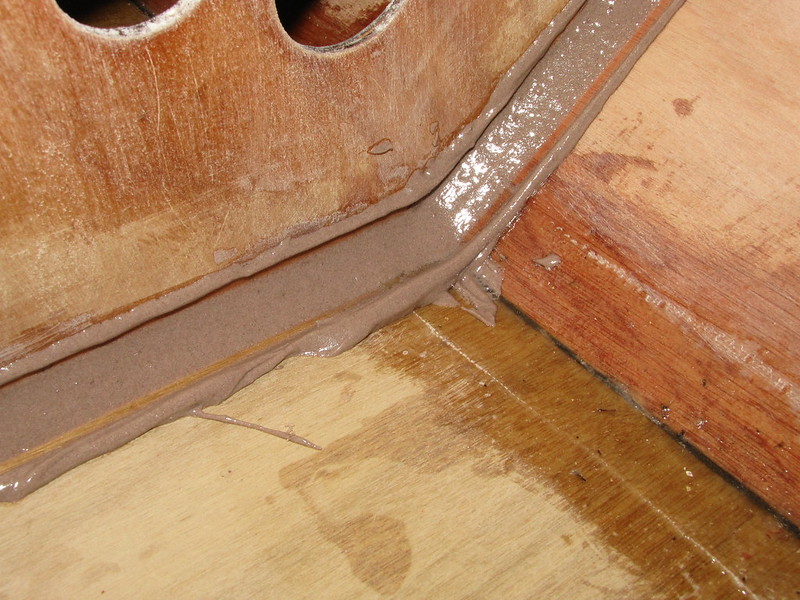
11. Closer view of the rear end-plate fillet
12. Rear end-plate roof fillet, even closer
Follow this link to my Flickr account
Now I can think about final sanding of the end-plates before putting on a coat of 'pox ;). Those will probably be done tomorrow as I'm still waiting for the fillets to set, and have other things that I need to be getting on with in any case, including various areas that need attention (outer side panels, chamfers on the ends of the rear end-plate "feet", etc., etc. I did remember to order some more sandpaper today, too.
The resin may be hard enough to sand after tea, but with this cold snap (and accompanying high winds; bang, crash, thump) that we've just had, I won't hold my breath. I am in fact fairly happy with the way that the roof is turning out: the final fillets were almost the last of the "weather seals" to be done - even though it's yet more weight, making sure that the exposed ends are water-proof - i.e., without any possible capillary-layer access for water - is a good thing. The last of the seals is painting some epoxy over the end-plates, in side and out, and putting a coat or so on the undersides of the roof panels where they jut out over the ground. I also dug up the small blue Bosch "palm" router this evening, as I can run it around the insides of the roof formers to remove a little bit of weight: it won't be much, but might balance the last fillets a bit, and will make painting slightly easier.
I can actually think more about the painting now, as the rest of the construction draws to a close. Some final shaping and sanding, some more epoxy (end-plates, eaves), a bit more sanding, then: paint :). Painting will start on the underside, I think, rather than turning the thing over more times than is necessary! It's finally getting there.Last edited by AlexN; 20th April 2013 at 12:22 AM. Reason: Changed photo 9 and caption
-
20th April 2013, 09:48 AM #3169
Senior Member
- Join Date
- Sep 2012
- Location
- NSW, Australia
- Posts
- 474
TBH I would have skipped all that filleting and just used bits of wood. Much less goop to deal with. Each to their own though.
I missed the origin of this roof thing (have tried to find it) but is this for camping under, or just to keep the boat dry on a trailer, or both?
-
20th April 2013, 03:13 PM #3170
GOLD MEMBER
- Join Date
- Jan 2009
- Location
- Blaxland, Australia
- Age
- 65
- Posts
- 2,551
Hello Sumbloak,
Welcome to the thread :).
I like filleting: being known as the Notorious Filleting Fiend - or, by unkind persons (such as me, f'rinstance) as the Infamous Filleting Fiend. Faced with two internal faces, I'll (almost) automatically fillet 'em ;).
As to the roof itself, you are half right. It is indeed to keep the boat dry - the severe damage to the hull, documented around page 195 et seq. (I think), was in part caused by the boat filling up with water during a period of heavy rain (and in part by my not bailing it out in time before she fell off her perch).
It is also to keep largish branches from raining down on the boat and inflicting their own damage: the first instance of major damage to the boat was a smallish branch punching a moderately-hard-to-fix hole (ask MIK about it ;) in the foredeck. there are lots of trees in this neck o' the woods: a solution would be to hire an arborist to trim the dead branches off things, but that would require too much common sense on my part (I ain't got none).
dkirtley, who sometimes appears on this thread, suggested making some legs so that the roof could be converted to a cabana at the seaside (or wherever), The roof is too heavy though - if it became detached from its legs the inhabitants would be comprehensively squashed, egg-sliced, or both.
Cheers,
Alex.
-
20th April 2013, 07:02 PM #3171
GOLD MEMBER
- Join Date
- Jan 2009
- Location
- Blaxland, Australia
- Age
- 65
- Posts
- 2,551
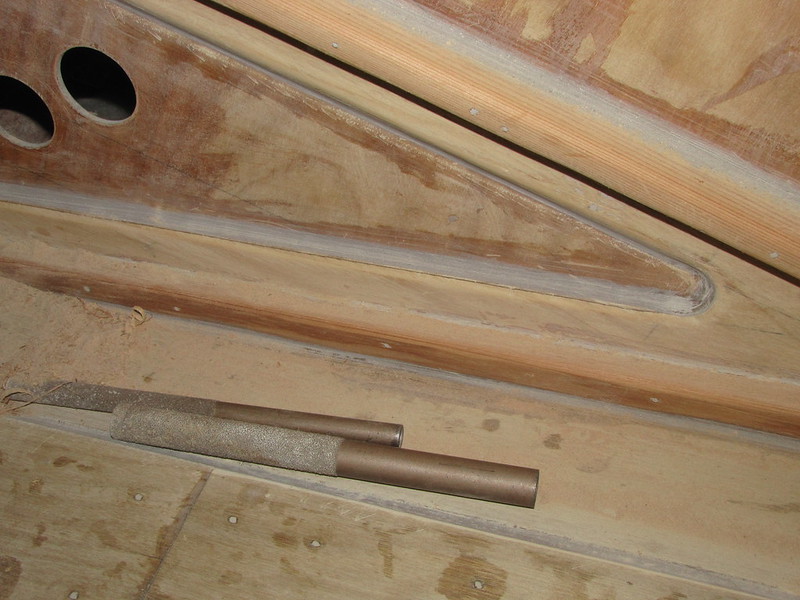
Well, it has been pouring Datsun cogs here today, so it was a good day to spend in the workshop. What a fun time I've had of it, indeed. Sanding:
1. A roof full of sawdust: or router-bit dust, to be more accurate. I've just run around various frame edges with the 6 mm pilot round-over bit, here
2. A routered frame. I went as quickly as I possibly could with this exercise - only to bog down again in hand sanding...

3. Close-up of a routered frame: the front end-plate in this instance
4. Rear end-plate routered - spot the slip-ups
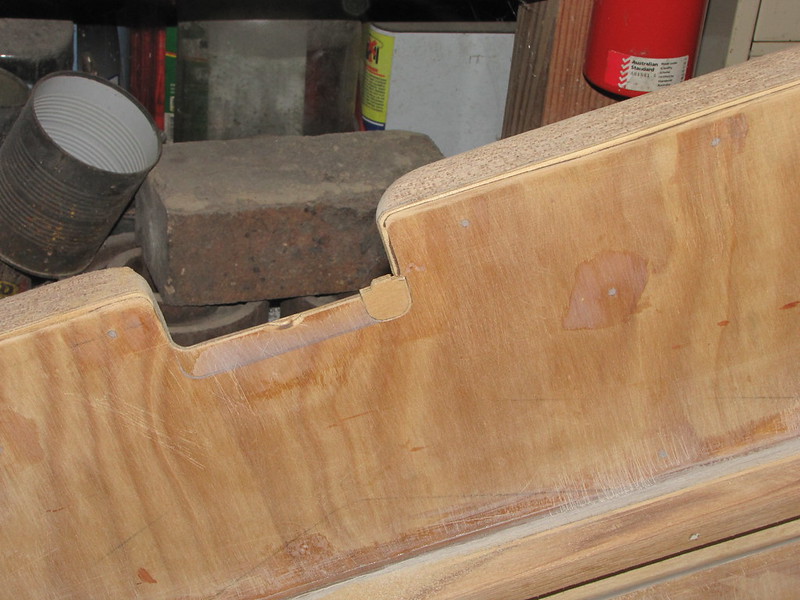
5. Oops... Guess who forgot that there wasn't a bit of frame-work around the gudgeon cutout? It doesn't take much with this type of tool to make a real mess in a very short space of time. More glue, more work, more time... :(

6. A routered, rasped (Perma-Grit) and sanded frame. I did as much as I could get at with the relatively large router base (even though, as routers go, it's quite small). I could have removed the base, but therein lies a little bit of risk...
7. Another view of a partially smoothed-down frame. I went hammer and tongs at this process, not wanting to spend any more time on this stage than was absolutely necessary. Rough work is an understatementt: no "furniture whittling" here...
8. Rounded base of an A-frame member between the two pieces of stiffening frame: a lot of work with the sand paper and Perma-Grit, in an awkward spot. This takes care of a potential water collection area in a vulnerable spot, though. The gap is a clearance cutaway for the tow-rope deadeye on the bow edge of the 'Duck's foredeck
9. Closer view of the relieved piece of framing: this is the front end-plate. The "internal" edges of the A-frame have also had a slight rounding: done by hand as the router base couldn't fit. This whole area has generally been tidied up - I'm happier with it as a result
Follow this link to my Flickr account
Hmm. "Happier" is a word that I wouldn't really describe my view of the roof as at the moment - I must have got out of the wrong side of the bed this morning.
On closer inspection I found quite a number of things that looked as though they need tidying up and/or removing: mostly glue, but some wood as well. I dare say that I'd better get back to it - and see if I can find some more things to make work for myself and delay the finishing date for this project way into the far-distant future...
-
21st April 2013, 03:13 PM #3172
GOLD MEMBER
- Join Date
- Jan 2009
- Location
- Blaxland, Australia
- Age
- 65
- Posts
- 2,551
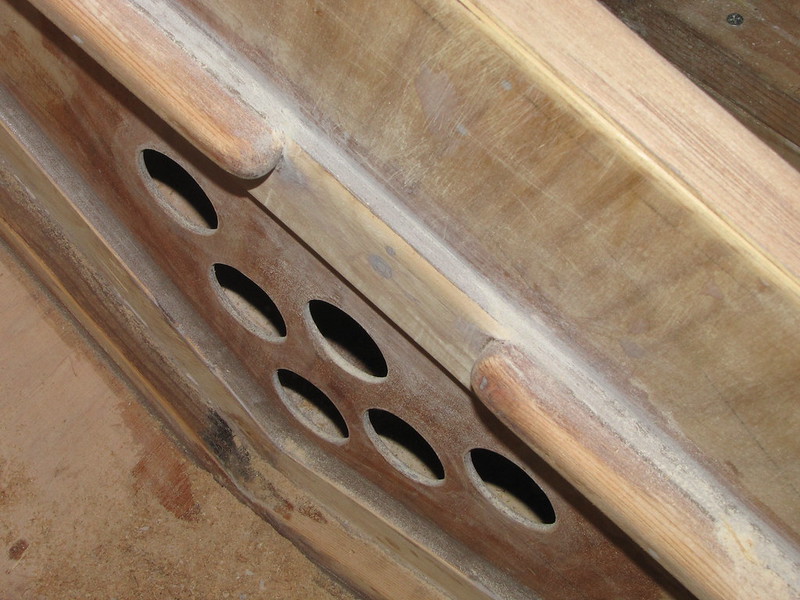
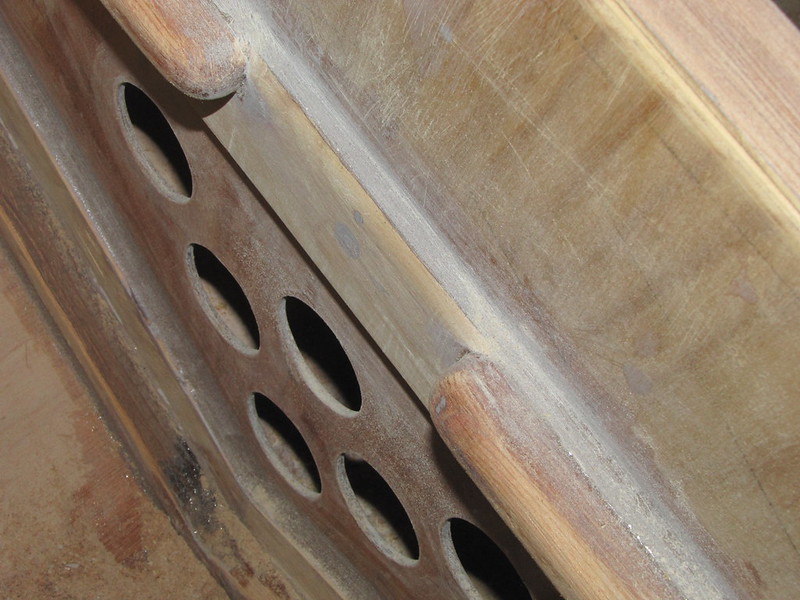
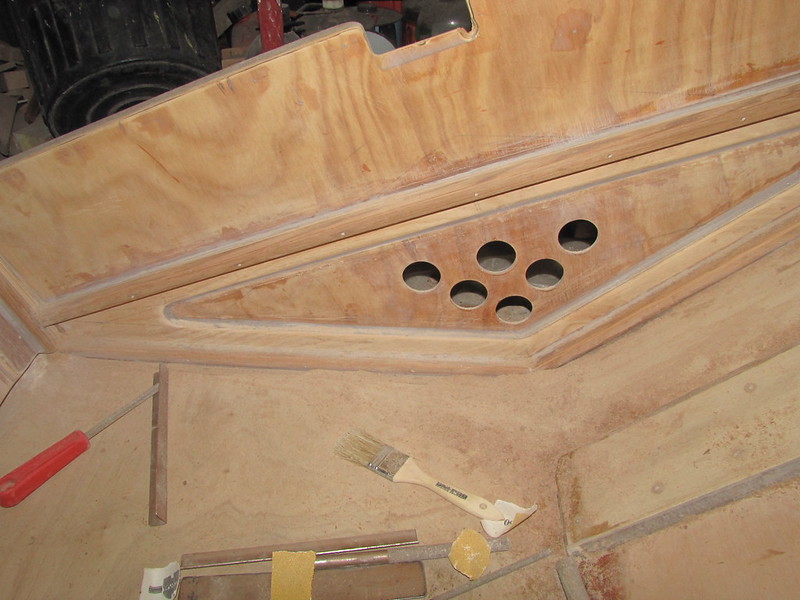
Regarding the purpose(s) of the "movable boatshed", see photo no. 9 (& 10) in post #3155 on the previous page (211), which gives the falling-branches reason fairly succinctly, I hope. And circa page 195 +/- a bit, regarding the water reason. I'd better get back to the surface preparation - for my sins...
-
22nd April 2013, 07:38 AM #3173
Senior Member
- Join Date
- Sep 2012
- Location
- NSW, Australia
- Posts
- 474
Aha. That makes sense then.

-
22nd April 2013, 11:57 PM #3174
GOLD MEMBER
- Join Date
- Jan 2009
- Location
- Blaxland, Australia
- Age
- 65
- Posts
- 2,551
If I were to be doing this again (not a nice thought!) I would do several things - at least - differently. One would be to run the palm router around the A-frames before glueing anything to them; another would be to remove all the stained/waxed surfaces of the framing material before getting them anywhere near the glue-pot; and the third would be to do much more masking and careful post-application (pre-gelling) cleanup.
The last few days have been a seemingly never-ending cascade of sanding and glue removal. If it hadn't been for the Perma-Grit tools I may have chucked it in: even so a number of the PG tools are showing some wear on their ends. They - and my hands - have been put through the wringer. In fact, I wasn't able to hold the oboe yesterday as my thumb was to sore to support its weight; I trussed the appendage up with some band aids and half the files and sandpaper a bit differently. Thankfully, said thumb was feeling better today or I would have been as cross as two sticks (i.e., even crosser than I was on the weekend).
Here are some snaps from the weekend, to delight you all:
1. Lots more dust; and the end is a way away yet. Or it seemed to be when I took this snap...
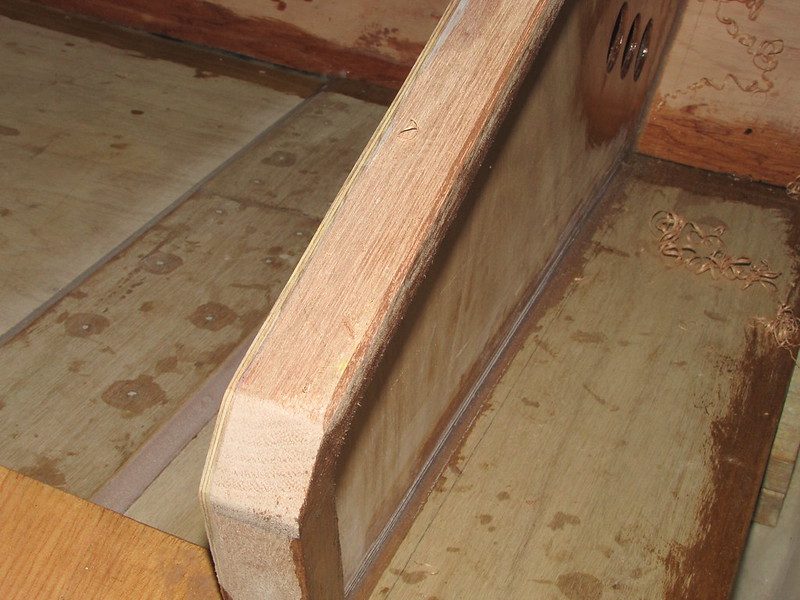
2. Working on the rear end-plate - almost complete. The sharp edges of the inside of the A-frame have been rounded over considerably, and blended in with the fillet to make more of a smooth curve - and less of a moisture trap. I just have to fix those infernal router-bit dings, now...
3. Closer-up view of the shaped A-frame edges, port side
4. Rear end-plate A-frame, starboard side
5. An attempt to photograph the top side of the lower stiffening element, rear end-plate A-frame: in order to see what's going on there!

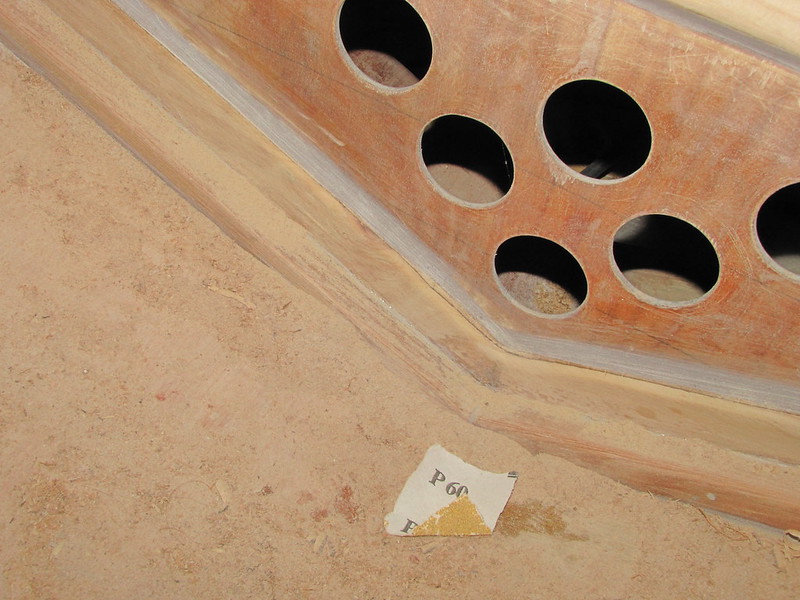
6. Internal view of port rear corner. A considerable amount of grinding was done in this corner with the Perma-Grit tools: at least it looks nice - well, nicer than it did. The epoxy/birch-ply complex felt as though it's diamond-hard, and even the Perma-Grit had trouble with it: the birch ply inserts in this block were thoroughly recalcitrant; the 60-grit paper had no hope!
7. Starboard corner, rear end-plate. Considerably less work was needed to clean this corner up. Note that the ply butt-straps on both sides have been rounded over to blend into the side panels: as much as possible, anyway...
8. Bottom surface of bottom stiffener, rear end-plate. This has had a horrible mixture of resin, wax coating and wood-stain, which was removed with a Perma-Grit file then sanded with 60-grit paper. The resin/wax/stain layers sort-of rolled off the wood...
9. Overview of front end-plate, port side. Note the (essential) dust brush
10. Overview of front end-plate, starboard side. The dust is getting deeper; it's going to get deeper still...

11. Front end-plate. Some rounding-over of the A-frame has been done along the bottom edge. I've cut up the top edge on this side with a 0.25 " chisel to speed up the material removal - something of an experiment (in the end I used the belt sander on it!)
12. The other side of the front end-plate. The top edge of bottom of the A-frame has been rounded over here too; bottom side of top of A-frame on this side untouched so far (apart from some cursory sanding done on Saturday)
Follow this link to my Flickr account
As faintly implied by caption to photo 1 of this post, it does in fact look as though the sanding of the framework is drawing to a close. Given the large piles of dust I may also have reduced the weight of the structure a tiny bit. Compared with the 9 mm ply roof panels, however, such gains (or losses;) are likely to be negligible. Quite a bit of tidying up has been done, and there are far fewer nooks and crannies for moisture to lurk in.
There's still a little bit of rasping to do around the "skid" fillets, but that won't take all that long and besides, won't be very fiddly compared with much of what I've been doing over the last three days or so. At one point today I finally had enough and got out the belt sander: and am slightly wishing that I'd remembered it earlier in the piece.
-
23rd April 2013, 08:24 PM #3175
GOLD MEMBER
- Join Date
- Jan 2009
- Location
- Blaxland, Australia
- Age
- 65
- Posts
- 2,551
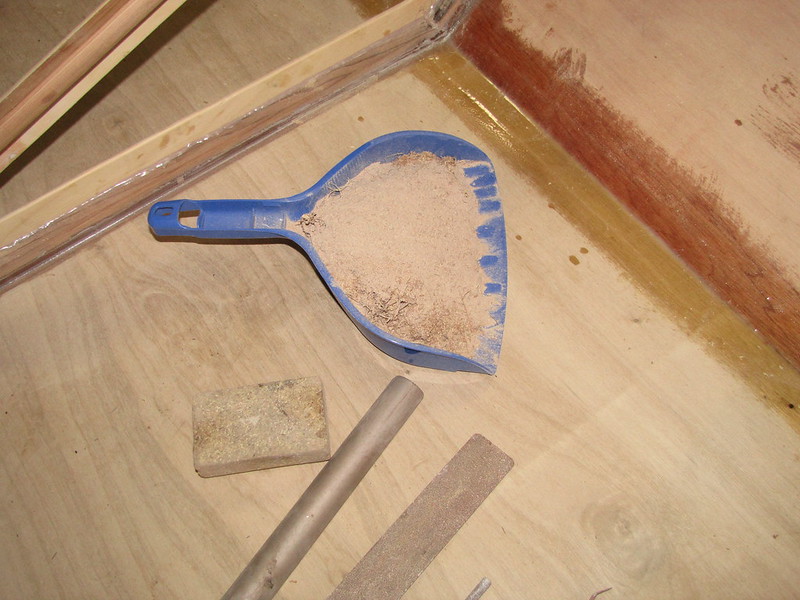
The dust threatening to get out of hand, I decided to do a clean-up, and as a result had a pile of dust which could be weighed to estimate how much I've removed so far. The result came to 172 grams, so allowing for a guess of 5 % lost into the air (the workshop has gone a grey colour), that makes it approximately 180 grams or 6.3 oz. As remarked previously, compared with the weight of the plywood roof panels, this is (laughingly) negligible; but I suppose that it is better than nothing. Had I been doing the cleanup to reduce weight I would have been sadly disappointed...
I'm not as far ahead as I thought yesterday - the state of progress seems to swing back and forth like a pendulum. The clean-up revealed how much of the glue-mess was unfortunately much more than I would have liked.
1. The belt sander. Having hurt my right thumb while sanding, I decided to give it a rest and try the belt sander. At least it was quick!

2. Belt-sanded front A-frame internal edge: a bit lump and bumpy.
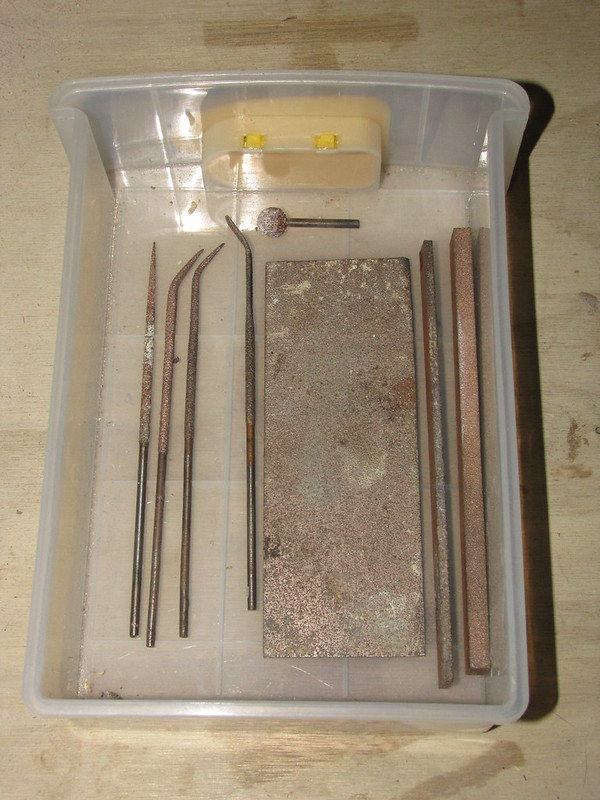
3. A Perma-Grit riffler: this one is their "half round" one, I think. There are five in the set, athough one has vanished, believed smothered in junk
4. The other side of the half-round riffler

5. A collection of useful Perma-Grit tools: the long rectangular thingson the right are spar-slotters (for model aircraft wings); the sheet is flexible tin-plate withPerma-Grit welded to one side (a freebie from RCSI magazine - and my first PG tool); the rest are various riffles, needle files and stuff
6. The other side of the front A-frame after belt-sanding
7. Close-up of where my machine guidance was way below that required for a neat edge

8. A-frame internal edge after some rasping and sanding. This is the side where I had used to chisel to loosen up the edge: the vestiges of the cuts can still be seen; epoxy will take care of them
9. Other side of the A-frame again, after sanding, etc. I've managed to even out the faulty belt-sanding a little bit
10. Deepening dust pile! Working away at the badly sanded edge has resulted in filing away most of the fillet at that point. Oh well, it's still probably more-or-less functional...
11. Rasping/sanding dust swept into piles

12. Dust collected for weighing: 172 grams according to the electronic kitchen scales
Follow this link to my Flickr account...
Tomorrow: more sanding.
-
24th April 2013, 07:23 AM #3176
Senior Member
- Join Date
- Sep 2012
- Location
- NSW, Australia
- Posts
- 474
You do seem to like doing things the hard way.
-
25th April 2013, 01:57 PM #3177
GOLD MEMBER
- Join Date
- Jan 2009
- Location
- Blaxland, Australia
- Age
- 65
- Posts
- 2,551
While I've been slaving away in the salt mine over the last week, I have been pondering - as is my won't - Where I Went Wrong(TM).
It can be summed up in one word:
HASTE!.
So desperate was I to get the roof finished that I ignored basic glue hygiene, so I have now set up some rules for myself:
* 1. ALWAYS allow enough time for cleaning up excess glue (planning & organisation, etc.);
* 2. ALWAYS clean up excess glue BEFORE it sets;
* 3. Make a COMPLETE CLEAN-UP after allowing time for glue-ooze to subside (but before glue sets, see above);
* 4. Apply any fillets separately AFTER the glue joints have been cleaned up - or set;
* 5. NEVER start glueing in the evening;
* 6. "There is no Rule 6" ^* ;);
* 7. Evaluate whether a fillet is really necessary: a good working default would be NO FILLETS AT ALL.
Another associated problem alluded to in Rule # 4 above is my attempts to avoid waste of materials, by using the glue-ooze for filleting. I've wasted a massive amount of TIME instead...
^* Apologies to Monty Python's Flying Circus for borrowing their phrase :).
Rather than trot out yet another series of snaps with minuscule incremental differences from its predecessors, I present the following for you amusement. Laugh yer heads orf, kiddies - I know I did...:
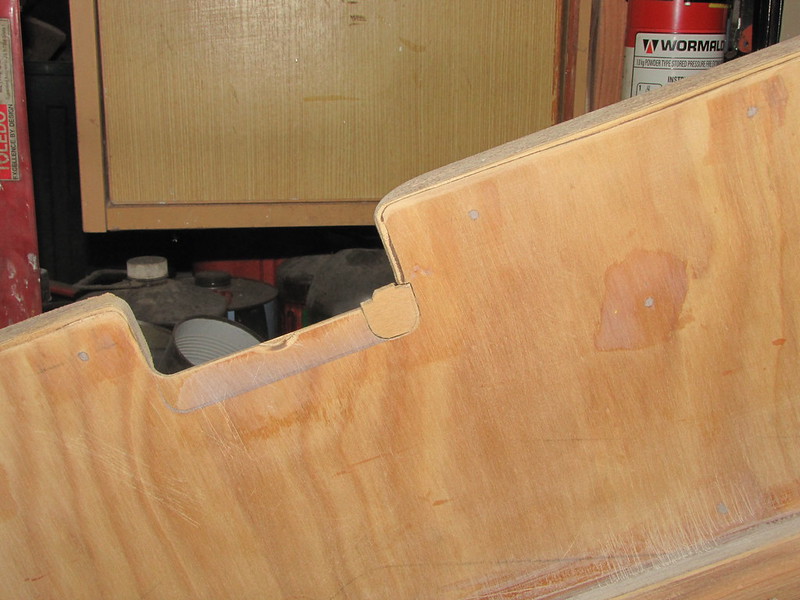
1. Small plywoood insert to patch the router-bit slip-up
2. Closer-up view of plywoood gudgeon cutout (insert) patch. The remaining ding can be dealt with with a small blob of glue
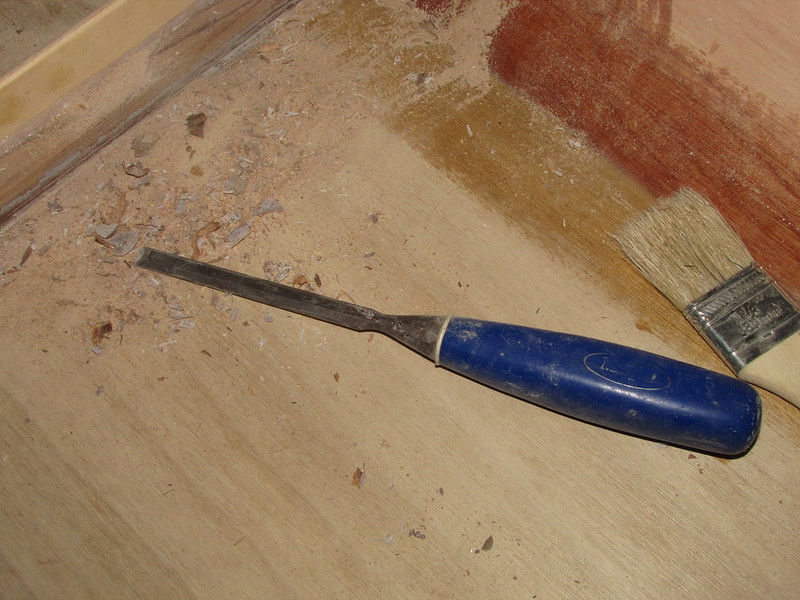
3. Newly-discovered/newly-employed rapid-removal tool for dealing with glue: a chisel - one of my "el cheapos" (Marples is now owned by Irwin and no longer made in the UK, and that includes this chisel...). Note the clear evidence of its efficacy :)

4. Chunks of rapidly-removed glue :). Much quicker - although cruder - than the Perma-Grit files; I used the latter to tidy up after the chisel had passed. The chisel is also useful for carving the glue - an added bonus :)
Follow this link to my Flickr account
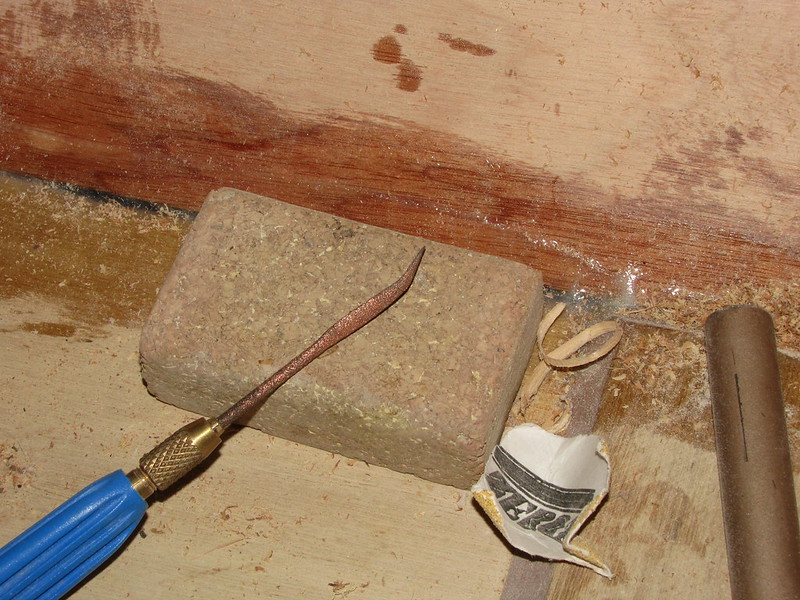
I'm now cleaning up the internal and external "skid" fillets with the largest of my cylidrical PG tools - which is ripping through the lumps like anything: zip, zip, zip... :). Once they're done, I'll finish sand the bottom surfaces of said "skids", and work out what to do next (I'm not making any plans UNTIL I've got the glue-removal finished).
While watching the annual Anzac Parade broadcast on the ABC here in Sydney this morning, I was pleased to see the concert band that I play in (that's me shamefully attempting to bask in a certain amount of reflected glory). I couldn't play today on account of not having a uniform; also, my technique isn't quite up to the mark yet (certainly not for marching!) - it's getting there rapidly though. Maybe next year ;).
-
25th April 2013, 06:13 PM #3178
Senior Member
- Join Date
- Sep 2012
- Location
- NSW, Australia
- Posts
- 474
Hey I reckon it'd look awesome if you finished it with slates. That would add a real touch of class when it was on the boat.

They wouldn't need bog or sanding either. Just nail 'em on.
-
26th April 2013, 09:29 AM #3179
Senior Member
- Join Date
- Sep 2012
- Location
- NSW, Australia
- Posts
- 474
Ok, I suppose I shouldn't tease you when we hardly know each other and you're at a demoralising stage of the project. In all seriousness though, your insistence on filleting all internal corners, regardless of whether it is structurally necessary or not, seems to be creating a lot of boring and grotty work for you. If you only used fillets where they were really necessary, things would go faster and you would enjoy the job more.
-
26th April 2013, 04:31 PM #3180
Happily receives emails.
- Join Date
- Jul 2005
- Location
- 'Delaide, Australia
- Age
- 65
- Posts
- 8,138
As a designer I had to work through the whole thing of ... what people do with my plans.
As you know I try to push them back to the basic ideas involved, point out the simplest way ... but in the end it is their boat. And it is important to be happy with that.
In the end people can only do the boat that matches their psychology. It's a mess of wants and needs, hidden desires and past experience - we are all in the same boat (haw).
A couple of stories ... no ... just one ... don't want to bore people to death.
Read this about an old boss of mine from the slipway days.
It took me a long time to digest this different way of thinking. Otherwise I would be terminally stressed by all the changes people make to my designs. But it seems if I keep at people hard enough that they really have to justify changes then the end results are pretty good.
Clients needs are met and mine too.
MIK


 Reply With Quote
Similar Threads
-
New Queensland PDRacer Build
By duncang in forum Michael Storer Wooden Boat PlansReplies: 71Last Post: 26th April 2012, 08:30 AM -
Oz PDR build in Adelaide - sexy black PDRacer
By m2c1Iw in forum Michael Storer Wooden Boat PlansReplies: 39Last Post: 27th April 2009, 06:30 PM -
OZ PDRacer - Dylan's build in the Philippines
By Boatmik in forum Michael Storer Wooden Boat PlansReplies: 16Last Post: 23rd February 2009, 05:50 PM -
Brisbane Timber and Working with Wood. Boatmik/PDRacer
By Boatmik in forum Michael Storer Wooden Boat PlansReplies: 1Last Post: 11th April 2007, 08:06 PM -
Flawed wood on the TS --DUCK!
By Robert WA in forum WOODWORK - GENERALReplies: 7Last Post: 19th February 2004, 11:42 AM
Tags for this Thread
balanced lug,
boatmik,
build,
dacron(tm),
douglas fir,
duck,
enamel,
epoxy resin,
fibreglass,
hoop pine,
interminable,
lug,
machinery,
materials,
michael,
oregon,
oz racer mk 2,
ozracer,
paint,
paulownia,
paulownia/glass mast,
pdracer,
plywood,
polytarp,
primers,
really simple sails,
sail-making,
sailmakers thread,
sanding,
storer,
sydney,
timber,
tools,
varnish,
verbose,
western red cedar,
wood,
wood duck,
wrc
