

 Thanks:
  Likes:
  Needs Pictures: 0
 Picture(s) thanks:
Results 3,271 to 3,285 of 3347
-
25th September 2013, 08:28 AM #3271
 Senior Member


- Join Date
- Sep 2012
- Location
- NSW, Australia
- Posts
- 474

How much does the roof weigh?
-
25th September 2013 08:28 AM # ADSGoogle Adsense Advertisement
- Join Date
- Always
- Location
- Advertising world
- Posts
- Many
-
25th September 2013, 10:19 AM #3272
GOLD MEMBER
- Join Date
- Jan 2009
- Location
- Blaxland, Australia
- Age
- 65
- Posts
- 2,551
Hi Sumbloak,
It weighs far too much.
On the other hand, all that needs to be done is to lift the thing off and put it down next to the trailer when departing to go sailing; and reversing the procedure when home. The handling time is therefore at a minimum.
Taking some good advice that I was given early on in the "design" stage from pindimar (Bolger and Michalak boat builder) and using Colorbond for the roof panels would have reduced the weight considerably. But when do I ever listen to advice?
Cheers,
Alex
-
26th September 2013, 01:26 PM #3273
GOLD MEMBER
- Join Date
- Jan 2009
- Location
- Blaxland, Australia
- Age
- 65
- Posts
- 2,551
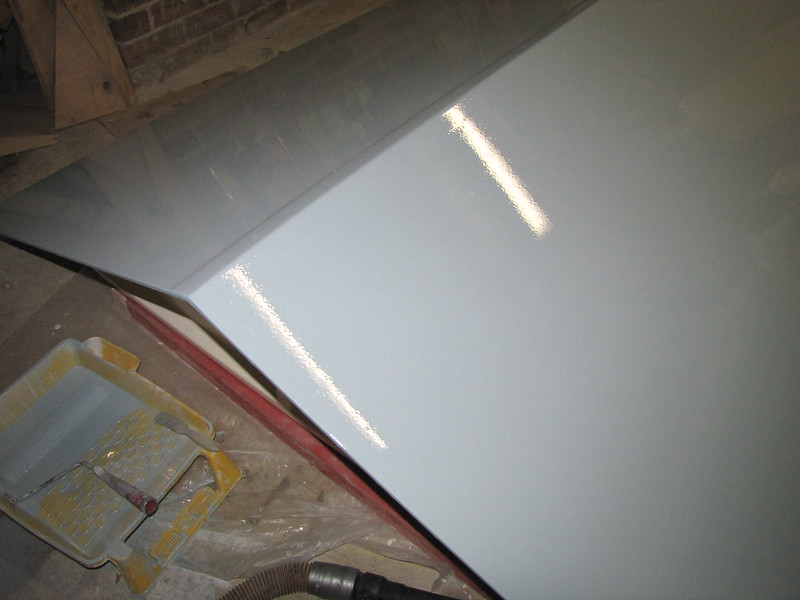
Hooray! Roof is done! Complete! Finished! Hooray!
I've just finished the second and last top-coat, so the final milestone has been reached! Well, final except for getting the thing out of the workswamp and down to where the boat is supposed to live without too much damage.
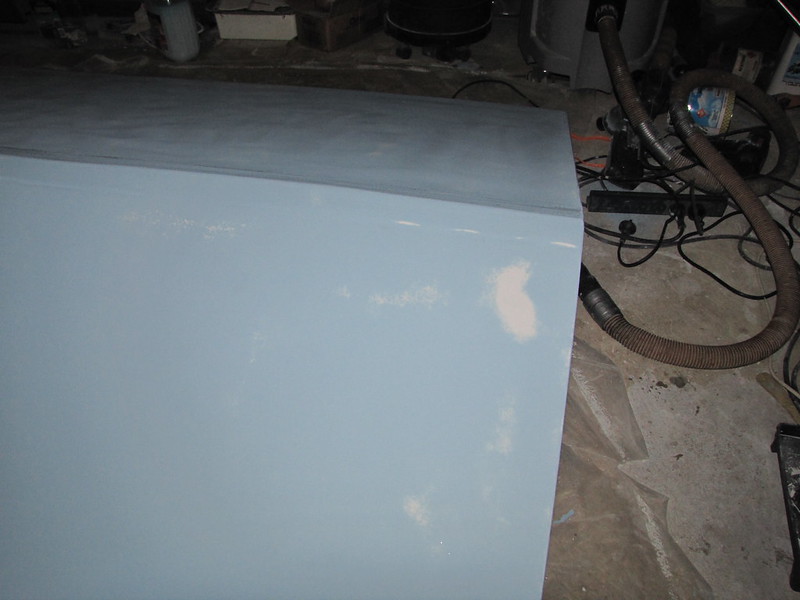
1. First top-coat, ROS-sanded: 320-grit paint disc used; the ridge cap was done by hand with 240-grit sandpaper
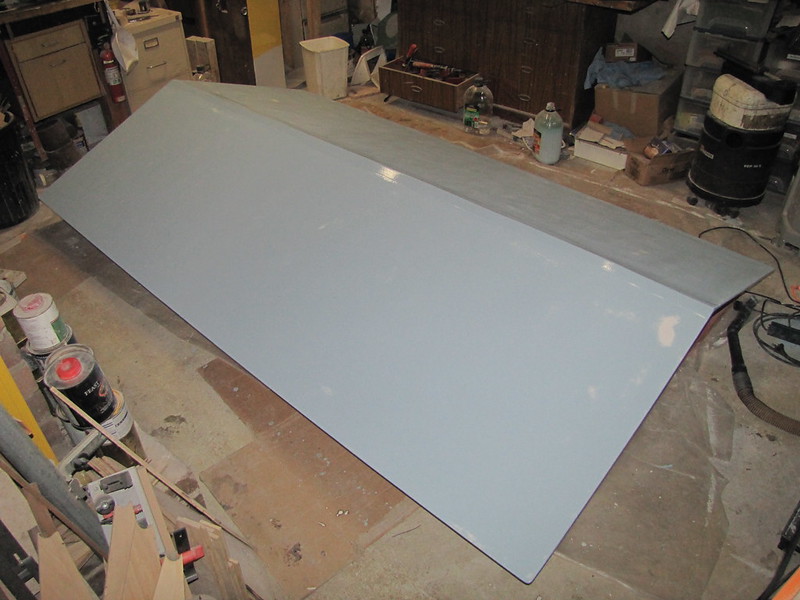
2. Rather moth-eaten after the sanding, even though I was careful and kept the pressure as light as possible
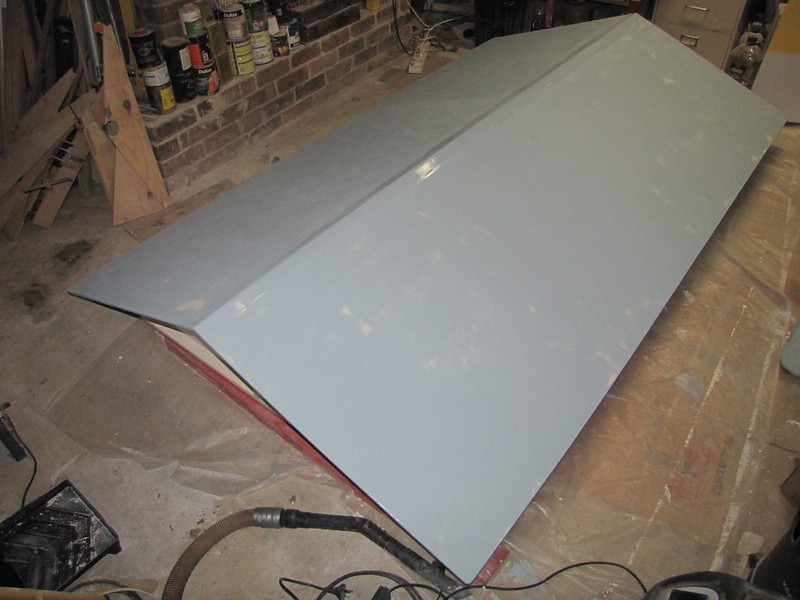
3. Close-up of a heavy-handed piece of sanding. At least it's smooth ;)
4. Last coat on! Hooray!

5. Last coat, viewed from the other side :)
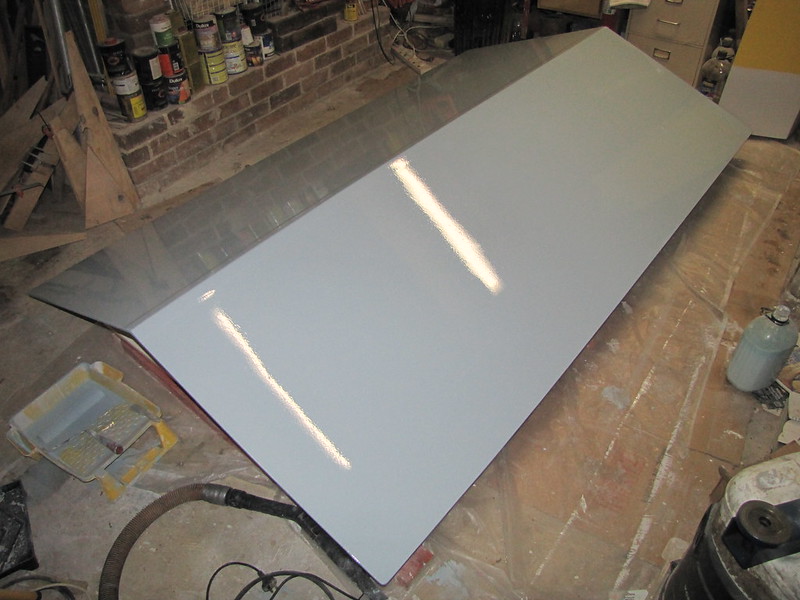
6. Close-up of last coat. I still got a cascade of hairs plus roller fluff, but it's done and that's all I'm worried about. Once the paint has hardened sufficiently the thing will get carted outside
Follow this link to my Flickr account
Whew! I'm so relieved to have this millstone finished! As soon as I'd finished running around the edge with the soft artist's brush to tidy up, I put the roller in turps to soak, took these snaps, turned the lights off and locked up. I'll just have to be careful not to fairy-heffalump across the living room floor (workswamp ceiling) too much and dislodge (more) dust onto the surface until the paint is touch-dry. Given the warm - and very windy - day with low outside RH (24 %), that may be close to the tin's advice (2 hours) than usual (for here).
No matter what it looks like once the paint has dried, that's it, bar the 'Duckcote's extraction from the workswamp. That still leaves the boat to finish off: that is really just a small amount of varnishing, and I'm not going to go overboard (as it were) over that, either. I must say that the Accursed Roof has put me off building another boat - and almost any other woodworking project (I have one for the Boss that I have to complete) for life. Even if it hadn't, the Boss has seriously threatened the D-word if I so much as even think of building another boat...
-
26th September 2013, 07:31 PM #3274
Moderate Moderater
- Join Date
- Feb 2006
- Location
- Lindfield N.S.W.
- Age
- 62
- Posts
- 5,643
Do you want a hand this weekend to get stuff out of the workswamp?
Cheers
Jeremy
If it were done when 'tis done, then 'twere well it were done quickly
-
28th September 2013, 06:40 AM #3275
Senior Member
- Join Date
- Sep 2012
- Location
- NSW, Australia
- Posts
- 474
Well, if you particualrly wanted this look and were enjoying the project then that's fine. If you just wanted a functional roof that could be built with minimum effort, the way to do it would be just a basic skillion with 200 mm of fall end to end, sheeted with Colorbond, and using dressed treated pine framing. Colorbond is perfectly waterproof if given a 1 in 12 fall. Even though more is recommended these days, a lot of the older roofs have been fine for decades with 1 in 12. Originally Posted by AlexN

Two longitudinal 4x2's with four cross pieces at roughly 800 centres. Fix it together with standard exterior batten screws (16 in total) and screw the iron on (about 80 screws). Hey presto, one roof. Painted framing optional.
-
29th September 2013, 07:22 AM #3276
Sawing hack
- Join Date
- Oct 2007
- Location
- Sydney
- Posts
- 178
Nice job Alex. It looks great. No doubt the bush turkeys will appreciate a drier location to roost under your new roof! I'm now keen to see the boat getting its final fixes completed. Summer is coming down under, right?
-
29th September 2013, 02:57 PM #3277
GOLD MEMBER
- Join Date
- Jan 2009
- Location
- Blaxland, Australia
- Age
- 65
- Posts
- 2,551
Hi jmk, Originally Posted by jmk89
Many thanks for the kind offer - I accept :). Probably next weekend as I still have to move the turkey mound and clear a path through the workswamp large enough to move the roof out...
Cheers,
Alex.
-
29th September 2013, 03:05 PM #3278
GOLD MEMBER
- Join Date
- Jan 2009
- Location
- Blaxland, Australia
- Age
- 65
- Posts
- 2,551
Hi Sumbloak, Originally Posted by Sumbloak
The thing doesn't just need to shed water: it also has to - as I have commented on before - deflect falling branches of varying thickness/weight. And in any case a bit lat now ;). Thanks for the (belated ;) input, though.
Cheers,
Alex.
-
29th September 2013, 03:12 PM #3279
GOLD MEMBER
- Join Date
- Jan 2009
- Location
- Blaxland, Australia
- Age
- 65
- Posts
- 2,551
Hi Theodor, Originally Posted by Theodor
Thank you for your kind words :). The turkosaurs had jolly well better not roost in it, or Truly Terrible Things(TM) will happen to them ;). They are currently sauntering around on the top of the roof of the house in the early morning, upsetting the Dreadful Dog quite some considerable and thus waking us all up. Dreadful Dog. Terrible Turkeys.
I am also quite keen to see the boat repairs complete - and the thing (literally) out from under foot. Some sailing might be nice too.
As far as summer goes, it appears to be here already this year...
Cheers,
Alex.
-
29th September 2013, 06:35 PM #3280
Senior Member
- Join Date
- Sep 2012
- Location
- NSW, Australia
- Posts
- 474
I've seen and heard some pretty big branches bounce off Colorbond roofs. It's amazingly resilient.

-
9th October 2013, 04:29 PM #3281
GOLD MEMBER
- Join Date
- Jan 2009
- Location
- Blaxland, Australia
- Age
- 65
- Posts
- 2,551
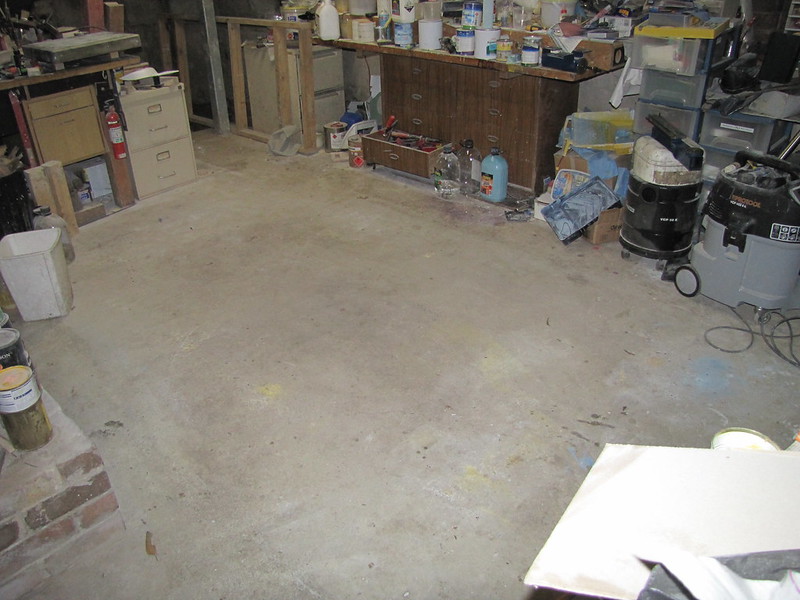
OK. Here's some snaps of the workswamp:
1. Going, going... It's still there, but note that I've cleared some room to get the thing out!

2. Gone!

3. Even goner ;). Boat has departed...
4. Even more goner! The floor has been cleared a bit :)
Follow this link to my Flickr account
Now I can get on with sorting everything else out :) ...
-
9th October 2013, 04:59 PM #3282
GOLD MEMBER
- Join Date
- Jan 2009
- Location
- Blaxland, Australia
- Age
- 65
- Posts
- 2,551
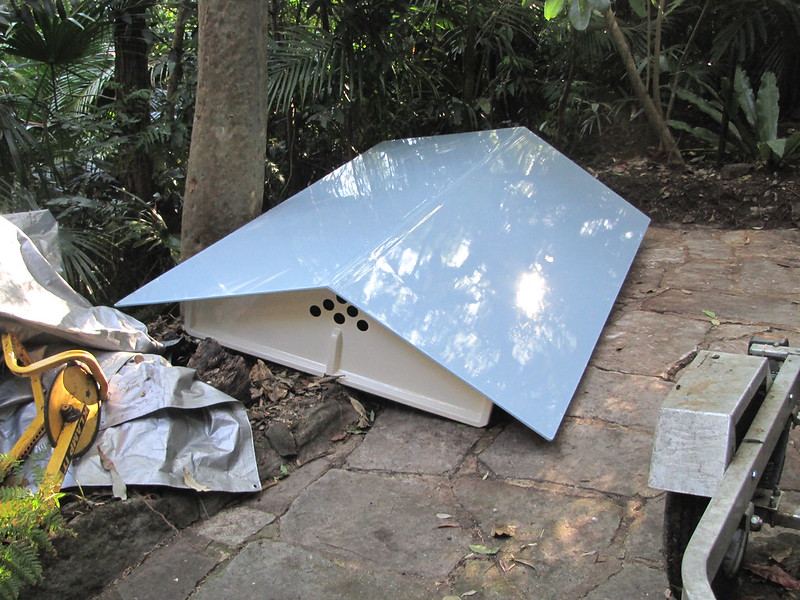
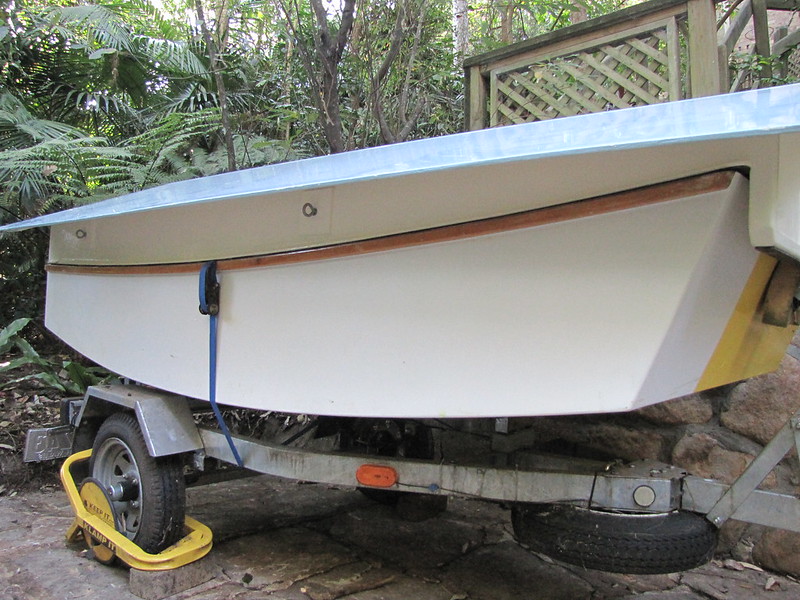
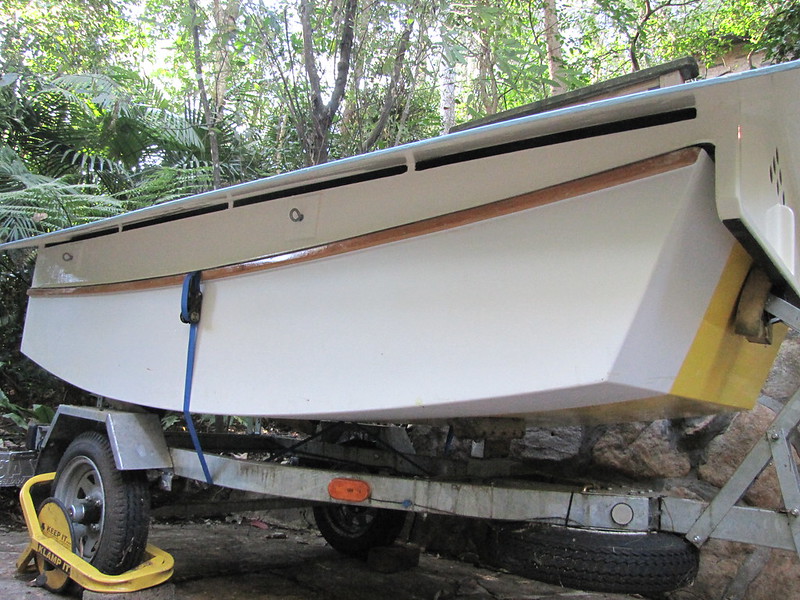
Here it is: the roof outside and installed:
1. Roof outside! Hooray! The rubber strips on its feet help prevent it getting scratched up when at rest

2. Showing off the glossy surface. The end-plates are doing exactly what was intended: supporting the thing while on the ground
3. Wood Duck back in place on her carriage: it's getting on for two years after her last perch thereon...
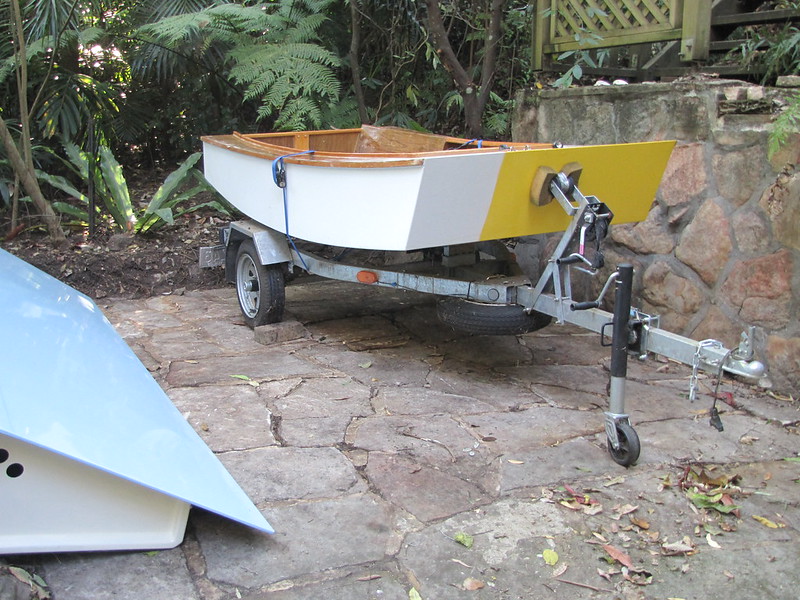
4. Front end of the 'Duckcote. Plenty of room/nice snug fit :). I took the designer's advice and left the primer on the hull unpainted...
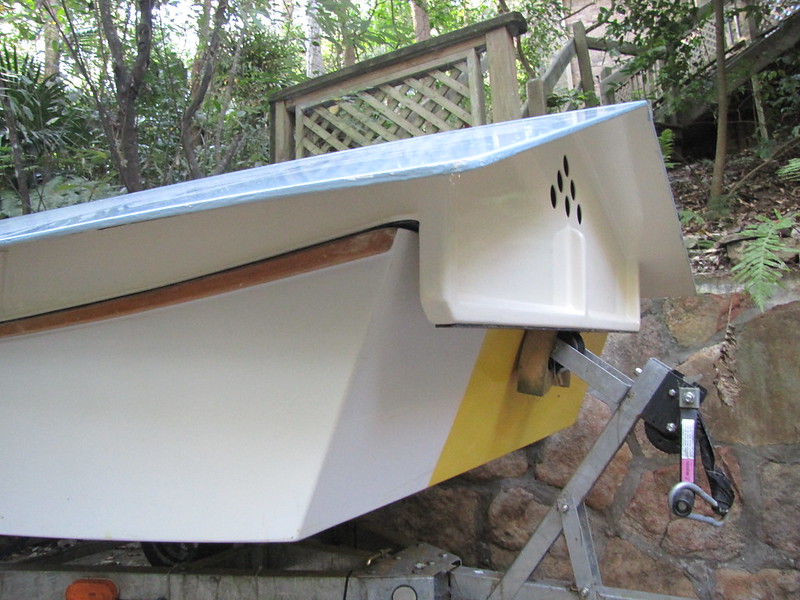
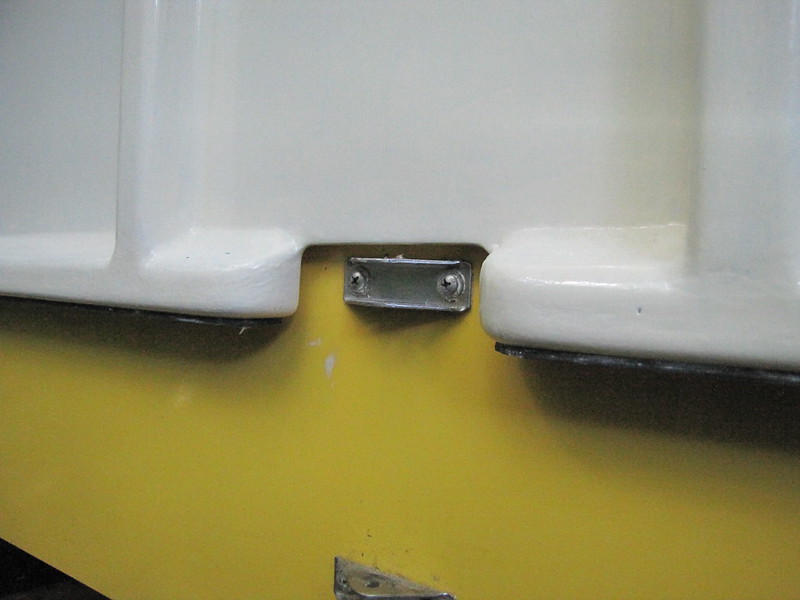
5. View of side-frame on the deck: working exactly as intended :)
6. Roof ventilation slits in evidence, as is a ratchet tie-down (through the centrecase on both sides of the boat - just in case). interestingly, despite the weight, the whole thing is surprisingly stable - and the boat isn't likely to fill up with water again...
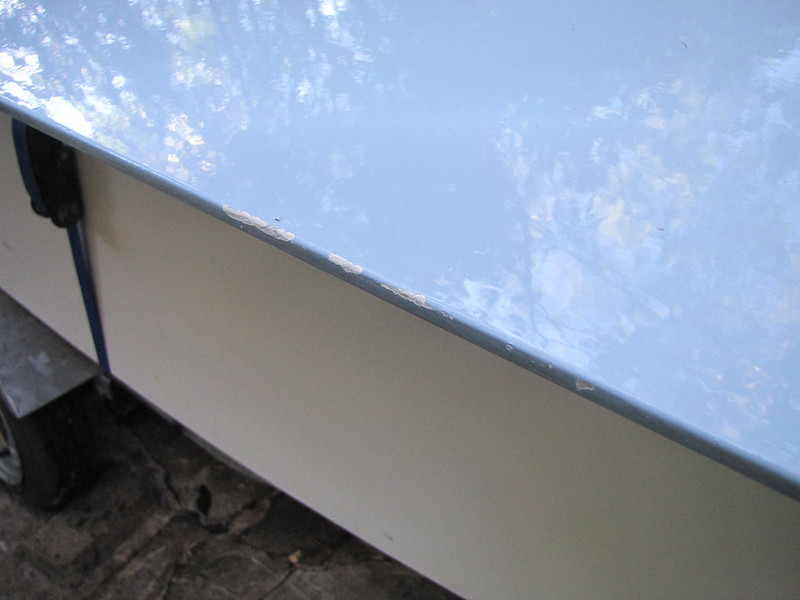
7. Not-quite-hangar rash: the results of getting bumped while proceeding down the stone steps outside the workswamp. Crunch, crunch, crunch, crunch...
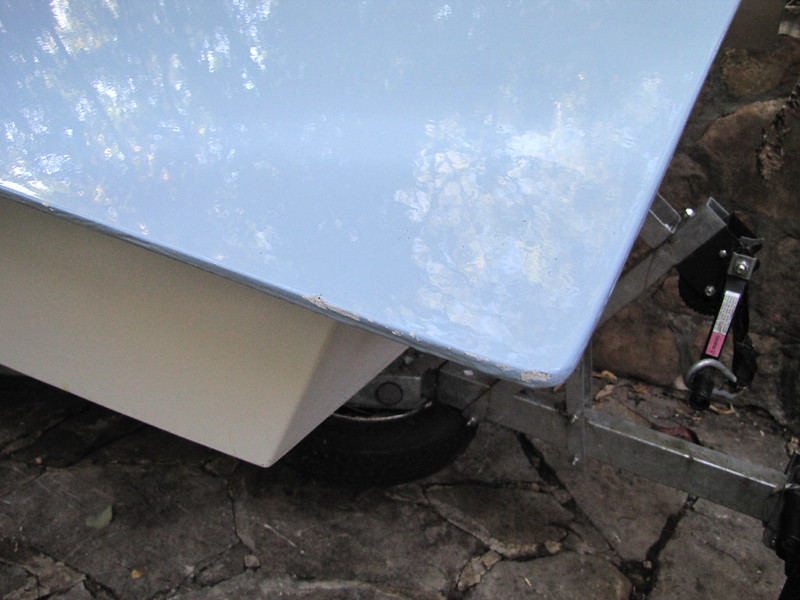
8. Close-up of another bit of chipping. Ouch. Nothing that a small paintbrush and some paint won't partially disguise, though ;)
9. Rear end of the roof/stern of boat

10. 6 mm or so clearance above the upper rudder gudgeon. Whew!
11. View of 'Duckcote from directly in front. Maybe some pardalotes or wrens will move in ;). I think I saw a bird eyeing it off as a prospective dwelling this morning....

Follow this link to my Flickr account
Well, that's it for the roof, thank goodness. I'll polish off the final bit of vanishing on the boat (foredeck) at my leisure. The priority now is to get the workswamp cleaned up, sorted out and operational, and the mill working. As for the boat-building, I've used up all the resin, so even if I hadn't decided to quite while I'm not ahead, I wouldn't be able to do anything of that nature in any case.
I may post some snaps of the boat's re-launch in due course.
-
9th October 2013, 05:48 PM #3283
Senior Member
- Join Date
- Sep 2012
- Location
- NSW, Australia
- Posts
- 474
The birds will love that. And the wasps. And the spiders. Maybe a bit of mesh on the inside of the holes would be worthwhile.
Looks good though.
-
9th October 2013, 07:14 PM #3284
i-Sails Australia
- Join Date
- Apr 2009
- Location
- Hunter Valley NSW
- Age
- 69
- Posts
- 1,759
It looks great Alex. I'm gobsmacked really. Just in time too, with 100km/h winds forecast for tomorrow

-
10th October 2013, 03:45 PM #3285
Sawing hack
- Join Date
- Oct 2007
- Location
- Sydney
- Posts
- 178
Nice job Alex. Do you have a pic of how the roof is lashed down?

 Reply With Quote


Similar Threads
-
New Queensland PDRacer Build
By duncang in forum Michael Storer Wooden Boat PlansReplies: 71Last Post: 26th April 2012, 08:30 AM -
Oz PDR build in Adelaide - sexy black PDRacer
By m2c1Iw in forum Michael Storer Wooden Boat PlansReplies: 39Last Post: 27th April 2009, 06:30 PM -
OZ PDRacer - Dylan's build in the Philippines
By Boatmik in forum Michael Storer Wooden Boat PlansReplies: 16Last Post: 23rd February 2009, 05:50 PM -
Brisbane Timber and Working with Wood. Boatmik/PDRacer
By Boatmik in forum Michael Storer Wooden Boat PlansReplies: 1Last Post: 11th April 2007, 08:06 PM -
Flawed wood on the TS --DUCK!
By Robert WA in forum WOODWORK - GENERALReplies: 7Last Post: 19th February 2004, 11:42 AM
Tags for this Thread
balanced lug,
boatmik,
build,
dacron(tm),
douglas fir,
duck,
enamel,
epoxy resin,
fibreglass,
hoop pine,
interminable,
lug,
machinery,
materials,
michael,
oregon,
oz racer mk 2,
ozracer,
paint,
paulownia,
paulownia/glass mast,
pdracer,
plywood,
polytarp,
primers,
really simple sails,
sail-making,
sailmakers thread,
sanding,
storer,
sydney,
timber,
tools,
varnish,
verbose,
western red cedar,
wood,
wood duck,
wrc
