

 Thanks:
  Likes:
  Needs Pictures: 0
 Picture(s) thanks:
Results 796 to 810 of 3347
-
18th September 2009, 12:56 PM #796
 GOLD MEMBER


- Join Date
- Jan 2009
- Location
- Blaxland, Australia
- Age
- 65
- Posts
- 2,551

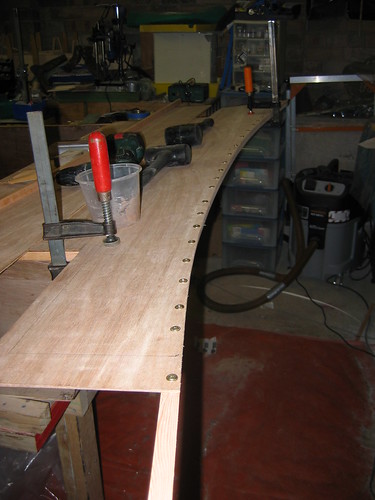
Thing have been a bit slow going so far today - I've profiled the starboard deck supports, except for the stern, which needs more work, and have cleaned off glue and rounded over cleats in the port side tank area while I ponder the next steps (glueing).
Photos from yesterday's session:
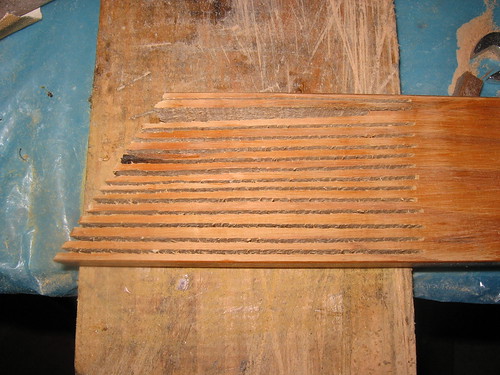
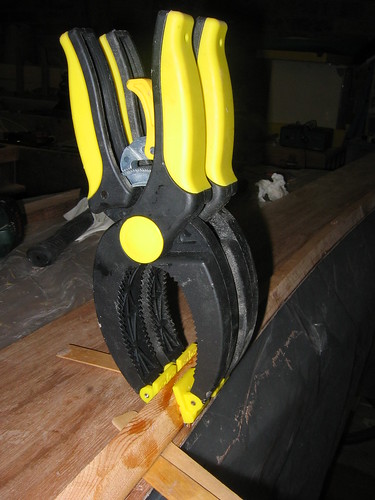
1. Newly-made rough-and-ready featherboard: made in a hurry using a hand saw. If I get around to making another one, it will look a lot nicer - but not necessarily perform any better...
2. Featherboard "in action", just prior to cutting the first stick. Board is F-clamped to the tabletop. Blade is up a bit high: I lowered it for the second stick when I noticed it waving around in the breeze ;). Note that the workpiece is "upside down" with respect to the way up that it will be used
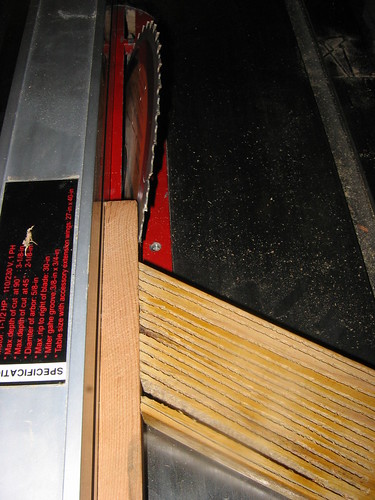
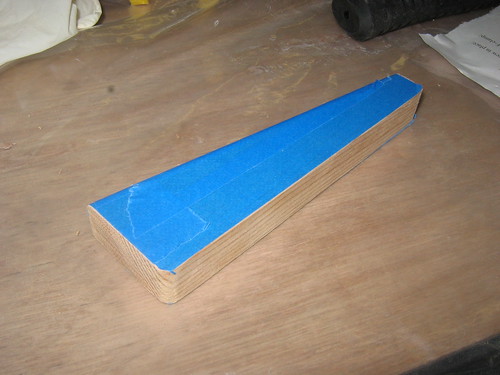
3. Results of the mitring process: several metres of 19 x 19 oregon trimmed on one side at 18-odd degrees
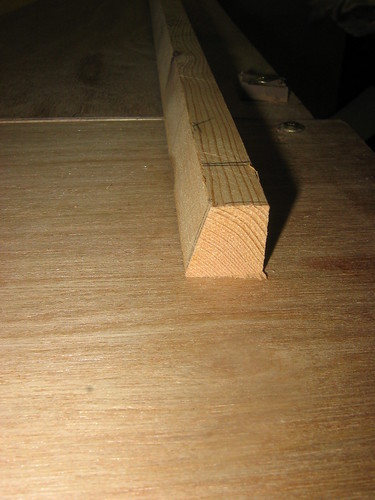
4. Angles match. They should do - I used a bevel gauge to get the angle off the F2 outer panel, and transferred it to the saw blade

5. Port carlin slightly trimmed for length, screwed onto the side deck, and mocked up with the port tank panel. Two screws are holding the deck in place - on at front, one at rear. Edge of front screw just visible on right edge of photo
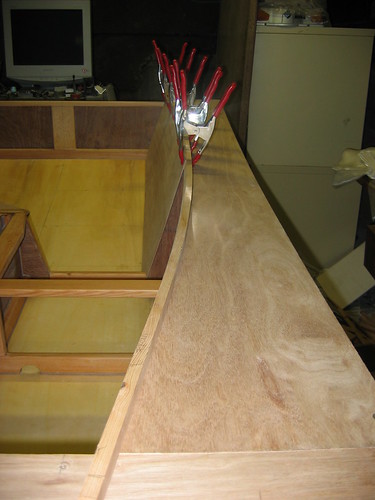
6. Another view of the tank/deck mock-up. The instruction manual makes another appearance - I've needed to read more than half a page for the first time in a few weeks - previous work has been oscillating around the centrecase installation. Note also that the side tank panel bottom edge almost automatically falls into position along the line marked along the hull bottom - it hardly needs any persuasion at all :)
7. Overnight delivery from Duck Flat. Ted sent this set-up the other day, along with bolts and nuts in exchange for money ;). Note the (rather unclear) pin clip at the bottom of the photo. All nice marine-grade stainles steeel :). Excellent! Thanks, Ted & Co!
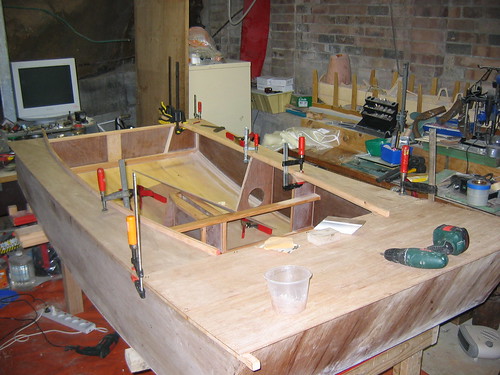
8. Previous work, photo out of sequence a bit. Side deck supports glued on and clamped, side tank panel has been shaped to close to its finished curve. This photo is something of a filler, but I didn't have room for it in an earlier post (it wasn't that important ;). I've since vacuumed the interior of the boat forward of F2...
Right, back to whatever it was that I was doing - admonishing the dog for excessive yapping? Tidying the house? Both, I think. Maybe some boat work later if time
-
18th September 2009 12:56 PM # ADSGoogle Adsense Advertisement
- Join Date
- Always
- Location
- Advertising world
- Age
- 2010
- Posts
- Many
-
18th September 2009, 12:57 PM #797
GOLD MEMBER
- Join Date
- Jan 2009
- Location
- Blaxland, Australia
- Age
- 65
- Posts
- 2,551
No! Wrong! Wrong area entirely ;). Originally Posted by topbarhive

A.
-
18th September 2009, 11:21 PM #798
GOLD MEMBER
- Join Date
- Jan 2009
- Location
- Blaxland, Australia
- Age
- 65
- Posts
- 2,551
Spent some time today sanding the outboard faces of the carlins while they are still free items - once they're glued on that would have been a lot harder to do without scratching up the deck surfaces. Also screwed the carlin onto the starboard deck, and played about with the camera taking photos of the decks on the boat - it's really staring to look like a Puddleduck now, with two side decks on (even if they aren't glue on - the bent carlins have twisted the deck panels into a concave sort of shape due to the direction of the carlin grain).
I'm planning to glue the carlins onto their respective decks tomorrow - fun with glue and screws and bending wood - all at the same time: not one of my favourite jobs, I must say.
-
19th September 2009, 03:44 AM #799
 Deceased
- Join Date
- Nov 2008
- Location
- Maylands, Perth, Western Australia
- Age
- 58
- Posts
- 218

Hi AlexN,
Gluing the carlins on can be quite simple, and relatively free of mess.
The method I used was to clamp the carlins in place, then temporarily fit the screws ( before tracing the carlins outline onto the side decks, and removing them ).
Then simply apply the glue to the side decks within the traced lines, and start screwing the carlins on from the centre outwards ( bending them into line as you go ).
-
19th September 2009, 03:57 AM #800
Deceased
- Join Date
- Nov 2008
- Location
- Maylands, Perth, Western Australia
- Age
- 58
- Posts
- 218
Mystery objects
Hi AlexN,
I think your mystery objects are most likely, either a vertical support for a tow eye in the centre of the bow ( front ), or for a skeg underneath the rear section of the hull, just in front of the rudder position.
-
19th September 2009, 09:06 AM #801
Senior Member
- Join Date
- Dec 2008
- Location
- McAllen, Texas, USA
- Age
- 64
- Posts
- 154
Centercase filler
Either for supporting a rowing seat or to keep splashing out when you are up on plane rowing

-
19th September 2009, 02:47 PM #802
GOLD MEMBER
- Join Date
- Jan 2009
- Location
- Blaxland, Australia
- Age
- 65
- Posts
- 2,551
Support is right, vertical is right, bow and stern (skeg) are wrong. Keep guessing - I'll post some more photos later, taken while I was glueing the carlins on ;). Originally Posted by dhgomm
-
19th September 2009, 02:49 PM #803
GOLD MEMBER
- Join Date
- Jan 2009
- Location
- Blaxland, Australia
- Age
- 65
- Posts
- 2,551
Support is correct, splash guard is wrong, see my reply directly above ;). Originally Posted by dkirtley
-
19th September 2009, 03:24 PM #804
GOLD MEMBER
- Join Date
- Jan 2009
- Location
- Blaxland, Australia
- Age
- 65
- Posts
- 2,551
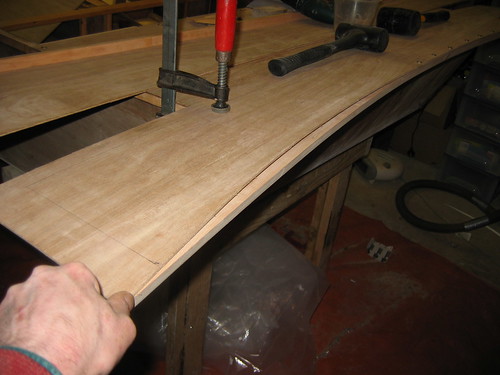
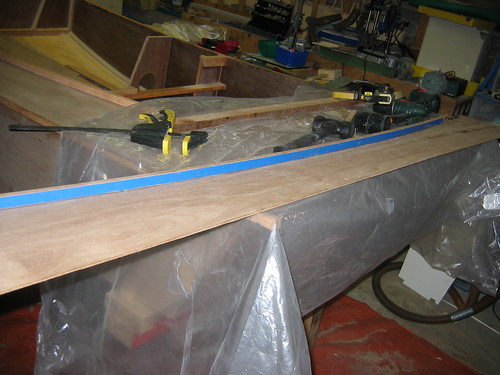
Got the two carlins glued onto the side decks this morning :). Well, sort of smile... The second carlin as a breeze, but the first one snapped just at the end: the dry-installed screws had split the wood, and I should really have started from that end :(.
Speaking of dry-installed and replying to dhgomm, yours is a good idea: in my case, I skipped the pencil line and bent the carlins by hand - with the carlins under the deck (i.e., the decks were upside down ;) - out to the deck edge and whacked in a screw at judiciously selected (well, I can pretend, can't I?) intervals, working a screw at a time until finished. It was then a simple matter of masking up, removing the screws, applying glue, and repeating the screwing process while trying to keep the carlin from wiping its glue off on the deck - not hard, just something I had to keep my eye on ;). Then a quick clean up, and job done.
Now for why I really wasn't looking forward to the job - at least with the first carlin. Confession time: before adding the carlins, I checked the alignment of the port side deck from three points: front edge firmly against the foredeck; inner edge on F2, and stern inner edge against the line projected straight from the diagonal stern cleat on that side. It appeared that the deck at the rear was 6 mm too far inboard, so what did muggins do? Why, he faird off the curve to match the projected point. This was all fine and dandy, until the idiot concerned checked the same thing with the carlin added, and the deck clamped into position. Well, of course, the deck was now 6 mm too far outboard from where it was supposed to be. Grumbling loudly - at least that's what I tell the public ;) - I repeated the checking on the starboard side with a fully-carlined-and-clamped deck, and the deck at the stern was about 3 mm inboard of the line. More cursing and swearing.
What to do? After some hours of letting the problem simmer on the back of the stove, as it were, I decided that the easiest way around this would be to unhitch the carlin from the deck at about half the distance between F2 and stern, and re-screw into the carlin along the original and now missing line. To approximate the original, I unscrewed the carlin per above, re-clamped the deck, hauled the carlin out to a straight-dege resting on the cleat and projecting over the carlin, and drew a line on the deck for reference. Clamped the carlin onto the deck using eight or nine clamps done up nice and tight, removed the deck, flipped it over and popped screws in to hold everything nicely. The screws ended up being quite close to the edge of the plywood, but that wasn't the problem, as it turned out: some of the screws split the grain in the carlin be being in unfortunate spots. Hoping to fix this later with neat resin, I left things for a day or so while I did other things, and got onto the glueing this morning. The carlin broke off, of course, on one of the splits, when the force on it due to the curvature at that point got too great. If I'd started at that end, I would have had much more of a lever and therefore would have been able to exert much finer control over the situation as a result of the "gear reduction".
So, quite a few things to learn for the future, the foremost of which is FOLLOW THE INSTRUCTIONS! If I'd put the carlins on first and test fitted the decks subsequently, I would have most likely have had less of a problem. As it is, I'm pretty sure that the decks followed the line as specified by Michael's offsets, and the same goes for the layout of the stern transom. Anyway, I've epoxied the two bits together, and will attempt another bend later. The worst that will happen is that there will be a large blob of glue between the carlin timber and the side tank panel, and I will have some sanding to do to fair the outboard face of the carlin, and serve me right! There may be some sanding to be done on the inside of the carlins as well, if in fact the alignment is crook - but I will do another check of the hull squareness before making any deductions and decisions about it. As a number of people on here have said, "hide it with glue" ;).
Anyway, one and ten elevenths carlins glued and complete, and some (more) fiddling to do.
I will get a cup of tea and decide which photos to post...
-
19th September 2009, 07:21 PM #805
GOLD MEMBER
- Join Date
- Jan 2009
- Location
- Blaxland, Australia
- Age
- 65
- Posts
- 2,551
The sunlight's gone yellow and dim, and there are quite large pieces of ash falling out of the sky. National Parks & Wildlife Service must be back-burning - burning the entire local (and large) National Park, by the looks! Not nice air for asthmatics such as myself, cough cough, wheeze wheeze. But lots better than being roasted alive in summer...
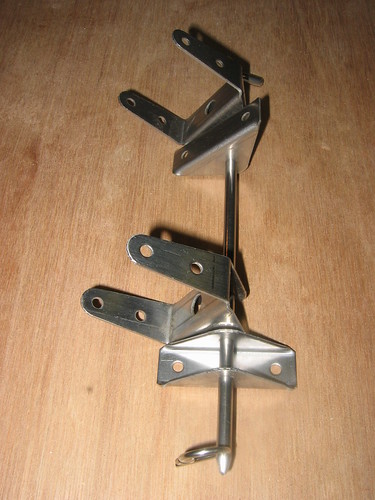
OK, some photos from yesterday. These are deck-/carlin-related. Since today's photos reveal the function and location of the Mystery Objects 1 & 2, I won't post those just yet ;).
So, today's photos:
1. Port side deck supports sanded to shape with the Permagrit block. That's one tough cookie, that block!

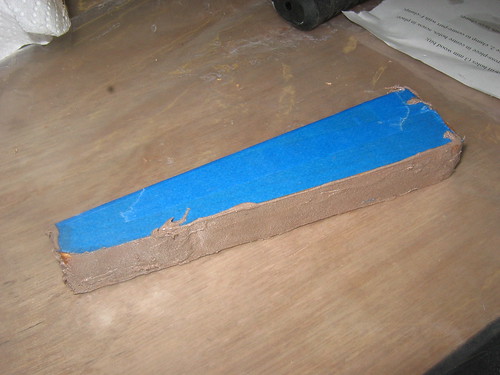
2. Glued supports with their protective tape still in place. Well, protective of the deck-mounting surface - which will be chewed off by the Permagrit block anyway. Waste of tape, Alex!

3. Shaping the starboard front side deck support. Pencil lines are there to tell me when to stop!
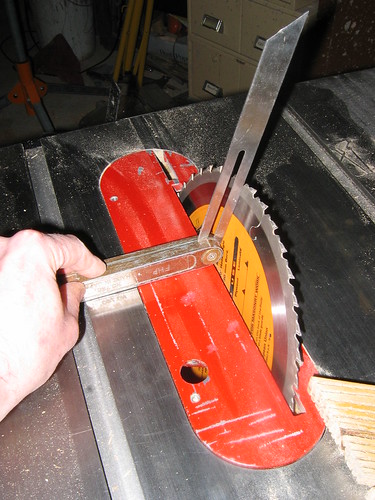
4. How to make sure your carlin bevels are at the same angle as your tank faces: use a bevel gauge - but make sure that the slide is fully extended, otherwise its end will jack up the base part, and your angle will be wrong...
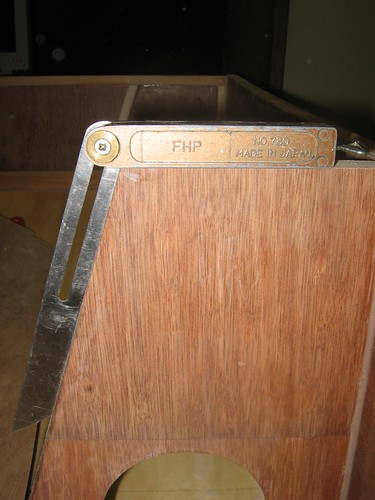
5. Setting the saw blade with the bevel gauge. The base part of the gauge is parallel with the table, not the table insert! Nice thin-kerf CMT blade used - expensive, but nice smooth clean cuts :)))). Note that pains are made to ensure that the bevel gauge is placed between teeth, not on them...

6. Me pushing down on the back of the bevel gauge to ensure that the angle is referent from the table, not the wobbly insert. Recently made - I mean hacked - featherboard poking its hairy snout into the frame on the right
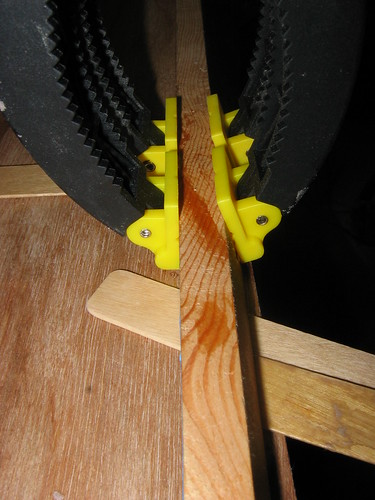
7. Speaking of the featherboard, here it is clamped to table. I would prefer two clamps, and will modify the next version with a central slot to take the clamping mechanism salvaged from the shop-bought featherboard that I destroyed the other day

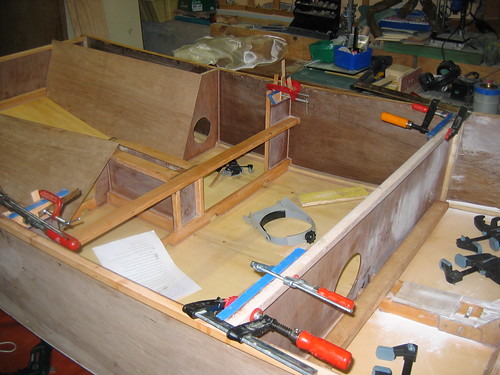
8. Pull back on the stick too much and you stall... Oops, I meant, pull back too hard on the stick and it snaps! Well, both, as it happens. But not at this stage: this is the second carlin/deck assembly being dry-screwed. Pull back on the stick so that the edges match, and drive in a screw. A bit fiddly, as the screw spacing isn't even, depending on wood resistance and line curvature. But fun, as it turned out. More fun than the previous carlin snapping just before the end, anyway...
9. My method of fixing the carlins, dry mode. Also same way I fastened/glued the sheer clamps and chinelogs onto the hull side panels - many months ago now!
10. Dry-fitting finished: just need to undo the screws, put some glue on the bottom of the carlin (uppermost face in this instance ;) and screw the lot back together again
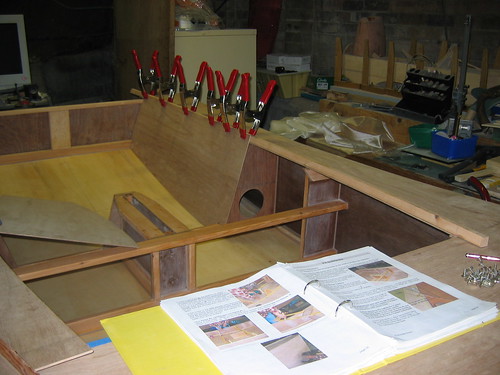
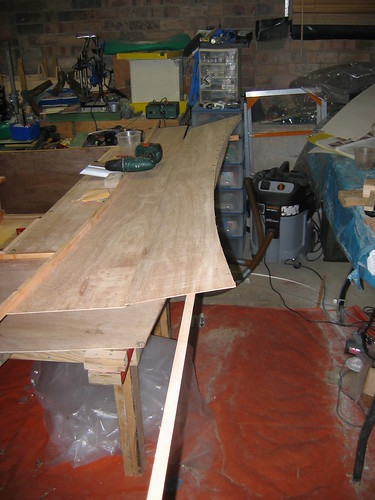
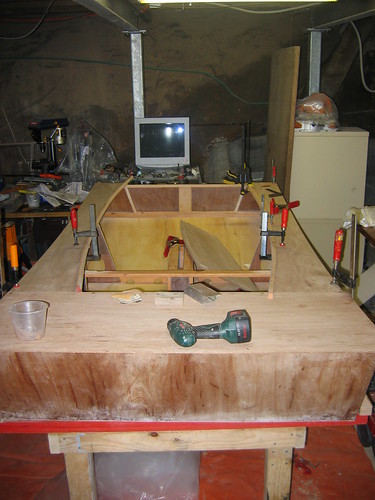
11. Two side decks dry-screwed: looks more like a Puddleduck now, doesn't it!
12. Wood Duck seen from the bow, resplendent with her newly-dry-fitted decks - clamped flat! :)
Since people are so close to getting the large Mystery Object right, I'll defer announcing what it is until tomorrow, to give you guys another go <snigger> ;). Finished off the day "reducing weight" (every little bit adds up - or subtracts) with a piece of sandpaper, scrubbing away at the cleating in the starboard side tank. That one's sort now, too :).
-
19th September 2009, 08:09 PM #806
GOLD MEMBER
- Join Date
- Jan 2009
- Location
- Blaxland, Australia
- Age
- 65
- Posts
- 2,551
OK, here are a few photos from today's work blocks.
1. Bang through the middle! This was a complete accident, and if even if I'd been watching closely where I was putting the screw, I wouldn't have known that it was gong where it did! It does serve to show the strength of 2:1 BoteCote plus high-strength glue powder, however. The photo was taken as I was putting the glue on (well, I stopped putting the glue on while I took the photo, of course ;)
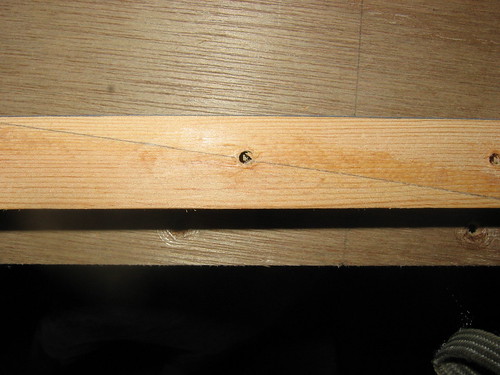
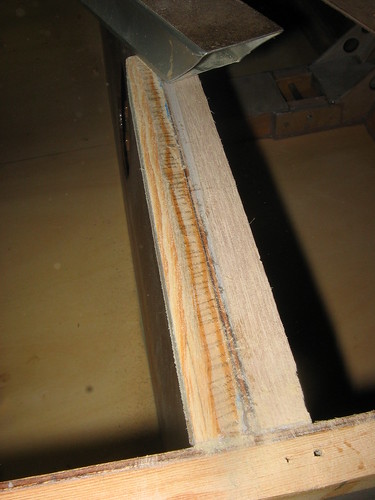
2. Carlin # 1 (port) almost glued on: the break towards the end of the stick can be seen on the RHS of the photo, near the edge. What a nuisance - still, my own fault...
3. Clamping the broken piece back on the rest of the carlin. These clamps are glue-proof, as demonstrated in one of my posts - er, some months back! Don't ask me where! "Glue" is neat 2:1 BoteCote, by the way
4. Close-up of the repaired break: two clamps the cover the entire length of the break, and some tongue depressors to jack up the short bit and prevent it drooping and setting like a banana
Right! The next two photos might act as helpful hints for ye Mystery Objects quiz :). Or Object # 1, at least...
5. So, what is Mystery Object # 1, now? Note that where it sitting is not where it will end up (another free hint! ;)
6. And now? Come on, boys and girls, this one should really give it away ;)
I look forward to reading the latest guesses :). Hopefully, at least one will get it right!
-
19th September 2009, 11:04 PM #807
Deceased
- Join Date
- Nov 2008
- Location
- Maylands, Perth, Western Australia
- Age
- 58
- Posts
- 218
mystery object challenge
Hi AlexN,
My last suggestion about the mystery objects, would be a vertical support just behind the middle of each rear buoyancy tank side panel, with the thin piece as a deck support ( horizontally on top of the thicker main object ), to strengthen the side decks for sitting on.
-
20th September 2009, 12:20 AM #808
Grumpy old Bugga
- Join Date
- May 2003
- Location
- South Oz, the big smokey bit in the middle
- Age
- 67
- Posts
- 4,377
You should have been using thickened epoxy mate, it's the powder that gives it the strength. In this case, it'll do the job so don't go worrying, but technically, you'd have been better with thickened poxy Originally Posted by AlexN

Richard
-
20th September 2009, 11:08 AM #809
GOLD MEMBER
- Join Date
- Jan 2009
- Location
- Blaxland, Australia
- Age
- 65
- Posts
- 2,551
Yeah I know I should have used powder - but seeing that the joint was rough and splintered, I figured that the powder would make the pieces harder to mate, or reduce the amount of epoxy in the joint. Originally Posted by Daddles
Proff of pudding will be when I go to bend it - but I suspect that the thing is going to crack at another sport where the timber split - there were at least three of them :(. We'll see - you probably hear the shrieks in Adelaide ;).
Btw, I'm not sure how the powder works chemically or physically - I had come to a conclusion that it acts as a bulking agent to reduce the amount of 'pox needed, but that would seem to be dead wrong in the light of your comment above...
Alex.
-
20th September 2009, 11:15 AM #810
GOLD MEMBER
- Join Date
- Jan 2009
- Location
- Blaxland, Australia
- Age
- 65
- Posts
- 2,551
Hi David, Originally Posted by dhgomm
Forget about the thin piece - it has no structural capacity whatsoever - it is purely parasitic (Mik is probably going to have a fit when he knows what I've done ;).
The idea about the larger piece is right as far as function goes, but its location is wrong! Regarding the scale and therefore size of the object - it's 19 mm thick - that should give the approximate height and therefore the location should be a snap. Function, height and shape: that's got give it away!
I'll post the photos that give the answers, along with the justification (for the Designer and others ;) this evening Oz time...
Now to take the screws out of the decks and see if the carlins go "sproing"...
Well, nothing appeared to go sproing. Amazing stufff, that high-strength powder :). The impromptu pure-epoxy "scarf" joint has st well and will take the load that will be requited of it - not, so the other cracked joints, I think. I'll set up the starboard deck/tank while I think of what to do next.
There are several options, two of which are: buy another sheet of plywood and cut a new deck, strip off the carlin, clean up and redo; or use a setup of stops and reversed ratchet clamps, and gently squeeze the carlin into position once the deck has been temporarily nailed down to the boat. A third is to insinuate glue into the cracks and clamp, and a fourth to snap the wood right off at the cracks, glue and clamp. I'm currently tending towards the clamping system, but will go for the snap and glue strategy if that fails (although I won't have to do as much snapping if it does ;). The new deck and glue insinuation options are equal last. I'm hopeful of the gentle squeeze technique doing the trick. I've been reading and re-reading the manual on the subject of the deck/tank installation, to make sure that no mistakes occur with the "good" starboard side.


 Reply With Quote
Similar Threads
-
New Queensland PDRacer Build
By duncang in forum Michael Storer Wooden Boat PlansReplies: 71Last Post: 26th April 2012, 08:30 AM -
Oz PDR build in Adelaide - sexy black PDRacer
By m2c1Iw in forum Michael Storer Wooden Boat PlansReplies: 39Last Post: 27th April 2009, 06:30 PM -
OZ PDRacer - Dylan's build in the Philippines
By Boatmik in forum Michael Storer Wooden Boat PlansReplies: 16Last Post: 23rd February 2009, 05:50 PM -
Brisbane Timber and Working with Wood. Boatmik/PDRacer
By Boatmik in forum Michael Storer Wooden Boat PlansReplies: 1Last Post: 11th April 2007, 08:06 PM -
Flawed wood on the TS --DUCK!
By Robert WA in forum WOODWORK - GENERALReplies: 7Last Post: 19th February 2004, 11:42 AM
Tags for this Thread
balanced lug,
boatmik,
build,
dacron(tm),
douglas fir,
duck,
enamel,
epoxy resin,
fibreglass,
hoop pine,
interminable,
lug,
machinery,
materials,
michael,
oregon,
oz racer mk 2,
ozracer,
paint,
paulownia,
paulownia/glass mast,
pdracer,
plywood,
polytarp,
primers,
really simple sails,
sail-making,
sailmakers thread,
sanding,
storer,
sydney,
timber,
tools,
varnish,
verbose,
western red cedar,
wood,
wood duck,
wrc
