

 Thanks:
  Likes:
  Needs Pictures: 0
 Picture(s) thanks:
Results 871 to 885 of 3347
-
14th October 2009, 10:30 AM #871
 GOLD MEMBER


- Join Date
- Jan 2009
- Location
- Blaxland, Australia
- Age
- 65
- Posts
- 2,551

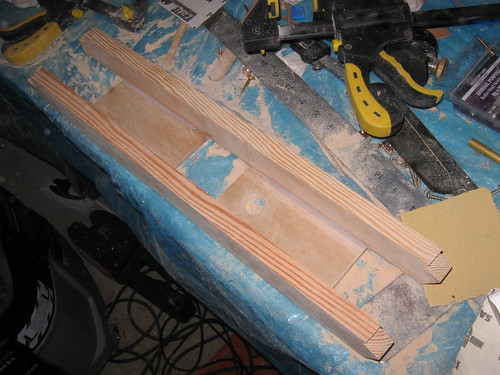
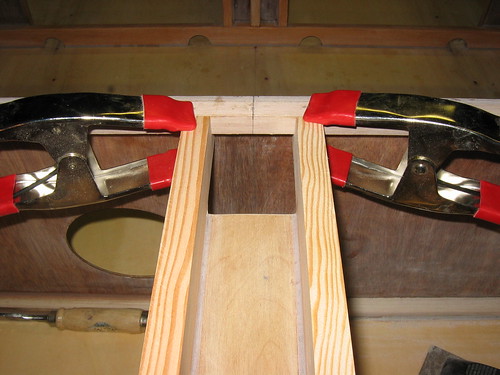
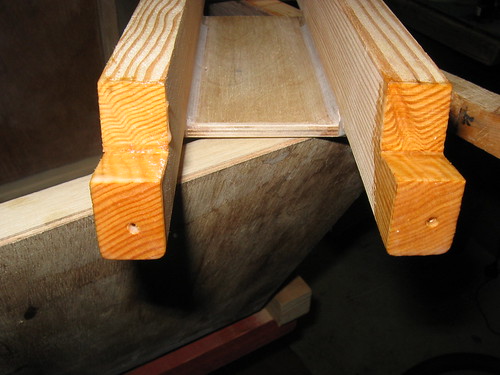
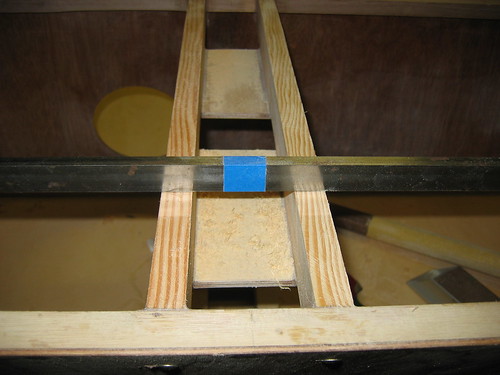
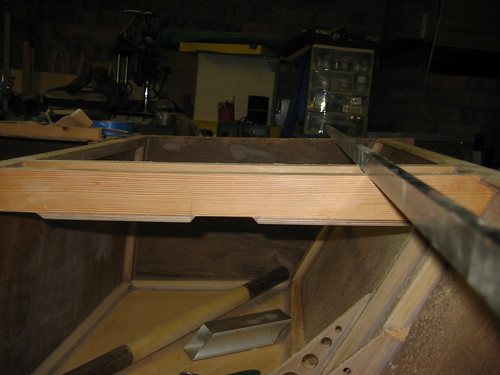
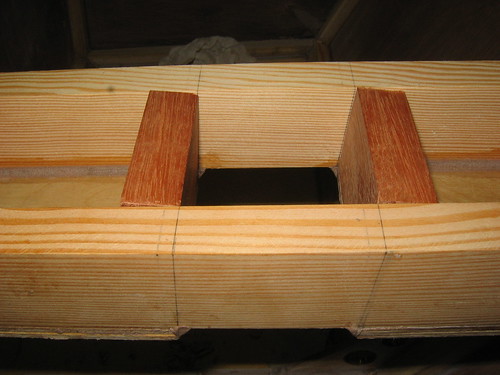
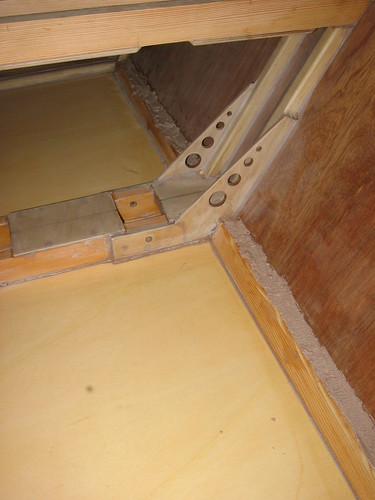
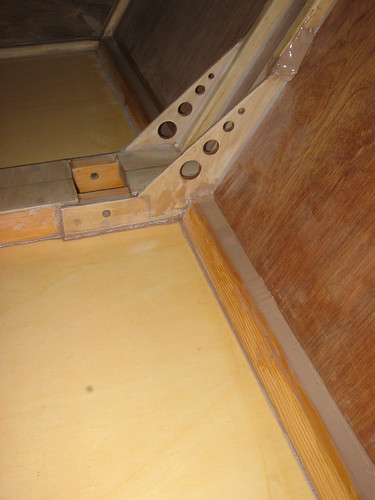
More partner installation photos:
1. Ply edges of partner sanded flush. Curved line at front of upper runner is where the saw blade cut a bit too deep - the TS's calibration has shifted, and the scale is reading a couple of mm out. Luckily I was cutting wide at that point! I sanded the edge smooth before installing the assembly in the boat

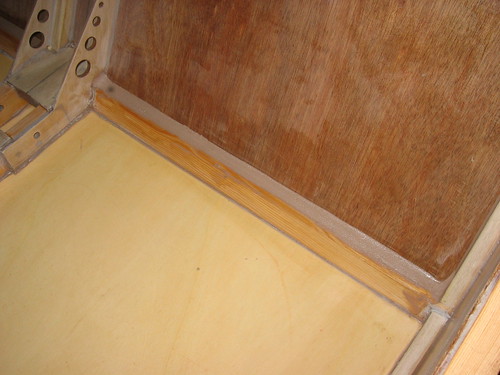
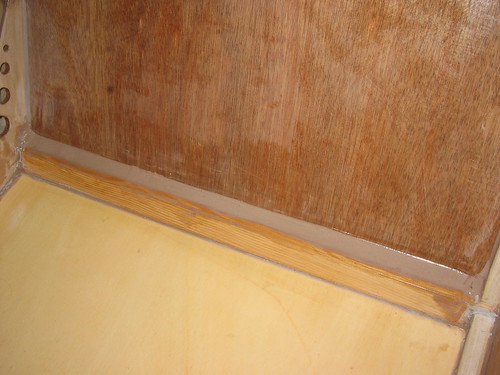
2. Ventral surface of partner, with all edges rounded over. Some square fillets fore and aft of each gusset were added quickly with a chisel stick
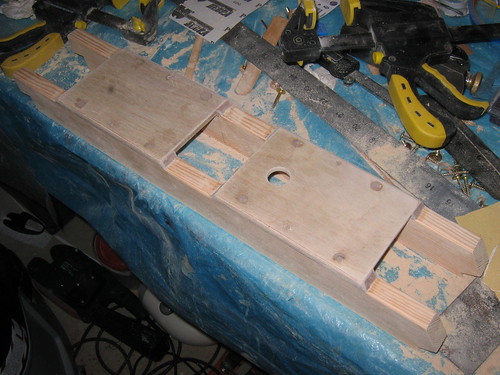
3. Dorsal surface of partner: the tops of the runners were not rounded over ;)
4. "Long" view of partner. Bulges created in the fillets (see photo in a recent post) by tightening up a couple of screws while the glue was still wet were scooped out using 6 mm diameter K&S brass tube from my engineering stocks, then sanded smooth. The resin was still just soft enough to be susceptible to the tube without major effort. It helped that the fillets had small radii, too ;)
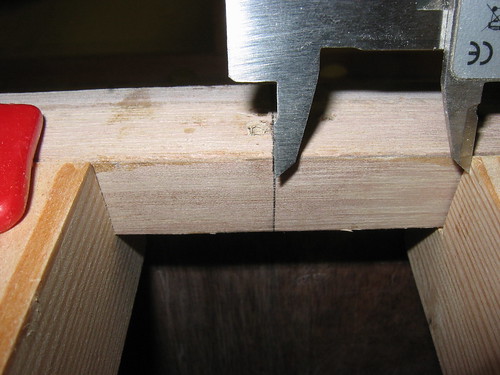
5. How to centre the partner: measure the width between the runners and divide by two; set the callipers to the result; place callipers against a runner; tap gently while clamped until the inner calliper blade lines up with the centre of the centre-line; done :). Easy! Now do the same with the front end
6. Partner clamped with spring clamps to cockpit bulkhead prior to drilling. Method of clamping ensures that tops of runners are level with the cockpit bulkhead top surface
7. Rear (reference) end of partner drilled and screwed in place. Pity about the colour of the filler used in those holes - oh well...
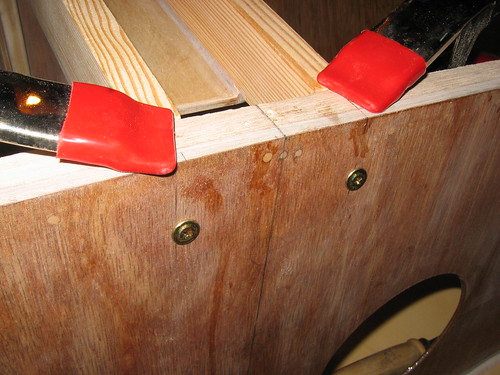
8. Front end centred and fastened

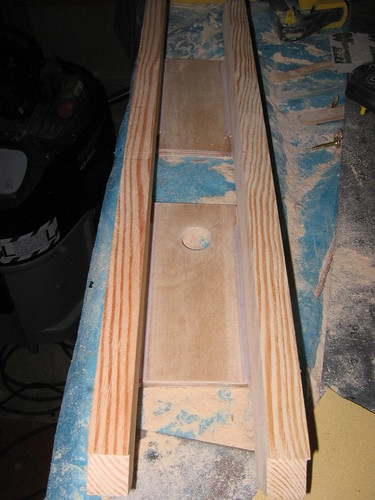
9. Overview of installed partner assembly: now for the glue!
10. Overview of partner. Foredeck is masquerading as a poop deck, currently ;)
11. Aft ends primed
12. Fore ends primed

Continued next post...
-
14th October 2009 10:30 AM # ADSGoogle Adsense Advertisement
- Join Date
- Always
- Location
- Advertising world
- Age
- 2010
- Posts
- Many
-
14th October 2009, 11:28 AM #872
GOLD MEMBER
- Join Date
- Jan 2009
- Location
- Blaxland, Australia
- Age
- 65
- Posts
- 2,551
Before I continue, here's an amusing boat-related link ;). It is all about boat design and skullduggery, and is understandably quite a long article, given its sensationalist and "heretical" subject matter...
More partner installation photos, continued:
1. Partner glued in place with HS-glue, prior to clean-up
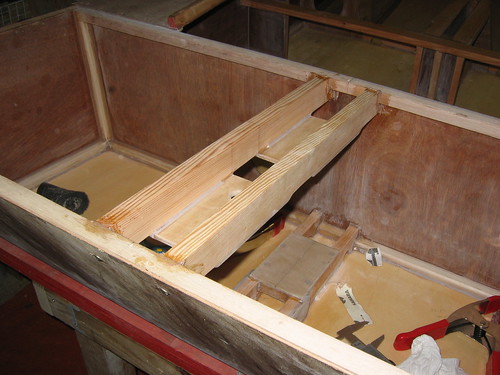
2. Partner in place, glue cleaned up, mess removed from tank(!)
3. Starting work on the partner runner undercamber, using my Giant Sanding Stick(tm) ;)
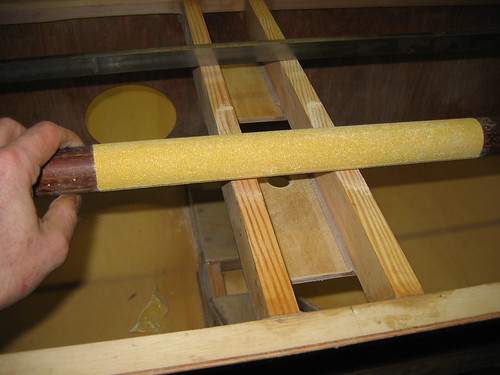
4. Straight-edge used for most of the work: blue tape marks centre of steel. I rather belatedly checked the edge and found that it had a tendency for the steel to droop at its ends under its own weight. This steel length is the best I've got at > 1220 mm, so I stuck with it. I used the foredeck as a guide towards the end of the process - although the ply itself had different stiffnesses on either side, so using it wasn't particularly reliable either. I ended up sighting along the width by eye and hoping for the best. I am going to investigat acquiring a 1400 - 1500 mm straight edge in due course...
5. Side view of undercamber about half way through the shaping process. Some shaping tools visible in background
6. Foredeck resting in place, testing the evenness of the partner undercamber. A newly-TS-trimmed coaming part is sitting at the back of the photo, posing for effect. The finish imparted by the "ultra-thin-kerf" CMT blade needs no almost further work before coating - it could be coated directly

7. Tools used in shaping partner undercamber, plus shavings and dust! Most of the work was done using the curved spokeshave on the left, and the Permagrit block on the right, with occasional touch-ups from the Great Big Sanding Stick(tm). The GBSS needs a new piece of sand-paper
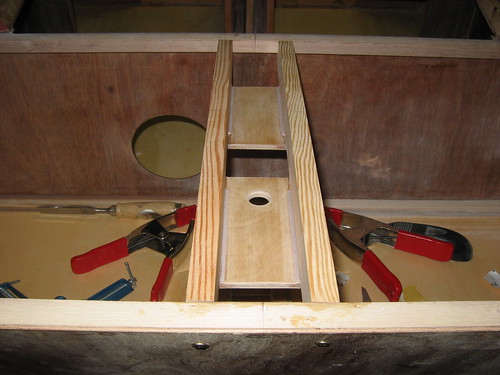
8. Mast positioning blocks in place, unglued: compare with photo below, which shows assembly prior to runner undercamber shaping
9. Mast-holding blocks prior to partner shaping: compare heights of blocks above runners here and in the shaped partner in photo above
10. Overview of dust, shavings, partner and blocks

That's it for the mast partner installation - whew! Not quite up-to-date, however, as I have a secret surprise to reveal in the next post ;).
-
14th October 2009, 12:17 PM #873
GOLD MEMBER
- Join Date
- Jan 2009
- Location
- Blaxland, Australia
- Age
- 65
- Posts
- 2,551
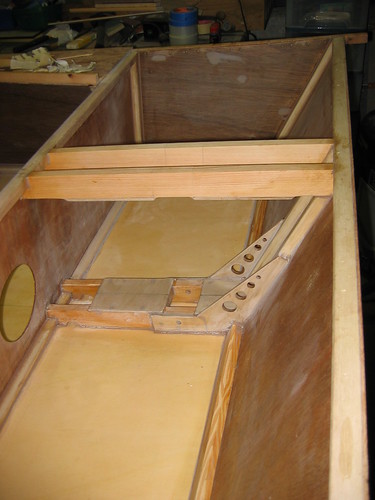
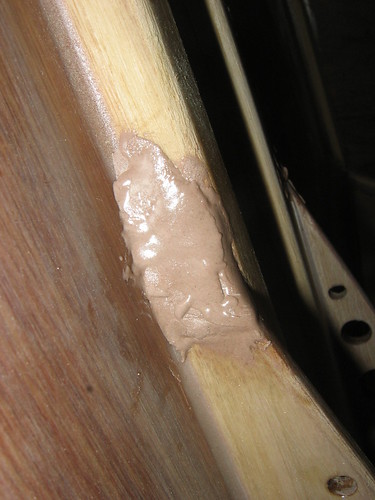
OK, here's the "secret surprise" ;). It shouldn't come as any surprise, really, giving my insanely fussy nature. For some time now I have been contemplating the fact that the bottom bow transom cleat effectively forms a water-trapping valley with the transom face, and it has been a niggle, even though I know that the spot will be resin-coated within an inch of its life and therefore waterproof (barring punctures from outside, of course). Given the cunning and tricksy nature of the water molecule I didn't like the idea of moisture pooling there and being difficult to mop up (although I always leave the port covers off when my old boat was stored, I must say). The obvious thing to do was to fill the valley with a filleting mix, although such an approach would require a lot of resin, given the volume and a requirement for there to be a reasonable downwards slope aftwards. I got both wee birdies with one stone, by sanding down the sharp edge of the cleat until I had removed about half of the potential volume to be filled, and put an "upwards" slope on it at the same time.
Photos follow:
1. Shaped bow transom bottom cleat viewed from above. This is the only photo that I have of the shaped cleat prior to filing the valley with goo. I had intended to take more explicative photos but forgot ;). You can infer where the aft edge is by the change in grain direction...
2. Port "valley" filled: I trowelled in a thick mixture of BoteCote 2:1 and sanding filler powder. I decided to use sanding filler rather than glue mix, to save those few extra and absolutely vital grams of weight ;)
3. Starboard valley filled. I overestimated the amount needed, as usual...
4. View of entire bottom cleat prior to shaping. Needless to say (?), I didn't try to fill the bit under the mast step ;). Honest!
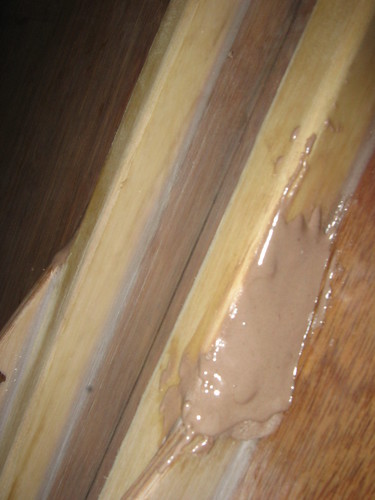
5. Fillet shaped using a resin/glue-mixing stick, i.e., a tongue-depressor cut off square and its corners rounded off.This took several passes until I was happyy with the result, and it will still probably get a (more fluid) skim-coat to finish off

6. Starboard fillet, shaped. The mast step (and boat ;) centreline from the mast partner installation is very clearly visible here...
7. View of both shaped fillets. I went the whole hog and filled in both of the equivalent spots at the tops of the step runner strengthening gussets, although I haven't taken a phot of that yet. I nearly forgot this bit, too, and discovered that I hadn't done them when reviewing the day's photos: quick dash back to the workshop!

8. Skim coat, port side

9. Skim coat, starboard side
10. Skim coat, entire cleat. Note the 'orrible lump at the top of the strengthening bracket: it and the one on the port side will be dealt with as soon as they have cured ;)
11. 'Ere's the 'orrible lump on the port bracket! Eew!
12. And on the starboard bracket, in close-up. Excuse me, I think I'm going to be sick ;)
I know that this is all non-standard and ex-design - not to mention trivial - but as I said, it was a niggle, and I have hopefully done it with a minimum of added weight. I wouldn't claim to have reduced weight, though, since the cleat itself was from the lightweight batch of oregon. I was also careful to try and avoid reducing the overall strength of the cleat by taking too much material off it. Hopefully the fillet will add back the strength "removed". I took a bit of work, and I am happy with the result - and I won't have to go scrabbling about so much with the drying rag!
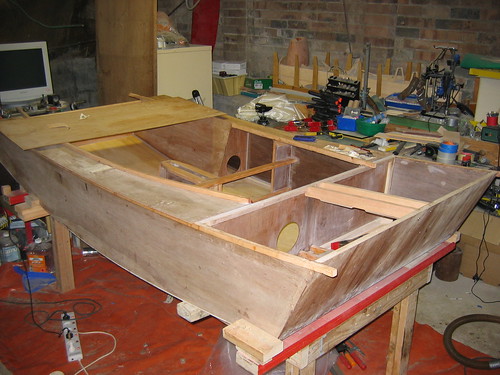
Back to household duties, by the "completion" of which (never-ending tasks ;) the filler should be hard enough for a quick sand, then it's a skim coat on the new fillets (actually, I did the skim coat over the unsanded fillets), a quick sand of the tank, and the painting on of the hull number. After which: triple-coating of exposed parts, then The Installation Of The Foredeck!
Having got the skim coat done in advance of all the other things listed above, I'm letting it all cure before doing anything else - don't want sanding dust getting stuck in the nice new slick surfaces ;). So something of an enforced "holiday" until tomorrow. That will give me a chance to recover from feeling ill, too <snigger> ;).
-
14th October 2009, 02:01 PM #874
Happily receives emails.
- Join Date
- Jul 2005
- Location
- 'Delaide, Australia
- Age
- 65
- Posts
- 8,138
Once one overcomes the niggles one is satisfied.
Cool!
-
14th October 2009, 04:56 PM #875
GOLD MEMBER
- Join Date
- Jan 2009
- Location
- Blaxland, Australia
- Age
- 65
- Posts
- 2,551
Indeed! That sounds like a koan ;). Or a proverb, at least. Or an aphorism! I'm glad you liked the fillet, anyway :). Originally Posted by Boatmik

A.
-
14th October 2009, 06:32 PM #876
GOLD MEMBER
- Join Date
- Jan 2009
- Location
- Blaxland, Australia
- Age
- 65
- Posts
- 2,551
It's a while since I've posted anything on tools, and it just so happens that I snuck out yesterday and visited Mitchell's Engineers Supplies ;). Bob got it in in really short notice (quite a bit less than a day). And while I wait for the skim coats on the bow transom fillets to cure, here's what I got:
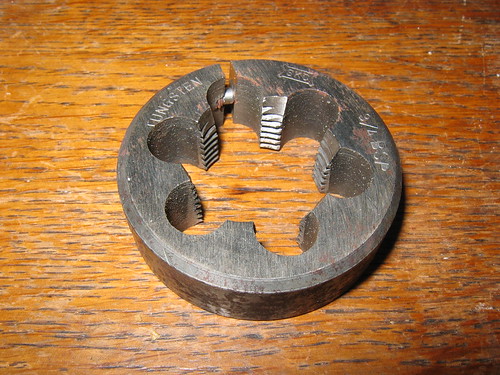
1. New toys: tools for pipe threading. Mug gives scale - I didn't get it with the hardware ;). The die came in the box, though :)
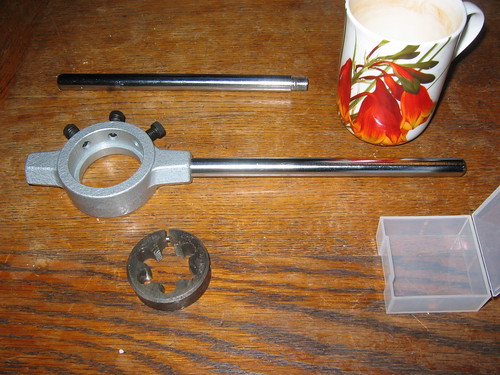
2. Close-up of the die: it's for threading the ends of standard (in UK and Oz at least) 3/4 " (internal diameter) water (and gas?) pipes, hence the "BSP" stamped on the die on the RH side
OK, so what's all that about? What does it have to do with Wood Ducks? Quite a lot, as it turns out. A while ago, I acquired a whole lot of 19 mm pipe clamps from various sources, and of course exceeded my pieces of threaded 19 mm (internal) pipe. The theory behind all this was that it would be cheaper than sash cramps. Well, the price has dropped on the sash cramps (being made in China), while the price of steel and water pipe have gone up (being made here in Oz). So who's the sucker? having bought all the pipe clamps, I didn't want to have a whole lot on miniature white (actually orange and red ;) elephants lounging around the place upsetting me every time I thought about them (grrr), I decided to get the pipes anyway. Bunnings flog 1.2 m lengths (threaded) at circa $30 each, so blow that. Surely I can make up my own for much less.
Well, yes, and no - of course. I can get enough water pipe to make five 1.3 m lengths for $17 odd per length, cut ($112.70/ 6.5 m length, galvanised, both ends threaded, free delivery ex Hardware & General (Plumbing), Brookvale - haven't checked unthreaded, non-galv yet) so I'm $12 odd and 100 mm/length ahead so far, BUT: when adding the cost of the die and its holder, I have to add $23 odd (per 1.3 m length) back in - aargh! Of course, I can defray the costs a lot by reducing the lengths to 0.5 m - so the additional figure becomes $9 odd. I can't recall what Bunnings' price on 500 mm threaded lengths was (if they in fact had them), but I would probably still be behind the eight-ball. On the other hand, if I use 500 mm lengths, that's $9 each length for the materials, and I get eight more lengths (or an extra five if I make the lengths 650 mm). Also - and here is the crunch - the widths of the Duck and Goat centreboards (the Got rudder is narrower) is much less than 500 mm and the real estate taken up by the clamp heads themselves. Not necessarily useful for any large items of furniture that I might hypothetically make at some time in the future - but then again, I can probably find (or make ;) a use the die, etc., in future engineering work. Or something...
I still need to acquire a few more clamps, I think, but I'm now almost set - tool-wise - to start on the 'foils. Actual working start on said 'foils is another matter - there's still the mast and a whole lot more work to be done on the hull and other bits (e.g., rudder box), yet. Unless I switch the order around ;). I'm more inclined to do the mast next - and maybe even before I nail the foredeck down permanently. I'm still not convinced that the partner is right, even though the measurements say that it is. Further thought does remind me that the mast bows back quite a bit - for the sprit rig at any rate - so maybe it is OK ;).
I shall stop rabbiting on now and go and check the skim coat :).
-
14th October 2009, 09:43 PM #877
GOLD MEMBER
- Join Date
- Jan 2009
- Location
- Blaxland, Australia
- Age
- 65
- Posts
- 2,551
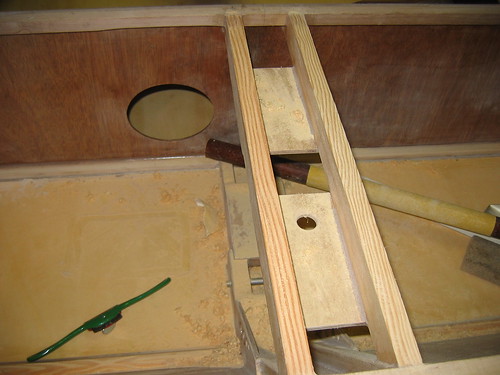
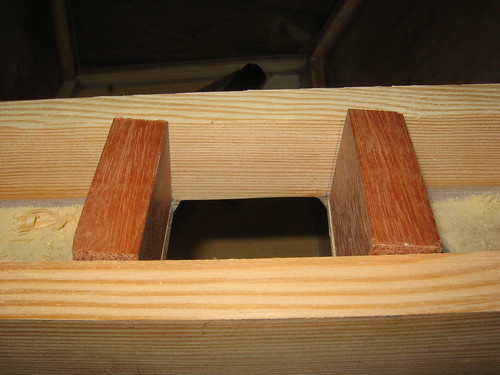
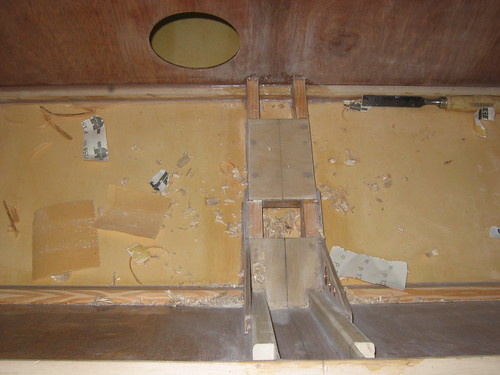
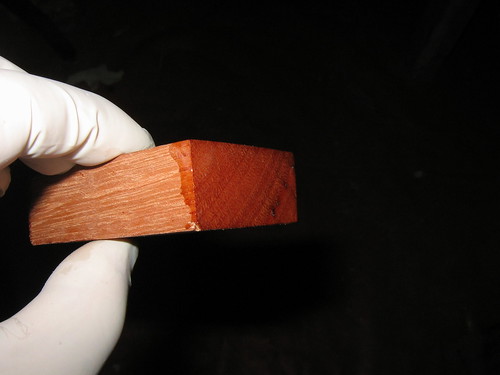
I got enthusiastic this evening, and after dinner, went and glued the mast support blocks into the mast partner. Gave the blocks' end grain a good soaking in resin first, and hen applied the glue.
Having not drilled holes and used screws, the job was a lot trickier than I had been expecting. I had decided not to use screws for some reason, but I can't remember why - possibly laziness and/or impatience. Still, after checking with the smallest of my engineers' squares, the blocks seemed to be square to the partner runners/parallel with each other so hopefully that won't translate to too much frustration down the track. I'll know for sure - albeit too late - when the glue has cured and I've done the final clean-up!
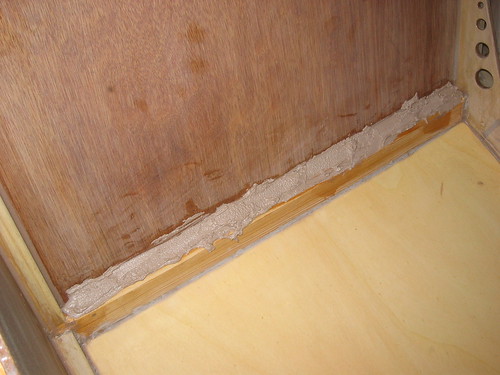
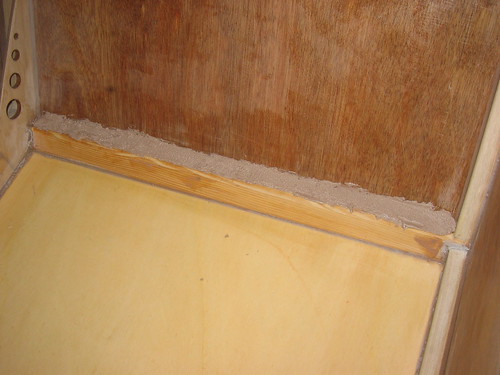
Also tidied up the forward tank hull fillets with a quick coat using left-over glue and the other (round) end of the mixing stick (10 mm radius).
A quick check in the morning indicated a very light shift in one block, as a result of glue memory, I suspect. In any case, it was a shift of < 0.5 mm (gasp!) on one side, which can be taken care of with some sandpaper, once the hole has been reamed out in the foredeck.
Oh, and I've started on the hull number painting...
Photos:
1. Installing the mast partner's mast blocks: priming the block ends with neat 2:1 BoteCote to saturate the end grain, which was quite thirsty
2. End and bottom of mast block seen closer to...
3. Installing the mast blocks: priming the mast step with resin
4. Other side of block: holes are possibly insect tunnels...
5. Uncoated top of block, plus end. All block ends got three resin coats, bottom surfaces one
6. Some glue slapped on to as a second priming coat: not very even in this photo. I added some more glue and spread it about more after taking this
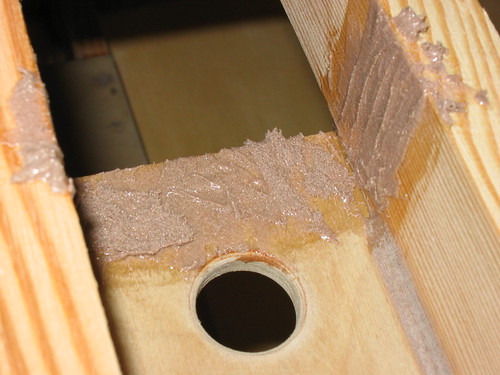
7. Blocks glued in place. They were nestled down slowly into the partner to exclude air bubbles, then left for a while for the glue to start to go off before cleaning up and final checking of alignments
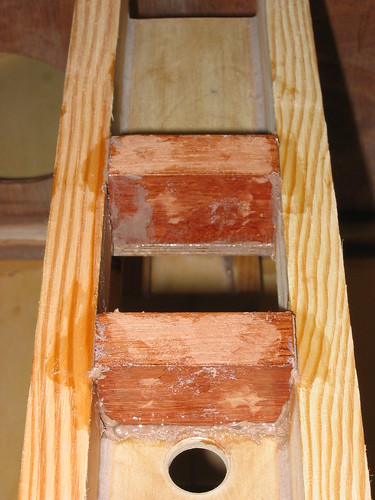
8. Mast partner after installing blocks: because there were no locating screws, I spent an inordinate amount of time getting the the blocks properly lined up. As time went on, the lines got paler and the high-strength (HS) glue started to develop memory as it set...
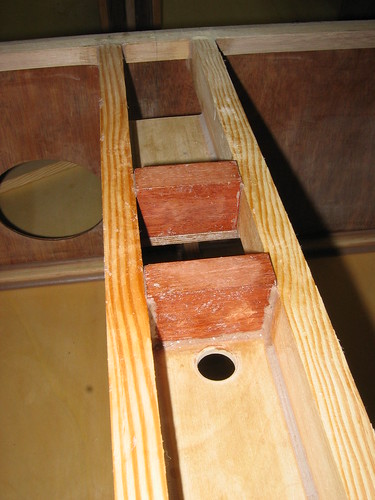
I tried some tentative planing with a block plane and sanding with the Permagrit block (the glue having set but not fully cured), and decided that sanding was easier ;). I'll probably scratch the excess down later this arvo, when the glue has had more time to cure. Next batch of photos is documents the interesting time doing the hull number...
-
14th October 2009, 09:54 PM #878
SENIOR MEMBER
- Join Date
- Oct 2007
- Location
- Poland
- Age
- 67
- Posts
- 805
Photos are necessery and required!!! Originally Posted by AlexN
")
-
15th October 2009, 03:49 AM #879
Happily receives emails.
- Join Date
- Jul 2005
- Location
- 'Delaide, Australia
- Age
- 65
- Posts
- 8,138
Alex - I really like this "stream of consciousness" method of building a PDRacer.
I can't work out if you are a reincarnation of Jack Kerouac or Allen Ginsberg.
MIK
-
15th October 2009, 04:26 PM #880
GOLD MEMBER
- Join Date
- Jan 2009
- Location
- Blaxland, Australia
- Age
- 65
- Posts
- 2,551
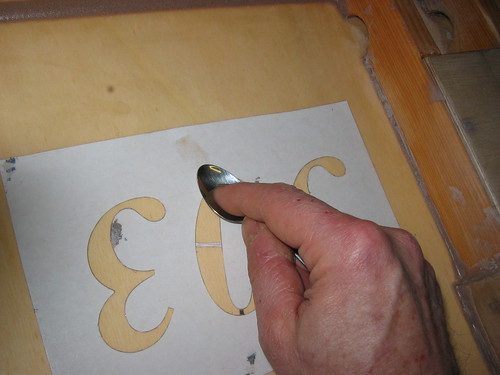
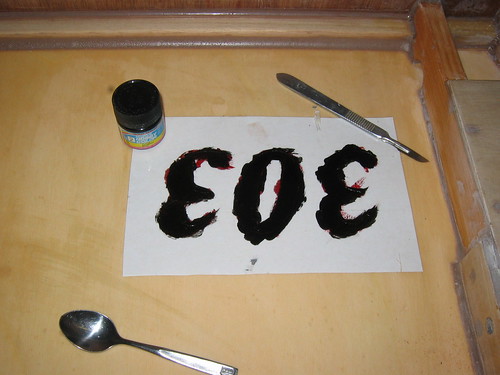
The hull number was a lot more "interesting" that I was expecting (of course) - the photo captions will cover the gory details...
1. Home-made "repositionable" stencil in position, smoothed out with a piece of paper towel. Exactly how repositionable will be seen in later photos. The lands holding the middle of the "0" stencil in place have not yet been removed. Stencil was a computer-printed outline of the number, covered in 3M heavy-duty clear packaging tape, and the inner bits cut out (except for the "0" lands). The resulting stencil was then sprayed with 3M "75" repositionable adhesive. A previous post goodness knows how many months ago documented the creation of this item

2. Burnishing down the stencil outlines with the back of a teaspoon to reduce amount of creep under the stencil. In hindsight this was probably completely unnecessary - and in fact it would have been a lot better not to have done it at all!
3. Ready to apply first coat of stain; zero-lands have been cut away (visible lying about on the stencil body)
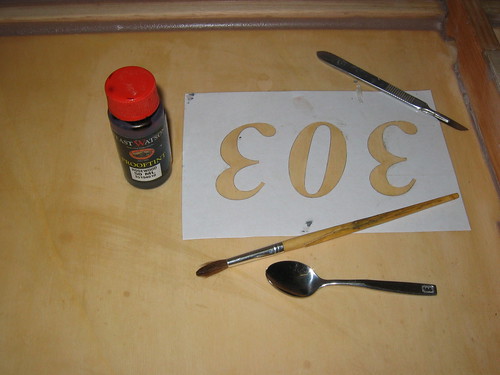
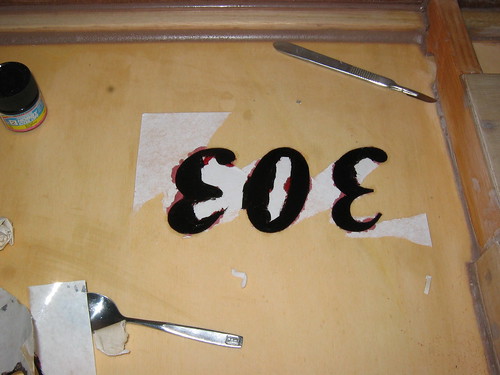
4. First coat of stain: this wasn't dark enough for my liking, so I ended up using some water-thinnable modelling paint. I chose this type of paint as it b more likely to be repelled by the stencil adhesive (thus minimising bleed-under), and less likely to be dissolved by the resin top coat. So far, the first one seems to have worked OK - won't know about the second for a while ;)

5. Water-thinnable gloss black painted over the first number (or rather, the last one ;). Gunze Sangyo water-thinnable is quite a nice paint to use - fumes are not as nasty as the enamel or lacquer-based varieties. Much beloved of plastic modellers...
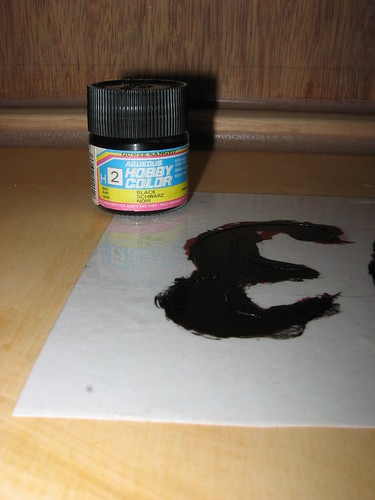
6. Gloss black applied over the dried stain: it might have been better to have removed the stain with some meths first, but didn't want to upset the stencil. As it turned out, the meths would probably have been OK...
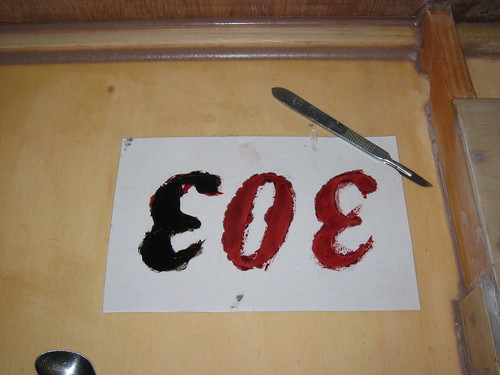
7. All numbers blacked in: looks a bit of a mess, so far. The number won't be seen very often in any case- hopefully!
8. "Repositionable" revisited... The adhesive stuck to the resin like, well, glue. I had added the adhesive some months ago when making the stencil, and it felt rather non-tacky, so I added some more fresh adhesive. Wrong! And burnishing the stencil was probably not a good idea either! It now looks even worse. You can in fact see where the stain snuck into the paper - although not, happily, under the adhesive! Well, mostly not - there were a couple of very small spots wihich are only visible if you go looking for them (I did, of course...)
9. The hull number with most of the stencil residua removed - with the exception of quite a bit of goo and small bits of paper. In fact, the stencil actually delaminated on the paper layer, with half staying with the glue, and the other half staying with the packaging tape clear cover. The adhesive was removed using numerous cotton buds and several mL of adhesive solvent sprayed into a handy little jam jar (see next photo)
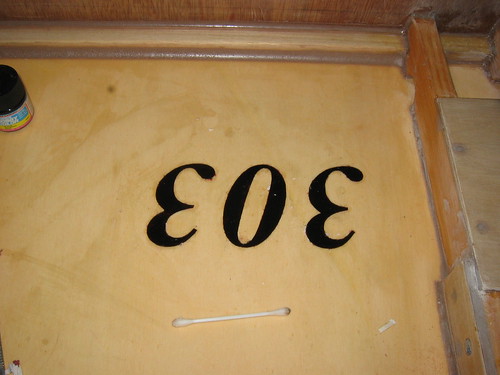
10. Hull number cleaned up - mostly. This is where I stopped - almost all the glue has been removed after much cursing, etc., and well over a dozen cotton buds used to swirl and poke away at the stuff plus mopping it up. A surprising amount of paint actually came away with the solvent - I'll touch it up with a fine brush in a bit, once I've finished posting this. Small jam jar with decanted adhesive solvent visible in background...
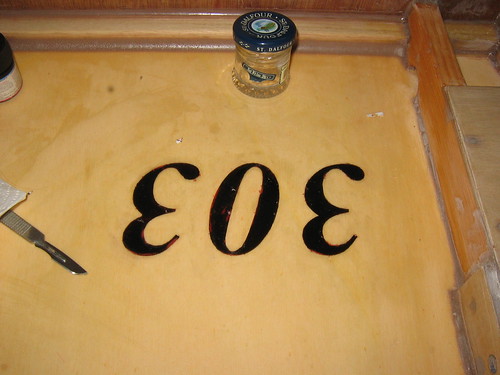
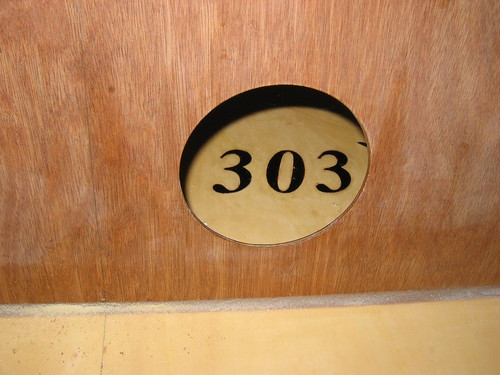
11. "Maintenance-crew's"-eye view of hull number, through the cockpit bulkhead inspection port hole
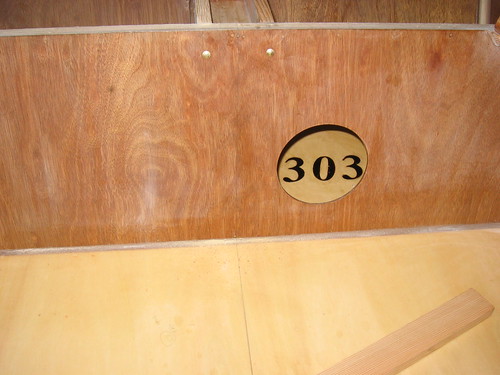
12. Close-up of hull number in its native habitat: Wood Duck's official class registration :). There appears to be a bit of residual adhesive on the hull bottom that will have to be removed before I attempt to apply resin over the top of it!
Back to touching up the number, then possibly (carefully) sanding away at the blocks in the mast partner...
-
15th October 2009, 04:27 PM #881
GOLD MEMBER
- Join Date
- Jan 2009
- Location
- Blaxland, Australia
- Age
- 65
- Posts
- 2,551
There are lots more lovely photos for you to look at now, Robert :). Originally Posted by robhosailor
-
15th October 2009, 04:32 PM #882
GOLD MEMBER
- Join Date
- Jan 2009
- Location
- Blaxland, Australia
- Age
- 65
- Posts
- 2,551
Ha ;). I'm not sure if you meant my general ravings, or my reply to your comment in particular - or both! I could be writing lots worse things, of course. Originally Posted by Boatmik
I'm technically not a reinc'n of either, but could of course be channelling them unwittingly :). I know of both of these gents by name and reputation of course, but have never actually read any of their writings - well, not yet, anyway. They are on my list of authors to read though, which I will do - once I get to them! Along with James Joyce and others ;).
Cheers,
Alex.
-
15th October 2009, 04:36 PM #883
SENIOR MEMBER
- Join Date
- Jul 2008
- Location
- Fenwick, Michigan
- Age
- 75
- Posts
- 908
Mik:
Possibly Feliz Unger?I can't work out if you are a reincarnation of Jack Kerouac or Allen Ginsberg.
Bob
-
15th October 2009, 06:50 PM #884
Grumpy old Bugga
- Join Date
- May 2003
- Location
- South Oz, the big smokey bit in the middle
- Age
- 67
- Posts
- 4,377
Regarding the stencils mate, I use a similar method - Redback's transom was done this way

In my case, I just print straight onto the paper and leave it at that. I too use the 3M spray and I too have trouble getting the residue off. Yes, rubbing down the edge of the numbers is a good move. Now, here's the trick. Use a spray paint (I now use an airbrush but spray cans work). Lay down a light dusting layer first to seal the edges, then, almost immediately (it dries near enough to instantly), lay on the heavier coats for colour depth. Remove the template immediately and when the paint's dry, get all worried about the damned glue.
I used to use clear contact and that works really well ... except when the layer of base paint hasn't stuck down properly.
It's a good method though, just be prepared to do some touching up by hand.
Richard
-
15th October 2009, 09:35 PM #885
GOLD MEMBER
- Join Date
- Jan 2009
- Location
- Blaxland, Australia
- Age
- 65
- Posts
- 2,551
Hi Richard, Originally Posted by Daddles
Redback looks good - so do the boat and the name ;). I've just come up from an extended session of touching up by hand - and scraping off again with a # 10 scalpel blade! My opinion at the moment is that it would have taken as much time or less to have traced the outline from the stencil and filled it in by hand with the stencil removed...
Thanks for the tips, I'll ponder them while I make plans for the stern stencils.
Cheers,
Alex.


 Reply With Quote


Similar Threads
-
New Queensland PDRacer Build
By duncang in forum Michael Storer Wooden Boat PlansReplies: 71Last Post: 26th April 2012, 08:30 AM -
Oz PDR build in Adelaide - sexy black PDRacer
By m2c1Iw in forum Michael Storer Wooden Boat PlansReplies: 39Last Post: 27th April 2009, 06:30 PM -
OZ PDRacer - Dylan's build in the Philippines
By Boatmik in forum Michael Storer Wooden Boat PlansReplies: 16Last Post: 23rd February 2009, 05:50 PM -
Brisbane Timber and Working with Wood. Boatmik/PDRacer
By Boatmik in forum Michael Storer Wooden Boat PlansReplies: 1Last Post: 11th April 2007, 08:06 PM -
Flawed wood on the TS --DUCK!
By Robert WA in forum WOODWORK - GENERALReplies: 7Last Post: 19th February 2004, 11:42 AM
Tags for this Thread
balanced lug,
boatmik,
build,
dacron(tm),
douglas fir,
duck,
enamel,
epoxy resin,
fibreglass,
hoop pine,
interminable,
lug,
machinery,
materials,
michael,
oregon,
oz racer mk 2,
ozracer,
paint,
paulownia,
paulownia/glass mast,
pdracer,
plywood,
polytarp,
primers,
really simple sails,
sail-making,
sailmakers thread,
sanding,
storer,
sydney,
timber,
tools,
varnish,
verbose,
western red cedar,
wood,
wood duck,
wrc
