

 Thanks:
  Likes:
  Needs Pictures:
  Picture(s) thanks:
Results 1 to 15 of 26
-
18th July 2013, 04:42 AM #1
 Intermediate Member


- Join Date
- Jul 2013
- Location
- Asia
- Posts
- 33
 Scratch Build :: DIY Aluminum CNC , by iD2
Welcome!!!
Scratch Build :: DIY Aluminum CNC , by iD2
Welcome!!!
Project No. :: 1 ,(1 of 3)
Project Name :: iD2CNC v.2.0
Project Description :: This project i will start to make Aluminum CNC and use this CNC to do my PC Acrylic Case ,why i need to make new CNC because actually i have my own CNC but already sold it ,so that that why i need to make new one.
Full Detail work log :: iD2CNC.wordpress.com
Project design ::

Specification ::
X-Axis :: Working area 700mm
Y-Axis :: Working area 520mm
Z-Axis :: Working area 120mm
X-Axis :: Using SBR Rail ,Dual ballscrew and drive
Y-Axis :: Using SBR Rail
Z-Axis :: Using Linear guide
Spindle :: 1.5KW Water Cooled ER16 + Inverter
Safety :: All axis have limit switch
Auto Zero Tool :: Have auto zero tool
Overall dimension:: 1000x860mmx550mm
Project by ::

Hope you like it.
PS. I'm not good in English , If i make you confuse please feel free to ask me.
Approved by Admin.
-
18th July 2013 04:42 AM # ADSGoogle Adsense Advertisement
- Join Date
- Always
- Location
- Advertising world
- Posts
- Many
-
18th July 2013, 05:39 PM #2
Intermediate Member
- Join Date
- Jul 2013
- Location
- Asia
- Posts
- 33
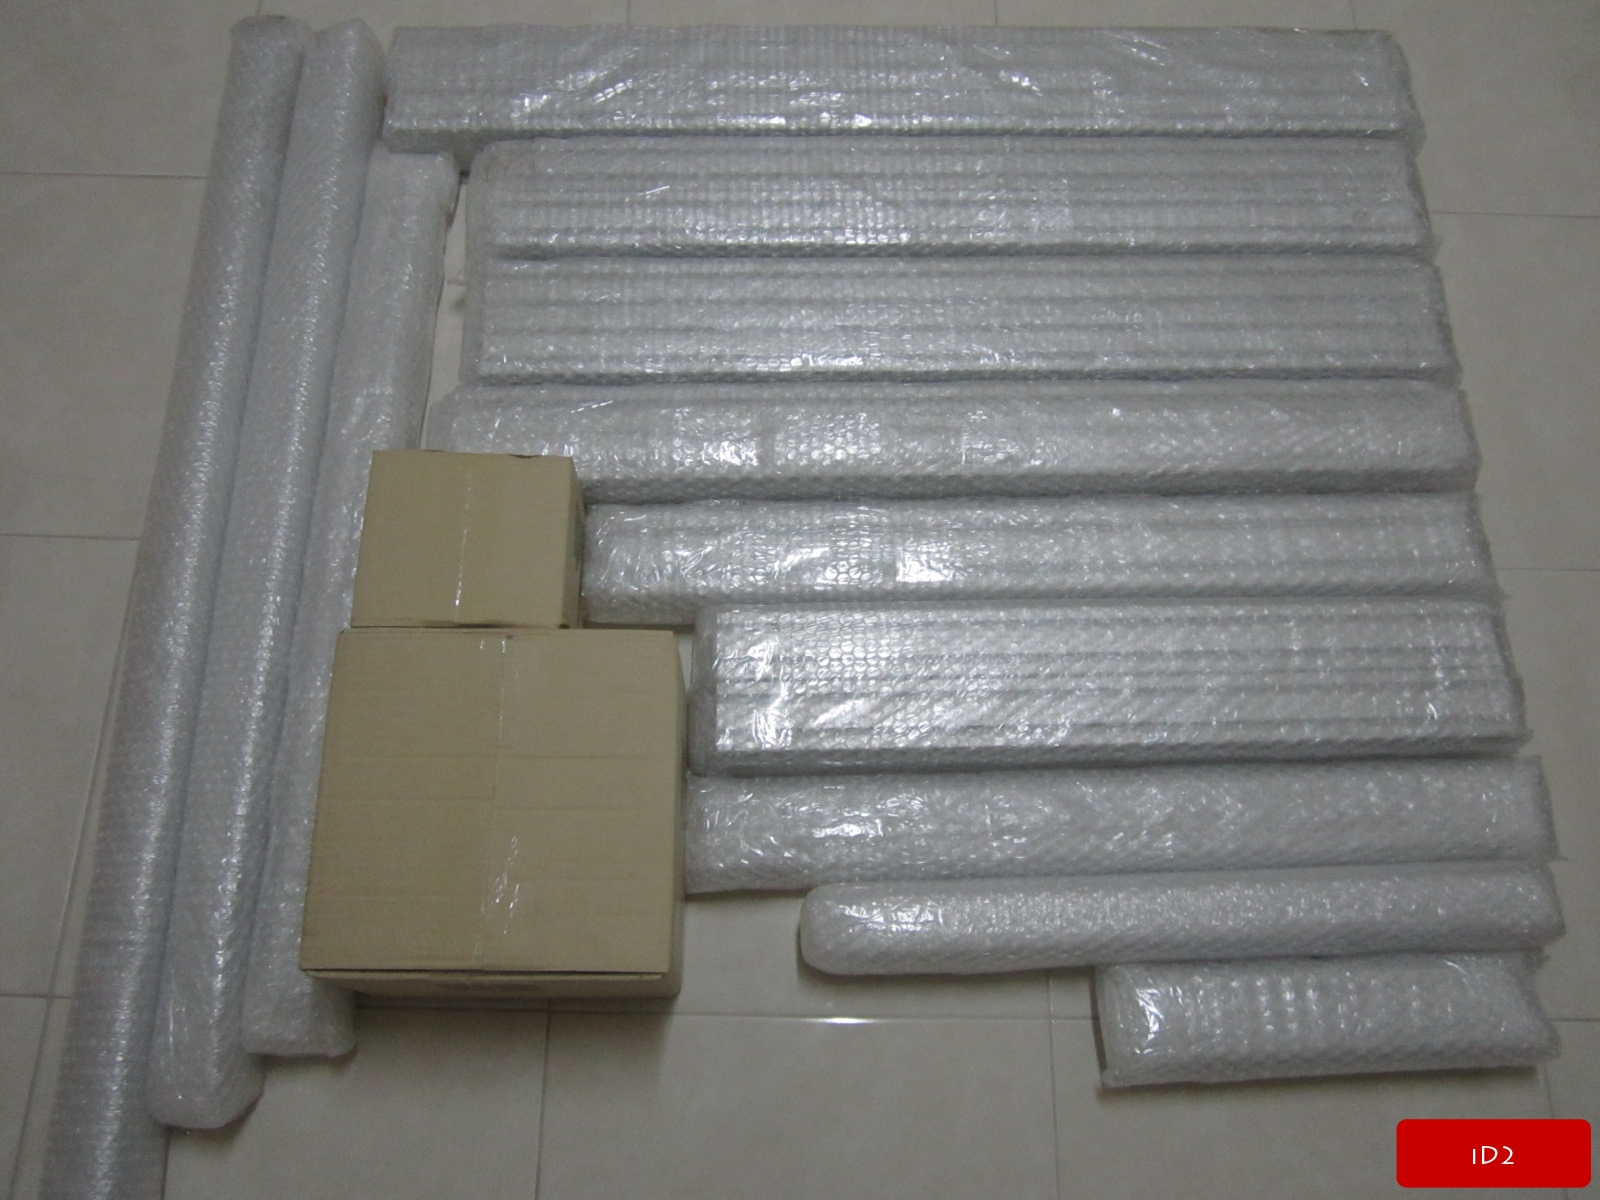
Just went to shopping for a couple week ago.
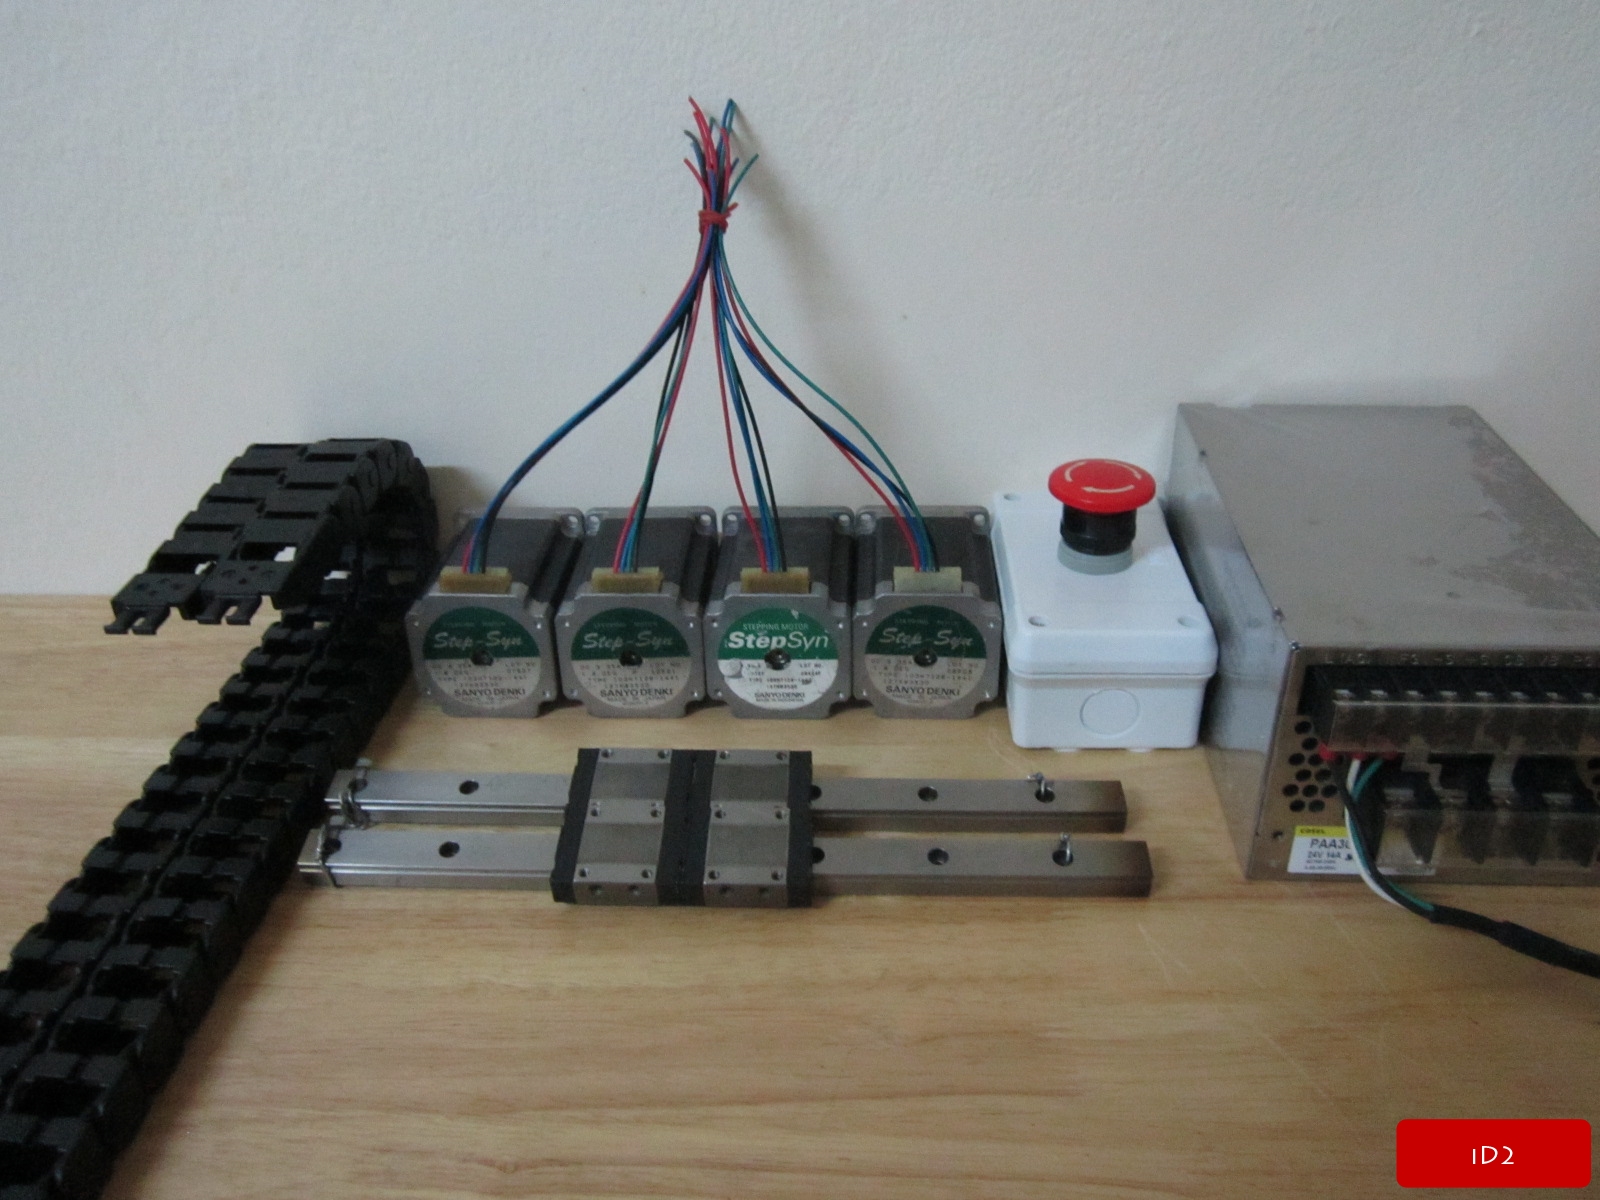
and aluminum profile and aluminum accessories just arrive today
-
18th July 2013, 05:40 PM #3
Intermediate Member
- Join Date
- Jul 2013
- Location
- Asia
- Posts
- 33
Update my tools for build my CNC

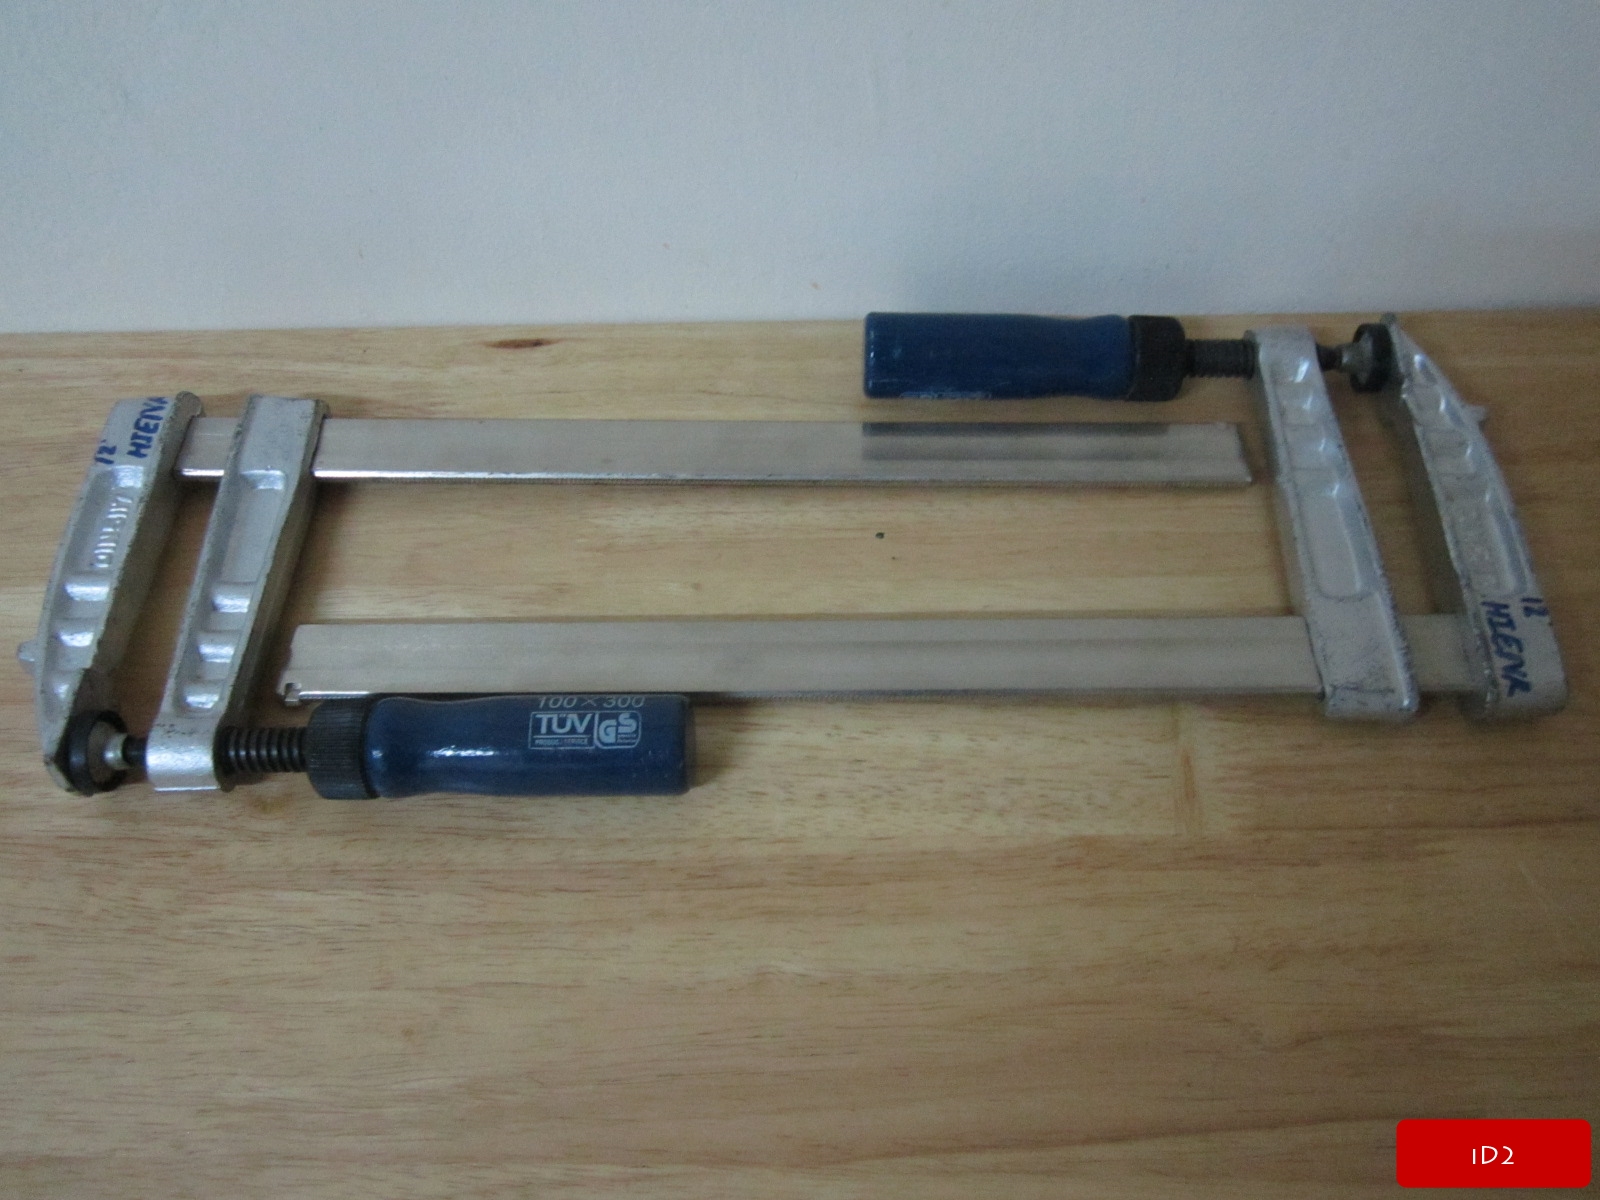
and other important tool was power drill. I'll take picture it soon.
-
24th July 2013, 04:16 AM #4
Intermediate Member
- Join Date
- Jul 2013
- Location
- Asia
- Posts
- 33
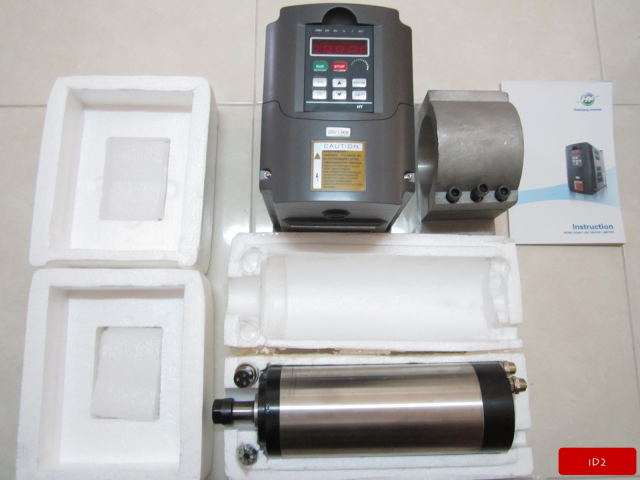
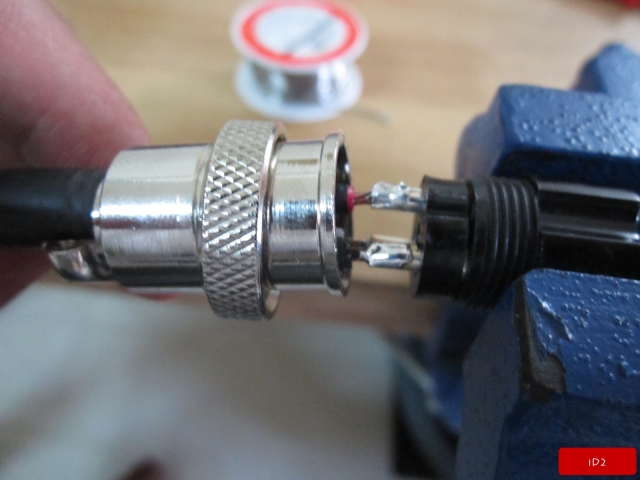
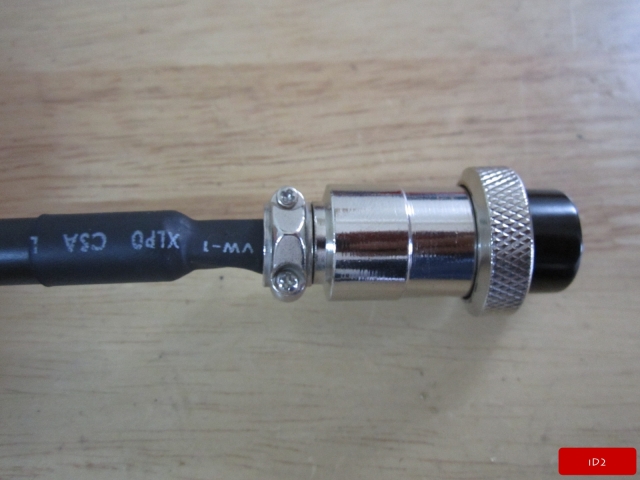
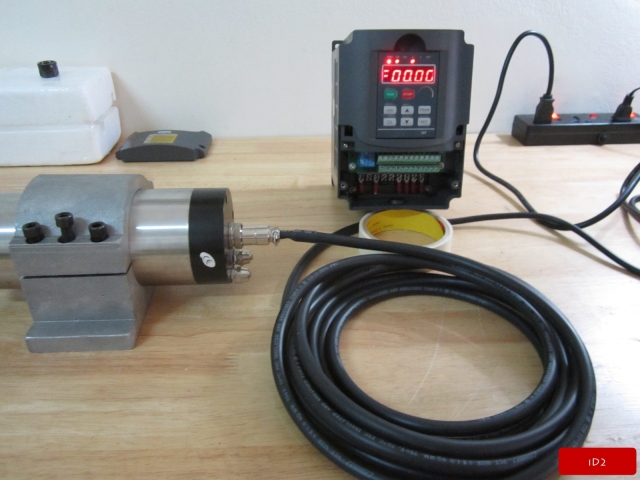
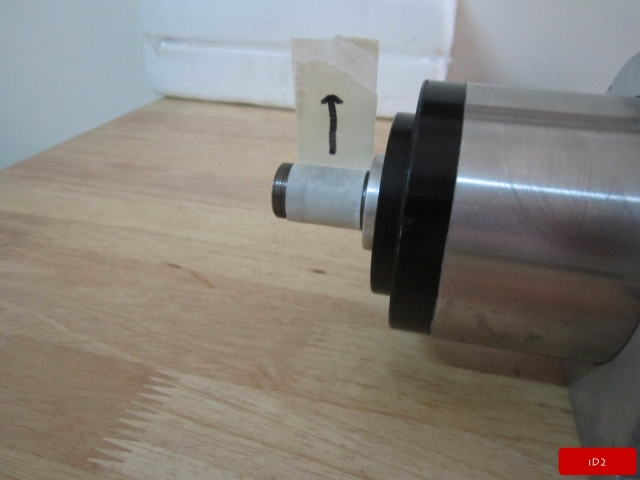
Just got Water cooled spindle + Inverter + Spindle clamp. So today i do wiring and add Potentiometer to Inverter and then test them to make sure everything work fine and correct wiring.
Item arrive ::
Unpack the package
Start wiring ::
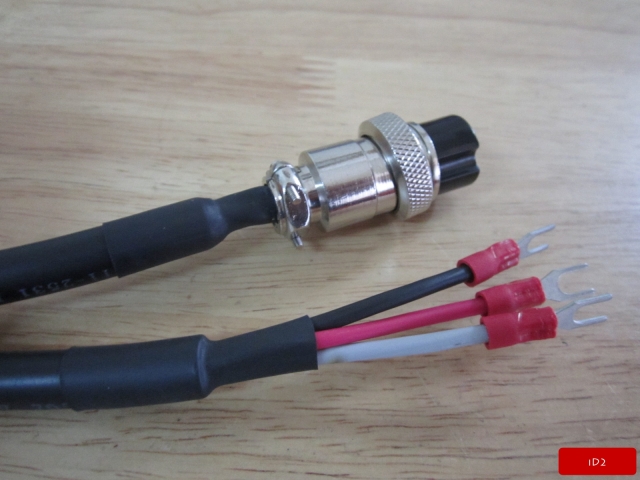
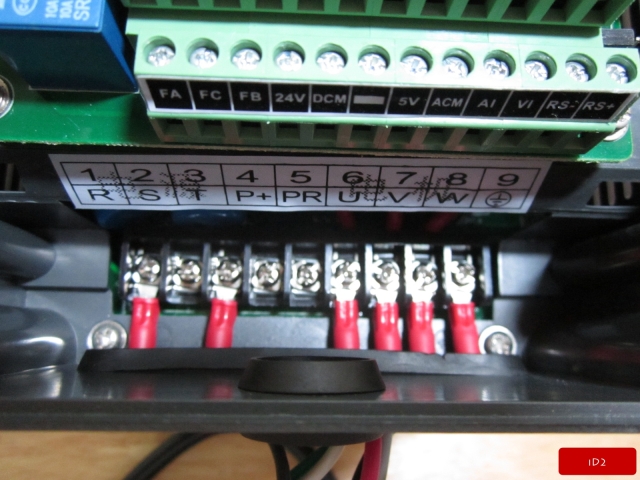
Note :: For single phase power use �R� and �T� but for Three phase power use �R� and �S� , or �S� and �T� , both will work fine.
After finish wiring then test run ::
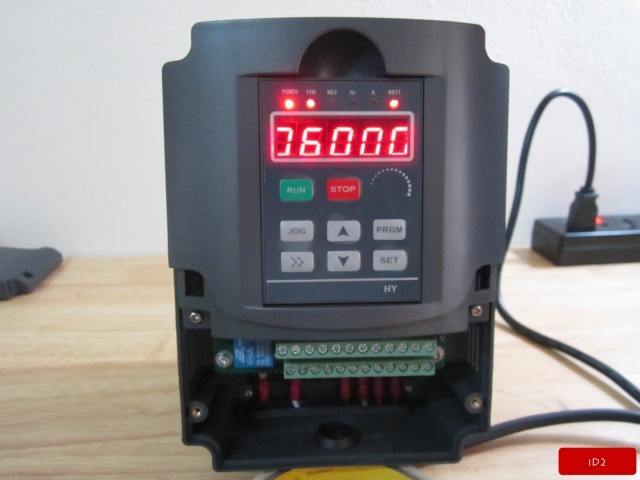
Note :: Before start run it VFD need to parameter setting.
- PD005 = 400 (Hz)
- PD004 = 400 (hz)
- PD003 = 400 (hz)
- PD008 = 220 (220volt)
- PD072 = 400 (hz)
- PD144 = 3000
This parameter need to set up before start run spindle. Other parameter see document.
After test , It work correctly and everything good so next i need to add potentionmeter to font panel of inverter , it already have socket for putting potentionmeter into it.
Done !!! lol
-
24th July 2013, 04:18 AM #5
Intermediate Member
- Join Date
- Jul 2013
- Location
- Asia
- Posts
- 33
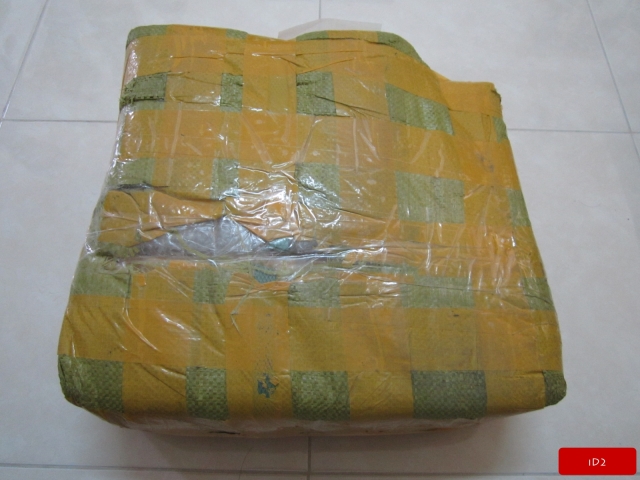
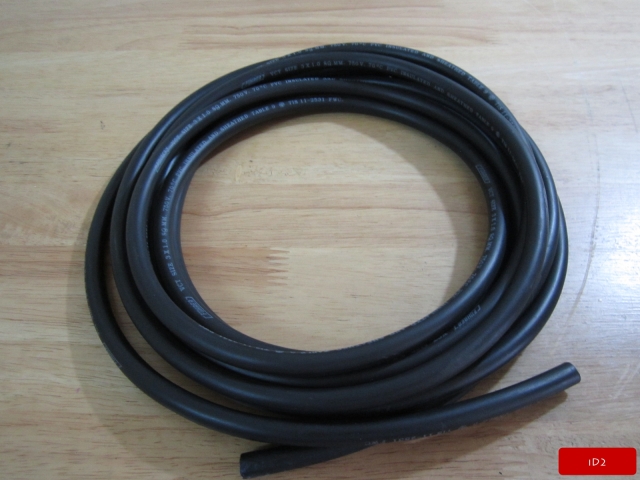
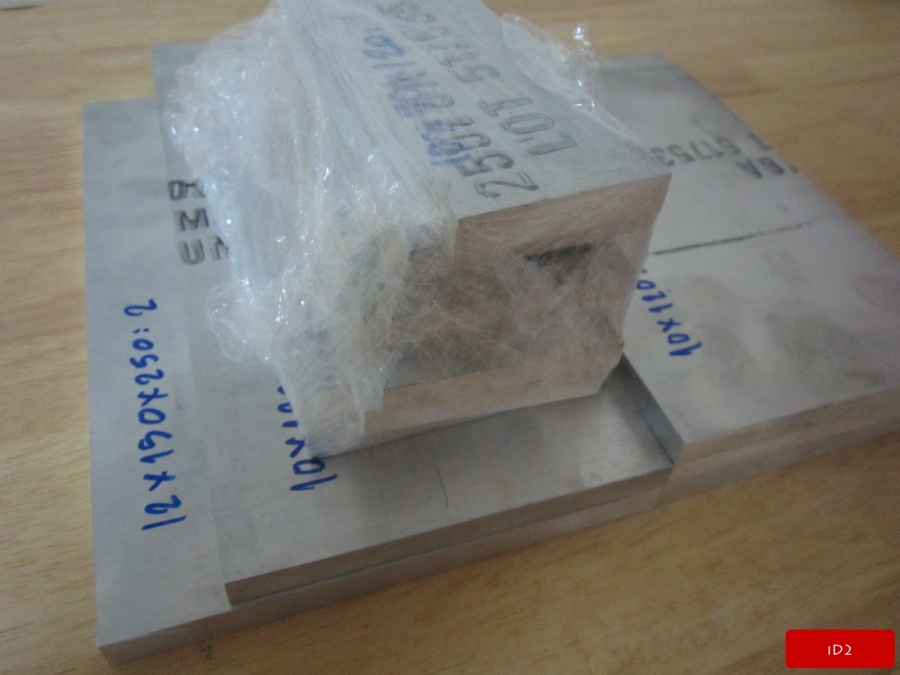
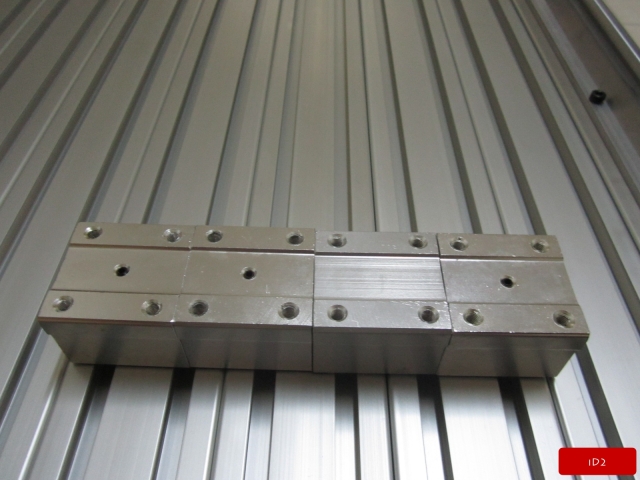
Got an aluminum
-
25th July 2013, 08:07 PM #6
Intermediate Member
- Join Date
- Jul 2013
- Location
- Asia
- Posts
- 33
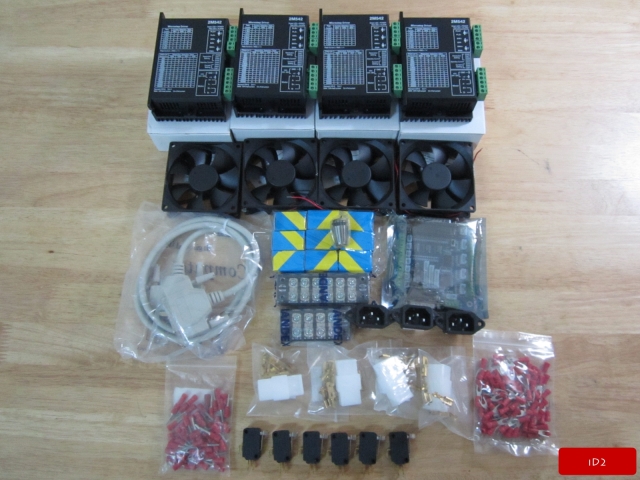
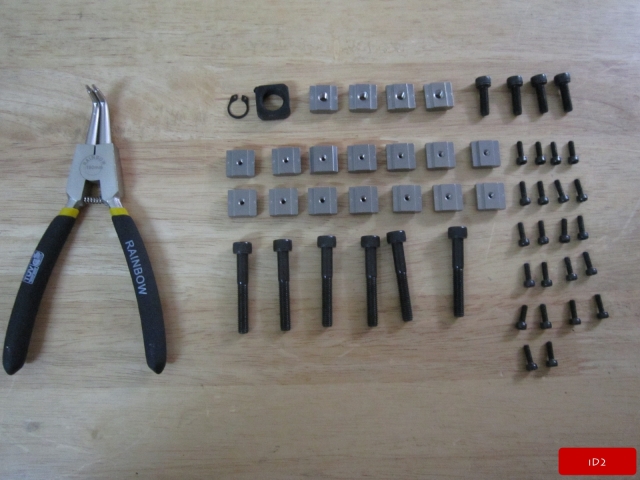
Electronic kits.


-
25th July 2013, 08:08 PM #7
Intermediate Member
- Join Date
- Jul 2013
- Location
- Asia
- Posts
- 33
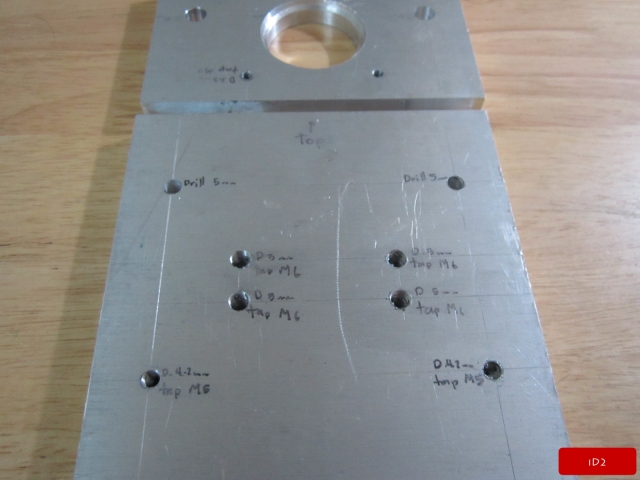
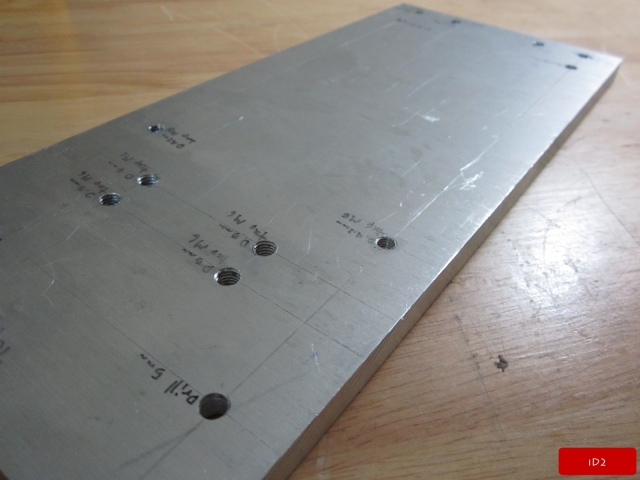
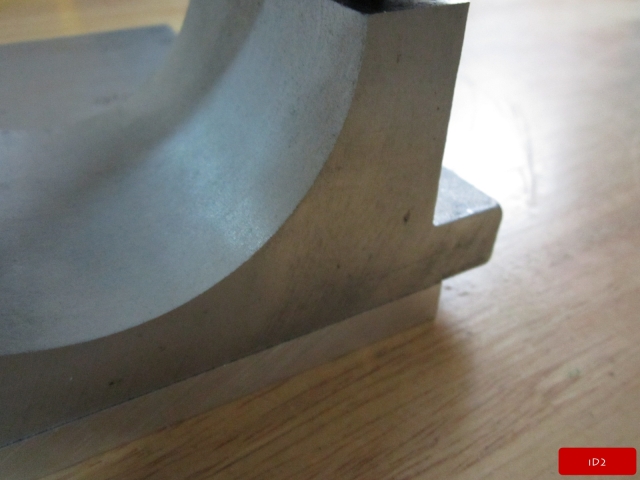
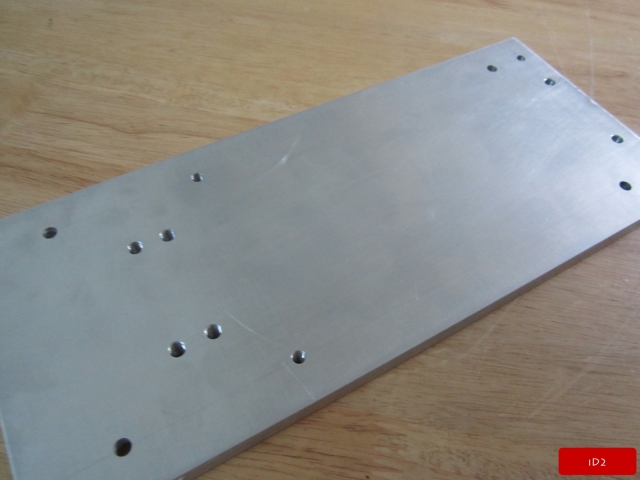
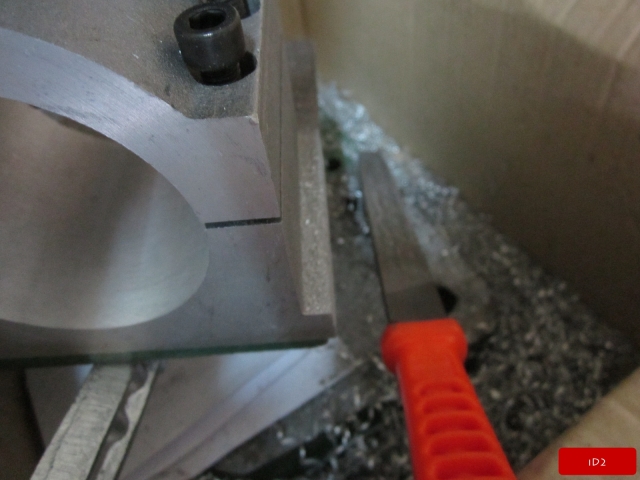
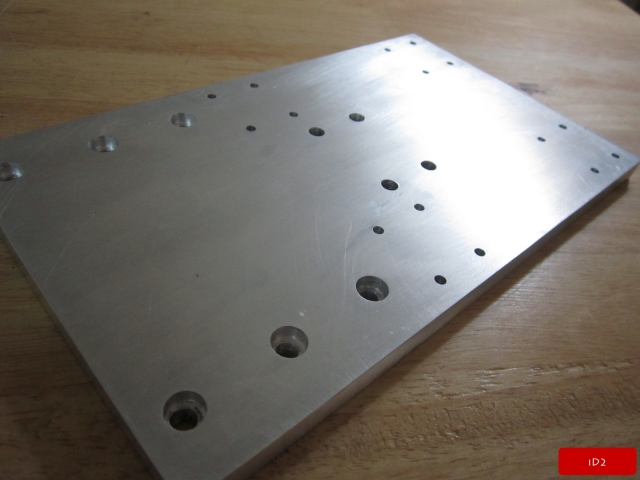
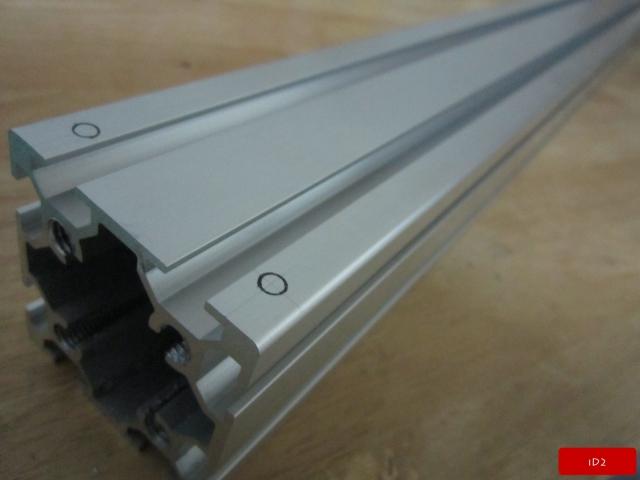
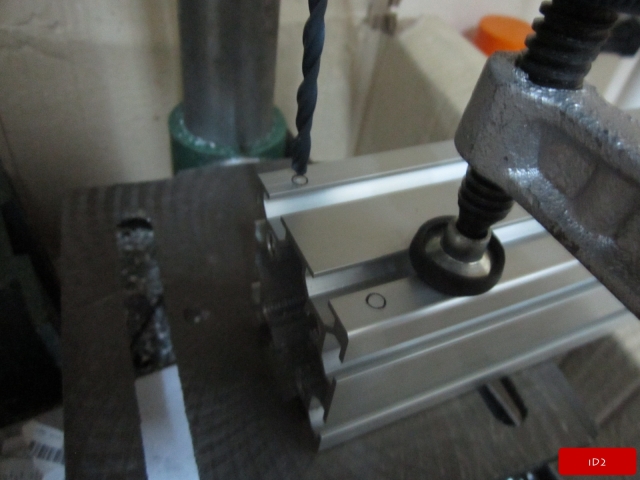
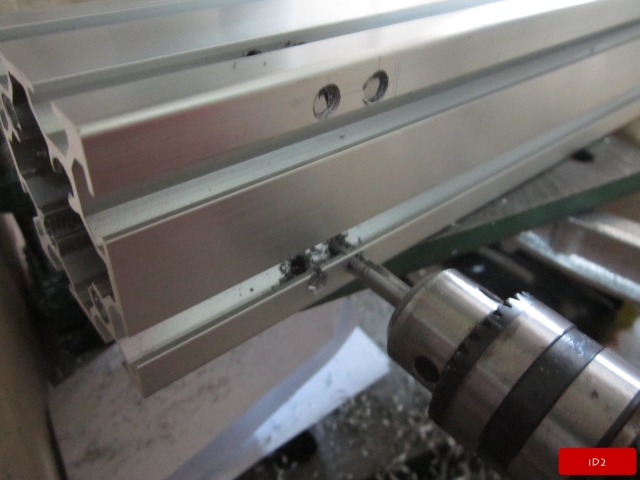
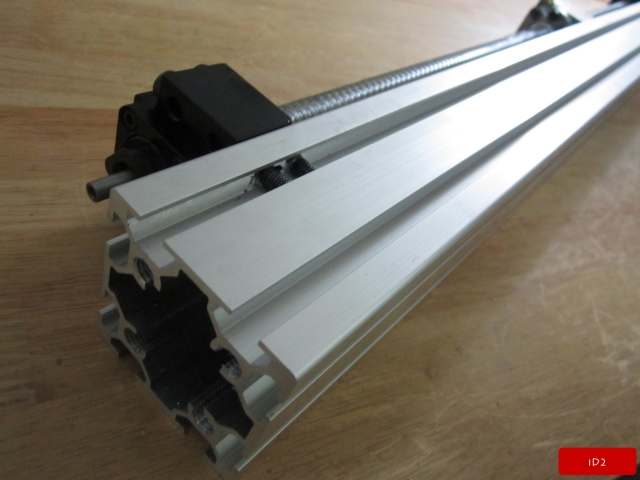
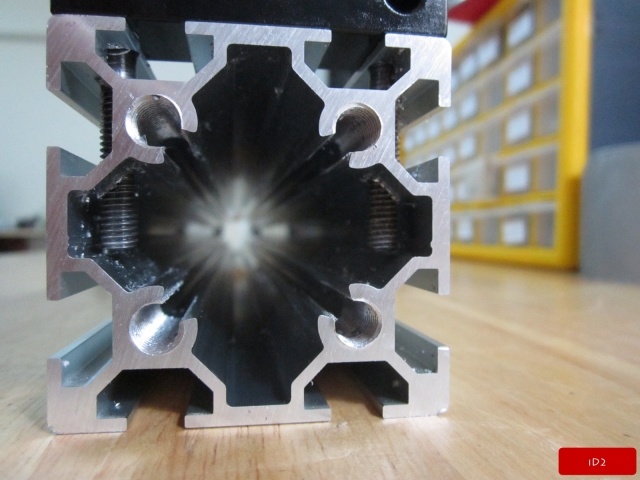
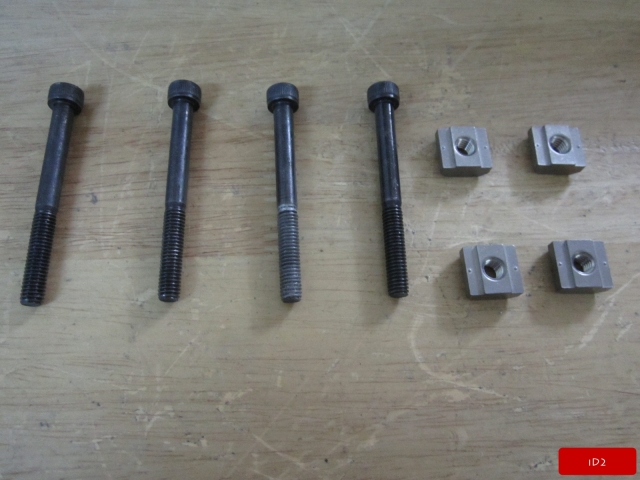
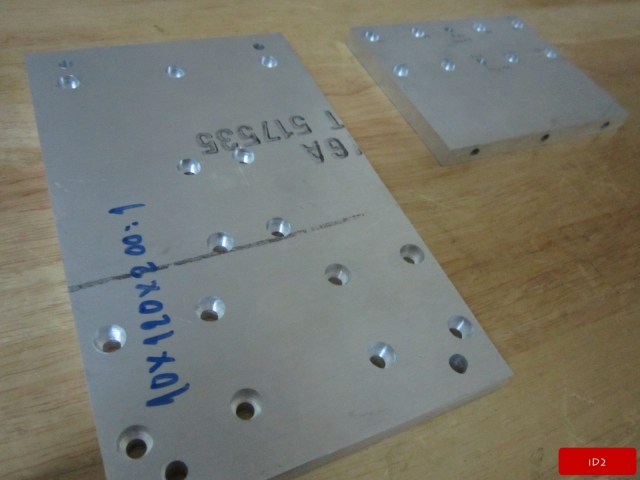
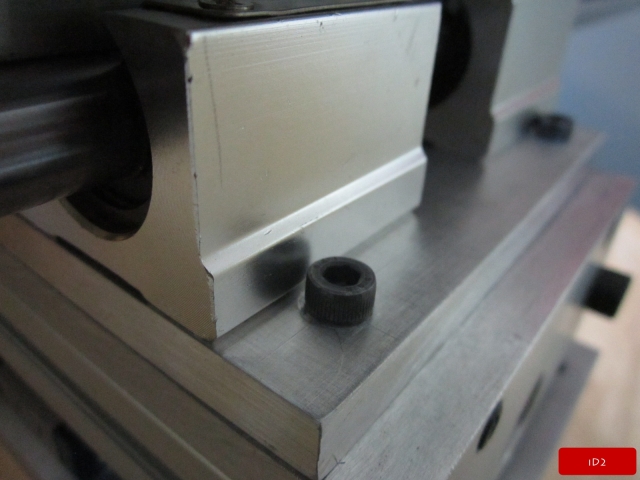
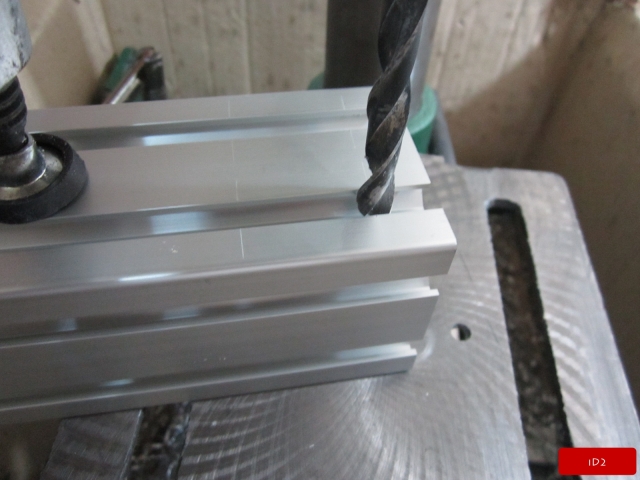
Tap aluminum profile ::


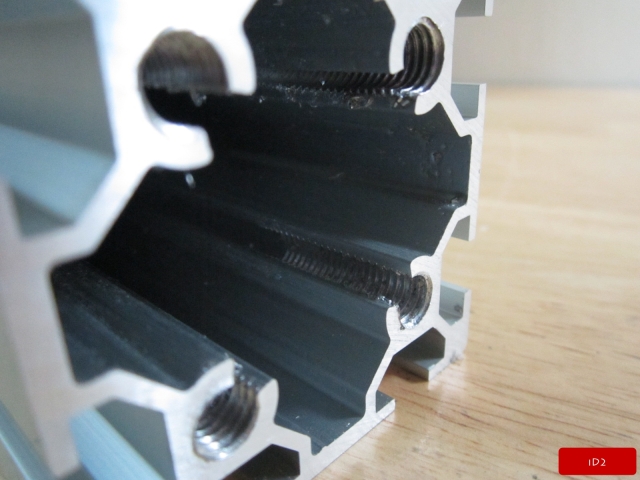
Mark drill & tap position of Z-Axis :: This can do 2 way, 1st like picture below , 2nd print my design as scale print but i choose 1st way.


-
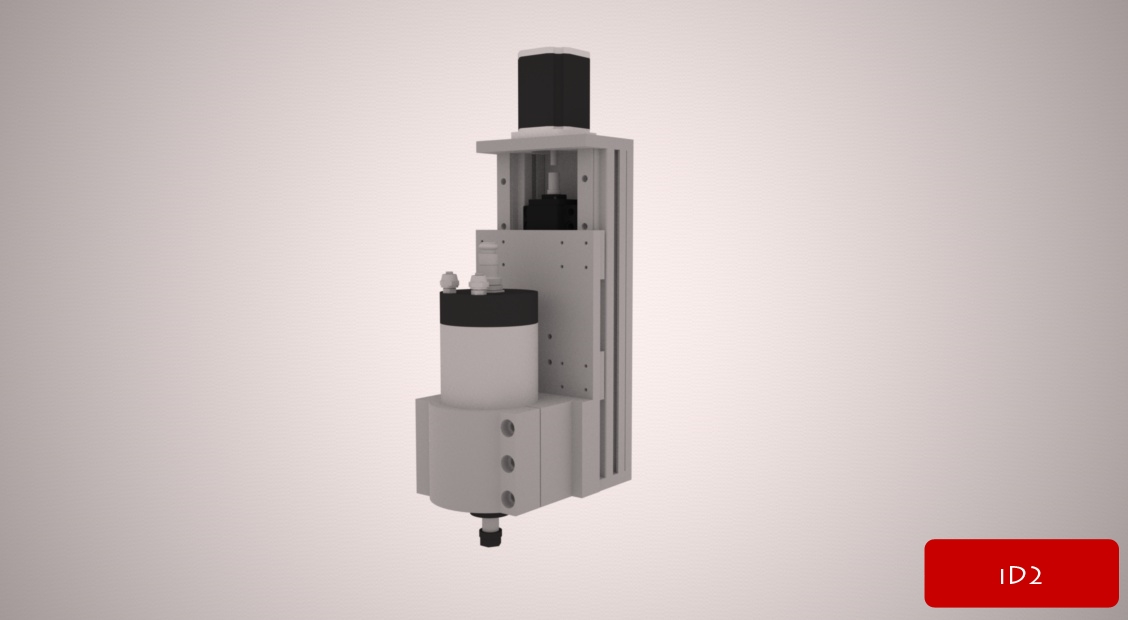
27th July 2013, 06:38 AM #8
Intermediate Member
- Join Date
- Jul 2013
- Location
- Asia
- Posts
- 33
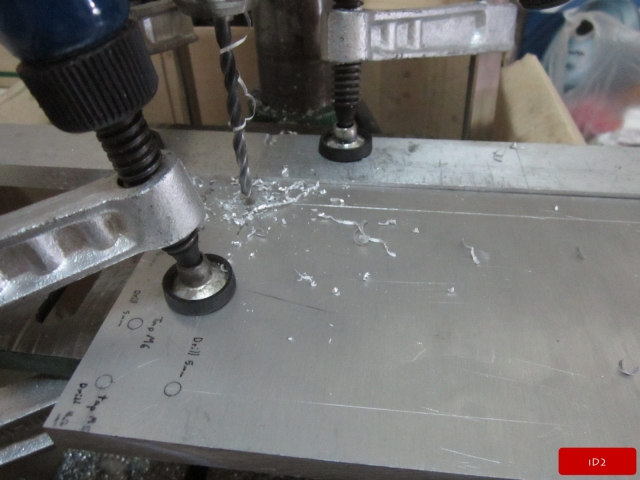
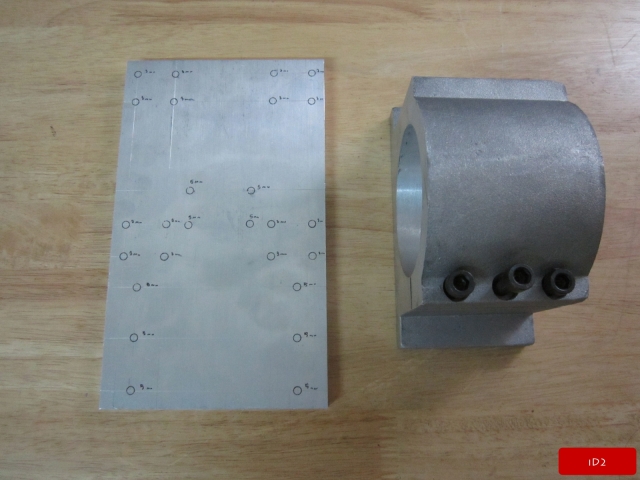
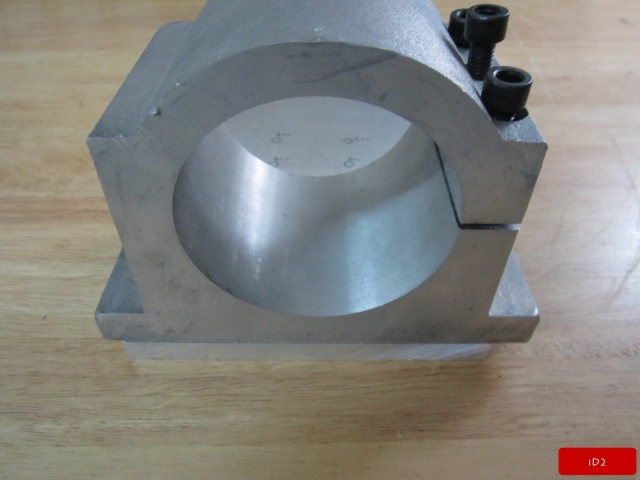
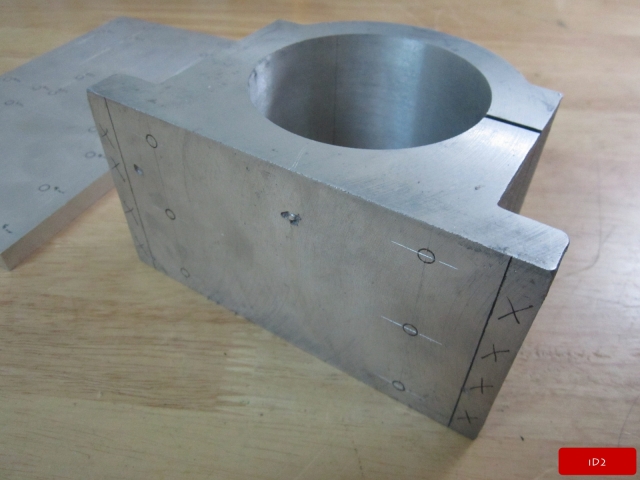
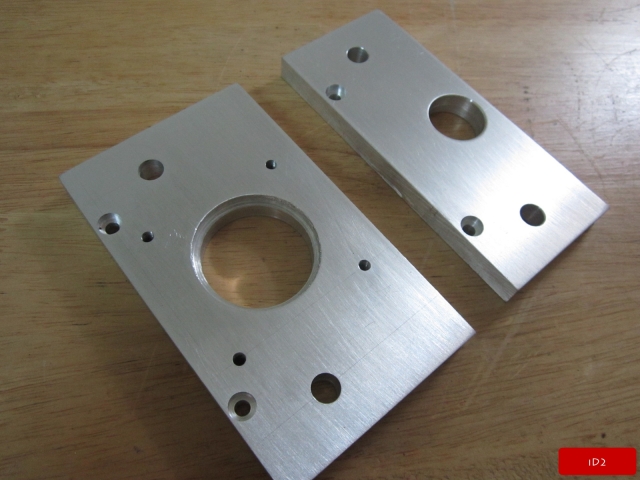
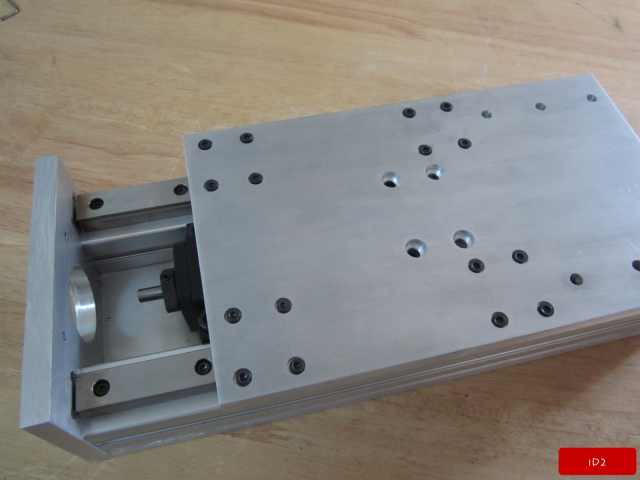
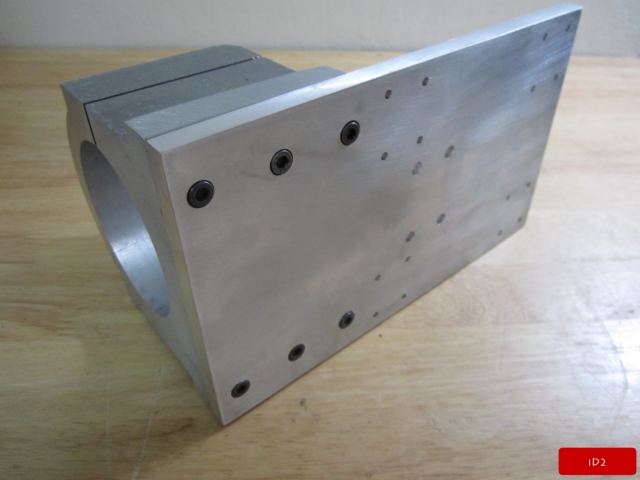
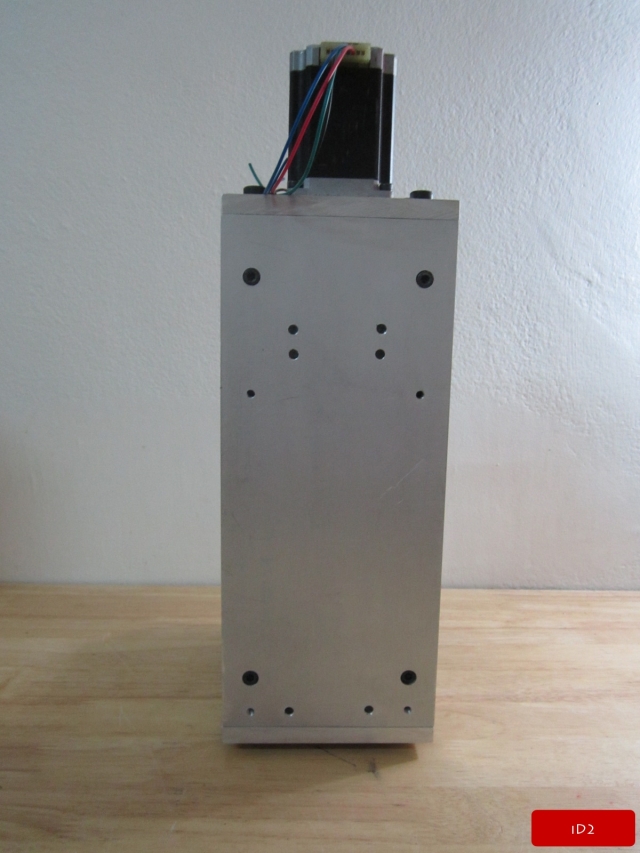
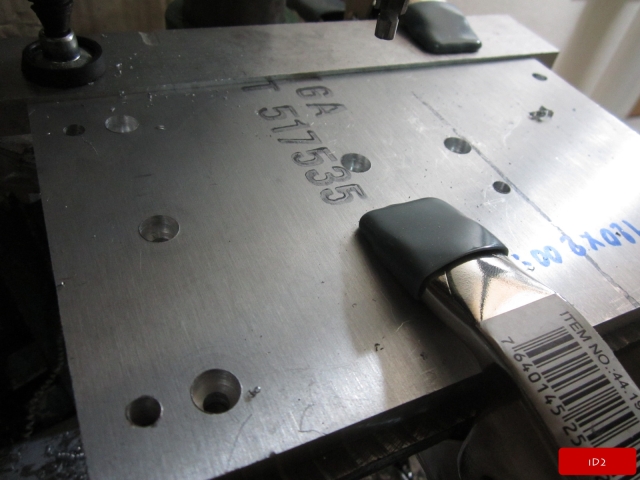
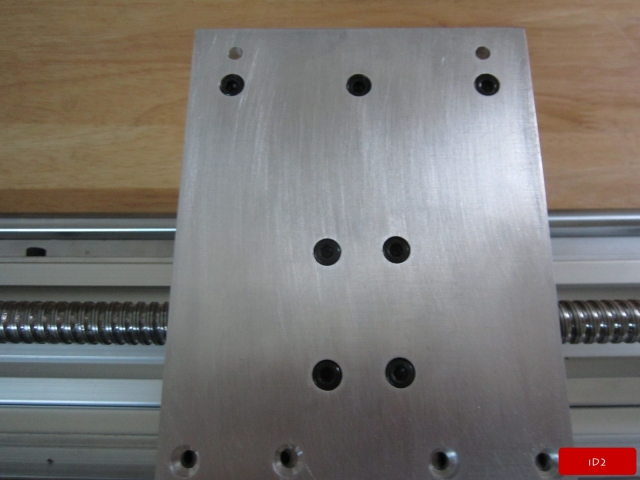
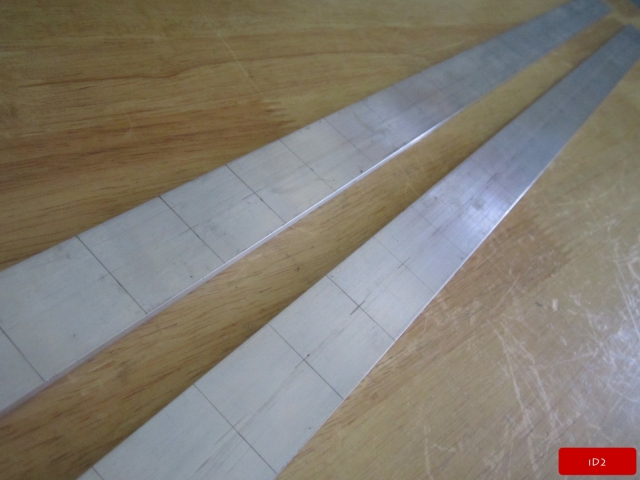
Finish build Z-Axis. More Picture see at my blog. iD2CNC.wordpress.com
I used cheap power drill that i have , it not accuracy and not precision but i can make it more precision and accuracy by process of drilling but some hole will have +- 0.2-0.5mm and how to make it still fit when mounting that was simple. OK how? if need to drill 3mm hole then just drill 3.3mm or 3.5mm hole then 0.3-0.5mm of hole will use for adjust aluminum plate when mounthing.


-
27th July 2013, 06:39 AM #9
Intermediate Member
- Join Date
- Jul 2013
- Location
- Asia
- Posts
- 33


-
27th July 2013, 06:41 AM #10
Intermediate Member
- Join Date
- Jul 2013
- Location
- Asia
- Posts
- 33


-
27th July 2013, 09:58 AM #11
New Member
- Join Date
- Nov 2012
- Location
- VIC
- Posts
- 1
Inteteresting project. Build is progressing on nicely. Your english is fine. Curious what the cost of materials is versus the fully built CNC machines of similar size and capacity. I've always dreamed about having one of these for building kite boards, so would need a rather long bed, ie in the order of 1.7m, could never really justify the cost.
Regards,
Norman.
-
27th July 2013, 03:51 PM #12
Intermediate Member
- Join Date
- Jul 2013
- Location
- Asia
- Posts
- 33
Thank you, For this machine above include water cooled spindle + inverter + aluminum profile table top , cost about 2,000$ but if need to save cost by using wood router replace water cooled spindle and replace aluminum table top by wood then cost of this machine about 1,400$. Originally Posted by SoutherlyBuster

But if need to build 4'x4' by using same design above , cost would be about 3,000$ or may be cheaper than 3,000$ , i think it should be about 2,500$ because it all same component but need more length aluminum profile and more length of ballscrew but other component still not change.
-
27th July 2013, 04:10 PM #13
Intermediate Member
- Join Date
- Jul 2013
- Location
- Asia
- Posts
- 33
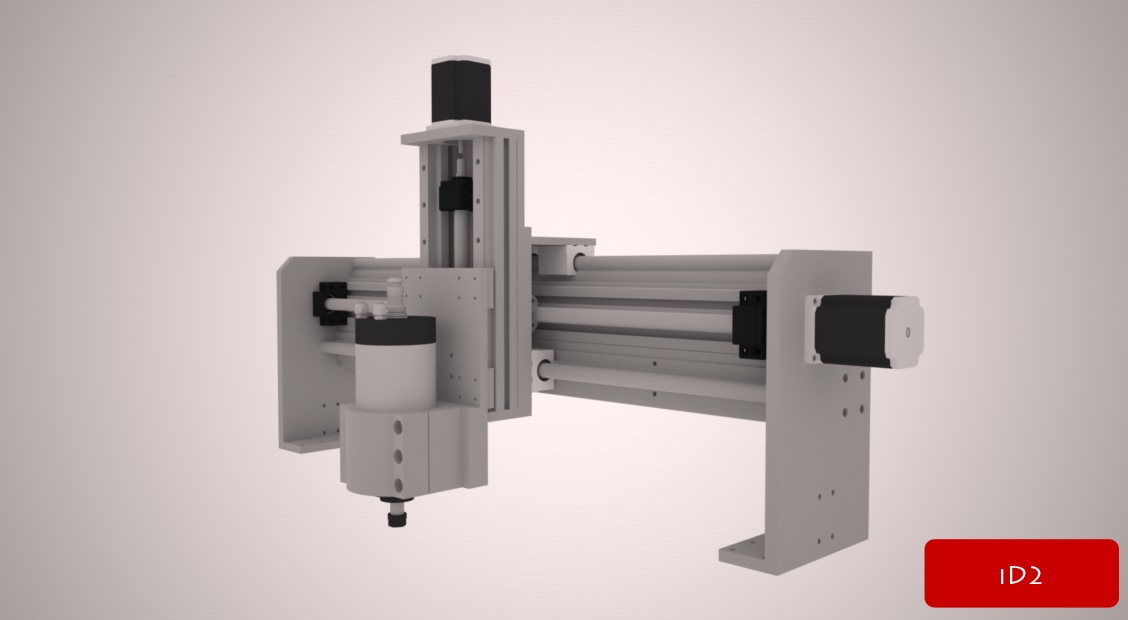
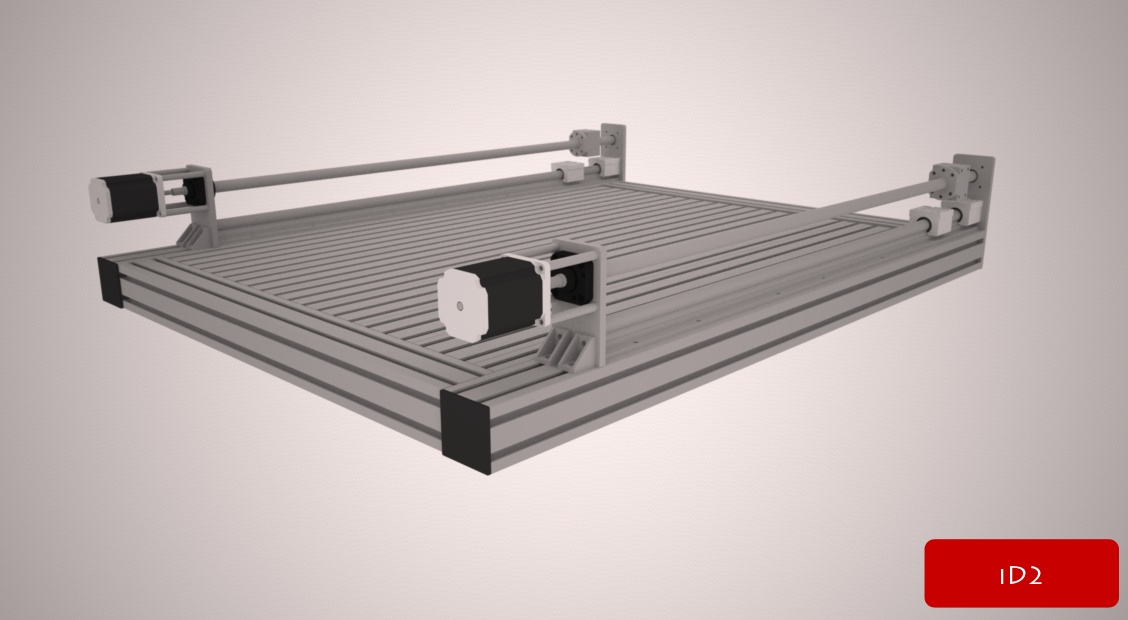
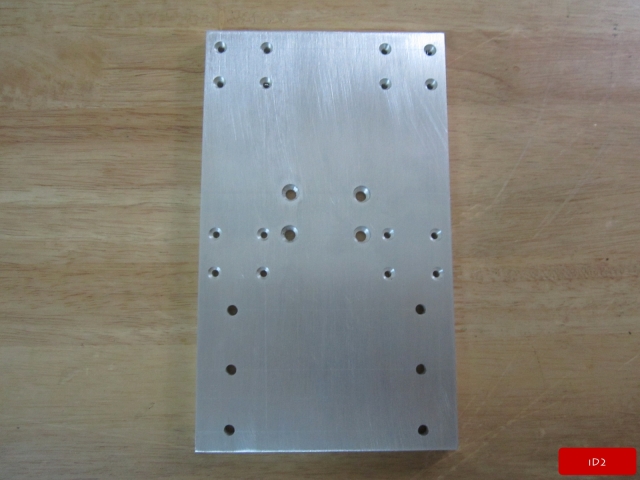
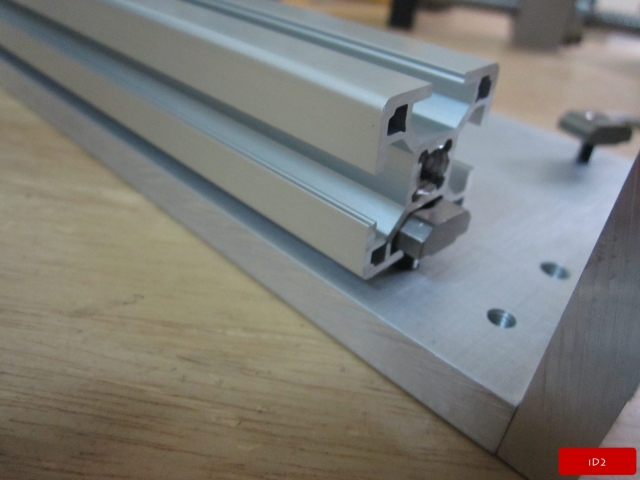
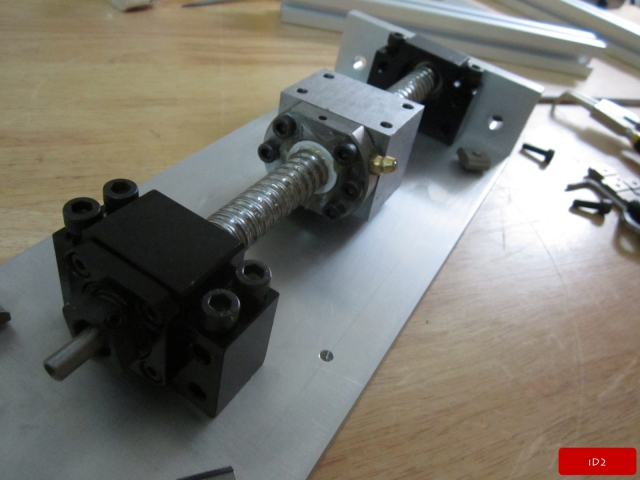
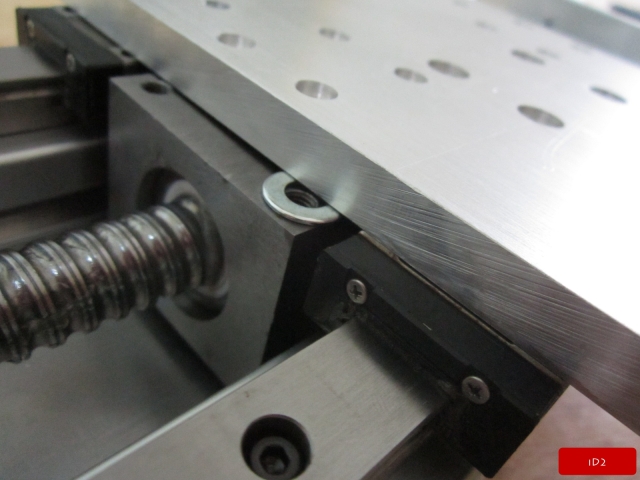
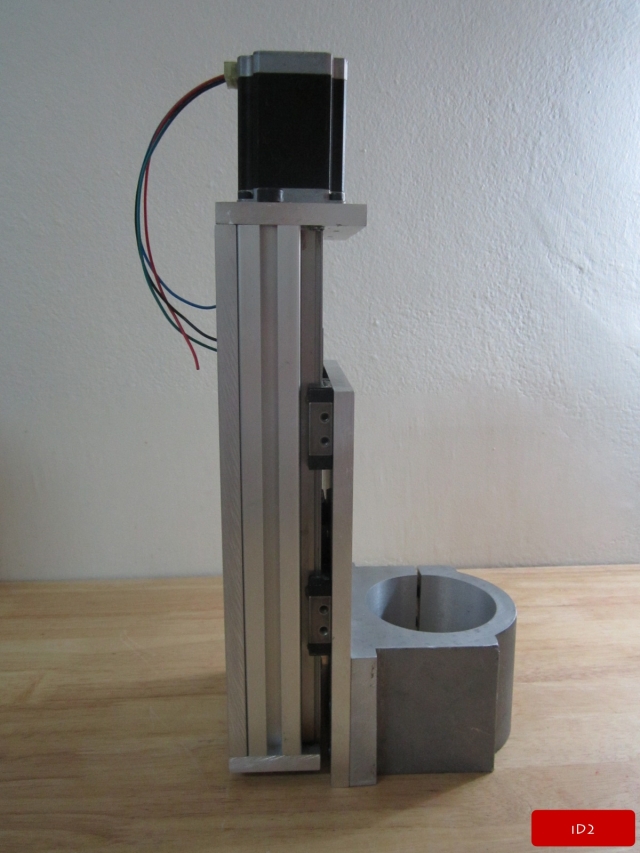
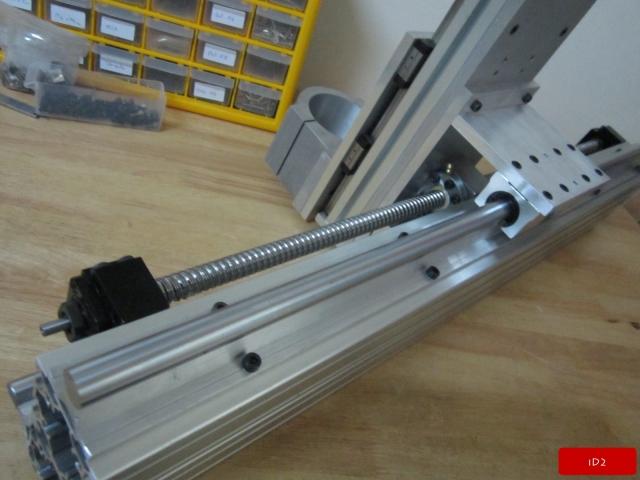
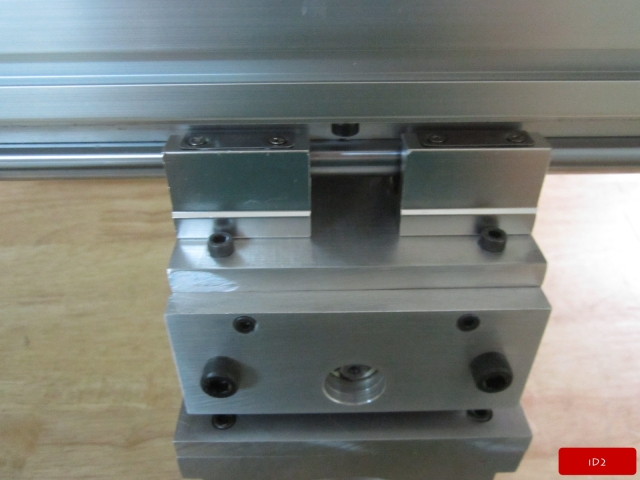
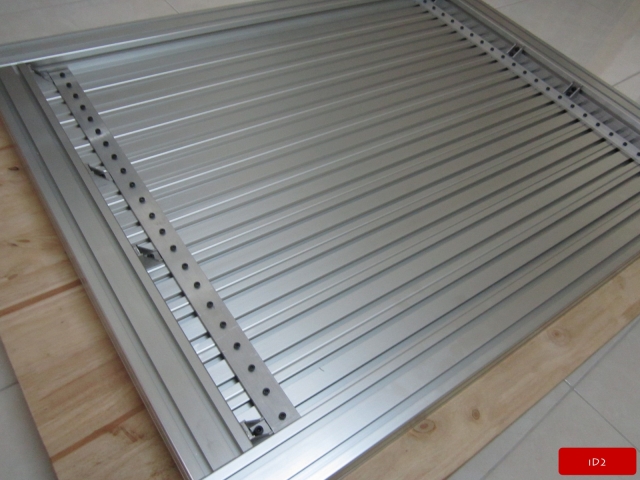
Update Y Axis build progress.
More pictures see at my blog :: iD2CNC.wordpress.com


-
27th July 2013, 04:12 PM #14
Intermediate Member
- Join Date
- Jul 2013
- Location
- Asia
- Posts
- 33


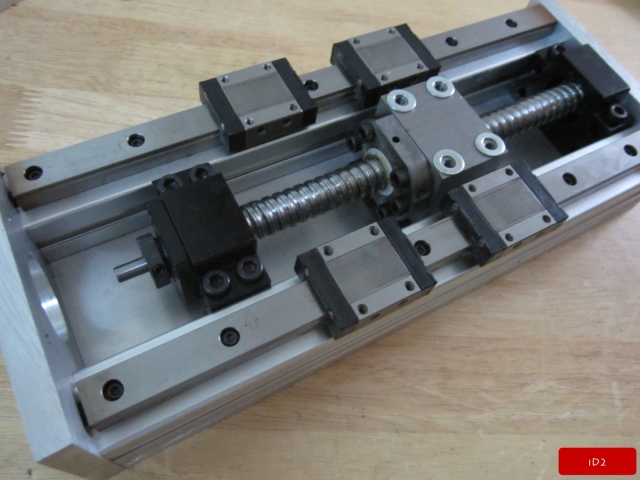
Test assembly Y Axis video ::
-
1st August 2013, 04:55 AM #15
Intermediate Member
- Join Date
- Jul 2013
- Location
- Asia
- Posts
- 33
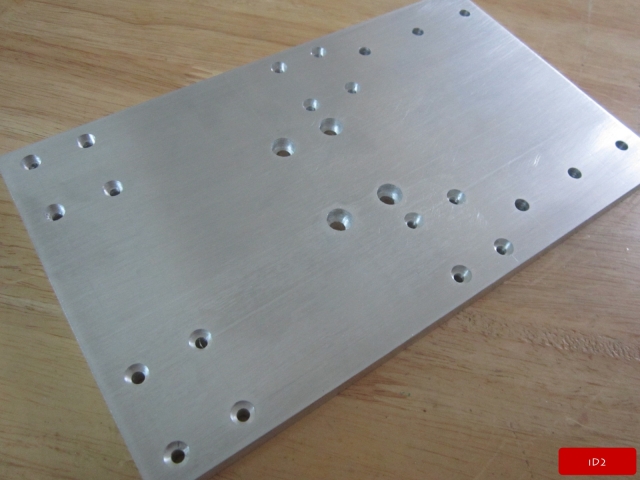
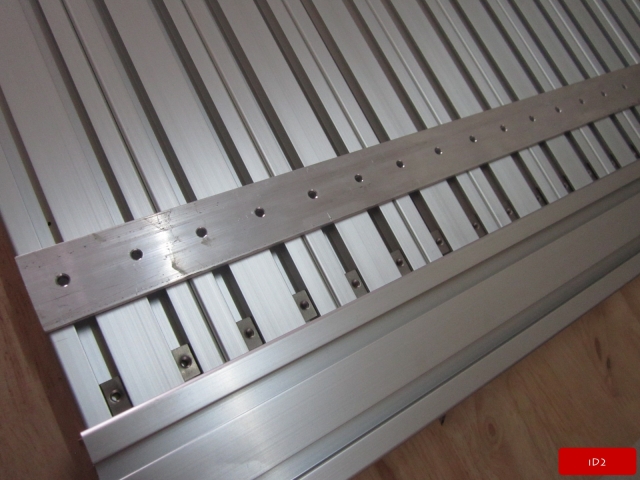
Working with X Axis base and table top then assembly rod rail and then assembly Y Axis and Z Axis.
More pictures , iD2CNC.wordpress.com
X Axis base and table top ::


 Reply With Quote
Similar Threads
-
Another Aluminum
By Mike in Nanaimo in forum WOODTURNING - PEN TURNINGReplies: 11Last Post: 4th February 2011, 11:43 AM -
New Build - 1st from Scratch
By mannym in forum MUSICAL INSTRUMENTSReplies: 146Last Post: 22nd August 2010, 12:26 PM -
Aluminum
By benupton in forum METALWORK FORUMReplies: 5Last Post: 1st April 2010, 01:11 AM -
New Build - start from scratch
By bassbuilderman in forum MUSICAL INSTRUMENTSReplies: 45Last Post: 17th December 2008, 04:14 PM
