

 Thanks:
  Likes:
  Needs Pictures:
  Picture(s) thanks:
Results 1 to 12 of 12
Thread: Dragsters revisited.
-
17th November 2012, 09:37 AM #1
 Senior Member


- Join Date
- Sep 2012
- Location
- Ex Nr Carcassonne S France Now NW Wiltshire, Blighty.
- Posts
- 497
 Dragsters revisited.
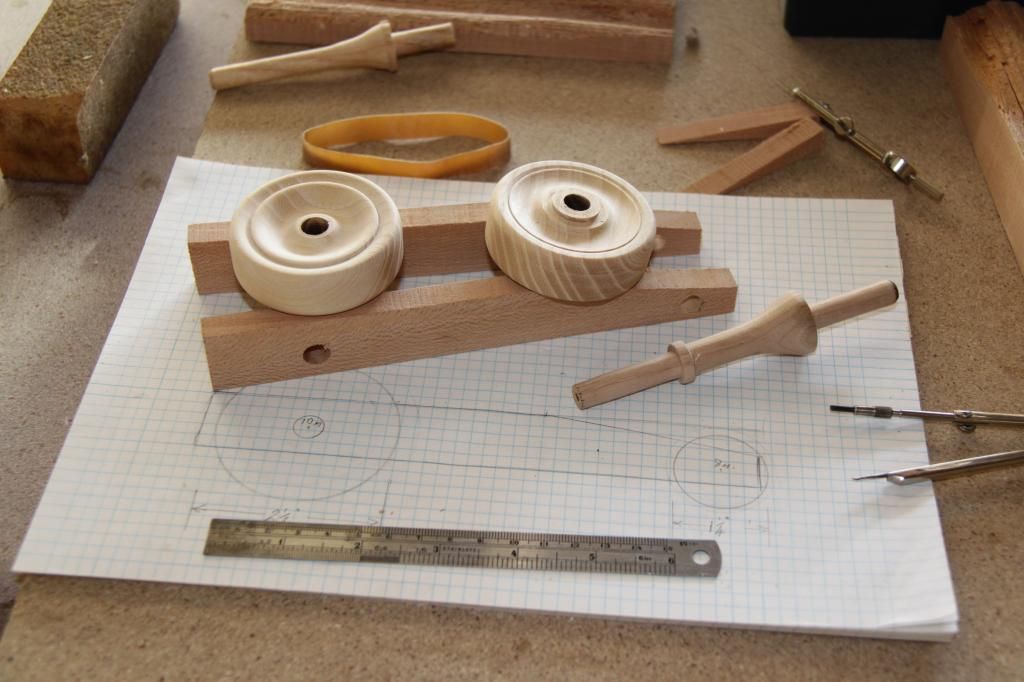
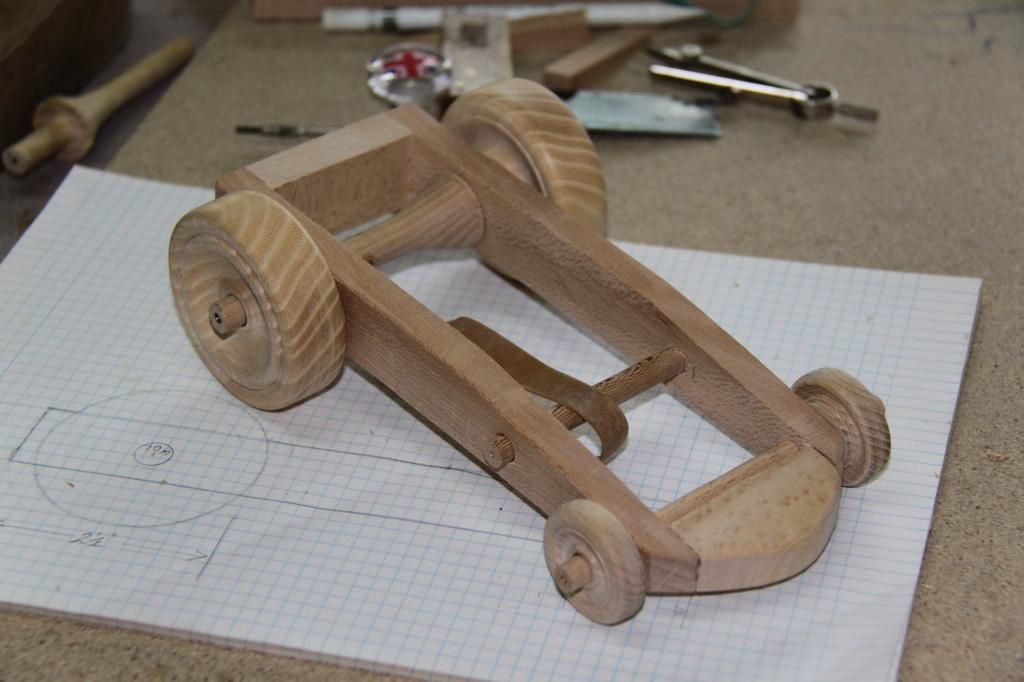
Well, spurred on by Crowies Super Dragster I decided that 3 of them would be the ideal pressies for my grandsons for krimble! Being a one for a challenge I decided, to re-invent the wheel so to speak, and do it from the pikkies. The prototype is too wide but I think it is on the right track
 and when it was assembled to try it just sat there and spun the wheels going forward a few feet. But when I used the Crowie traction method, 2 lakky bands on each driving wheel it did a wheelie and lifted the front!!!
 I have decided to try the 'cone drive', there, a new phrase in the world of motoring? It seems to work quite well, but I think that I opted for too bigger diameter shaft at 10mm. It doesn't allow for much of a lakky band wind.
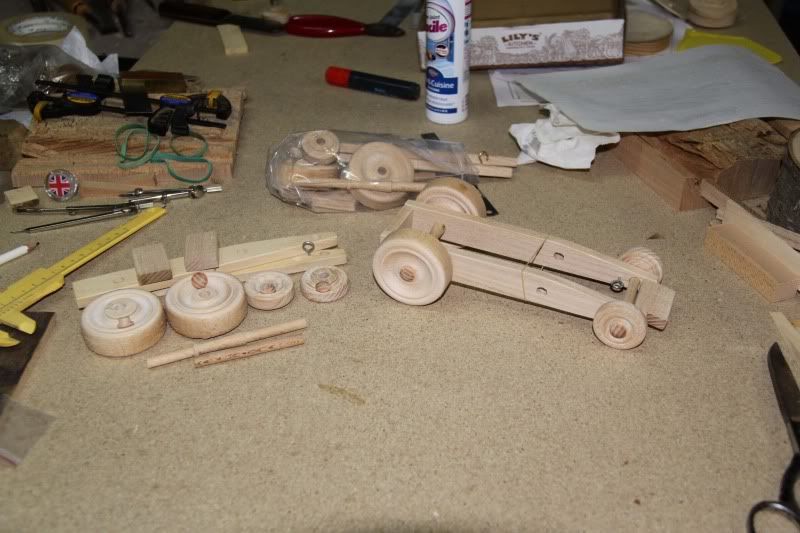
Most of the bits
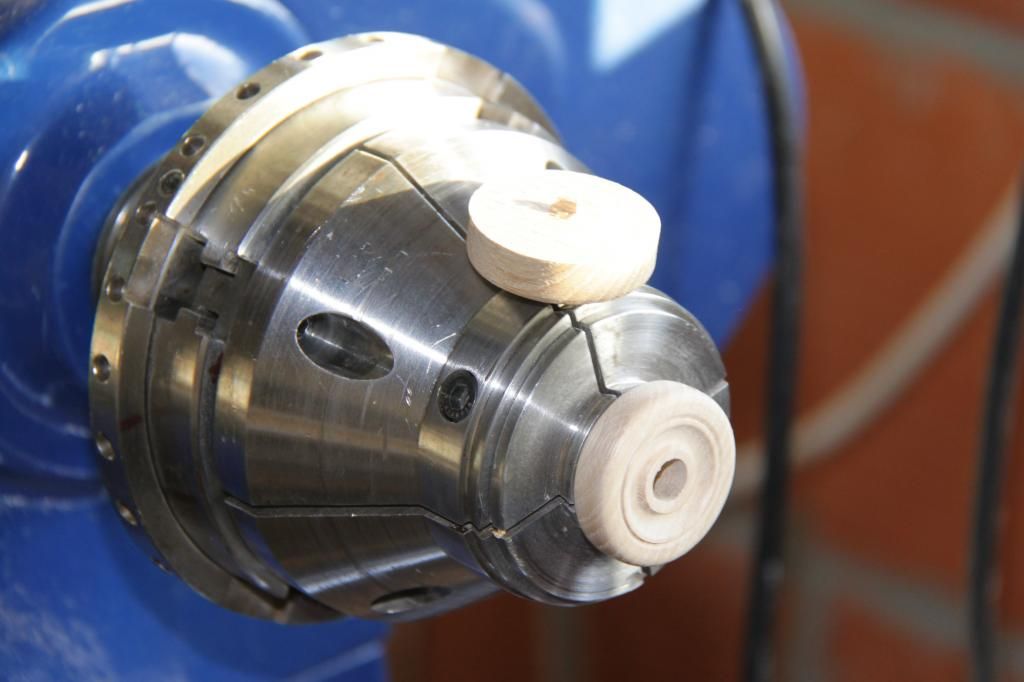
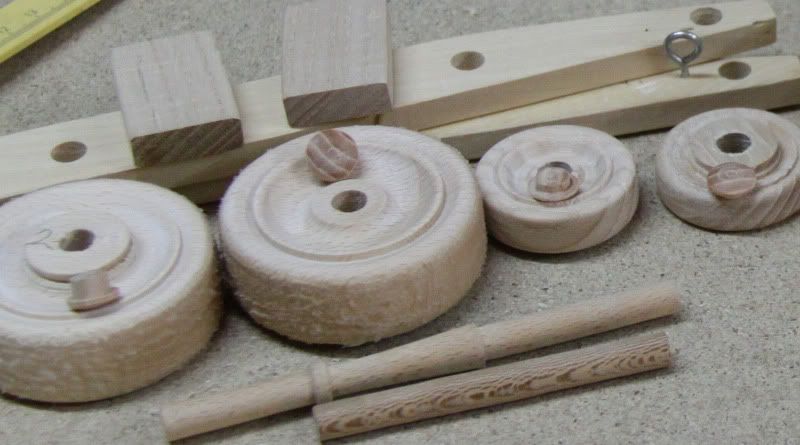
The front wheels in the making
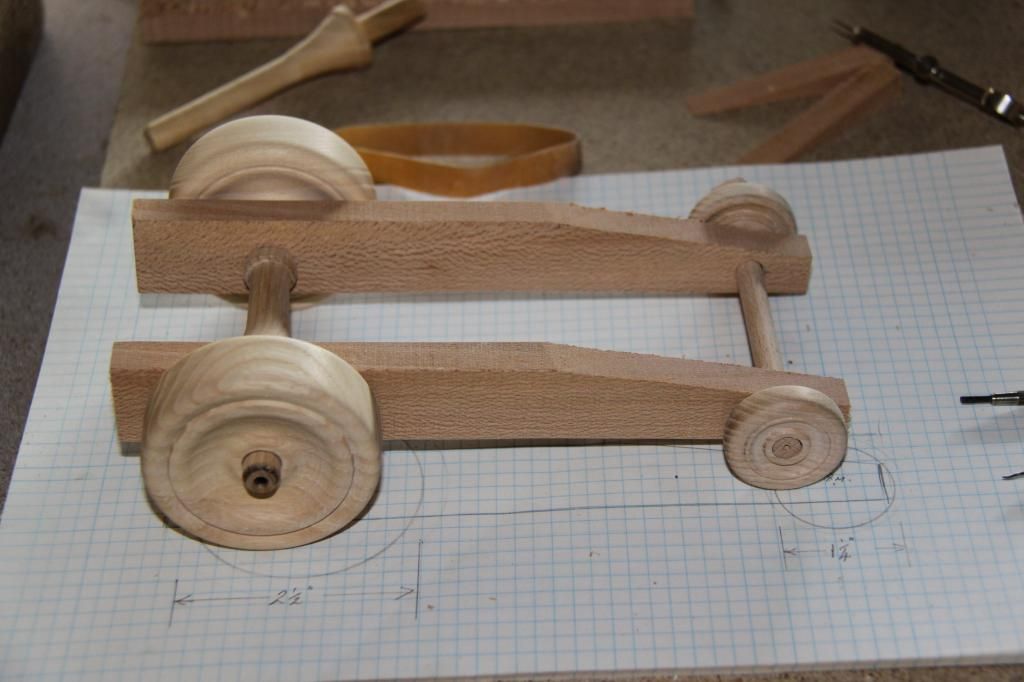
Dry assembly
Chassis assembled and sanded

The idea is that the lakky band is positioned on the opposite side to the pin on the axle so it doesn't catch. It winds itself up onto the cone.
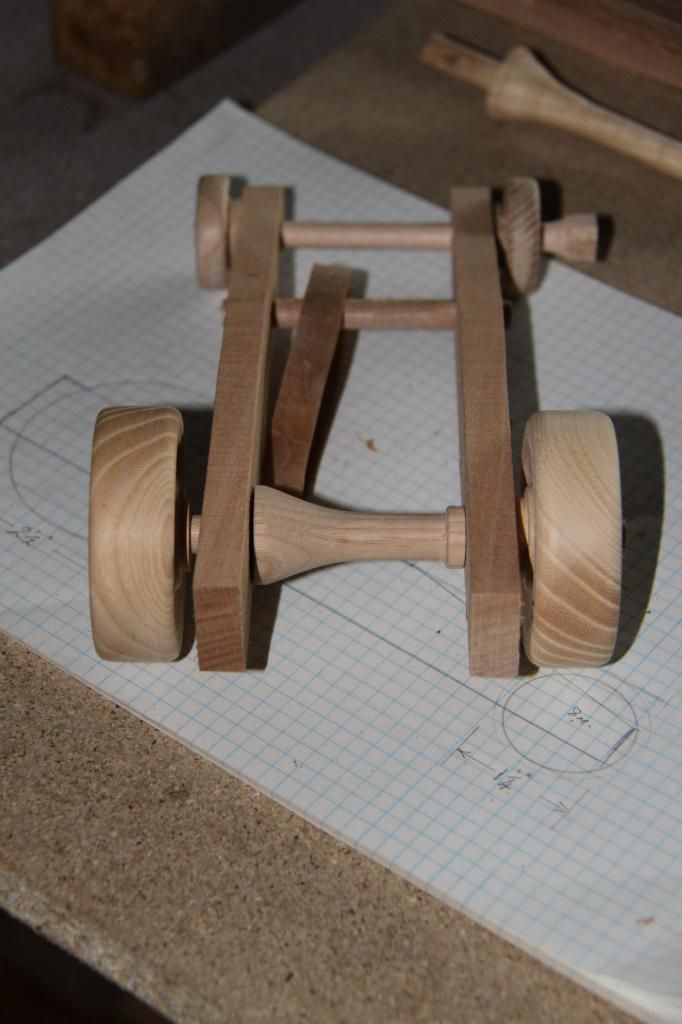
Ready for testing, but the rear wheels are just forced over masking tape so they can be removed
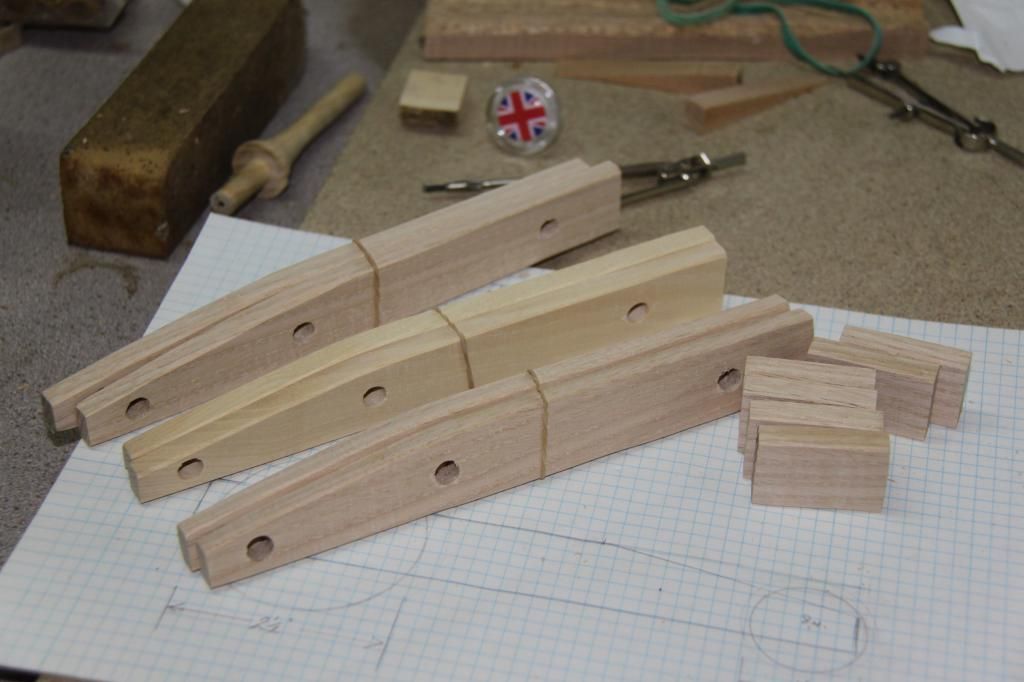
These are the chssis bits for the pressies. The chassis is going to be about an inch narrower and that should make it look better
I didn't get chance to get a photo of the wheelies, but I will tyr I will have to teach SWMBO how it operates and I will see if I can keep up with it. I still think that the weight is a benifit as it gives it mass when it gets going and there is well enough grunt to accelerate the weight.. I have to get into a DIY shed tomorrow and get a tube of clear silicon rubber to put a nice sticky, grippy coat on the rear wheels. t should work, after all that's what they use on the electric circuit racers and they go like the proverbial of a shovel
My ambition is to grow old disgracefully. So far my ywife recons that I'm doing quite well! John.
I will have to teach SWMBO how it operates and I will see if I can keep up with it. I still think that the weight is a benifit as it gives it mass when it gets going and there is well enough grunt to accelerate the weight.. I have to get into a DIY shed tomorrow and get a tube of clear silicon rubber to put a nice sticky, grippy coat on the rear wheels. t should work, after all that's what they use on the electric circuit racers and they go like the proverbial of a shovel
My ambition is to grow old disgracefully. So far my ywife recons that I'm doing quite well! John.
http://johnamandiers.wixsite.com/johns-w-o-w-1
-
17th November 2012 09:37 AM # ADSGoogle Adsense Advertisement
- Join Date
- Always
- Location
- Advertising world
- Posts
- Many
-
17th November 2012, 08:52 PM #2
 Life's Good, Enjoy each new day & try to encourage
- Join Date
- Dec 2009
- Location
- Faulconbridge, Lower Blue Mountains
- Age
- 68
- Posts
- 11,189
What a top job John....
Very well done indeed, looks better than the original & mine too.
The cone rear axles has come up a treat; top marks.
I might borrow your silicon idea for the rear wheel, thank you.
Cheers, crowie
-
18th November 2012, 09:26 AM #3
Senior Member
- Join Date
- Sep 2012
- Location
- Ex Nr Carcassonne S France Now NW Wiltshire, Blighty.
- Posts
- 497
Cheers Peter. I got back in the w/shop for an hour or so this afternoon and now have 6 rear wheels for the pressies and an idea for the front wheel axles. Instead of a through axle, 2 stub axles would be easier and I have turned 2 to see. That way I can include the hub cap, bit like a mushroom, with the stub glued into the chassis and the wheel turning freely on he stub.
Edit, due to lousy memory : - I forgot to say that I got a tube of silicon rubber this morning and coated the two rear wheels for the proto type jobbie. They will dry overnight and I will try them in the morning.. Got to let the silly-con cure properly. Don't want any tyre slip do we???
Method of application was to squirt some onto a page of A4 paper, spread it about a bit, like you do, and run the wheels back and forth through it. That way you get a nice knobely surface that will grip like a polar bear to a penguin My ambition is to grow old disgracefully. So far my ywife recons that I'm doing quite well! John.
http://johnamandiers.wixsite.com/johns-w-o-w-1
-
29th November 2012, 09:36 AM #4
Senior Member
- Join Date
- Sep 2012
- Location
- Ex Nr Carcassonne S France Now NW Wiltshire, Blighty.
- Posts
- 497
A bit further on now and have the bits done for the 3 basic units ready, I hope, for assembly. I turned the rear axle a lot thinner than the original 10mm. It was giving far too much torque and pointing the front of the dragster at the sky and loosing all the power. It now starts with the wound band at the smallest part of the axle, about 6 or 7mm and rising to about 10mm working on the principle that the biggest acceleration of the lakky band is at its biggest stretch then going onto the larger diameter as the stretch gets less.
There are 14 parts in each basic chassis and I haven't got to the rear body work yet? I put the bits in 3 bags so as not to get confused. That's easy with me now
I wondered how to do the axle/wheel bit and decided that the axle should come part way through the wheel and glue a 'hub cap' onto the end. The caps are about 10mm across the top and just a few mm into the wheel
The 'tyres' on the rear wheels look good and realy give the wheels some GRUNT on 'take off'. Just using some silicone sealer by squirting some onto a sheet of paper ad then rolling the wheel back and forth over it gives a fantastic grippy wheel. I had to rough up the wheel surface after carefully getting it nice and smooth on the lathe!! Pie-rellie eat yer heart out!

Tommorow I hope to get to glueing all 3 together and deciding what the body work is going to be like?
I also found that a longer lakky band hooked onto an anchor just behind the front axle and a longer lakky band produced a much better take off and runs of over 30 feet still with a wheelie start!!My ambition is to grow old disgracefully. So far my ywife recons that I'm doing quite well! John.
http://johnamandiers.wixsite.com/johns-w-o-w-1
-
29th November 2012, 10:23 AM #5
Timber Hoarder
- Join Date
- Sep 2002
- Location
- Minbun, FNQ, Australia
- Age
- 66
- Posts
- 12,881
Looks good....
interested to see if that silicon rubber tread stays on.
Cliff.
If you find a post of mine that is missing a pic that you'd like to see, let me know & I'll see if I can find a copy.
-
30th November 2012, 03:55 AM #6
Senior Member
- Join Date
- Sep 2012
- Location
- Ex Nr Carcassonne S France Now NW Wiltshire, Blighty.
- Posts
- 497
So will I Cliff
It is the method used on the electric racing R/C cars, but it's put on rubber tyres to give extra grip.
When I tried it on the first pair it worked well but was put onto a very nice smooth surface, as is normal when I'm turning, but it peeled off with the traction. So back to the lathe and a diamond point tool t gouge the surface and roughenit a bit. It seems much better not it has a 'key' to hang on to.. I hope It don't arf give the wheels some grip though!
No chance to get into the workshop this morning, lunch with a load of villagers and too dammed cold this afternoon. No chance tomorrow either with a haircut in the morning and my French lesson in the afternoon!
Retirement is so very tiring
My ambition is to grow old disgracefully. So far my ywife recons that I'm doing quite well! John.
http://johnamandiers.wixsite.com/johns-w-o-w-1
-
4th December 2012, 11:53 PM #7
GOLD MEMBER
- Join Date
- Nov 2008
- Location
- Canterbury UK
- Age
- 67
- Posts
- 3,996
-
5th December 2012, 01:01 AM #8
Senior Member
- Join Date
- Sep 2012
- Location
- Ex Nr Carcassonne S France Now NW Wiltshire, Blighty.
- Posts
- 497
You could always mold them in that lovely plastic
then they would all be the same  . Or use a CNC jobbie
I have to admit that when I did 2 tractor/trailers at the same time and they HAD to be kept seperate.
I managed to get a short while in the workshop yesterday and glued up one chassis. I've used celulose sanding sealer on the axles and the axle holes and then put some candle wax on the bearing part of the axles. They run nice a smoothly now. I have still to decide how to do the tops. I may just fair a piece up the rear sides and put a 'wing' on the top, I'll see how it looks?My ambition is to grow old disgracefully. So far my ywife recons that I'm doing quite well! John.
http://johnamandiers.wixsite.com/johns-w-o-w-1
-
5th December 2012, 06:42 PM #9
Life's Good, Enjoy each new day & try to encourage
- Join Date
- Dec 2009
- Location
- Faulconbridge, Lower Blue Mountains
- Age
- 68
- Posts
- 11,189
G'Day John,
I also run a nylon flat washer between the inside of the wheel & the chassis of all the wheeled toys I make, for free rolling.
Cheers, Crowie
-
11th December 2012, 03:41 AM #10
Senior Member
- Join Date
- Sep 2012
- Location
- Ex Nr Carcassonne S France Now NW Wiltshire, Blighty.
- Posts
- 497
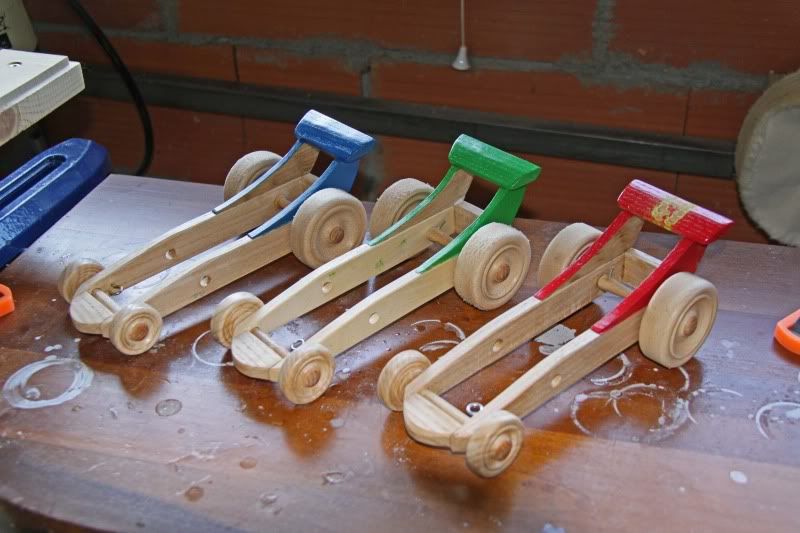
Finished now, packed and ready for the post.
The chassis were dry assembled with lakky bands and the axles carefully cut to length. The wheels have a small button turned and glued into the outside of the axle hole. They only go in about 1/16" and are just to finish off the center of the wheel. The axle has to fill the rest of the hole to give as much strength as poss.
Once the chassis were glued up, with the rear axle fitted because there's no way to fit it afterwards, the glue dry and then the nose blocks were sanded to shape on the sanding rig I made for my lathe.
I decided to keep the shape simple and cut the fairing to hold the rear 'wing' sanded and glued them in place and fitted the wing. The complete chassis was painted with celulose sanding sealer and de-knibbed with my favouries totally knackered 400 grit abrasive. This just takes the rough knibs off and leaves a silky surface. Masked off and out came my little spray cans of which only one worked properly. The dayglo yellow cam out in a dammed jet! I managed to get the other colours OK in the end, but what should have taken 1/2 hour took nearly 2!!!!! Anyway the paint dried over night and I buffed everything the following morning. The wheels were glued on and once it had dried the function test were carried out. They will each do a wheelie on a polished tile floor and starting on a carpet they will stand vertical if the band is would too much
Distances? Well, our hall is about 7 or so meters long and they are still going when they hit the loo door at the other end. I have done nothing to try to lighten them and a bit of extra weight wouldn't go amiss. The lakky band has power to spare for that and extra weight would give it the mass to go further..
Lovely to make and experiment as I went along, but more difficult than I originally thought they would be and quite tough according to the way they managed to bounce of various bits of hard furniture !My ambition is to grow old disgracefully. So far my ywife recons that I'm doing quite well! John.
http://johnamandiers.wixsite.com/johns-w-o-w-1
-
11th December 2012, 12:35 PM #11
Hotrod
- Join Date
- Jun 2010
- Location
- Leander, TX Central Texas Area
- Age
- 45
- Posts
- 1,061
Excellent Job John! They came out fantastic. Love the colors with the natural wood. It sounds like you had a lot of fun building them and that is what it is all about.
Bret
-
11th December 2012, 04:11 PM #12
Life's Good, Enjoy each new day & try to encourage
- Join Date
- Dec 2009
- Location
- Faulconbridge, Lower Blue Mountains
- Age
- 68
- Posts
- 11,189
Yes, a top job John.....Very well done.
They look great & from the sounds of it, they fly.
Did you do any closeup photos, please??
Cheers, crowie


 Reply With Quote


Similar Threads
-
CEO revisited ?
By gawdelpus in forum WOODTURNING - PEN TURNINGReplies: 2Last Post: 19th November 2011, 10:03 PM -
Welding revisited
By neksmerj in forum METALWORK FORUMReplies: 12Last Post: 23rd February 2009, 11:28 AM -
An oldie revisited
By Barry Hicks in forum WOODIES JOKESReplies: 0Last Post: 5th August 2007, 05:17 AM -
Oldy revisited
By Christopha in forum WOODIES JOKESReplies: 6Last Post: 14th June 2007, 01:05 PM -
Chainsaw Use Revisited
By joe greiner in forum WOODTURNING - GENERALReplies: 9Last Post: 15th April 2007, 01:16 AM
