

 Thanks: 0
 Likes: 0
 Needs Pictures: 0
 Picture(s) thanks: 0
Results 46 to 60 of 115
Thread: Started My Car
-
6th September 2008, 11:46 PM #46
 SENIOR MEMBER


- Join Date
- Sep 2007
- Location
- Melbourne
- Posts
- 1,133

Aussie,
Have you got a dremel or an engraver? Aldi had a dremel look-a-like for cheap recently and Juvy, those clamps look reasonable... especially for light clamping like you do in toy making.
Cheers,
Chipman
-
6th September 2008 11:46 PM # ADSGoogle Adsense Advertisement
- Join Date
- Always
- Location
- Advertising world
- Posts
- Many
-
7th September 2008, 12:11 AM #47
BOUNTY HUNTER
- Join Date
- Aug 2007
- Location
- Newtown Geelong
- Posts
- 1,878
Thanks chipman.Yes I do have a dremel (look alike) with a few tips or ends.I will practice doing straight lines etc tomorrow.Sounds good to me. Originally Posted by Chipman

I must be getting old.I should have thought of that and had it done already.

 Back To Car Building & All The Sawdust.
-
7th September 2008, 10:13 AM #48
SENIOR MEMBER
- Join Date
- May 2006
- Location
- Australia
- Posts
- 1,139
Maybe you could find someone in your area who does have the experience? we're very lucky here... our club has lots of different "experts" .... always someone who knows or can do what we don't know ourselves.
If you use a pen.... make sure you let the ink/colour set overnight or so to make sure it won't smear when you put the poly!
If you use a dremel/engraving tool.... once you've got your "dents" you could paint over them with dark paint ... rub off right away.... ( like antiquing) that way the letters would be easier to read.
JuvyWoodcrafters Haven
Wodonga - Supplies for Turners and Woodcrafters
Mobile 0407261703
-
8th September 2008, 09:32 PM #49
BOUNTY HUNTER
- Join Date
- Aug 2007
- Location
- Newtown Geelong
- Posts
- 1,878
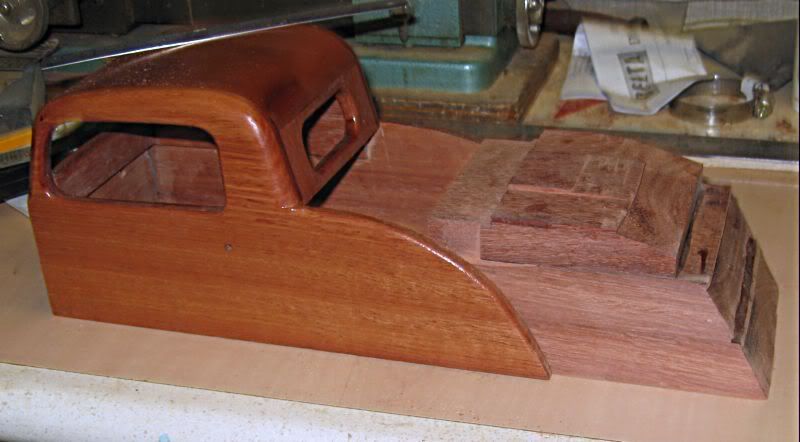
day 26 ?round about
Glued boot area into car body,cleaned it up a bit ,
then run the router down both sides.
Gave it a bit of a rub and put a wipe of poly on to show
spots that need working on.
A photo of the near finished guard for chipman.
and a quick mockup.Gets me excited.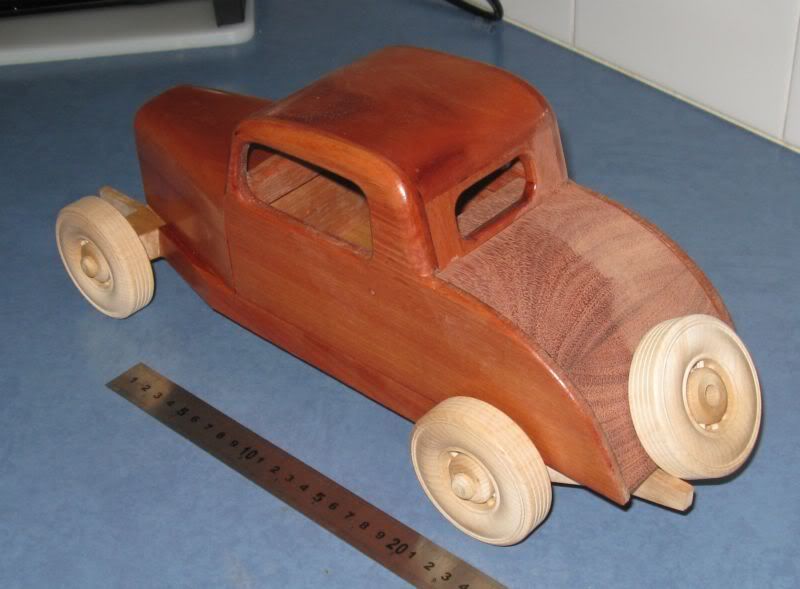
 Back To Car Building & All The Sawdust.
-
8th September 2008, 09:51 PM #50
SENIOR MEMBER
- Join Date
- Sep 2007
- Location
- Melbourne
- Posts
- 1,133
Thanks Aussie.
I actually have a stair tread (300x50x1000) in that black flecked Jarrah. I was at the timber merchant's to buy a piece of blackwood for a kitchen repair job for my brother inlaw and when I saw it, I couldn't help myself just had to buy it and went home happy but $80 poorer
I have also got a mortar and pestle turned out of another piece and turned a lidded box for another friend. It really is nice stuff. I will see if I can find a picture of a piece of it.
Ah, here it is (turned in end grain and the lighter wood is Canadian Maple rescued from my father in law's wood pile in Benalla.
By the way, I really like your car and the finish you are getting is a real credit to you.
Regards,
Chipman
-
9th September 2008, 01:51 PM #51
GOLD MEMBER
- Join Date
- Mar 2007
- Location
- Munruben, Qld
- Age
- 83
- Posts
- 10,027
Awesome AUSSIE just awesome. I love it.
I am sure someone has asked you this but to save time reading back over all the posts, One more time for the dummies, What glue do you use? it seems to clean up really well. Hey and congratulations of your box challenge win. Well done. Maybe you should post a link to your entry for those who haven't seen it. Well worth a look guys.
Reality is no background music.
Cheers John
-
9th September 2008, 06:58 PM #52
GOLD MEMBER
- Join Date
- Jun 2007
- Location
- North Of The Boarder
- Age
- 68
- Posts
- 16,794
Aussie Aussie Aussie
They are great Aussie very impressive another reason that odd bits n pieces should be viewed as "What can it become" !!!!
-
10th September 2008, 07:15 PM #53
BOUNTY HUNTER
- Join Date
- Aug 2007
- Location
- Newtown Geelong
- Posts
- 1,878
Hi Munruben and wheelinround.
By the way I am in the dummies group as well.
I just do what feels OK.
The glues I used on the car are epoxy quickgrip,
epoxy 5 minute ,and superglue and activator.
With the activator,apart from making it set quicker you can also fill gaps using it,or build up fillets.Very handy .I fill little nicks etc and spray them with activator.It sends the dob of super glue off and as hard as a rock.Sand it down and no more hole or gap.
Get them at hobby shops The ones for wood.Not the one for plastic.
The epoxy quick grip (sellys) sets very quick,great if you need to hold something till it sets.Takes a lot longer to go right off(real hard a day or more.)
makes the job a bit slower but you can watck tv or do some other jobs.
A bit dear though,I think it was $16 for a syringe setup.
I bought one syringe off it,Got home and it wouldnt work.Contacted selleys and they sed it was aut of date.The sent me (i think 2 or 3 syringes of it. ) I took the old one back to shop and showed them my email and asked for a refund.
I was offered another one.I asked if it was new stock and was told it wasnt.Grabbed my money and left the building.I only look silly.
Would need to be a special job for me to buy it again.
I buy a range of things to try,Pick the ones that suit me and use them
Always test them on scraps and go all the way till it looks a finished product.
That way I dont get any surprise later.
I am only new to woodwork but learnt to fully test things with other jobs over the years.
When I get a chance I will say how I get a finish on the wood .I dont use primer sealer or oils anymore .Takes too long, and still get a reasonable finish I think.
I carry on a fair bit don't I?
Should have some more photos on later Guys.Back To Car Building & All The Sawdust.
-
10th September 2008, 11:09 PM #54
BOUNTY HUNTER
- Join Date
- Aug 2007
- Location
- Newtown Geelong
- Posts
- 1,878
More Photos
More photos.
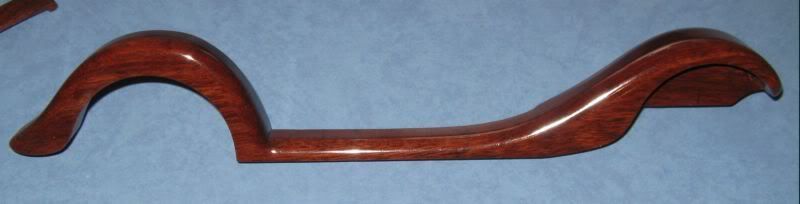
This may be the last for a short time.Most of the work I will be doing is puting the interior in the car.Steering wheel, gear stick ,seat,back shelf, etc.
Then mounting trims on bonnet and sides of car.
Marking door and boot openings.
Also have the head and tail lights to mount along with many other small and fiddly jobs that may not be interesting or hard to photograph.
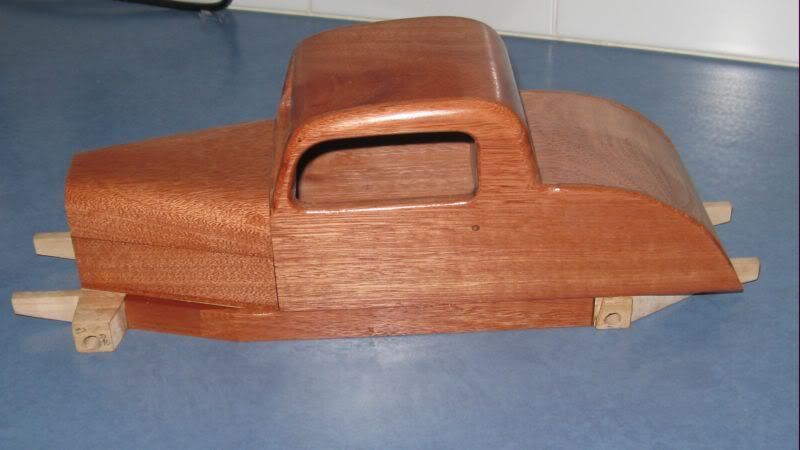
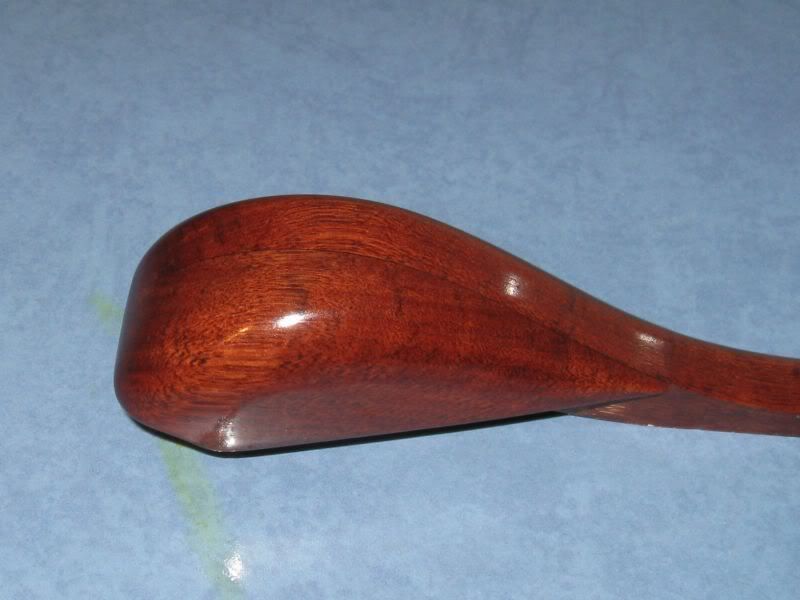
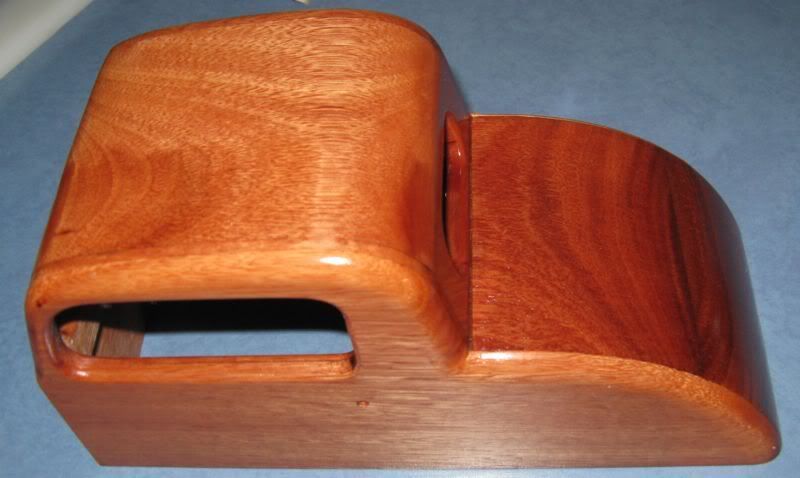
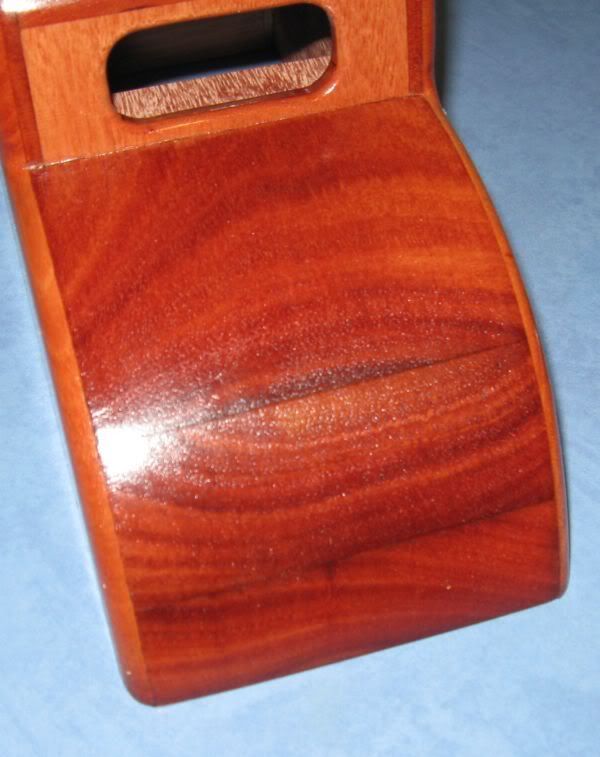
Any How! todays progress..I have finished one guard and included photo with unfinished guard 3 coats on finished,Has come up nice and glassy looking.
One of the main body ,,getting close to outside being finished (a few hours)
The other photo is the boot area with 2 coats.
It looks like this may take several coats and sanding to get it smooth.
The whole area is basically end grain.I think that is what you would call it.Let me know please.
Already planning my next car.I would buy a large plank of Jarrah if I could get it.
This is so I could get it all the one color.And another for dark parts.
Even this would not be perfect,as cut on different angles and the angle you look at it make it change color.I cant change the color to match like the pros. so that would be my best bet.After working with pine then camphor Jarrah is a magic wood to work with.To me it does everything I want it to do.
While you are reading this I have 6 sticks off DDR 400 RAM 500 meg each for sale.
Plus a G force FX5600 graphics card for sale $22.00 each plus post at roughly cost.
PM or email me.First in Best dressed guys.All fine condition.I just upgraded a bit.
 Back To Car Building & All The Sawdust.
-
10th September 2008, 11:25 PM #55
SENIOR MEMBER
- Join Date
- Sep 2007
- Location
- Melbourne
- Posts
- 1,133
It won't be long and you will be putting it all together
The choice of wood and the colours of the different parts are excellent...contrast for the guards and wheels and the rest is blending in nicely even with the different direction of the grain.
Regards,
Chipman
-
10th September 2008, 11:41 PM #56
BOUNTY HUNTER
- Join Date
- Aug 2007
- Location
- Newtown Geelong
- Posts
- 1,878
Just added this bit.I was talking about me using super glue.And noticed a post from watson that led me to this today sept 11
http://teknodeco.com/tips_superglue2.html
Hi Chipman Thanks .
With the grains running in different directions.They are all running the length of the car.
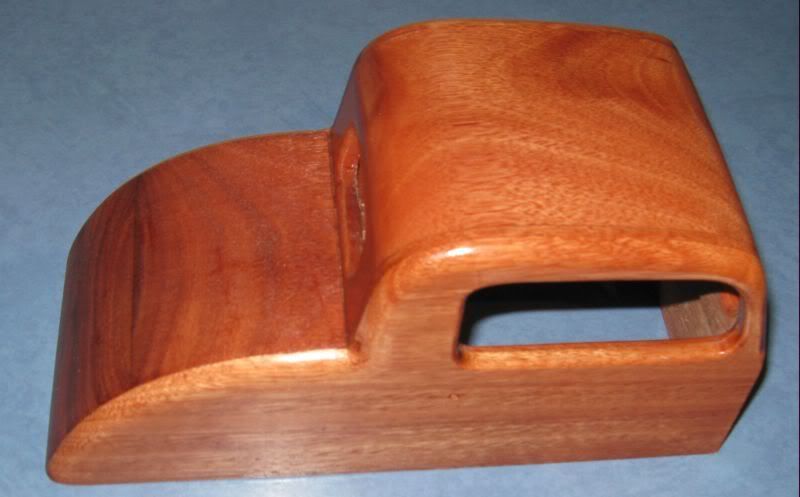
Including the roof and boot.,But because some are curved or rounded they look otherwise.I have included the boot wood before shaping.You can see the grain.When I rounded the rear off it it looks different.I am having trouble explaining it (as I usually do)I just noticed. If you look in the back window of the car,you can see the untreated wood.this is the same bit as the outside of the window but not cut at an angle.Previous post,just above this one
Last edited by AUSSIE; 11th September 2008 at 09:18 AM. Reason: sept 11 08 found info on CA glues
Back To Car Building & All The Sawdust.
-
11th September 2008, 10:00 AM #57
GOLD MEMBER
- Join Date
- Jun 2007
- Location
- North Of The Boarder
- Age
- 68
- Posts
- 16,794
Aussie your WIP is excellent in depth and informative well appreciated.
I was about to direct you to Free Jarrah Thread you started it ") still waiting for ours in Sydney get it soon I hope.
still waiting for ours in Sydney get it soon I hope.
Yes end grain is correct you matched up the grains nice on the boot .........nice unit variation would be with a Dickie seat in the back.
A sanding sealer or using water to create a slurry may help with end grain sanding you can always try on scrap see if it suits your needs.
Colour change can be difficult as it easy using house hold cleaners etc for bleaching and sanding/sawdust soaked/boiled in water to create dyes/stains or of course U-beaut dyes.
Interesting little lathe in the background any chance of a better shot of it
Your wheels look great are they two piece turned then halved spokes inserted and rejoined ???
Ray
-
12th September 2008, 04:40 AM #58
BOUNTY HUNTER
- Join Date
- Aug 2007
- Location
- Newtown Geelong
- Posts
- 1,878
Some answers for Wheelinround
Some answers for Wheelinround I really didnt match up grains on boot at all.That is the way they turned out by them selves.All I did was make sure the timber grain run from fron to back of car as is the rest of car.
Oh Wheelinround.You mentioned post from perth.Well I was in post office yesterday near 5.00pm and was told post is going up on MONDAY man.
All I know is letters are going from 50c to 55c ,so parcels are not going to be cheap.
Hope they were wrong.
I will get lathe to the front for a photo soon.It is a small Jewelers lathe from Japan,
I have had it for about 30 years.Made for metal work.I dont do any metal work now,but dug it out to make 3 bits of Jarrah for my box in the challenge.The radiator cap and the 2 little stands under the back of it.Dont have a wood lathe,so you use what you have.
I have made the gear stick on it, for this car and steering column shown if earlier post.
I got a very low score for finish from at least one judge on that box. It is so smooth and clear people that have seen it cant believe it .Is this wrong?
Should I have a mat finish on this car? I am confused
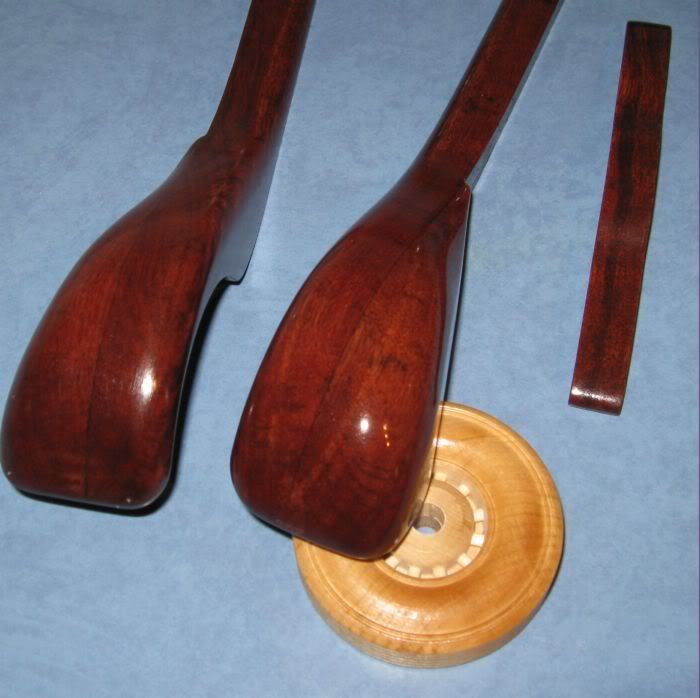
The wheels.Well I bought them fromThe Plan maker Joys and Toys in USA.
I got the kit before I got the plans. Just to see how god they were.They are top stuff.
To me anyway.Since then I have got the plan for this car and a truck along with the truck wheels.Truck wheels are same wheels without the insert with spokes.I have included a pic of truck wheel.The car wheel has the centre with spokes sitting in the centre of this.No split in any direction. The truck wheel would be easy to turn up,but insert for car is beyond me at the moment,
Just a small note.I think I have just bought a good thing in super glues.And an activator liquid.It is at a good price as well.Will give it a test soon.Available at hobby shops. www.mercuryadhesives.com.
Plenty of videos as well .Back To Car Building & All The Sawdust.
-
13th September 2008, 09:59 AM #59
GOLD MEMBER
- Join Date
- Jun 2007
- Location
- North Of The Boarder
- Age
- 68
- Posts
- 16,794
Ross thanks for the indepth above
Yes sadly LOML bought some stamps during the week 55c it going to effect all our mail ordering I think.
-
14th September 2008, 08:08 PM #60
BOUNTY HUNTER
- Join Date
- Aug 2007
- Location
- Newtown Geelong
- Posts
- 1,878
Wheely
You wanted to see my lathe Wheely
A rule is included for size
It is a Mini Metal turning Lathe.I have had about 30 years.
Has turned many things in steel,aluminium and brass.
I only use it now for the odd wood part such as knobs.
gear stick and steering column for this car etc.
Aussie
Back To Car Building & All The Sawdust.

 Reply With Quote


Similar Threads
-
How to get started
By In2Wood in forum SMALL TIMBER MILLINGReplies: 31Last Post: 28th August 2008, 10:48 PM -
Getting started
By Matt88s in forum WOODTURNING - PEN TURNINGReplies: 16Last Post: 3rd May 2007, 04:43 PM -
Let's Get Started!
By RufflyRustic in forum WOOD WHISPERING WOMENReplies: 23Last Post: 17th February 2007, 10:06 AM -
How to get started
By swiftden in forum WOODTURNING - PEN TURNINGReplies: 5Last Post: 1st June 2006, 11:51 AM -
Getting started again
By haemish762 in forum WOODTURNING - GENERALReplies: 4Last Post: 21st October 2005, 12:48 PM
