

 Thanks: 0
 Likes:
  Needs Pictures: 0
 Picture(s) thanks: 0
Results 31 to 45 of 63
Thread: Track bike trailer build.
-
25th January 2014, 05:31 AM #31
 Member


- Join Date
- Dec 2012
- Location
- WA
- Posts
- 68

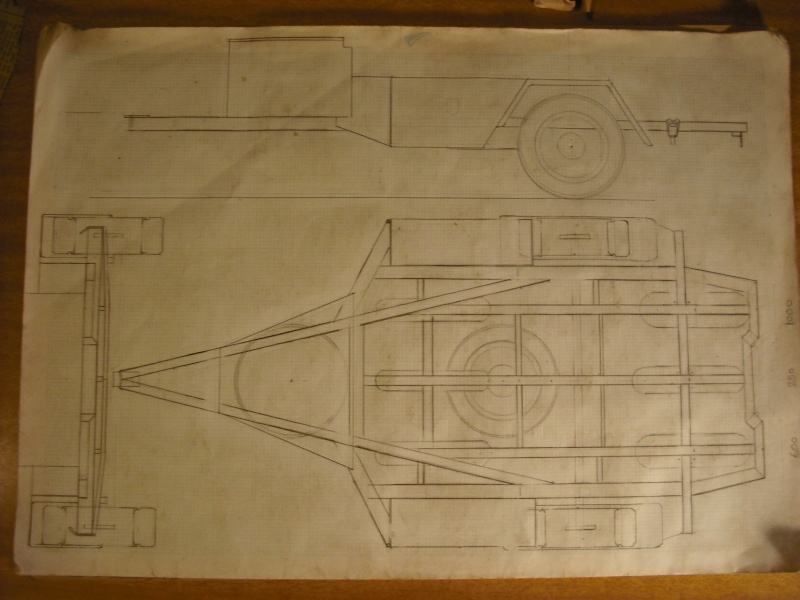
Plan update with 100mm longer drawbar, Front drawbar toolbox repositioned, unsprung ride height drawn, 60 series tyres, 80mm mudguard clearance, lower side boxes, provision for a spacesaver spare underneath.
Its always evolving, but one day someone who likes the plan can turn it into 3D.
-
25th January 2014 05:31 AM # ADSGoogle Adsense Advertisement
- Join Date
- Always
- Location
- Advertising world
- Posts
- Many
-
25th January 2014, 05:32 AM #32
Member
- Join Date
- Dec 2012
- Location
- WA
- Posts
- 68
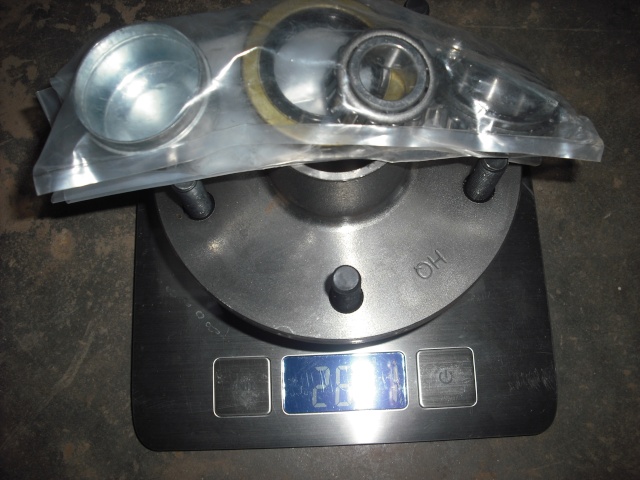
Purchased spare CO103 HQ STD Hub assy with Brgs, seal, cap and spare domed wheel nuts for Alloy rims.
Weighs 2.81kg.
Total- $44.58
-
25th January 2014, 05:34 AM #33
Member
- Join Date
- Dec 2012
- Location
- WA
- Posts
- 68
Back to the fun stuff.
Cut the two 75x50x2.5 drawbar pcs equal lengths,
clamped some box across the back at the width of inside shassis rails,
tacked together at the front to form the triangle,
marked forward where it needs to be cut to fit inside the chassis.
Pressed some 75x5 flat bar which will cap the front of the drawbar for strength.
Cut plate to width,
Drilled then cut out some drainage slots at the front so the drawbar never rusts out.
Fully welded the drawbar vertically.
Sprayed with Cold galv, then chamfered the RHS.
-
25th January 2014, 05:36 AM #34
Member
- Join Date
- Dec 2012
- Location
- WA
- Posts
- 68
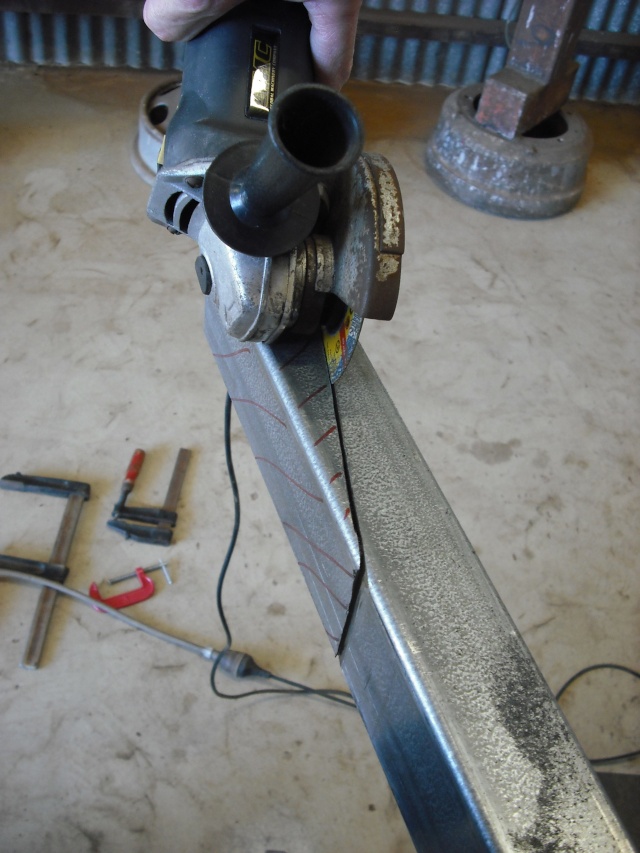
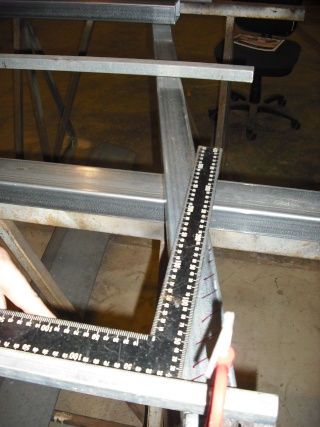
Cut the rear of drawbar each side.
Set up a stand with the Drawbar level on top of the trailer frame,
Tacked the front cap on,
Tacked three 4" nails, one centre of drawbar cap, one front of trailer frame, and one at the rear.
Lined up the three nails,
Cut the front X member from 75x50x2 and tacked in place,
Marked the trailer frame where it needs to be cut for the drawbar to fit.
-
25th January 2014, 05:39 AM #35
Member
- Join Date
- Dec 2012
- Location
- WA
- Posts
- 68
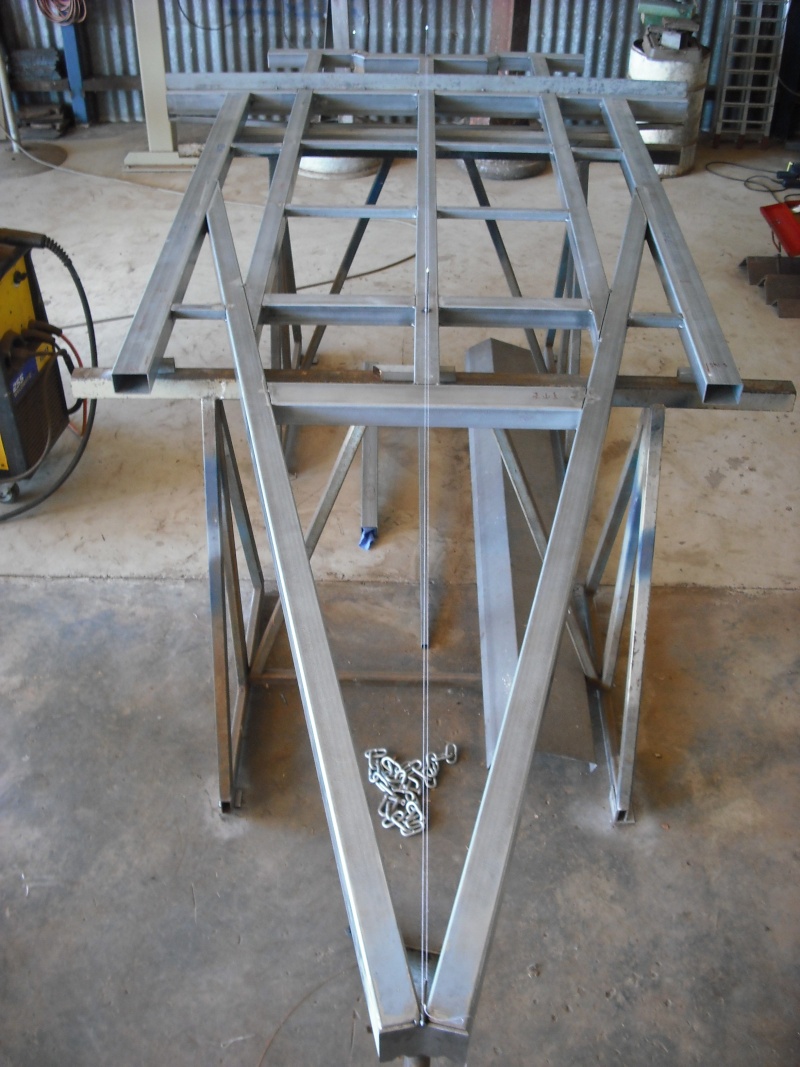
Cut the trailer frame same method as the Drawbar was done with 1mm cutting disc on 4" grinder.
lowered the front stand and sat it all level.
ran some cotton around the front and rear nails and tacked both parts together.
The scribe lines matched up when the cotton just skimmed the centre nail,
so its perfectly aligned and billiard table flat.
-
25th January 2014, 07:18 PM #36
Member
- Join Date
- Dec 2012
- Location
- WA
- Posts
- 68
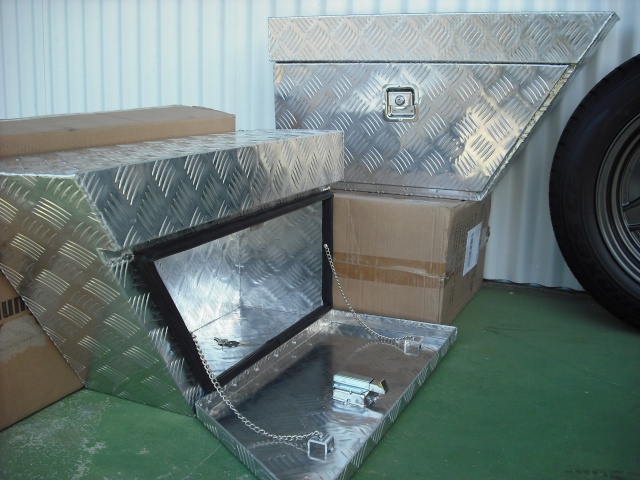
Side boxes arrived.
Mr Chinaman will always be a useless ****, but still better than I expected for the price.
-
4th March 2014, 11:47 PM #37
Member
- Join Date
- Dec 2012
- Location
- WA
- Posts
- 68
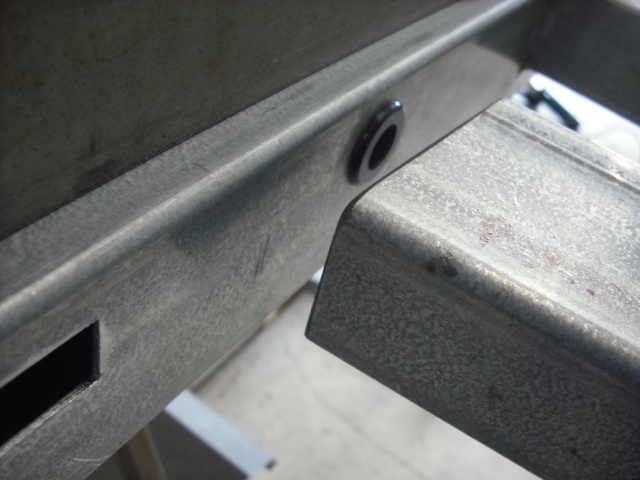
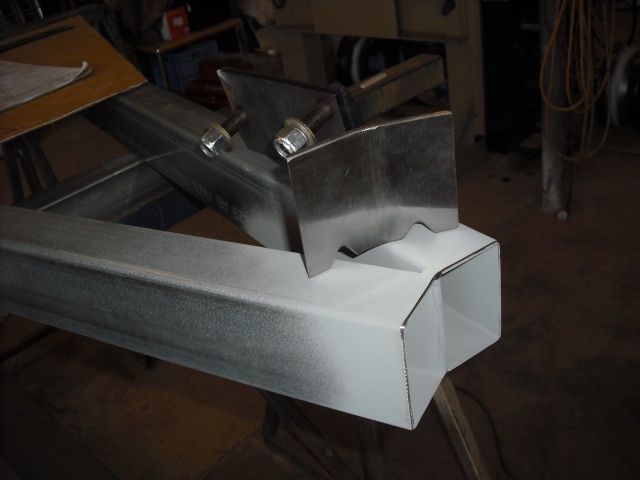
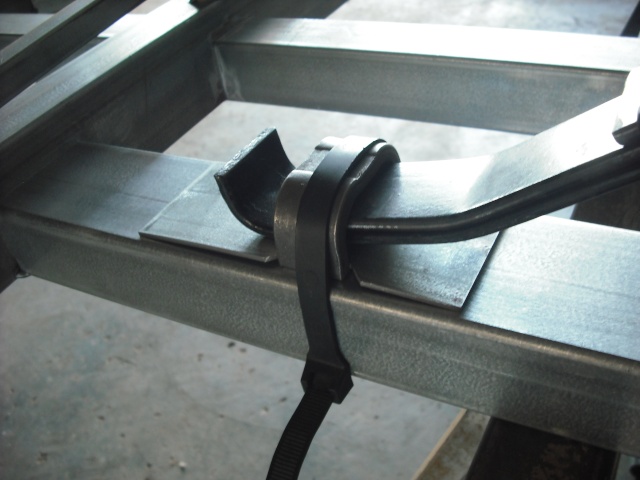
5/8"x1" grommets are fitted for the wiring to pass through the frame for the recessed Lights and concealed wiring before tacking the rear corners on.
Made the tapered pieces each side of the the number plate recess.
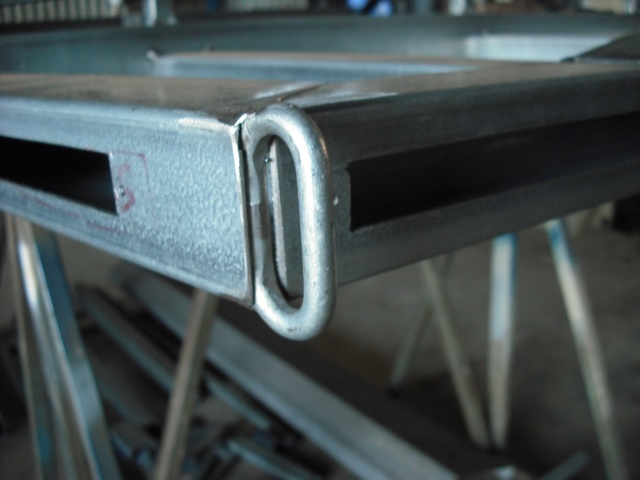
Allowed a gap of 8mm in the rear corners for a chain link,
These serve as a slinging point, a tie down location, protectcts the taillights, and gives strength.
Rear corners on, LED light slots cut, mounting holes drilled, Numberplate lighting and mountings drilled.
Purchased sundries, Grommets, washers & Nutserts
Total - $27.
-
4th March 2014, 11:49 PM #38
Member
- Join Date
- Dec 2012
- Location
- WA
- Posts
- 68
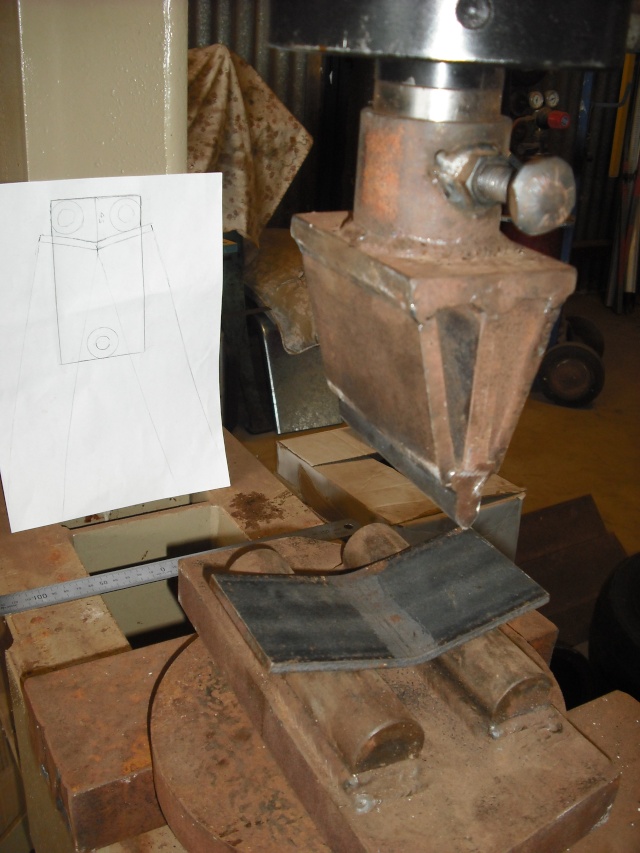
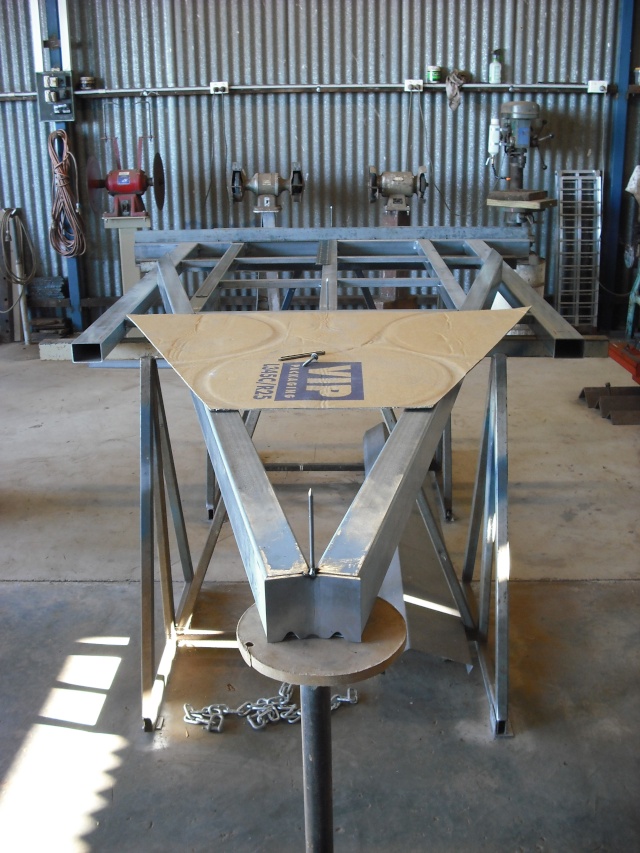
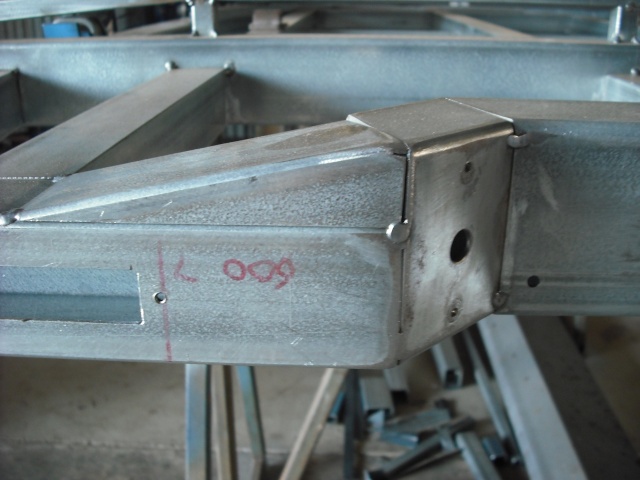
Chasing the lowest ride height possible without going to a Drop/overlay axle, or Independent suspension.
So am laying the front spring hangers flat.
Welding across a chassis rail is big no, so made some front spring hanger mounting plates from 3mm steel with Internal cutouts to allow clearance.
This was done by using a 44mm Holesaw overlapping the two holes then filing the corners.
Tacked with a spacer tube to allow 0.5mm end float to stop any spring binding.
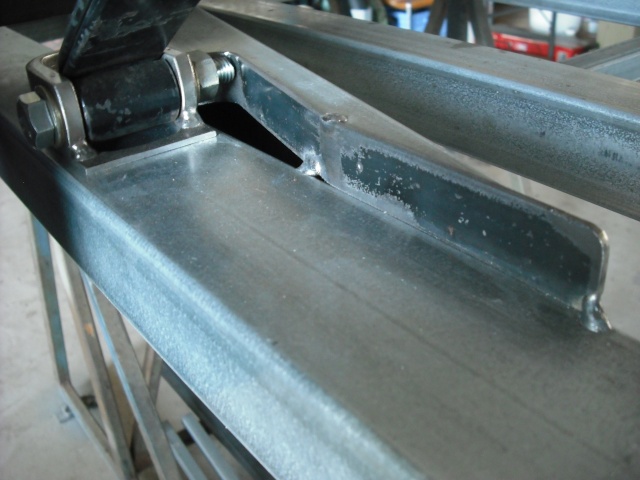
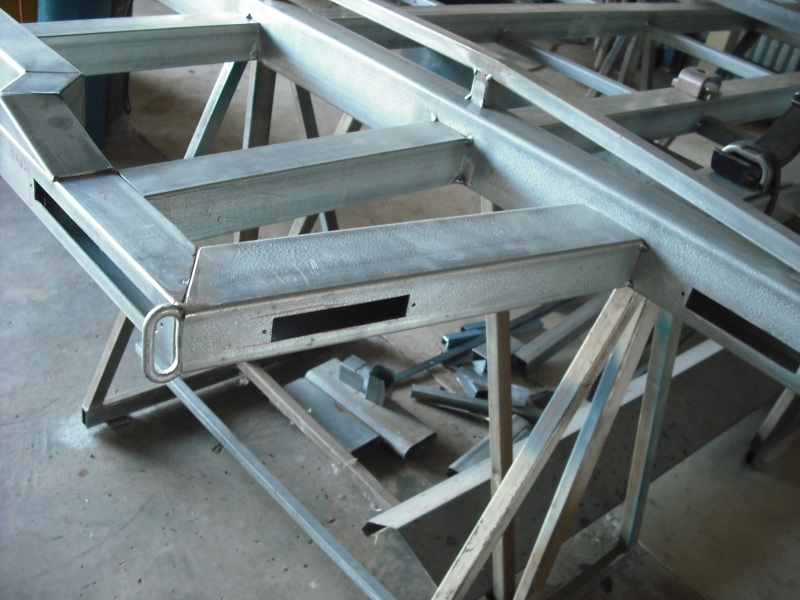
The way the drawbar was sunk into the frame between the Chassis rails means the opening needs to be capped for strength.
Shaped some 23x3mm flat bar that extends along the chassis rail.
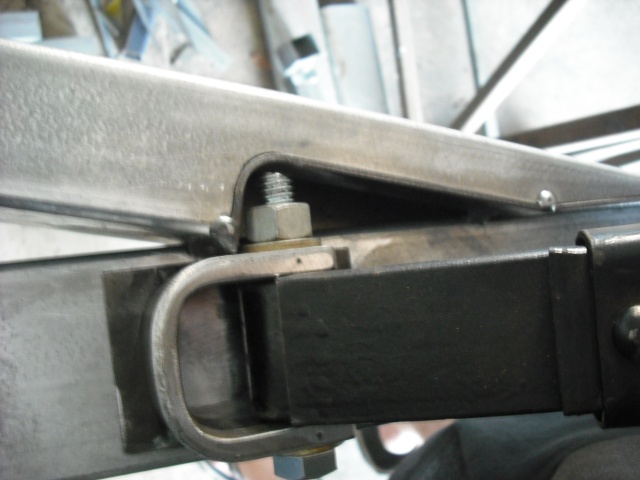
Made a cutout in the drawbar for front spring hanger bolt clearance, and to give access to the nut.
The 25mm flat bar extends all the way round and back to the spring hanger.
The centre punch marks are for alignment.
To determine axle location I used the 25mm per 600mm rule of thumb.
Drawbar toolbox to the rear numberplate (Load area) is 2136mm
2136 divided by 600 = 3.56
3.56 x 25 = 89mm
Axle is 89mm rearward of the centre of load area.
Same principle is used to determine where the bike axle centres are located.
-
4th March 2014, 11:52 PM #39
Member
- Join Date
- Dec 2012
- Location
- WA
- Posts
- 68

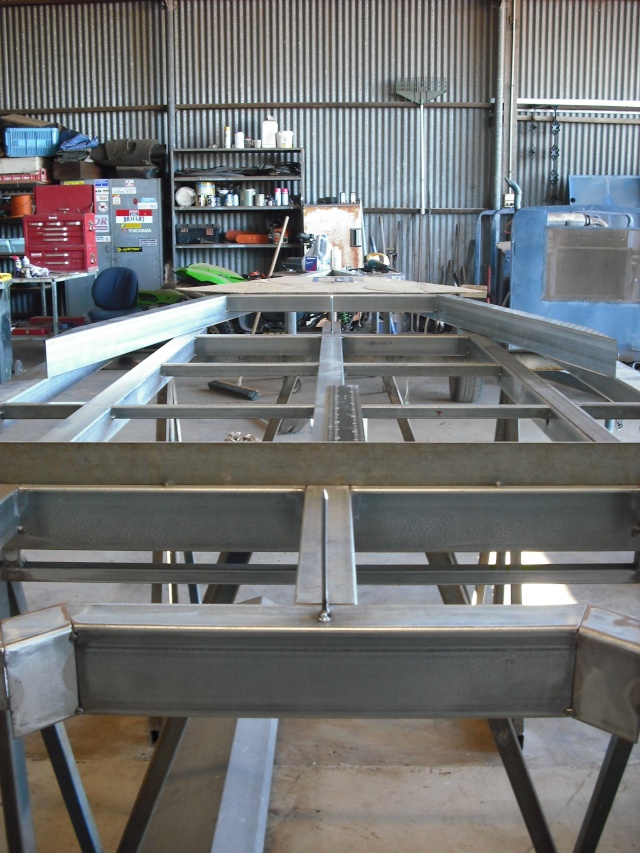
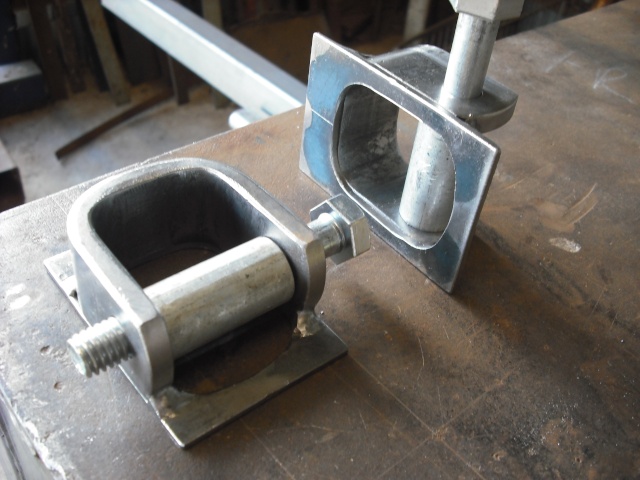
Made some 3mm thick slipper plates for the rear spring hangers that will allow the hangers to be welded to both the chassis and the plates.
45' degree cutouts will allow a good weld.
-
4th March 2014, 11:53 PM #40
Member
- Join Date
- Dec 2012
- Location
- WA
- Posts
- 68
Purchased 2 sheets of aluminium treadplate.
2.0mm x 1200 x 2400 (17kg) for the sides , top of mudguards and front corners.
2.5mm x 1200 x 2400 (21kg) for the floor.
Total - $219.25
-
8th March 2014, 01:41 AM #41
Banned
- Join Date
- Jul 2013
- Location
- Perth
- Posts
- 665
Still watching
Still watching with much interest.
I have to say your very meticulous & neat and accurate with all your work. It is neat WIP built to watch in progress & a credit to you.
Have you considered maybe oil bath bearings for this trailer build?.
Is this what you do for a living or just a hobby?
What suburb are you located in?
It's taking shape now.
Very Flash.
-
8th March 2014, 03:24 AM #42
Member
- Join Date
- Dec 2012
- Location
- WA
- Posts
- 68
Yes It will get Durahubs, Originally Posted by Timless Timber

Fitter (by hobby now) enjoyable project building a much needed trailer that will see me out if done properly.
Researching trailers led to this forum, and gave the inspiration. (and Yonnee's excellent advice to home builders)
This trailer is a bit different to most and certainly doing it the hard way regarding my design.
Regretting not going with AL-KO I.R.S. axle, was only $200 dearer but nobody freights west under a billion dollars, but in 10 years can always replace the leaf setup with I.R.S.
Wouldnt use Cheap imported galvanized RHS again like I have either, Blue painted RHS instead.
On the cool south coast, but building Inland where Temps hit 48 degrees in January so called it quits for a few weeks,
that's why its dragged on and the race season has started without it.
Lots to go yet!
-
8th March 2014, 11:16 AM #43
Trailer Bloke & Mild Mannered Moderator
- Join Date
- May 2007
- Location
- Tooradin, Vic.
- Age
- 52
- Posts
- 1,885
Loving your work Aufitt. Originally Posted by Aufitt
May I suggest... The 3mm spacer plate you're fitting under the rear hanger, trim the wide section in front of the hanger and only stitch the plate in so that it can be removed without cutting the hanger off.
The idea behind this plate would be that the plate wears out and not the chassis. If you stitch weld it in in such a way you can get a grinder on the welds, you can replace this plate more easily.
I would weld the hanger fully in first, then trim the plate so it slides in and out, then stitch it in.Too many projects, so little time, even less money! Are you a registered member? Why not? click here to register. It's free and only takes 37 seconds!
 Doing work around the home? Wander over to our sister site, Renovate Forum, for all your renovation queries.
-
8th March 2014, 11:29 AM #44
Trailer Bloke & Mild Mannered Moderator
- Join Date
- May 2007
- Location
- Tooradin, Vic.
- Age
- 52
- Posts
- 1,885
Originally Posted by Aufitt

I wouldn't got to the trouble of retro fitting the Al-Ko unless you set the trailer up now for the mounts. I would use the trailer as is, then either build an identical one, or by that time you may have figured out a couple of things you'd do differently, so then you can re-design and build with the Al-Ko axle.This trailer is a bit different to most and certainly doing it the hard way regarding my design.
Regretting not going with AL-KO I.R.S. axle, was only $200 dearer but nobody freights west under a billion dollars, but in 10 years can always replace the leaf setup with I.R.S.
Wouldnt use Cheap imported galvanized RHS again like I have either, Blue painted RHS instead.
Is it the "cheap imported" or the "galvanized" you're having trouble with?
DuraGal is the locally produced option, but working with any galvanized steel requires taking the Galv. coating off where you're going to weld it. If you do this, then welding it is much more enjoyable.Too many projects, so little time, even less money!Are you a registered member? Why not? click here to register. It's free and only takes 37 seconds! Doing work around the home? Wander over to our sister site, Renovate Forum, for all your renovation queries.
-
15th March 2014, 03:09 PM #45
Senior Member
- Join Date
- Sep 2008
- Location
- Perth
- Posts
- 363
I'm also curious what you don't like about the galvanised?
And Yonnee, those are the same type of springs that I had a thread about a few months back - non-removable due to the bend at the end.


Similar Threads
-
Bike trailer plans help
By BLKWDW in forum TRAILERS & OTHER FABRICATED STUFFReplies: 8Last Post: 28th December 2013, 11:52 PM -
Camper/bike/box trailer
By Rat1314 in forum TRAILERS & OTHER FABRICATED STUFFReplies: 4Last Post: 15th April 2013, 09:57 PM -
Planning a bike trailer
By Rat1314 in forum TRAILERS & OTHER FABRICATED STUFFReplies: 42Last Post: 7th April 2013, 10:52 PM -
Bike and Trailer
By fenderbelly in forum CYCLINGReplies: 2Last Post: 29th October 2008, 08:58 AM
