

 Thanks: 0
 Likes:
  Needs Pictures: 0
 Picture(s) thanks: 0
Results 46 to 60 of 63
Thread: Track bike trailer build.
-
21st June 2014, 07:40 AM #46
 Member


- Join Date
- Dec 2012
- Location
- WA
- Posts
- 68
 I'll never be removing it, but in 100ys if I had to i'd cut the hanger off and plate over it, and its stronger welded near the edge of the RHS, you'll see when I post the pic of it tacked on.
 Originally Posted by Yonnee
 Nothing wrong with the welding, its the accuracy of the imported steel, put a square on some and you'll see the uneven 0.5mm bow in the sides.. Then put a square on the Blue SHS. As for galv- Originally Posted by Yonnee
-
21st June 2014 07:40 AM # ADSGoogle Adsense Advertisement
- Join Date
- Always
- Location
- Advertising world
- Posts
- Many
-
21st June 2014, 07:42 AM #47
Member
- Join Date
- Dec 2012
- Location
- WA
- Posts
- 68
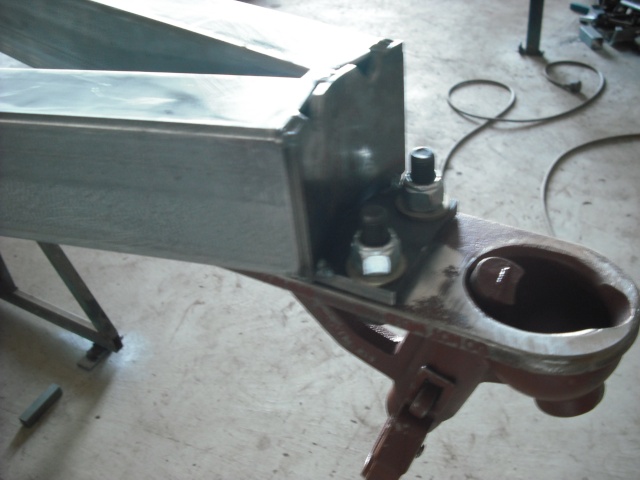
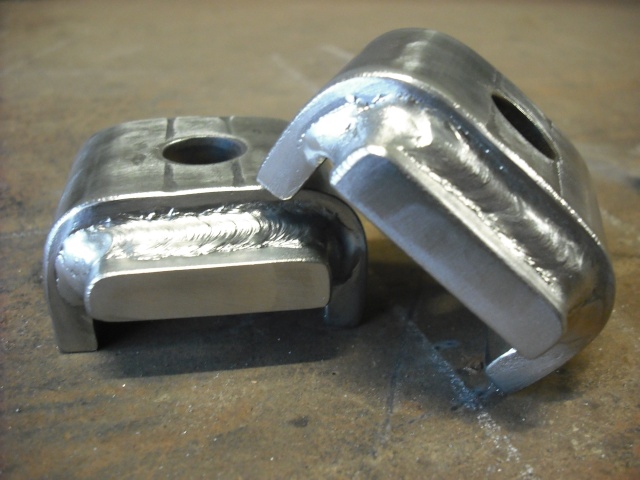
Coupling plate tacked on, Trigg 50mm 2000kg coupling (De-burred and casting marks cleaned up) bolted with three 1/2" UNF grade 5 bolts washers and Nyloc nuts.
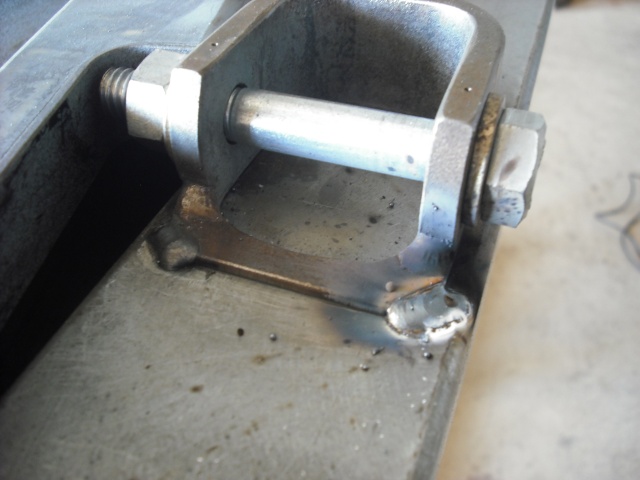
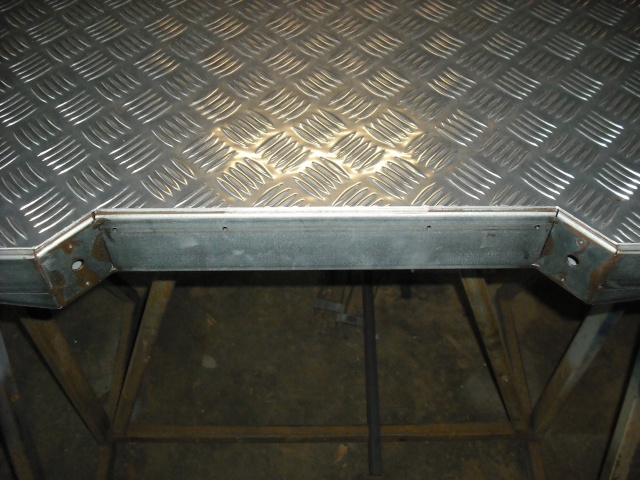
Confident of the exact axle position, tacked the 45' corners of the front spring hangers.
Where possible, most welds will end at the Tack.
All measurements of the trailer are taken from those two centre punch marks, the axle centres, and the front of the drawbar.
-
21st June 2014, 07:44 AM #48
Member
- Join Date
- Dec 2012
- Location
- WA
- Posts
- 68
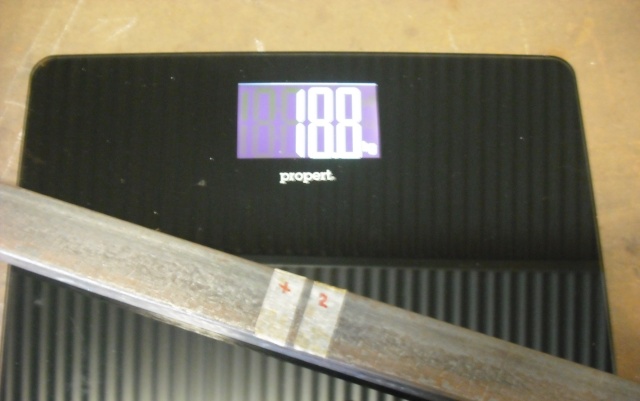
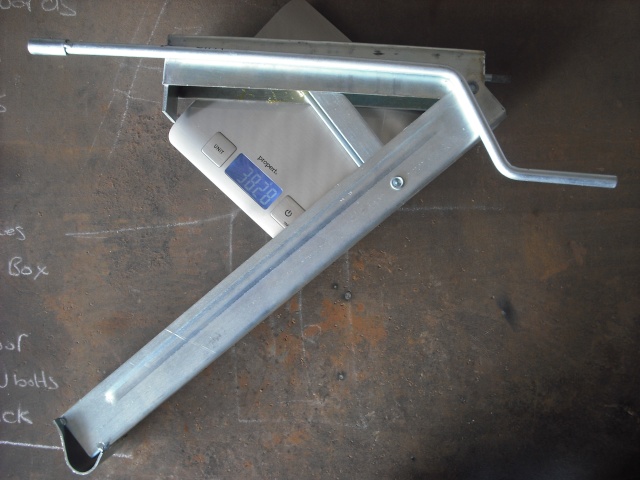
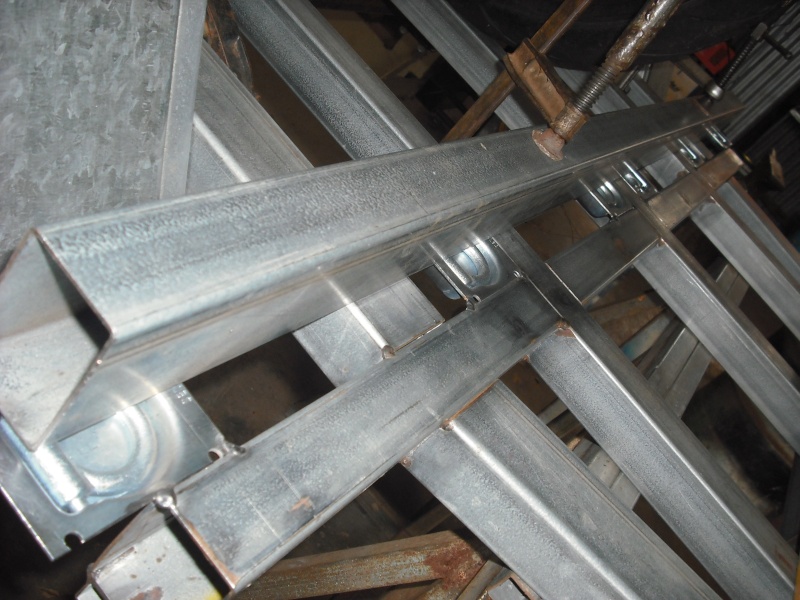
40mm square 65" (1650mm tip to tip) axle weighs 18.8kg.
Cut some 10x40mm flat bar and welded it to the axle saddles.

Extra 10mm lower ride height, and they fit the axle much better than the saddles on their own.
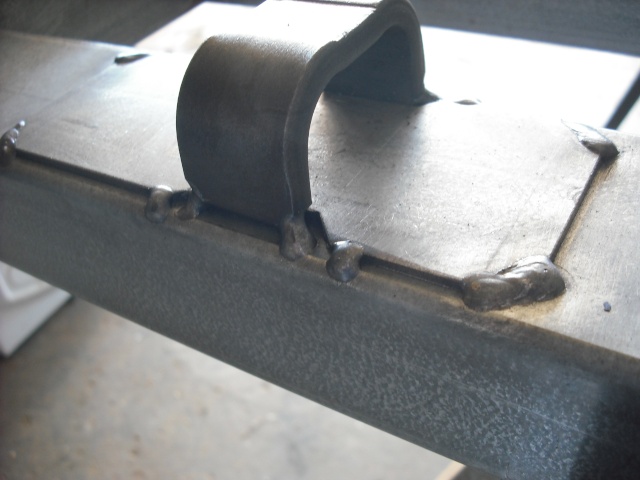
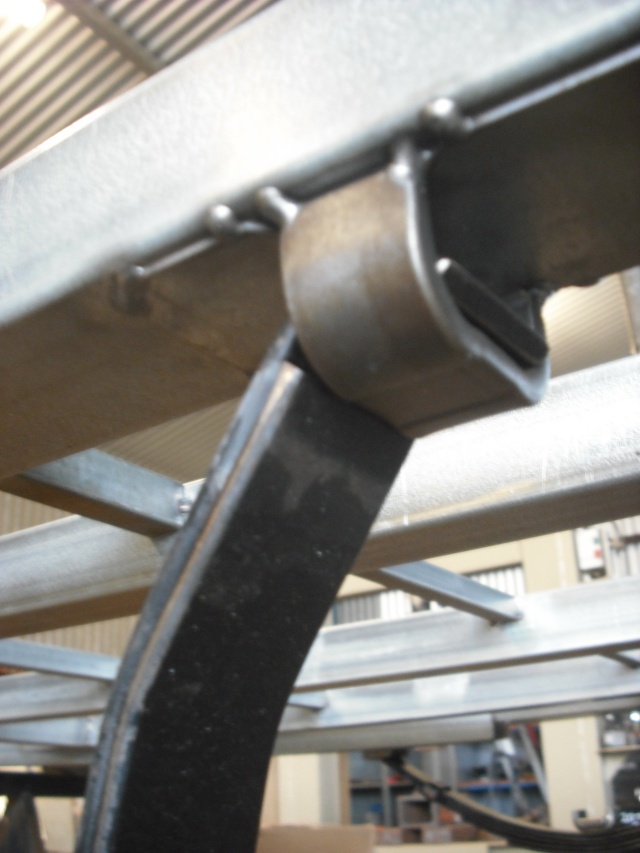
Rear spring hangers tacked 20mm from the end of the spring (unloaded), Chamfered & 45' cutouts allow best penetration when it gets fully welded.
Removed Axle and spring assembly, turned the frame over onto level trestles.
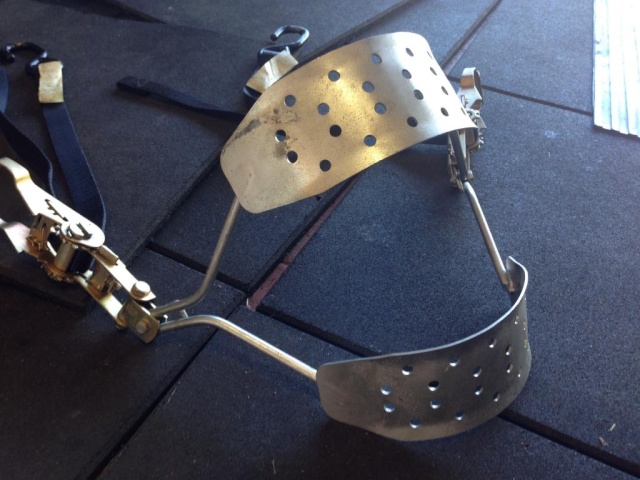
These springs have the bend at the rear to stop them letting go when reversing, but still able to be removed which makes disassembly for painting easier
There is pro's and cons vs the straight ones, these tend to be a little noisy if not set up right.
-
21st June 2014, 07:47 AM #49
Member
- Join Date
- Dec 2012
- Location
- WA
- Posts
- 68
Purchases from Bozbuilt Australind who are a leading motor body building and trailer parts supplier.
BZM-ALFM5 500mm Adjustable leg & BZM-LH1P 550mm slotted handle. 3.8kg.
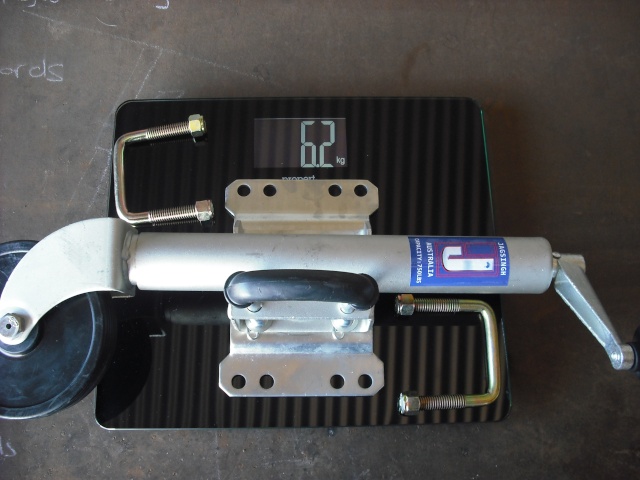
JS-JW06SB Jockey wheel, 6" 750lbs swing up bracket with round pull handle & 77x 102mm U bolts with Nyloc nuts. 6.2kg.
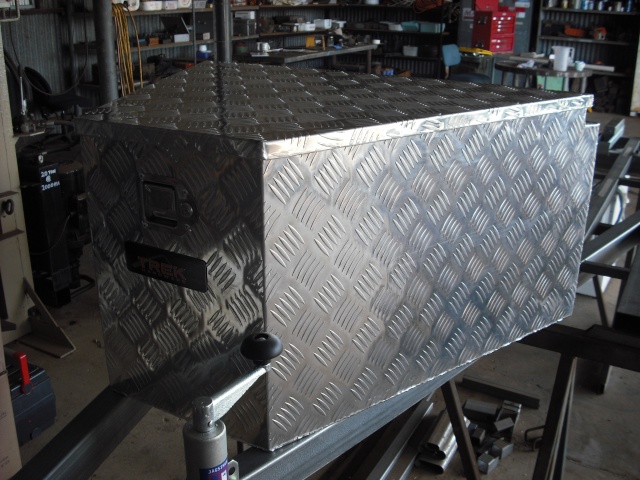
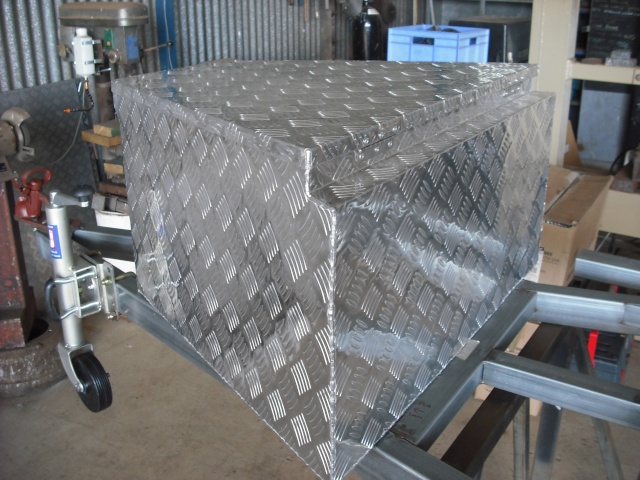
JS-TBX920 Trek Drawbar toolbox 920x460x700 Lockable, 2 keys, and gas damper. 10.3kg
A 600mm 195/60-15 tyre just fits inside, same diameter as 17" sports bike tyres.
Total - $382
-
21st June 2014, 07:49 AM #50
Member
- Join Date
- Dec 2012
- Location
- WA
- Posts
- 68
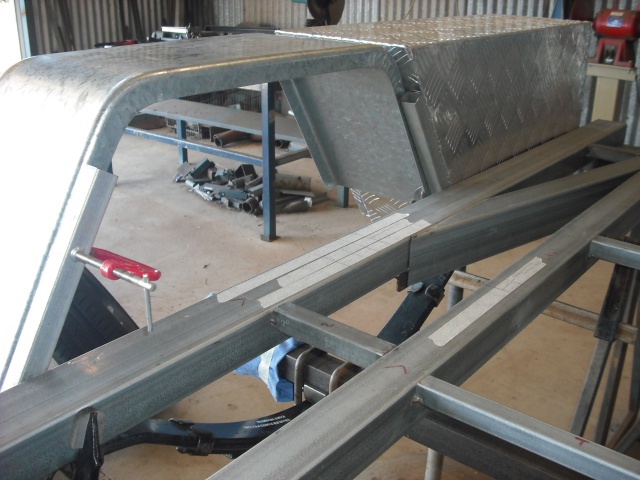
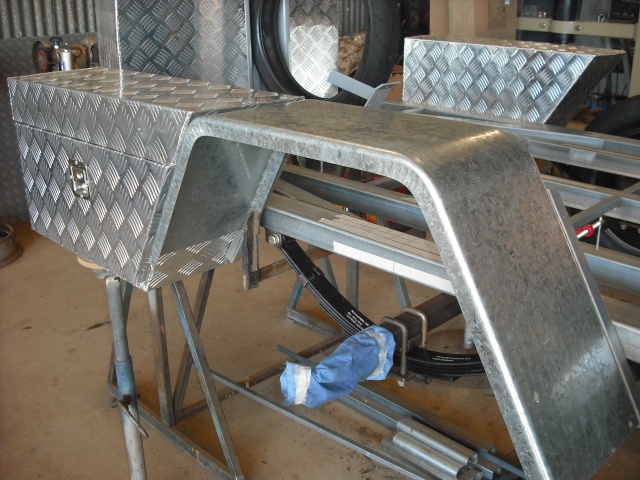
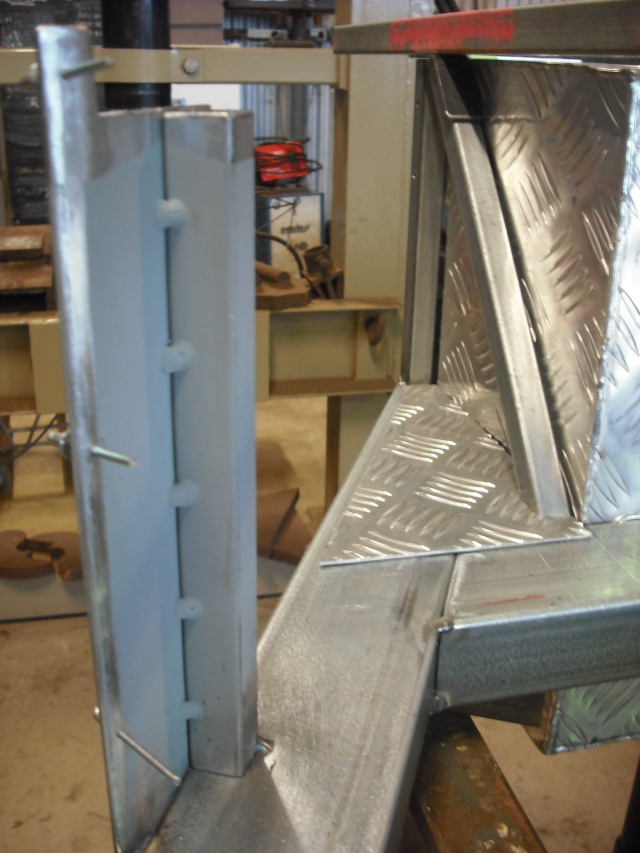
Set up the side boxes on stands with two rivets, and clamped the mudguards on with 25mm SHS to get the correct placement.
-
21st June 2014, 07:52 AM #51
Member
- Join Date
- Dec 2012
- Location
- WA
- Posts
- 68
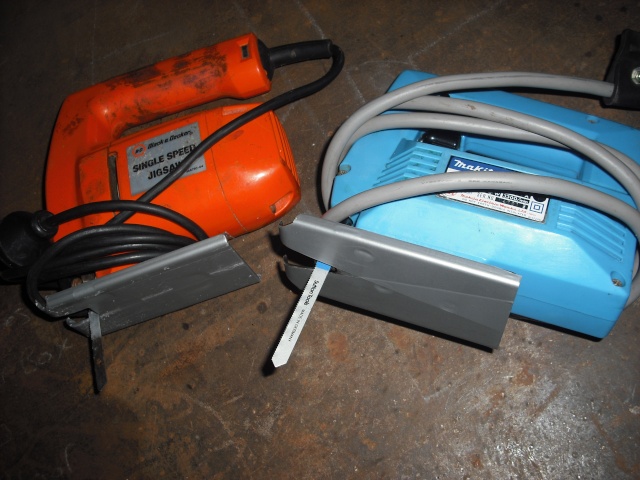
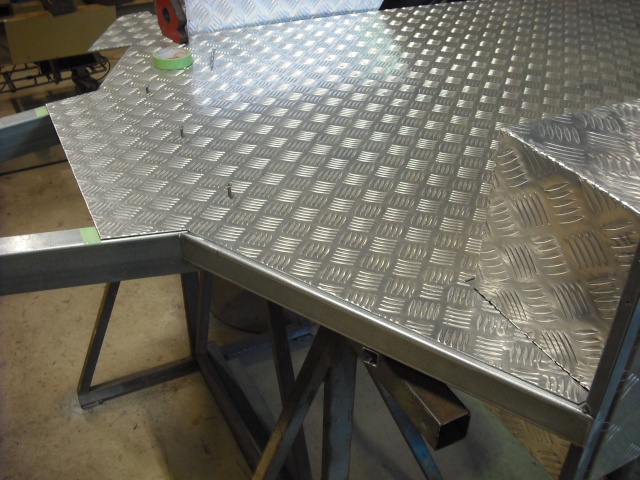
Nitto tape on the Jigsaw.
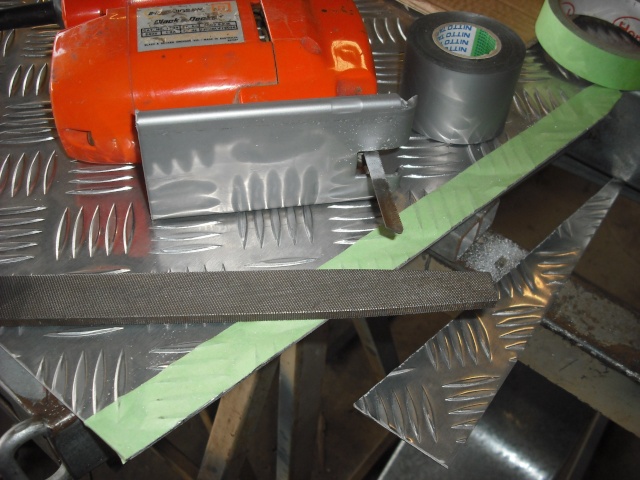
Scribe line and Masking tape to follow 0.5mm away, then file finish.
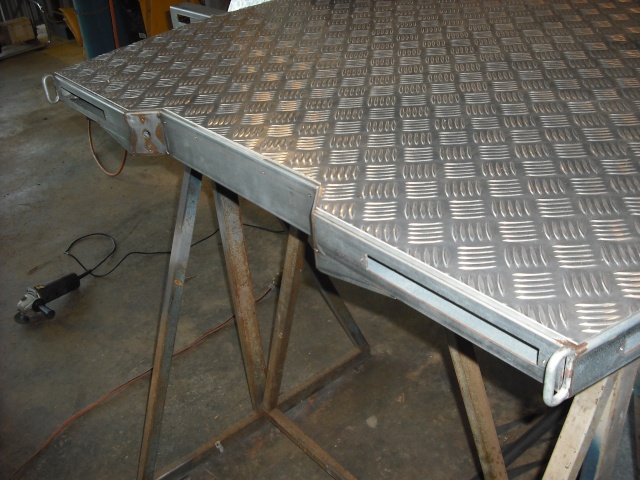
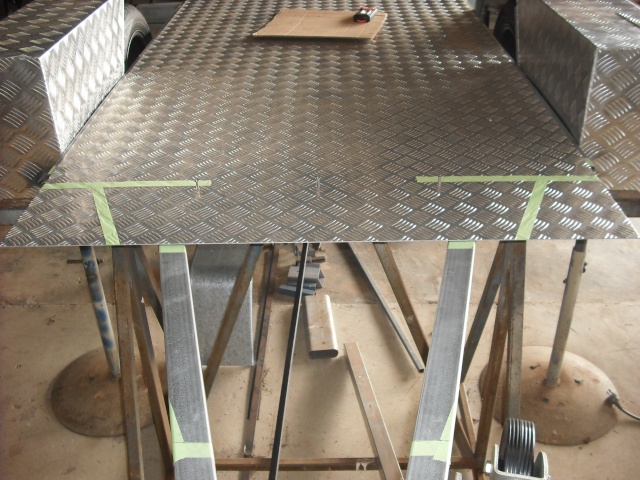
Cut the tail section of the tread plate floor 5.5mm in from the outside of the frame.
-
21st June 2014, 09:40 PM #52
SENIOR MEMBER
- Join Date
- Feb 2010
- Location
- Ballina, NSW
- Posts
- 725
Very nice work aufitt. thanks for the pics.
- Mick
-
9th July 2014, 06:46 PM #53
Member
- Join Date
- Dec 2012
- Location
- WA
- Posts
- 68
M6 Nutserts into primed holes attach the Aluminium drawbar box and side boxes to the frame.
-
9th July 2014, 06:49 PM #54
Member
- Join Date
- Dec 2012
- Location
- WA
- Posts
- 68

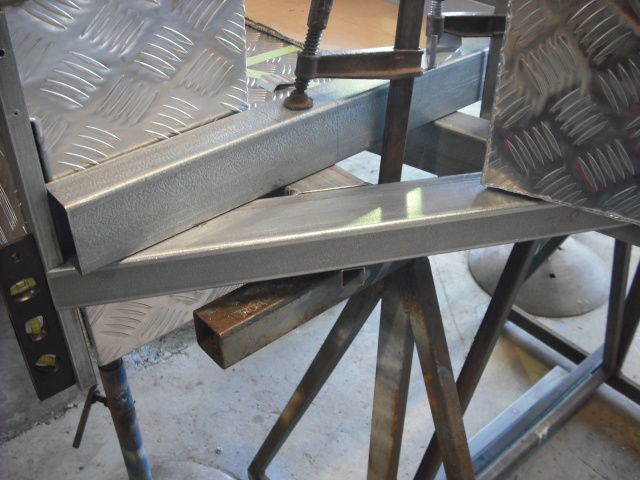
Made a template for the front corners, marked and cut the front of the chassis rails
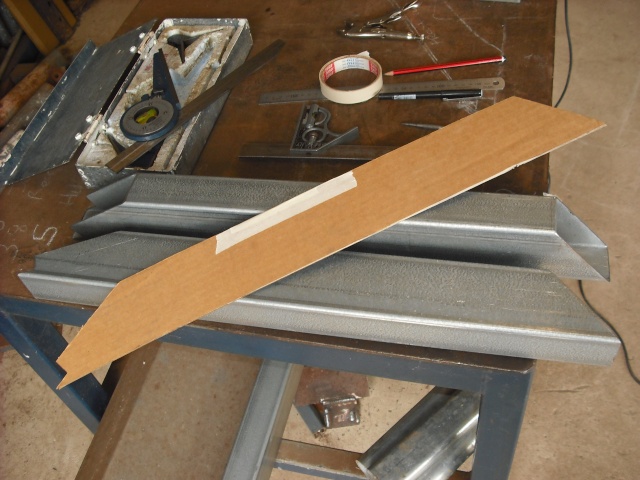
Made the pieces mirror image from 75x50x2 RHS with a 20mm notch in the outside corners for the uprights.
-
9th July 2014, 08:20 PM #55
Member
- Join Date
- Dec 2012
- Location
- WA
- Posts
- 68
Purchased Small Tyredown, suits 95-150 rear tyre.
KYA RACING
Secondhand
Total- $70
-
26th March 2015, 01:08 AM #56
Member
- Join Date
- Dec 2012
- Location
- WA
- Posts
- 68
Purchases-
cleaning vinegar $6
Nutserts (20) $13.60
Grommets (2) $3
Killrust Heavy duty metal Primer (500ml) $28.25
Killrust Epoxy Gloss enamel (1l) $39.95
Methylated spirits (1l) $4
Mineral Turps (1l) $4.55
Makita Jigsaw blade $6.50
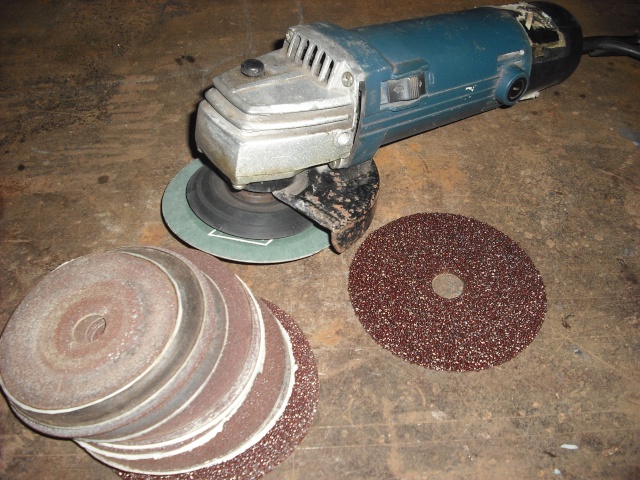
Metalite fibre disc $2.55
Zinc Galv (400g can) $9.98
Sikaflex 11FC polyurethane construction sealant/adhesive (2x310ml tubes) $36
Ranex rust converter (500ml) $24.75
Alum angle 25x25x2mm (2m) $16.75
Alum angle 38x38x2mm (2m) $27.50
Steel Angle 50x50x3 (2.2m) $17.33
Lashing Rings 1500lb folding draining 96x102mm (8) $60
Teflon boat strip 50mm wide Blue (3m) $26
HSS drills (6) $20.20
Total - $346.91
Total to date - $2677.18
-
26th March 2015, 01:14 AM #57
Member
- Join Date
- Dec 2012
- Location
- WA
- Posts
- 68
Installed grommets and ran migwire for a pull through down the drawbar and out thru the wings into the side boxes for clearance lights.
Also some flat bar welded in as an extra mounting point for the side boxes.
Clamped a 75x50 offcut as a jig to get the front corners and uprights in position then tacked them in.
Cut the front of the floor sheet and also some small triangular pieces for the outer corners.

Cut an infill section for the top of the drawbar.
-
26th March 2015, 01:19 AM #58
Member
- Join Date
- Dec 2012
- Location
- WA
- Posts
- 68
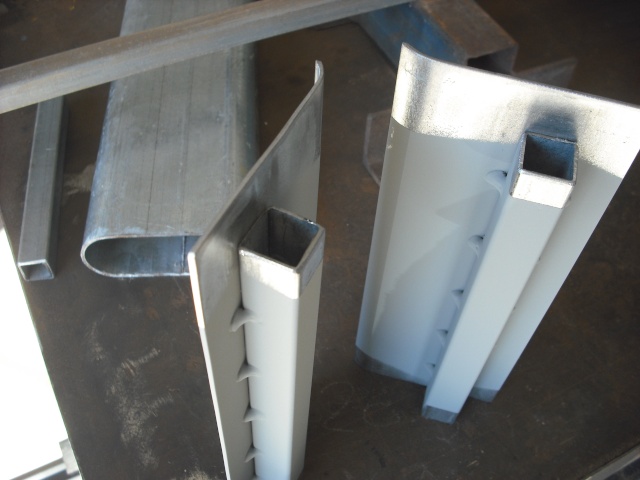
Needed some special curved uprights where the drawbar box joins the front corners, so cut some pieces out of cattle rail and joined them to 20x20x2 SHS.
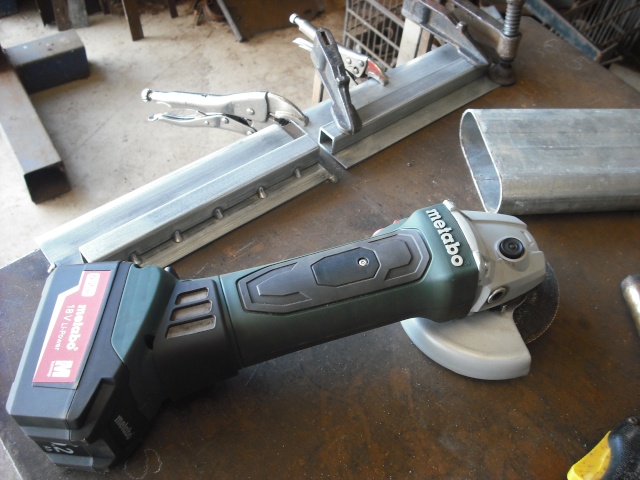
New Metabo cordless 18v 5.2aH Li-Ion brushless 125mm angle grinder, smooth and easy to use, makes 240v obsolete and primitive in performance & feel. battery life isn't spectacular, but runs 3 batteries and the fast charger.
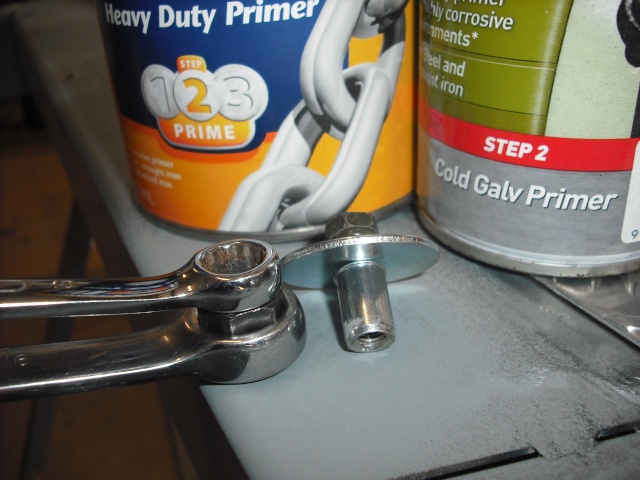
Cold galv where possible.
-
26th March 2015, 01:23 AM #59
Member
- Join Date
- Dec 2012
- Location
- WA
- Posts
- 68
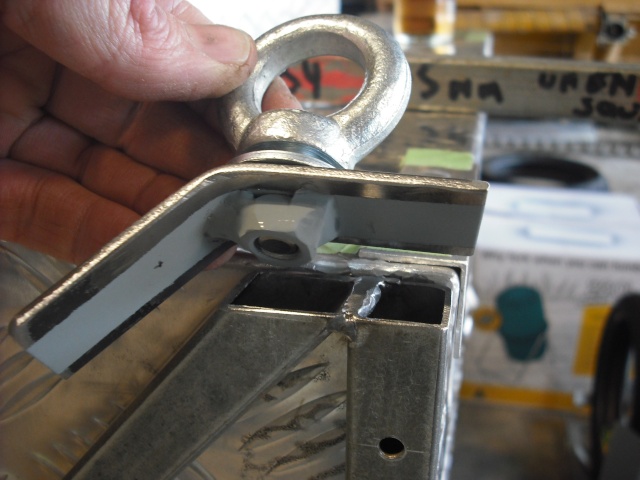
Welded some braces in front of the side boxes from the chassis up to some tie down points, capped with 25x3 gussets with M10 nuts for eyebolts.

-
26th March 2015, 06:18 PM #60
Member
- Join Date
- Dec 2012
- Location
- WA
- Posts
- 68
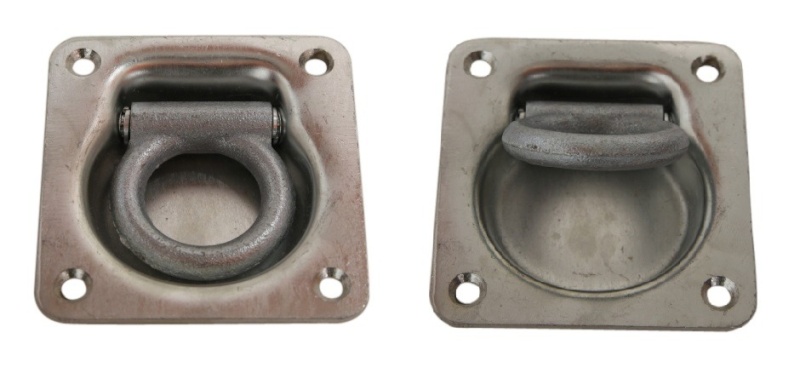
Bozbuilt JS-LR-1 D type Lashing Rings 1500lb stamped, zinc plated, recessed, folding, draining, spring loaded.
$7.50 each.
Outside dimension- 96x102mm
( each )- 314grams
( x6 )- 1.884kg
( x8 )- 2.152kg
9mm removed from the rear edge to get the best of the '50-100mm rearward of bike axle centre'
(Its within that range for a wide range of motorcycle wheelbase, front wheel chock is also adjustable for weight balance)
12mm removed from the two central ones, and the outers mounted 12mm outwards to get within ''750-900mm apart.'
(Its aprox 800-850 tie down points)
Tacked using the marked Jig, level with the top of the frame.

 Is it the "cheap imported" or the "galvanized" you're having trouble with?DuraGal is the locally produced option, but working with any galvanized steel requires taking the Galv. coating off where you're going to weld it. If you do this, then welding it is much more enjoyable.
Similar Threads
-
Bike trailer plans help
By BLKWDW in forum TRAILERS & OTHER FABRICATED STUFFReplies: 8Last Post: 28th December 2013, 11:52 PM -
Camper/bike/box trailer
By Rat1314 in forum TRAILERS & OTHER FABRICATED STUFFReplies: 4Last Post: 15th April 2013, 09:57 PM -
Planning a bike trailer
By Rat1314 in forum TRAILERS & OTHER FABRICATED STUFFReplies: 42Last Post: 7th April 2013, 10:52 PM -
Bike and Trailer
By fenderbelly in forum CYCLINGReplies: 2Last Post: 29th October 2008, 08:58 AM
