

 Thanks:
  Likes:
  Needs Pictures: 0
 Picture(s) thanks:
Results 76 to 90 of 155
Thread: Apothecary chest
-
11th July 2018, 03:14 PM #76
 GOLD MEMBER


- Join Date
- May 2007
- Location
- Sth Gippsland Vic
- Posts
- 4,412

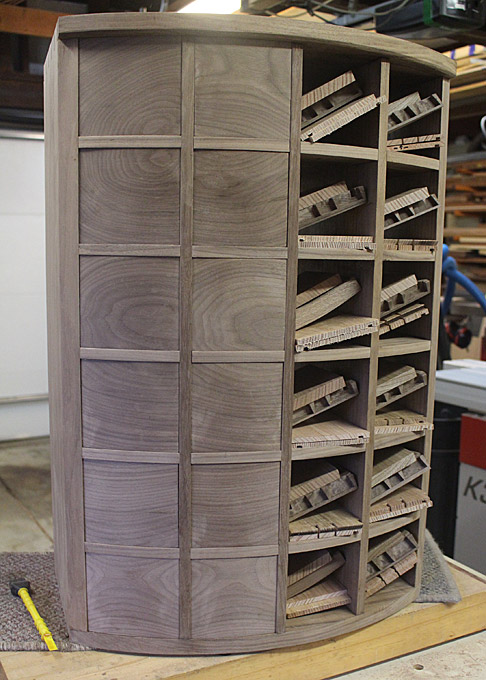
Its looking real Good Derek.
Cabinets with lots of drawers are a favorite of mine . Good sellers too I'm sure .
The random grain is a nice feature and hard to plan or know exactly what your going to end up with . The handles / Knobs and polish will blend it all together .
Something I like or consider on these sort of things is adding a fine incised bead around the drawer front . It can make a nice difference and add some more interest and helps refine the drawer fronts gap to the carcase which is where or why beads, whether incised or applied were used.
Not that your going to veneer or planned to but vacuum isnt needed if you wanted to . The old way beats it by far because of the pressure that can be used and that hide glue can be used as well . Either moist sand formed in a box with the drawer front clamped down into it . Or sand in a canvas bag stitched up and the front clamped down into it or the bag clamped to the front . The bag can be moist sand and heated .
The walnut's going to look nice finished with the random grain .The way Walnut ripens over a few months after polishing is nice and will show it right off!
Rob
-
11th July 2018 03:14 PM # ADSGoogle Adsense Advertisement
- Join Date
- Always
- Location
- Advertising world
- Posts
- Many
-
15th July 2018, 03:30 AM #77
Be inspired. Be creative. Be bold.
- Join Date
- Apr 2001
- Location
- Perth
- Posts
- 10,828
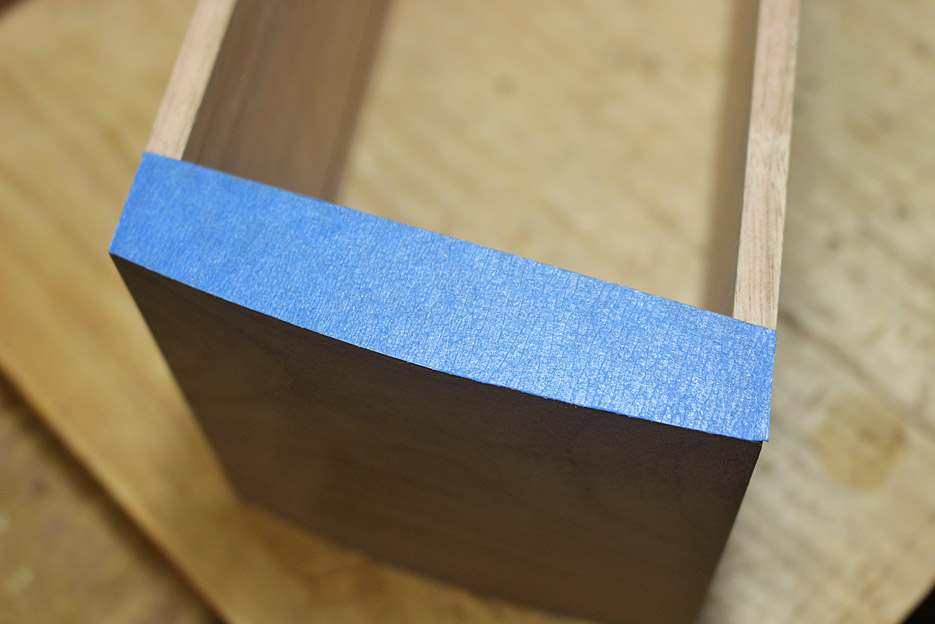
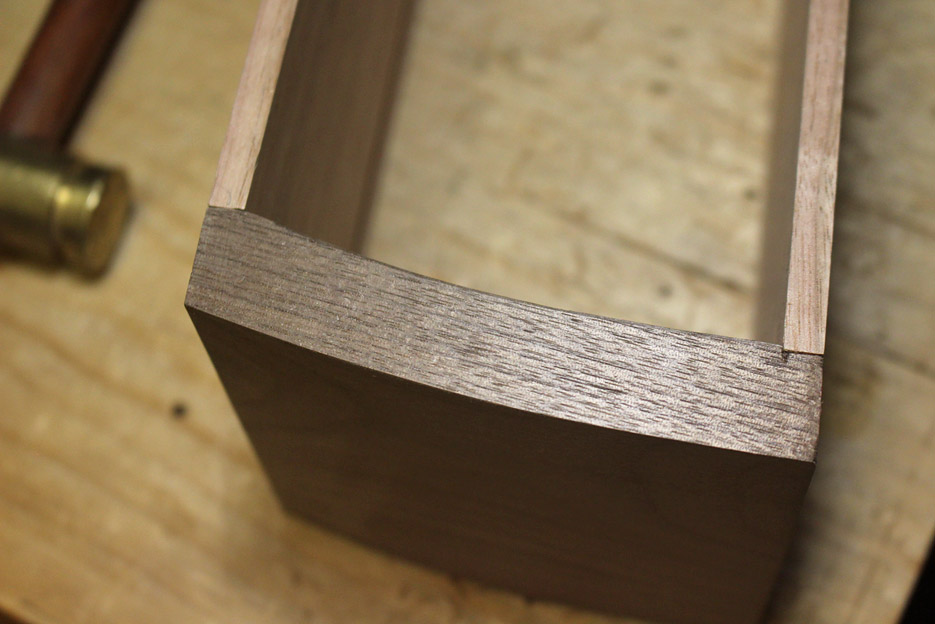
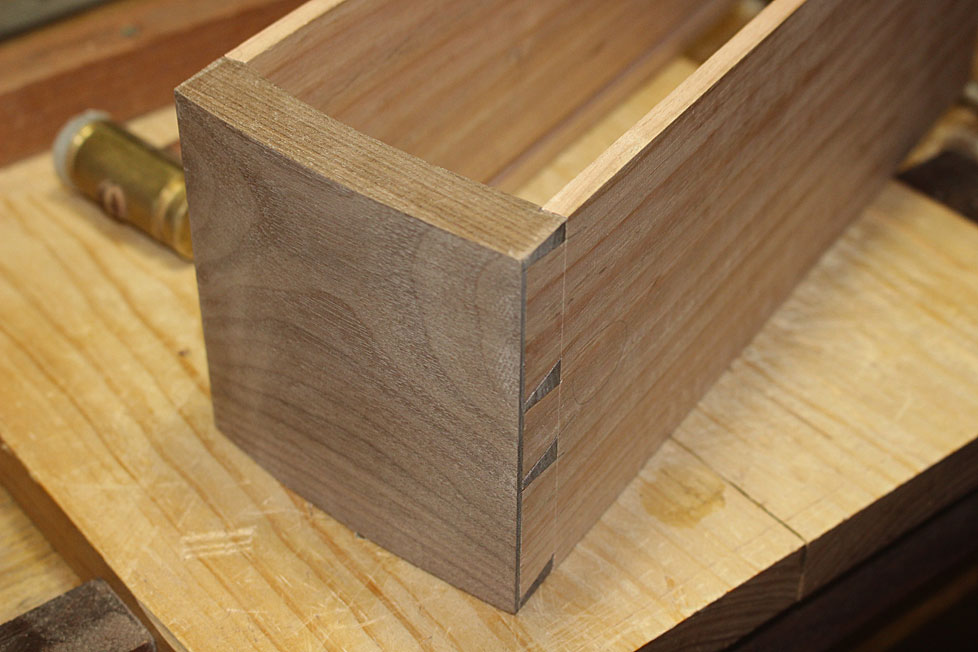
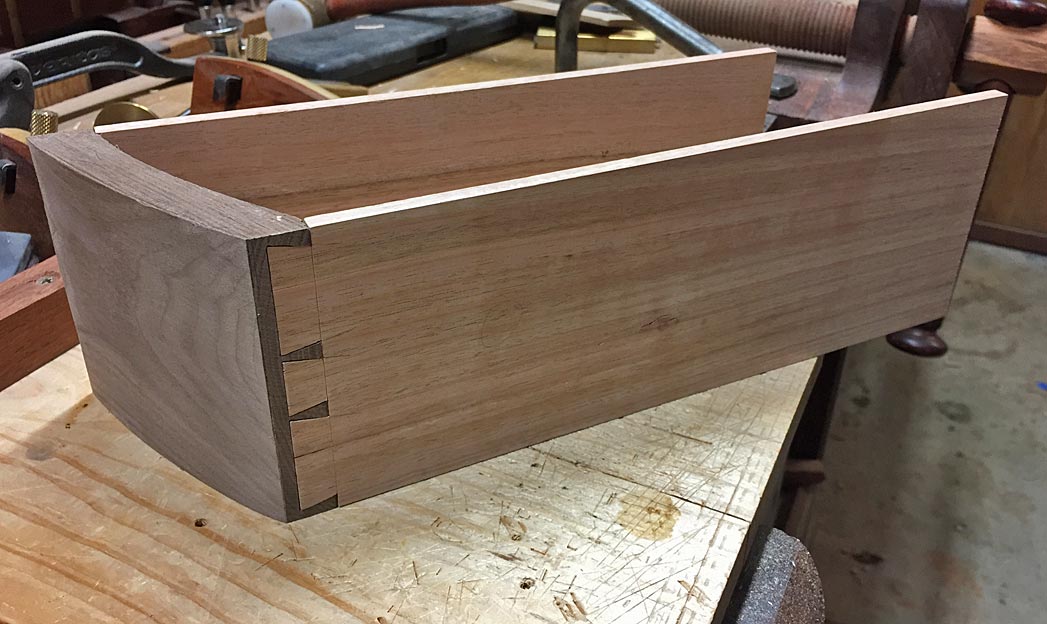
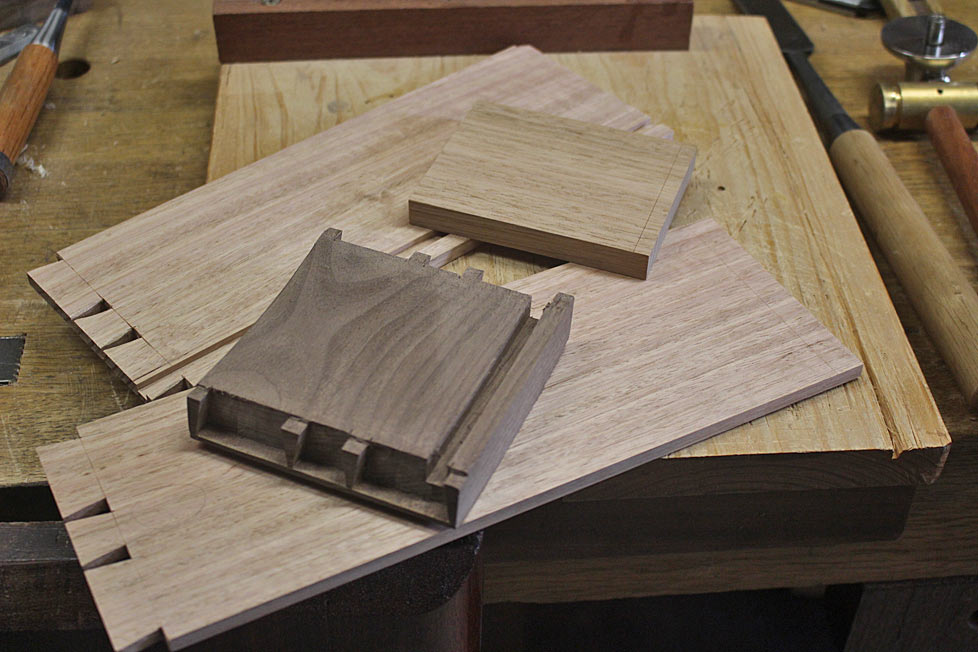
Shaping the curved faces of the drawers was a lot of work, and I was very pleased to see it done. Dusty and dirty.Not fun. Now the inside faces need to be done, and this will complete the the third stage of building the drawers (the first stage was to fit parallelogram-shaped drawer fronts into their recesses, and the second stage was dovetailing the fronts).
The drawer front shaped on the outside only ...

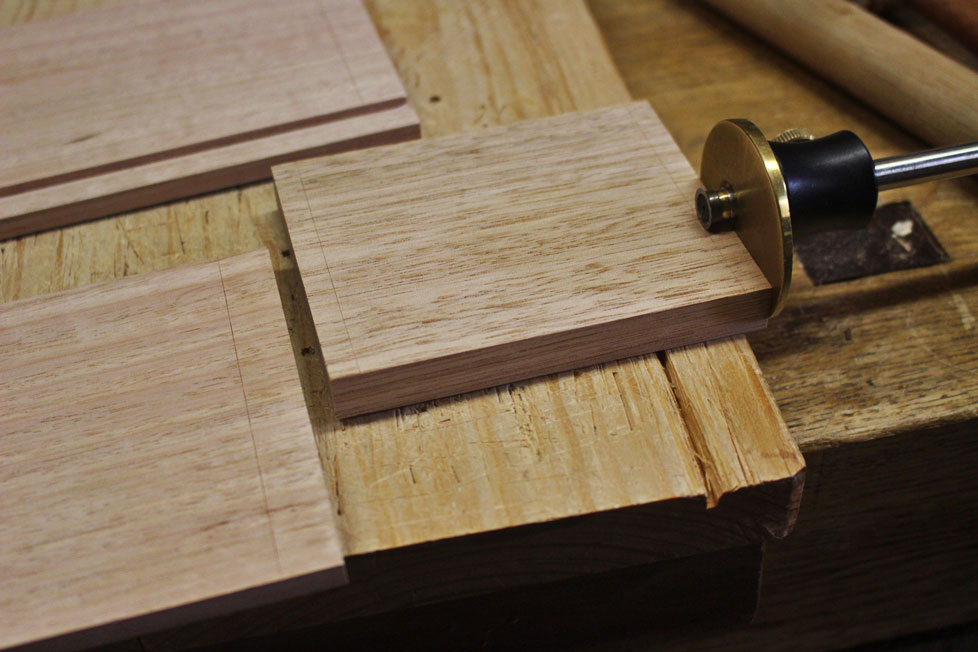
Blue tape (what else! ) is added to upper and lower edges ...
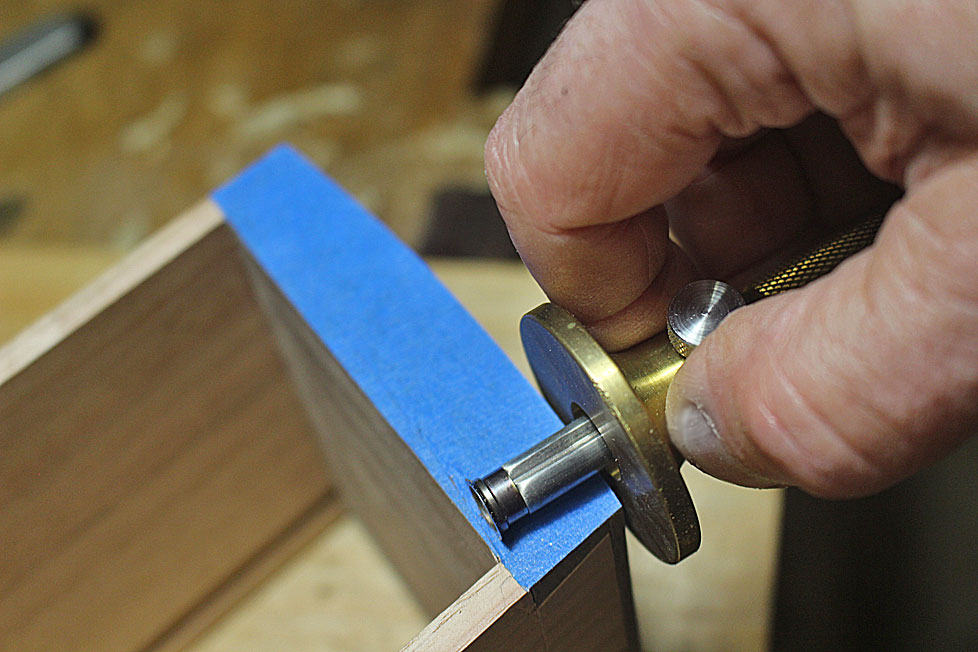
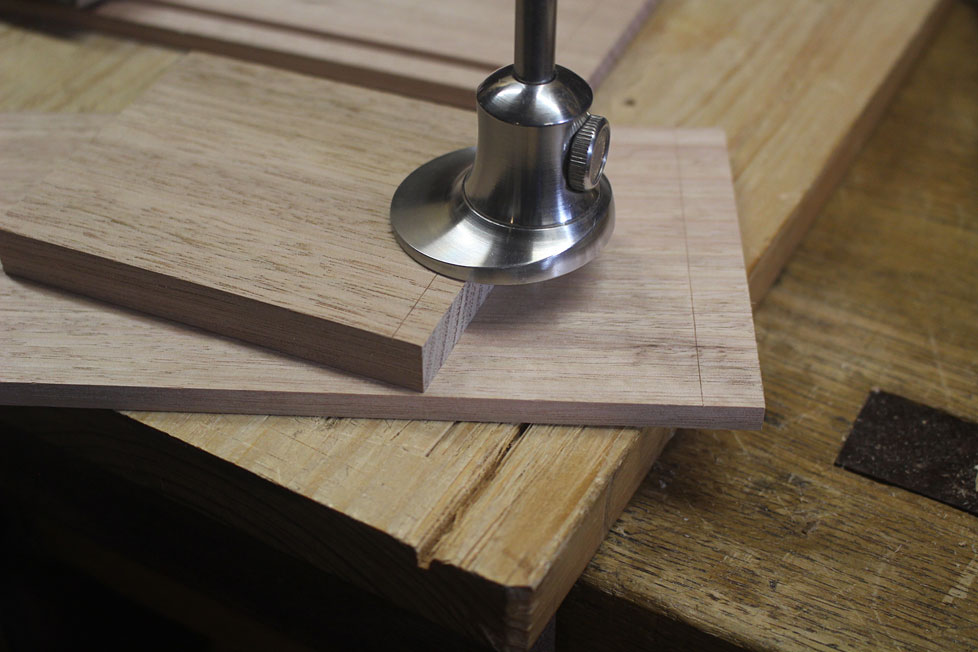
The inside curve is scribed ...
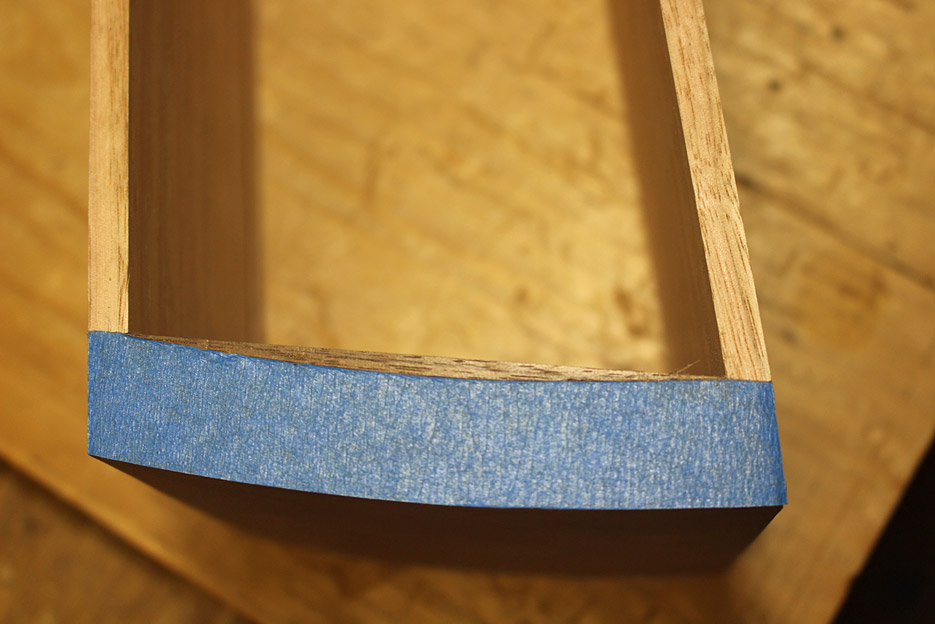
Pulled apart, the rear of the drawer front is chamfered with a round bottomed spokeshave to prevent spelching ...
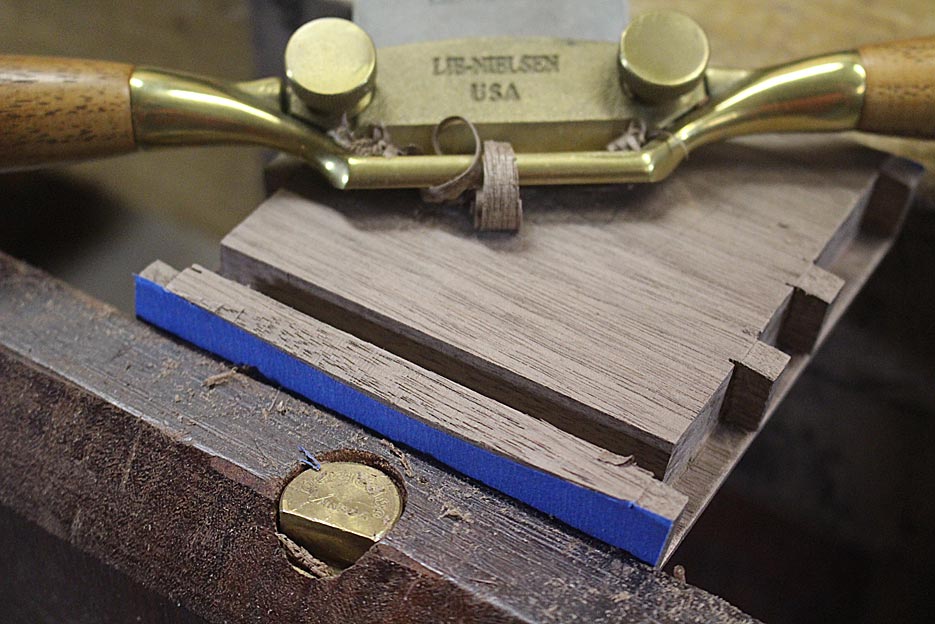
The waste is removed with rasps - this is an Auriou 10 grain ...
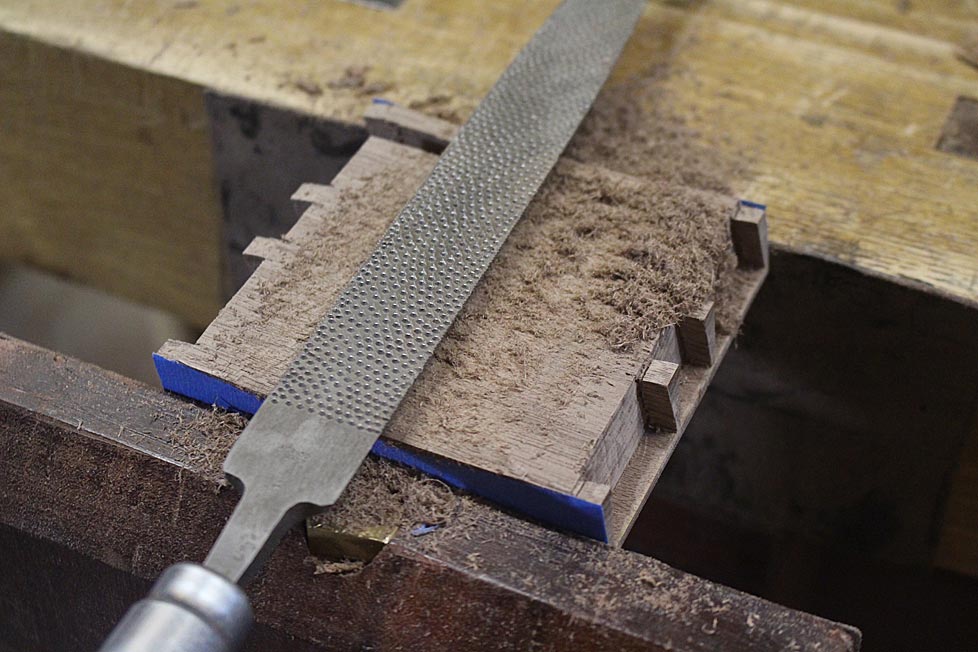
Three rasps in all are used to remove and smooth, ending with this 15 grain ..
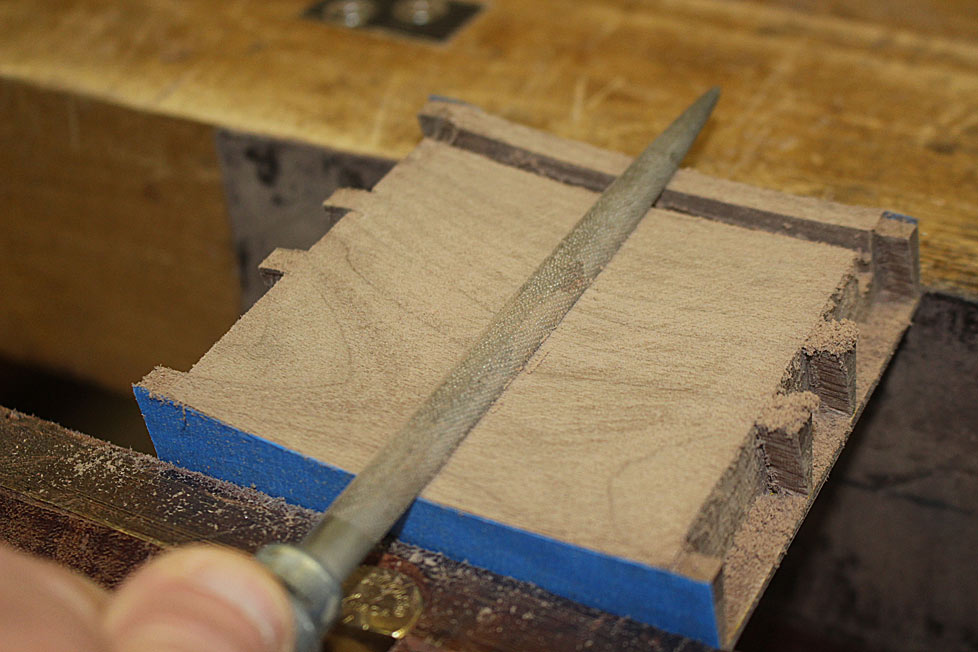
The surface is refined and finished with a scraper ..
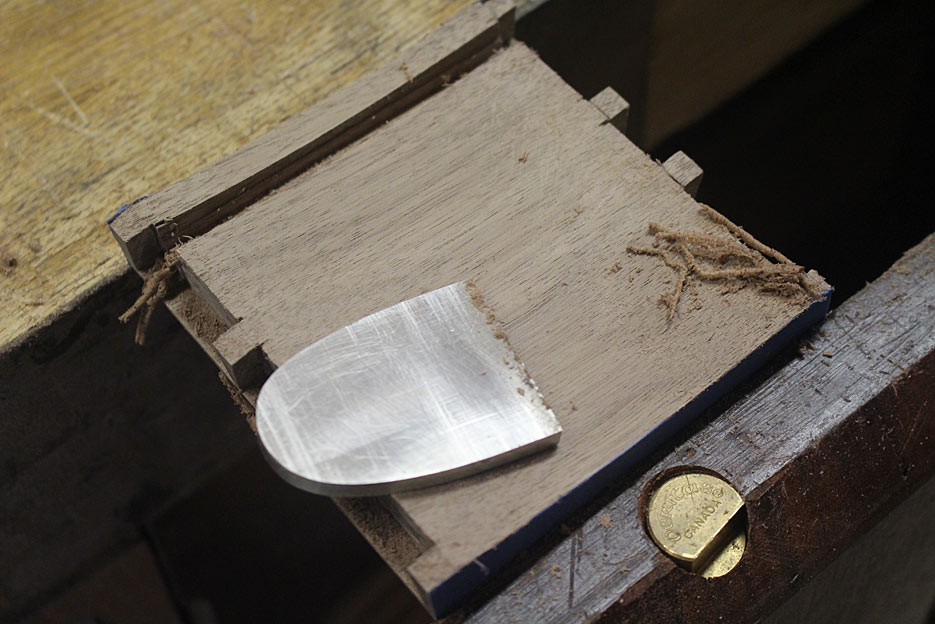
Final shots of the completed drawer front ...
Regards from Perth
DerekVisit www.inthewoodshop.com for tutorials on constructing handtools, handtool reviews, and my trials and tribulations with furniture builds.
-
15th July 2018, 09:16 AM #78
The prize lies beneath - hidden in full view
- Join Date
- Oct 2010
- Location
- 1017m up in Katoomba, NSW
- Posts
- 10,662
That's a nice detail Derek.
I've heard people say that a dovetail should be put together just the once - with glue - because pulling it apart can weaken it (and I guess that may depend on the timber). Clearly you don't subscribe to that idea, but these joints have been pulled apart a few times now I think. Are you not concerned about chipping out the pins or sockets? (I guess you have no choice in this case, but even so.....)
Do you mean the edge where the rasp will exit, which would spelch (badly, going across grain)? Originally Posted by derekcohen

-
15th July 2018, 11:45 AM #79
Be inspired. Be creative. Be bold.
- Join Date
- Apr 2001
- Location
- Perth
- Posts
- 10,828
Hi Brett
I must have knocked open and then tapped back together all the dovetails half a dozen times. As you note, I don't have a choice. It is needed just to measure up. For example, once the shaping of the drawer front was completed, the parts went back together and back inthe drawer recess to mark off the length of the drawer sides. Every drawer has a longer and shorter side. Every drawer is slighter different from all others, so it is not possible to simply gang cut a row. And so every drawer has to be measured individually And then pulled apart once again to dovetail the rear of the drawer (which I am no doing).
There has been a little chipping here-and-there. The walnut is not as brittle as jarrah, for example. Later I will go through every drawer and fill in any gaps with slivers.
The likelihood for spelching is a certainty when planing or rasping across the grain and over a far edge. Chamfering the far edge to the finish line is the way to prevent it taking bites out of the surface you want to keep.
Regards from Perth
DerekVisit www.inthewoodshop.com for tutorials on constructing handtools, handtool reviews, and my trials and tribulations with furniture builds.
-
17th July 2018, 03:29 AM #80
Be inspired. Be creative. Be bold.
- Join Date
- Apr 2001
- Location
- Perth
- Posts
- 10,828
This is a long post, and so feel free to skim through it. Who needs another dovetailing documentary?
This one is specific to the back of a drawer, and so is different from the through dovetails which one might use on boxes. Also, I have a few techniques to share, ones that I do not see mentioned much, if at all.
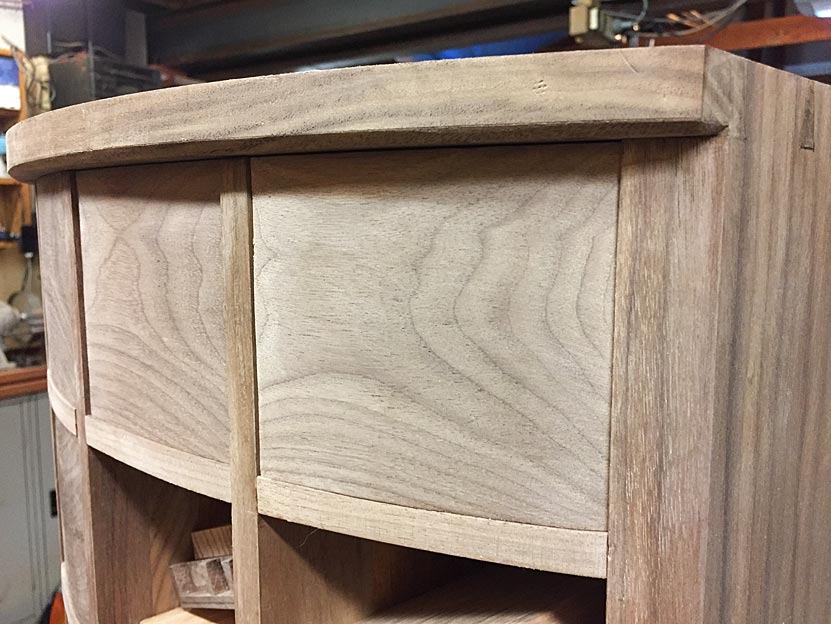
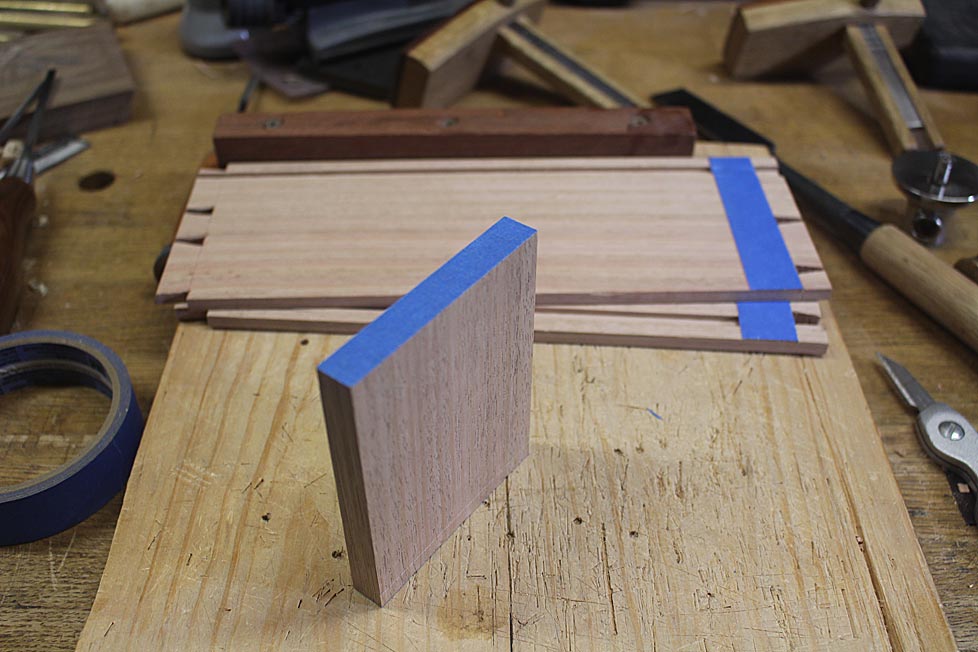
The drawer is one in the Apothecary chest. What has been shown before was the dovetailing hijinks needed for the curved fronts. This affects the drawer sides as well, since they are not equal in length. In fact, the length for the sides need to be measured individually.
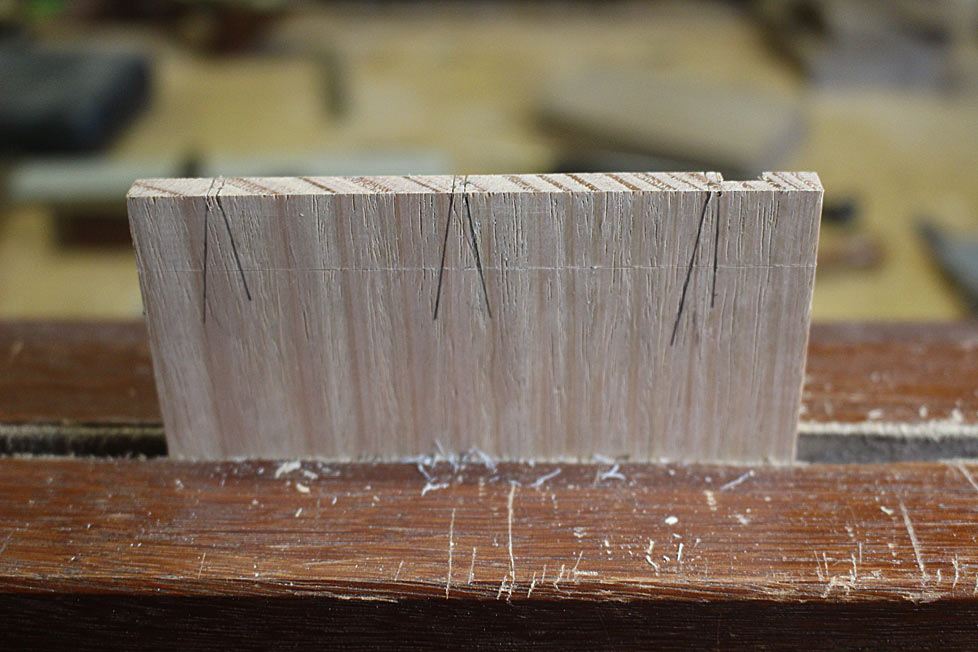
Here is a drawer front with sides ...
It is fitted in the recess and positioned carefully (top right hand drawer) ...
At the rear of the chest, the drawer sides are clamped to avoid any movement ...
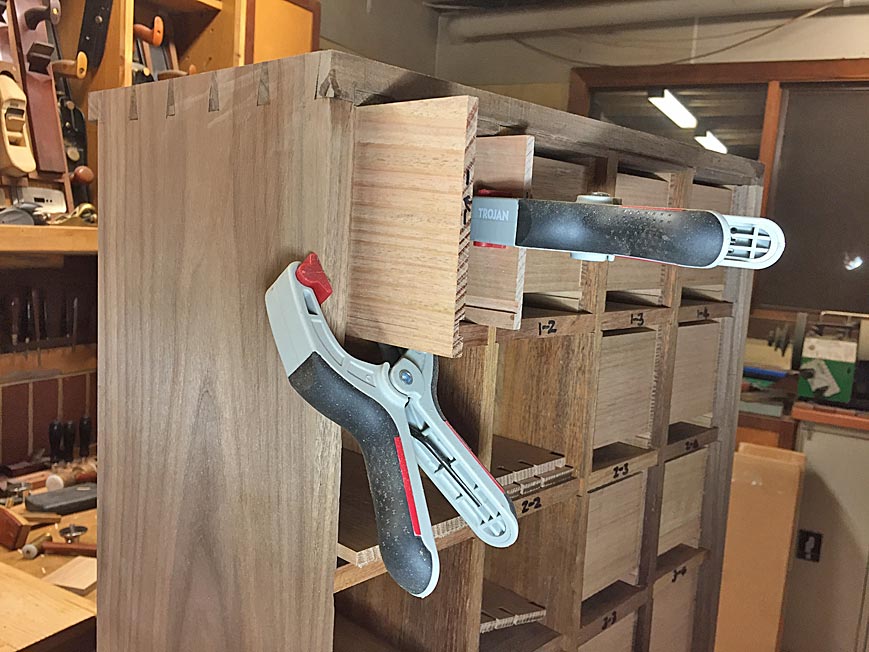
Now the drawer side length can be marked. The final length is 10mm in from the back of the recess.
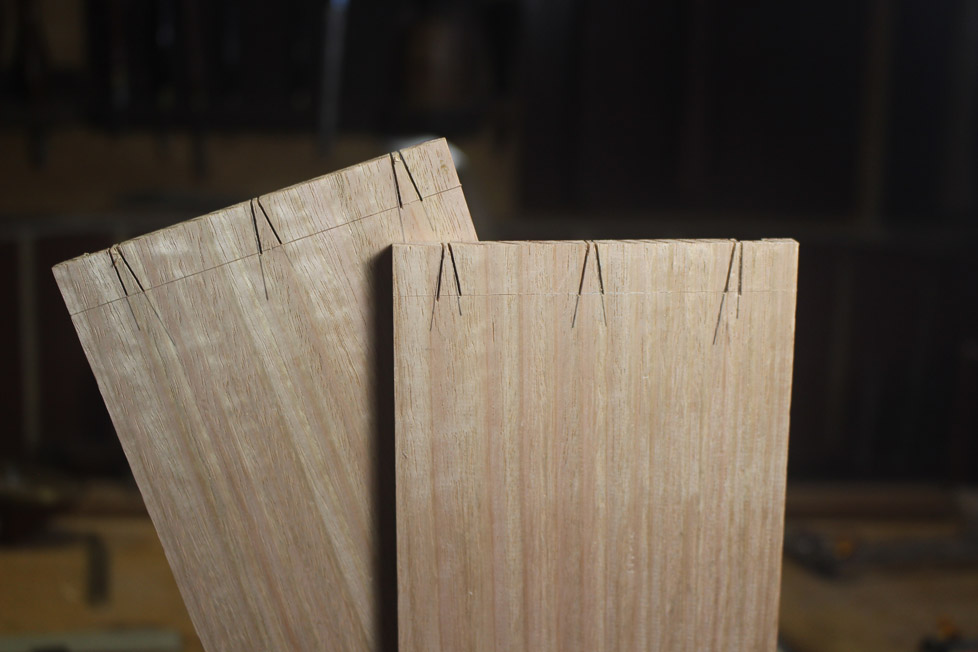
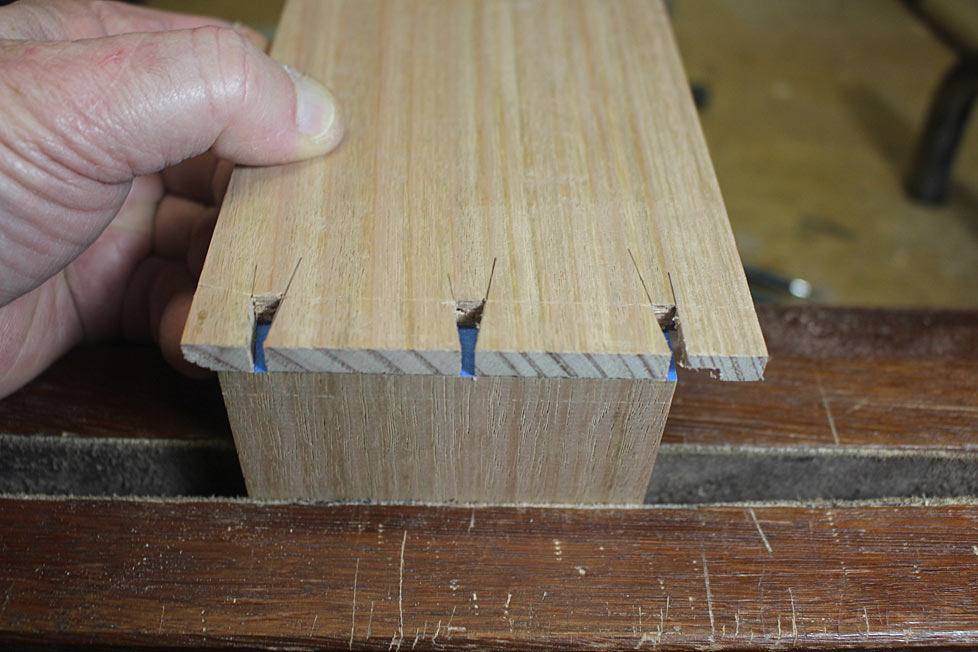
We are ready to begin joining the rear of the drawer. A drawer back has been added to the parts ...
"Drop" (the gauge) for the width of the drawer back and transfer it to the ends of the drawer sides ...
Now do the same for the drawer sides and transfer this to the drawer back ...
With 24 drawers, it was quicker and easier to make up a template for positioning the tails ...
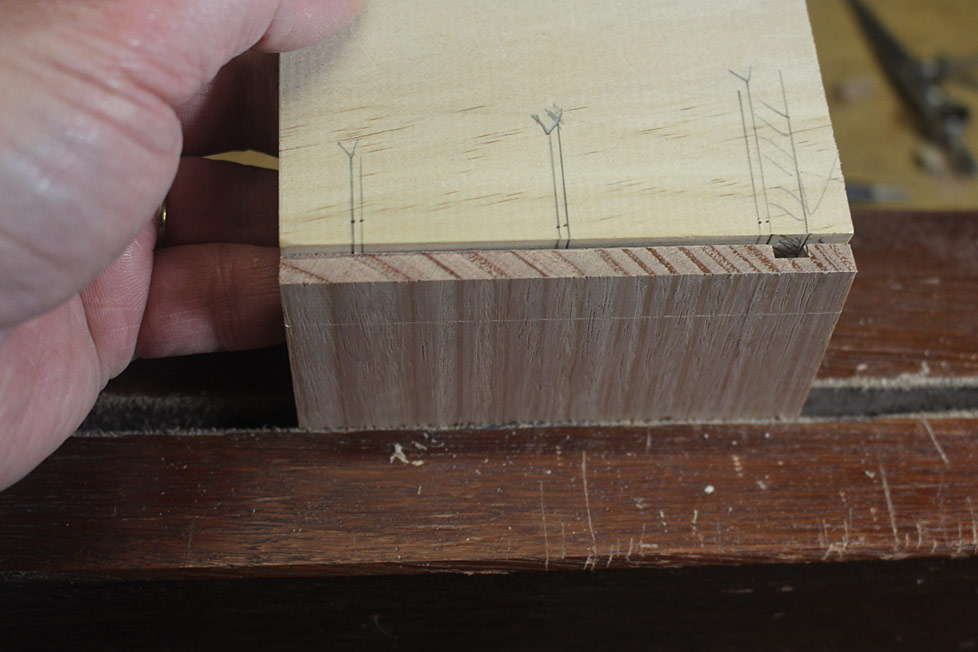
Note that the tail alongside the groove (for the drawer bottom) is not a triangle, but one side is vertical (flanking the groove) ...
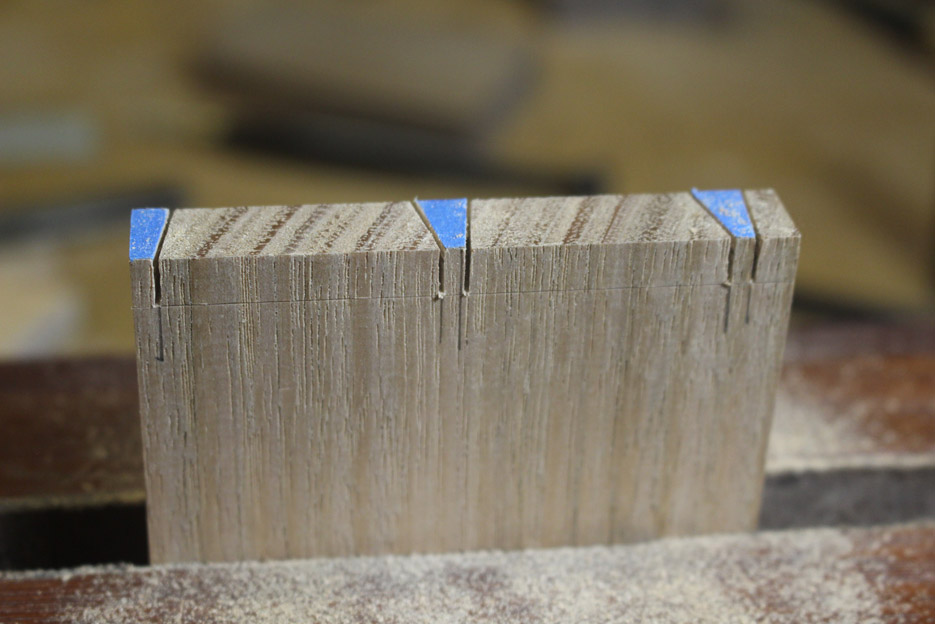
Saw both drawer sides ...
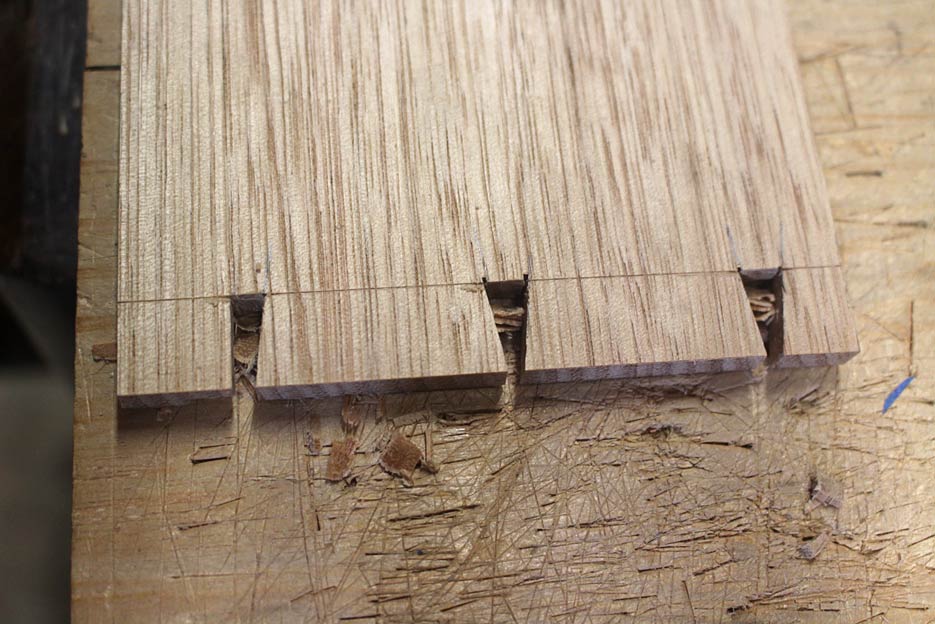
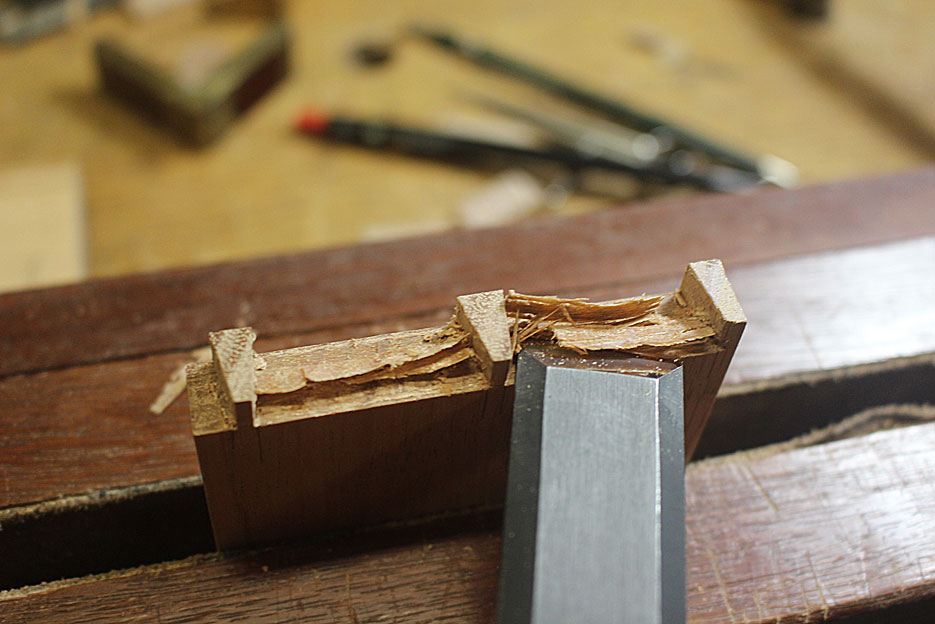
Time to remove the waste from the tails. First, create a chisel wall for all the tails ...
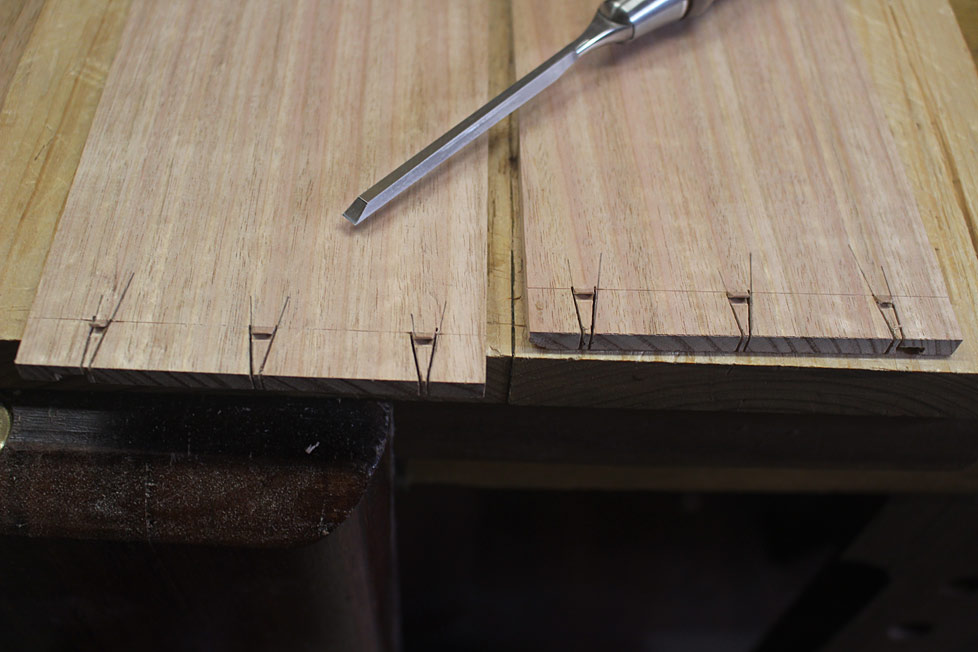
Fretsaw the waste to 1-2mm from the line ...

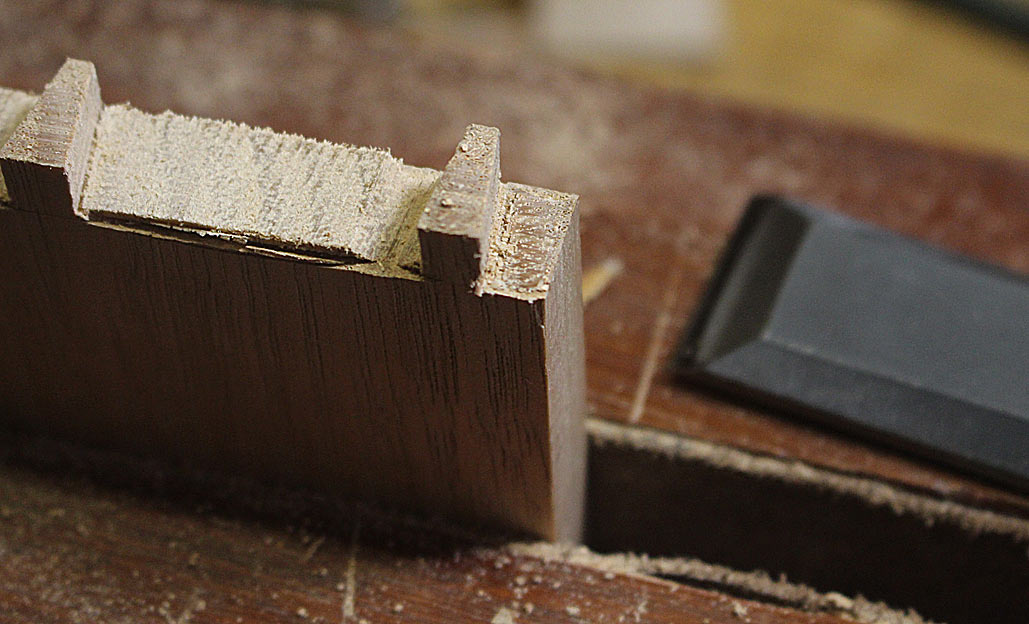
Remove the waste in thin layers for the cleanest finish. Note that the Tasmanian Oak is too thin (6.5m) to confidently pare half way by hand (better to use a hammer for precision). By taking very fine layers it is possible to push through the board without spelching the other side ...
Blue tape on everything!! The drawer sides have blue tape ala the #140 trick (I wrote this up recently on my website). There are 4 layers. The drawer back has tape to aid in transferring marks (don't knock it if your eyesight is better than mine).
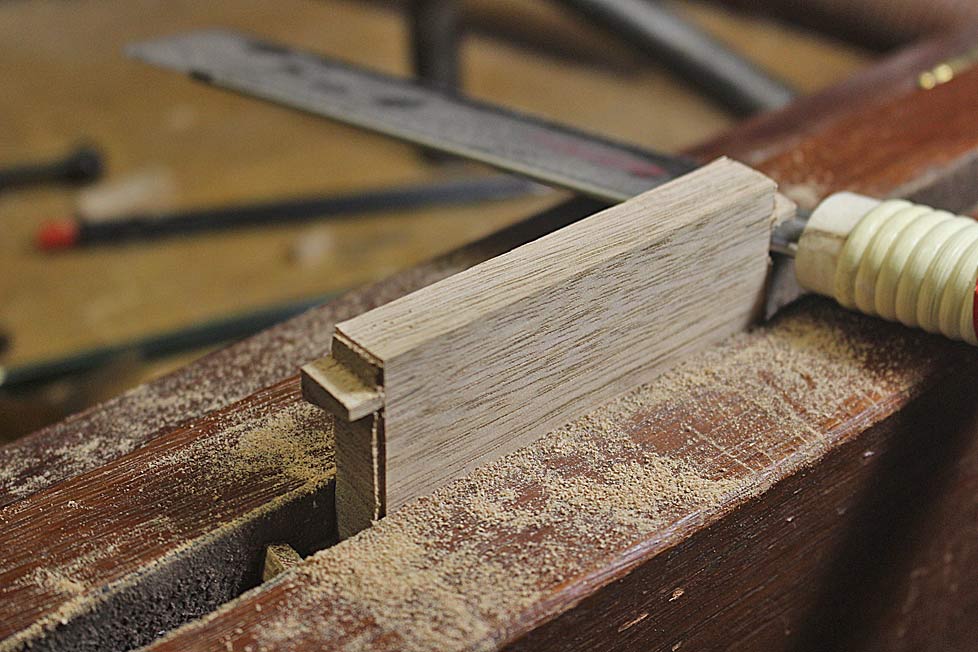
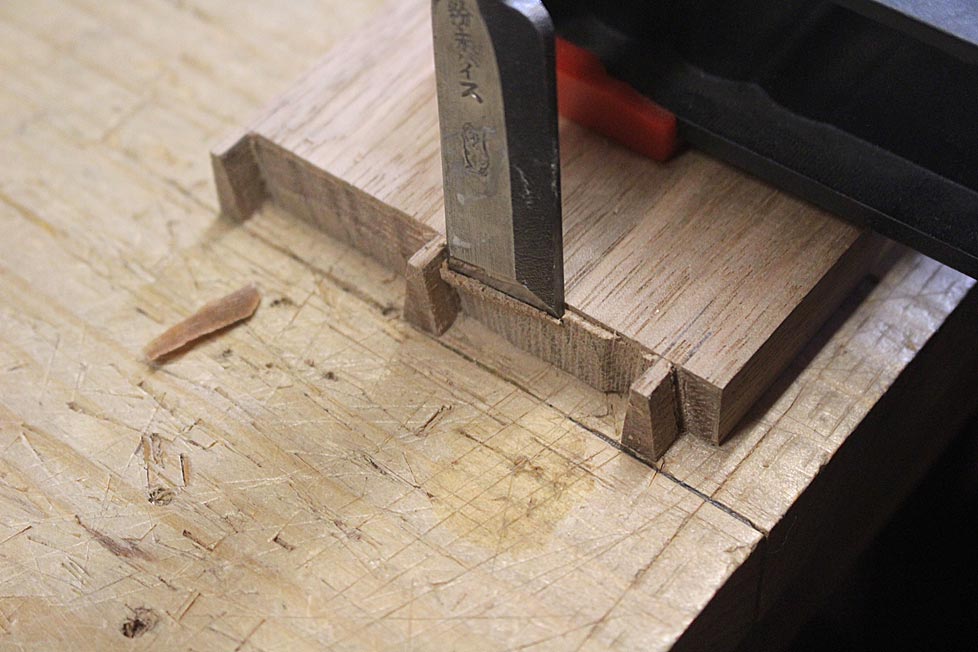
Transfer the tails to the pin board ...
The great thing about the blue tape method is that you only need one knife stroke to cut through. No sawing away to make an impression in the end grain. Saw against the tape. Go for it!
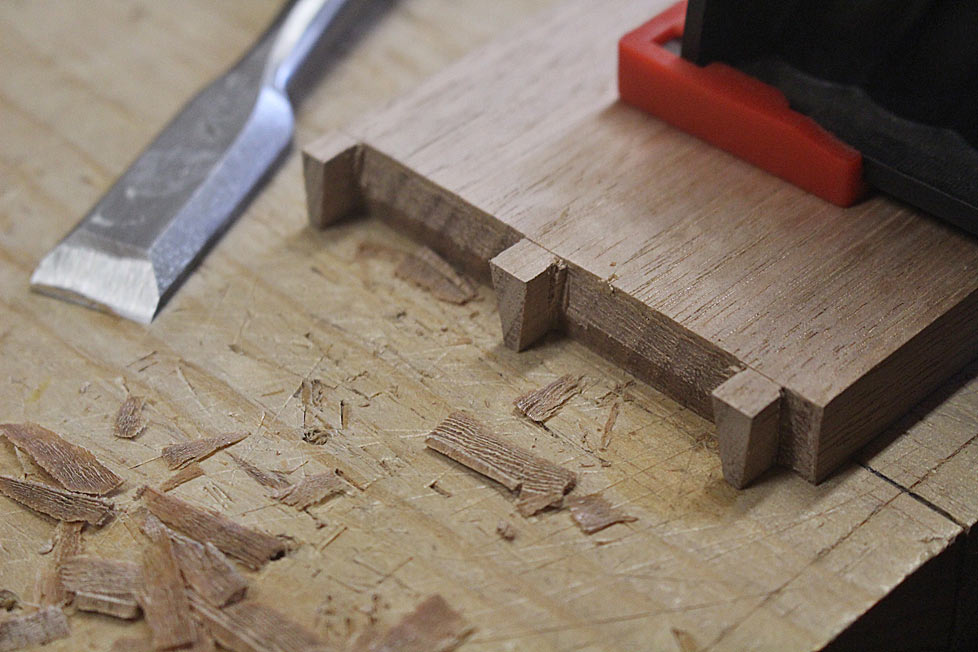
Now remove the waste with a fretsaw. Again, aim for about 1mm above the line. For control, hold the saw handle very gently, and saw as lightly as you can - do not force the cut. Let the saw do the work. You will be rewarded with a straight line ...

I saw away the ends about 1mm above the line ...
In years past, I used to saw to the line. I now see more value in paring to the line. What you will notice is the chisel wall around the section. I am reminded of David Charlesworth's method of removing end waste. He calls his process "tenting". In this he pares upward, reducing the waste all the time. In my method, this is unnecessary since the chisel wall protects the sides and you can see when you are getting close to level ...
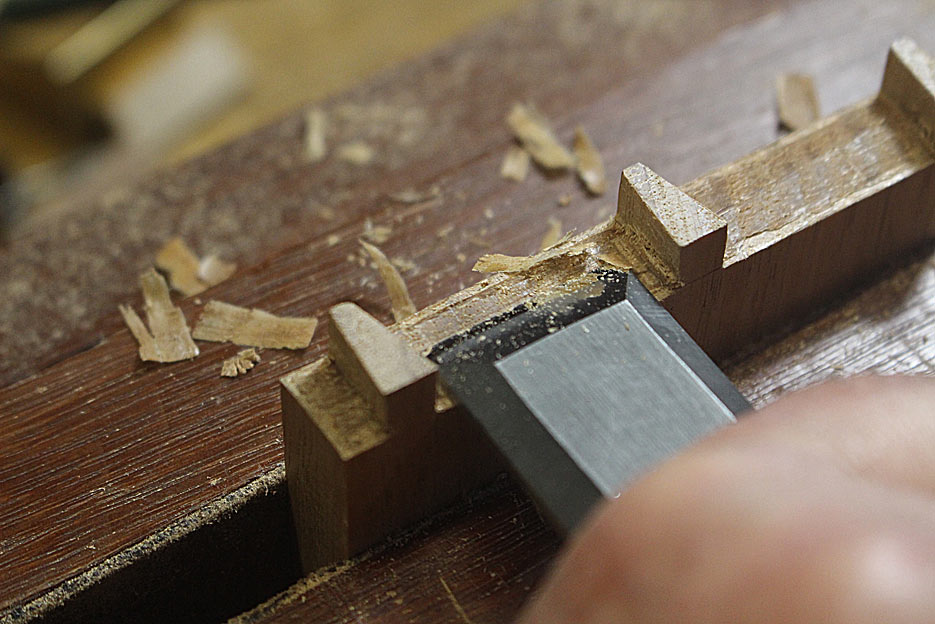
Of all the aspects in through dovetailing, I think that removing the waste between the pins is the hardest. This is again where I was reminded of David's tenting method (but which he does not use in this section, only at the ends).
Again the chisel wall aides in enabling the chisel to register against the line without any danger of going over it. The chisel here is PM HSS, and very tough (and sharp!). The blade is driven at an angle away from the sides ...
Turning the board over, and repeating the manoeuvre, the result is a tent ...
I have two methods for removing the remaining waste. The first is to pare the tent, slowly reducing the angle. Since you are paring upwards, there is now danger to spelching the opposite side of the board ...
The second is a side-to-side sweep, which slices away the waste ...

Finished ...
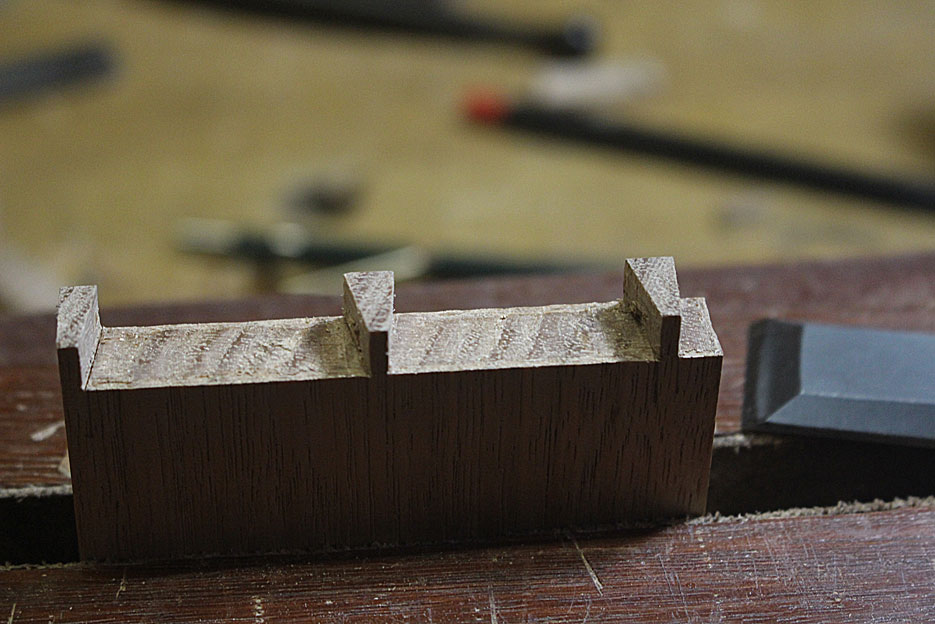
The parts are now assembled. From the top ....
... and the bottom ...

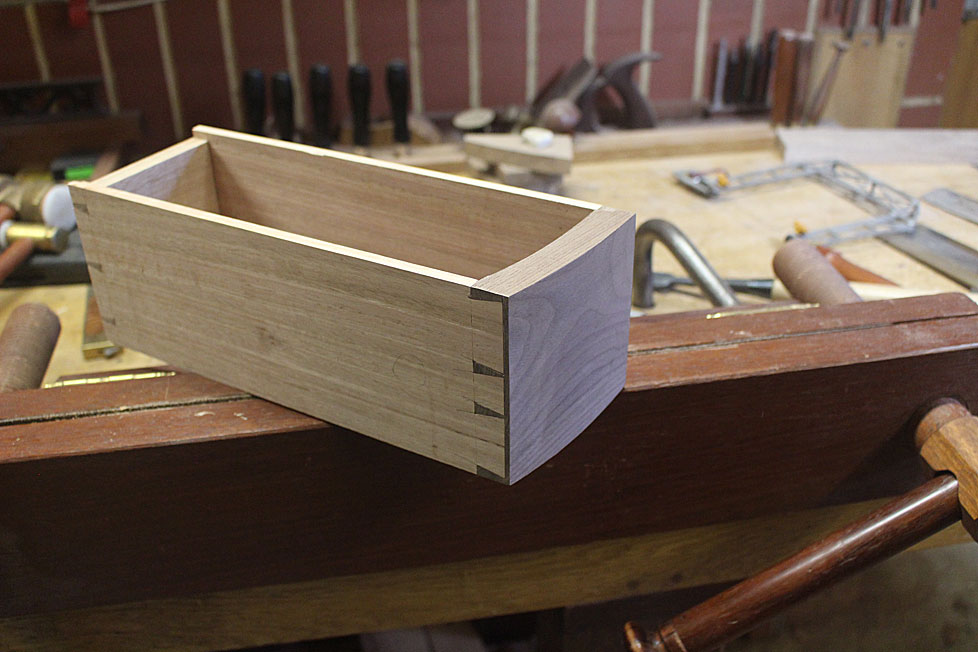
Fitting the drawer ...
My plan is to set the drawers back a mm or two ...
Any thoughts about this?
Regards from Perth
DerekVisit www.inthewoodshop.com for tutorials on constructing handtools, handtool reviews, and my trials and tribulations with furniture builds.
-
17th July 2018, 09:20 AM #81
Intermediate Member
- Join Date
- Nov 2014
- Location
- Melbourne
- Posts
- 42
Hi Derek,
Thank you so much for the last post on dovetailing. (I am totally new to woodworking and love your contributions).
Regards.Last edited by IanW; 17th July 2018 at 09:51 AM. Reason: remove unnecessary 'quote'
-
17th July 2018, 09:49 AM #82
GOLD MEMBER
- Join Date
- Mar 2004
- Location
- Brisbane (western suburbs)
- Age
- 77
- Posts
- 12,137
Well, it certainly adds a sculpted look to the face of the chest, and would be a good way to disguise any slight mismatches between runners & drawer-fronts. I find no matter how meticulous I am with drawers, in a large set, one or two will end up fractionally out of square after glue-up. It can usually be pulled straight when you fit the bottom, but inevitably, you end up with a drawer or two that isn't quite perfect, and requires a bit of fiddling with placing the stops to get it to sit perfectly flush when closed. But with such narrow drawers, I don't think you'll have that option (adjusting stops) - they'll either sit flush or they won't. You are going to have to be meticulous to get every single one dead-square! Originally Posted by derekcohen
Rob's suggestion of mini beads on the edges of runners & stiles would achieve a similar effect in disguising any minor discrepancies, but I think that might over-do things moreso, (& be a lot of work, mitreing all those intersecting beads!!).
Dunno - this is a situation where I'd stand & stare at the thing for a long time, trying to decide. You've got a busy picture already, with the grain pattern, & coupled with added sculptural elements, it might look a bit too tizzy for a piece that's really a utilitarian thing in its original incarnation. The grain patterns will mute as it ages, so they probably won't be as eye-catching as they are at present, and the sculpted look will take over....
Hmmmm, glad it's your decision & not mine!
Cheers,IW
-
17th July 2018, 10:49 AM #83
 GOLD MEMBER
- Join Date
- May 2012
- Location
- Woodstock (Cowra)
- Age
- 74
- Posts
- 3,381
I would be inclined to keep them flush as wear on the horizontal shelf will show after a period of time, that is, if this is to be a user, if just a looker, then set back as you suggested. My take on drawers that are set back is "what is being camouflaged?"
The person who never made a mistake never made anything
Cheers
Ray
-
17th July 2018, 10:56 AM #84
Franklin Ferrier
- Join Date
- May 2007
- Location
- Gold Coast
- Age
- 70
- Posts
- 2,735
Hi Derek, If you think the drawers look better set in a mm, I think it is also a possibility the stiles and rails on the carcass might benefit from scratching a bead around the openings. I think a shallow scratched bead wouldn't look as prominent as a cockbead on the drawer and it might have the effect of diminishing the appearance of the width of the framing around the drawers.
Cheers,Franklin
-
17th July 2018, 11:04 AM #85
Be inspired. Be creative. Be bold.
- Join Date
- Apr 2001
- Location
- Perth
- Posts
- 10,828
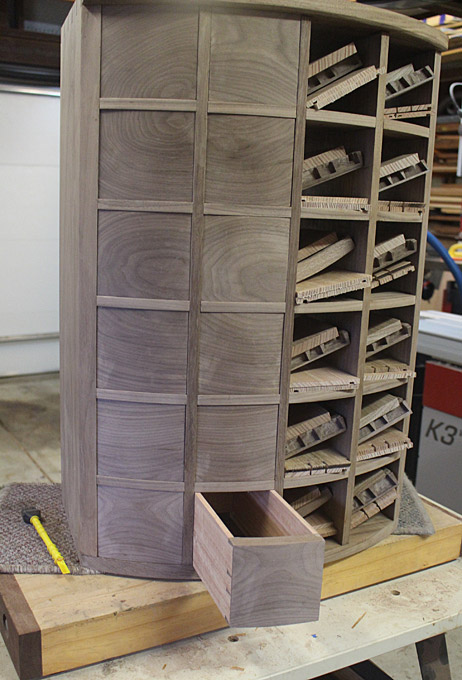
The reason for the set back is two-fold: firstly, there are 2 drawers in the 24 where there is a slight gap (very slight, but enough to irk me), and the set back will hide this.
Secondly, I like the look. It makes the piece more "modern". The setback also means that I do not need to add any details to the drawers, such as a bead or bevel.
Regards from Perth
DerekVisit www.inthewoodshop.com for tutorials on constructing handtools, handtool reviews, and my trials and tribulations with furniture builds.
-
17th July 2018, 11:29 AM #86
The prize lies beneath - hidden in full view
- Join Date
- Oct 2010
- Location
- 1017m up in Katoomba, NSW
- Posts
- 10,662
Apart from any practical reasons to set the drawers back, it might depend on how this piece will be lit (and I do NOT mean with a match!
 ). The best way to show off timber (apart from direct sunlight which is the ultimate) is a direct point source light, such as a down light. If it is to be in a location where a point source light could be aimed directly at it, then the set back will give it more 3D from the wee shadows on every level of drawers.
-
17th July 2018, 04:55 PM #87
Be inspired. Be creative. Be bold.
- Join Date
- Apr 2001
- Location
- Perth
- Posts
- 10,828
Brett, the chest will end up in the entrance hall, which has a glass-fronted door. There is lots of raking light, and this will show up the shadow lines.
I am also aware that it is Winter in Perth and it is wet. The wood is now at its most swollen, and will likely shrink in the dry heat of summer. Trying to keep the drawer ends flush with the face of the chest is a fools errand. A set back will aid in avoiding this issue as well.
Regards from Perth
DerekVisit www.inthewoodshop.com for tutorials on constructing handtools, handtool reviews, and my trials and tribulations with furniture builds.
-
17th July 2018, 06:34 PM #88
The prize lies beneath - hidden in full view
- Join Date
- Oct 2010
- Location
- 1017m up in Katoomba, NSW
- Posts
- 10,662
That's perzackly where I imagined it would go. Originally Posted by derekcohen
-
17th July 2018, 08:28 PM #89
GOLD MEMBER
- Join Date
- May 2007
- Location
- Sth Gippsland Vic
- Posts
- 4,412
If you set your stops down the back in that 10mm space you will probably have a fluctuating recess with the drawer front . The piece will act as a Hygrometer as well . Originally Posted by derekcohen
Wouldn't you be putting the drawer stops up front the traditional way for the drawer front to stop on?
Rob
-
17th July 2018, 08:40 PM #90
Be inspired. Be creative. Be bold.
- Join Date
- Apr 2001
- Location
- Perth
- Posts
- 10,828
I was in two minds about this (because the space was so restricted), but the drawer stops will go at the front.Wouldn't you be putting the drawer stops up front the traditional way for the drawer front to stop on?
Regards from Perth
DerekVisit www.inthewoodshop.com for tutorials on constructing handtools, handtool reviews, and my trials and tribulations with furniture builds.


 Reply With Quote


Similar Threads
-
Sea Chest
By LR09WA in forum WOODWORK - GENERALReplies: 14Last Post: 11th June 2011, 08:00 PM -
Ice Chest
By 2sharp in forum FINISHINGReplies: 6Last Post: 22nd January 2008, 04:30 AM -
Ice Chest
By rod1949 in forum Links to: TIMBER & HARDWARE SUPPPLIERSReplies: 1Last Post: 15th September 2004, 08:13 PM -
Chest
By GRS in forum WOODWORK PICSReplies: 8Last Post: 7th July 2004, 12:26 PM -
Apothecary Chest
By Paul O'H. Ingersoll Canad in forum WOODWORK PICSReplies: 4Last Post: 28th February 2004, 12:16 AM
