

 Thanks:
  Likes:
  Needs Pictures: 0
 Picture(s) thanks:
Results 91 to 105 of 155
Thread: Apothecary chest
-
17th July 2018, 10:02 PM #91
 GOLD MEMBER


- Join Date
- May 2007
- Location
- Sth Gippsland Vic
- Posts
- 4,410

I actually like fitting stops at the rear of side boards and side tables Derek. Its nice and easy .
The fitting of the drawer front to the cabinet front is fine tuned by shaving of material from the back of the side.
If the drawer side extends out the back away from the drawer back a little its even a bit better.
The sides of side table or side board carcase have grain running horizontal though so no expanding and contracting is going on in a way that buggers things up .
On things like a standard chest of drawers though . Or like yours its different. As you know .
Something that's interesting is, if you ever get to see it, is where someone makes a chest and makes the drawer sides go right to its back and don't leave that 10mm gap.
Obviously its a big No No. And its a rare thing to see in Antiques but it does show up . Every drawer is sitting out from the carcase and has no room to go back further. Major stuff up ! and hard to fix . Maybe they left to small a gap and it all shrunk away ?
-
17th July 2018 10:02 PM # ADSGoogle Adsense Advertisement
- Join Date
- Always
- Location
- Advertising world
- Posts
- Many
-
18th July 2018, 03:35 AM #92
GOLD MEMBER
- Join Date
- Feb 2016
- Location
- Canberra
- Posts
- 5,125
I'd be very interested to see how you do your drawer stops.
-
23rd July 2018, 01:55 AM #93
Be inspired. Be creative. Be bold.
- Join Date
- Apr 2001
- Location
- Perth
- Posts
- 10,827
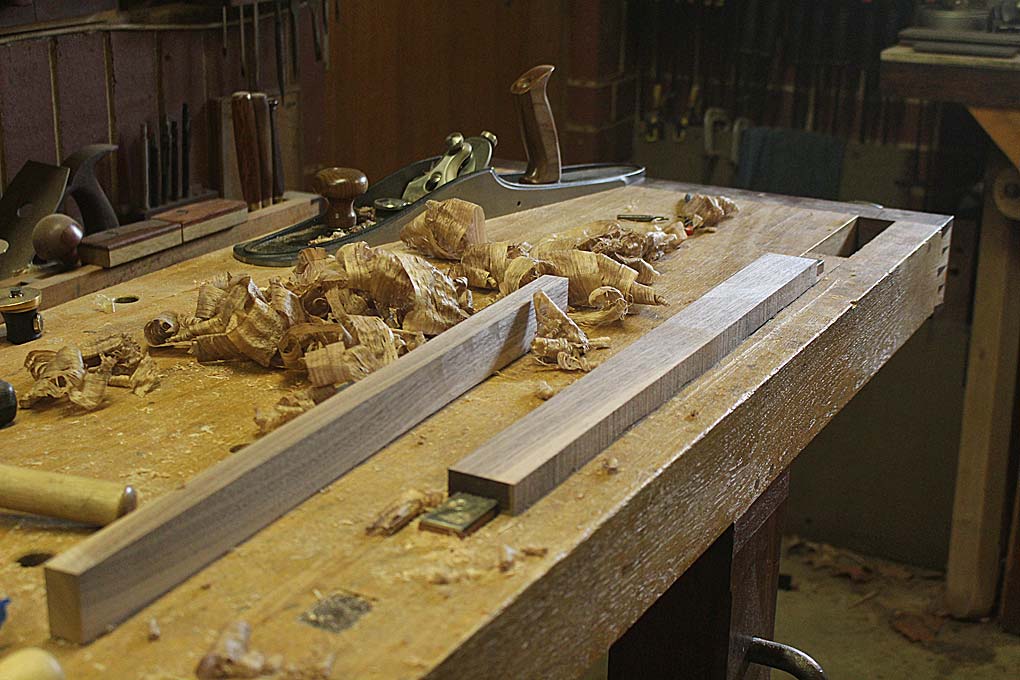
We are getting close. The drawers are done. There is still the base to be built, but the I feel that the hard yards are won. The following was completed this weekend ...
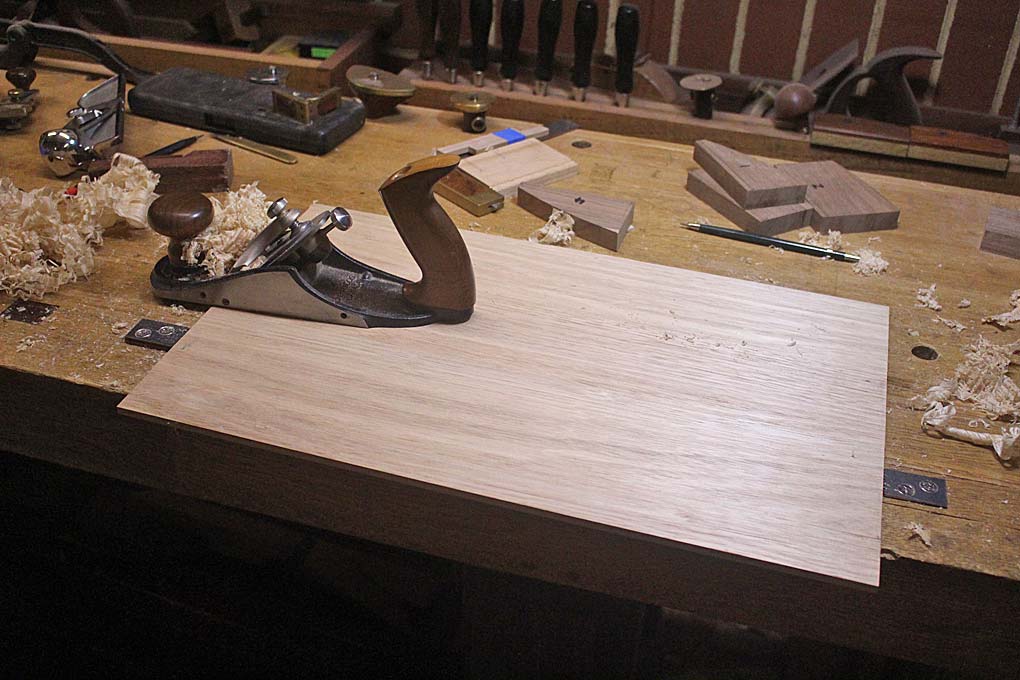
One of the joys with hand tools is simply planing. Nothing special, just planing wood and creating wonderful shavings. This was the final dimensioning of the drawer sides prior to glue up ...

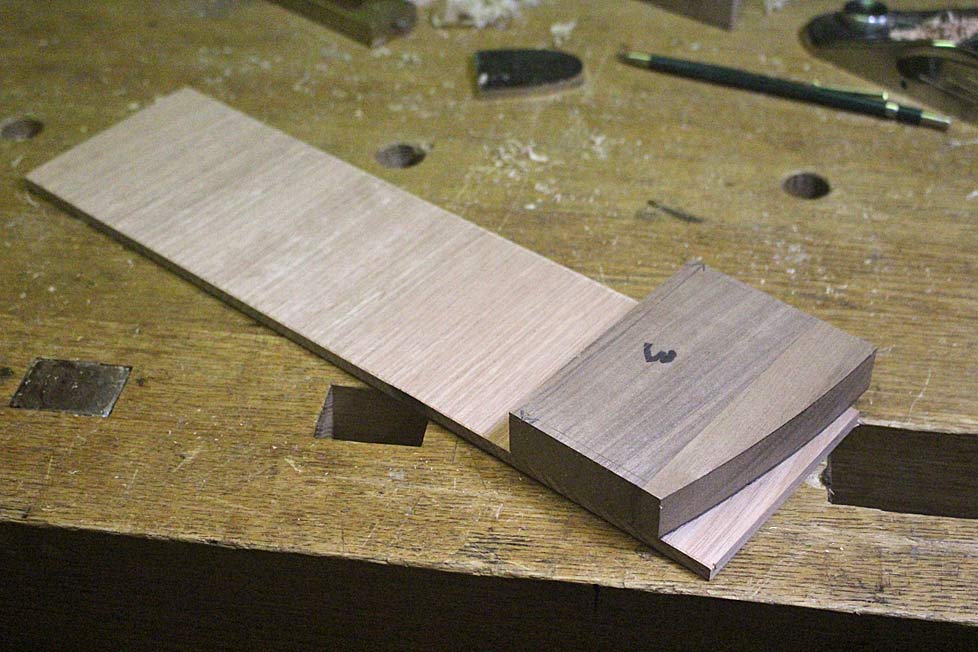
More planing - this time the panels for the drawer bottoms. These are 6mm thick. With drawers this small and narrow (100mm wide and 100mm high), one probably could run a drawer bottom along the length. I decided to plan for expansion along the length, so the grain runs side-to-side. The panels are Tasmanian Oak ...
The panels are ripped on the table saw, and one endt is shaped to the drawer front using the template for that row ...
Here is a glued up drawer ready for the drawer bottom ...
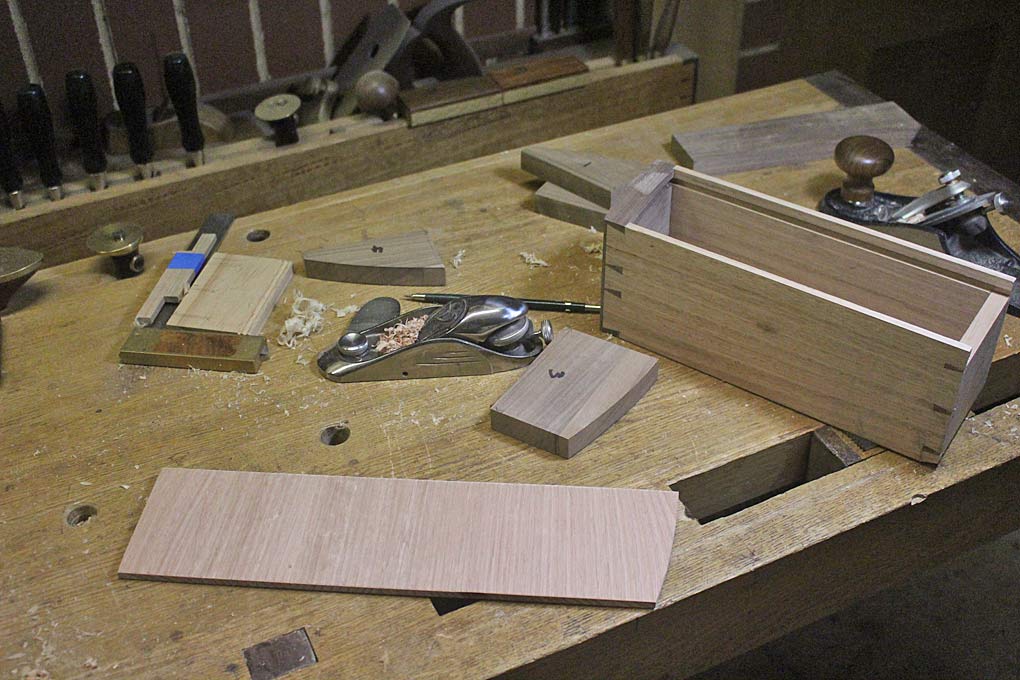
Extra long at this stage ...
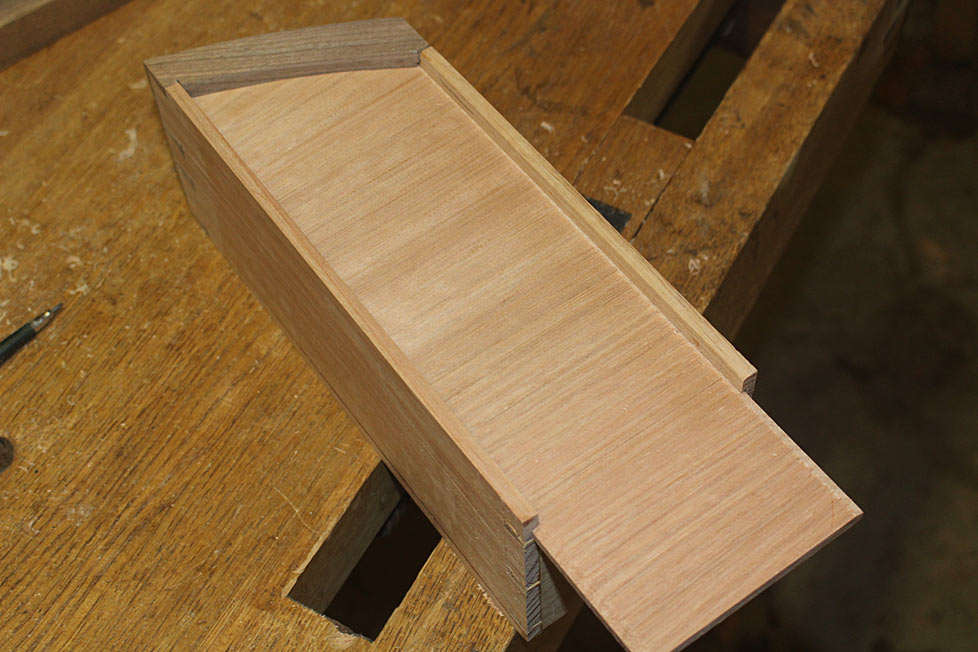
... and trimmed to size (the extra "tongue" is to aid in removal, if needed) ...
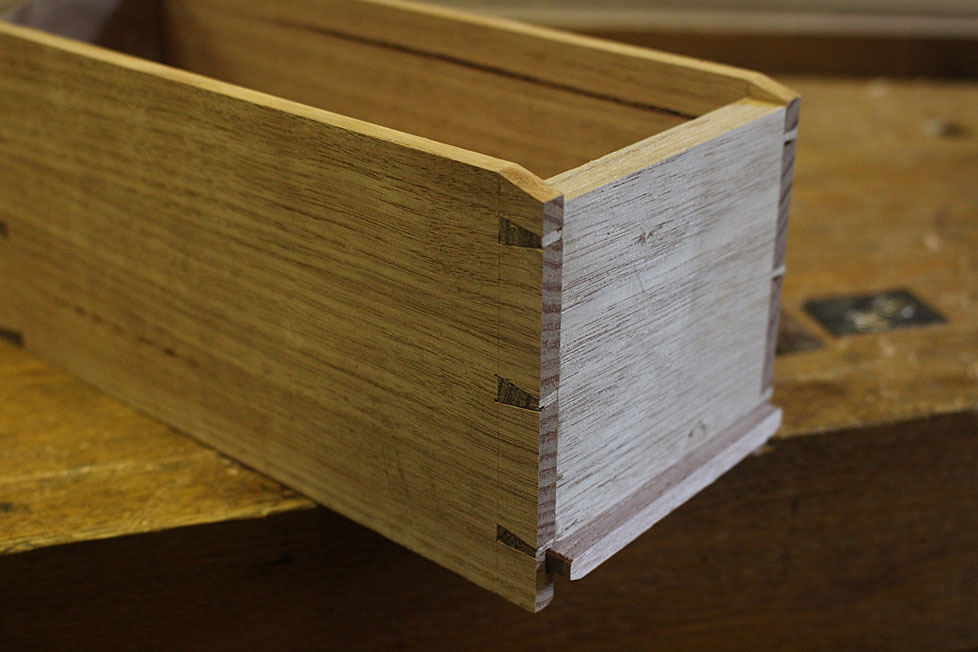
There is some expansion that can take place into the drawer front, as the groove there is deep enough (5mm at the front and 3mm at the sides). Some expansion can also take place to the rear. What I have done is drill an over size screw hole ...
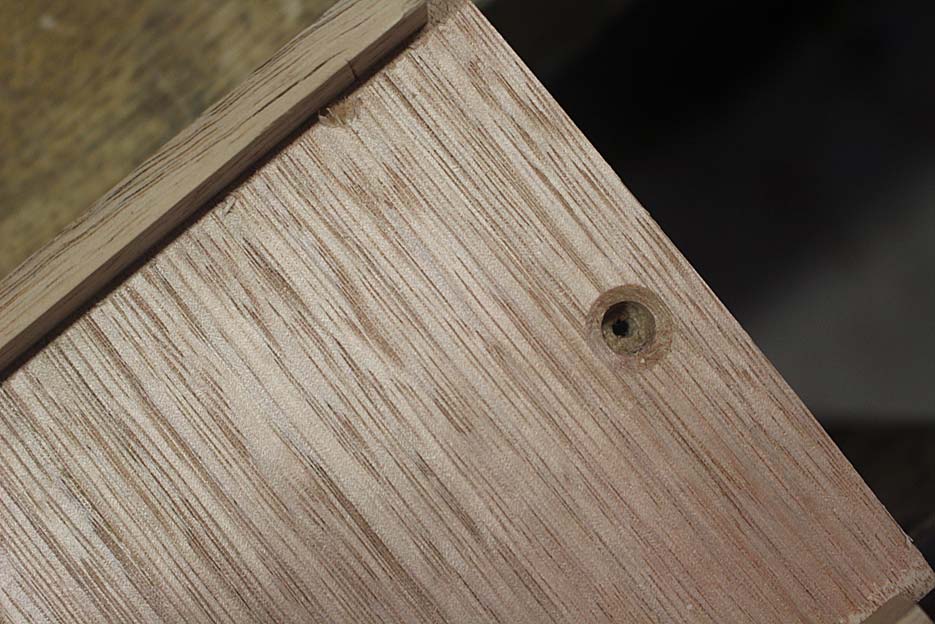
The screw needs to sit flush with the underside, as will become apparent in a while ...
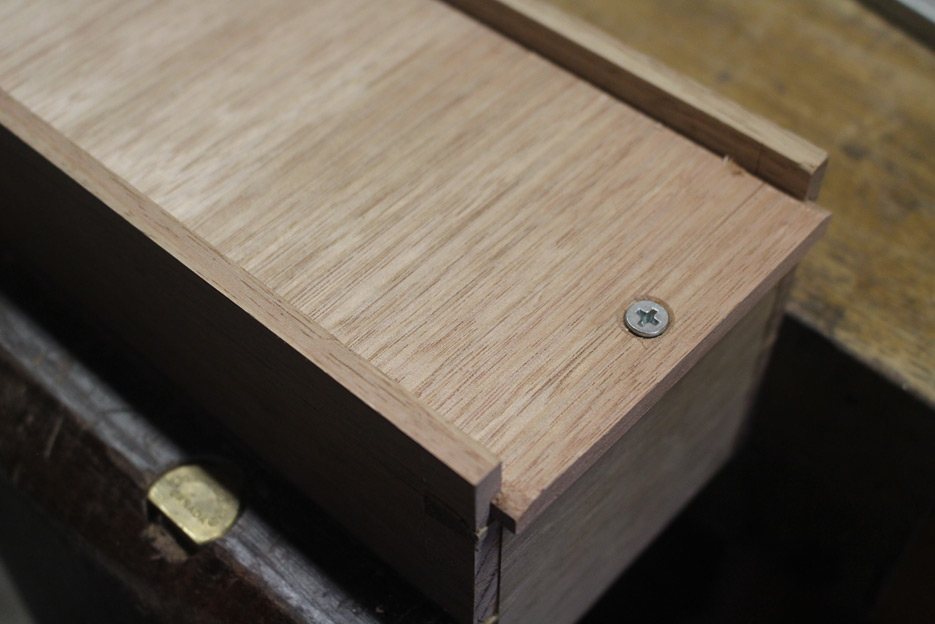
I am very happy with the drawers. They are tight and crisp, and all slide in-and-out their recess smoothly.
I am also very pleased with an idea I came up with for the drawer stops. Drawer stops are very important in this chest as the drawers are inset by 3mm, and a stop at the front, behind the drawer front, will enable this gap to be maintained through the year.
These stops are a little different. I searched the Internet to see if anything like these have been made, sold or used before. Nada, zip. I am amazed. The concept is so simple, and so easy to install. Please make and use them. I think that you will like the idea. Adjustable drawer stops ...
I planed down some scrap Black Walnut. These strips ended up 20mm wide ...
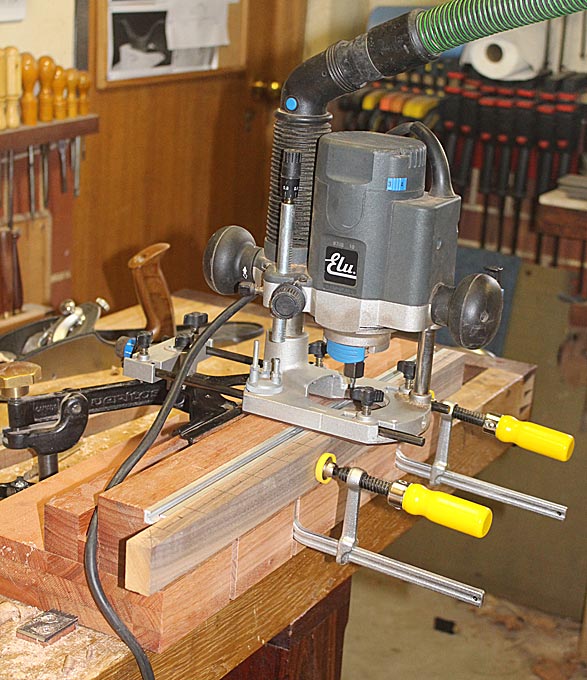
40mm lengths were marked off, and the piece attached to my router-morticing jig ...
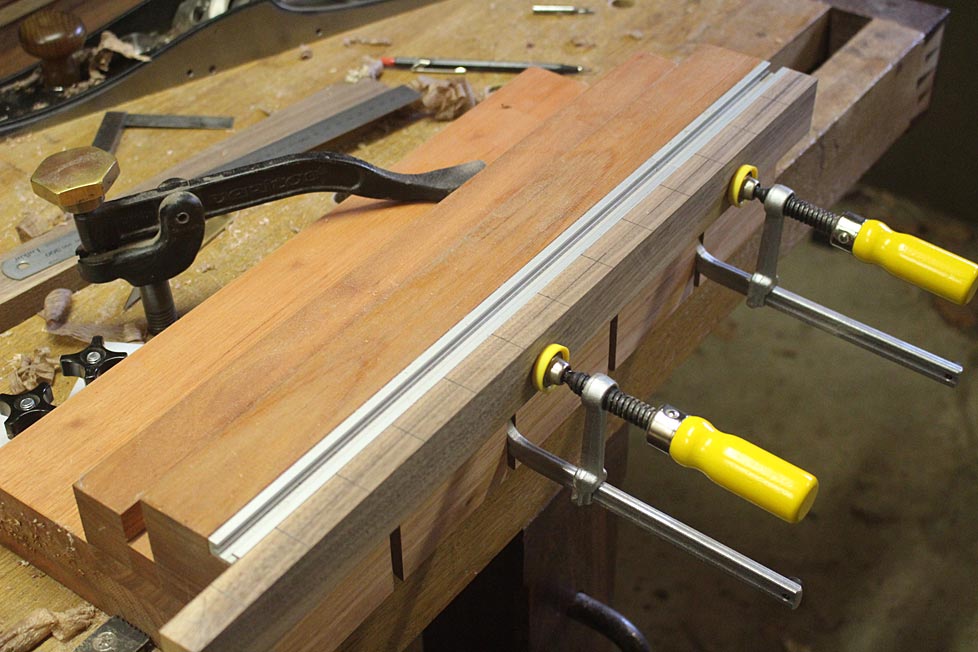
Here's the complete set up. It was used to rout out 10mm long mortices ...
Sawing away two strips, you are left with this. It was planed to a thickness of 3mm ...
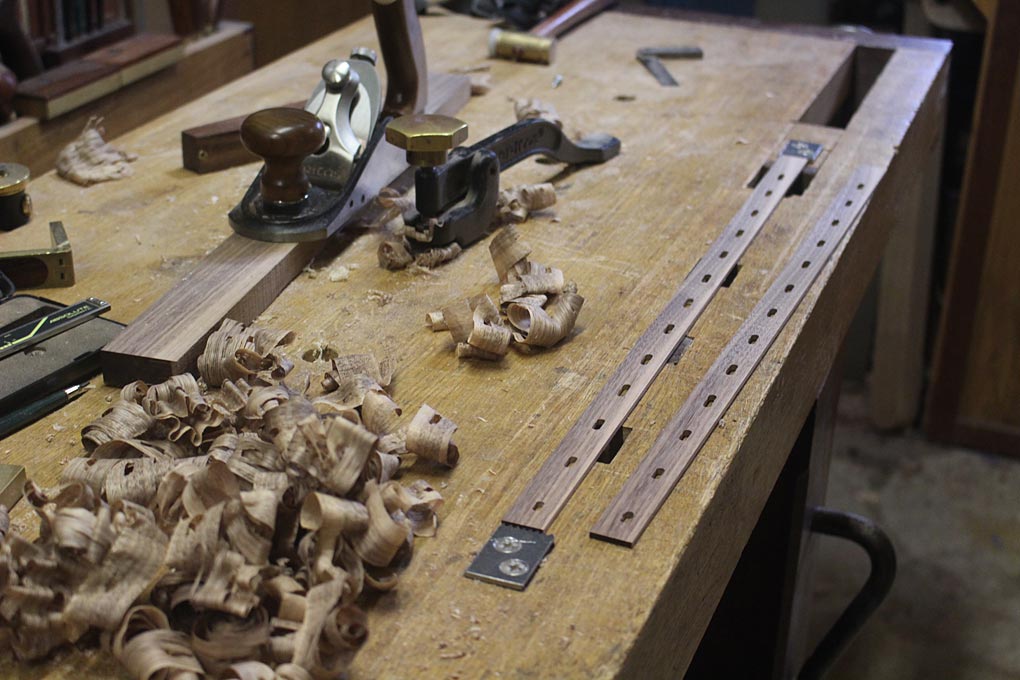
These were cut up and the fronts rounded. The reason for the round section is that it will butt up against the rear of the drawer front, which is curved ...

These are screwed into the drawer recess. They can be fine-adjusted with the screw. All pretty obvious, really. The low profile allows the drawer to slide in without obstruction.

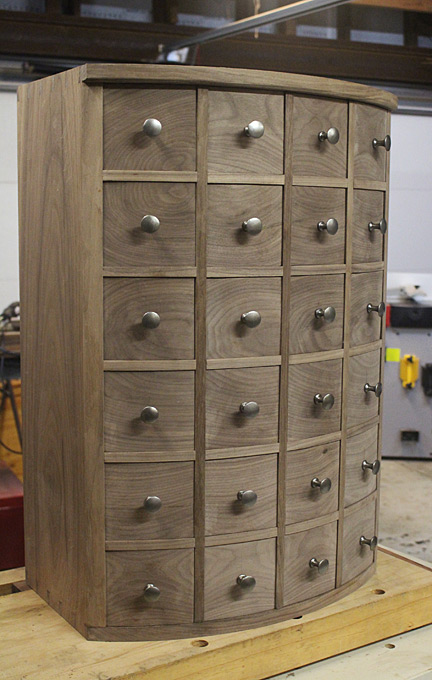
With the drawers done, the knobs were attached. These are cast iron and small (just 22mm across). Yet they seen ginormous after looking at bare drawer fronts for so long.
I was thinking of blacking the cast iron, but I now quite like the grey. I think that it adds to the modern feel of this chest. Your thoughts?
The boards have been cut for the back board and the base. Next time.
Regards from Perth
DerekVisit www.inthewoodshop.com for tutorials on constructing handtools, handtool reviews, and my trials and tribulations with furniture builds.
-
23rd July 2018, 07:46 AM #94
Franklin Ferrier
- Join Date
- May 2007
- Location
- Gold Coast
- Age
- 70
- Posts
- 2,735
Hi Derek, I hate to say it but my first impression of the knobs is that they're not the right ones. I think the size and shape dominate, detracting from the great cabinetry underneath. Just my 2 cents worth...
On drawer stop ideas, the only adjustable ones I've noticed have been eccentric discs that could be rotated around the screw to adjust the depth setting. Having an inline slot might allow for dislodgement if a drawer is pushed in with enthusiasm. Another option I've seen is to glue an L shaped block into a slot in the blade and to shave back the front of the forward facing leg of the L to reach the required fit. I think these were described in a Robert Wearing book.
Cheers,Franklin
-
23rd July 2018, 08:14 AM #95
SENIOR MEMBER
- Join Date
- Feb 2015
- Location
- Hobart
- Age
- 77
- Posts
- 650
Derek
IMHO, your silver grey knobs are perfect. Black would distract the eye from the beauty of the timber. As a very crude "experiment", replace one of the knobs with a bubbly cork cut to approximate size and painted black. And there would be 24 of these!!...
In fact, the grey seems to "pick up" the hue of the timber.
What a beautiful-looking piece. Bravissimo!
Yvan
-
23rd July 2018, 08:38 AM #96
The prize lies beneath - hidden in full view
- Join Date
- Oct 2010
- Location
- 1017m up in Katoomba, NSW
- Posts
- 10,662
That's a great idea - love the simplicity! Originally Posted by derekcohen

I think you'll get used to the size of the knobs, and depending on the weight of what goes in the draws you may need a decent size. As for the colour - it's fine, and they will probably age with handling anyway. You can always black them later, so I would definitely do nothing at this point. Originally Posted by derekcohen
Furthermore, you really need to assess the colour after you applied the finish to the drawer fronts.
But this...
Maaaaaate, that screw looks like shight! Originally Posted by derekcohen

In a work of this beautiful quality you've got to spring it for some square brass screws from Screw it. People will take the box out and turn it over and "Aaaaggh!" quickly slam it back in, possibly knocking the drawer stop out of alignment!
That one looks like an 8 gauge, probably 15-19mm, so here you go: 8g 19mm Brass Screws. You can also get them in Silicon Bronze, and they are beautiful (I have some) - polish up the heads and they look like copper. (one has to be very gentle with the bronze - the square drive dings the drive recess all too easily - definitely put a steel screw in/out a few times first to thread the timber)
Same thing goes for the drawer stop screw - even more visible - but it might be a little more problematic to source. I know that Screwit don't have any Truss or Pan Head brass screws, but surely they exist somewhere. I'll see what I can find.
-
23rd July 2018, 08:53 AM #97
The prize lies beneath - hidden in full view
- Join Date
- Oct 2010
- Location
- 1017m up in Katoomba, NSW
- Posts
- 10,662
Hmmm.
Raised heads (slot) which would still require countersinking.
Closer, but too big.
Right, 6g �".
-
23rd July 2018, 09:22 AM #98
SENIOR MEMBER
- Join Date
- May 2018
- Location
- Melbourne
- Posts
- 507
Looks like planing to me
-
23rd July 2018, 10:58 AM #99
Be inspired. Be creative. Be bold.
- Join Date
- Apr 2001
- Location
- Perth
- Posts
- 10,827
I am not 100% sold on the knobs. I know that they look larger than they really are because they are a new introduction. In reality, they are small. I searched all over for small, ebony knobs. Every one I found was physically larger than these. I search every nook and cranny of the Internet, in Oz and overseas. I would make them myself if I have time - and I will try to do so - but everything must be completed by the end of the coming weekend. I have a couple of hours after work to work on the base. I will be going all out this week, and hope there is time. Let me know if you can source knobs with a cross section under 20mm (as mentioned, these are 22mm). Originally Posted by Fuzzie
Regards from Perth
DerekVisit www.inthewoodshop.com for tutorials on constructing handtools, handtool reviews, and my trials and tribulations with furniture builds.
-
23rd July 2018, 11:06 AM #100
Franklin Ferrier
- Join Date
- May 2007
- Location
- Gold Coast
- Age
- 70
- Posts
- 2,735
Years ago I got some nice little black wooden knobs from Freedom. Have you got IKEA over there? They seem to have a variety of small pulls in 14mm https://www.ikea.com/au/en/catalog/c...kitchen/16298/
Maybe even something like the leather pulls would look good?
Cheers,Franklin
-
23rd July 2018, 12:27 PM #101
Be inspired. Be creative. Be bold.
- Join Date
- Apr 2001
- Location
- Perth
- Posts
- 10,827
Franklin, thanks. The Ikea knobs are not the style I want, but - this is the point - knobs may look small in a catalogue, and then you look at the dimensions, and it is disappointing. They are all upwards of 25mm diameter (25mm would be on the smaller side).
It is likely I shall have to turn my own. I have not been able to source ebony or a black wood - tried for months - and will either go with walnut (make them disappear) or stain the walnut.
Regards from Perth
DerekVisit www.inthewoodshop.com for tutorials on constructing handtools, handtool reviews, and my trials and tribulations with furniture builds.
-
23rd July 2018, 12:36 PM #102
Franklin Ferrier
- Join Date
- May 2007
- Location
- Gold Coast
- Age
- 70
- Posts
- 2,735
These are 13mm and 14mm.
I'm trying to visualize the 14mm laquered zinc ones on the drawers.
0282802_PE420365_S5.jpgFranklin
-
23rd July 2018, 12:42 PM #103
Be inspired. Be creative. Be bold.
- Join Date
- Apr 2001
- Location
- Perth
- Posts
- 10,827
Brett, you're thinking like a woodworker!Maaaaaate, that screw looks like shight!
In a work of this beautiful quality you've got to spring it for some square brass screws from Screw it. People will take the box out and turn it over and "Aaaaggh!" quickly slam it back in, possibly knocking the drawer stop out of alignment!
The steel screws were chosen because they compliment the cast iron knob - more on the industrial and modern side. Also I very much doubt that anyone will look at the underside of the drawers!
The screws need to be flat headed. Dome headed screws will end up too high and obstruct.
But I'll replace the screws with brass if I change the knobs.
Regards from Perth
DerekVisit www.inthewoodshop.com for tutorials on constructing handtools, handtool reviews, and my trials and tribulations with furniture builds.
-
23rd July 2018, 01:51 PM #104
The prize lies beneath - hidden in full view
- Join Date
- Oct 2010
- Location
- 1017m up in Katoomba, NSW
- Posts
- 10,662
Yebbut you and us know its there.... Originally Posted by derekcohen

Ah, I thought the drawer stop screw looked like a raised head of some kind. That's good then - just the one type of screw to get. Originally Posted by derekcohen
I just think that a) gal finish, and b) Philips head look cheap (I detest Philips from a practical point of view). Even if you stayed with silver (not changing the knobs) then square head Stainless looks nice(r).
Anyhoo, tis a grand project, and I'm sure we are all looking forward to the end product!
-
24th July 2018, 01:45 AM #105
Be inspired. Be creative. Be bold.
- Join Date
- Apr 2001
- Location
- Perth
- Posts
- 10,827
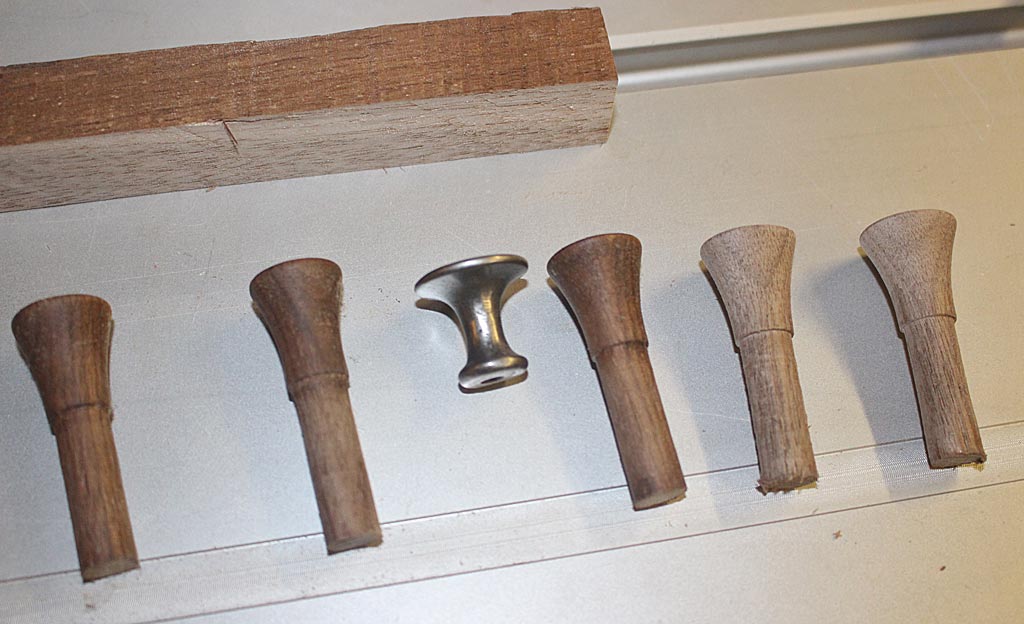
Well, I spent late afternoon turning knobs for the chest. I should have done this at the start, but thought it would take too long. In all, it required about 2 hours. They are not quite finished, but enough is done so you get an idea. And your thoughts, as always, are welcomed.
All along, Lynndy has said, "make the knobs in the same colour as the drawers". She wants them to blend in, and after staring at the chest knob-less for so long, I see her point. So they will be finished in oil and wax, as per the carcase and drawer fronts.
The iron knobs are 22mm wide and 21mm high. The new knobs are 18mm wide and 20mm high.
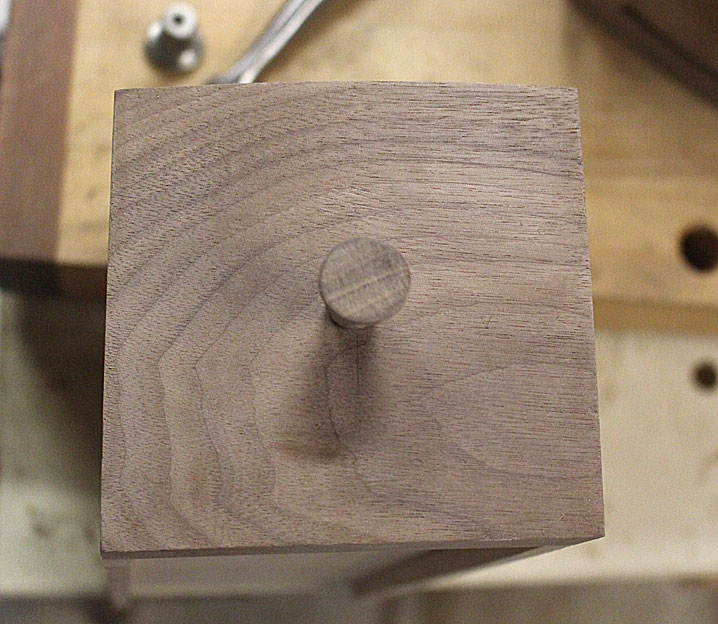
The tenon is 3/8" and long enough to extent through the drawer front and be attached with a wedge from inside.
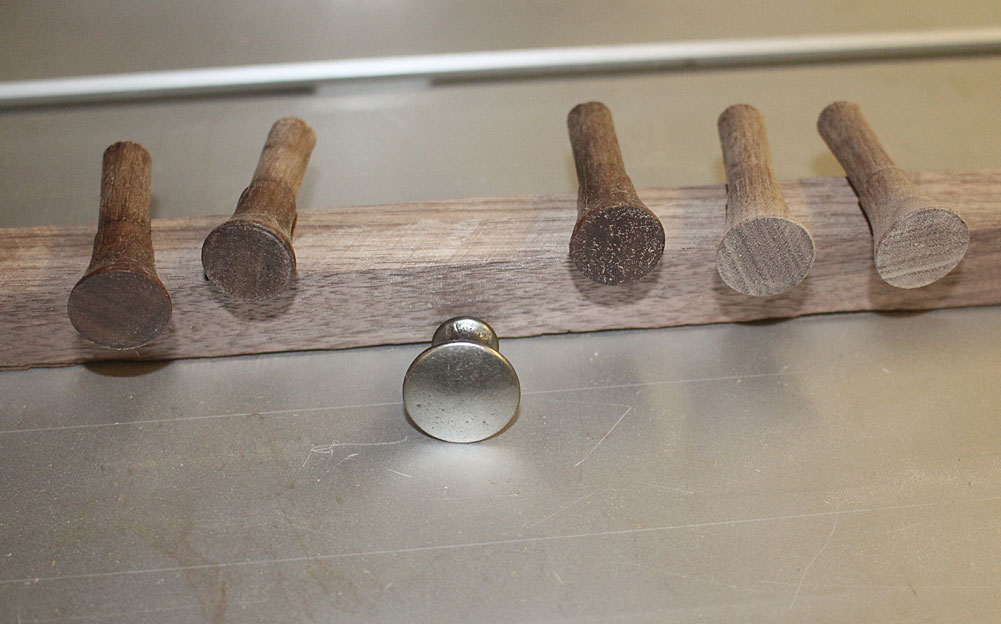
Some have a little wax to obtain an idea of the final colour.
There are enough here for all the drawers ...
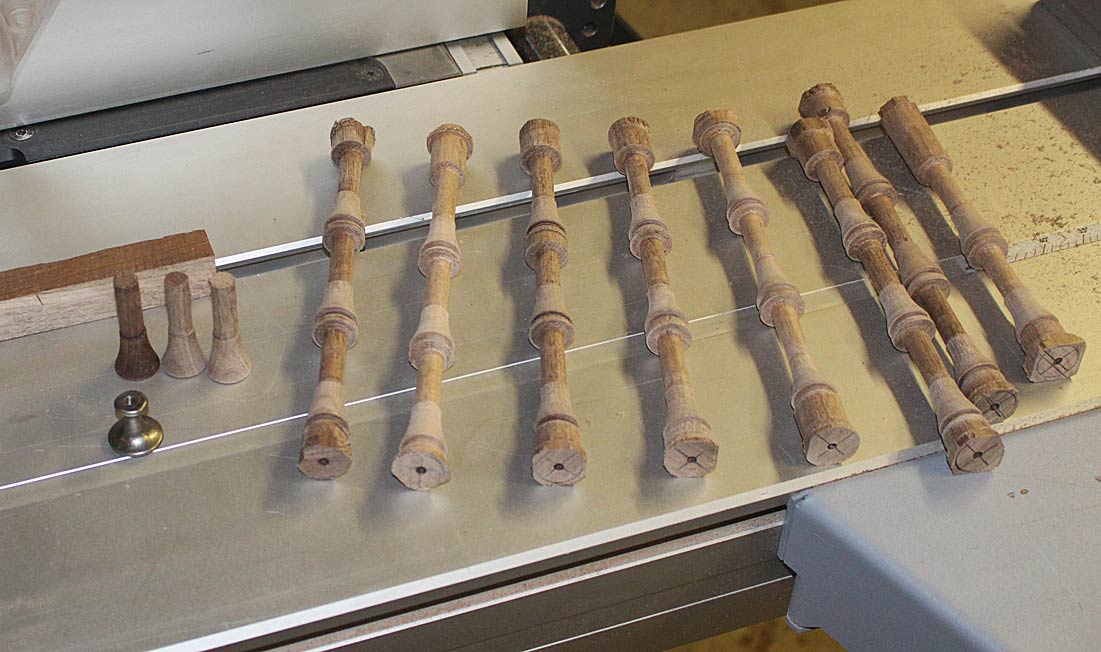
The idea is for the knobs not to dominate ...
Thoughts?
Regards from Perth
DerekVisit www.inthewoodshop.com for tutorials on constructing handtools, handtool reviews, and my trials and tribulations with furniture builds.


 Reply With Quote


Similar Threads
-
Sea Chest
By LR09WA in forum WOODWORK - GENERALReplies: 14Last Post: 11th June 2011, 08:00 PM -
Ice Chest
By 2sharp in forum FINISHINGReplies: 6Last Post: 22nd January 2008, 04:30 AM -
Ice Chest
By rod1949 in forum Links to: TIMBER & HARDWARE SUPPPLIERSReplies: 1Last Post: 15th September 2004, 08:13 PM -
Chest
By GRS in forum WOODWORK PICSReplies: 8Last Post: 7th July 2004, 12:26 PM -
Apothecary Chest
By Paul O'H. Ingersoll Canad in forum WOODWORK PICSReplies: 4Last Post: 28th February 2004, 12:16 AM
