

 Thanks:
  Likes:
  Needs Pictures: 0
 Picture(s) thanks:
Results 1 to 12 of 12
Thread: Coffee table
-
10th September 2018, 03:33 AM #1
 Be inspired. Be creative. Be bold.


- Join Date
- Apr 2001
- Location
- Perth
- Posts
- 10,826
 Coffee table
It's been a long time since I made a coffee table. This one is for my son, who recently moved to Sydney. New city, new job. He has found a great apartment, and has begun to request furniture, first a coffee table to replace an Ikea piece his girlfriend purchased. I think that he is playing with fire! No, she's great

It's a long weekend in a fortnight, and Lynndy and I plan to visit. (We have family in Sydney, and old friends from when we lived there 30 years ago). My idea was to build a coffee table and take it on the plane as a sort of surprise (he knows I am building it, but will not expect it this way). Fun, eh?
So, I needed a knock-down design. And a design along the lines of Danish Modern, which would fit in nicely in his home.
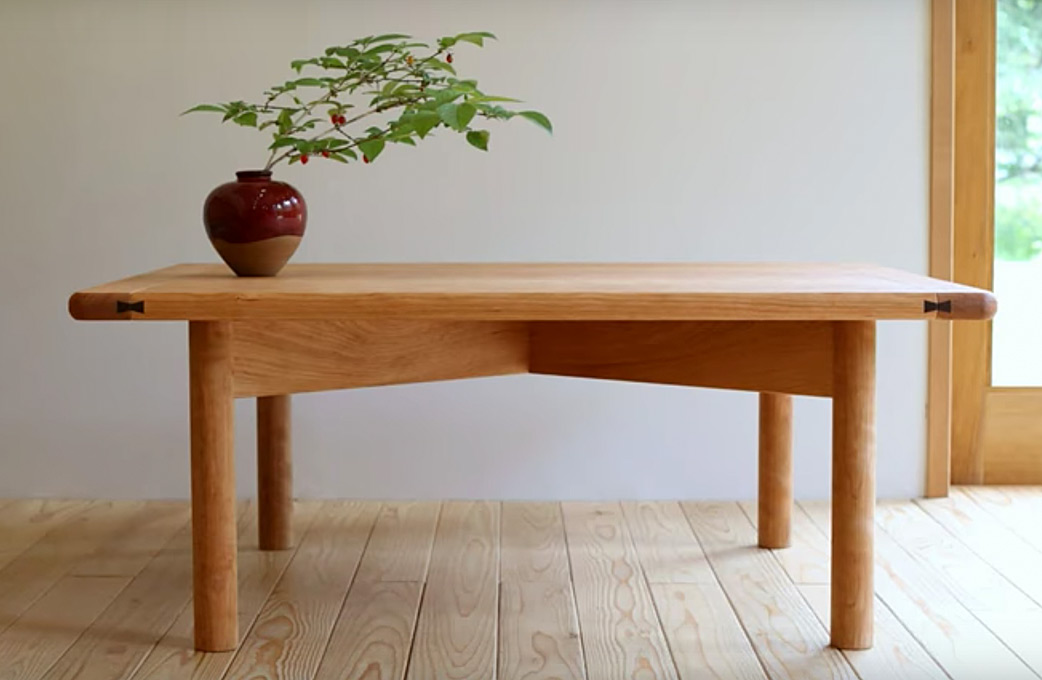
I was taken with a piece by a Japanese maker, Ishitani. He has some great builds on YouTube which are worth looking up. Inspiration came from this design of his ...
The top lifts off ...
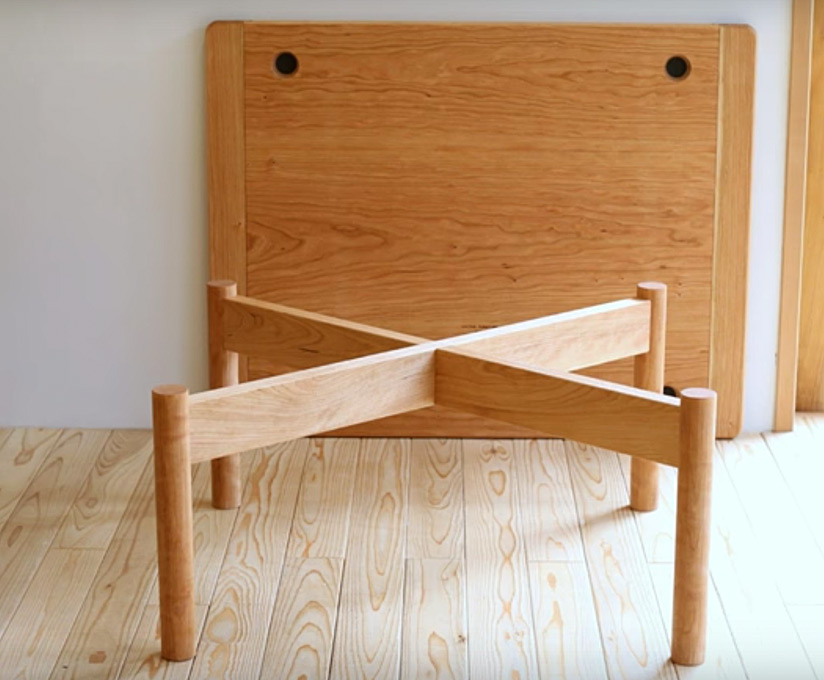
... and the legs come apart ...
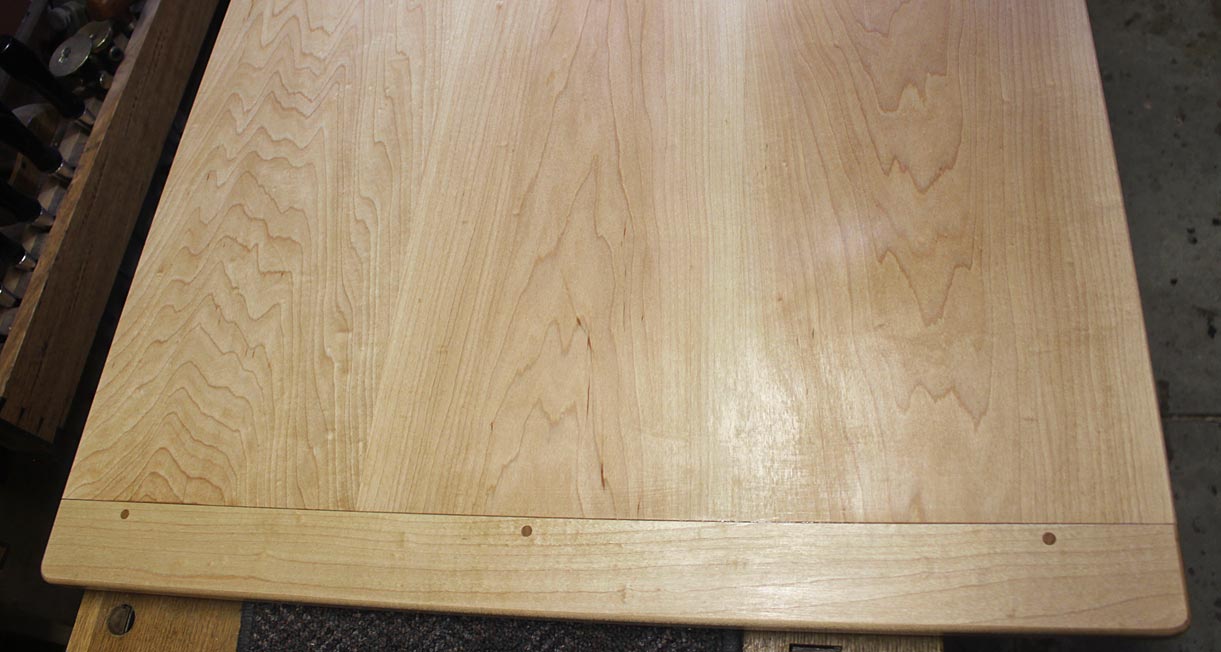
The coffee table required two weekends to complete. That's a nice change from the pieces I've been building. The wood is Hard Maple. I've grown to like this stuff.
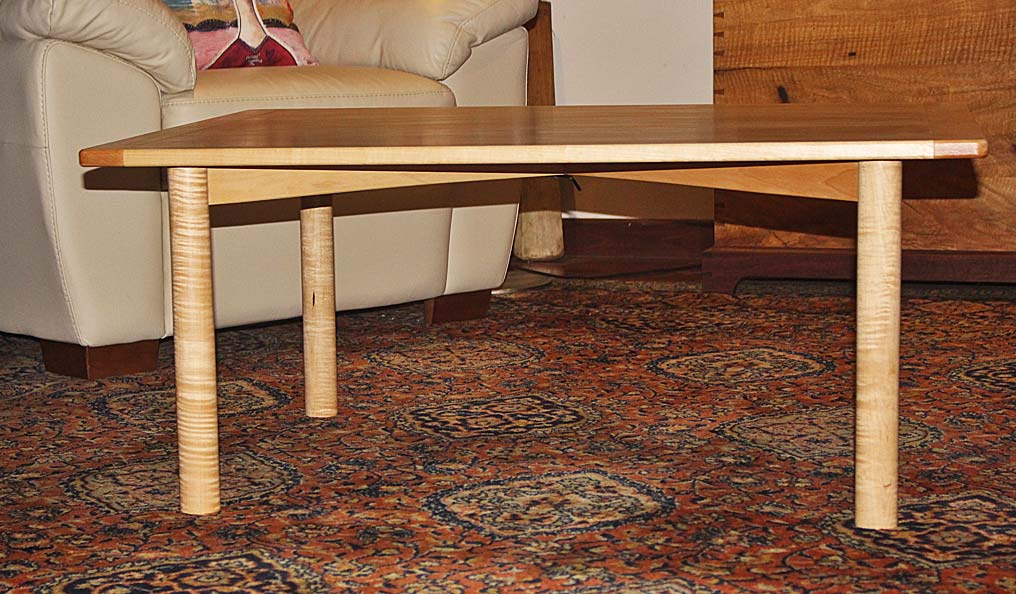
I made a few changes to the design. Firstly, it is a little slimmer and larger (I think): 38" long x 28" wide and 16 1/2" high. Plus a few modifications.
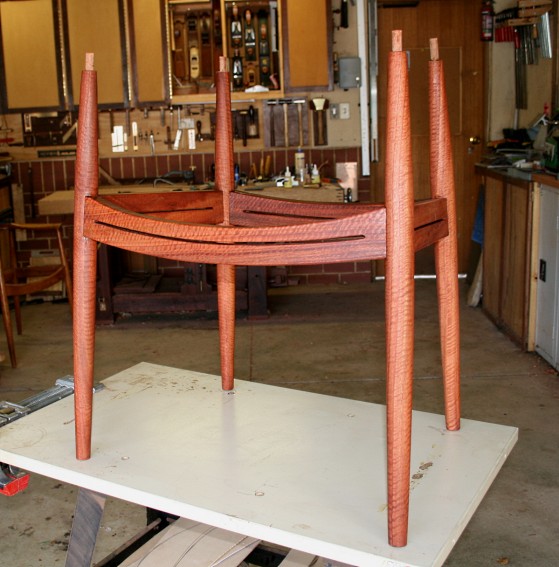
Here's the table ...
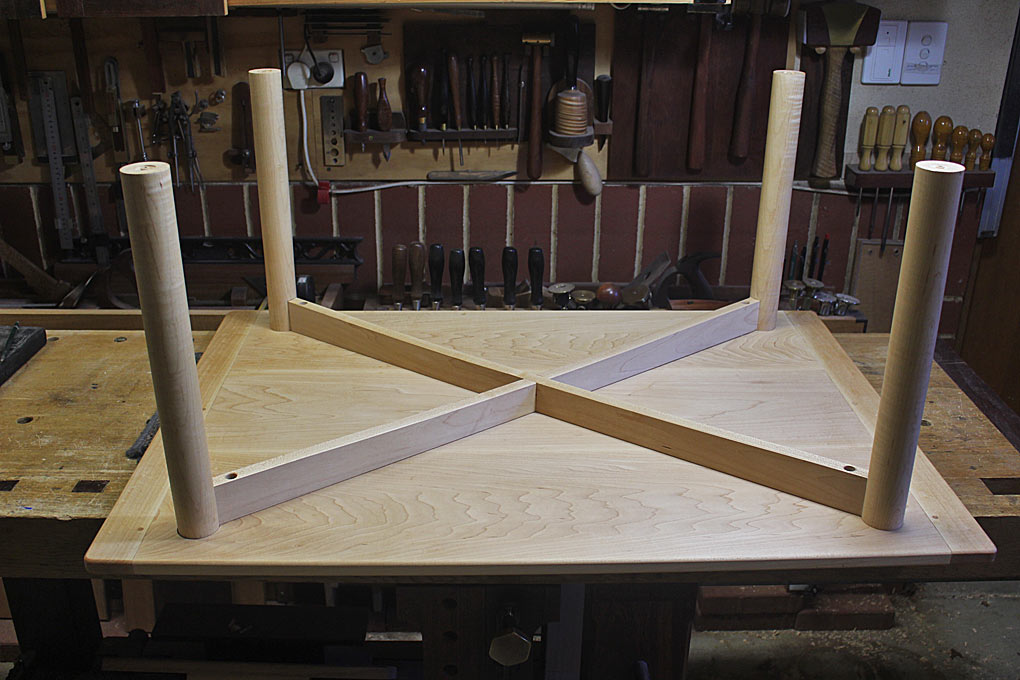
To take this shot I had to crawl on the carpet. Much of the underside is unlikely to be seen, even at a distance.
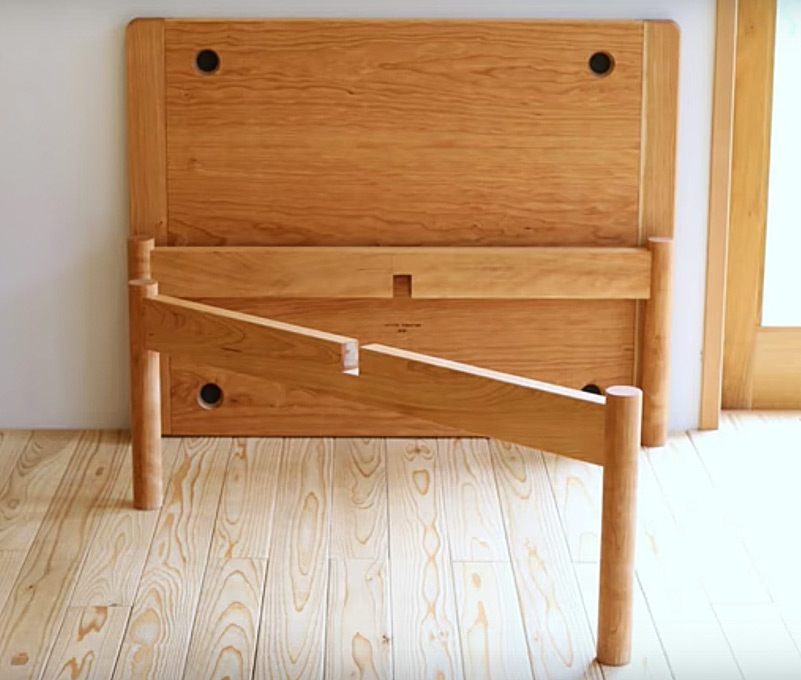
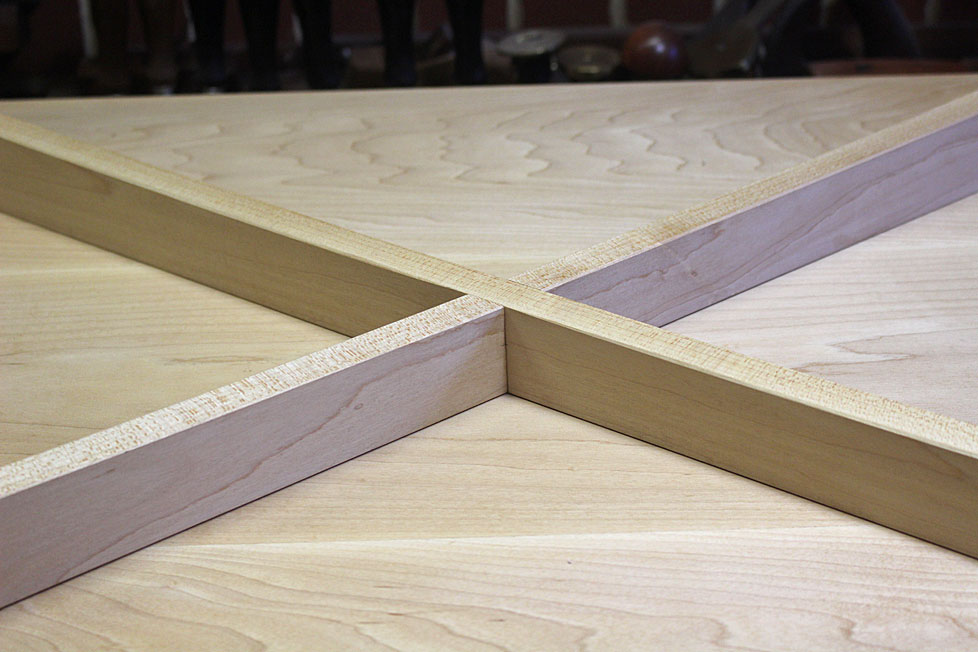
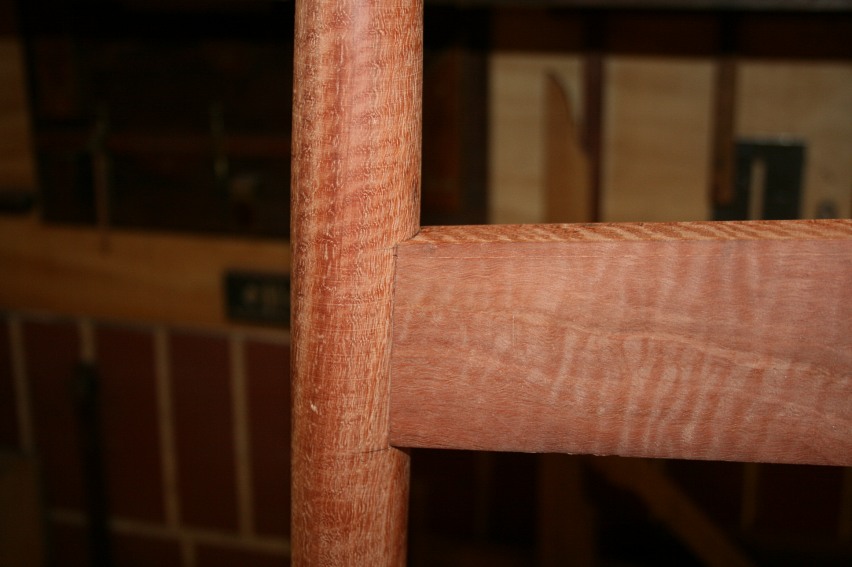
Here's what it looks like underneath. Where Ishitani left his rails straight, I've added a curve (you know me and curves) ..
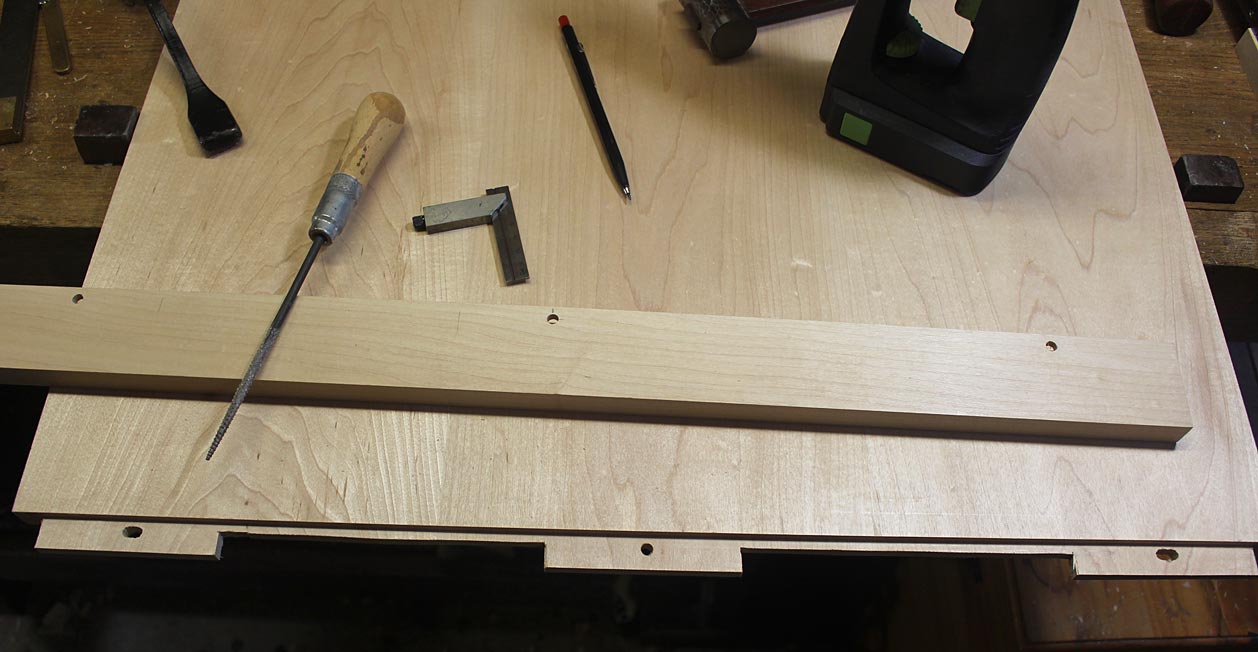
The legs come off for packing flat ...

Join at the centre ...
Ishitani connected breadboard ends with a dovetailed spline. I have used a true drawbored breadboard construction. The weather in Sydney changes from dry cold in Winter to high humidity in summer. I did not think that a dovetail would cope with this.
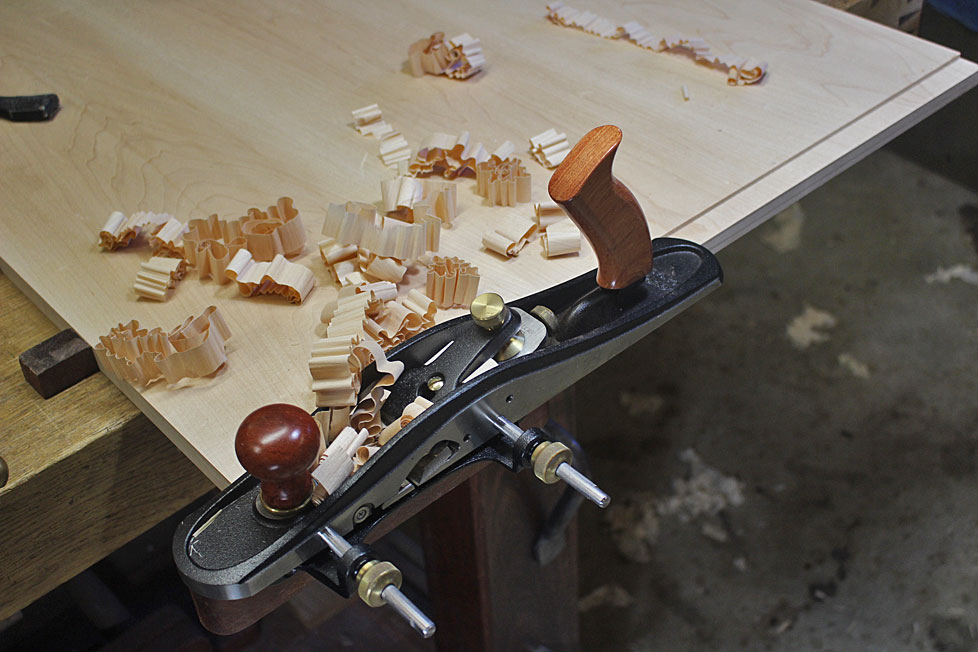
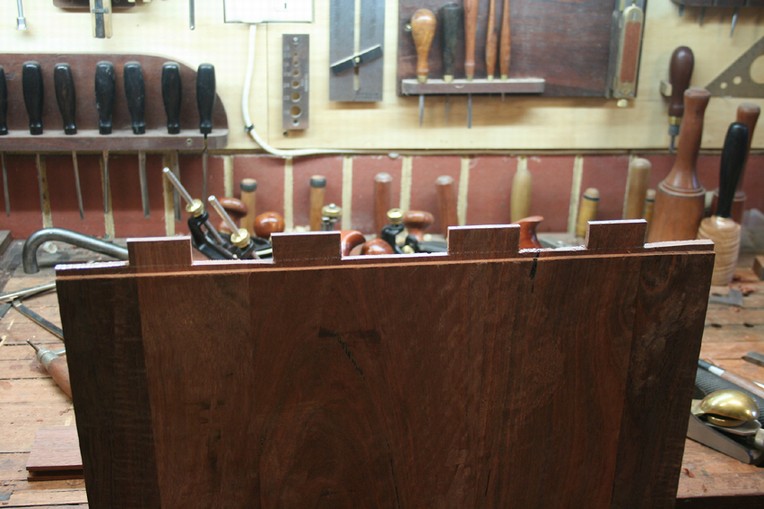
Gotta show a tool - these were made with a Veritas Jack Rabbet (to balance the recent post of a power router for the mortices) ...
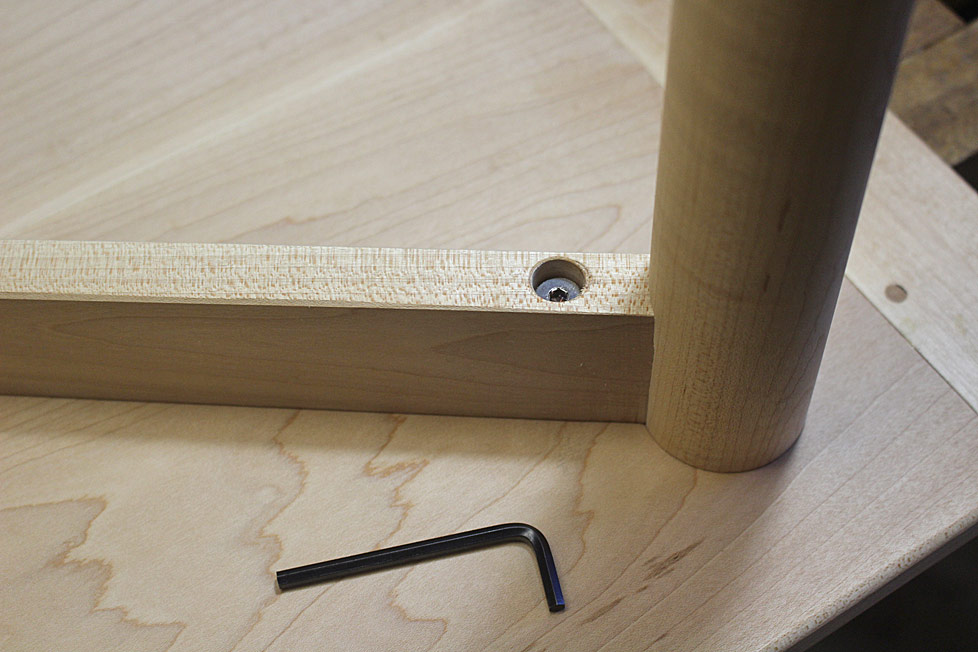
Another change is the legs are connected with hex bolts. I really could not envisage the coffee table living a life with a loose top ..
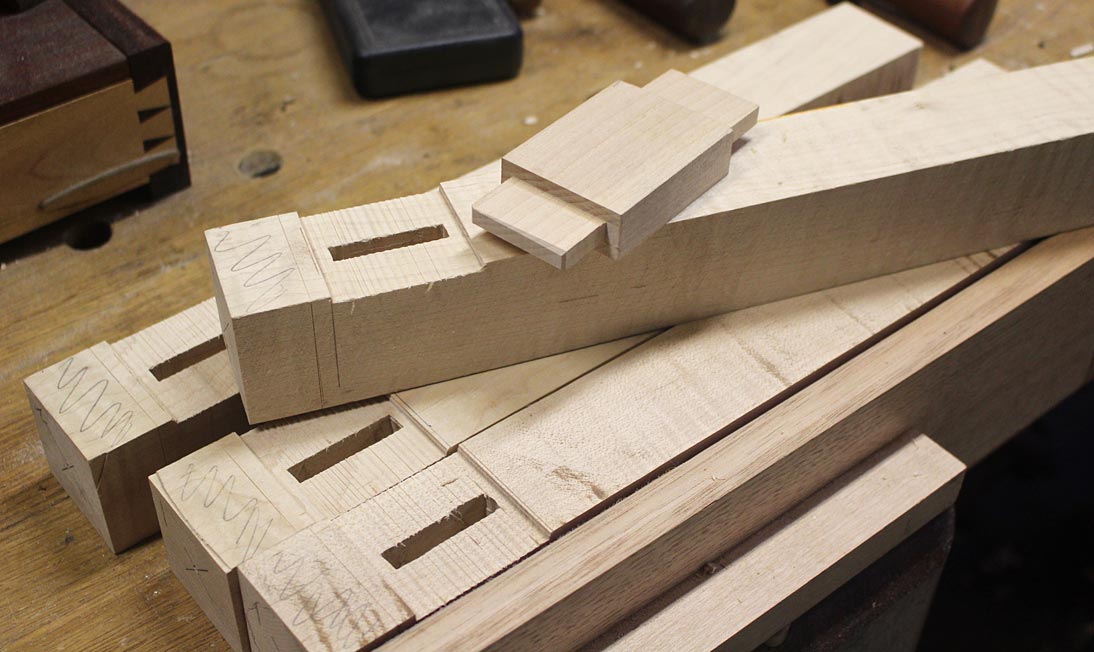
This was a very straightforward build. The only slight challenge was the legs - turning them precisely, and then morticing for the rails.
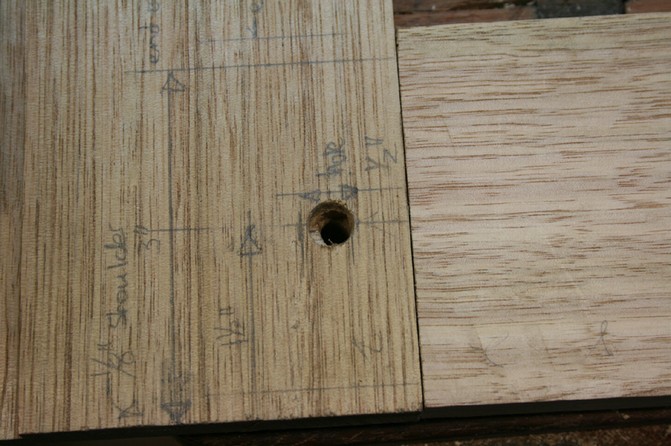
The mortices were first cut in the blanks ..
.. and then turned ..
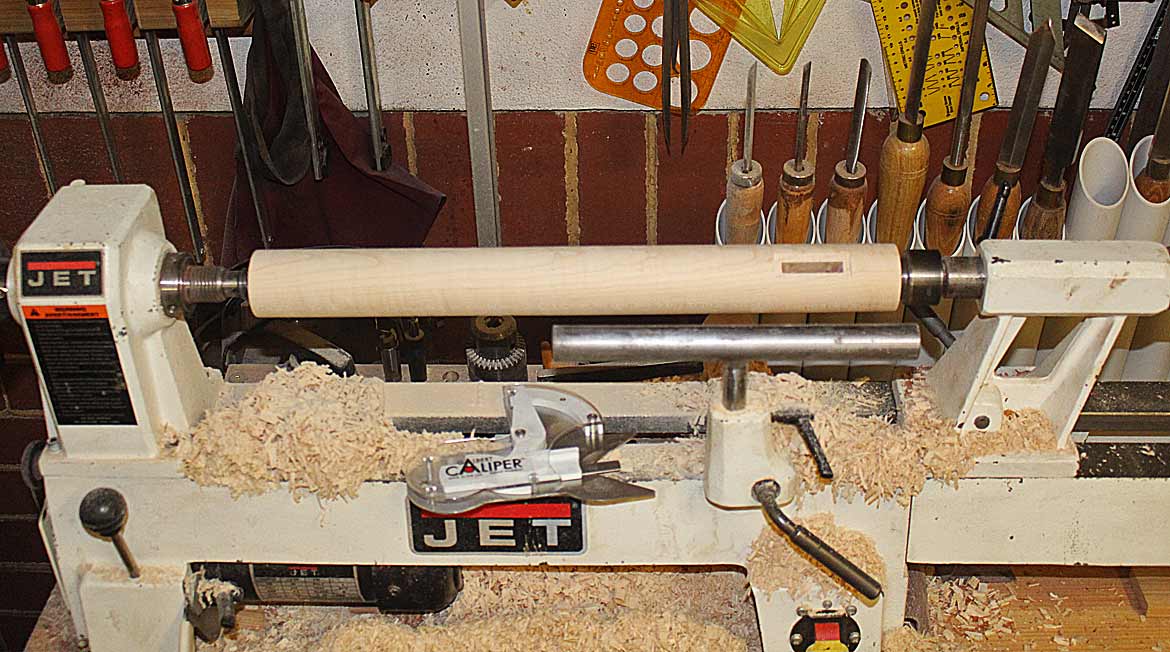
That's Peter Galpert's caliper on the lathe bed. I really recommend it for sizing spindles.
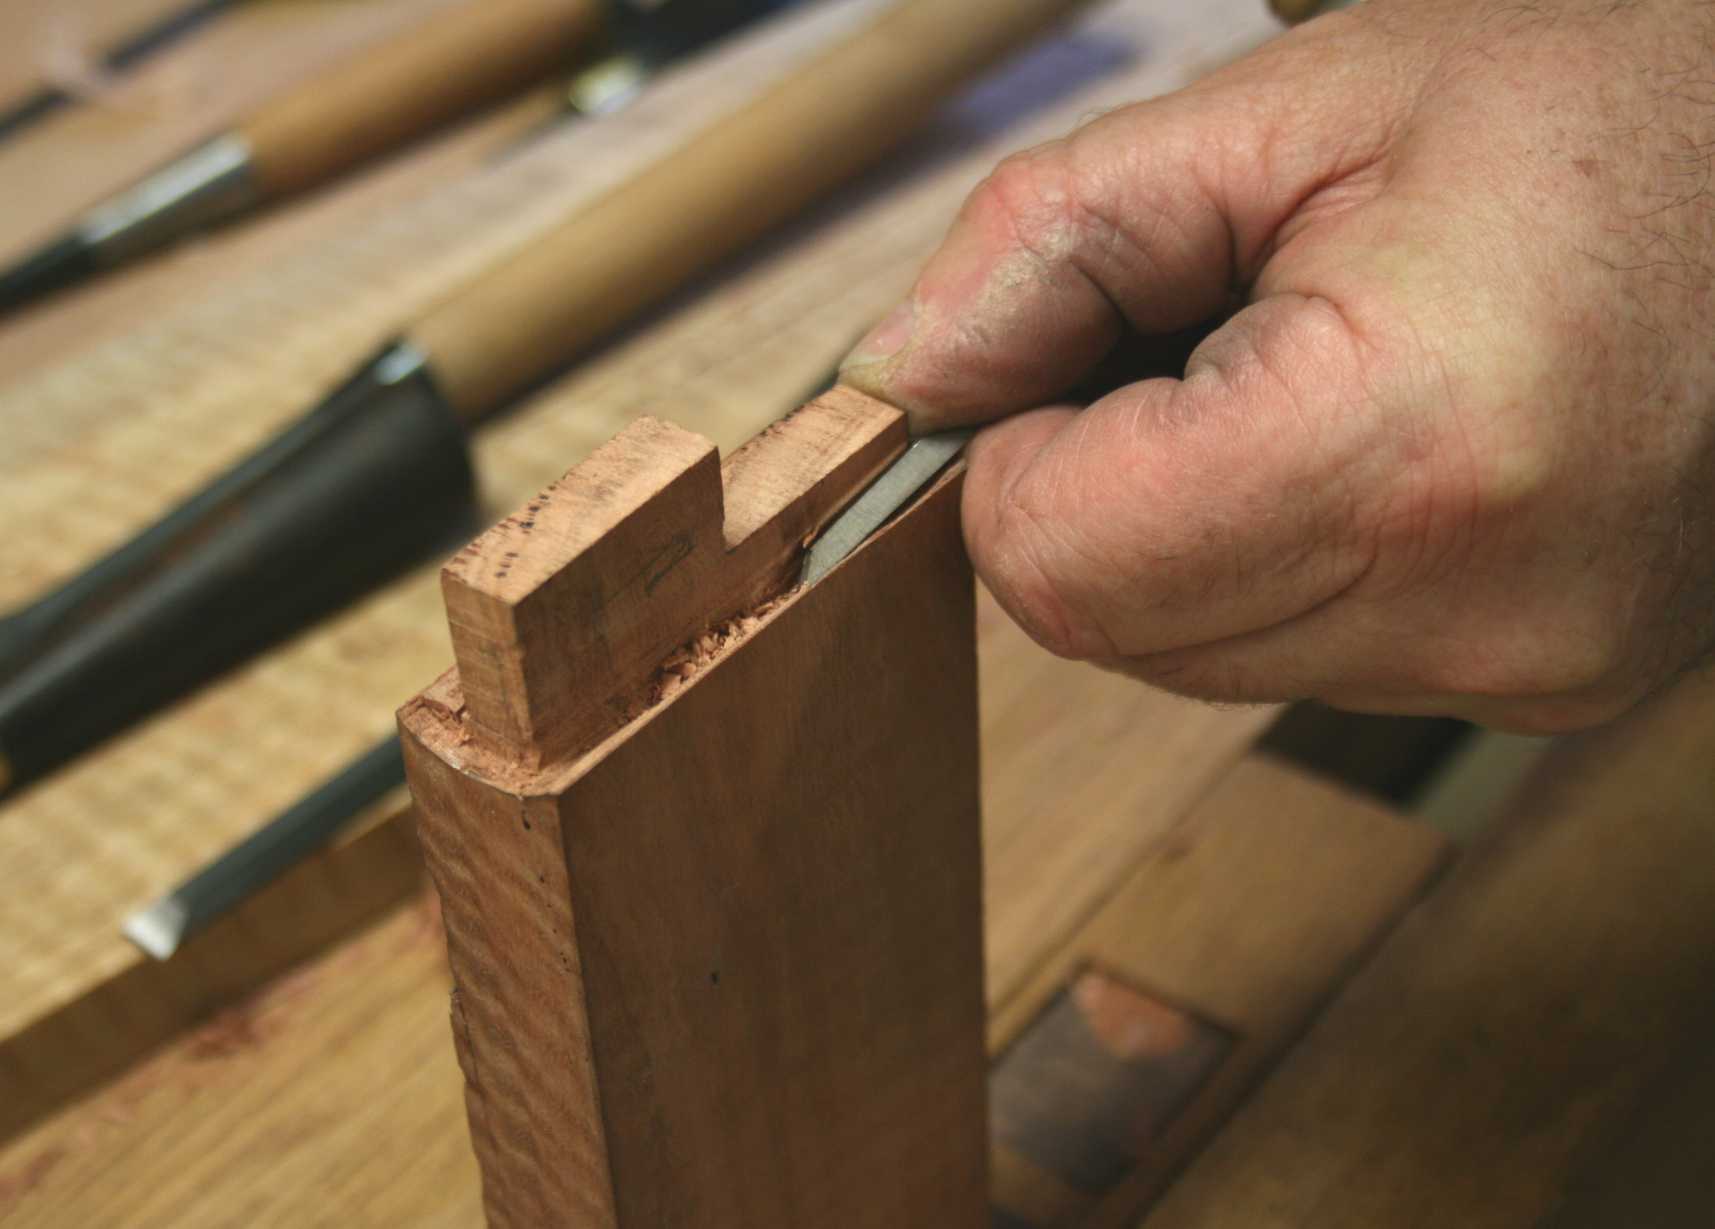
The tenons were fitted into the mortice ...
... and marked out:
.. before being rebated (is that the correct term here?) for the shoulder ...

And that was it. Finish was a coat of Livos Universal Wood Oil to add a little amber to the very light maple. Then 5 coats of General Finishes water based poly was rubbed on for durability. This adds a little shine. Looks great.
Can't wait to see Jamie's face!
Regards from Perth
DerekVisit www.inthewoodshop.com for tutorials on constructing handtools, handtool reviews, and my trials and tribulations with furniture builds.
-
10th September 2018 03:33 AM # ADSGoogle Adsense Advertisement
- Join Date
- Always
- Location
- Advertising world
- Posts
- Many
-
10th September 2018, 07:17 AM #2
SENIOR MEMBER
- Join Date
- Apr 2016
- Location
- Mooroopna, Victoria, Australia
- Age
- 34
- Posts
- 228
Very nice Derek. I'm sure your son and his girlfriend will enjoy the upgrade from ikea furniture.
-
10th September 2018, 08:29 AM #3
GOLD MEMBER
- Join Date
- Mar 2018
- Location
- Sydney
- Posts
- 1,166
Plus that makes it a real Ikea replacement that way Originally Posted by derekcohen

-
10th September 2018, 08:42 AM #4
SENIOR MEMBER
- Join Date
- Aug 2017
- Location
- Mt Kembla
- Age
- 62
- Posts
- 256
Very nice take on Ishatani's table Derek.Definitely one of my favourite builders.The tenons fit nicely into the mortices on the legs well done.
But I thought you may of taken the challenge and made an incannell chisel and used that for the tenons.Maybe one for next time .
.
cheers....Roy
-
10th September 2018, 11:29 AM #5
SENIOR MEMBER
- Join Date
- Mar 2018
- Location
- Sydney
- Posts
- 469
Hi Derek,
Would you mind explaining about the drawboarding technique you used. As a newbie based in Sydney a coffee table will be on my to do list so i am very keen to understand.
Online YouTubers don't seem to fix the breadboard ends to allow the wood to move instead securing it only in the centre, usually with the breadboard as a sprung joint.
Does the size of the coffee table mean this approach isn't needed? If so at what dimension would this change? I understand that this would vary on both the wood and also how its cut but maybe there is an approximate rule of thumb you may use.
Regards,
Adam
-
10th September 2018, 12:32 PM #6
Be inspired. Be creative. Be bold.
- Join Date
- Apr 2001
- Location
- Perth
- Posts
- 10,826
Like this Roy? Originally Posted by royflatmate

Been there, done that. Horses for courses, and all that
Regards from Perth
DerekVisit www.inthewoodshop.com for tutorials on constructing handtools, handtool reviews, and my trials and tribulations with furniture builds.
-
10th September 2018, 04:40 PM #7
Be inspired. Be creative. Be bold.
- Join Date
- Apr 2001
- Location
- Perth
- Posts
- 10,826
Hi Adam Originally Posted by taz01
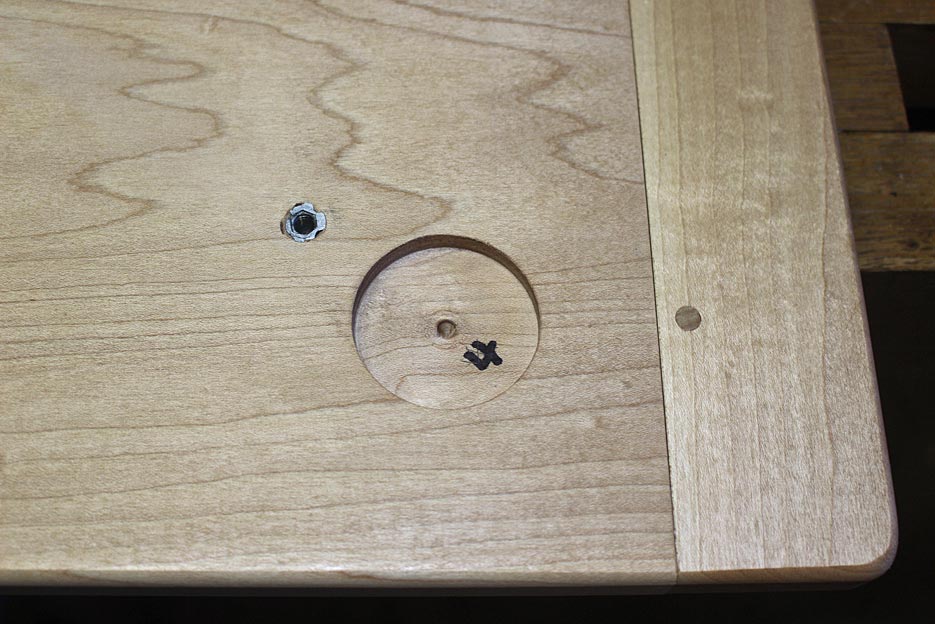
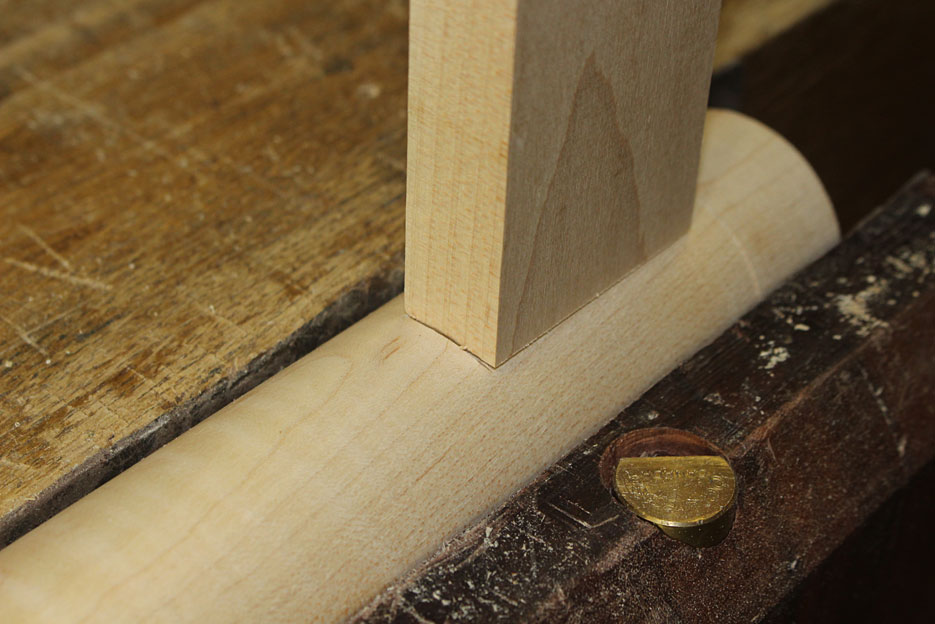
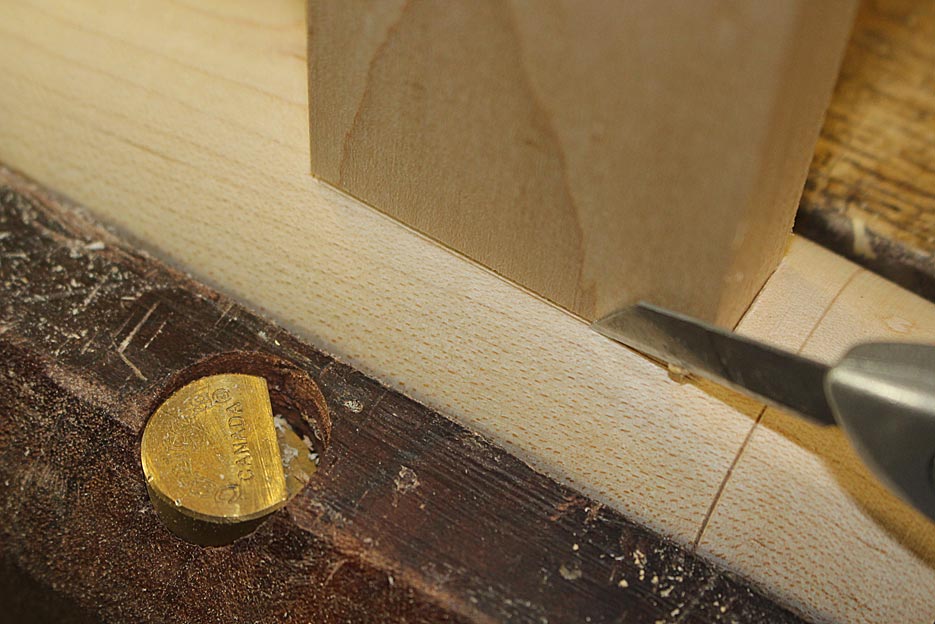
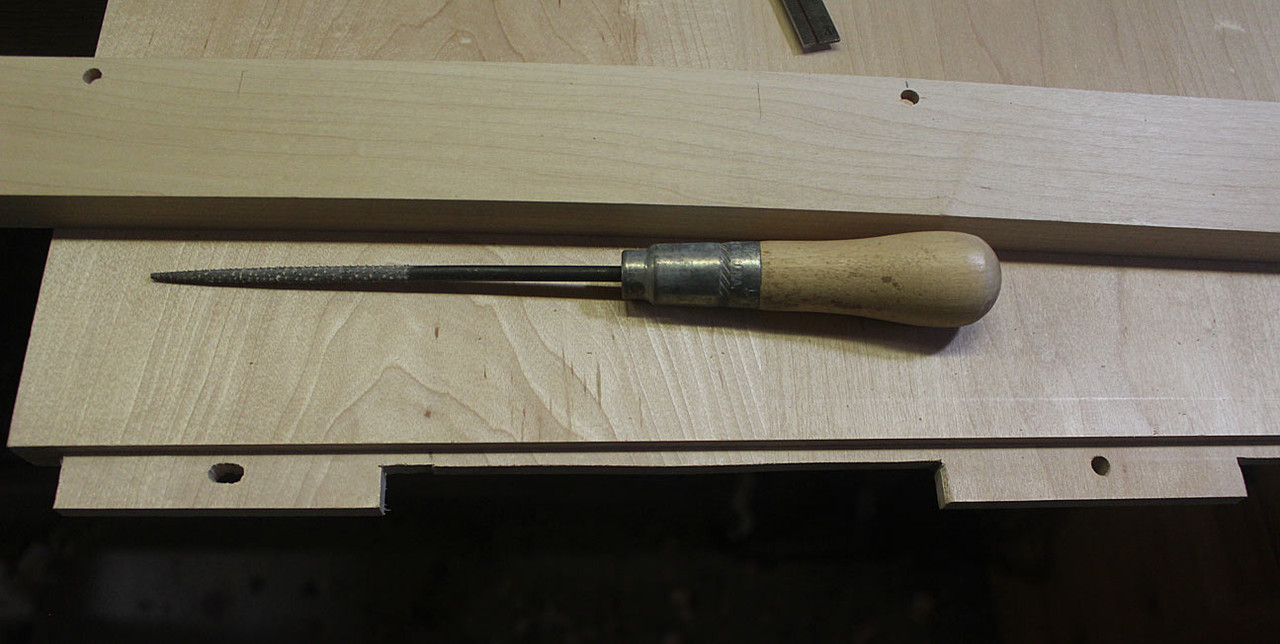
Only the centre mortice/tenon inn the breadboard is glued and unmovable. The ends are free to move back-and-forth. They are still pulled tight against the table top with drawbore pins, however the holes are slotted to allow for lateral movement. Look closely and you will see this (the round rasp was used to create the slot) ...
In this particular breadboard, I have enclosed the ends for a cleaner look. An alternative is to have part of the tenon showing at the side ...

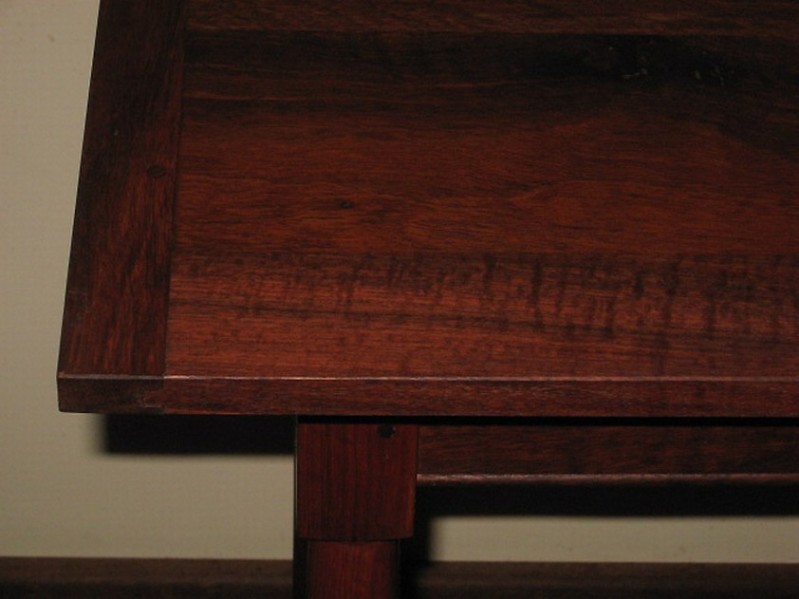
Plenty of space is left internally for movement in either lateral direction.
Here is an article on my website on breadboards: http://www.inthewoodshop.com/Furnitu...boardEnds.html
And another on drawboring: http://www.inthewoodshop.com/Furniture/Drawboring.html
Regards from Perth
DerekVisit www.inthewoodshop.com for tutorials on constructing handtools, handtool reviews, and my trials and tribulations with furniture builds.
-
10th September 2018, 04:44 PM #8
SENIOR MEMBER
- Join Date
- Mar 2018
- Location
- Sydney
- Posts
- 469
Thanks Derek, Originally Posted by derekcohen
Your explanation is exactly what i was after.
I'll definitely have a read of those articles later today.
Best regards,
Adam.
-
10th September 2018, 06:28 PM #9
SENIOR MEMBER
- Join Date
- Aug 2017
- Location
- Mt Kembla
- Age
- 62
- Posts
- 256
Thought that you would be all over it
 Special tools for special jobs
  I was shown one of those chisels the other day,nice piece of kit.
cheers .......Roy
-
10th September 2018, 06:33 PM #10
Be inspired. Be creative. Be bold.
- Join Date
- Apr 2001
- Location
- Perth
- Posts
- 10,826
Roy, I do have gouges
Actually, I have many. These ones are new (well old and almost NOS) ...
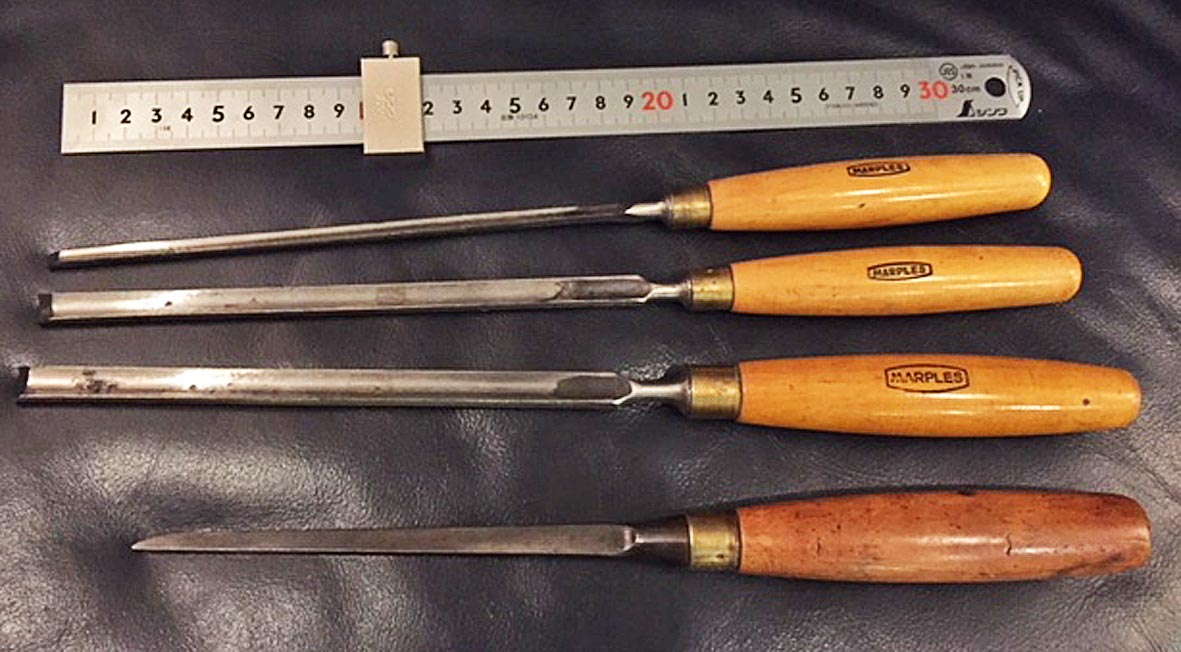
It is just that much of the task can be done with a 1/8" straight chisel. The gouges came in later (they are harder to sharpen, so I try to do less with them).
Regards from Perth
DerekVisit www.inthewoodshop.com for tutorials on constructing handtools, handtool reviews, and my trials and tribulations with furniture builds.
-
10th September 2018, 09:25 PM #11
SENIOR MEMBER
- Join Date
- Aug 2017
- Location
- Mt Kembla
- Age
- 62
- Posts
- 256
Thanks for the photo Derek.After i saw the chisels I did a search and one of the names I saw them called was an incannell chisel.Not sure what the
owner referred to them as but they were Marples same as yours.Hopefully catch up with him next week.
cheers....Roy
-
14th September 2018, 11:42 AM #12
Skwair2rownd
- Join Date
- Nov 2007
- Location
- Dundowran Beach
- Age
- 76
- Posts
- 19,922
A truly admirable piece!!
Love the simplicity of the design!!


 Reply With Quote
Similar Threads
-
Coffee Table
By Woody1 in forum WOODWORK PICSReplies: 4Last Post: 7th December 2011, 09:07 AM -
Coffee table
By DIY DAN in forum WOODWORK - GENERALReplies: 13Last Post: 3rd December 2011, 12:41 PM -
Wanting to Buy - 2xTV unit, Coffee Table Dinnng room table
By Overboardkiller in forum WOODWORK - GENERALReplies: 6Last Post: 10th November 2010, 05:59 PM -
Tall Coffee Table/Desk/BookCase/Holdall of important bits/Sofa Table
By RufflyRustic in forum WOODWORK PICSReplies: 11Last Post: 3rd December 2009, 12:14 AM -
Kitchen table to Coffee table
By Scribbly Gum in forum WOODWORK PICSReplies: 8Last Post: 2nd April 2009, 12:21 PM
