 Needs Pictures: 0
Results 1 to 15 of 67
Thread: Coffee table for my nephew
-
24th November 2018, 12:25 AM #1
 Coffee table for my nephew
I have begun the build, but this is just prep at this stage.
This is the design chosen by my nephew ..
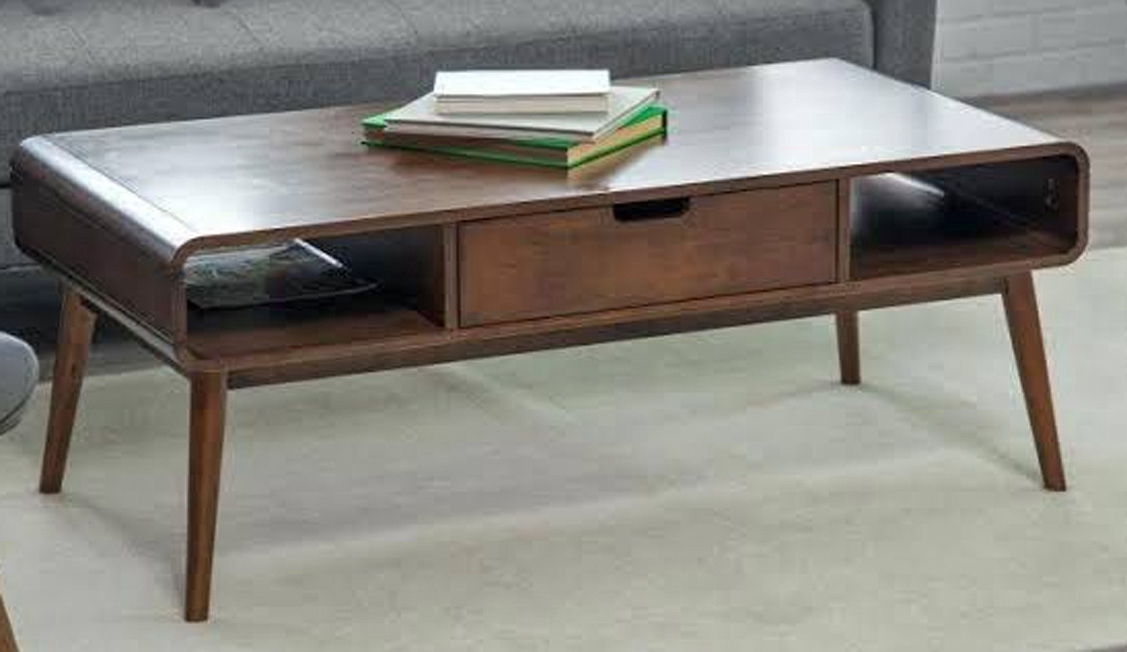
There shall be a few interesting challenges along the way since I am using solid wood all the way.
The joinery will be rounded corners shaped from through dovetails, mitred at each side. The challenge is to have accurately cut and fitted dovetails in hard Jarrah (no compression) as the outside will be removed in the rounding process.
The other challenge is the splayed and angled legs which, for added strength, will be fitted to a traditional rail design, that is, the legs and stretchers will be mortice-and-tenon joinery. The legs will splay from the corners.
Lastly, the drawer will extend the full width, and be opened from either end. No handles.
Beginning the prep by resawing some really nice Fiddleback Jarrah, which will be the top and sides. The length of the coffee table is 1000mm ...

I was watching the boards come out of the blade, keeping an eye on the kerf for movement. This even kerf told me that the boards were going to be well-mannered and stable ...
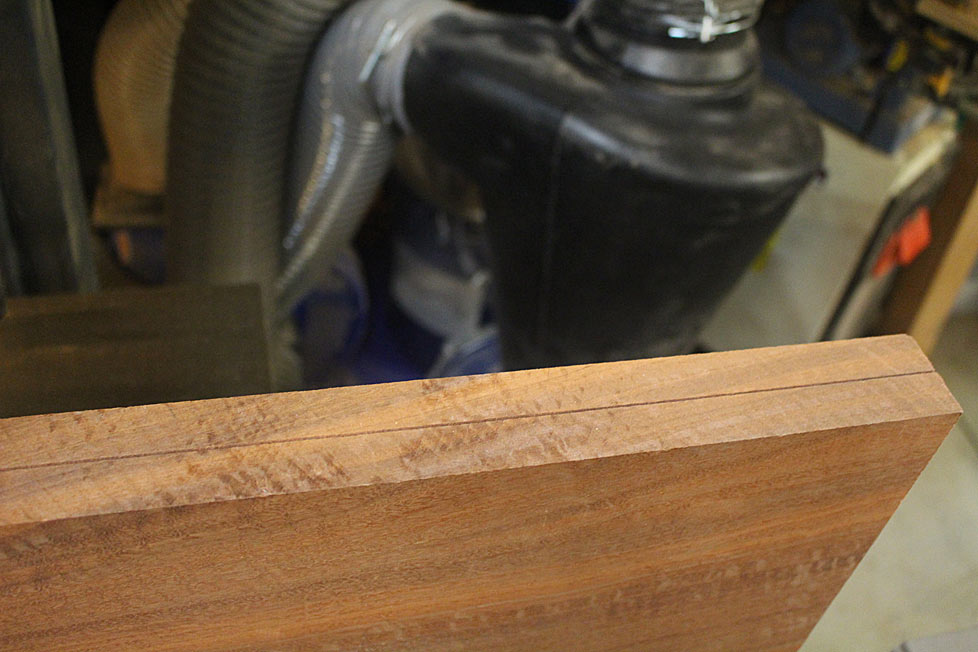
Here's an example of the figure. These boards will be bookmatched to create a width of 500mm ...

The lower side of the coffee table will be made of more "common" narrower Jarrah boards (still extremely nice!). I picked up a length 4m long, and then joined three together to get the width ...


The boards were stickered for a week ..

Some may have liked to have accentuated the centre figure this way when book-matching ...
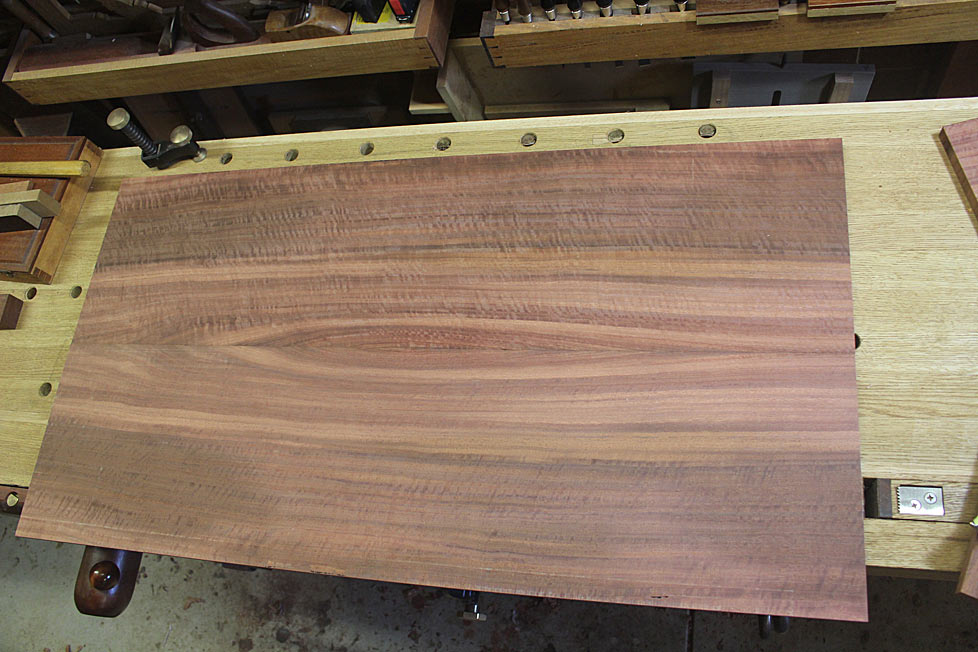
Too busy for my liking.
I preferred this ...

And this is where I left the boards at the end of last weekend ...

Regards from Perth
DerekVisit www.inthewoodshop.com for tutorials on constructing handtools, handtool reviews, and my trials and tribulations with furniture builds.
-
24th November 2018 12:25 AM # ADSGoogle Adsense Advertisement
- Join Date
- Always
- Location
- Advertising world
- Posts
- Many
-
24th November 2018, 07:23 AM #2

Chair pulled up and watching with interest.
In the photo the legs appear to be connected at their tops with rails, is it your intention to keep that feature as well as adding stretchers further down?Nothing succeeds like a budgie without a beak.
-
24th November 2018, 08:42 AM #3
 SENIOR MEMBER


- Join Date
- Aug 2017
- Location
- Mt Kembla
- Age
- 62
- Posts
- 256

Looks like it's going to be an interesting build Derek.For the legs are you going to angle the mortices both sides so they spley out.
cheers....Roy
-
24th November 2018, 10:43 AM #4
 Visit www.inthewoodshop.com for tutorials on constructing handtools, handtool reviews, and my trials and tribulations with furniture builds.
-
24th November 2018, 11:25 AM #5

I've pulled up a seat.
SBPower corrupts, absolute power means we can run a hell of alot of power tools

-
24th November 2018, 11:59 AM #6
 SENIOR MEMBER


- Join Date
- Jun 2007
- Location
- Blue Mountains
- Posts
- 817

I'm watching too. Ready for another Masterclass.
Cheers,
ajw
-
29th November 2018, 05:12 PM #7
 Senior Member


- Join Date
- Apr 2017
- Location
- Dandenong Ranges
- Posts
- 266

Good luck with it so to speak.
Combining the two ideas you were considering - dovetails with rounding a mitre - should look great using the one piece for top and sides.
-
7th December 2018, 06:51 PM #8

The latest newsletter from Australian Wood Review has an article about a student making a similar table; he used finger joints for joining the elements making the rounded corner components. A young fella by the name of Ethan Edwards.
Click!Last edited by Chief Tiff; 7th December 2018 at 06:53 PM. Reason: Bit rude of me not to name the chap!
Nothing succeeds like a budgie without a beak.
-
8th December 2018, 07:15 PM #9

Thanks Chief
That table ... sideboard really ... is beautiful, and I am filled with admiration for someone of Ethan's age building something as complex as this.
The ends are similar, but not similar enough to copy. The coffee table I am building is about 1/3 of the height, and the end curves are going to be much tighter. I also prefer to link the sides directly to the top to achieve a wrap-around of the figure. As nice as Ethan's is, his sides are multi-part.
I am hoping to start this work next weekend.
Regards from Perth
DerekVisit www.inthewoodshop.com for tutorials on constructing handtools, handtool reviews, and my trials and tribulations with furniture builds.
-
16th December 2018, 09:13 AM #10
 SENIOR MEMBER


- Join Date
- Aug 2008
- Location
- Birkdale
- Age
- 51
- Posts
- 279

I'll be following this also.
You've definitely chosen the best way to join the top. Like you, I think the other way was a bit too much. It drew your eye to only one part of the board, rather than admiring the whole thing.
-
17th December 2018, 09:03 PM #11
 SENIOR MEMBER


- Join Date
- Dec 2012
- Location
- Australia
- Posts
- 684

Grabbing the popcorn for this one. Looking forward to more progress

-
18th December 2018, 02:59 AM #12

The immediate challenge is to create the curved ends. The plan is to make dovetailed corners, round them on the outside and add a filler/filet to the inside corner, which will be hollowed to compliment the outer radius.
Complicating this is the need to mitre the insides of the dovetailed ends, since this will permit the shape to flow better than butt ends. Interesting ... as I have never made mitred dovetails to date. This is going to be a steep but quick learning curve!
I spent some time researching mitred dovetails. There is not much around. The only book I could find with directions was Ian Kirby's "The Complete Dovetail". I like Ian's work, but the writing here were not his best. There is a short video by Chris Schwarz (Google for it), which was helpful. There was also an article on the UKWorkshop forum (by Custard), which is a Pins-first method (I tend to saw Tails-first). There were one or two other articles to be found, of less assistance to someone like yours truly, who becomes easily spatially challenged. In the end I worked it out but, reflecting on the method that evolved, it does not look like those who came before. Perhaps it is a different way of doing it? I really do not know. Let me have your thoughts here. Anyway, I plan to show it for the education of those who want to learn a method.
Beginning with a tail board that has been marked and sawn (to speed up the description). Note that there is no shoulder here (which is common on butt ended dovetails). The wood is Merbau, which is hard, hard, hard. 20mm thick, as per the panels on the table ...

The aim is to saw all the tails. Forget about the mitre for now (... this is a departure from the methods I observed).
To make the removal of waste easiest, undercut the baselines (shallow cuts to avoid losing vertical) ...

Now fretsaw away the waste. Get as close to the baseline as you dare! My cuts are about 1mm ...

This enables the minimum of waste removal. You can place the chisel immediately against the chisel wall and pare/chop down halfway ...

With the waste removed, mark the mitre cuts at the sides - but do not cut them yet (this is another departure) ...


Time now to transfer the marks to the pin board.
First, here is an alternative to the "#140 trick" (the #140 trick involves creating a shallow rebate to securely connect the tail board to the pin board when transferring marks. This was popularised by Rob Cosman and Chris Schwarz, amongst others). My alternative is three layers of blue tape, which is peeled away afterwards.
Lay three layers of blue tape over the baseline. No need to be careful ...

Now use the cutting gauge (which marked the tails) to slice away the tape, leaving an edge butting against the baseline ...

This is the fence. Here it is seen with the pin board, which has a layer of blue tape on the end ...

The "fence" makes it easy to align the boards, while the blue tape on the pin board also acts as a non-slip ..

When you trace the sockets (with a knife), the outlines look like this (great for old eyes!) ...

Drop all the vertical lines, with the exception of the line on the outside at each side ...

Remove the waste in the same way as done on the tail board (undercut the baseline, fretsaw and chisel) ...

Mark out the mitre lines ...

... and drop the verticals on the reverse side...

Now saw the mitre cuts and remove the waste ...


Do this on the tail board as well - the reason it was left until now was that it would be difficult to transfer the outside tail if the mitre was sawn.
Stay about 1mm from the mitre line. Do not saw to the line. This will be more accurately shaped with a chisel.
For chiseling, use a mitre guide. This is just a 45 degree saw cut. I made a double-ended guide - to use on opposing sides ..


Take it slowly, a smidgeon at a time.

Finally ... the moment of truth arrives ... will she .. won't she ??

Looking promising as the top is pressed together with finger pressure. Then I wack it - the wood is uncompromising. The clamp is to prevent any cracking in such circumstances.

Not too shabby.
Mitres are tight ...


Now about the rounded edge ... here is the secret weapon:
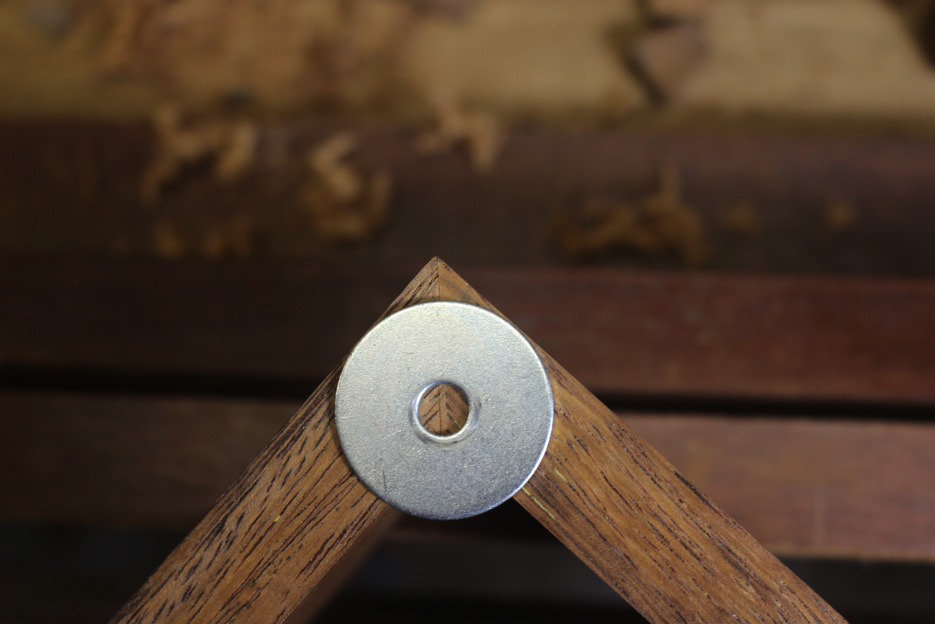
After marking out, the waste is removed with a block plane, and then sanded smooth. Just lacking the inner filet ...

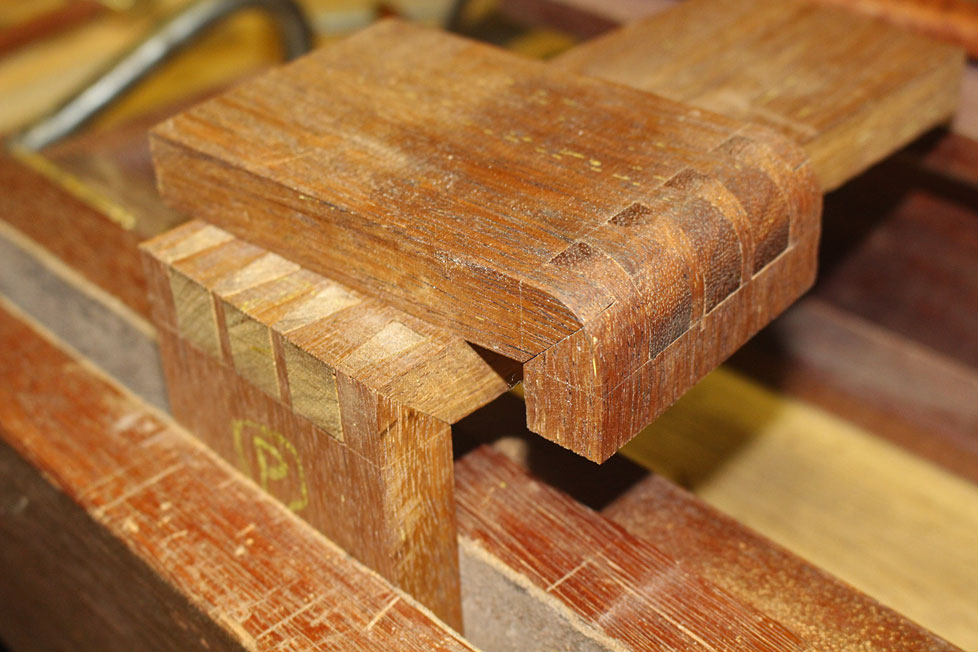
Enough practice. Now for the real thing. A bit more of a challenge as the panels are 500mm wide.
Regards from Perth
DerekVisit www.inthewoodshop.com for tutorials on constructing handtools, handtool reviews, and my trials and tribulations with furniture builds.
-
18th December 2018, 05:28 PM #13
 Woodworking mechanic


- Join Date
- Jan 2014
- Location
- Sydney Upper North Shore
- Posts
- 4,470
-
18th December 2018, 07:07 PM #14
 Intermediate Member


- Join Date
- Dec 2018
- Location
- Jimbooma Qld, Australia
- Posts
- 29

Wow that awesome work

Sent from my SM-G960F using Tapatalk
-
19th December 2018, 02:44 PM #15

This is impressive for a test piece, can't wait for the real thing.
SBPower corrupts, absolute power means we can run a hell of alot of power tools

Similar Threads
-
Little Something for my Nephew
By PLD in forum SCROLLERS FORUMReplies: 3Last Post: 21st August 2014, 05:04 PM -
A toy for my Nephew.
By Mr. Lara in forum TOY MAKINGReplies: 20Last Post: 12th February 2014, 02:55 AM -
New box for Nephew
By Evanism in forum BOX MAKINGReplies: 9Last Post: 17th February 2013, 03:12 AM -
Wanting to Buy - 2xTV unit, Coffee Table Dinnng room table
By Overboardkiller in forum WOODWORK - GENERALReplies: 6Last Post: 10th November 2010, 05:59 PM -
Tall Coffee Table/Desk/BookCase/Holdall of important bits/Sofa Table
By RufflyRustic in forum WOODWORK PICSReplies: 11Last Post: 3rd December 2009, 12:14 AM


 Thanks:
  Likes:
  Picture(s) thanks:
 Reply With Quote
 Cheers Chief, that should have read rail and not stretcher. An added stretcher would be too busy.