

 Thanks: 0
 Likes: 0
 Needs Pictures: 0
 Picture(s) thanks: 0
Results 76 to 90 of 111
-
7th November 2010, 04:04 PM #76
 Dan @ TheLoveOfWood


- Join Date
- Jan 2008
- Location
- Australia
- Posts
- 752

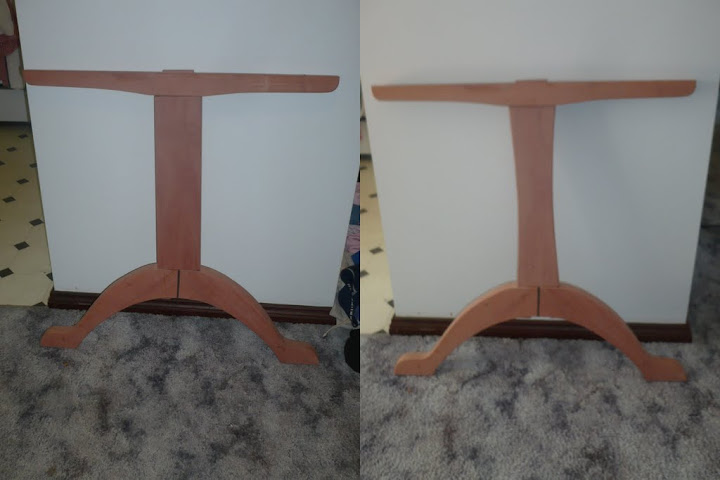
You've got me worried now about the bench toppling over. My plan is to finish the table and then get cracking on some projects for xmas. Benches may have to wait until the new year. I'm a little limited on timber for anything too complex with the benches.
About the table legs... here's a before and after snap. I think it's a definite improvement.
 My blog: ~ for the love of wood ~ - http://theloveofwood.blogspot.com/
-
7th November 2010 04:04 PM # ADSGoogle Adsense Advertisement
- Join Date
- Always
- Location
- Advertising world
- Posts
- Many
-
7th November 2010, 04:59 PM #77
GOLD MEMBER
- Join Date
- May 2004
- Location
- Epping.Vic
- Age
- 58
- Posts
- 1,094
Nice job Dan, The "after pic" looks much better with the curves added
 Regards
Al .
You don't know, what you don't know, until you know it.
-
7th November 2010, 05:42 PM #78
Neander Normite
- Join Date
- Jan 2005
- Location
- Melbourne
- Age
- 65
- Posts
- 11,997
-
7th November 2010, 09:10 PM #79
Mildly Moderate
- Join Date
- Nov 2007
- Location
- Albury Well Just Outside
- Posts
- 13,315
I like the before one.
Nah I just messing with your mind.
-
9th November 2010, 08:23 AM #80
 Fossil Member
- Join Date
- Jan 2005
- Location
- Perth
- Posts
- 1,181
What they said Boz. The curve looks the goods.
Cheers
Pops
-
9th November 2010, 09:31 AM #81
Dan @ TheLoveOfWood
- Join Date
- Jan 2008
- Location
- Australia
- Posts
- 752

I started to glue up this morning. Using epoxy on the lower joint as there are a few gaps to to fill. My hand cut tenons are comming out well but the mortises need work. If I had my time again I would use a thinner tenon to improve strength in the base.My blog: ~ for the love of wood ~ - http://theloveofwood.blogspot.com/
-
11th January 2011, 03:27 PM #82
Dan @ TheLoveOfWood
- Join Date
- Jan 2008
- Location
- Australia
- Posts
- 752
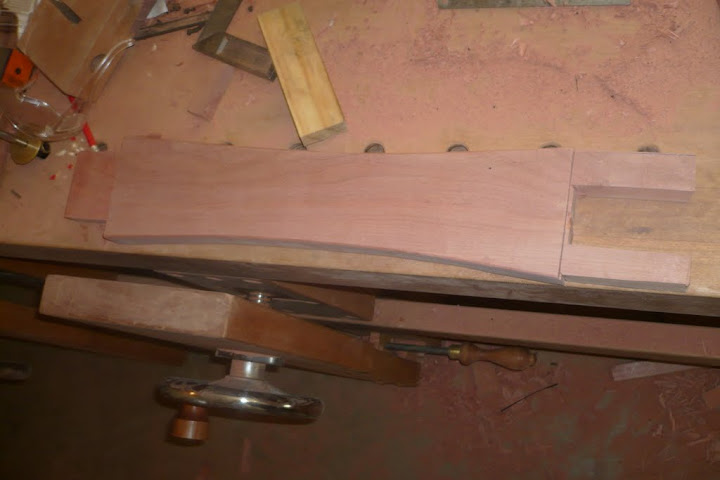
With the (near) completion of the Christmas Boxes I've had some time to work on the Anniversary Table. Over the past two days I've worked on shaping the blanks I prepared back in October. The two benches will have three solid legs. Each leg is made of ~40mm Tas. Mrytle. The back is formed by a straight taper and a gentle curve. The front has a gentle curve to match the table leg (seen in the background.) The detail is an ellipse found in traditional design.

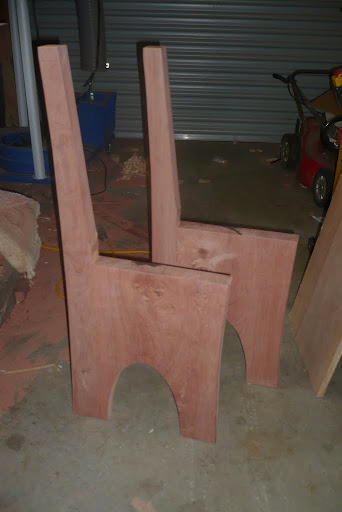
The boards behind the first picture will become the seat and the back rest. I am debating on including a stretched under the seat. In Shaker furniture this added strength to the 3/4" timber, but here it'll be purely aesthetic. I feel it shall balance the ellipse and the front curve to have a stretcher ~70mm from the front.My blog: ~ for the love of wood ~ - http://theloveofwood.blogspot.com/
-
11th January 2011, 04:23 PM #83
What... you mean it's not 1792?
- Join Date
- Oct 2006
- Location
- Melbourne
- Posts
- 5,271
I have an eighteenth-century equivalent of your bench across the end of a bed. It has a stretcher immediately below the seat (flush with the top of the slab legs) which stops the bench from racking, but also has the effect of preventing the seat from sagging.
.
I know you believe you understand what you think I wrote, but I'm not sure you realize that what you just read is not what I meant.
Regards, Woodwould.
-
14th January 2011, 04:37 PM #84
Dan @ TheLoveOfWood
- Join Date
- Jan 2008
- Location
- Australia
- Posts
- 752
-
14th January 2011, 05:50 PM #85
Neander Normite
- Join Date
- Jan 2005
- Location
- Melbourne
- Age
- 65
- Posts
- 11,997
-
14th January 2011, 05:58 PM #86
Dan @ TheLoveOfWood
- Join Date
- Jan 2008
- Location
- Australia
- Posts
- 752
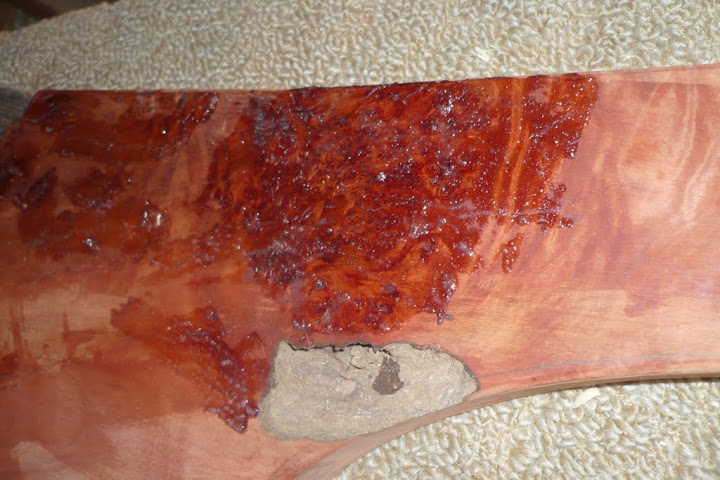
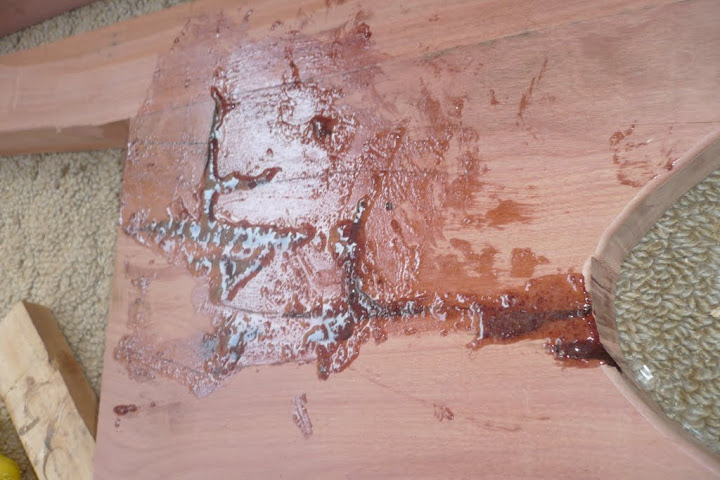
I mixed up 36ml of the stuff and had ample time work across the 6 pieces without rushing.
I have the slow setting resin, not sure what it's marketed at, but I find I get a good 20-30min. If was a joint, not a filling application, probably 10min would be ok. This is longer than titebond III which I use for most of my joints.
Todays the first time I've used the microfiber filling, (actually I used microfiber and saw dust), I think that will take some time to get the balance. Without the filling the west system is very low viscosity, like metho. Even a small amount of filler would be useful in joints.
I like the West System method of adding filling allowing you control of viscosity.
I'll wait to its set and sanded before passing final judgement. But all looks good so far.My blog: ~ for the love of wood ~ - http://theloveofwood.blogspot.com/
-
14th January 2011, 06:32 PM #87
Neander Normite
- Join Date
- Jan 2005
- Location
- Melbourne
- Age
- 65
- Posts
- 11,997
I think I'll get some for the dovetails when I join them. Some gap-filling may be necessary.
-
16th February 2011, 02:57 PM #88
Dan @ TheLoveOfWood
- Join Date
- Jan 2008
- Location
- Australia
- Posts
- 752
The two benches are nearly ready for sanding and finishing. The various sections will be glued and screwed together, with the screws covered in ebony plugs.


My blog: ~ for the love of wood ~ - http://theloveofwood.blogspot.com/
-
16th February 2011, 03:47 PM #89
GOLD MEMBER
- Join Date
- Feb 2005
- Location
- Sydney
- Age
- 75
- Posts
- 1,387
Looking Good
I think they'll outlast all of us.
Great colour and result for a lot of hard work.
Greg
-
16th February 2011, 04:24 PM #90
Heavy Machinery
- Join Date
- Mar 2008
- Location
- Lambton, Newcastle, NSW, Australia
- Posts
- 4,957
Great work Dan, they have come up a treat.


 Reply With Quote


Similar Threads
-
A Shaker table for Mother's Day
By derekcohen in forum WOODWORK PICSReplies: 8Last Post: 9th May 2010, 06:54 PM -
Shaker Sewing Table
By Glennet in forum WOODWORK PICSReplies: 24Last Post: 26th November 2009, 10:40 AM -
Small shaker-ish table
By Poppa in forum WOODWORK PICSReplies: 8Last Post: 8th April 2008, 01:05 PM -
Shaker Table Shaking
By Buzza in forum FINISHINGReplies: 0Last Post: 2nd February 2006, 05:04 PM -
Shaker table
By Geoffexpat in forum WOODWORK PICSReplies: 17Last Post: 1st December 2005, 09:21 AM
