

 Thanks: 0
 Likes: 0
 Needs Pictures: 0
 Picture(s) thanks: 0
Results 61 to 75 of 111
-
8th August 2010, 10:21 PM #61
 Dan @ TheLoveOfWood


- Join Date
- Jan 2008
- Location
- Australia
- Posts
- 752

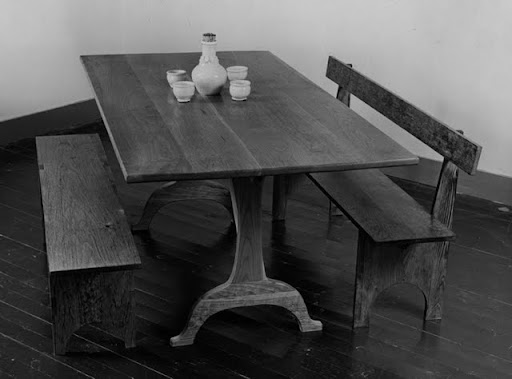
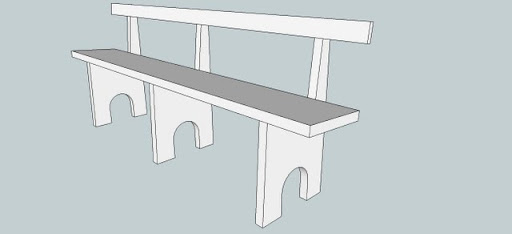
I'd like some feed back on some bench design modification. I'm attempting to remake this traditional shaker table and bench with back support. The design calls for a flat bench, parallel to the floor. I've sloped mine slightly (20mm over the 300mm width.) I'm also using thicker material 40mm cf. 16mm.


Any feedback will be welcome.
SketchUp Examples
http://sketchup.google.com/3dwarehou...61&prevstart=0
http://sketchup.google.com/3dwarehou...61&prevstart=0
http://sketchup.google.com/3dwarehou...7f&prevstart=0My blog: ~ for the love of wood ~ - http://theloveofwood.blogspot.com/
-
8th August 2010 10:21 PM # ADSGoogle Adsense Advertisement
- Join Date
- Always
- Location
- Advertising world
- Posts
- Many
-
8th August 2010, 10:25 PM #62
Neander Normite
- Join Date
- Jan 2005
- Location
- Melbourne
- Age
- 65
- Posts
- 11,997
Nice choice Boz. I reckon seats need minimal slope, 10mm over that distance would do me. Also, don't forget that if you change the angle of seat to back support you should adjust the back support to suit.
-
10th August 2010, 03:43 PM #63
SENIOR MEMBER
- Join Date
- Jul 2008
- Location
- Aspley, Brisbane
- Age
- 46
- Posts
- 362
Looking good Dan. Perhaps a visit to George R. Walker's blog may help in working out the proportions for your next version. I can say it was an eye opening experience reading his first post on classical propotions in design. Originally Posted by BozInOz


Denim.
-
10th August 2010, 10:24 PM #64
Dan @ TheLoveOfWood
- Join Date
- Jan 2008
- Location
- Australia
- Posts
- 752
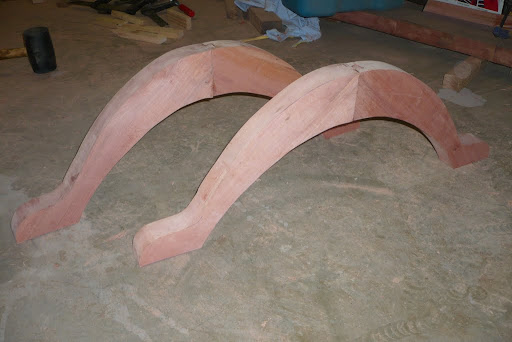
Thanks Demin. I've seen his blog before, I used to be subscribed to the RSS before my comp died. But yeah interesting stuff. I'll have to re-look at the ratio work. Designing is tricky. Change one thing and the whole look is different.
On a practical note, I've made some progress on the legs. See pics below.My blog: ~ for the love of wood ~ - http://theloveofwood.blogspot.com/
-
10th August 2010, 10:35 PM #65
Dan @ TheLoveOfWood
- Join Date
- Jan 2008
- Location
- Australia
- Posts
- 752
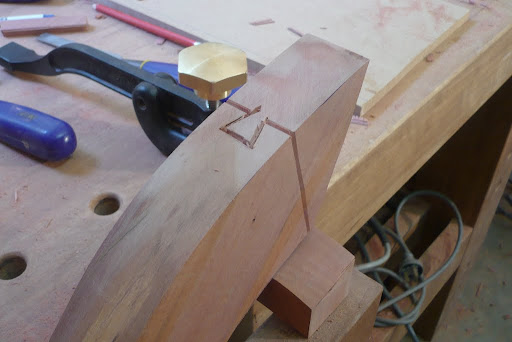
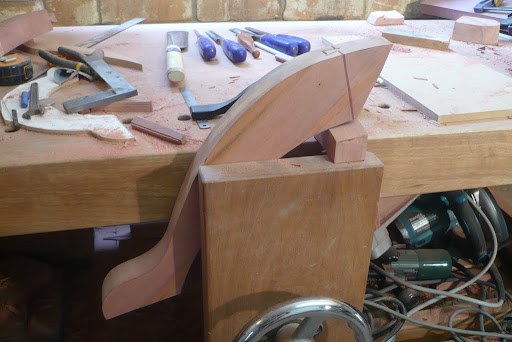
The legs. I've debated the leg long and hard. Thought of steam bending, bent lamination, straight grain timber, and combinations of the above. In the end I decided to join two pieces to maximize long grain strength... which of course means a joint in the middle.
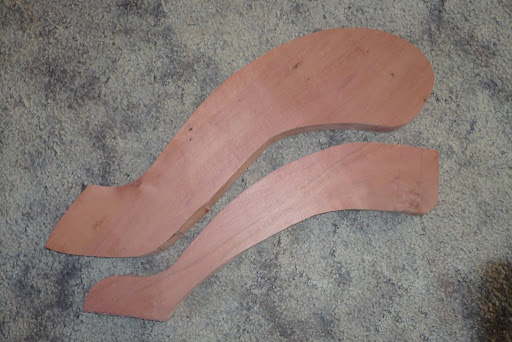
After making a template, rough cutting and machining the piece, I then used a jigsaw to cut a closer but still rough outline of the leg.
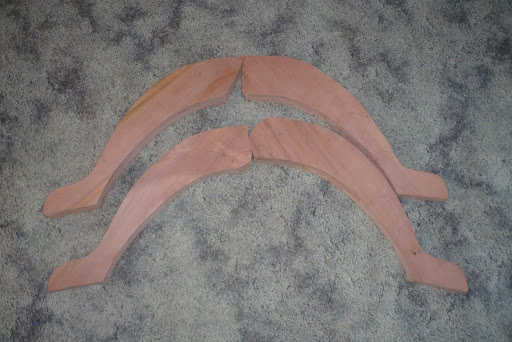
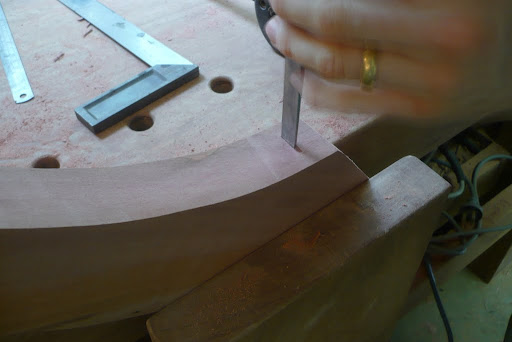
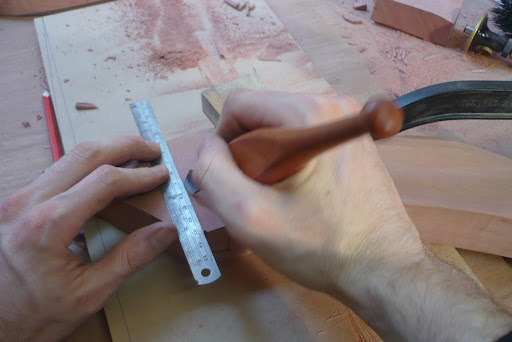
Using a chisel, a marking knife and some patients I outlined my cuts.
 ]
]
And then started making some cuts...
Which made me a tail...
...and some pins...
With a bit of glue I got a rather nice joint.
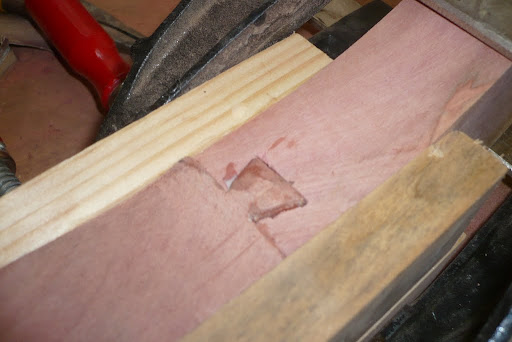
Though, like all wood workers I'm my own worse critic. There are some gabs in the joint and between the two pieces. Some will need filling, some may need to be made a 'feature' of to correct. (Eg. one side as a 1-2mm gap on the face side, this may be replaced with a strip of timber mrytle or perhaps ebony.)
For those wondering about how the vertical leg piece will attach. I plan to use two small wedged m&t joints either side of the sliding dovetail.My blog: ~ for the love of wood ~ - http://theloveofwood.blogspot.com/
-
10th August 2010, 10:54 PM #66
gravity is my co-pilot
- Join Date
- Apr 2010
- Location
- Melbourne
- Posts
- 562
A cunning way around your 'problem'. A stip of Ebony to match the pegs would be nice!
-
12th August 2010, 10:17 PM #67
Mildly Moderate
- Join Date
- Nov 2007
- Location
- Albury Well Just Outside
- Posts
- 13,315
Seeing that you are thinking of the next step. And actually doing it.
-
13th August 2010, 06:32 PM #68
Dan @ TheLoveOfWood
- Join Date
- Jan 2008
- Location
- Australia
- Posts
- 752


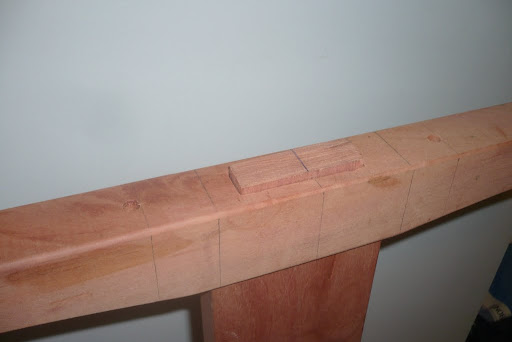
Quick post to show the hand cut ebony inlay.
After reading the latest FWW I'm inspired to make some ebony wedges for the stretcher which should match the vertical lines of the inlay.My blog: ~ for the love of wood ~ - http://theloveofwood.blogspot.com/
-
14th August 2010, 07:40 PM #69
Mildly Moderate
- Join Date
- Nov 2007
- Location
- Albury Well Just Outside
- Posts
- 13,315
That is some very quick work. Still looking good.
-
6th November 2010, 06:59 PM #70
Dan @ TheLoveOfWood
- Join Date
- Jan 2008
- Location
- Australia
- Posts
- 752

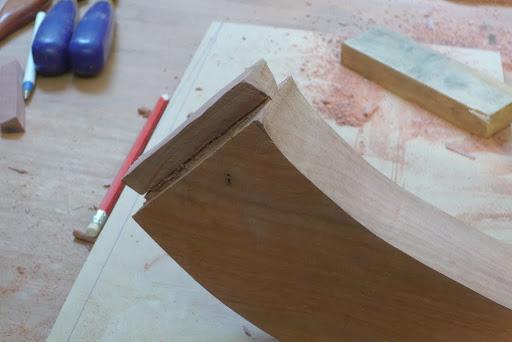
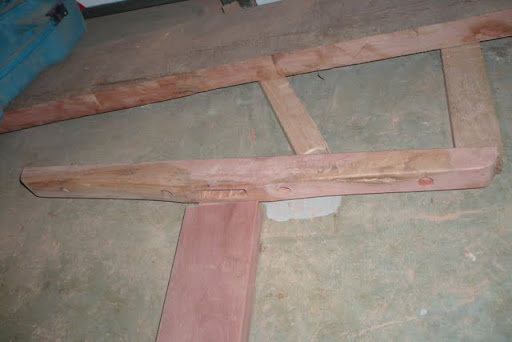
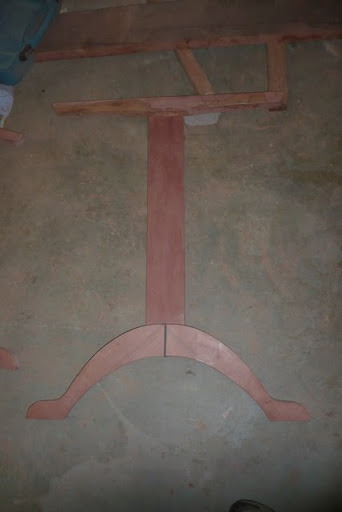
I've got the legs together now. I feel the upright is a little thick. I'm thinking of bowing the sides with a gentle curve of about 1-1.5cm in from each side. What are peoples thoughts? I thought to centre it or have it off centre opposite to where the stretcher tennon will come through.My blog: ~ for the love of wood ~ - http://theloveofwood.blogspot.com/
-
6th November 2010, 07:04 PM #71
Dan @ TheLoveOfWood
- Join Date
- Jan 2008
- Location
- Australia
- Posts
- 752


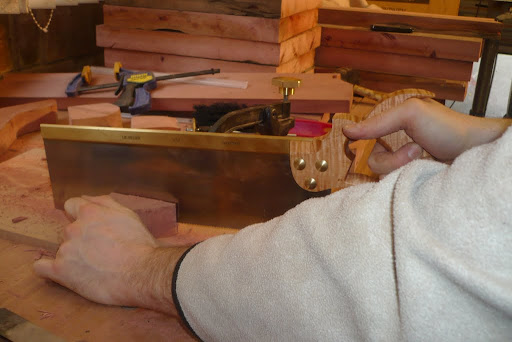
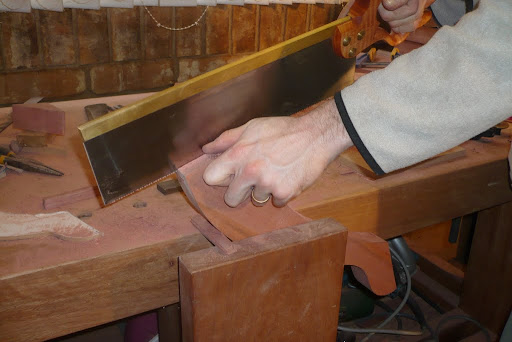
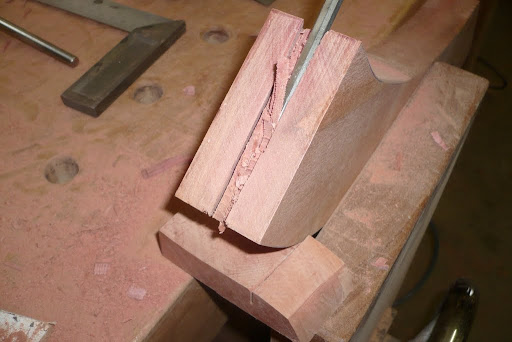
Here's some pictures of the joinery. All done by hand (except my coping saw blade broke and the jigsaw was closer than the store.) I had a bit of a blow out while chiseling from the top, still have the piece to go back in.My blog: ~ for the love of wood ~ - http://theloveofwood.blogspot.com/
-
6th November 2010, 08:26 PM #72
gravity is my co-pilot
- Join Date
- Apr 2010
- Location
- Melbourne
- Posts
- 562
Does the upright appear to narrow with something the thickness of the top (or bits of the top wood) offered up?
-
6th November 2010, 09:04 PM #73
Dan @ TheLoveOfWood
- Join Date
- Jan 2008
- Location
- Australia
- Posts
- 752
not following your question there.
the upright at present has no taper.My blog: ~ for the love of wood ~ - http://theloveofwood.blogspot.com/
-
6th November 2010, 11:26 PM #74
gravity is my co-pilot
- Join Date
- Apr 2010
- Location
- Melbourne
- Posts
- 562
Should have said, 'it may look slimmer when the top is on'. Originally Posted by BozInOz
cheers,
B-D
-
7th November 2010, 02:20 PM #75
 Fossil Member
- Join Date
- Jan 2005
- Location
- Perth
- Posts
- 1,181
Hi Boz,
Been loving your thread, and all the great photos of progress.
Regarding your questions about the bench seat design; I like the slight slope of the seat toward the back. Friends have a similar bench seat which also slopes and it is quite confortable. The things I would spend time checking out are, the footprint width and width to height ratio for stability.
I have on more than one occassion seen bench seats go toppling over backwards, with all onboard because the seat became unstable as people leaned back. A wider footprint than the drawings show might be needed to get a good stable seat.
Keep up this great WIP. Can't wait to see the completed table.
Cheers
Pops


 Reply With Quote


Similar Threads
-
A Shaker table for Mother's Day
By derekcohen in forum WOODWORK PICSReplies: 8Last Post: 9th May 2010, 06:54 PM -
Shaker Sewing Table
By Glennet in forum WOODWORK PICSReplies: 24Last Post: 26th November 2009, 10:40 AM -
Small shaker-ish table
By Poppa in forum WOODWORK PICSReplies: 8Last Post: 8th April 2008, 01:05 PM -
Shaker Table Shaking
By Buzza in forum FINISHINGReplies: 0Last Post: 2nd February 2006, 05:04 PM -
Shaker table
By Geoffexpat in forum WOODWORK PICSReplies: 17Last Post: 1st December 2005, 09:21 AM
