

 Thanks: 0
 Likes: 0
 Needs Pictures: 0
 Picture(s) thanks: 0
Results 91 to 105 of 111
-
20th February 2011, 09:28 AM #91
 Lignum Vexator


- Join Date
- May 2007
- Location
- North of the coathanger, Sydney
- Age
- 68
- Posts
- 9,417

Nice work
should look speccy when finish is appliedregards
Nick
veni, vidi, tornavi
Without wood it's just ...
-
20th February 2011 09:28 AM # ADSGoogle Adsense Advertisement
- Join Date
- Always
- Location
- Advertising world
- Age
- 2010
- Posts
- Many
-
20th February 2011, 10:16 AM #92
Skwair2rownd
- Join Date
- Nov 2007
- Location
- Dundowran Beach
- Age
- 76
- Posts
- 19,922

Nice work Dan!!

Something about Shaker style furniture.I think it has to to do with more than the elegant simplicity of the style.
-
20th February 2011, 11:55 AM #93
GOLD MEMBER
- Join Date
- Sep 2004
- Location
- Melbourne
- Age
- 87
- Posts
- 1,327
Looking good
I've just become an optimist . Iv'e made a 25 year plan -oopps I've had a few birthdays - better make that a 20 year plan
-
27th February 2011, 10:06 AM #94
Dan @ TheLoveOfWood
- Join Date
- Jan 2008
- Location
- Australia
- Posts
- 752
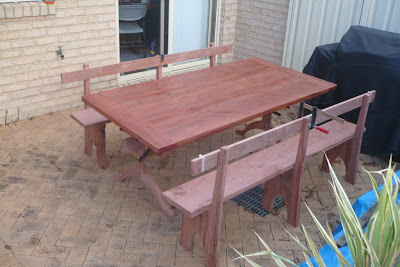
The Anniversary table has been a long time in the coming. To check proportions and decide on final sizing and shaping I assembled the piece in our small courtyard. The shaker inspired modern table is a 2x1m trestle table with two benches capable of sitting eight comfortably.
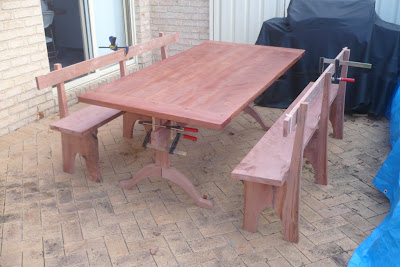
The benches will be assembled with long screws covered by ebony plugs - keeping the detail of the top.
In the shaker design which uses 3/4" timber (cf. 1 1/2" timber in my piece) there is a stretcher beneath the benches to prevent racking and increase strength. Although this is not needed with the thicker timber I plan to add a smaller stretcher for aesthetics.
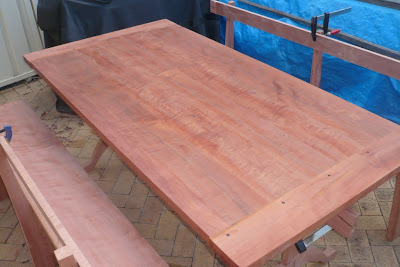
The top I've had completed and finished for nearly 6 months. Given the heat we've had lately the top has shrunk about 1.5cm across it's 1m width. The breadboards were designed for 2cm of movement so this isn't a problem (other than needing to tidy the breadboards).
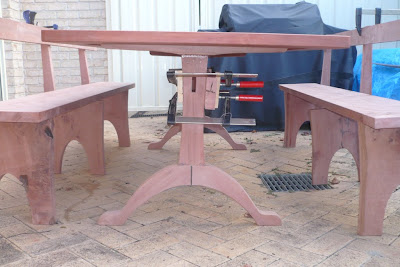
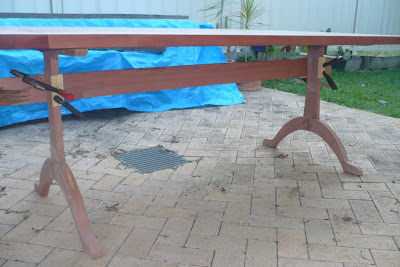
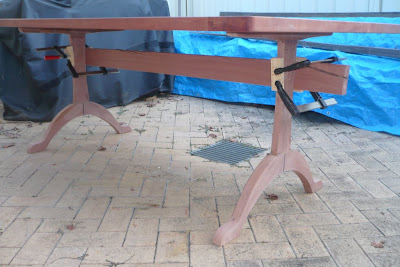
Since this last photo was taken I've shaped the stretcher supporting the two legs. In keeping with the rest of the piece. It now has a gentle curve thinning the mid section. The ends will be tightened with keyed m&t joints which need to be shaped and sanded.
Work in progress photos and details.My blog: ~ for the love of wood ~ - http://theloveofwood.blogspot.com/
-
27th February 2011, 10:13 AM #95
GOLD MEMBER
- Join Date
- Sep 2004
- Location
- Melbourne
- Age
- 87
- Posts
- 1,327
That is certainly looking spectacular. Even better with the finish on.
I've just become an optimist . Iv'e made a 25 year plan -oopps I've had a few birthdays - better make that a 20 year plan
-
27th February 2011, 08:48 PM #96
Mildly Moderate
- Join Date
- Nov 2007
- Location
- Albury Well Just Outside
- Posts
- 13,315
Watching and waiting, no hurry from my side. How is it going on your side?

-
2nd March 2011, 11:35 AM #97
Dan @ TheLoveOfWood
- Join Date
- Jan 2008
- Location
- Australia
- Posts
- 752
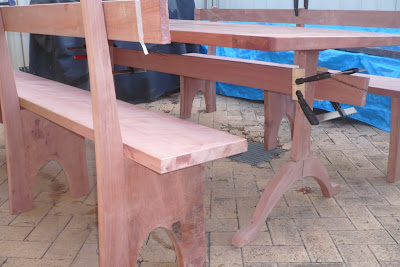
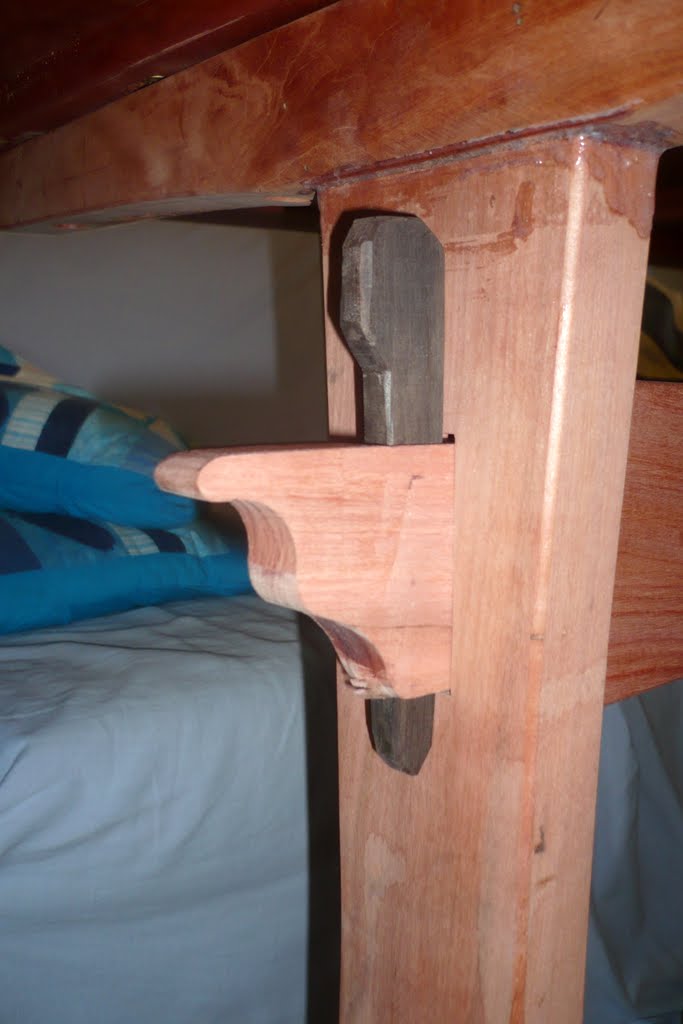
The stretcher or cross member is essential to hold the two trestle legs securely. Using a jigsaw and belt sander I thinned the center producing a gentle curve. Looking at it now it could be thinned at the end.

The through tenons are secured using a solid ebony 'key'. At present they are functional but also need some detailing work with the rasp.

Overall... average.My blog: ~ for the love of wood ~ - http://theloveofwood.blogspot.com/
-
2nd March 2011, 12:09 PM #98
GOLD MEMBER
- Join Date
- Sep 2004
- Location
- Melbourne
- Age
- 87
- Posts
- 1,327
Looking good.
Did you consider placing the stretcher lower for better stability ?
I've just become an optimist . Iv'e made a 25 year plan -oopps I've had a few birthdays - better make that a 20 year plan
-
1st April 2011, 08:02 PM #99
Dan @ TheLoveOfWood
- Join Date
- Jan 2008
- Location
- Australia
- Posts
- 752
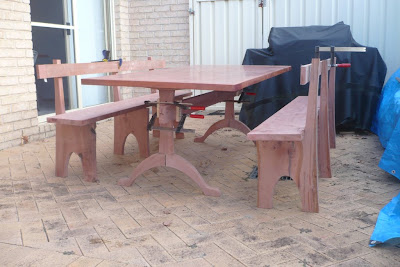
Phew those pews were long overdue...
Work, sickness, and family priorities have led to very little in the way of woodworking these past four or five weeks. Today however I had a break through in assembling the pews.
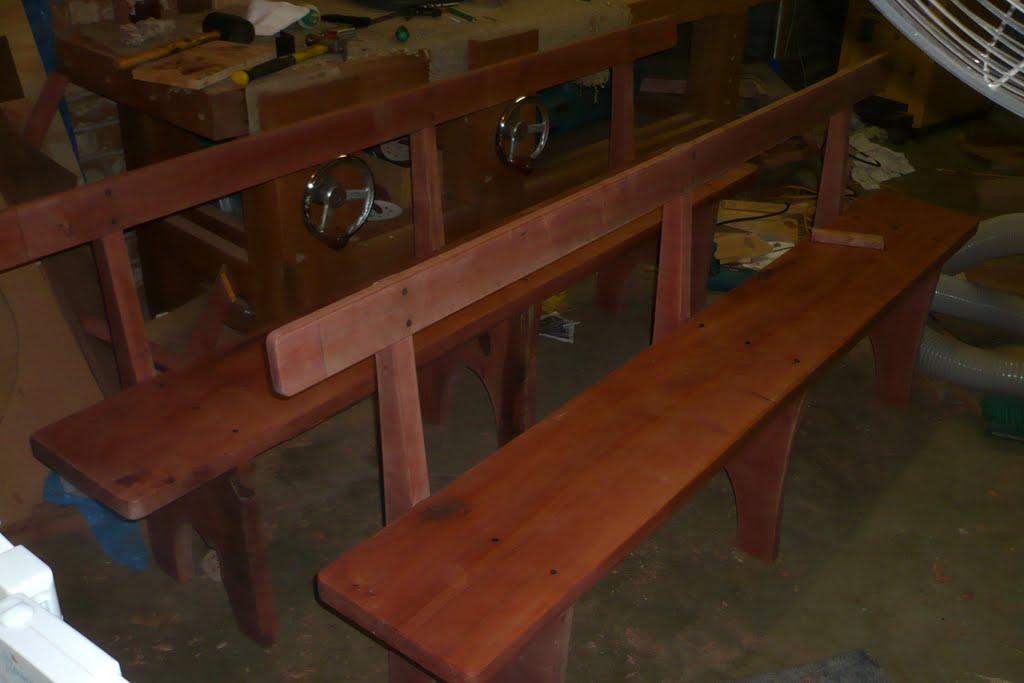
The 5" makita ROS sander got a mighty work out. Prior to assembly all pieces went step by step through 120, 180, 240, shellac sealer, 240, and 320grit. It reads quickly, but it took several hours to get through all the pieces.


Repetitive drilling was made easier with a memory stick made from scrap pine. A drill press allowed me to form 90 degree holes at set points in the scrap. The scrap could then be moved along the board and used to guide a hand drill. A quick pilot hole with a twist bit followed by a counterbore with a forsnter bit.


After gluing and screwing the holes were filled with plugs. The plugs were cut using the vertias snug plug system (very nice), glued, tapped, and then flush cut.

There's still work to go; more sanding, and then the oiling begins.My blog: ~ for the love of wood ~ - http://theloveofwood.blogspot.com/
-
1st April 2011, 09:34 PM #100
Heavy Machinery
- Join Date
- Mar 2008
- Location
- Lambton, Newcastle, NSW, Australia
- Posts
- 4,957
Thats moved things along a bit Dan, have you been home again for a while?
-
1st April 2011, 11:55 PM #101
Lignum Vexator
- Join Date
- May 2007
- Location
- North of the coathanger, Sydney
- Age
- 68
- Posts
- 9,417
Nice
those veritas flush cut saws are the bees knees
regards
Nick
veni, vidi, tornavi
Without wood it's just ...
-
2nd April 2011, 12:16 AM #102
Mildly Moderate
- Join Date
- Nov 2007
- Location
- Albury Well Just Outside
- Posts
- 13,315
I am in no hurry. Take your time.
-
2nd April 2011, 06:42 AM #103
Dan @ TheLoveOfWood
- Join Date
- Jan 2008
- Location
- Australia
- Posts
- 752
ClawHammer - My current job arrangement (which is about the change again) is working 7 days on 7 days off. So we to 8am to 830pm for 7 days... then 7 days off... then 8pm to 830am for 7 days... then 7 days off and repeat.
Sawdust - it's a nice saw, I have the double edged one which is convenient, you need to be careful not to damage the flexible blade, much easier then using a normal saw.
Christos - yeah, should never rush, but I'm keen to regain some space in the shop, and I was hoping to finish this project by december and my next one by easter... oh well.My blog: ~ for the love of wood ~ - http://theloveofwood.blogspot.com/
-
2nd April 2011, 07:45 AM #104
Lignum Vexator
- Join Date
- May 2007
- Location
- North of the coathanger, Sydney
- Age
- 68
- Posts
- 9,417
Yeah - I've had one for a few years - magic
This and another project before easter you say - that's about three weeks - better get your skates on regards
Nick
veni, vidi, tornavi
Without wood it's just ...
-
5th June 2011, 12:42 PM #105
Dan @ TheLoveOfWood
- Join Date
- Jan 2008
- Location
- Australia
- Posts
- 752
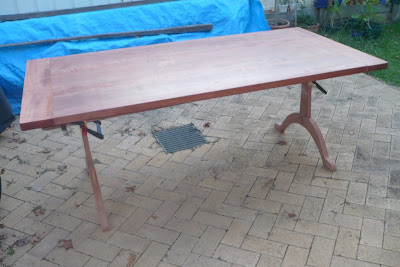
Construction of the Anniversary Shaker Table is in the home stretch. Today I with the stretcher held securely to the bench I could finish some of the details. A nicholson fine rasp, a cheap riffler and some sand made quick work of rounding the edges and fitting the joint.

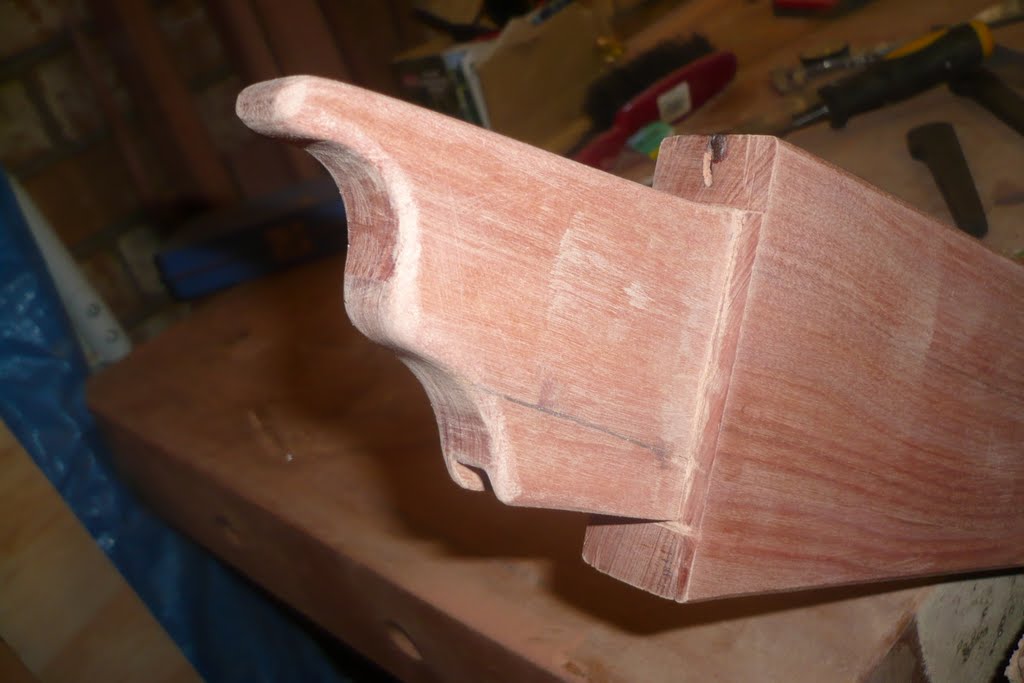


Holding the stretcher to the legs are keyed through mortise and tennon joints. I made the ebony keys quickly with a chisel and saw. Although a quick and fun way to build... the lack of planing caused one small hassle. A combination of a slight difference in the angle of the key and mortise and leaving the short grain too short caused a small blow out at both ends. The solution... it's now a design feature...My blog: ~ for the love of wood ~ - http://theloveofwood.blogspot.com/


 Reply With Quote


Similar Threads
-
A Shaker table for Mother's Day
By derekcohen in forum WOODWORK PICSReplies: 8Last Post: 9th May 2010, 06:54 PM -
Shaker Sewing Table
By Glennet in forum WOODWORK PICSReplies: 24Last Post: 26th November 2009, 10:40 AM -
Small shaker-ish table
By Poppa in forum WOODWORK PICSReplies: 8Last Post: 8th April 2008, 01:05 PM -
Shaker Table Shaking
By Buzza in forum FINISHINGReplies: 0Last Post: 2nd February 2006, 05:04 PM -
Shaker table
By Geoffexpat in forum WOODWORK PICSReplies: 17Last Post: 1st December 2005, 09:21 AM
