

 Thanks:
  Likes:
  Needs Pictures: 0
 Picture(s) thanks:
Results 46 to 57 of 57
-
31st March 2024, 02:02 AM #46
 Be inspired. Be creative. Be bold.


- Join Date
- Apr 2001
- Location
- Perth
- Posts
- 10,828

Arms - part 1
The key piece is the top rail, and the key element here is the rear curve. Here it is smoothed on the belt sander. It will be a reference side for marking curves ...

The angles I have had to guestimate have been the tilt, front and rear, of the top rail. This is what I came up with ...
The plan is to join the arms using dowels. The Rule of Thirds applies. 3 x 3/8" dowels (3/8" = 9.5mm, which is close to the 10mm tenons used previously). Why dowels? Because they are easier to position accurately without a reference edge.
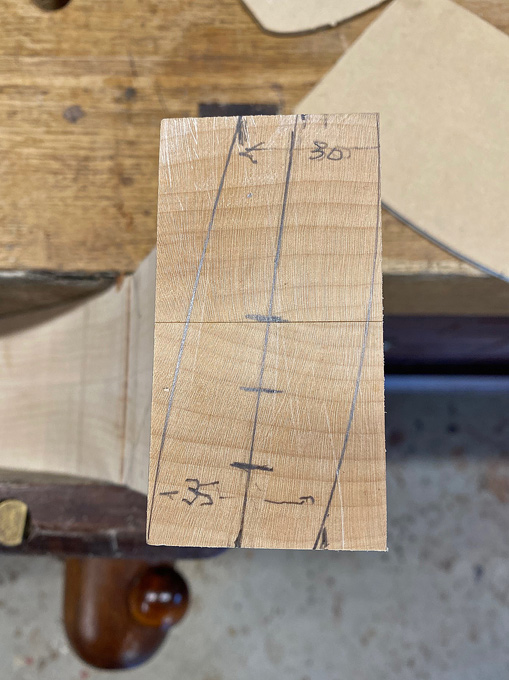
Since a large amount of waste will be removed from the top rail and arms, through shaping, the dowels need to be positioned where they will not be cut into. The three marks on the ends of the top rail are the position for the dowels. The wooden block was a quick guide to drill vertical as it needed to be done freehand ..

The only complication was that I had 6mm dowel centre points. It would have been easier if they were 3/8". Nevertheless ...


Drilled for 3/8" dowels in Jarrah (I have a bucket of them), each close to 50mm (2") in length.


Everything is still a rectangle at this stage ...

The inside face of the top rail is shaped ...

It is at this point that I have a re-think about the curve of the rear - it is not a fair curve and enough curve when compared with the photos of the DC 09 chair. The re-drawn curve on the left looks correct to me now, and this is what we will go with ...

The parts are joined up as a loose fit (using undersized dowels)...

The arm/rail combination is now placed on the arm supports and adjusted to the front and rear to determine the rear overhang and position for the front joint ..

The template I made up earlier is used to trace out the side elevations. The shaping here is approximate. The main goal is to establish the length of the arms and from arm support joint ...

A little detail of interest: the height cut is slightly more than the front joint triangle would suggest as the final shaping requires a little extra meat to end in a curve ...


This is now sawn to shape, except for the underside of the arm, as the mortise/tenon area needs to be determined separately for each arm ...

Tomorrow will begin the final shaping and, hopefully, glue up of the arms.

Regards from Perth
DerekVisit www.inthewoodshop.com for tutorials on constructing handtools, handtool reviews, and my trials and tribulations with furniture builds.
-
31st March 2024 02:02 AM # ADSGoogle Adsense Advertisement
- Join Date
- Always
- Location
- Advertising world
- Posts
- Many
-
1st April 2024, 01:10 AM #47
Be inspired. Be creative. Be bold.
- Join Date
- Apr 2001
- Location
- Perth
- Posts
- 10,828
A little more as it is getting closer.
The first step is to align all the arms and mortices ...

There was a lot of scribing, fitting, scribing and more fitting.
Finally the shaping of the underside of the arms was possible as it was now possible to determine the general position of the mortises.

The waste was removed with a bandsaw and coping saw ..

Now the specific position for the mortices was fixed with dowel pointers ...

Drilled and dowelled ..

And the arms fitted to check that all will fit at the end ...

Shaping to come.
Regards from Perth
DerekVisit www.inthewoodshop.com for tutorials on constructing handtools, handtool reviews, and my trials and tribulations with furniture builds.
-
1st April 2024, 07:23 AM #48
Butcher of wood
- Join Date
- Jun 2010
- Location
- Bundaberg
- Age
- 54
- Posts
- 3,430
On the home run now, looks like just a lot of carving, fairing in and smoothing to go� but I guess you can sit in one chair while working on the other!
Nothing succeeds like a budgie without a beak.
-
1st April 2024, 11:36 AM #49
Be inspired. Be creative. Be bold.
- Join Date
- Apr 2001
- Location
- Perth
- Posts
- 10,828
Home run, indeed. We fly off to New Zealand tomorrow for three weeks, and I have been using the Easter Weekend to get as much done as possible. Could do with a sit down.

Regards from Perth
DerekVisit www.inthewoodshop.com for tutorials on constructing handtools, handtool reviews, and my trials and tribulations with furniture builds.
-
1st April 2024, 01:56 PM #50
 GOLD MEMBER
- Join Date
- Apr 2006
- Location
- Hobart
- Posts
- 5,132
Enjoy your holiday in the Shaky Lands, Derek. Originally Posted by derekcohen

Three weeks to think about your chairs, and do nothing!
-
2nd April 2024, 01:07 AM #51
Be inspired. Be creative. Be bold.
- Join Date
- Apr 2001
- Location
- Perth
- Posts
- 10,828
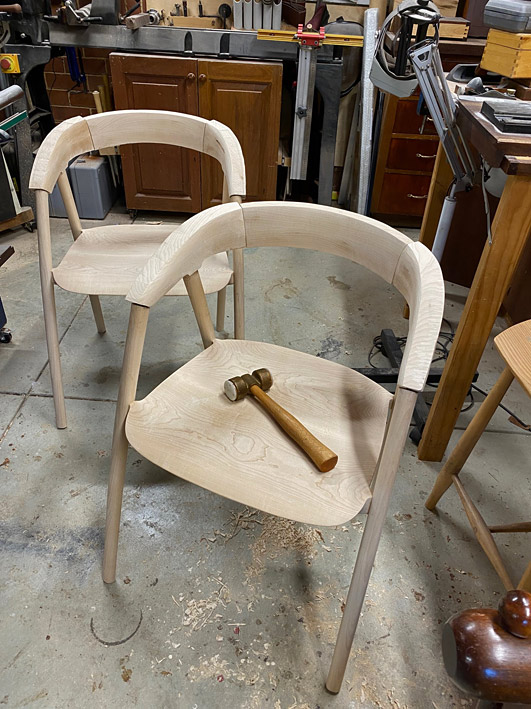
The Arms (part 2)
This is a last post before I return from three weeks being dragged over New Zealand mountains by my wife and her family. I used the Easter Weekend to get as much done as possible, but I needed a few more days. So there is more to come, later.
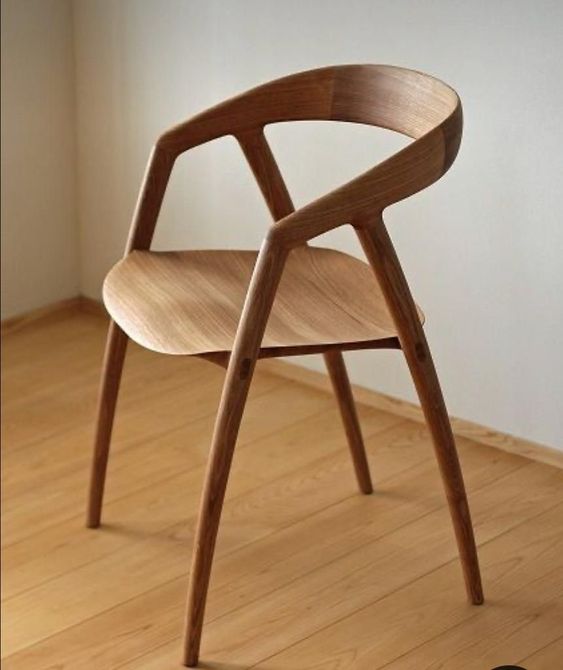
It is helpful to remember what the aim is - as close a copy of the DC 09 chair as possible. All guidance from photos ...
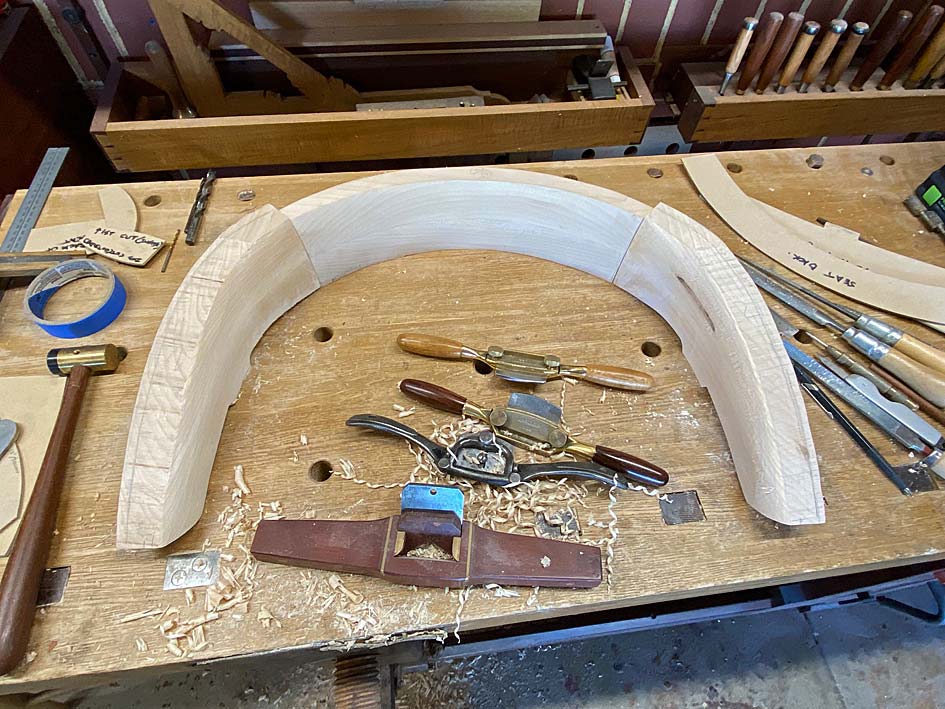
We left off here ...
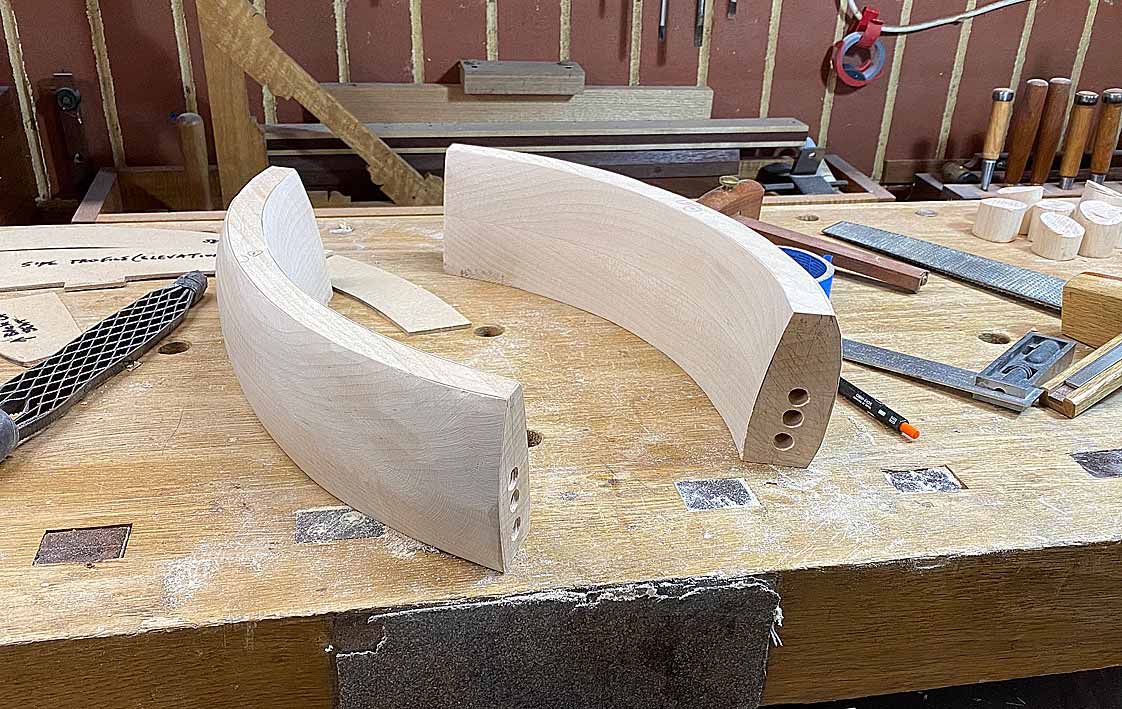
The three parts that make up the arms and top rail ..

The top rails were shaped ...
And shaping started on the arms ...
Today the arms were begun.
I find it easier to do one part as far as I can take it, then stop and repeat this with another part. When all four arms have progressed the same distance, I start with the first arm again and take it to the next stage. Then the other three to match. And so on.
Each stage completed must be checked, and this is done by putting the parts together, to check that they balance. The two sides must remain a mirror image, and the two chairs must be identical. There are no templates to mark the lines to work towards, only the rough layout lines that appear fair to the eye.
The arms are shaped with rasps and spokeshaves ... mainly coarse rasps - the Shinto and a 10 grain Auriou - followed with round- and flat bottom spokeshaves. Starting with the inside faces ...

Inside faces mostly done ...
Inside faces almost done, except for the undersides ...
Further along - top inside and outside faces mostly done ...

And that's it for now. More later. Thanks for keeping me company through this build.
Regards from Perth
DerekVisit www.inthewoodshop.com for tutorials on constructing handtools, handtool reviews, and my trials and tribulations with furniture builds.
-
2nd April 2024, 08:25 AM #52
Butcher of wood
- Join Date
- Jun 2010
- Location
- Bundaberg
- Age
- 54
- Posts
- 3,430
Just think of it as physio for your knee and enjoy the scenery!
I�m looking forward to see the process of fairing in the joints between the arms and legs; although I�ve seen many examples of the finished joint I don�t think I�ve seen the construction steps.Nothing succeeds like a budgie without a beak.
-
2nd April 2024, 11:19 AM #53
Be inspired. Be creative. Be bold.
- Join Date
- Apr 2001
- Location
- Perth
- Posts
- 10,828
Chief, this is what was the state of the Hans Wegner chair intersection, and what I expect is the case now ..
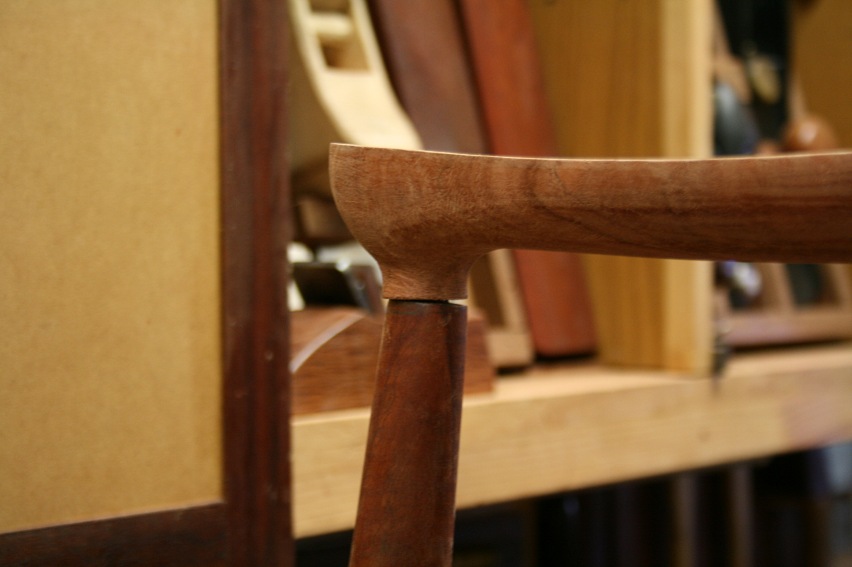
And what I expect to have to do here as well ..

Sawing inside the join (mindful that there is a tenon in there!), opening it up, and creating a kerf that becomes progressively parallel to both surfaces.
Regards from Perth
DerekVisit www.inthewoodshop.com for tutorials on constructing handtools, handtool reviews, and my trials and tribulations with furniture builds.
-
7th April 2024, 08:47 AM #54
Be inspired. Be creative. Be bold.
- Join Date
- Apr 2001
- Location
- Perth
- Posts
- 10,828
Comment on the grain direction
One point I have not drawn attention to, but was important for me, is the grain direction throughout this build.
If you look at the arms and legs, the grain has all been oriented so that the blanks are quarter sawn. For example, the arms will show the long side grain when looking at them fron the side, as will the legs. The figured sides face the top, are carved away, and therefore the figure is minimised. The aim is to present a clear, uncluttered grain, and this should emphasise the shape/silhouette. This was not possible with the seat, and the figure was positioned as best as possible.
Regards from Perth
DerekVisit www.inthewoodshop.com for tutorials on constructing handtools, handtool reviews, and my trials and tribulations with furniture builds.
-
7th April 2024, 09:19 PM #55
Butcher of wood
- Join Date
- Jun 2010
- Location
- Bundaberg
- Age
- 54
- Posts
- 3,430
Interesting; I�m building a couple of bar stools out of silky oak and while the seat and upper stretchers are quarter sawn to show off the figure I purposely selected rift-sawn sections for the legs and lower stretchers for a similar reason. The grain on the legs will be seen on two sides at a time so having one side face grained and the other one side grain will just look odd; as rift sawn blanks tend to look the same on all four sides I thought that would look better overall.
Nothing succeeds like a budgie without a beak.
-
24th April 2024, 01:17 PM #56
GOLD MEMBER
- Join Date
- Apr 2006
- Location
- Hobart
- Posts
- 5,132
A Little Aside before Derek Returns
Derek is due back from New Zealand very soon now.
One of my favourite designer/makers is David Haig who, coincidentally lives and works just outside Nelson, New Zealand.
He has just published an article in Australian Wood Review which discusses his approach to some of the problems Derek has been wrestling with in the build of his dining chairs.
Joining curves':' David Haig'''s method - Australian Wood Review
Photo - David Haig and AWR
-
24th April 2024, 10:49 PM #57
Be inspired. Be creative. Be bold.
- Join Date
- Apr 2001
- Location
- Perth
- Posts
- 10,828
Thanks Graeme. I shall have a read.
Back home!
Regards from Perth
DerekVisit www.inthewoodshop.com for tutorials on constructing handtools, handtool reviews, and my trials and tribulations with furniture builds.


 Reply With Quote
Similar Threads
-
Building dining room carver chairs
By derekcohen in forum FURNITURE, JOINERY, CABINETMAKING - formerly BIG STUFFReplies: 37Last Post: 25th January 2024, 10:01 PM -
Dining room chairs
By Template Tom in forum ROUTING FORUMReplies: 0Last Post: 18th May 2016, 06:15 PM -
dining room chairs
By Gaza in forum WOODWORK - GENERALReplies: 1Last Post: 23rd December 2007, 08:13 PM -
Dining Room Chairs
By dreinoga in forum DESIGNS & PLANS FOR PROJECTSReplies: 3Last Post: 13th November 2004, 09:28 PM -
Books on making dining-room chairs
By willy_punter in forum WOODWORK - GENERALReplies: 4Last Post: 8th June 2004, 05:21 PM
