

 Thanks: 0
 Likes: 0
 Needs Pictures: 0
 Picture(s) thanks: 0
Results 1 to 15 of 18
Thread: Entertainment cupboard, WIP
-
1st September 2009, 08:01 PM #1
 GOLD MEMBER


- Join Date
- Aug 2007
- Location
- St Georges Basin
- Posts
- 1,017
 Entertainment cupboard, WIP
It's SWMBO's birthday in three weeks, and rather than buy her some rubbish, I thought I would make her a little cupboard to put the TV on and the various associated machines in. She has been agitating for this for some years so it is probably fairly timely. I'll do this as a WIP over the three weeks so you can see what I'm up to.
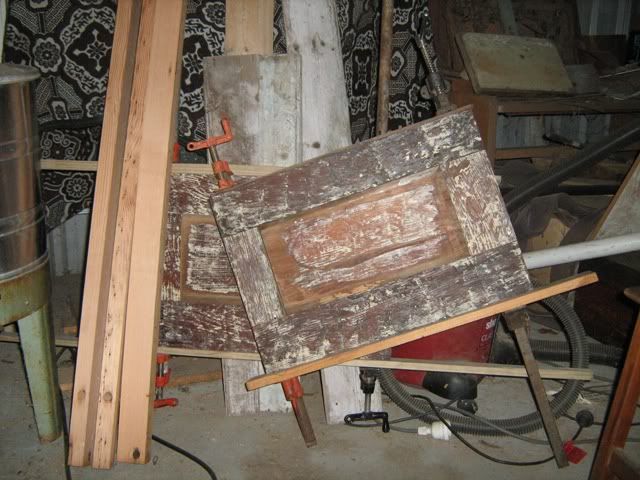
First, here's the basis for the doors.
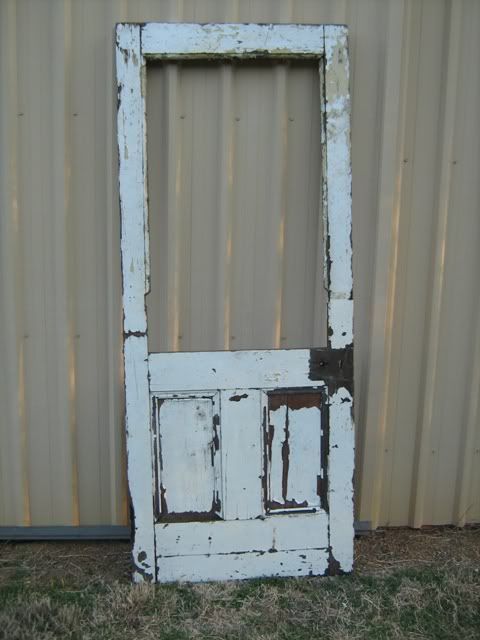
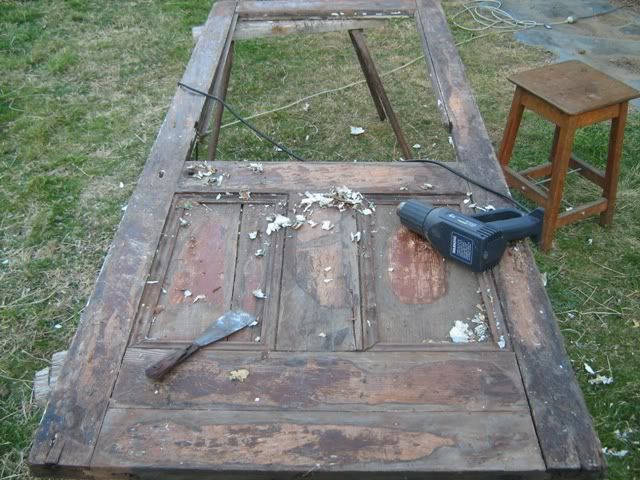
This old door came from the tip some years ago and finally deserves to be put to a better use. The first step is to get rid of the old paint with a heat gun.
-
1st September 2009 08:01 PM # ADSGoogle Adsense Advertisement
- Join Date
- Always
- Location
- Advertising world
- Posts
- Many
-
3rd September 2009, 04:38 AM #2
Skwair2rownd
- Join Date
- Nov 2007
- Location
- Dundowran Beach
- Age
- 76
- Posts
- 19,922

Bugger of a job, paint stripping. Looks like some decent timber under however many coat of paint.
-
3rd September 2009, 07:09 AM #3
GOLD MEMBER
- Join Date
- Aug 2007
- Location
- St Georges Basin
- Posts
- 1,017
Yes Artme,. it will be nice timber!
I got a bit of a surprise when the old paint was off and I started removing the mouldings from around the panels. The construction was considerably simpler than I had expected.
The panels and muntin are usually held in grooves in the stiles and rails, but no grooves or joints here! Everything was just butted up and nailed in place. There were some very thin tenons on the rails which don't inspire me very much.
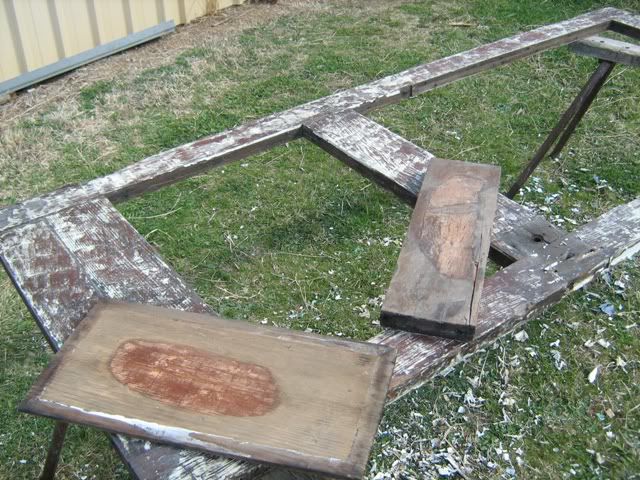
My usual approach with these old doors is to continue putting them back together with M & T joints to match the originals, but in this case I think I will go for dowel joints for the rails and stiles and then run some grooves internally for the panels to float in. That will speed up the process and also give me some leftovers to use in the top or bottom frames.
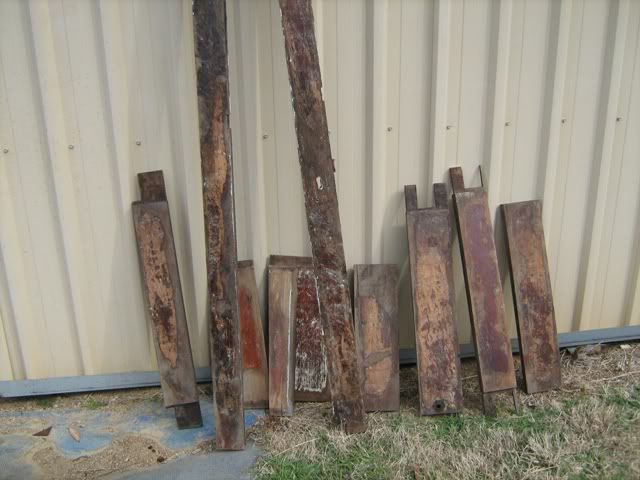
Lets see what I can do with these bits!
-
3rd September 2009, 09:56 AM #4
GOLD MEMBER
- Join Date
- Jul 2004
- Location
- Laurieton
- Posts
- 2,251
Watching, watching .....
Bob
"If a man is after money, he's money mad; if he keeps it, he's a capitalist; if he spends it, he's a playboy; if he doesn't get it, he's a never-do-well; if he doesn't try to get it, he lacks ambition. If he gets it without working for it; he's a parasite; and if he accumulates it after a life time of hard work, people call him a fool who never got anything out of life."
- Vic Oliver
-
3rd September 2009, 10:02 AM #5
GOLD MEMBER
- Join Date
- Nov 2003
- Location
- Sydney
- Age
- 53
- Posts
- 8,879
-
4th September 2009, 07:48 AM #6
GOLD MEMBER
- Join Date
- Aug 2007
- Location
- St Georges Basin
- Posts
- 1,017
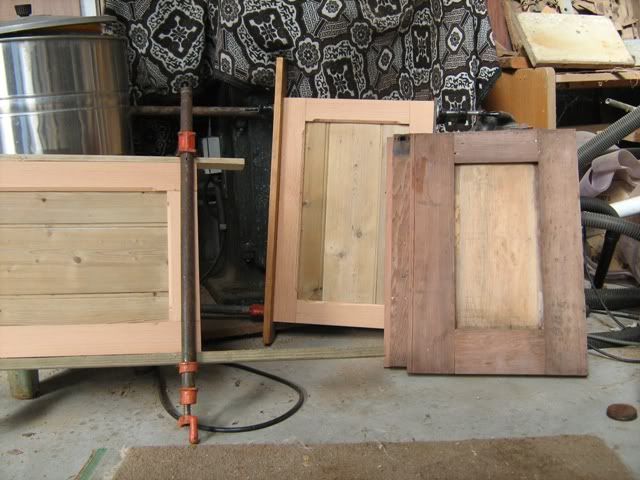
Here are the new doors glued up. The stiles are the rails from the original door and the new rails are made from the muntin (on the bottom) and part of one of the original stiles (on the top). I had to reduce the size of the panels slightly but that is still within limits of what I want. There is still one original stile left and the best part of the other. They will come into play later.
Also in the pic are some pieces of Oregon that have gone through the planer. I will use them to make the frames for the sides of the cupboard. These were reclaimed from the tip too. They were from one of those old bed bases, you can see where I have filled some of the bolt holes and also where the wire spring was nailed onto it. With careful management I should be able to hide all that on the finished unit. The wood they used in those old beds was lovely stuff, you can't get it like that these days!
There are also a couple of preloved Baltic lining boards there which will form the panels in the sides. I will hit them with some caustic today.
-
5th September 2009, 12:17 PM #7
GOLD MEMBER
- Join Date
- Aug 2007
- Location
- St Georges Basin
- Posts
- 1,017
Sides glued up and some serious stripping of the doors. A touch of oxalic acid is required on the doors to address the old iron stains, then I'll put the mouldings back on.
-
5th September 2009, 06:59 PM #8
SENIOR MEMBER
- Join Date
- Feb 2007
- Location
- Adelaide
- Posts
- 595
Thanks for these WIPs, the nearest thing I can think of to express my admiration is the story where the magician waves his wand and the frog becomes a prince.
-
5th September 2009, 09:47 PM #9
Skwair2rownd
- Join Date
- Nov 2007
- Location
- Dundowran Beach
- Age
- 76
- Posts
- 19,922
I like what I see so far.

-
6th September 2009, 06:45 AM #10
GOLD MEMBER
- Join Date
- Aug 2007
- Location
- St Georges Basin
- Posts
- 1,017
Here's what's happening with the stiles off the original door.
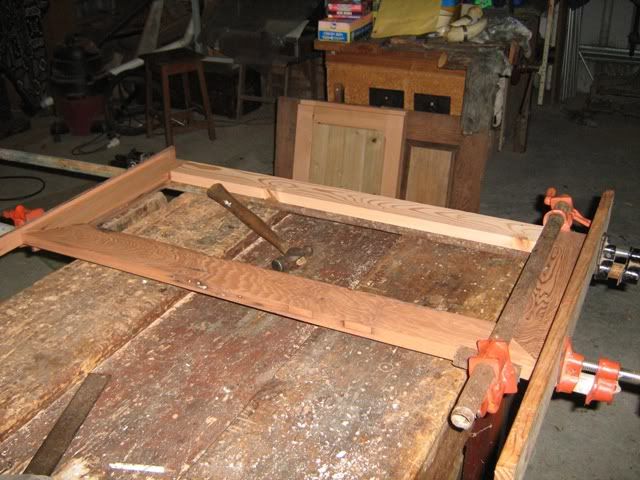
I have filled the old mortice holes and then planed and thicknessed them. This frame here will be the basis of the top of the cupboard. I'll do the bottom frame today and look around for some material for the feet. I'll also be looking for some printers pallets for material to do the floor and back.
-
7th September 2009, 04:11 PM #11
GOLD MEMBER
- Join Date
- Aug 2007
- Location
- St Georges Basin
- Posts
- 1,017
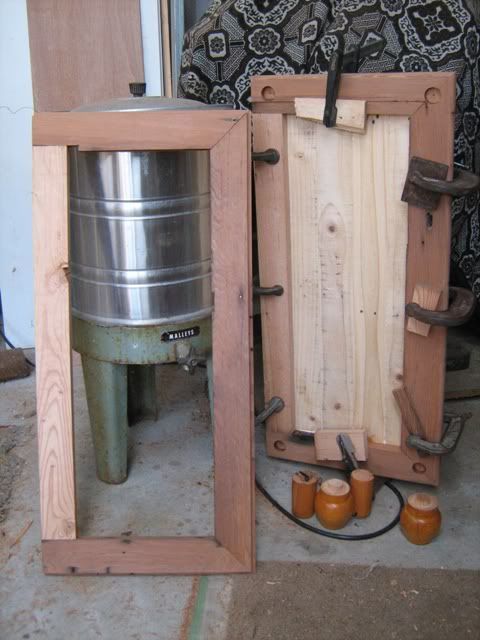
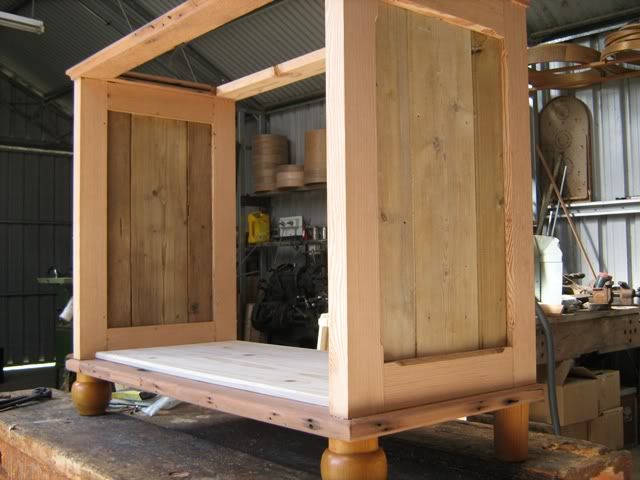
I managed to find one good pallet to provide some material for the floor. Here it is after planing and t&g'ing, being glued onto the base frame. I found some more oregon and turned up these feet. They will fit into those sockets drilled into the base. The top is finished and when all is dry I can begin assembly.
-
7th September 2009, 11:48 PM #12
Skwair2rownd
- Join Date
- Nov 2007
- Location
- Dundowran Beach
- Age
- 76
- Posts
- 19,922
Coming along nicely.Timber looks like Oregon or Wester Red Cedar.
-
8th September 2009, 03:34 PM #13
GOLD MEMBER
- Join Date
- Aug 2007
- Location
- St Georges Basin
- Posts
- 1,017
The carcase is assembled with screws, down through the top frame into the sides and also up through the bottom frame and the legs into the sides.
And at last, doors hung, a top screwed on and a couple of coats of shellac.
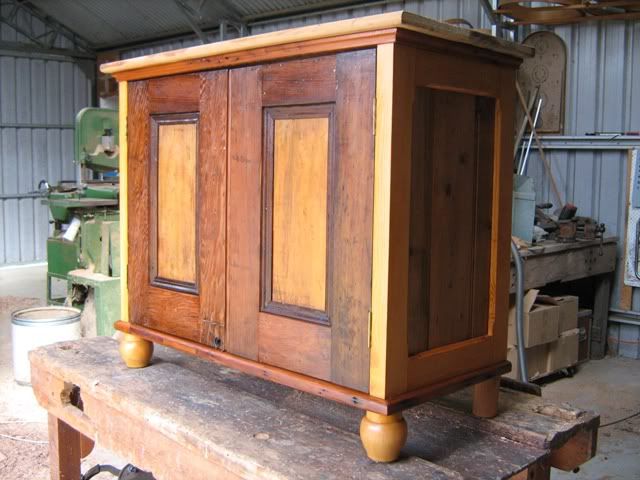
Apart from a couple of little finishing touches, thats it. Thanks for your forebearance, I'll get out of your way now.
-
8th September 2009, 04:08 PM #14
GOLD MEMBER
- Join Date
- Jul 2004
- Location
- Laurieton
- Posts
- 2,251
Interesting project. Good to see reclaimed timber being put to use.
 Bob
Bob
"If a man is after money, he's money mad; if he keeps it, he's a capitalist; if he spends it, he's a playboy; if he doesn't get it, he's a never-do-well; if he doesn't try to get it, he lacks ambition. If he gets it without working for it; he's a parasite; and if he accumulates it after a life time of hard work, people call him a fool who never got anything out of life."
- Vic Oliver
-
8th September 2009, 04:19 PM #15
GOLD MEMBER
- Join Date
- Nov 2003
- Location
- Sydney
- Age
- 53
- Posts
- 8,879


 Reply With Quote
Similar Threads
-
Entertainment Cabinet
By koala_1977 in forum FURNITURE, JOINERY, CABINETMAKING - formerly BIG STUFFReplies: 5Last Post: 20th January 2009, 11:00 AM -
Entertainment Unit
By Dr DBW in forum WOODWORK PICSReplies: 8Last Post: 22nd December 2008, 08:00 PM -
Entertainment unit
By Chaps in forum WOODWORK PICSReplies: 9Last Post: 18th February 2006, 01:49 AM -
Low Entertainment Unit
By Redback in forum WOODWORK PICSReplies: 9Last Post: 5th August 2005, 10:58 PM -
My entertainment unit
By MrFixIt in forum WOODWORK PICSReplies: 14Last Post: 12th April 2005, 10:02 PM
