

 Thanks:
  Likes:
  Needs Pictures: 0
 Picture(s) thanks:
Results 31 to 45 of 88
Thread: Entry hall table for a niece
-
26th January 2020, 05:40 PM #31
 Senior Member


- Join Date
- Sep 2018
- Location
- Tasmania
- Age
- 53
- Posts
- 186

Ah yes, I understand what you mean now. I can see the extra work but it's an elegant result (much more so than my hack!)
Regards Adam
-
26th January 2020 05:40 PM # ADSGoogle Adsense Advertisement
- Join Date
- Always
- Location
- Advertising world
- Age
- 2010
- Posts
- Many
-
26th January 2020, 06:53 PM #32
Butcher of wood
- Join Date
- Jun 2010
- Location
- Bundaberg
- Age
- 54
- Posts
- 3,427
Hi Derek, loving your latest WIP!
Have you considered adding a central drawer �runner� underneath each drawer? It would just require 3/8� x 2� (ish) strips attaching to the bottom part of the carcass and corresponding slips added to the drawer bottoms. The drawers would still be your standard piston fit into the carcass; the only thing the �runners� would do is to prevent lateral movement when opening or closing them.Nothing succeeds like a budgie without a beak.
-
28th January 2020, 02:37 AM #33
Be inspired. Be creative. Be bold.
- Join Date
- Apr 2001
- Location
- Perth
- Posts
- 10,820
Thanks chief - it's a very reasonable suggestion ... however, I really dislike mechanical fittings, even wooden ones. We'll see ... I spent a good bit of today ensuring that the internal area of the case was square, as this will affect the dividers being square .. and the space inside being parallel. And all that is important to make the drawers run true ... mmm ... your suggestion is sounding better all the time

Regards from Perth
DerekVisit www.inthewoodshop.com for tutorials on constructing handtools, handtool reviews, and my trials and tribulations with furniture builds.
-
2nd February 2020, 03:32 AM #34
Be inspired. Be creative. Be bold.
- Join Date
- Apr 2001
- Location
- Perth
- Posts
- 10,820
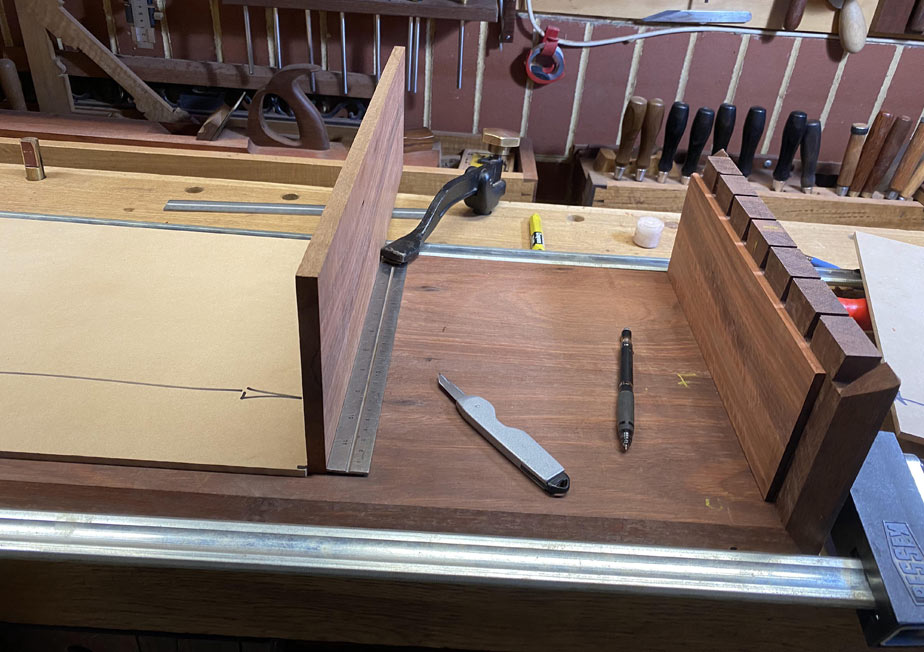
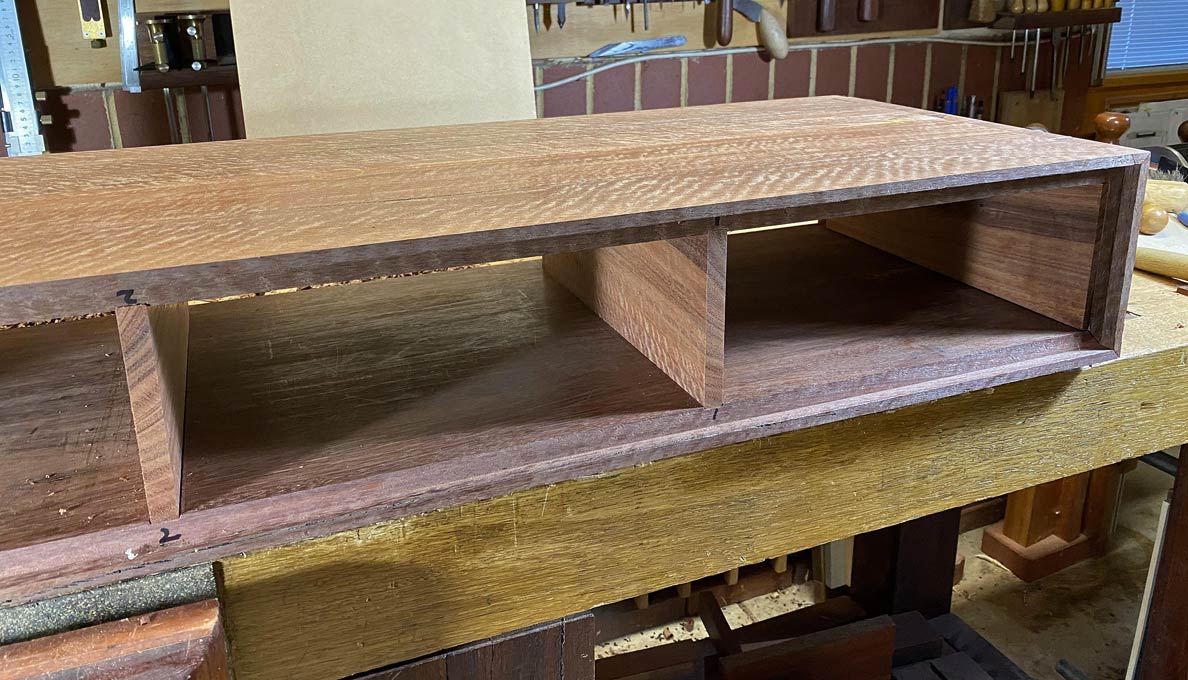
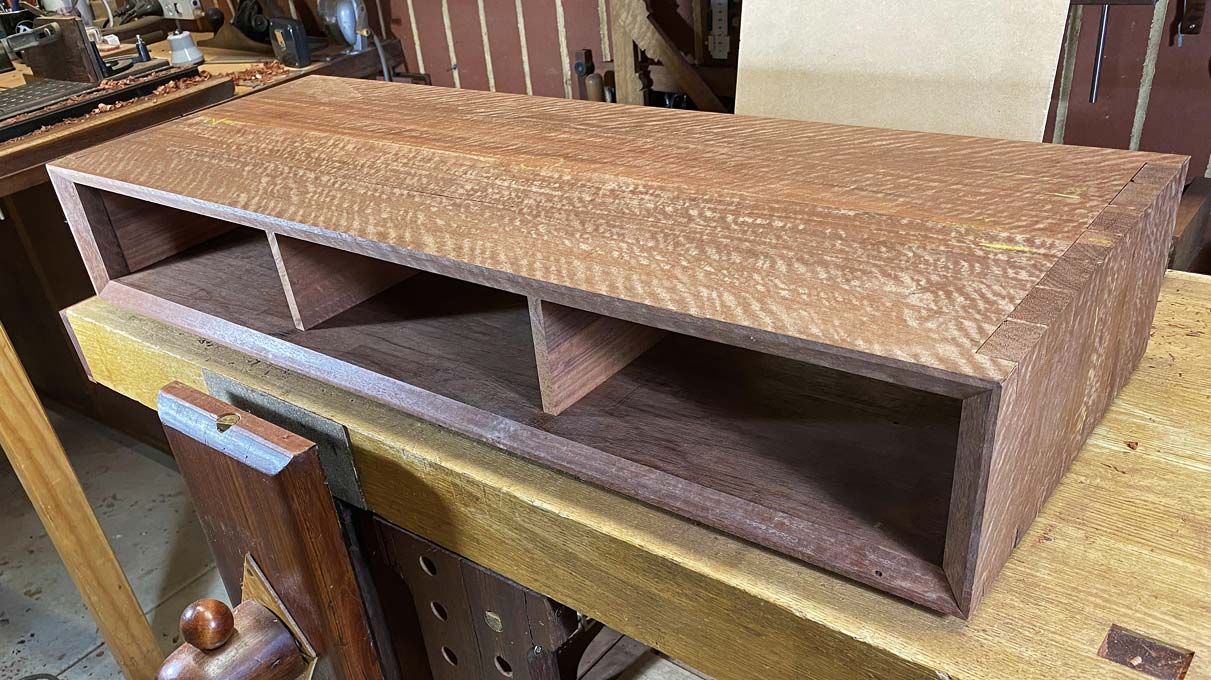
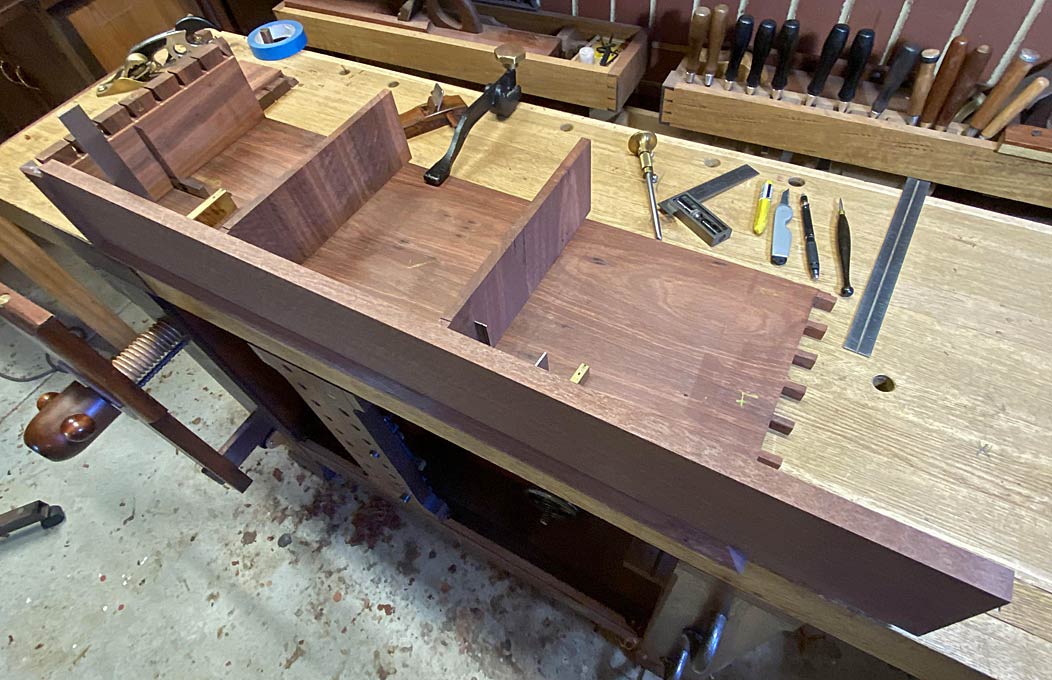
The basic case complete ...
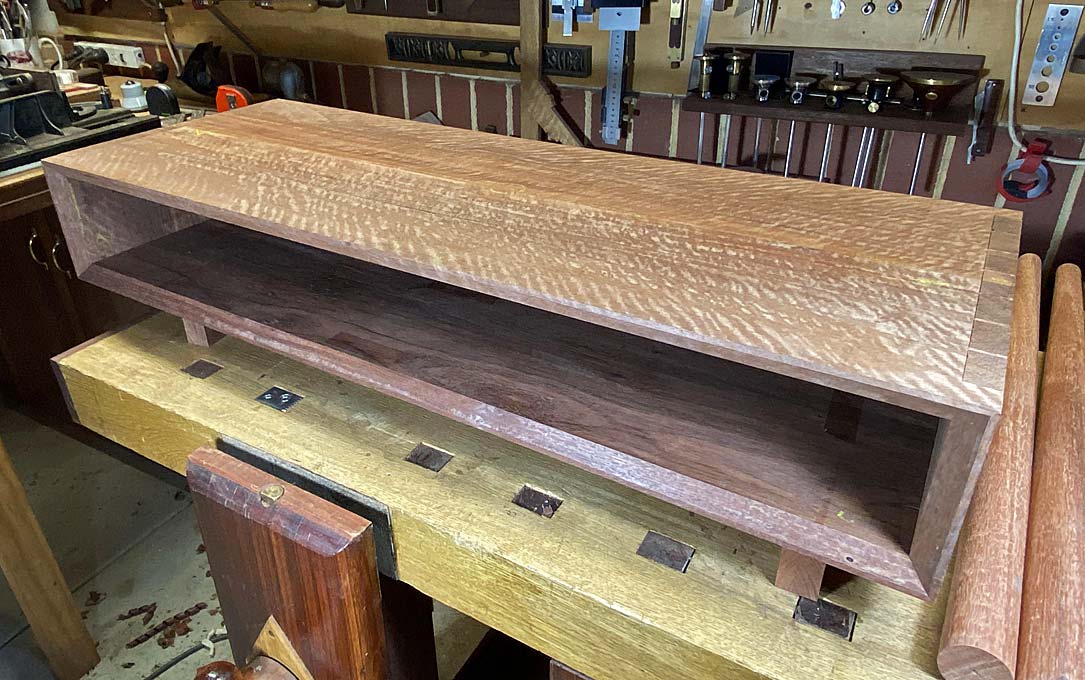
My niece's expressed wish is to have a table front looking as if it was faced by a single board. The original model for this project has two drawers. I did not see this working here since, as their width would be greater than their depth, two drawers would likely rack. Consequently, I decided to build three drawers of equal width (I considered a narrow drawer in the centre, but decided this would be too busy).
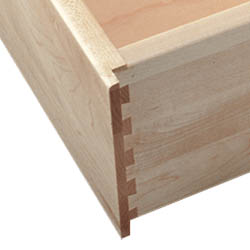
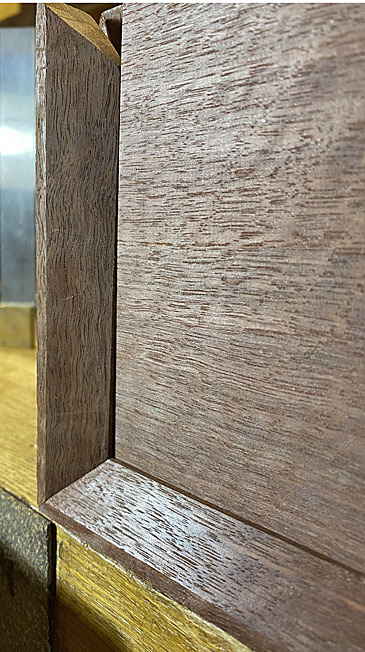
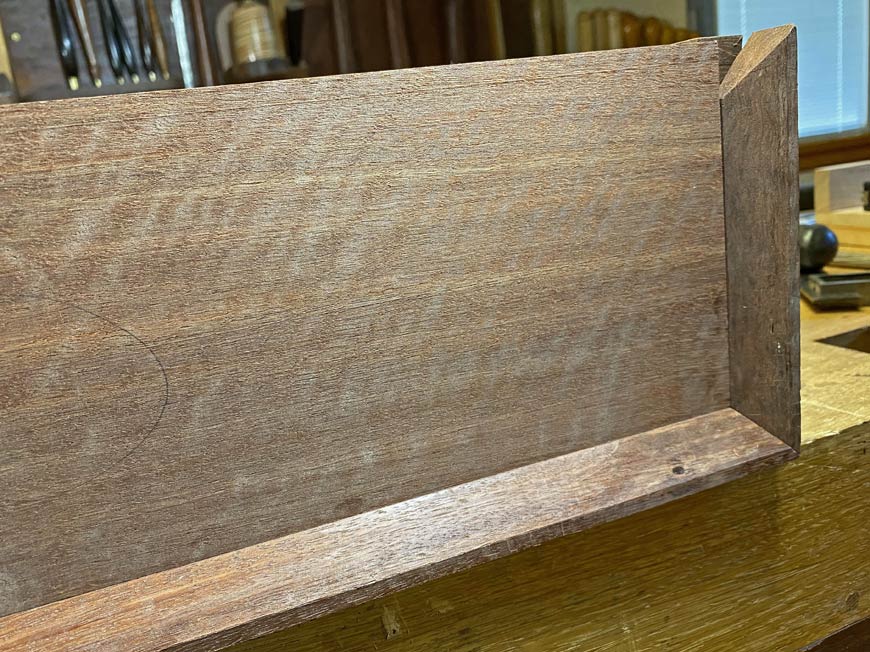
In order that the figure of the drawer fronts would not be interrupted by the drawer dividers, the drawers are to have half-blind dovetailed side lips, such as these ...
The drawers will each have a side lip of 6mm. This requires a 6mm wide side panel on each side of the case, and two 12mm wide drawer dividers. This will allow three drawers to run adjacent to one another, and the three fronts to be cut from a single board.
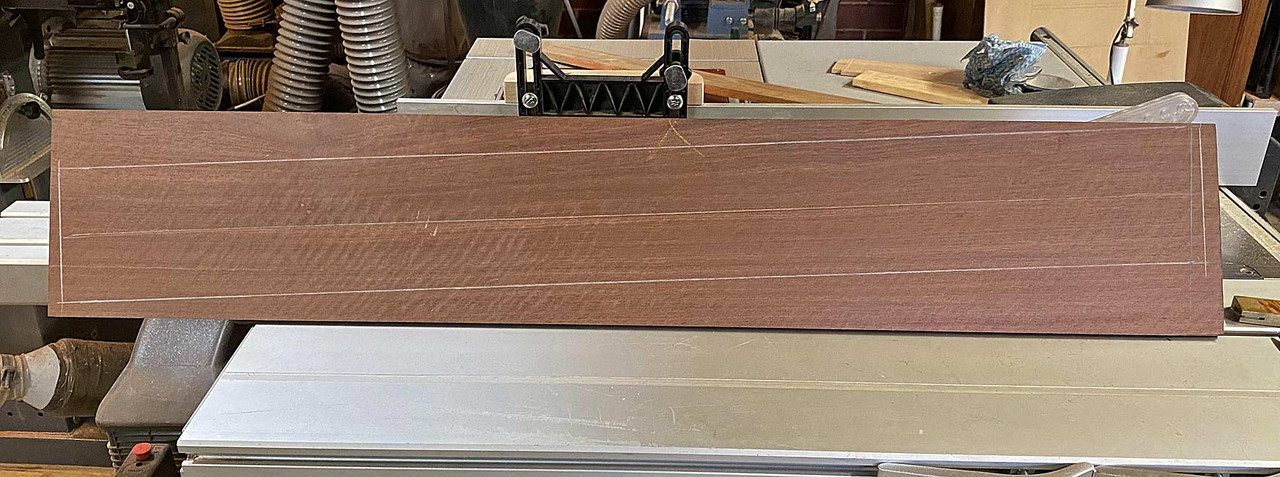
The drawer fronts will come from this board ...
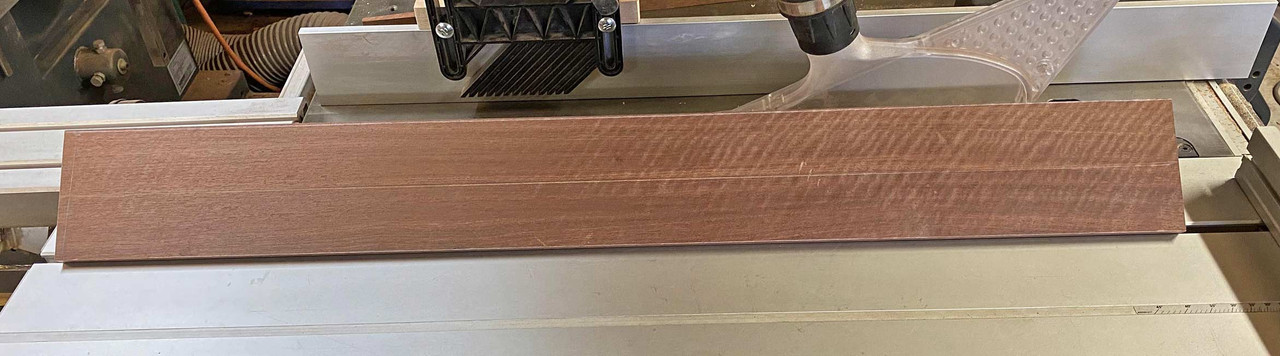
Below are the panels for fitting ...
It occurred to me later (of course!) that the 6mm end panels could have been made to run with the grain direction of the case. Being the same Jarrah, this would have counted for any expansion/contraction, and there would not be any danger of movement being intrusive. Too late. It's glued.
So I did the next best thing, and planed 2mm off the upper and lower edges. This will permit enough movement, if any (it is a small and thin panel). There will not be any gaps seen as the front edges will later receive edging, which will be used as a depth stop.
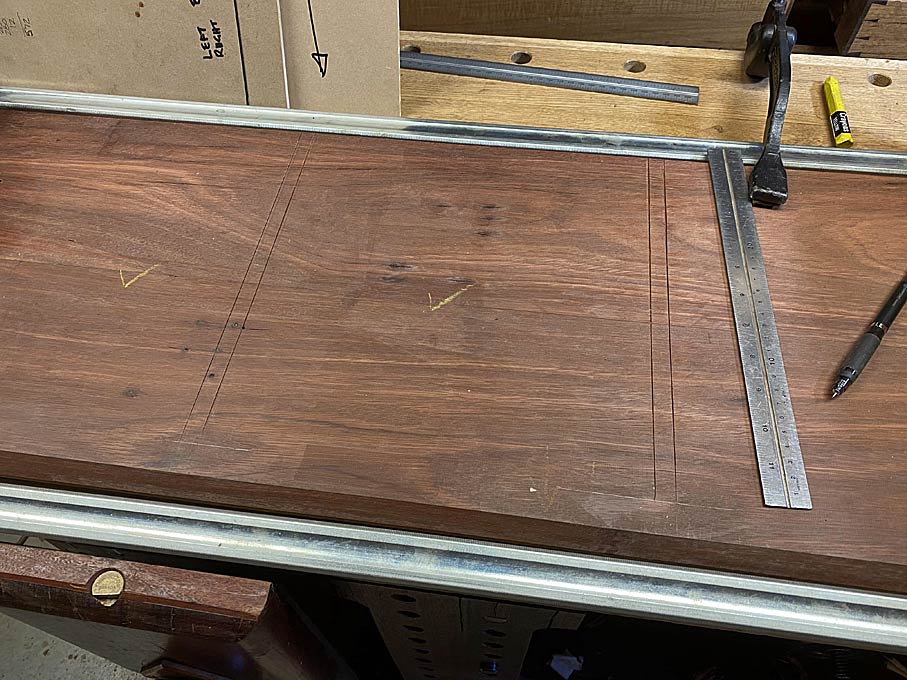
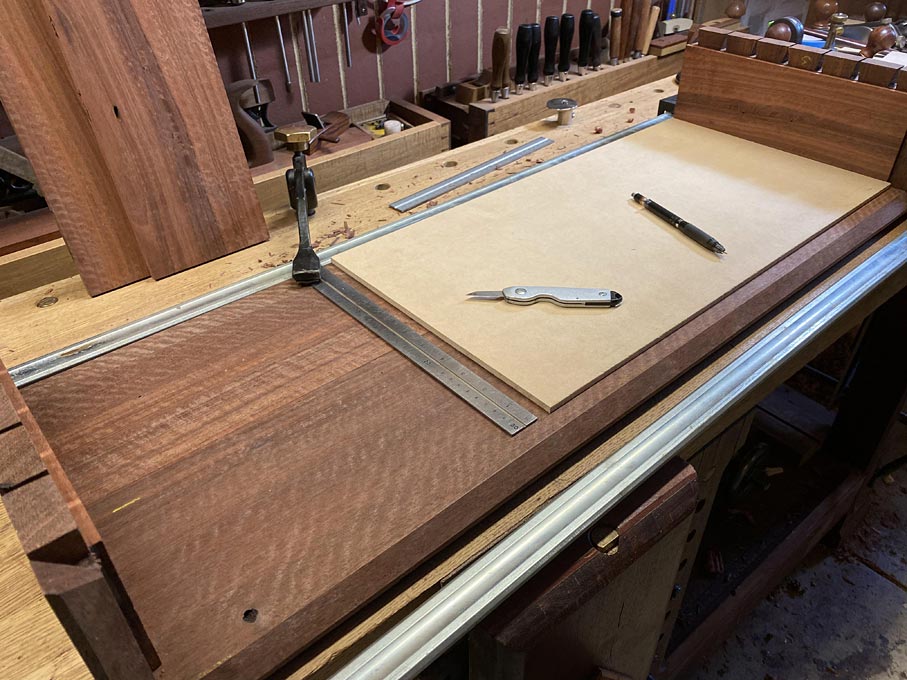
Frankly, the hardest part of this section of the project was accurate marking out of the two central drawer dividers. These need to be both perfectly parallel, and also aligned vertically (the lower panel with the upper panel).
There is a second area that needed to checked, which is important for drawers to work well, and this that the lower panel is flat - that is, does not have any hills. I learned my lesson the hard way about this. All good.
The way I go about marking the dados for the dividers is to make templates for their position. These are used on both the lower panel, as below, and then the upper panel ...
The process is self-explanatory ...

The dados are knifed deeply ...
Chisel walls cut ...
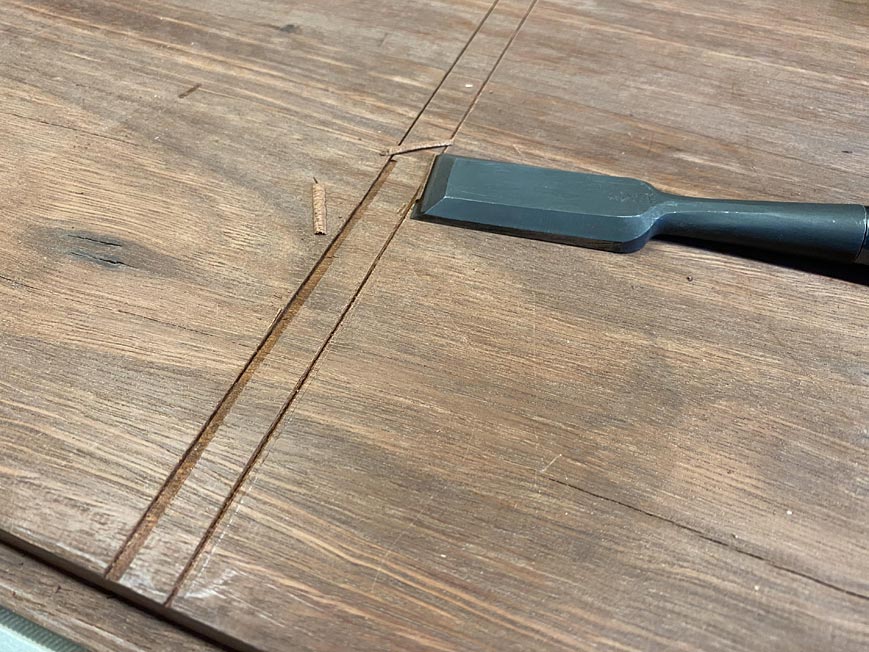
.. and then the waste is removed with a router plane ...
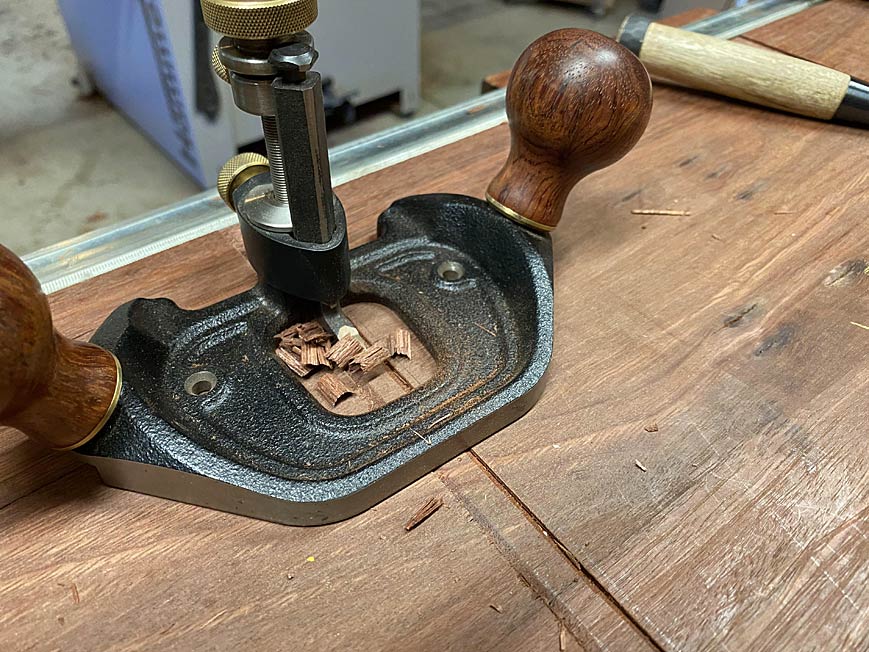

The dados are just 2mm deep. That is deep enough to prevent any movement. This process is quick and relaxing (compared to setting up and using a power router).
Once done, the process is repeated on the upper panel ...

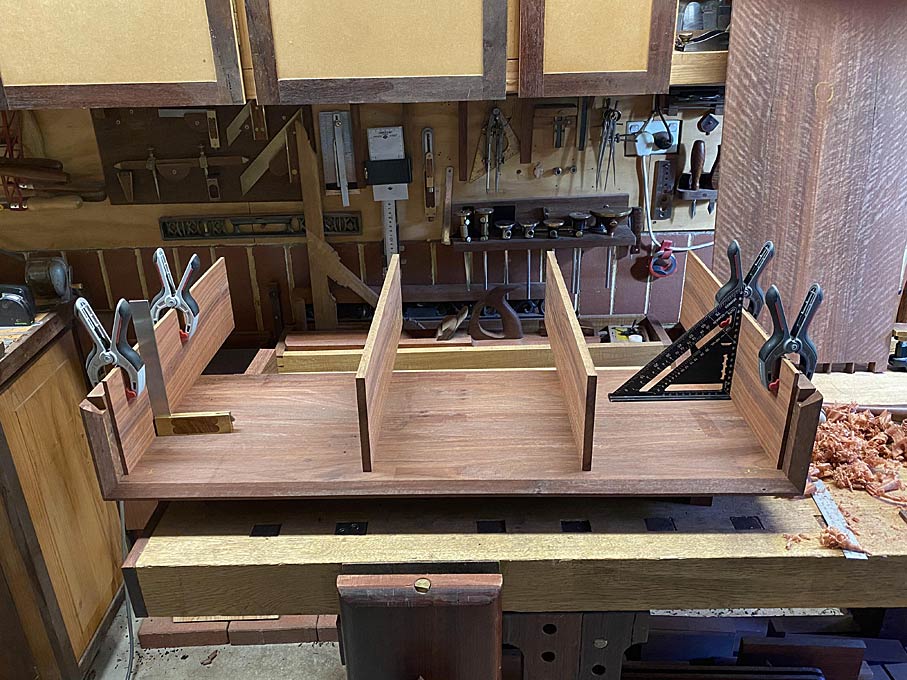
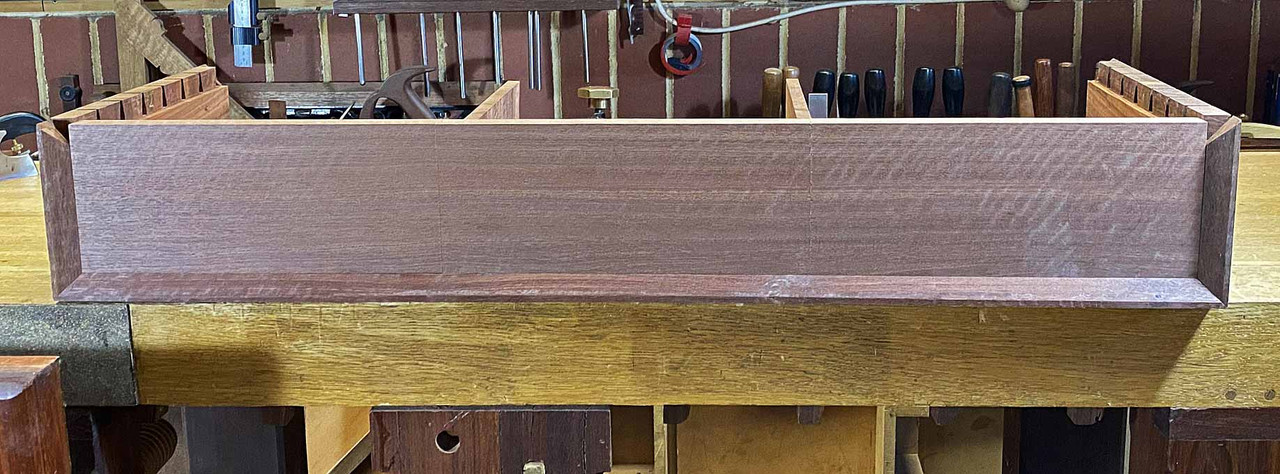
All ready for a dry fit. The rear of the case ...
... and the front ...
Happily, all is square ...

Tomorrow I shall glue it up.
Regards from Perth
DerekVisit www.inthewoodshop.com for tutorials on constructing handtools, handtool reviews, and my trials and tribulations with furniture builds.
-
2nd February 2020, 09:16 AM #35
SENIOR MEMBER
- Join Date
- Mar 2018
- Location
- Sydney
- Posts
- 469
Thanks for this masterclass Derek.
Is there any change in your method for half blind dovetails for the drawer fronts when you have the lip extending out?
Regards,
Taran
Sent from my SM-G973F using Tapatalk
-
2nd February 2020, 12:39 PM #36
Be inspired. Be creative. Be bold.
- Join Date
- Apr 2001
- Location
- Perth
- Posts
- 10,820
Taran, what do you mean by “lip extending out”?
These shall be the first side lips I have done. upper- or lower lips (see below) are quite straight forward as a rebate is not necessary.

Regards from Perth
DerekVisit www.inthewoodshop.com for tutorials on constructing handtools, handtool reviews, and my trials and tribulations with furniture builds.
-
2nd February 2020, 02:42 PM #37
SENIOR MEMBER
- Join Date
- Mar 2018
- Location
- Sydney
- Posts
- 469
Hi Derek, Originally Posted by derekcohen

Poor description on my part. I meant the side lip on the drawer front.
Regards,
Taran
Sent from my SM-G973F using Tapatalk
-
2nd February 2020, 02:47 PM #38
Be inspired. Be creative. Be bold.
- Join Date
- Apr 2001
- Location
- Perth
- Posts
- 10,820
Hi Taran
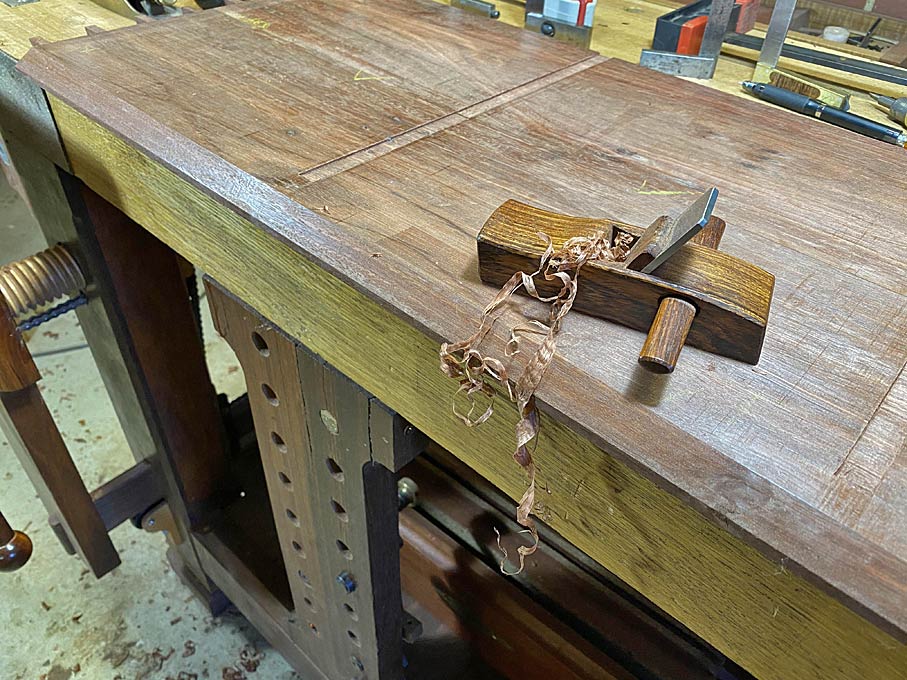
The side rebates will be made with a rebate plane, fine tuning (if needed) with a shoulder plane. Then mark out the pins from the tail board, butting against both front and sides of the rebate. Saw what I can, and chisel out the rest. Easy peasy
Regards from Perth
DerekVisit www.inthewoodshop.com for tutorials on constructing handtools, handtool reviews, and my trials and tribulations with furniture builds.
-
2nd February 2020, 02:51 PM #39
GOLD MEMBER
- Join Date
- May 2007
- Location
- Sth Gippsland Vic
- Posts
- 4,368
Originally Posted by derekcohen
Its a similar thing to Pedestal desk top construction Derek . Different a little in that they have a separate fitted top screwed on after .
Something like this could have been a good option .
IMG_3322.JPG
Rob
-
2nd February 2020, 10:35 PM #40
Be inspired. Be creative. Be bold.
- Join Date
- Apr 2001
- Location
- Perth
- Posts
- 10,820
Thanks for the reassurance, Rob. I really mean that - you will see more in the next post.
Regards from Perth
DerekVisit www.inthewoodshop.com for tutorials on constructing handtools, handtool reviews, and my trials and tribulations with furniture builds.
-
2nd February 2020, 10:38 PM #41
Be inspired. Be creative. Be bold.
- Join Date
- Apr 2001
- Location
- Perth
- Posts
- 10,820
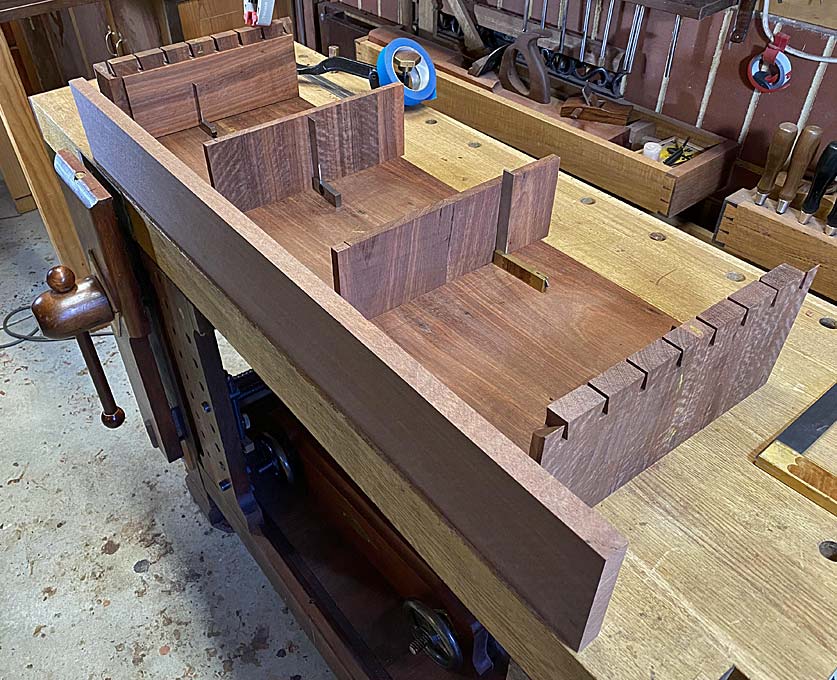
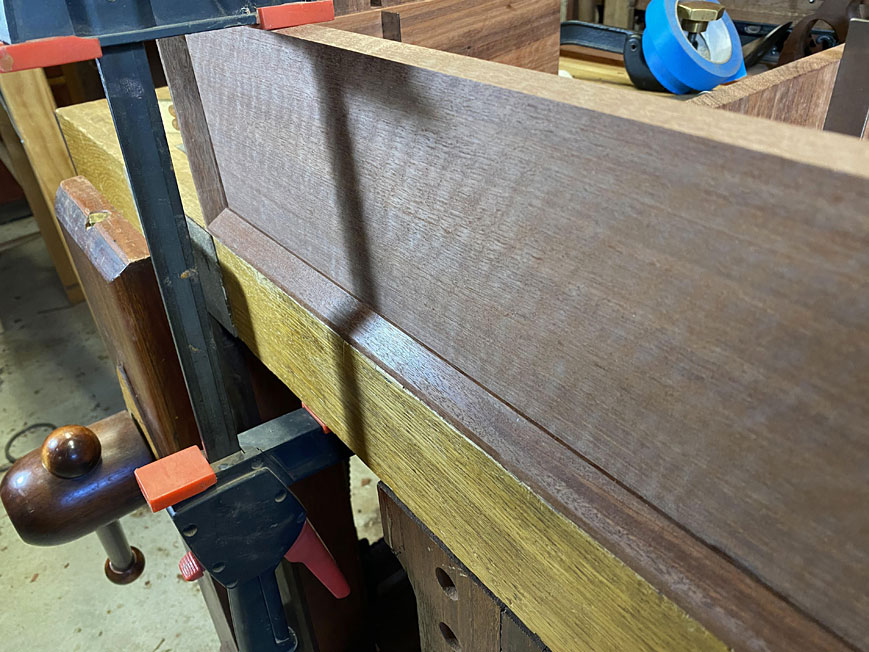
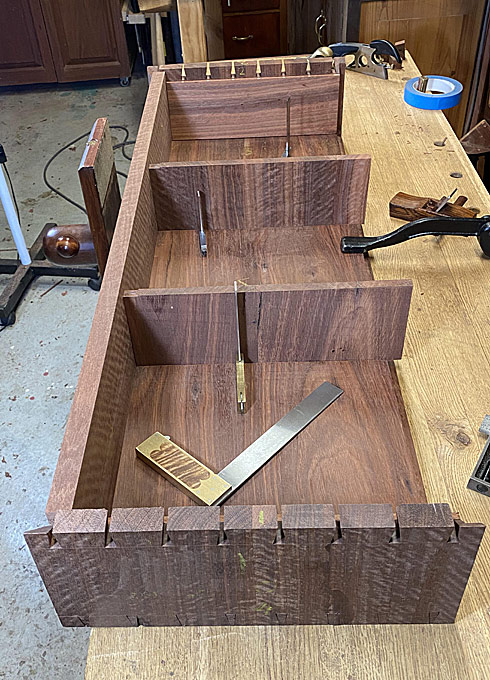
We ended the last session with the drawer dividers installed ...
Everything was nice and square, but the more I thought about what I had done, the unhappier I became. Such an elementary oversight. I cannot believe I did it, and also that no one pulled me up for it. What was it? Two items:
The first was that the grain for the drawer dividers runs the wrong way. Although the boards are as close to quarter grain as possible, which adds to stability, they will expand vertically. That could cause them to buckle, and then the drawers will not run nicely.
The second is that I could have built in a way to close up the drawer dividers against the back of the (to-be-built) side lipped drawer fronts ... this is to be used as a drawer stop ... at this stage it would be necessary to add a filler. Not good.
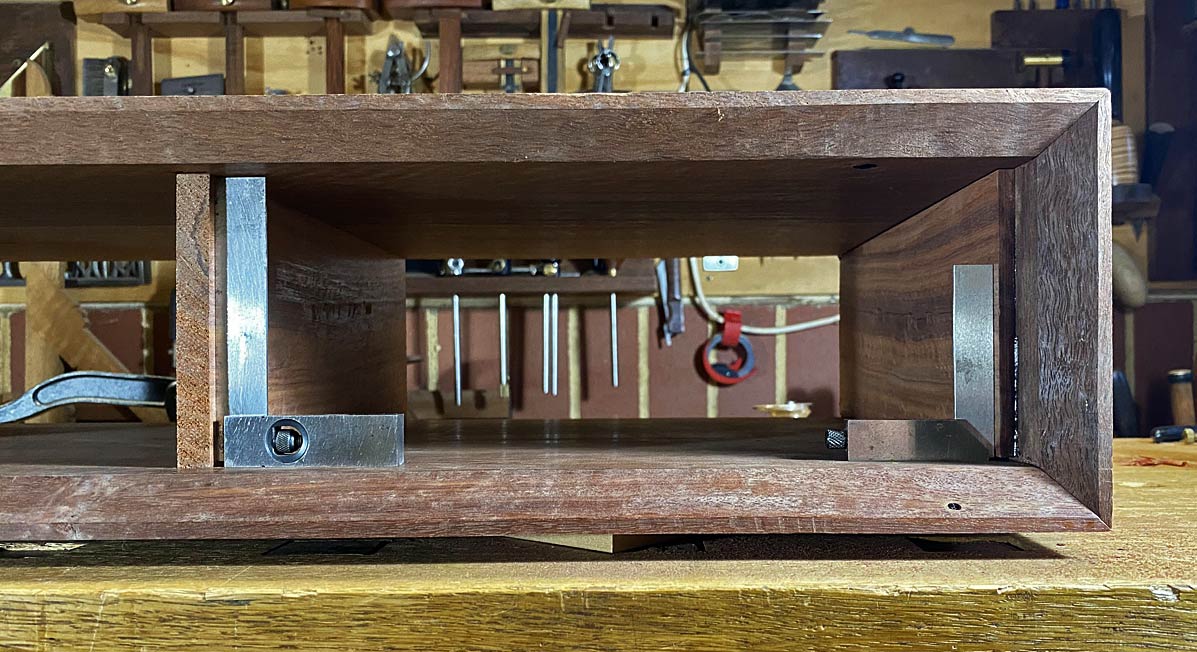
So I re-did the drawer dividers. Here is the rear of the case. The drawers are left long on purpose ...
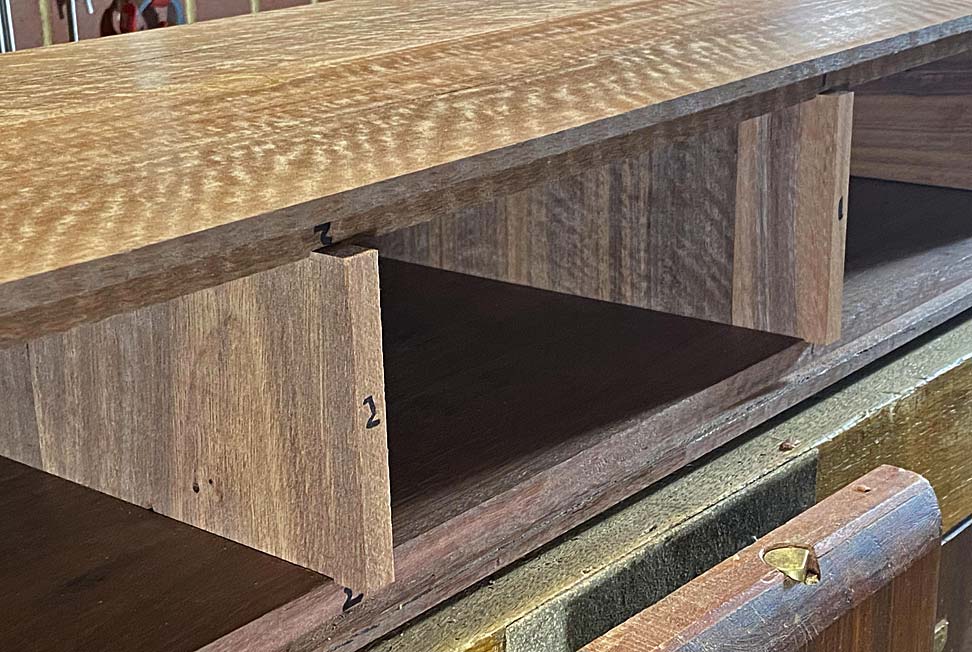
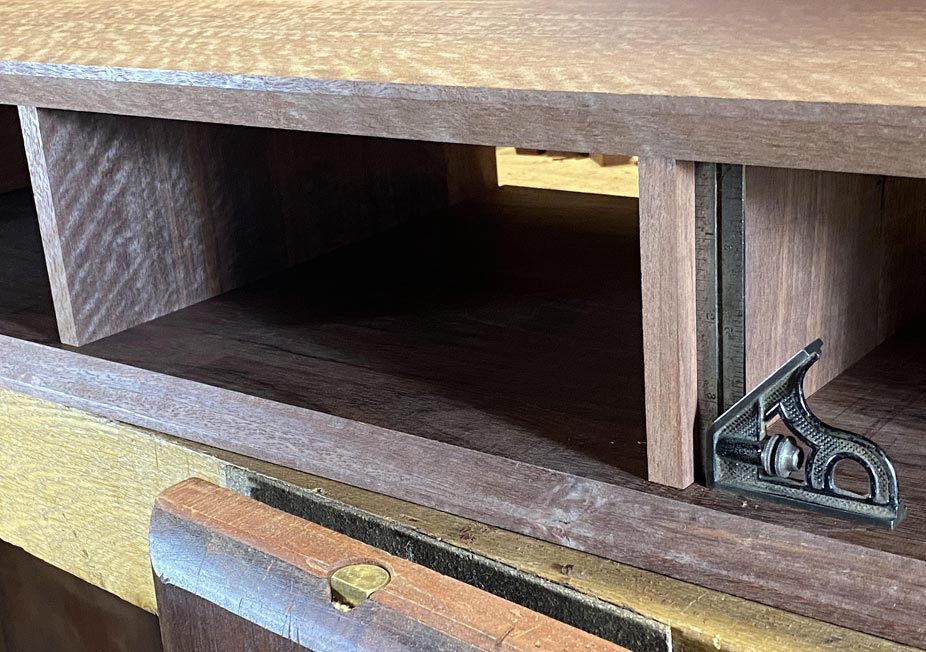
Provision is made for the dividers to be adjustable in length (to close up with the back of the drawer front). They are given rebates to slide further forward ... it will be necessary that they move around 15mm forward (to within 5-6mm of the opening).

The rebate is 2mm deep (the depth of the dados), and largely created with a cutting gauge. The blade slices away end grain, and the resulting splitting away makes it easy to chop the remainder.
Here are the dividers, further forward than before, and capable of moving a little more still ...

The plan was to glue up the case. However, before this is done, it is wise to fit the drawer fronts across the width (the height will be done at a later date).
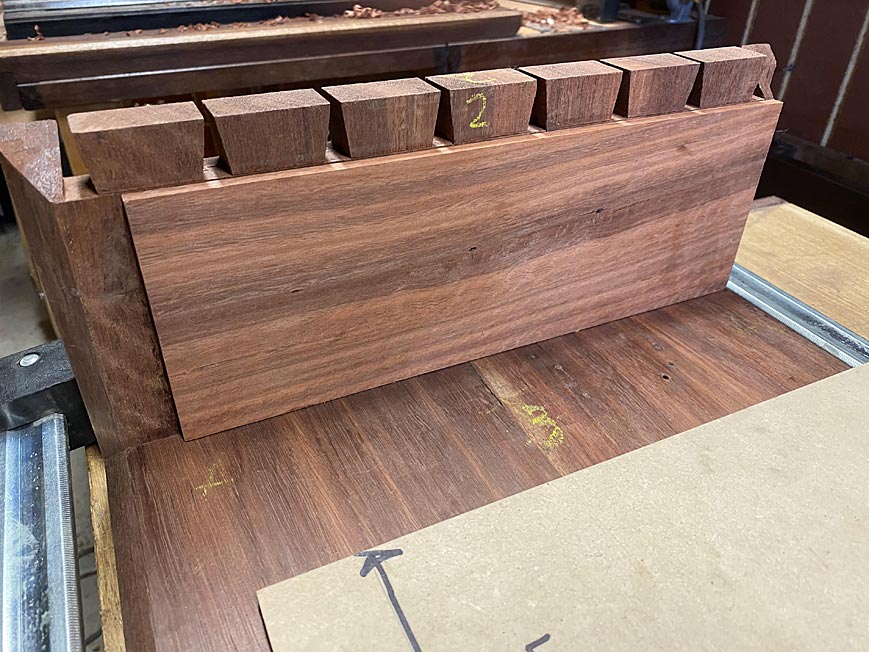
This is the board for the three drawers.
Removing one end, the board is set on the case ...
It is now apparent that the front of the bevel, where it meets the drawers, is not straight. It is possible to see a small amount of flat ...
This is especially noticeable in this corner ..
This is fairly easy to remedy ... mark with a pencil, and then plane away the pencil marks ...
Perfect now ...

The other end needs no more than a smidgeon removed ..
The upper side is now treated the same way. Interestingly, this needs no work at all.
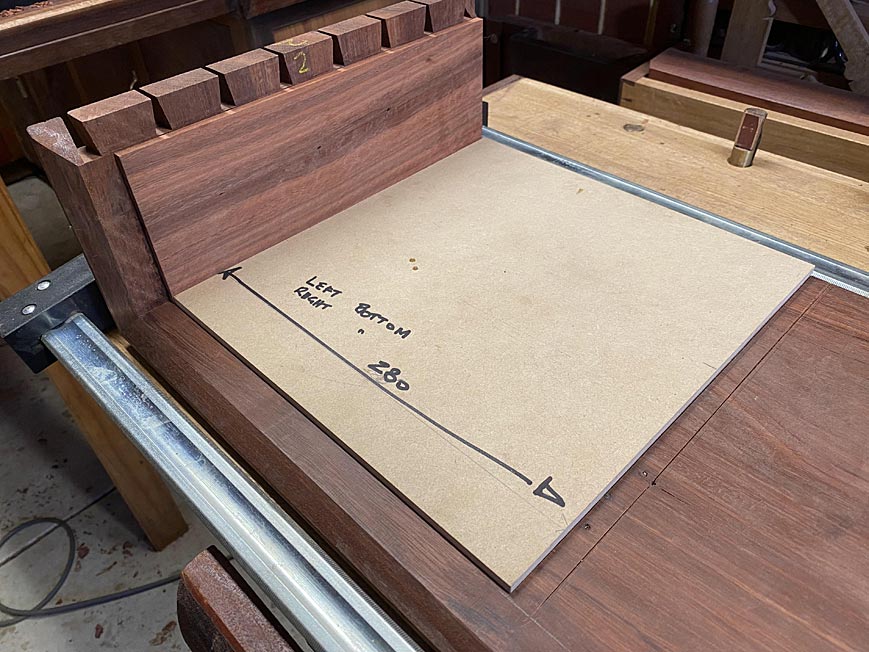
Time to saw the drawer fronts to size.
First step is to mark the middle point of each divider (since the lips will share the divider). The mark can be seen in the rebate ...

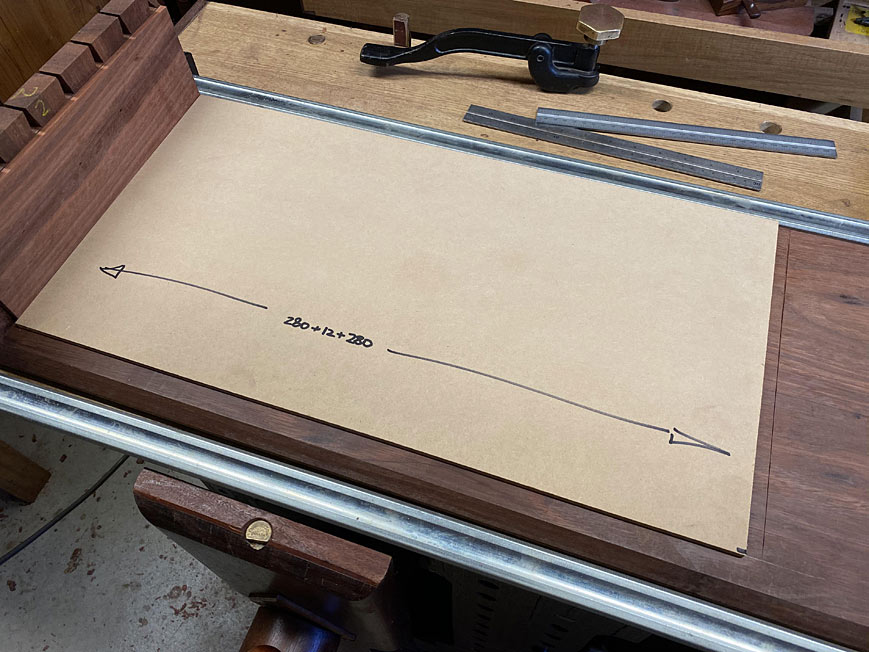
The drawer board across the front ...
Transfer the mark, and then saw the drawer front ...

This process is repeated. Here are the three sequential drawer fronts. You can just make out the breaks ...
I am happy with this.
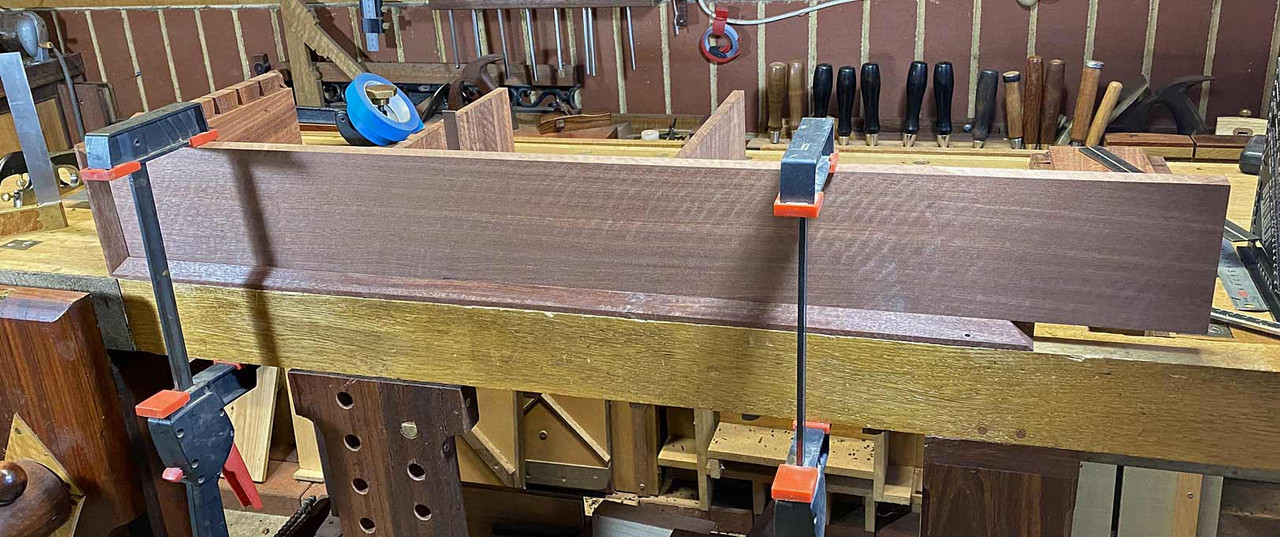
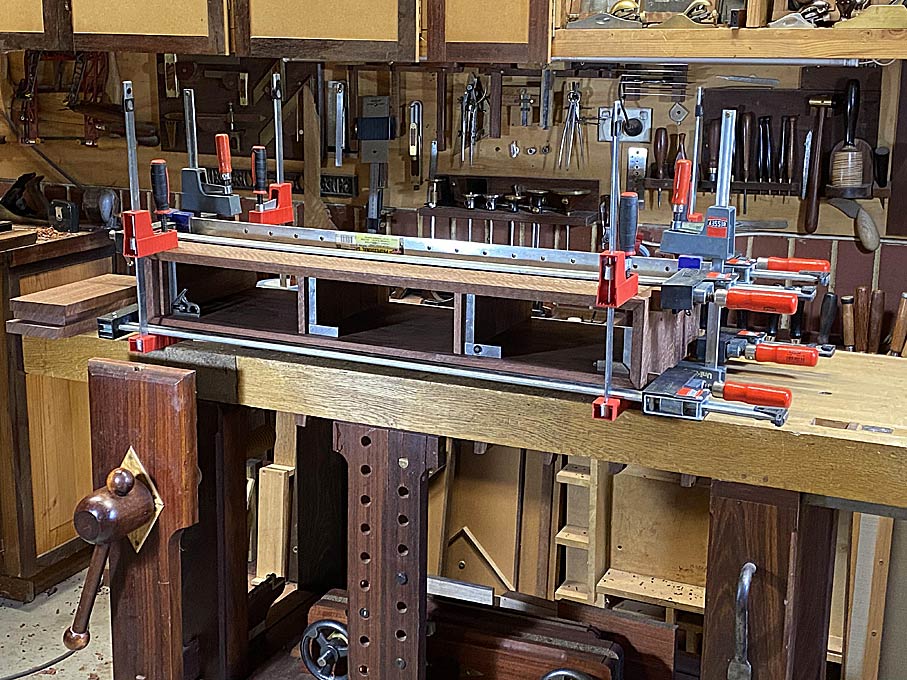
And so, finally, the case is glued up (Titebond Liquid Hide Glue - reversibility and long open time). Looking like a trussed up fowl ....
Regards from Perth
DerekVisit www.inthewoodshop.com for tutorials on constructing handtools, handtool reviews, and my trials and tribulations with furniture builds.
-
3rd February 2020, 02:18 AM #42
GOLD MEMBER
- Join Date
- May 2007
- Location
- Sth Gippsland Vic
- Posts
- 4,368
Good solution on the dividers Derek . Were they glued in as well ? Could be done loose or glued I suppose. I would glue . They would still move with the rest of carcase.
My suggestion on dividers would not have been as good . Its what you see in desk construction but the desk has ends the same usually. Sometimes veneered over. Matching to the ends is the go .
Rob
-
3rd February 2020, 03:34 AM #43
Be inspired. Be creative. Be bold.
- Join Date
- Apr 2001
- Location
- Perth
- Posts
- 10,820
Hi Rob
The two central dividers are still loose. They will be glued in (or, at least, the first 1/3 will be glued in, allowing movement towards the rear) once the drawers are built and fitted as they need to slide up to and behind the lips to act as stops.
I would like your opinion on the side spacers (for want of a better term). The spacers should have had the grain running in the same direction, but of course it does not (because I realised this too late), and they were hide glued in. These spacers are 6mm thick, compared with the side panels of the case, which are 20mm thick and 40mm taller altogether.
I am concerned whether the spacers could warp. There are 2mm grooves above and below the spacers for expansion. This is a piece of furniture which will be in the entrance hall of a house.
I could add a 6mm horizontal groove through the centre of each spacer (saw and chisel, or perhaps use a trim router).
Do I need to do anything at all?
Regards from Perth
DerekVisit www.inthewoodshop.com for tutorials on constructing handtools, handtool reviews, and my trials and tribulations with furniture builds.
-
3rd February 2020, 10:20 AM #44
GOLD MEMBER
- Join Date
- May 2007
- Location
- Sth Gippsland Vic
- Posts
- 4,368
Ah that's what they are , I thought the spacers were just a drawer side sitting loose in the pic . I was thinking you were having a lip or overhang of the drawer fronts on one side only on the left and right drawers. I haven't read every word through the thread and just come in really .
Are they full glued in ? Its like you created a bit of unbalanced plywood . The 20mm is going to be stronger than the 6mm and if it moves its locked so something dramatic could happen . A bend in the side most likely, or a snap/crack sound in the night ? Unlikely . One day down the track.
It has to have a big shift in heat and humidity to do that that lasts a while . Being 6mm and all tucked away in their with the drawers closed over a period where big weather swings come and go probably wont do it . A change from a setting where its made to a house with very different conditions may do it with enough time . Polishing and sealing in and out both sides would help if you left it .
It is hide glue so you could take them out . You know that of course but have you actually had to do it under do or die conditions ? Its a heart beat raiser when a lot of hard work depends on it going right .
The unit standing on its end with an electric iron being moved around starting at the front for long enough should get it loose . If an electric iron fits . If not a heated thick block of steel . A home made iron . Or a heat gun . 6mm thick is going to take a bit of heating though . But I think it will come out fine If you want to fix it that way . Its what I would be doing . I don't think routing it does much except turn the spacer into strips that are having the same effect.
The way I think I would have made it to give the drawer face something to stop on would be a much smaller piece with grain matching the side glued in at front. And a drawer guide just nailed in behind that .
IMG_3328.JPG
Rob .
Edit again . Thinking more about it . The distance of the side length and the way the sides are joined into the top and bottom probably means the side wont bend . Its so strong there. The pressure build up , if it happens, will probably be held and nothing much will change . For a long time
-
3rd February 2020, 04:01 PM #45
Be inspired. Be creative. Be bold.
- Join Date
- Apr 2001
- Location
- Perth
- Posts
- 10,820
Thanks Rob.
My paranoia lies with this table moving from dry Perth to a humid Sydney. You have helped quieten my inner voice of doooom.
To be safe, I may just route away about 10-12mm along the centre of the side spacers. My thinking is that there is less with which to fight, and more space to move. I can get a trim router in, and it will take a few minutes at most.
Regards from Perth
DerekVisit www.inthewoodshop.com for tutorials on constructing handtools, handtool reviews, and my trials and tribulations with furniture builds.


 Reply With Quote


Similar Threads
-
Entry Hall Mirror - WIP
By Rookie in forum WOODWORK - GENERALReplies: 5Last Post: 31st August 2010, 11:12 PM -
A gift for my Niece's 21st ... ssshhh don't tell her!
By Touchwood in forum BANDSAWN BOXESReplies: 10Last Post: 22nd November 2009, 11:13 AM -
hall table, wine table, water stone box
By driftit in forum WOODWORK - GENERALReplies: 6Last Post: 1st May 2009, 11:20 PM -
Project 1 - Entry Way Table
By `Felix` in forum WOODWORK PICSReplies: 13Last Post: 25th March 2004, 03:54 PM
