

 Thanks:
  Likes:
  Needs Pictures:
  Picture(s) thanks:
Results 1 to 15 of 42
Thread: French doors WIP
-
13th June 2011, 10:27 AM #1
 GOLD MEMBER


- Join Date
- Aug 2007
- Location
- St Georges Basin
- Posts
- 1,017
 French doors WIP
The current reno project is a little Bluestone Miner's cottage. The facade is somewhat spoiled by having a partially infilled front verandah with a hole knocked through the front bedroom where a window used to be, for access. We've decided to open up the verandah, remove the tacked on room and rather than replace the window, a set of French doors should be acceptable and will mean I don't need to match up any heavy stonework. The doors will be taller and narrower than any standard sizes so I will make up a set myself.
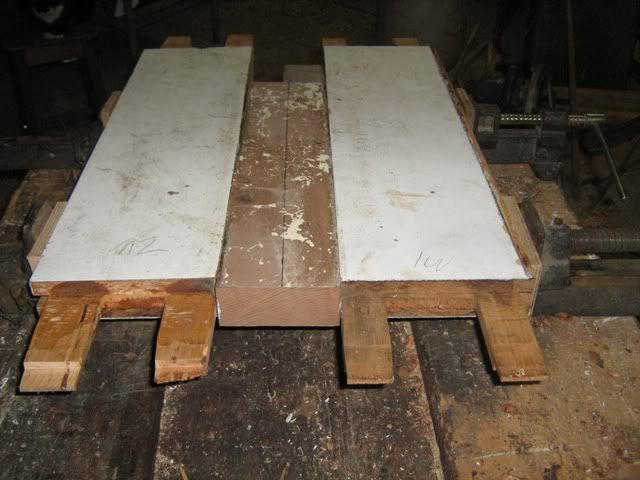
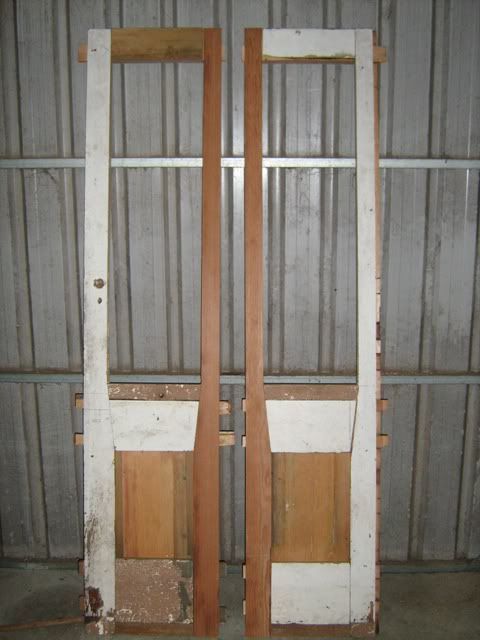
The bulk of the material for the new doors will come from this old door. I'll need a couple of 4"x2"'s for the extra stiles and also have some material of similar size to be used where required.
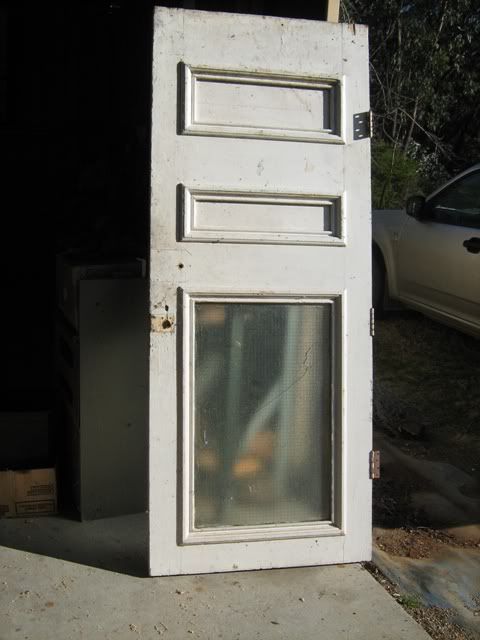
First job is to remove all the old furniture, mouldings etc and then knock the door apart.
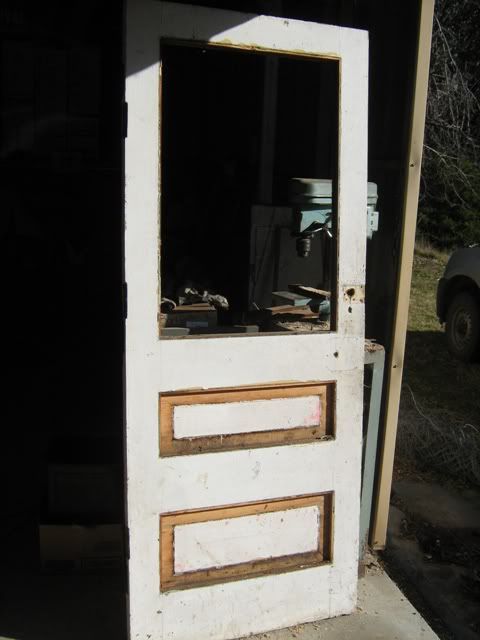
The rails got cleaned up along the rough edges and I ran rebates along their length. This helped me to determine just what dimensions I was able to work with.
The stiles were just a little short, so I dowelled some extra material onto the bottoms and matched up the profile.
I also used some extra material to bulk up the middle and bottom rails.
-
13th June 2011 10:27 AM # ADSGoogle Adsense Advertisement
- Join Date
- Always
- Location
- Advertising world
- Posts
- Many
-
13th June 2011, 11:08 AM #2
The Laird
- Join Date
- Jan 2007
- Location
- Katoomba NSW
- Posts
- 4,774
-
13th June 2011, 11:11 AM #3
 GOLD MEMBER
- Join Date
- Sep 2006
- Location
- Sydney
- Age
- 83
- Posts
- 1,474
Me too. Looks like an interesting project.
And my head I'd be a scratchin'
While my thoughts were busy hatchin'
If I only had a brain.
-
14th June 2011, 05:47 AM #4
GOLD MEMBER
- Join Date
- Aug 2007
- Location
- St Georges Basin
- Posts
- 1,017
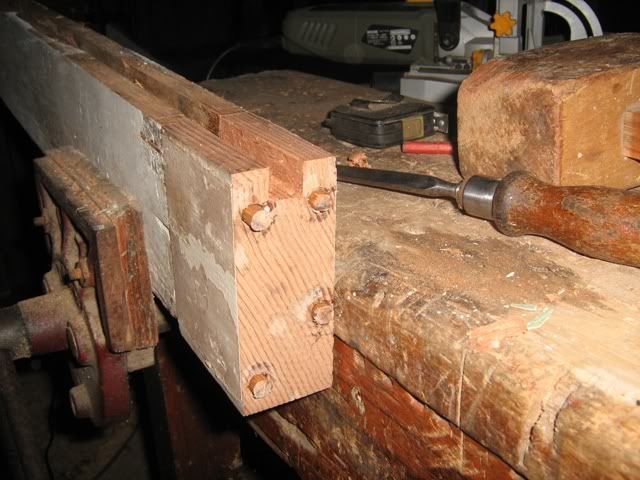
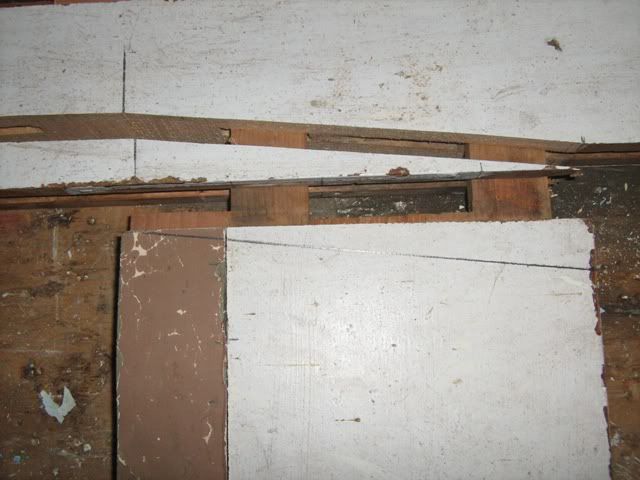
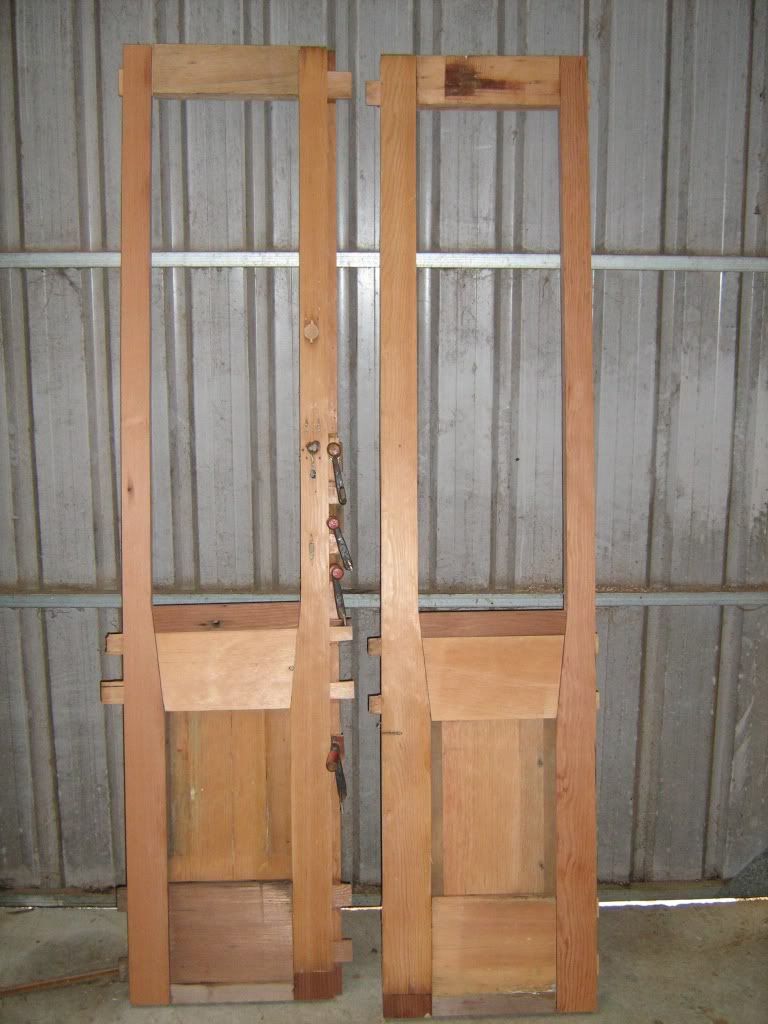
Working with secondhand doors like this is a pleasure because of the quality of the wood they used, it also has cost advantages ($0 from the tip back in the day), but there are drawbacks too. Often it means you need to work backwards in terms of marking and cutting. Here's an example of that.
There are tenons already cut on the rails and plenty of mortices in the stiles but I only found one mortice in a position that I could use to get the middle rail into a suitable position. So the first step was to mark the position of the useable mortice, then, using the precut tenons as a template, I was able to mark out the position for the second, new mortice. I cut that and assembled the joint. That meant I could mark the top and bottom of the middle rail and then mark and cut the haunch to make a gunstock stile style door. (couldn't resist that)
With the haunch cut I went on and marked and cut the rail to fit and then assembled the joint.
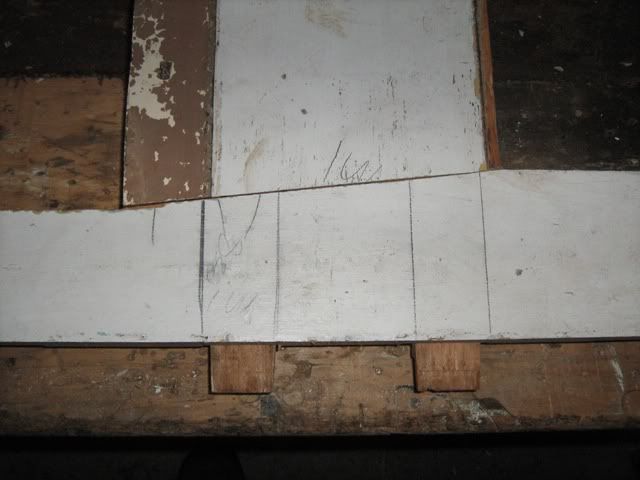
Now I can go on to mark out the position of the middle rail on the rest of the stiles to match the first one and then cut the necessary joints, once again using the existing mortices and tenons where possible as templates.
I probably could have gotten away with a straight stile door, but doing these little extras can be a factor in the amount of satisfaction you get from a job. No other bugger will ever look at it twice, it will just be a couple of doors, but I will enjoy the process to get them there.
-
15th June 2011, 07:39 AM #5
GOLD MEMBER
- Join Date
- Aug 2007
- Location
- St Georges Basin
- Posts
- 1,017
I had a bit of business down the line yesterday so I dropped into the nearest demolition yard and got a couple of lengths of 4"x2" oregon. $12 all up. I managed to get them dressed and transferred a few measurements across before it got too cold in the shed.

-
15th June 2011, 08:03 PM #6
Mildly Moderate
- Join Date
- Nov 2007
- Location
- Albury Well Just Outside
- Posts
- 13,315
That's looking good. Interesting work in progress.
-
16th June 2011, 01:17 PM #7
GOLD MEMBER
- Join Date
- Aug 2007
- Location
- St Georges Basin
- Posts
- 1,017
A few mortices and tenons later and the first door takes shape.
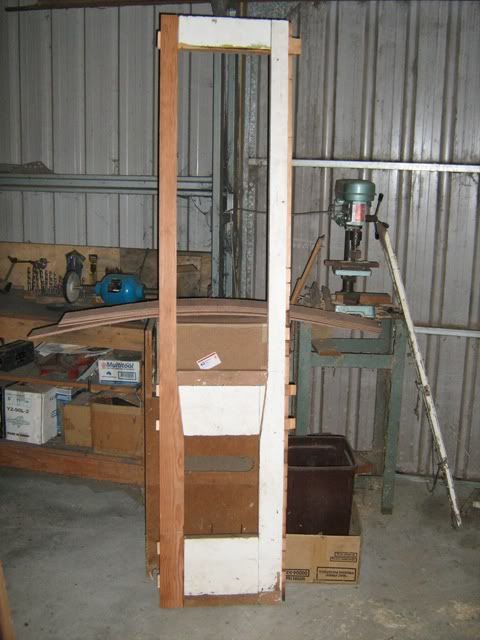
With any luck, I'll pick up an ogee bit tomorrow at the woodshow to finish off the top panel where the glass goes.
-
16th June 2011, 03:47 PM #8
Senior Member
- Join Date
- Jun 2010
- Location
- Canberra
- Posts
- 195
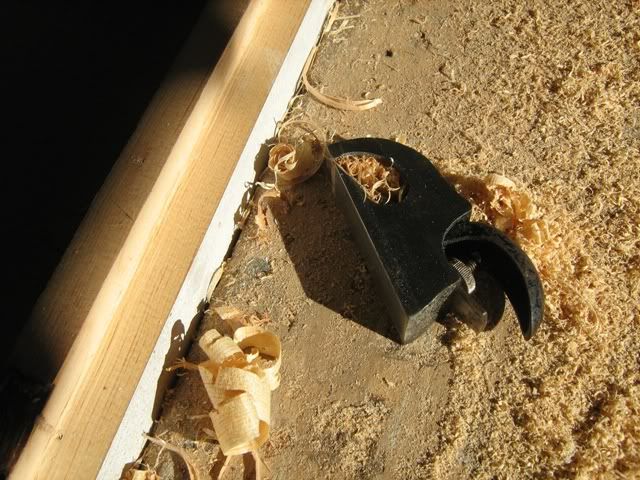
Burra, What are you using to cut those deep mortices?
-
16th June 2011, 09:30 PM #9
GOLD MEMBER
- Join Date
- Aug 2007
- Location
- St Georges Basin
- Posts
- 1,017
 Originally Posted by pampelmuse

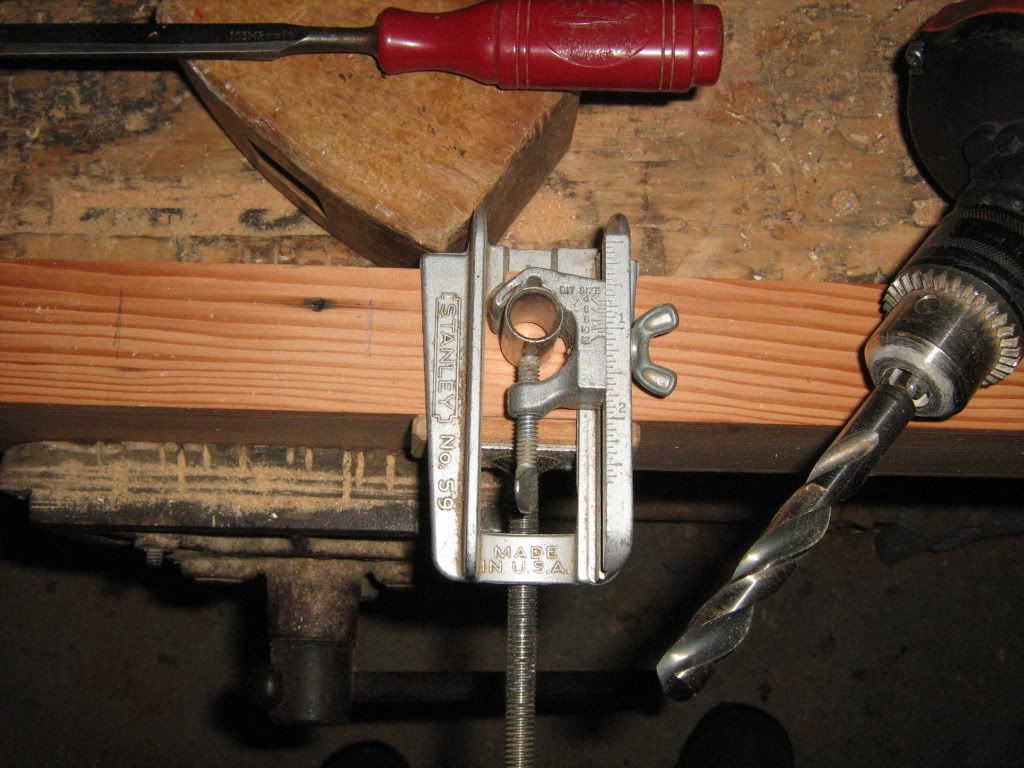
The good old Stanley Dowelling Jig does the roughing out and a chisel cleans them up. I work from both sides to prevent tear-out in the event of the bit coming thru the timber.
The jig has long been a favourite tool, but I wish I could get metric inserts for it!
-
21st June 2011, 04:01 PM #10
GOLD MEMBER
- Join Date
- Aug 2007
- Location
- St Georges Basin
- Posts
- 1,017
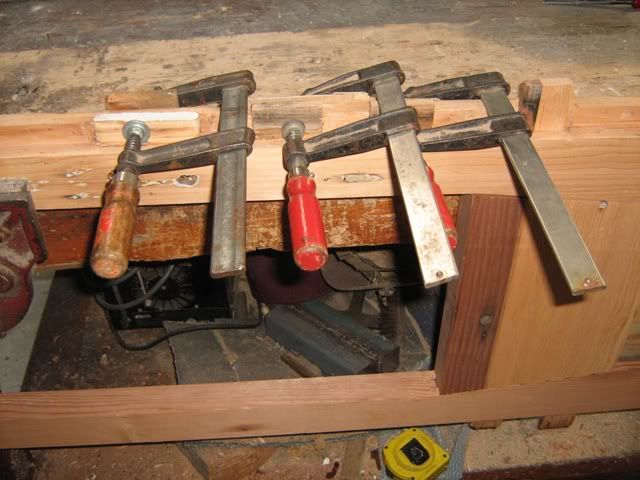
Both doors assembled.
Time for a bit of a cleanup.
-
21st June 2011, 07:41 PM #11
Mildly Moderate
- Join Date
- Nov 2007
- Location
- Albury Well Just Outside
- Posts
- 13,315

Still watching.
-
22nd June 2011, 08:52 PM #12
Lignum Vexator
- Join Date
- May 2007
- Location
- North of the coathanger, Sydney
- Age
- 68
- Posts
- 9,417
burraboy
Nice work
regards
Nick
veni, vidi, tornavi
Without wood it's just ...
-
23rd June 2011, 07:04 AM #13
GOLD MEMBER
- Join Date
- Aug 2007
- Location
- St Georges Basin
- Posts
- 1,017
There's plenty of meat on these doors and a pass thru the thicknesser cleans them up nicely.
Then start to fill the old mortice and lock holes.
-
23rd June 2011, 11:33 AM #14
The Laird
- Join Date
- Jan 2007
- Location
- Katoomba NSW
- Posts
- 4,774
These are coming along nicely. Good work BB

-
23rd June 2011, 03:27 PM #15
Senior Member
- Join Date
- Jul 2009
- Location
- queensland
- Posts
- 129
Nice work brother. I watched your work bench build, now french doors. Slightly different to say the least. As for the dovetail jig, i have a had a few of them over the years and they are awesome little things. As far as metric collets are concerned i has some cut from steel pipe at and engineers a few years back. They work fine, chop out a bit quicker than the normal collets. A quick trip to the engineering place and all sorted again.
Skippy


 Reply With Quote


Similar Threads
-
maranti french doors
By ian h in forum FINISHINGReplies: 4Last Post: 1st August 2018, 07:33 PM
