

 Thanks: 0
 Likes: 0
 Needs Pictures: 0
 Picture(s) thanks: 0
Results 1 to 6 of 6
Thread: Glueing up.
-
24th July 2011, 03:08 AM #1
 Be inspired. Be creative. Be bold.


- Join Date
- Apr 2001
- Location
- Perth
- Posts
- 10,826
 Glueing up.
This may be a little simplistic for some.
It occurred to me to keep a record of glueing up the two Military cabinets. In part, I always look for feedback to improve methods. And in part, it may help someone what to do - or what not to do! - as glueing together dovetailed cabinets can be a little unnerving.
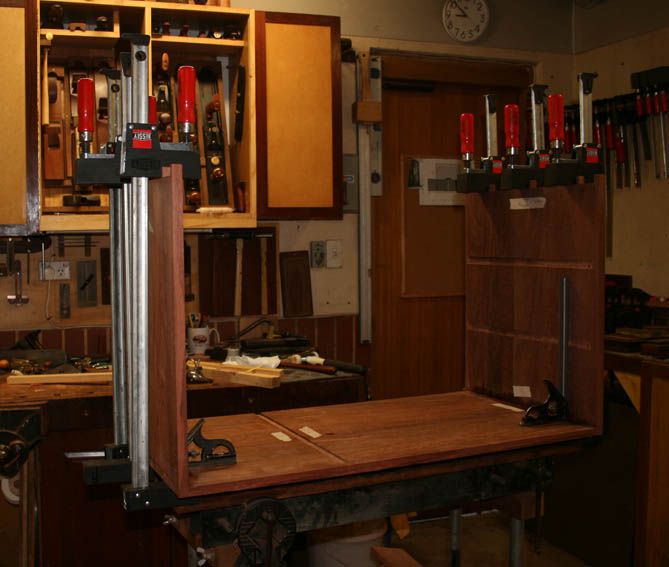
I left off last weekend at this stage - a dry fit of the two cabinets ...
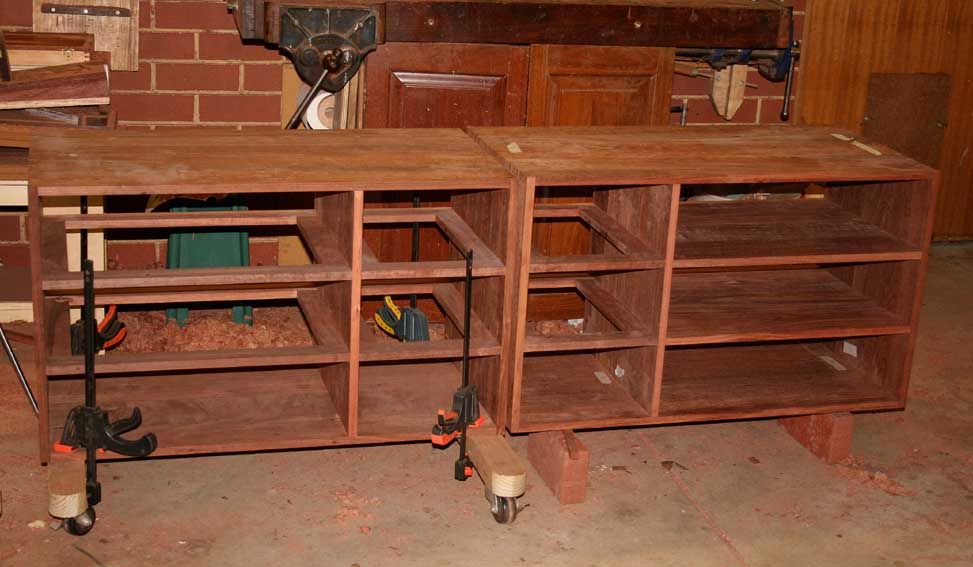
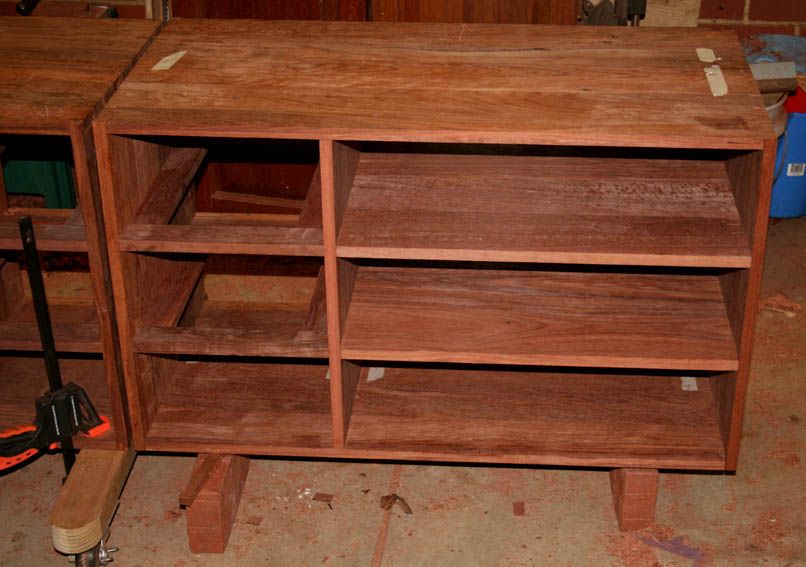
Here I present the right hand cabinet, which will have three drawers and three shelves ...
Glue? I am using Titebond III. It has about 15 minutes of open time, and is required to be clamped for 30 minutes for the initial bond.
The internal "seen" surfaces (around the shelves) have been scraped. All other internal surfaces are planes flat and smoothed but scratches and scrapes are left be. They will never be seen.
The clamps are ready, the glue bottle is clean. I have made up a fresh bunch of spatulas.
I make glue spatulas from an old, broken, cheap tape measure ...

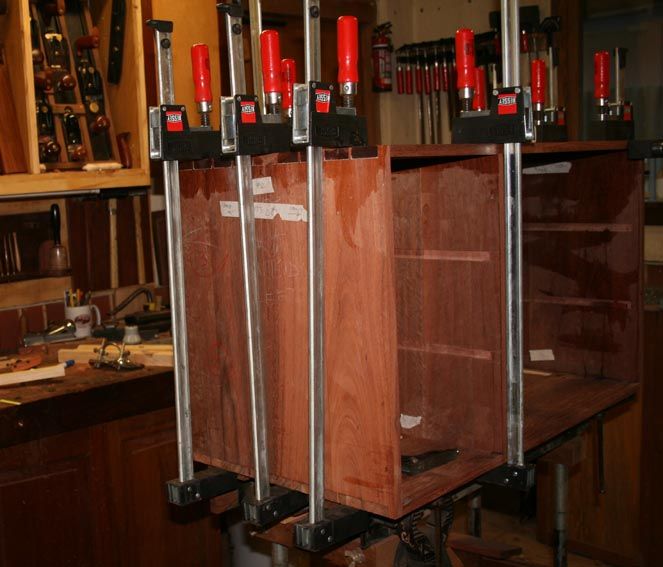
I start with the sides:

I only add glue to one side, not both. I find it easier to place the glue on the pin board as there is a wide area, and it can be plastered on evenly and completely.
First one side ...
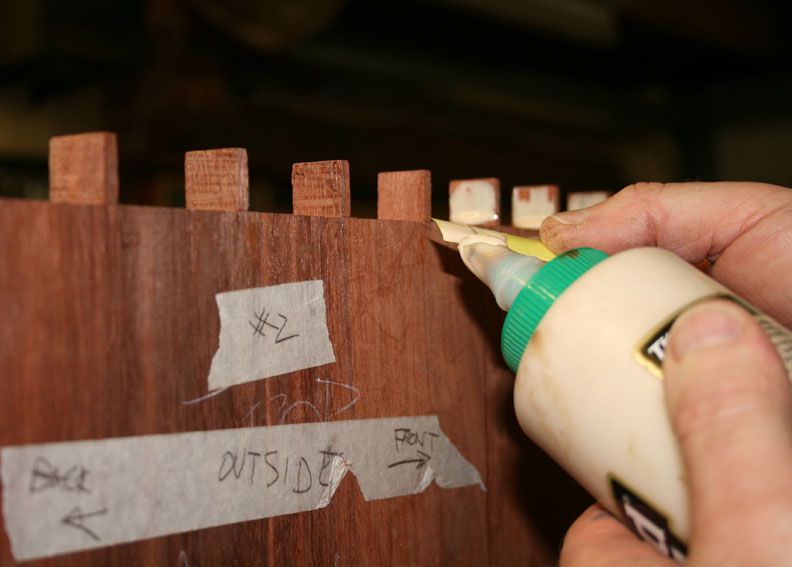
Then the other ...

And lastly the centre (even if it is end grain) ...
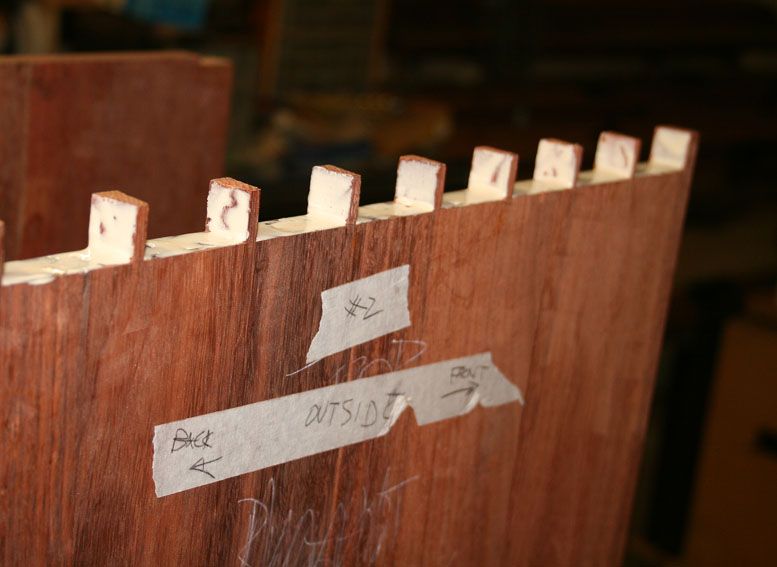
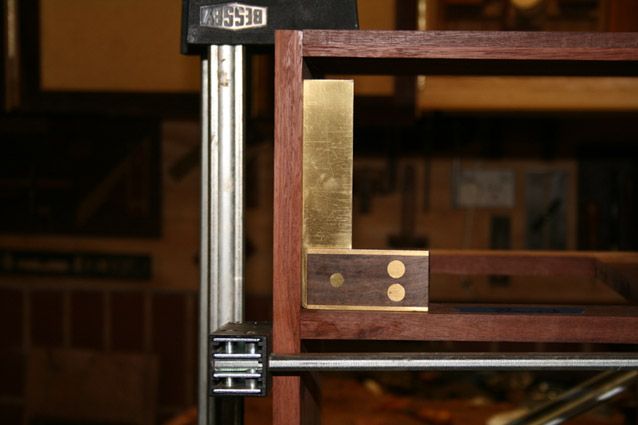
The clamps do double duty. As the boards warp a little and are no longer as straight as they were when first built, the clamps pull the join into alignment. Secondly, by angling the clamps you are able to alter the pressure on the sides and square up the angle.
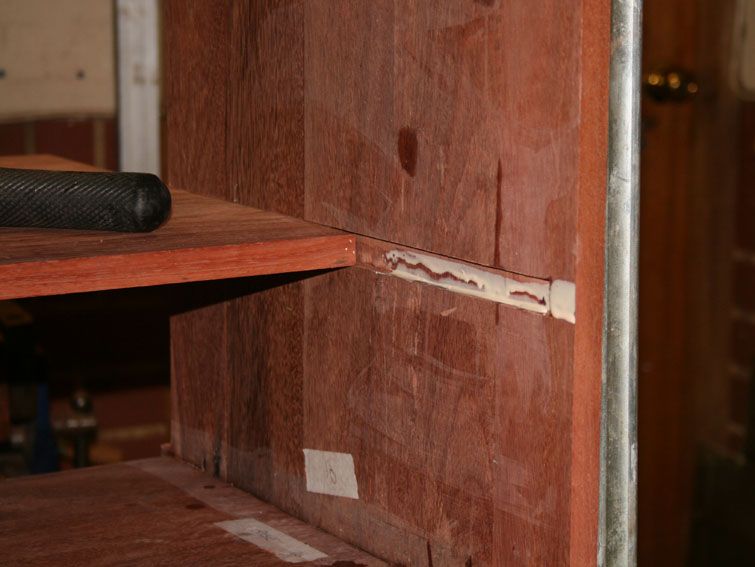
Next the centre divider is glued in. Glue runs the full length of the stopped dado, and I add a little more for the undercut edge. I am never sure whether one should leave an unglued section for expansion here?

I clean up with tepid water as I go.
Now the top can be added ...

 Visit www.inthewoodshop.com for tutorials on constructing handtools, handtool reviews, and my trials and tribulations with furniture builds.
-
24th July 2011 03:08 AM # ADSGoogle Adsense Advertisement
- Join Date
- Always
- Location
- Advertising world
- Posts
- Many
-
24th July 2011, 03:09 AM #2
Be inspired. Be creative. Be bold.
- Join Date
- Apr 2001
- Location
- Perth
- Posts
- 10,826
I had worked hard on the dados and the runners of the drawer supports and the shelves to fit well. I did not want to be surprised at this stage with sticking parts, drying glue, and panic. Happily the shelves slid in smoothly, the lower one first ...
I only glued the first quarter of the dado. This would allow the solid shelves to expand and contract with changes in the weather.

I did the same with the drawer supports althogh these will expand differently, probably hardly at all (as they are all mortice-and-tenon joints).
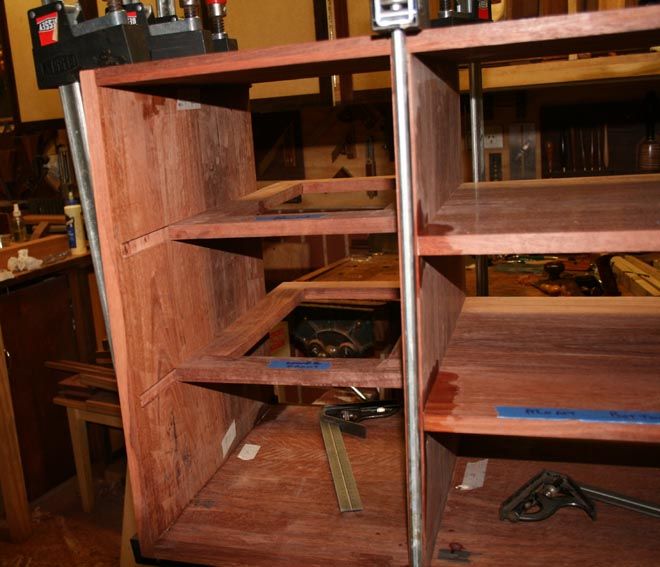
Clamps ensure that there are no gaps at the front ...

And then diagonal braces are used to fine tune the squareness ...
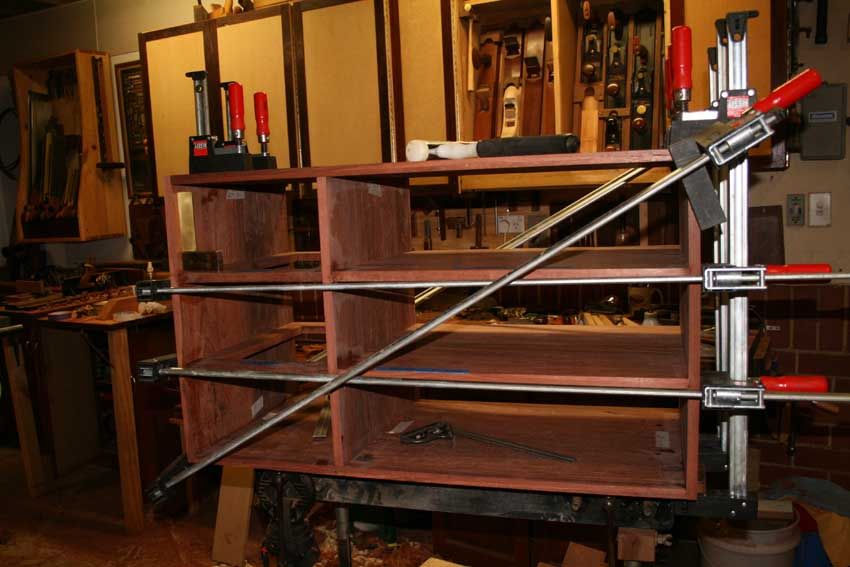
That came out just fine:
Next up - smooth planing the outside and building the bun feet.
Regards from Perth
DerekVisit www.inthewoodshop.com for tutorials on constructing handtools, handtool reviews, and my trials and tribulations with furniture builds.
-
24th July 2011, 11:25 AM #3
SENIOR MEMBER
- Join Date
- Nov 2007
- Location
- Victoria
- Posts
- 734
Not too simplistic for me ! Great to see it presented so clearly. Thanks Derek.
-
24th July 2011, 11:28 AM #4
When the student is ready, the Teacher will appear
- Join Date
- Jan 2006
- Location
- Telegraph Point
- Posts
- 3,036
Like you, I find glue up to be the most nerve-wracking part of construction.
Things look like they are shaping up nicely.
You really can't have too many clamps can you.
Thanks for sharing
SG .... some old things are lovely
Warm still with the life of forgotten men who made them ........................D.H. Lawrence
https://thevillagewoodworker.blogspot.com/
-
24th July 2011, 06:08 PM #5
 Fossil Member
- Join Date
- Jan 2005
- Location
- Perth
- Posts
- 1,181
Hi Derek,
Coming along nicely. As one piece now, I bet the cabinet is getting a bit heavy to toss about the workshop. Looking forward to the next round of photos.
Cheers
Pops
-
24th July 2011, 06:45 PM #6
Now I've got a 10x14m shed! I need a new name...
- Join Date
- Jan 2005
- Location
- Wollondilly, NSW
- Posts
- 1,150
Excellent piece Derek, and thanks for sharing.
It came across somewhat calm.... rather deceptive I'd say!
Nathan.


 Reply With Quote

Similar Threads
-
Glueing the transom.
By danangles in forum BOAT BUILDING / REPAIRINGReplies: 9Last Post: 5th May 2011, 02:49 PM -
Glueing Trim
By JackD in forum BOX MAKINGReplies: 4Last Post: 24th March 2010, 09:46 PM -
need help glueing
By philip.h.locke in forum WOODWORK - GENERALReplies: 7Last Post: 27th February 2008, 11:38 AM -
glueing Teak
By Gino in forum WOODWORK - GENERALReplies: 5Last Post: 14th June 2007, 10:52 PM -
Glueing with PVA glue
By ozeb in forum GLUEReplies: 8Last Post: 9th July 2006, 10:56 PM
