

 Thanks:
  Likes:
  Needs Pictures: 0
 Picture(s) thanks:
Results 16 to 26 of 26
Thread: Harlequin side table
-
17th June 2019, 01:55 AM #16
 Be inspired. Be creative. Be bold.


- Join Date
- Apr 2001
- Location
- Perth
- Posts
- 10,820

We left off with the drawer dividers a dry fit in the case ...
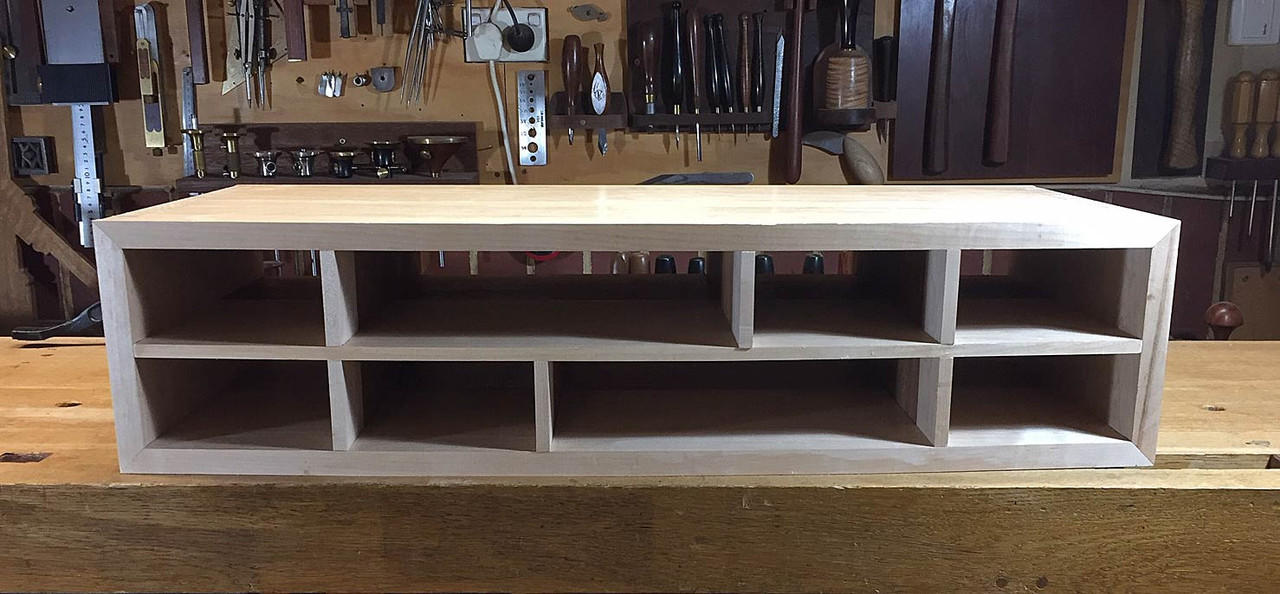
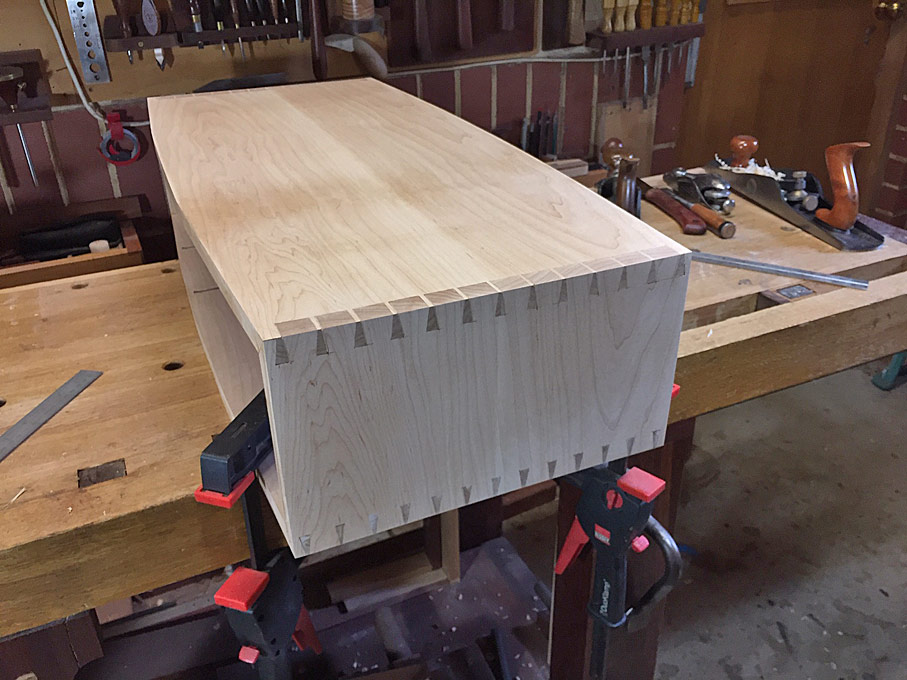
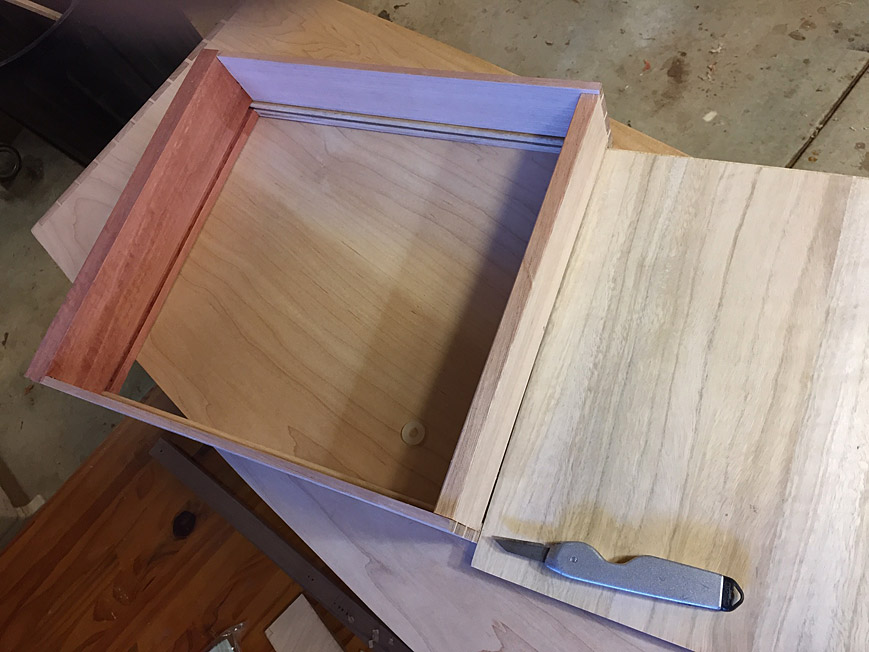
And then this was pulled apart and the case glued up. After a clean up, the ends were looking a little tidier ...
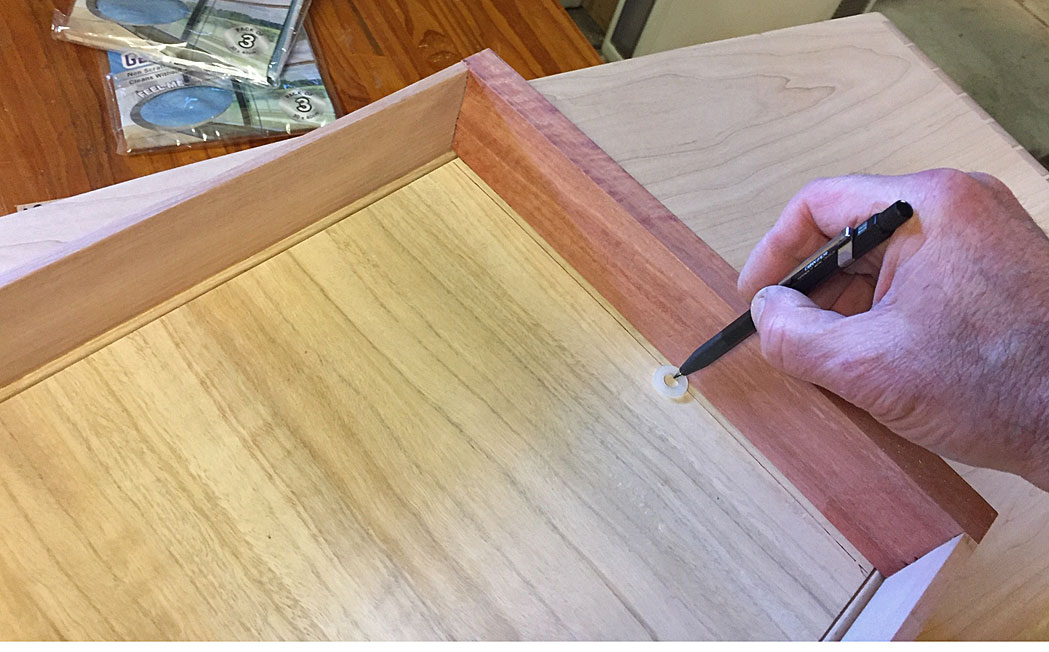
Now we've been through this together with the Jarrah coffee table, but for those who want to know how ...
The ends are marked (with a washer) ..
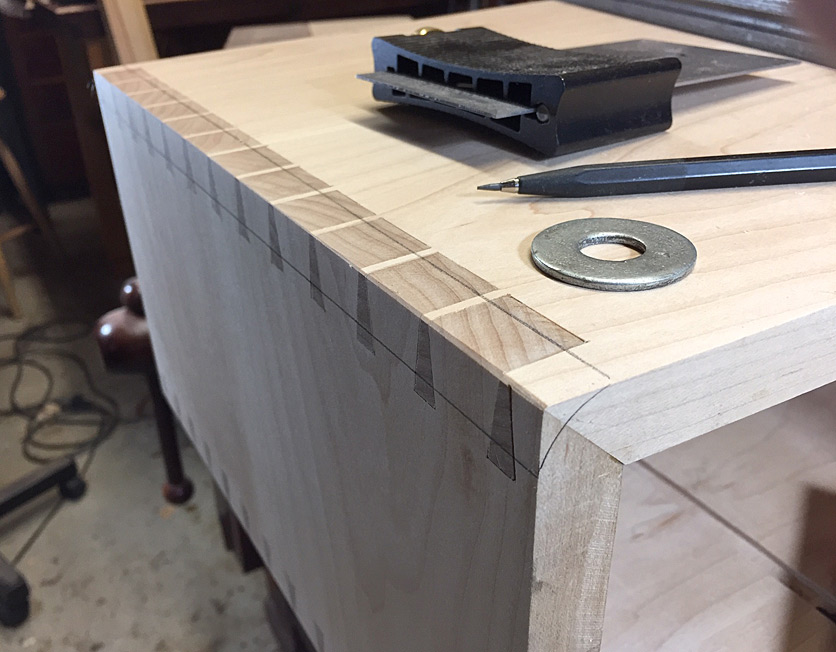
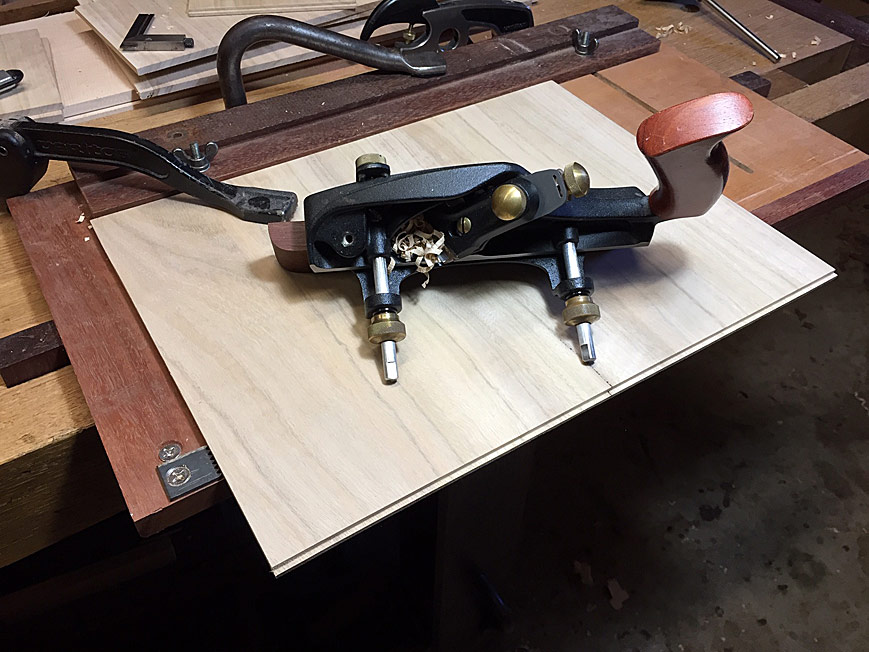
The aim is the remove the waste progressively to the lines ...
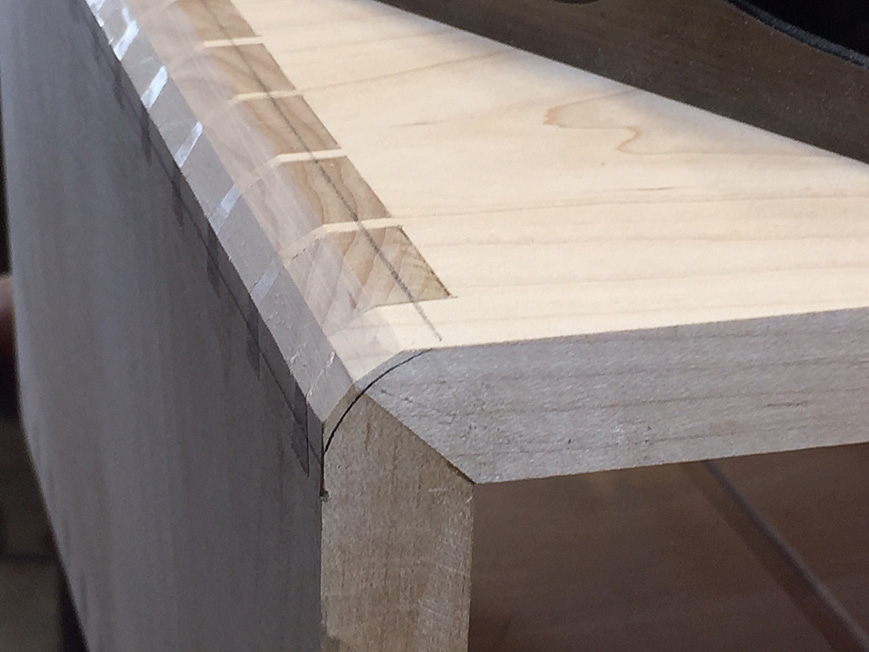
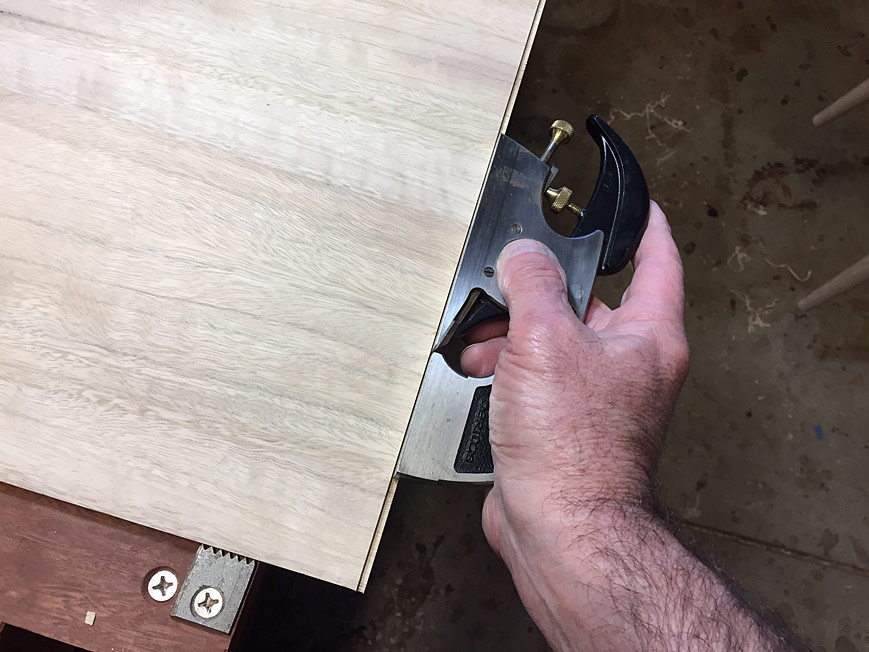
This is quick to do with a low angle jack ...
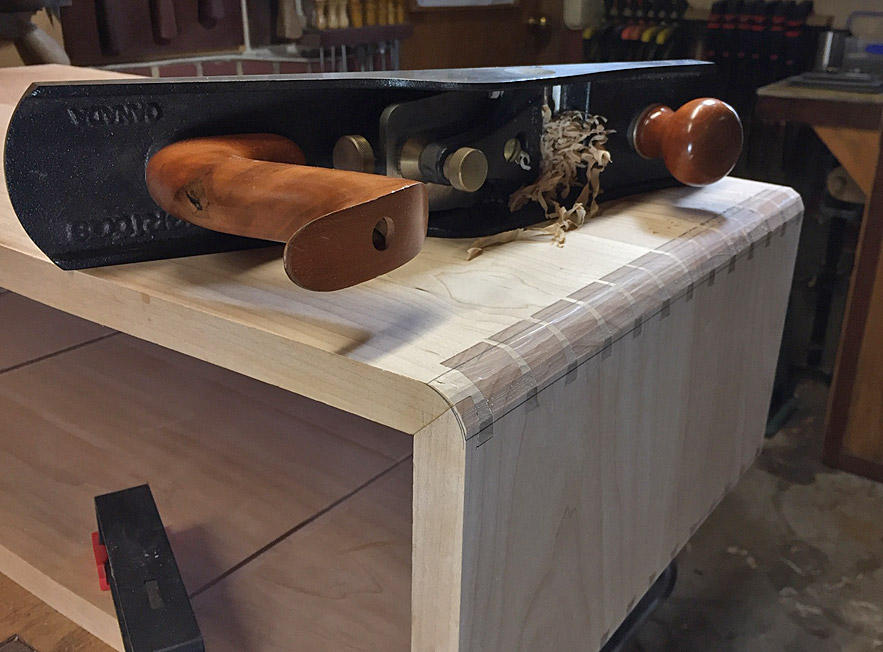
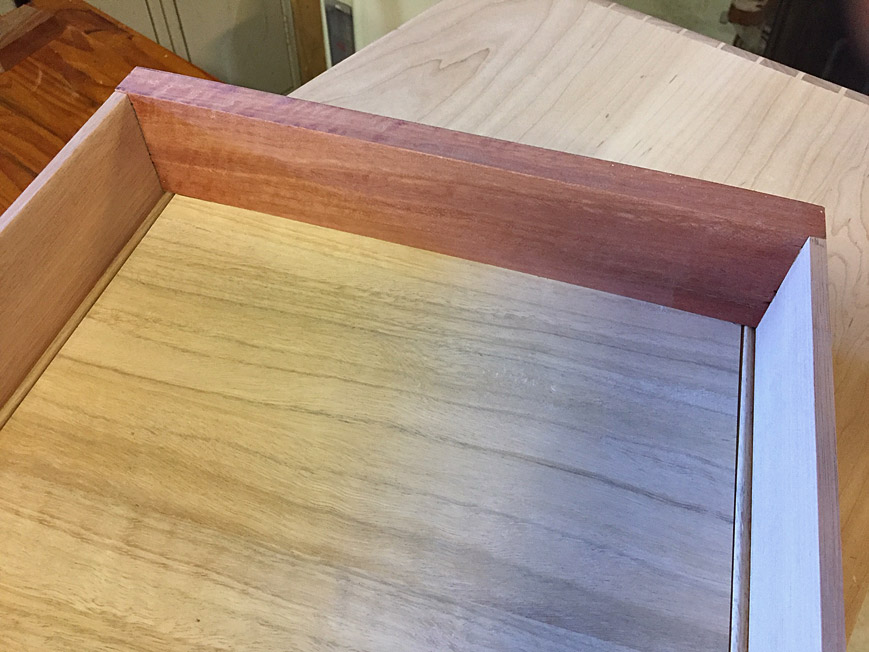
.. and finish with a block plane ...
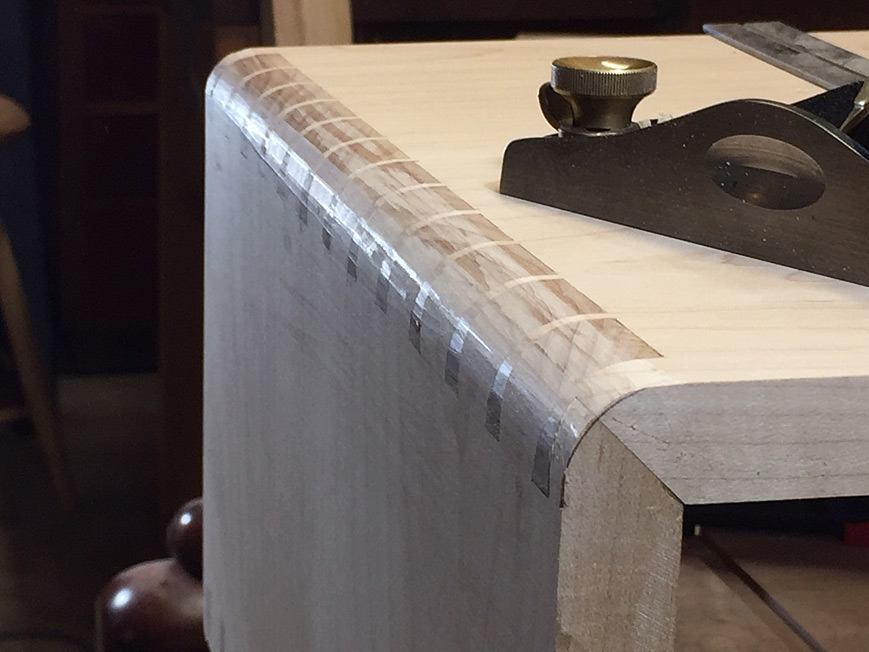
Now finish with sandpaper - 80/120/240 grit ...
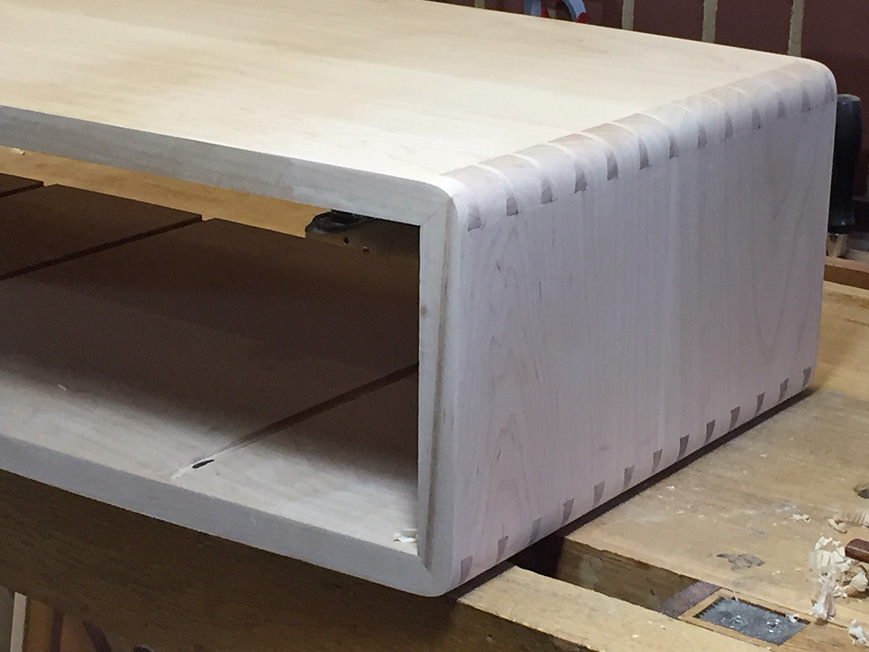
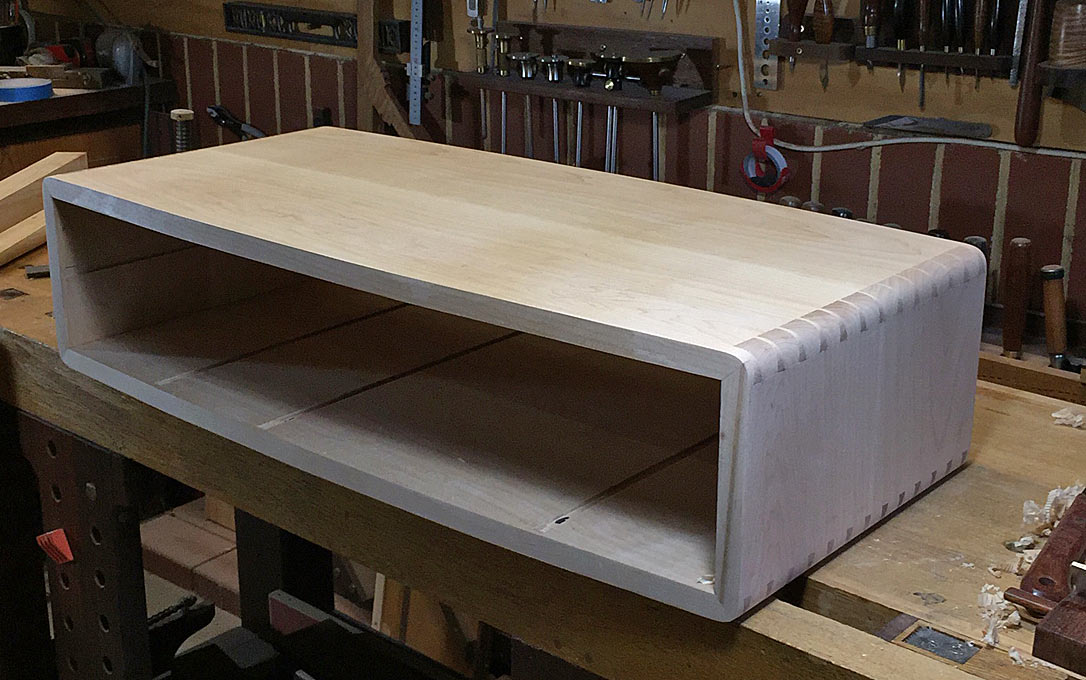
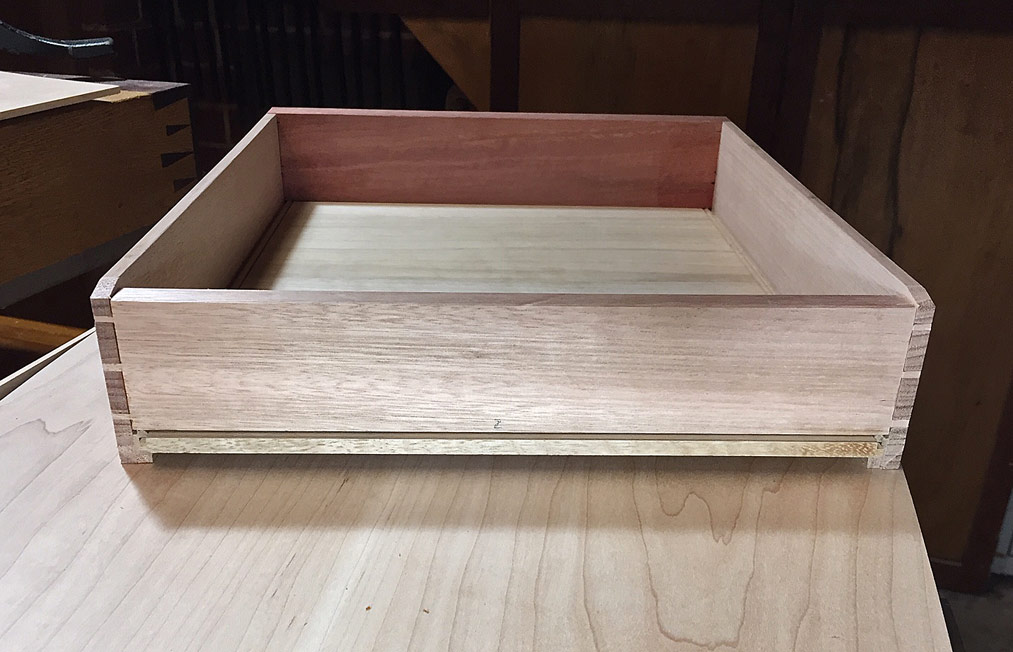
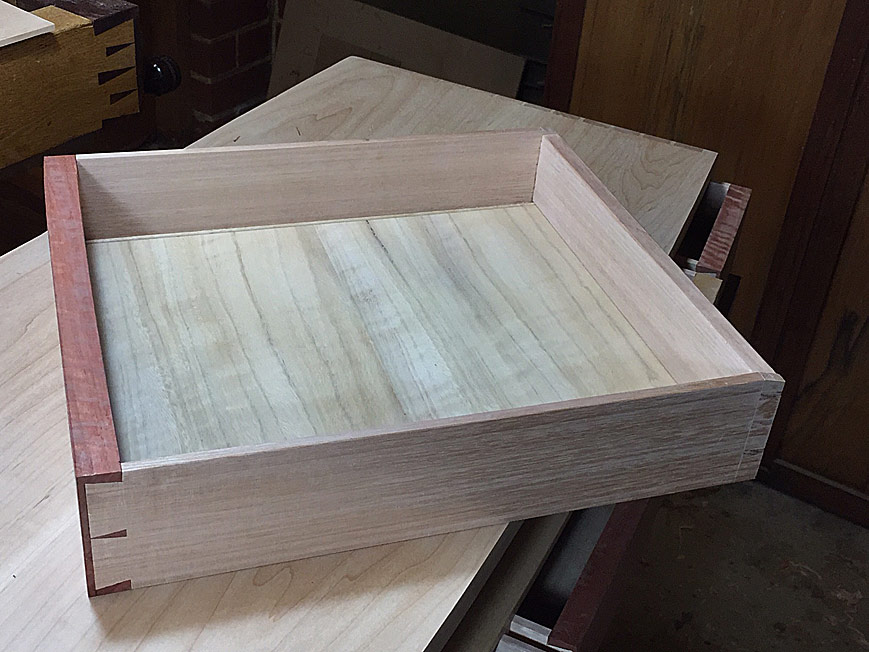
The completed case ...
I spent a few hours today turning a few legs. Rather than show the prototypes, I am hoping that I may have enough time to complete them tomorrow - I have the afternoon off! - and then I will post more photos.
Regards from Perth
DerekVisit www.inthewoodshop.com for tutorials on constructing handtools, handtool reviews, and my trials and tribulations with furniture builds.
-
17th June 2019 01:55 AM # ADSGoogle Adsense Advertisement
- Join Date
- Always
- Location
- Advertising world
- Posts
- Many
-
23rd June 2019, 12:48 AM #17
Be inspired. Be creative. Be bold.
- Join Date
- Apr 2001
- Location
- Perth
- Posts
- 10,820
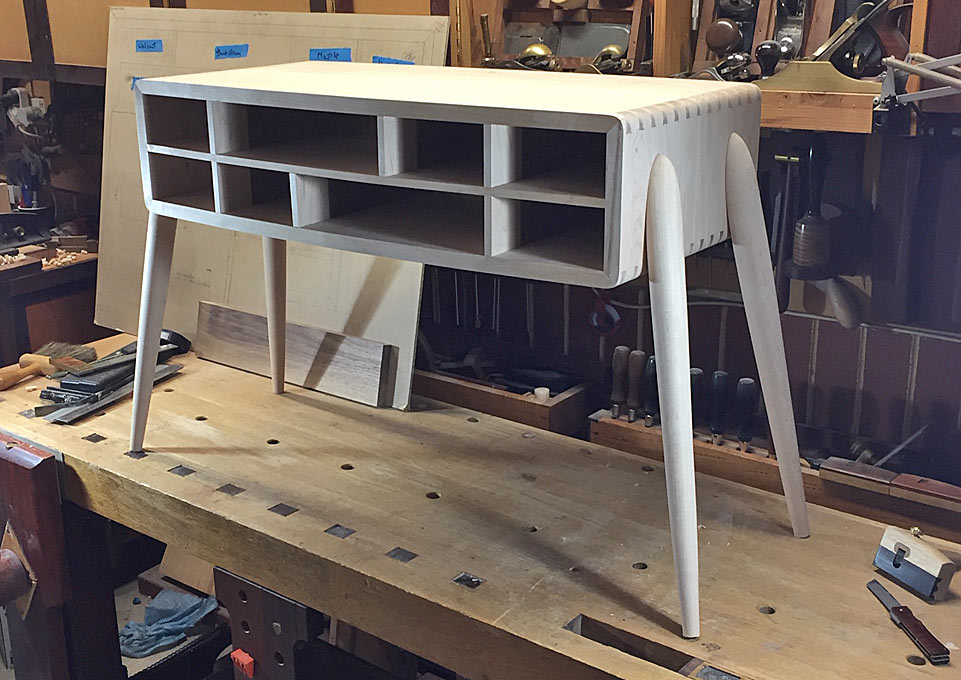
The case was completed last time ...
... but before the drawer dividers can be permanently installed, the legs need to be made and attached.
This was the original drawing ...

Some has been retained and some has been changed.
Instead of curved legs, which I later decided did not match the overall style, I decided on round, tapered legs that will splay out from the case.
Before turning the legs, the splay was created by tapering the top of the legs on the table saw. The slider uses a Fritz and Frans jig to rip the end at the chosen angle (8 degrees). This ensured that the splay angle would be the same for all legs.

The blanks were then turned to shape. Here I am checking that the near-to-finished legs are the same dimensions and have the same taper angle ...
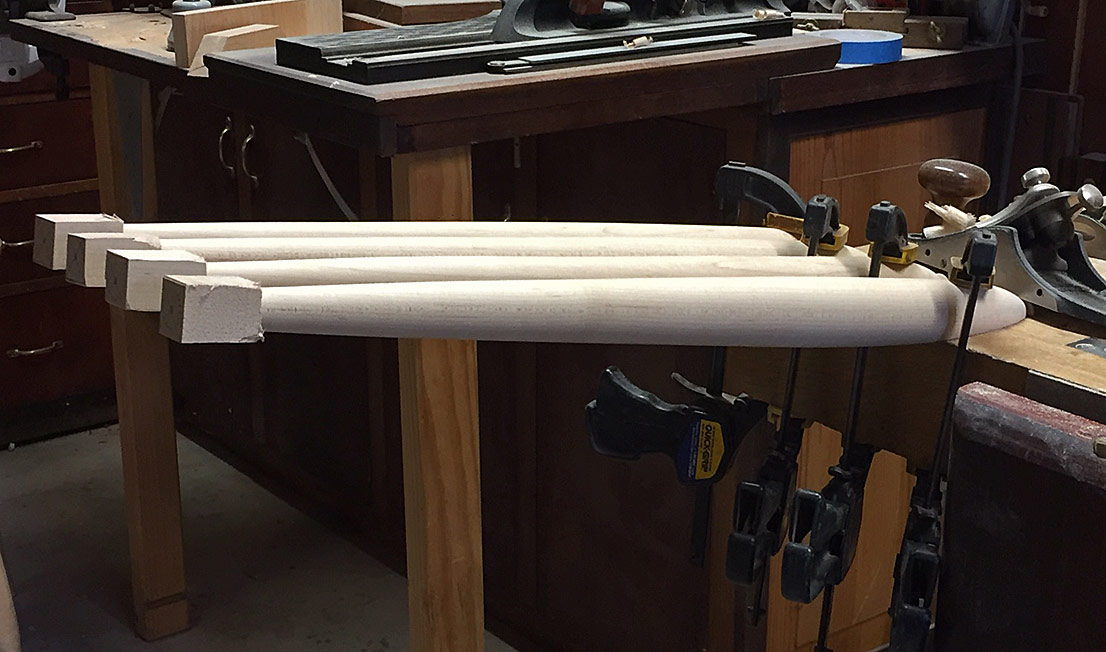
The ends were then cut off and the top was shaped with rasps and sandpaper ...


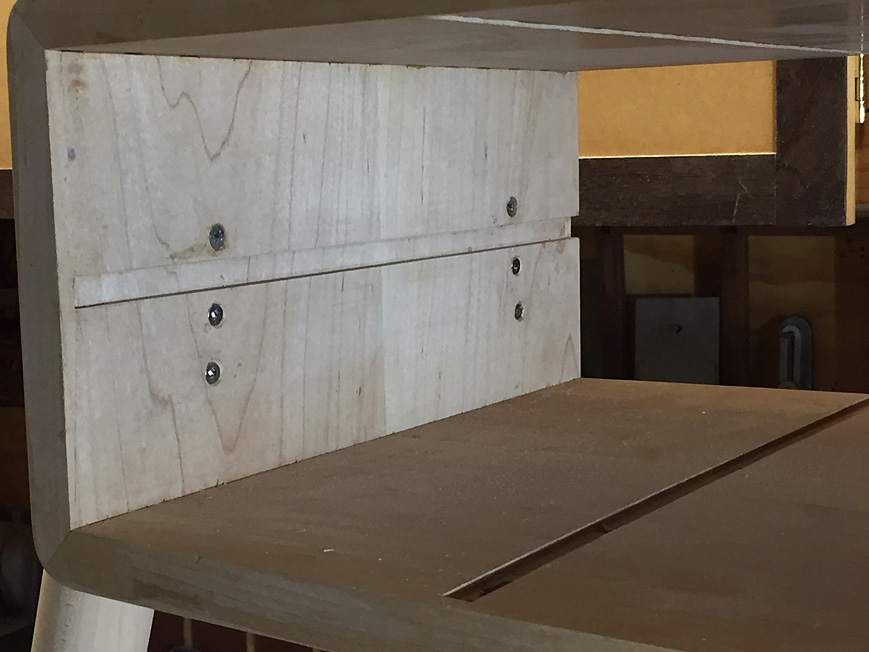
How to attach the legs? Well, that had given me a real headache. I was thinking along the lines of a loose tenon ... overcomplicating matters (as usual). A number suggested simply glueing and screwing. I was skeptical, but of course, a glue joint alone is generally stronger than the wood ... and reason prevailed
There are three screws per leg, which were countersunk for the drawers. The glue chosen was Titebond III.
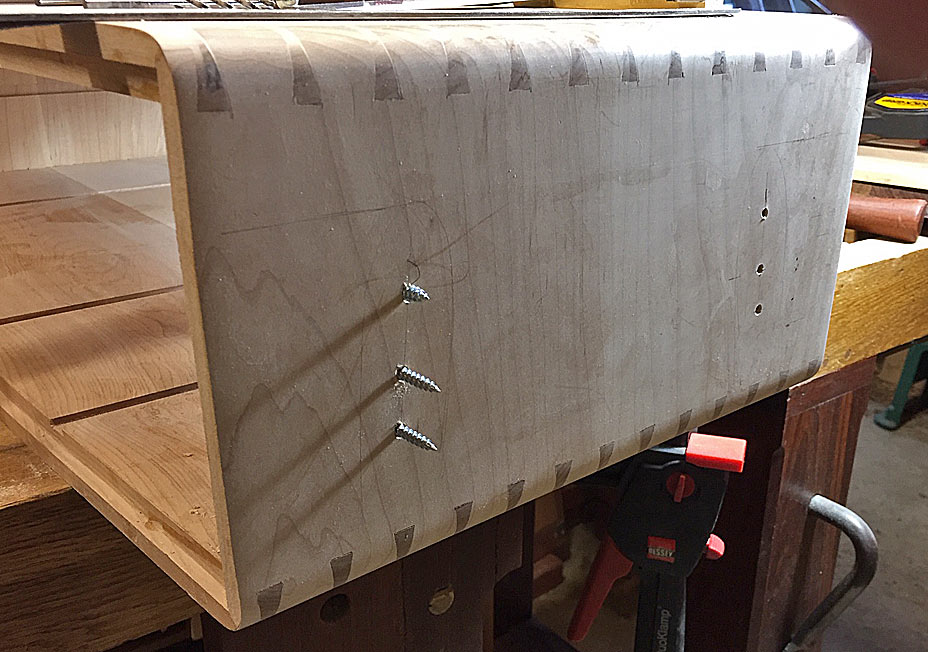
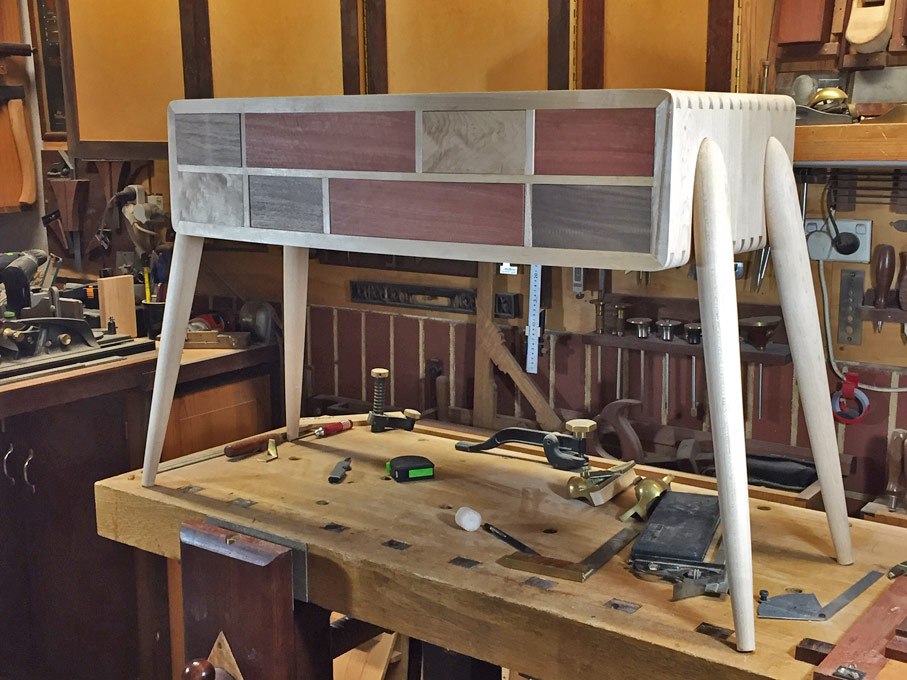
All cleaned up, this is what we have (drumroll) ...

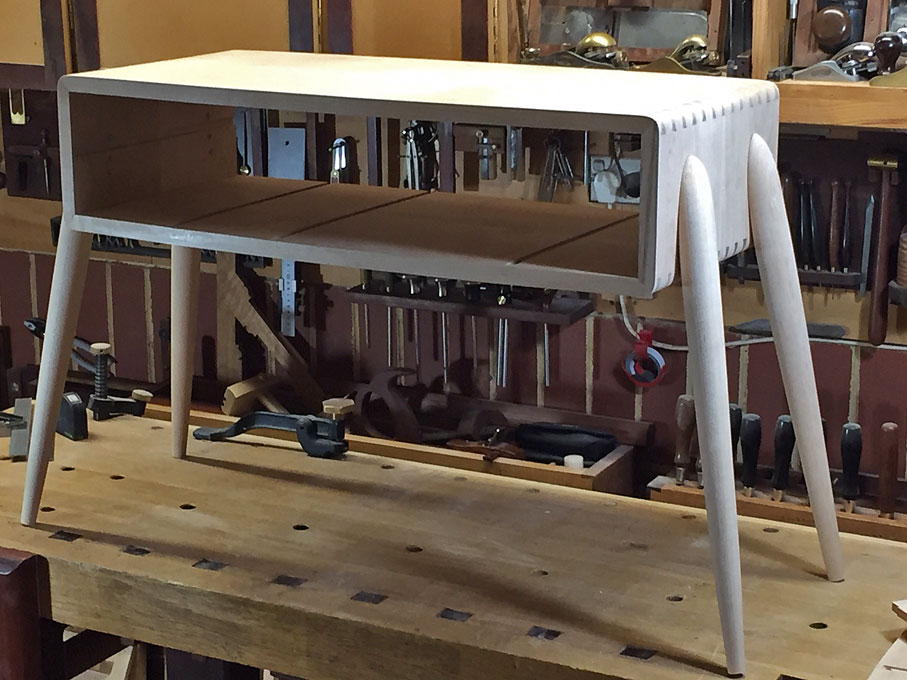

The splay to the side is 8 degree, and from the sides, the legs are aligned with the front and rear of the case.
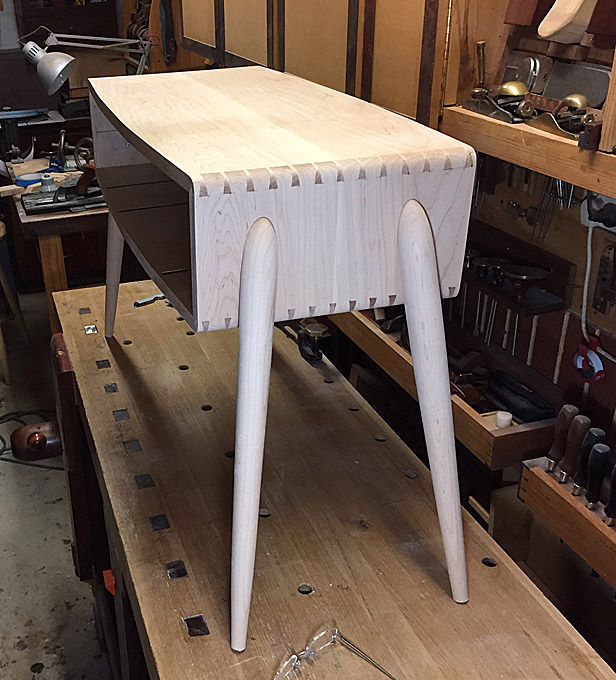
Drawers next
Regards from Perth
DerekVisit www.inthewoodshop.com for tutorials on constructing handtools, handtool reviews, and my trials and tribulations with furniture builds.
-
24th June 2019, 11:41 PM #18
Be inspired. Be creative. Be bold.
- Join Date
- Apr 2001
- Location
- Perth
- Posts
- 10,820
A frustrating Sunday: I began installing the horizontal divider/drawer blade, and my spatial confusion (or lack of concentration) kicked in. In went the divider ... upside down! Well, fortunately it jammed half-way and could not be glued in ...
Knocking it out, however, caused the rear section of the panel (it is made of three boards) to break off. It was glued back again, but the panel needed to dry before starting again, and so I lost my Sunday afternoon. This table is destined for the Perth Wood Show at the start of August, and I am already battling with time as weekends are generally all that are available for woodworking.
Fortunately, I had this afternoon (Monday) off from my practice, and had a couple of hours to try and catch up a little.
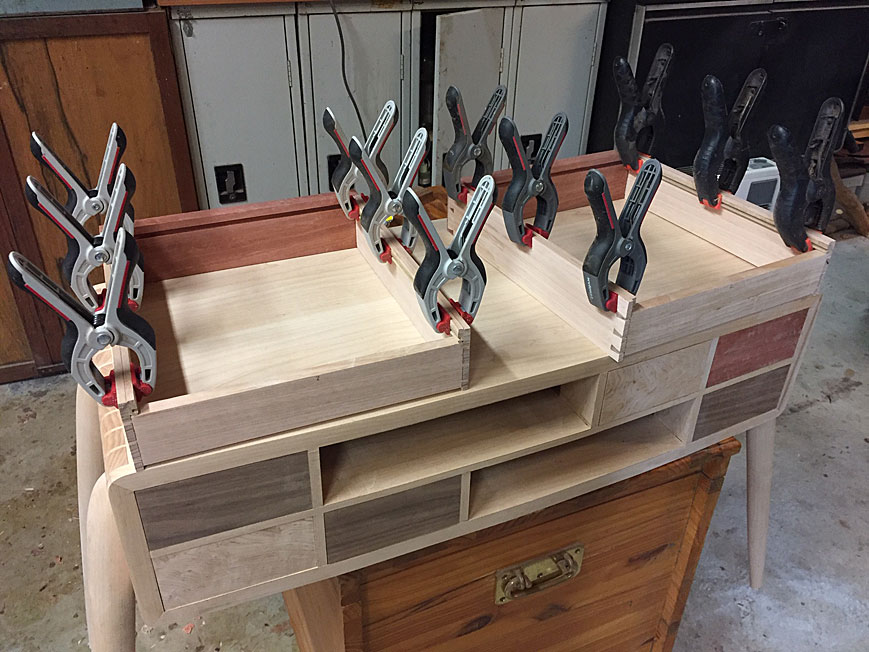
The glue dried, and the panel was fine. It was sanded to 240 grit, and then installed. Ditto the side dividers. All went smoothly ... all lined up and everything is square. Clearly I have been a good boy
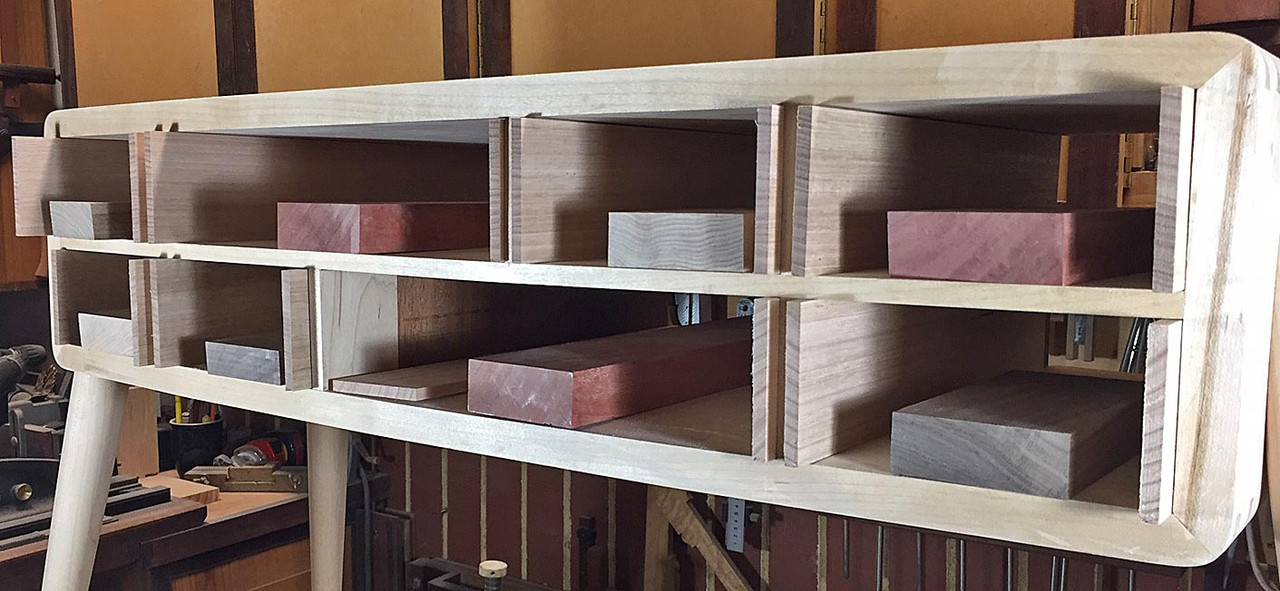
The reason why the table is termed "Harlequin" is that the drawers will be a mix of different timbers: Black Walnut (x3), Figured Hard Maple (x2) (both from the USA), and Tasmanian Blue Gum (x3) (which is local, of course).
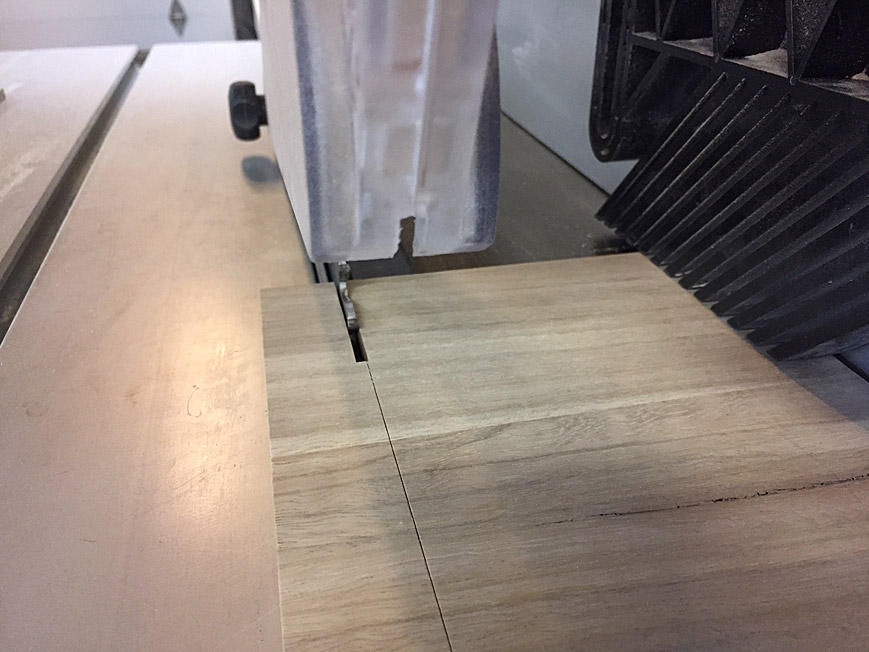
The drawer fronts all curve, and I spent the last part of the afternoon cutting out the Walnut blanks. This will will give you an idea of the effect ..
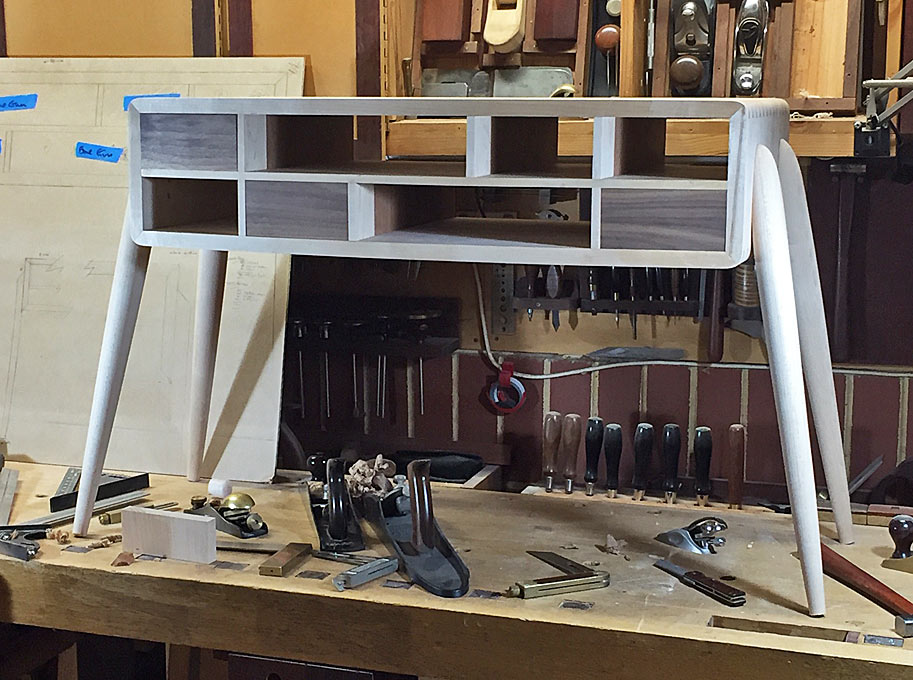
Unless someone is interested in a walk through in dovetailing on the curve (which I have posted here previously), the next images will be the completed table.
Regards from Perth
DerekVisit www.inthewoodshop.com for tutorials on constructing handtools, handtool reviews, and my trials and tribulations with furniture builds.
-
8th July 2019, 03:14 AM #19
Be inspired. Be creative. Be bold.
- Join Date
- Apr 2001
- Location
- Perth
- Posts
- 10,820
I was planning to next post with the completed Harlequin Side table, however it has been two steps forward and one back. Selecting the drawer fronts .. well, I've cut and recut them a few times, and only now satisfied with the result. It is no small deal each time since a drawer front has to be fitted into a recess that is shaped like a parallelogram. And if the fit is not good enough ... well, a few would-be drawer fronts were discarded.
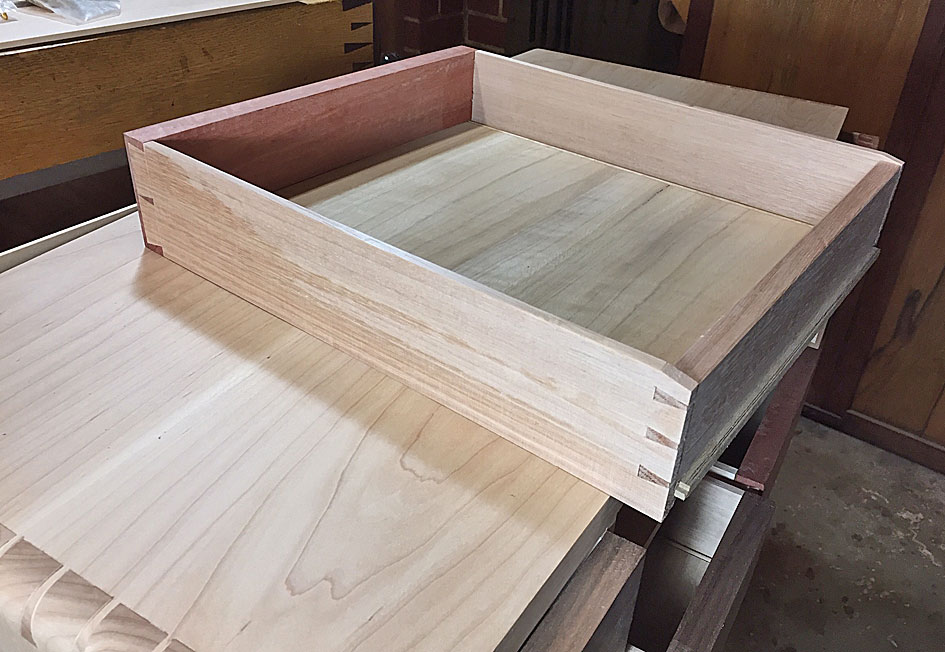
What parts are needed? Well, the drawer sides are 1/4" thick - too thin for grooves, so there will be slips to support the drawer bottom.
The drawer sides are Tasmanian Oak, which I use frequently, as it is a light wood that allows the drawer fronts to be shown to their best, and it is available quarter sawn. The drawer back will also be Tassie Oak.
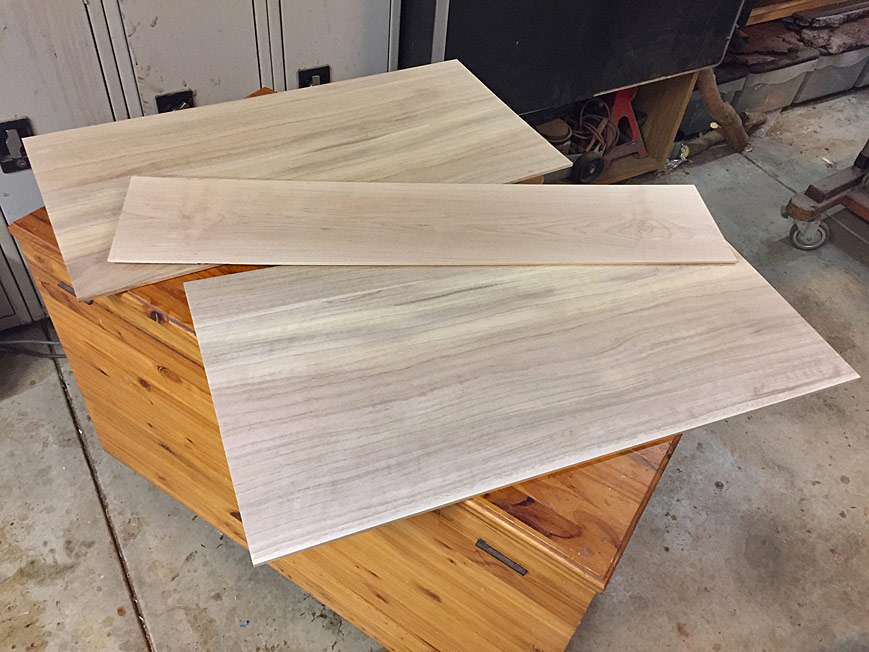
The drawer bottoms are solid wood and 1/4" thick. Rather than use Tasmanian Oak, I thought I would add a little life with Tasmanian Blue Gum. It is quite similar is texture and tone (although the photos here do not show this), but has more figure.
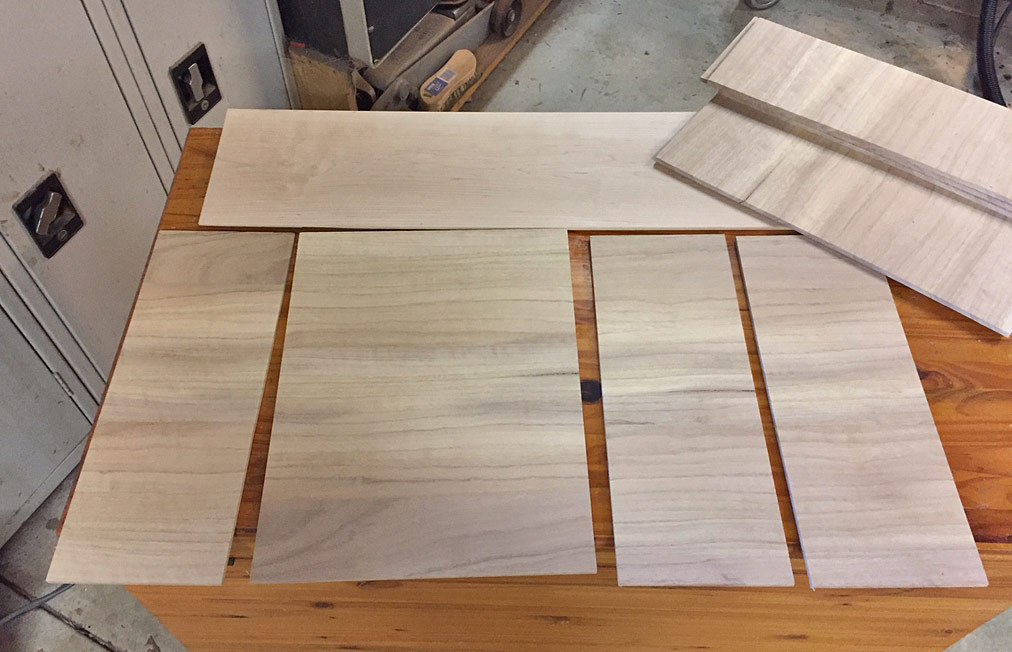
Enough here for 8 drawers ...
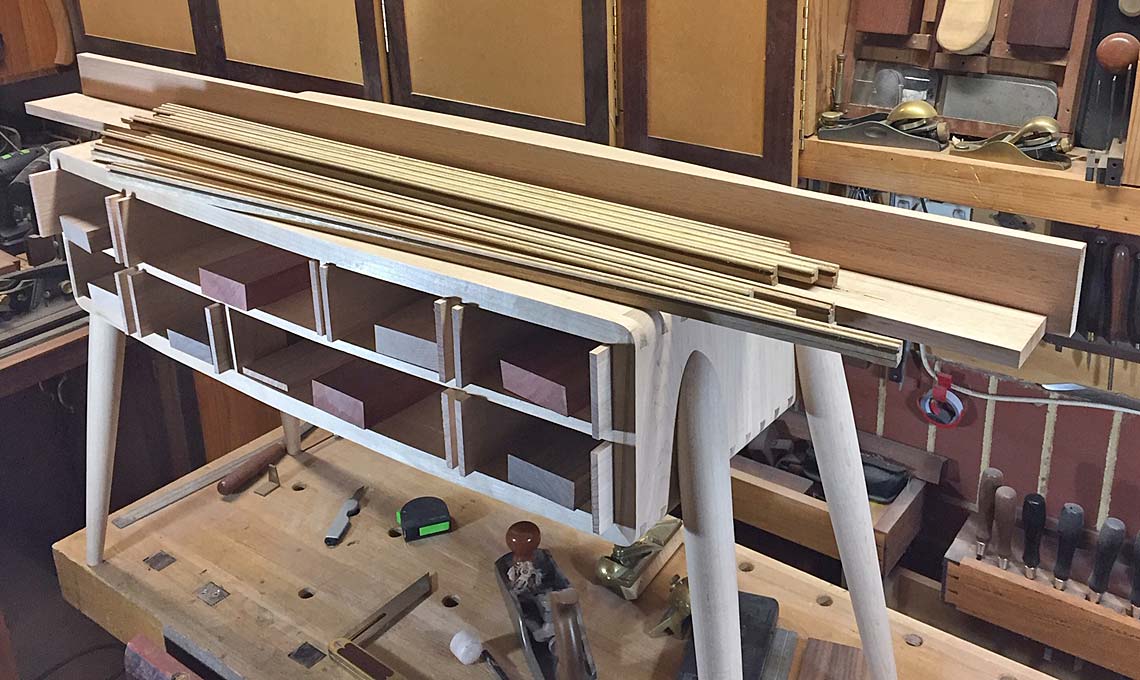
Drawer sides and drawer fronts ...
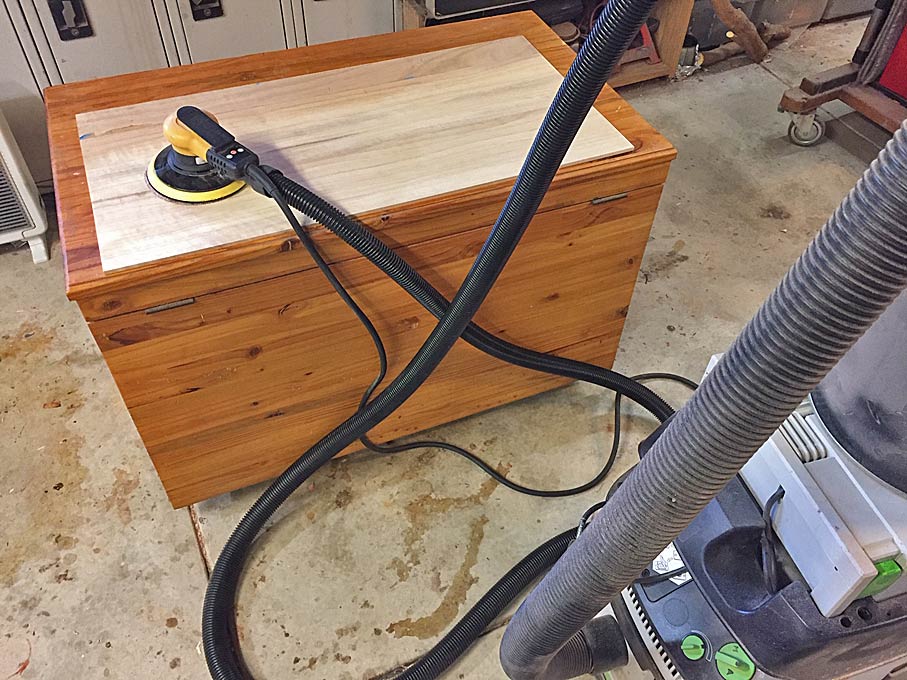
Great sander ... Mirka Ceros ...
These will be the drawer bottoms. The board in the centre is the Hard Maple case back ...
Do you think anyone will notice that the drawer bottoms run sequentially?
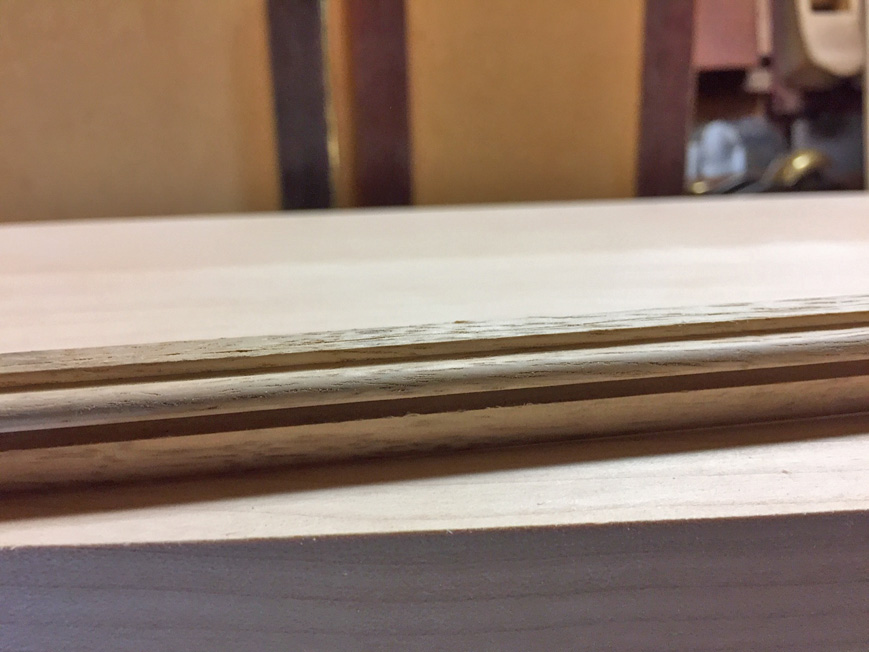
The making of the drawer slips may have some interest. I used Tasmanian Blue Gum (because it links to the drawer bottoms). This is quite interlocked and any planing with a plough to form either grooves or beads would be expected to end unhappily, with much tearout. I have posted this tip before: add a 15 degree backbevel to all plough blades to create a high 60 degree cutting angle.
The 3/16" beads were ploughed with the Veritas Combination Plane ...
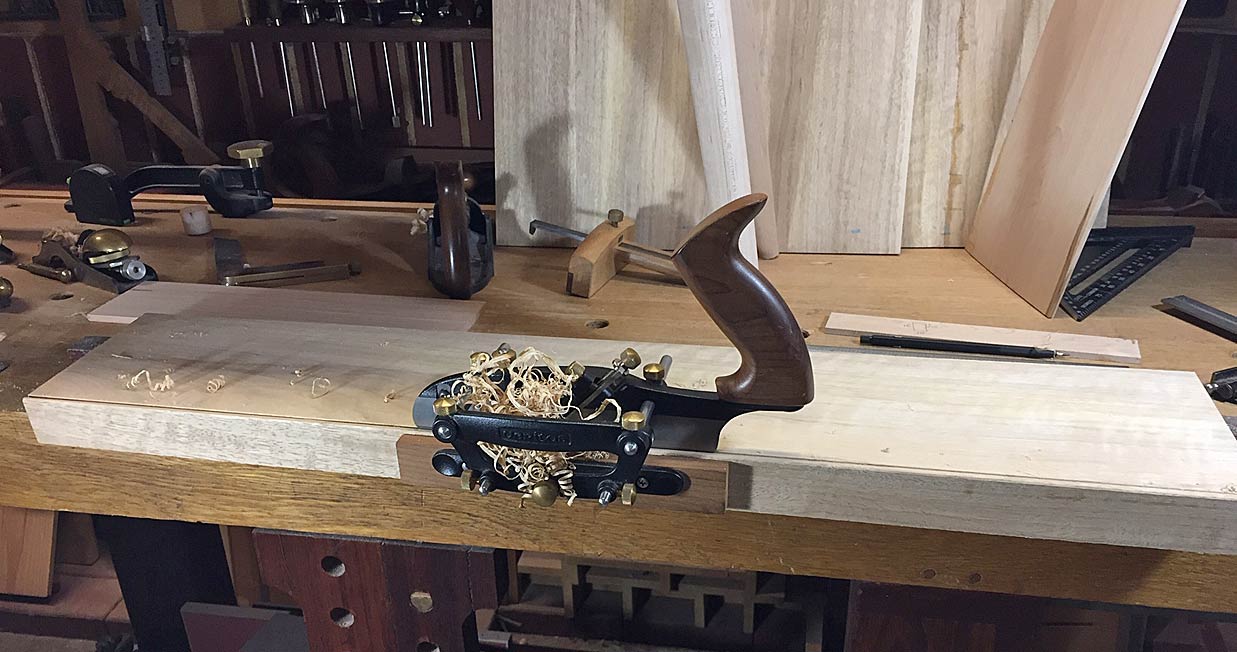
Brilliant finish ...
... and a 1/8" groove for the rebate in the drawer bottom was ploughed by the Veritas Small Plow ...
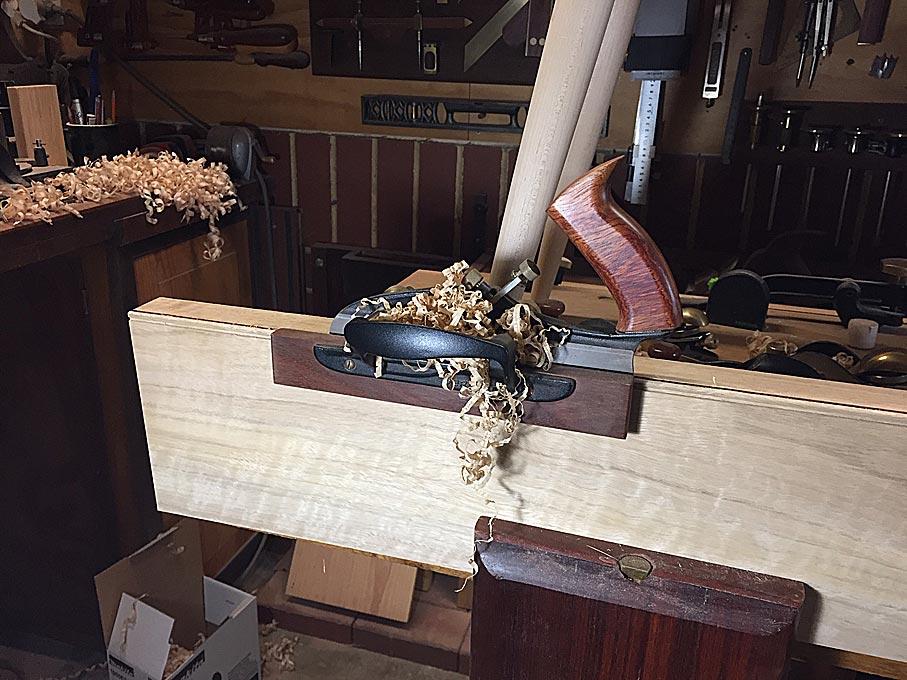
Again, tearout free ...
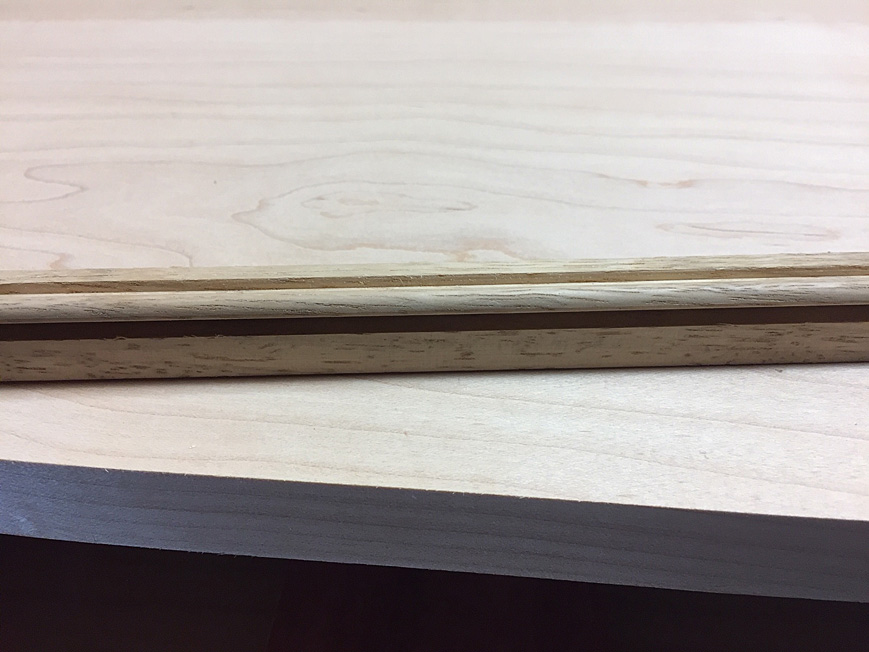
This is a mock up of the intersection of the drawer front (back), drawer side into drawer slip and against a drawer side ...
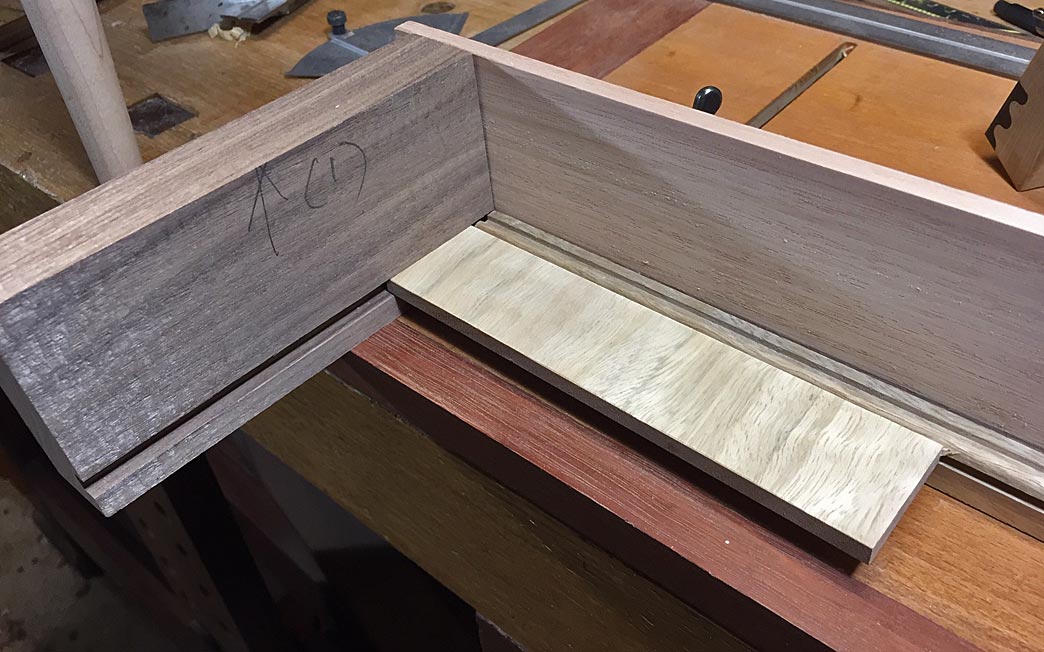
Note that the drawer front is straight/flat at this stage but, once dovetailed, they will be shaped to curve along the bow front of the case.
These are the timbers I have chosen for the drawer fronts. This is what gives the side table the harlequin name. Three timbers: Black Walnut, a pink Jarrah, and figured Hard Maple. Keep in mind that there is no finish at this stage ...
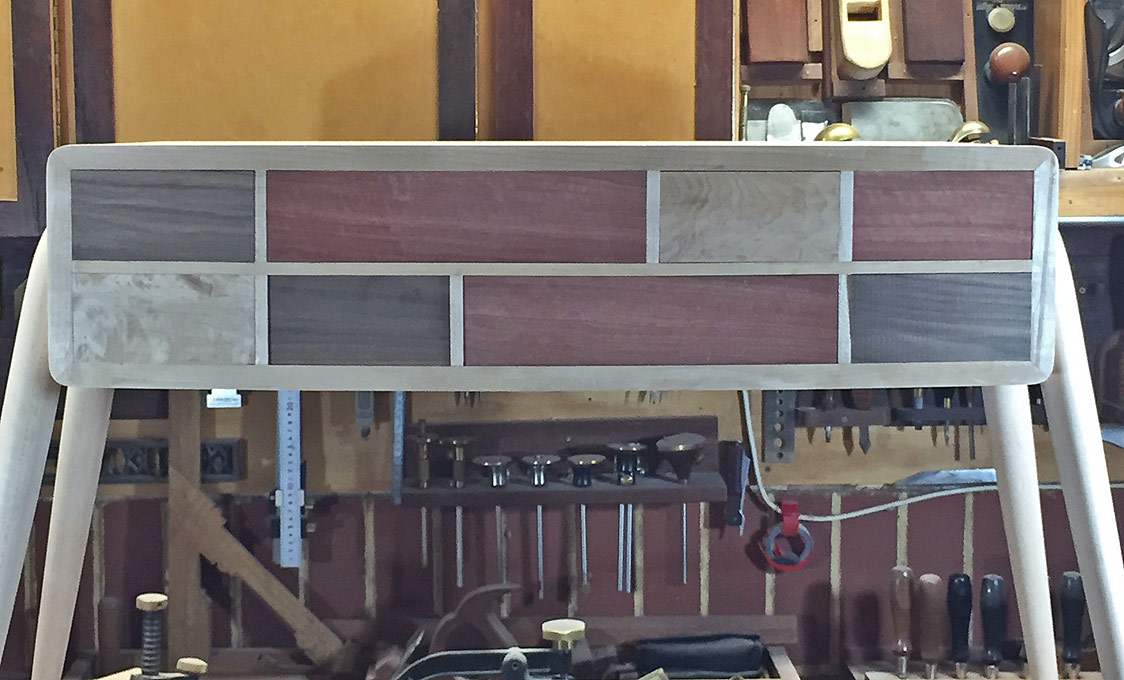
Next time hopefully with everything completed.
Regards from Perth
DerekVisit www.inthewoodshop.com for tutorials on constructing handtools, handtool reviews, and my trials and tribulations with furniture builds.
-
28th July 2019, 04:42 AM #20
Be inspired. Be creative. Be bold.
- Join Date
- Apr 2001
- Location
- Perth
- Posts
- 10,820
I am in the process of completing the Harlequin Table. I will post the finished piece in a couple of days. Here are a few pictures of making the drawer bottoms for the slips, which may interest a few.
Bill was not enamoured with the slips as they has this ruddy great groove down one side. That was a too-wide quirk from the beading blade. Not to worry Bill, I cut that section away, leaving just the bead.
Here are the slips being glued in ...
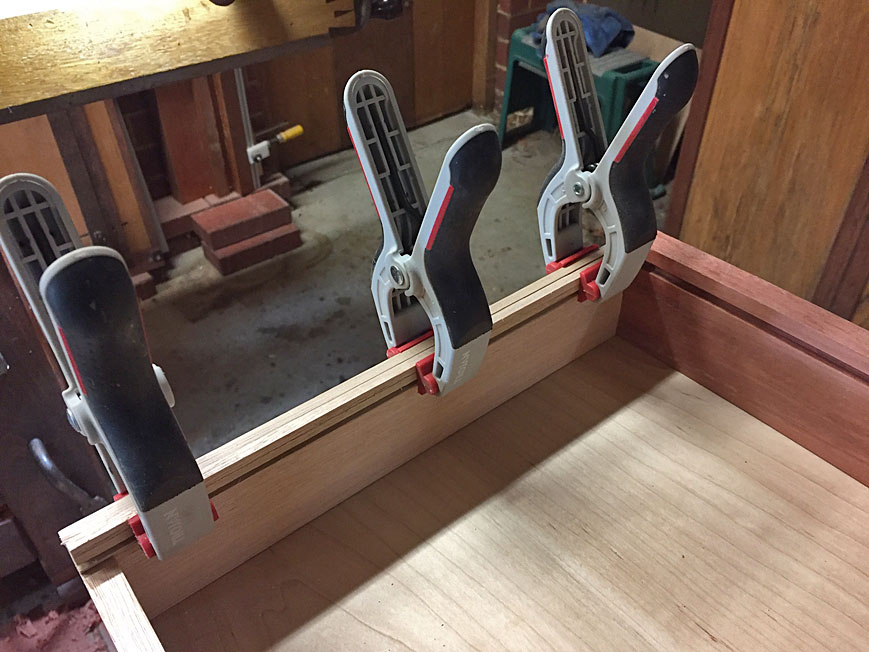
The drawer slips and bottoms are Tasmanian Blue Gum. The drawer sides are Tasmanian Oak. Both are 1/4" thick.
The groove in the slip is 1/8" (3mm). The slip requires a matching 1/8" rebate. This was planed with a skew rebate plane on a sticking board ...
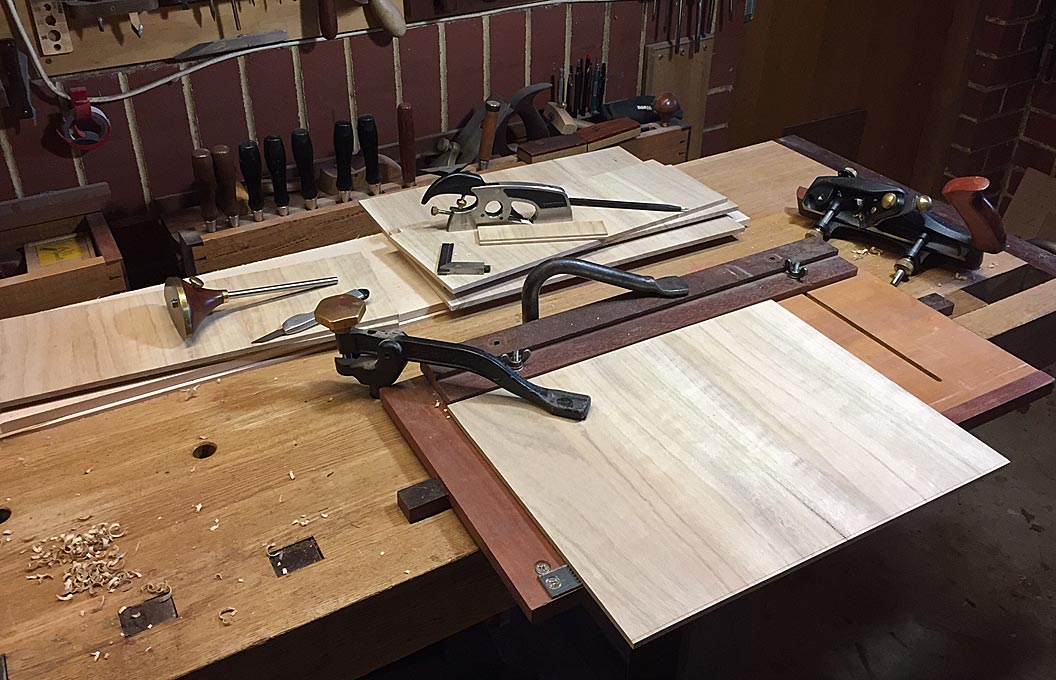
Although the plane has a nicker, I always scribe the line as well ...
It is worth the effort to set up the rebate plane for a precise cut ...
Once the one side is done, slide the tongue into the groove of the slip, and mark off the width of the drawer bottom ...
Then saw to width ...
Any fine tuning is done with a shoulder plane ...
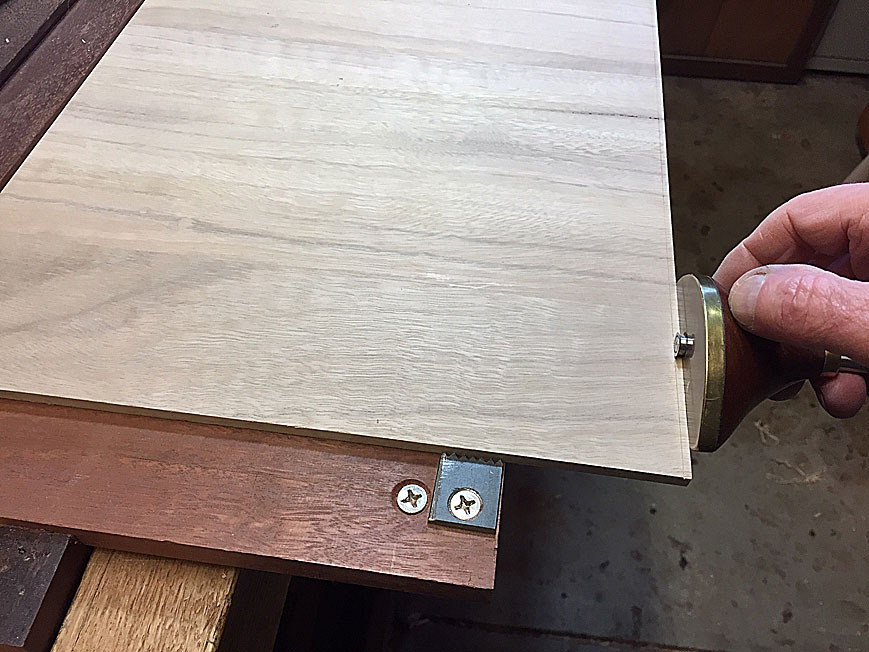
The drawer fronts are all curved, and the drawer bottom must be scribed to match this ...
Here is the fit behind the front of the drawer, and the match with the beaded slips ...
The rear of the drawer, with the added bearing surface from the slips ...
The profile of the drawer sides ...
Until the final pics ...
Regards from Perth
DerekVisit www.inthewoodshop.com for tutorials on constructing handtools, handtool reviews, and my trials and tribulations with furniture builds.
-
31st July 2019, 04:22 AM #21
Be inspired. Be creative. Be bold.
- Join Date
- Apr 2001
- Location
- Perth
- Posts
- 10,820
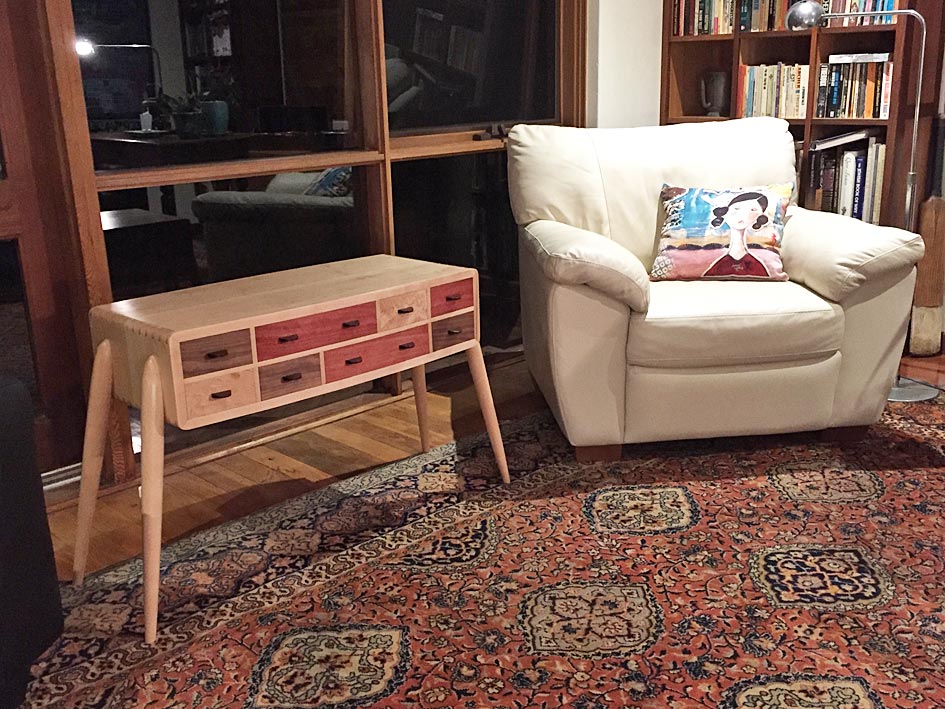
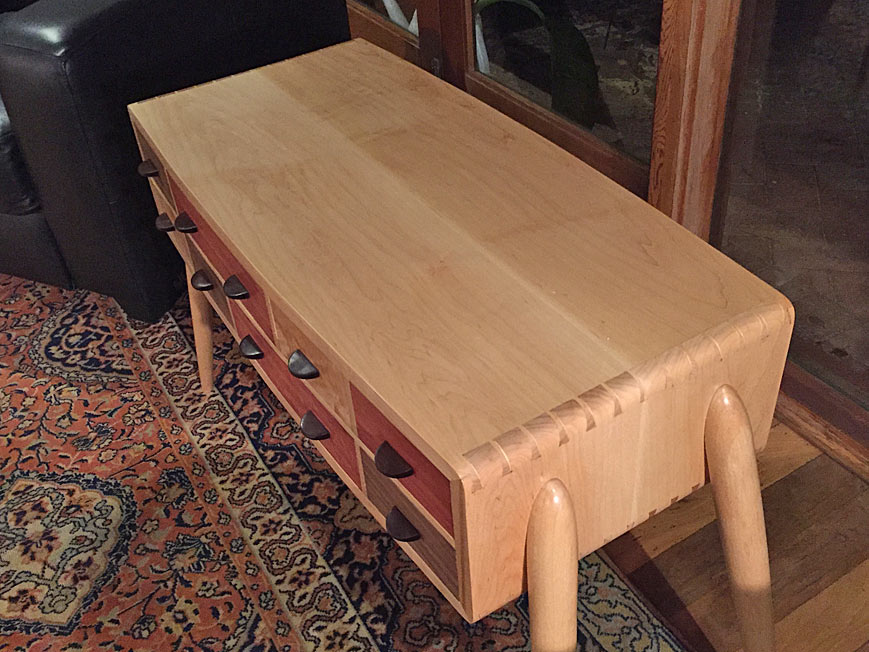
FINAL PICTURES
We are done building the side table. Here are pictures (taken with my iPhone6).
The case is Hard Maple from the USA. The drawer fronts are Black Walnut, figured Hard Maple, and pink Jarrah (hence the name, Harlequin). The drawer sides are quartersawn Tasmanian Oak, and the drawer bottoms/slips were made from Tasmanian Blue Gum.
Finish was, initially, two coats of dewaxed UBeaut Hard White Shellac (the very faint amber adds a little warmth), followed by three coats of General Finishes water-based poly (this remains clear - does not yellow the maple - and appears to have some UV protection. It is hard wearing, which is necessary for a side table).
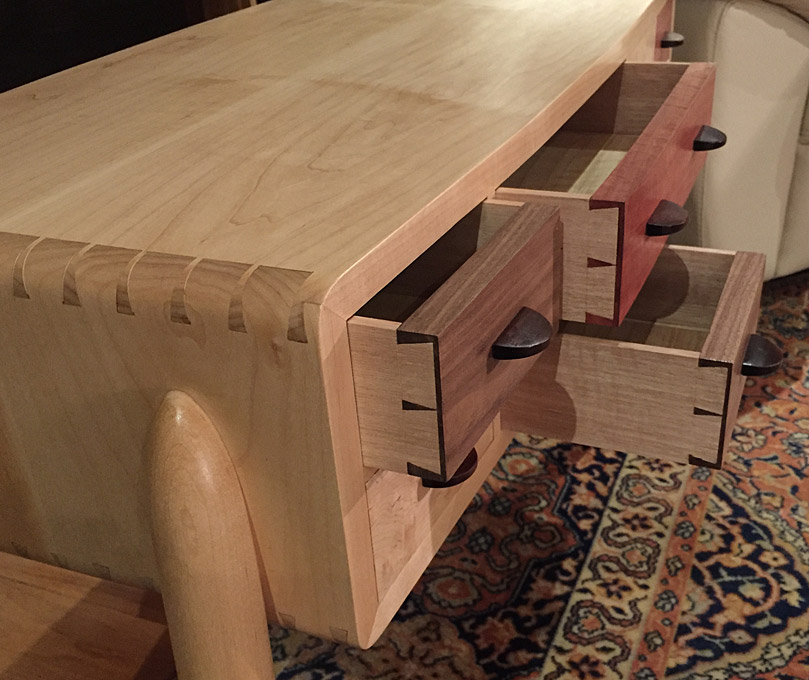
The build features mitred, rounded dovetails and bow front and back. Eight drawers featuring compound dovetailing to match the bow front. Drawers are traditional half-blind dovetails at the front and through dovetails at the rear, with drawer bottoms into slips.
About 2 months to build, mainly on weekends.
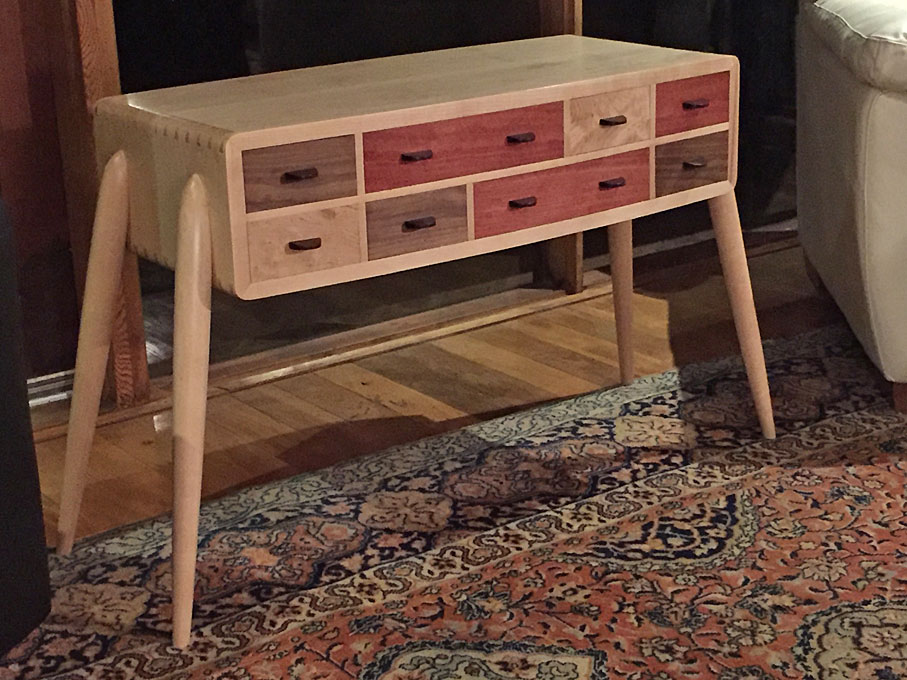

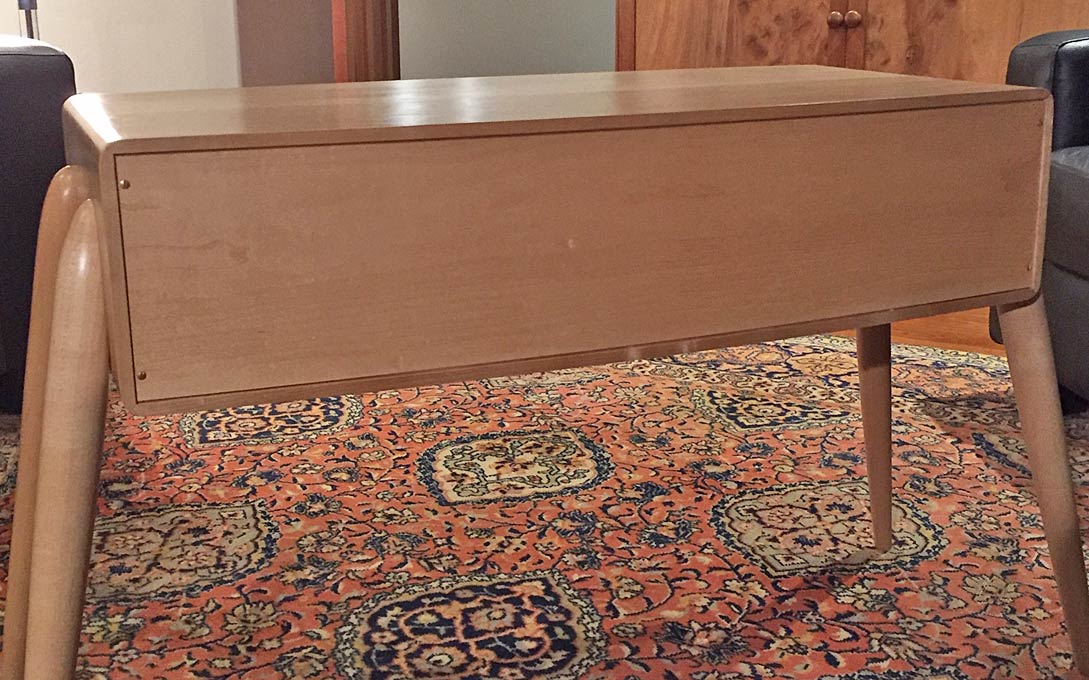
Here is the rear of the table (which will be seen through the windows, which run floor-to-ceiling along the family room ...
The pulls were shaped from what-I-believe-to-be-some-type-of Ebony ...
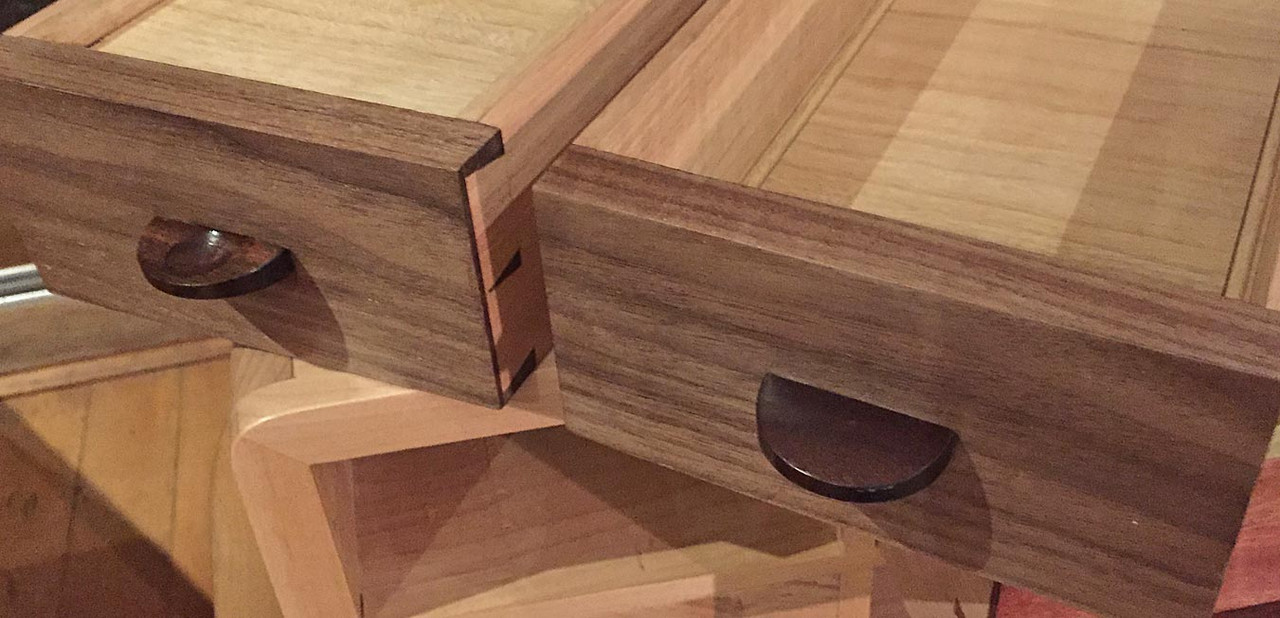
The obligatory dovetails ...
Do you think that anyone will notice that the drawer bottoms run sequentially?

And this one is for Bill, who was concerned that the chamfers at the end of the drawers (to ease entry into the case) might impair their extension ...
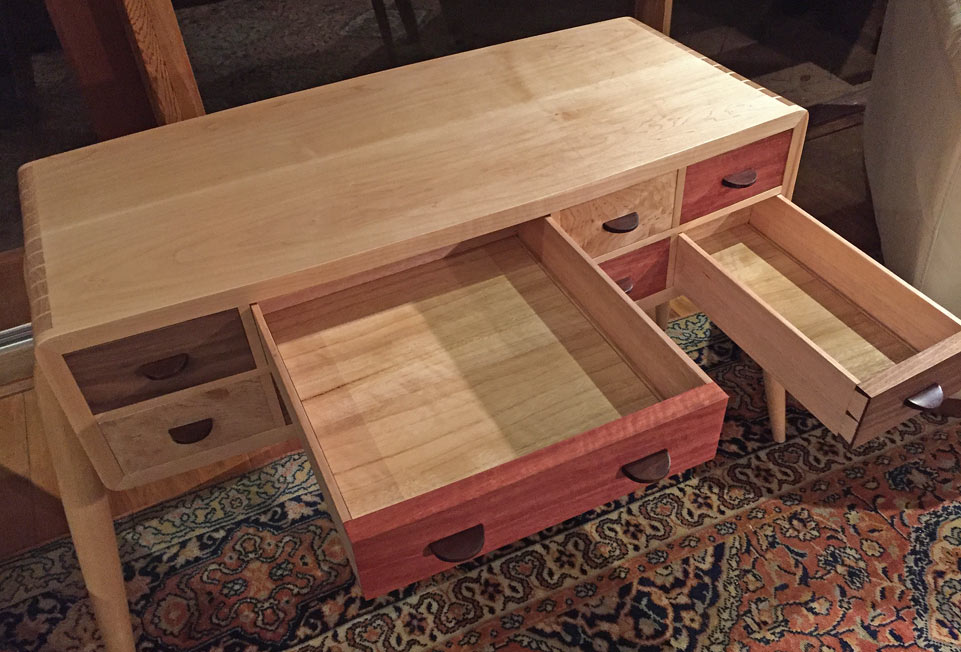
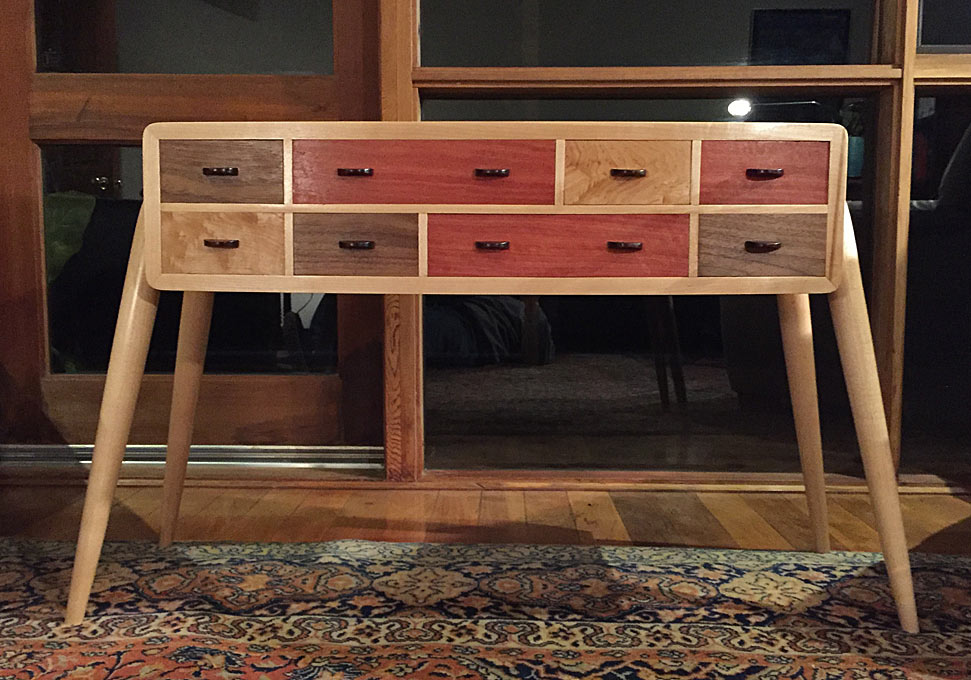
A last look ...
Thursday morning I haul the table to the Perth Wood Show for the annual furniture competition. Wish me luck.
Regards from Perth
DerekVisit www.inthewoodshop.com for tutorials on constructing handtools, handtool reviews, and my trials and tribulations with furniture builds.
-
31st July 2019, 08:13 AM #22
Senior Member
- Join Date
- Aug 2016
- Location
- Hervey Bay
- Age
- 46
- Posts
- 230
Beautiful piece Derek.
Thanks for taking the time to document the build, very interesting and educational.
-
31st July 2019, 09:19 AM #23
SENIOR MEMBER
- Join Date
- Sep 2010
- Location
- Port Sorell, Tasmania
- Posts
- 592
Ill second the beautiful work comment, thanks for posting Derek. Will be interested to hear how you go in the furniture competition. No doubt there'll be other high standard work there.
TonyYou can't use up creativity. The more you use, the more you have. ~Oscar Wilde
-
31st July 2019, 10:20 AM #24
GOLD MEMBER
- Join Date
- Mar 2008
- Location
- Hobart, Tas
- Posts
- 1,211
That�s a lovely piece of furniture Derek. Beyond the technical execution which is inspiring to say the least, the different timber draw fronts really add a fun element to it.
I will chorus the other comments in thanking you for documenting and sharing your thought process throughout the build.
Kind regards,
Lance
-
31st July 2019, 02:19 PM #25
SENIOR MEMBER
- Join Date
- Mar 2018
- Location
- Sydney
- Posts
- 469
That's a beautiful piece and best of luck in the competition.
As a retrospective review, is there anything you would change (design, construction method or joinery) if you were to start that again?
Regards,
Adam
-
31st July 2019, 06:03 PM #26
 Senior Member
- Join Date
- Jun 2011
- Location
- Bongaree, Queensland
- Age
- 84
- Posts
- 162
A tour-de- force in the design the construction and also the documenting of the processes involved. Absolutely brilliant. Brian.
- - - Updated - - -
A tour-de- force in the design the construction and also the documenting of the processes involved. Absolutely brilliant. Brian.


 Reply With Quote
Similar Threads
-
Side Table
By brendan stemp in forum WOODTURNING - GENERALReplies: 7Last Post: 16th October 2014, 08:57 PM -
Harlequin bowl (tutorial)
By Michael Spain in forum WOODTURNING - GENERALReplies: 7Last Post: 31st October 2011, 07:08 AM -
Bed Side table
By Woody1 in forum WOODWORK PICSReplies: 9Last Post: 28th September 2010, 06:28 PM -
My (harlequin) workshop
By journeyman Mick in forum WOODWORK PICSReplies: 4Last Post: 18th August 2003, 09:22 AM
