

 Thanks:
  Likes:
  Needs Pictures: 0
 Picture(s) thanks:
Results 1 to 15 of 23
Thread: The kitchen is finished!
-
16th May 2017, 02:44 AM #1
 Be inspired. Be creative. Be bold.


- Join Date
- Apr 2001
- Location
- Perth
- Posts
- 10,832
 The kitchen is finished!
Well, finished except for two side panels, but Lynndy has given me time off to build a piece of furniture

This post is to conclude what I started, for those interested in kitchen builds ... and, I guess, woodwork. The earlier posts I made - about building Shaker-style doors, and hand finishing them in water-based poly - are on my website for reference: http://www.inthewoodshop.com/Furnitu...20Rebuild.html
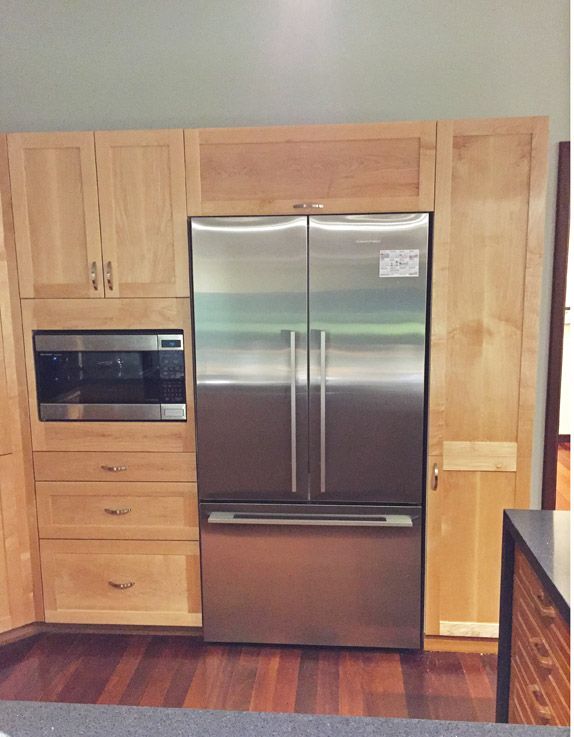
The original kitchen was 25 years old and tired. Even more tired was the fidge-freezer, which we bought 35 years ago. It needed to be replaced. The new fridge was wider and a touch taller than the old. The problem was that the alcove into which it was built had a cabinet above, and changing this cabinet meant changing the door � and it would not be possible to match the Tasmanian Oak to blend in with all the other cabinet doors and drawers.
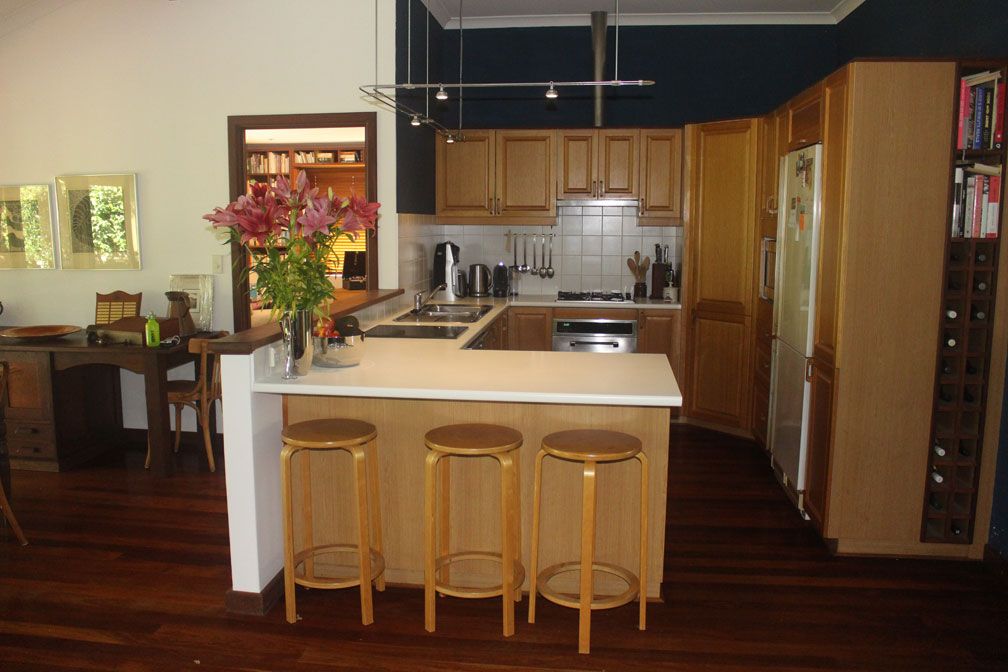
So we needed new cabinet doors and drawer fronts � and then it became a new countertop in granite � and then a more modern range hood ... and the gas hob would be replaced with a fancy-shmancy ceramic electric one that Lynndy has been eyeing for a long time.
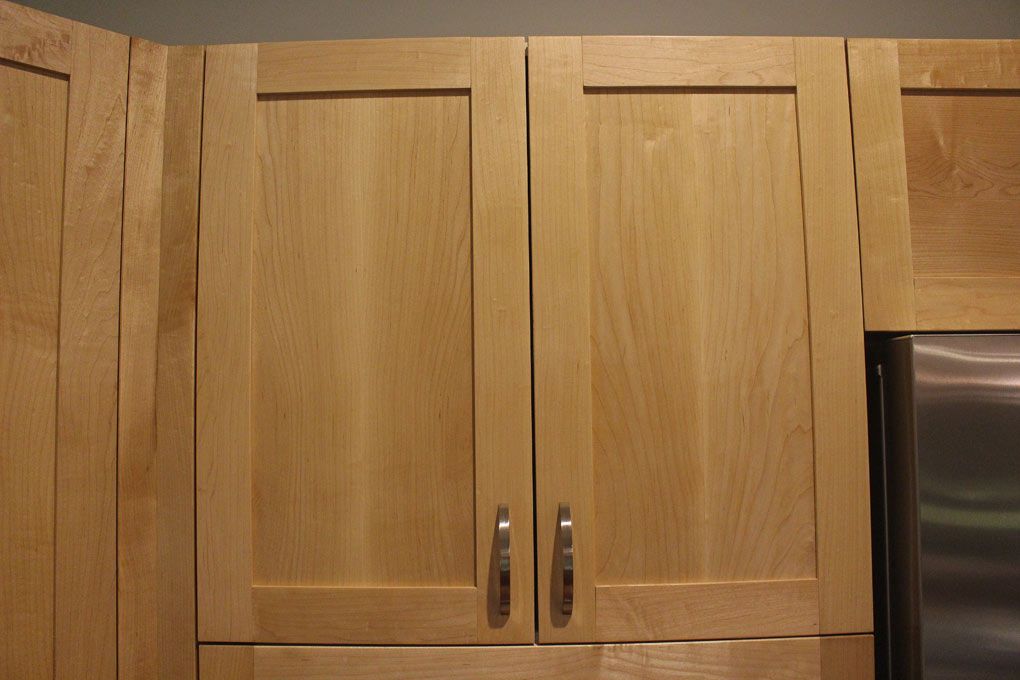
Lynndy wanted modern and light. And so the cabinet design would be Shaker and in Hard Maple (from the USA - my local wood salvage supplier had just received a large shipment).
I think that Lynndy planned this all along.
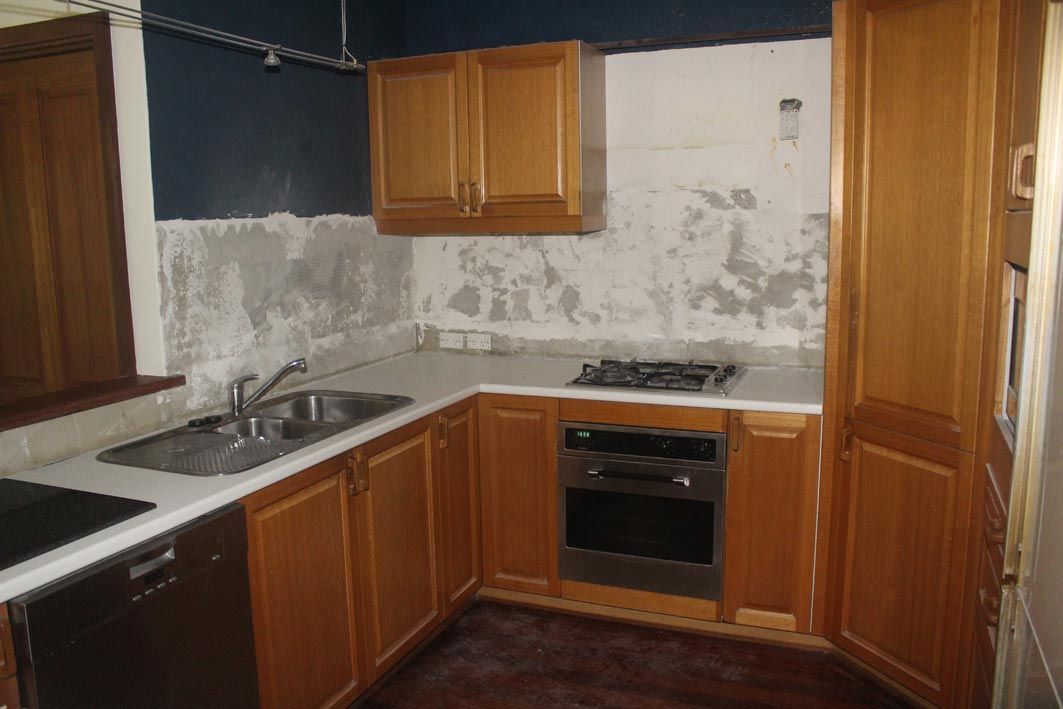
The old kitchen ...
With tiles stripped and a few cabinets removed ...
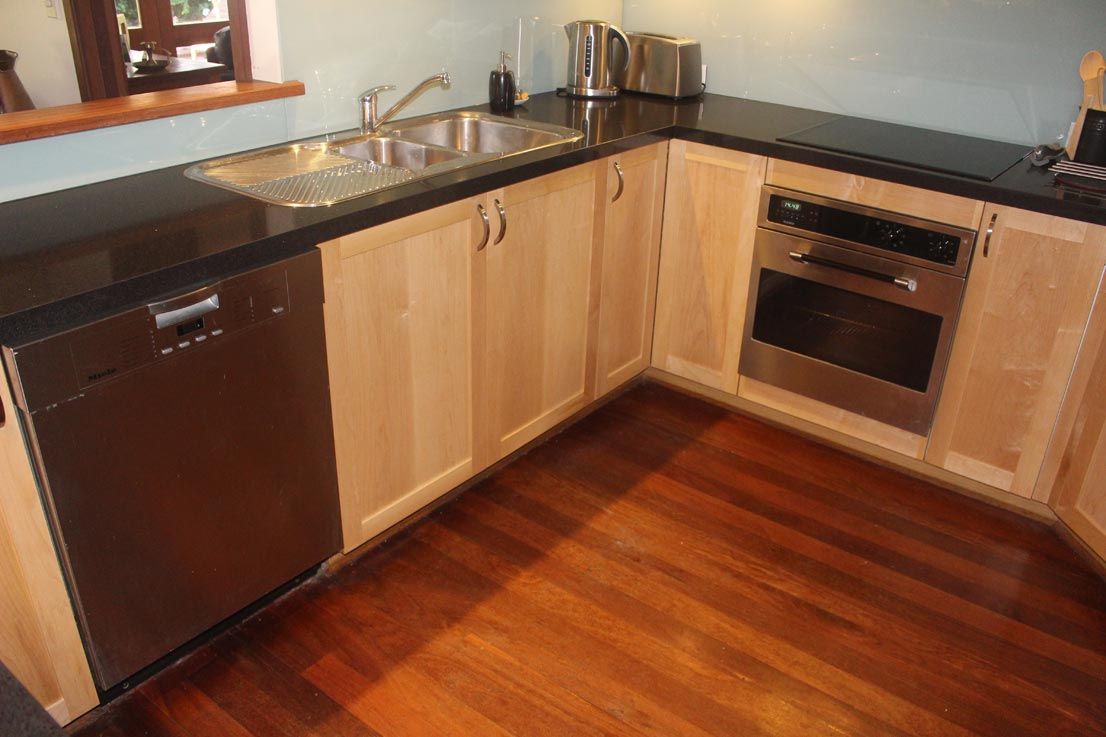
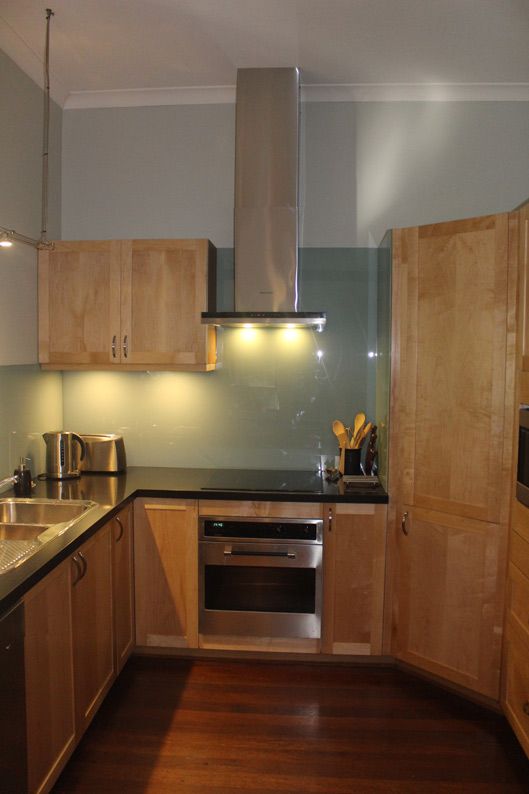
The countertop was replaced with granite ...
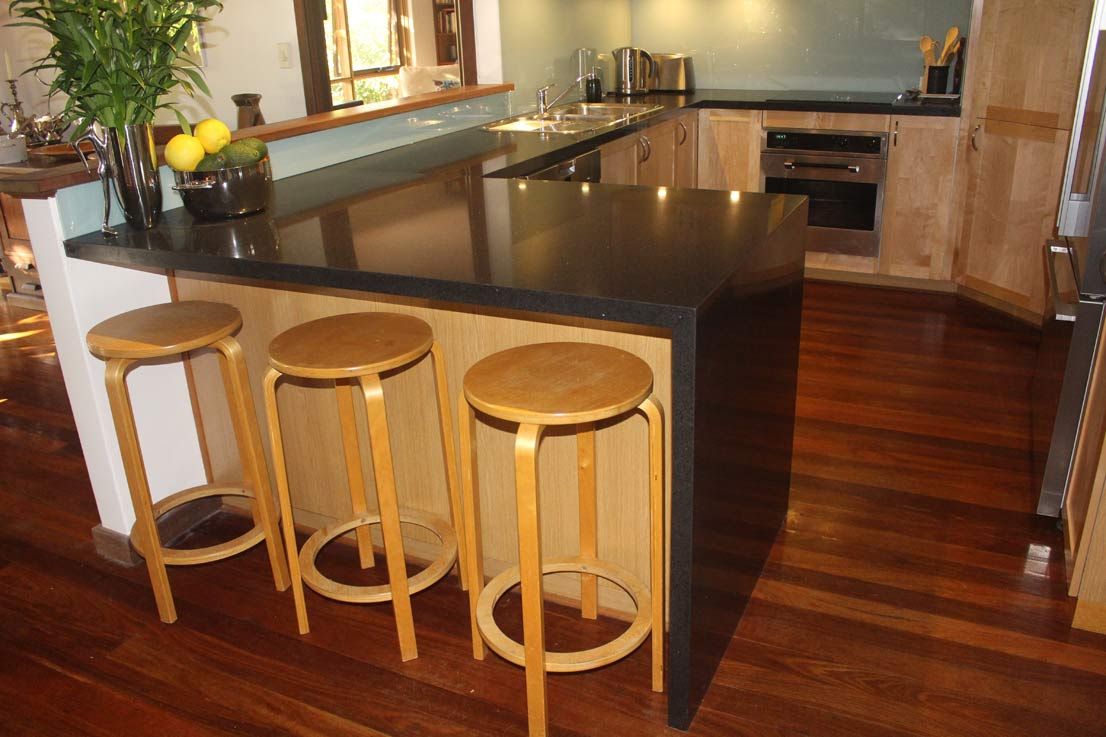
Yes, bar stools are on my build bucket list
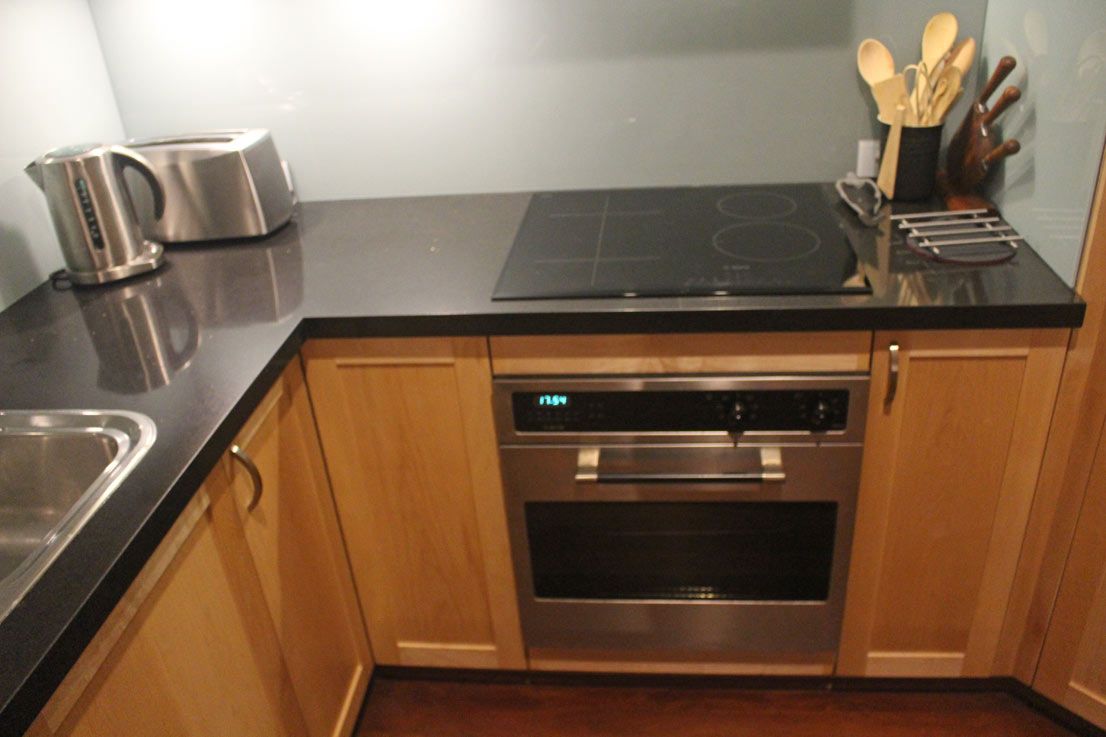
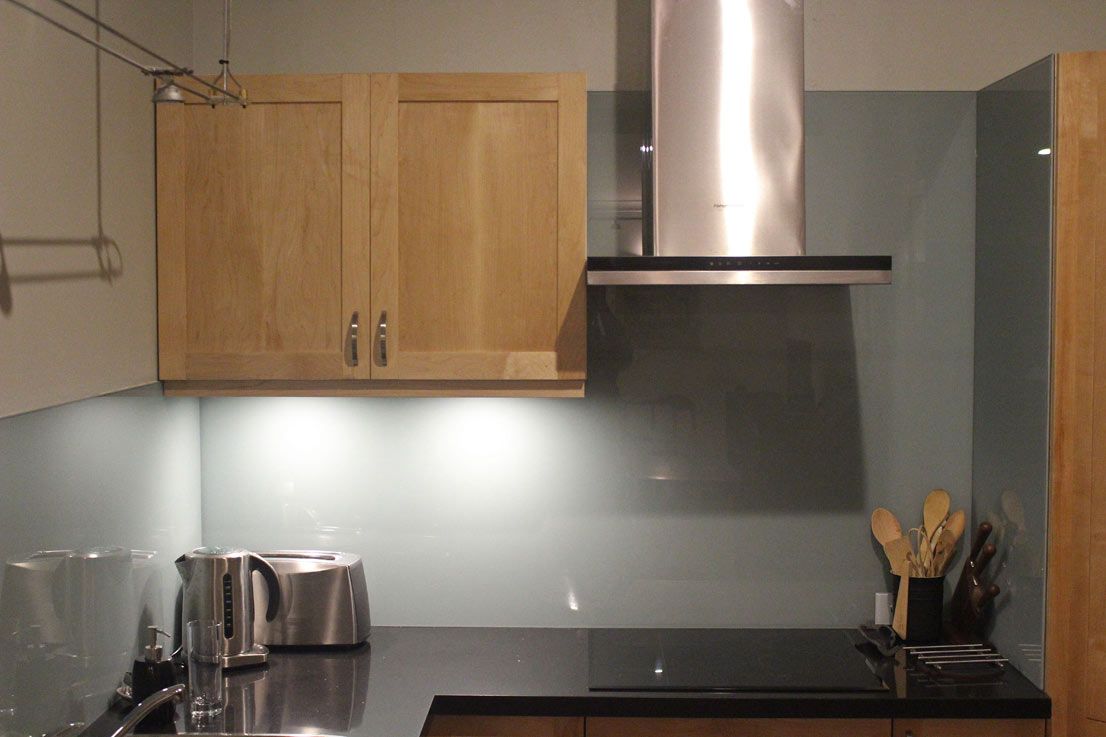
The backsplash is now a light green glass. And the new range hood ...
Some of the drawers ...

... and doors ...
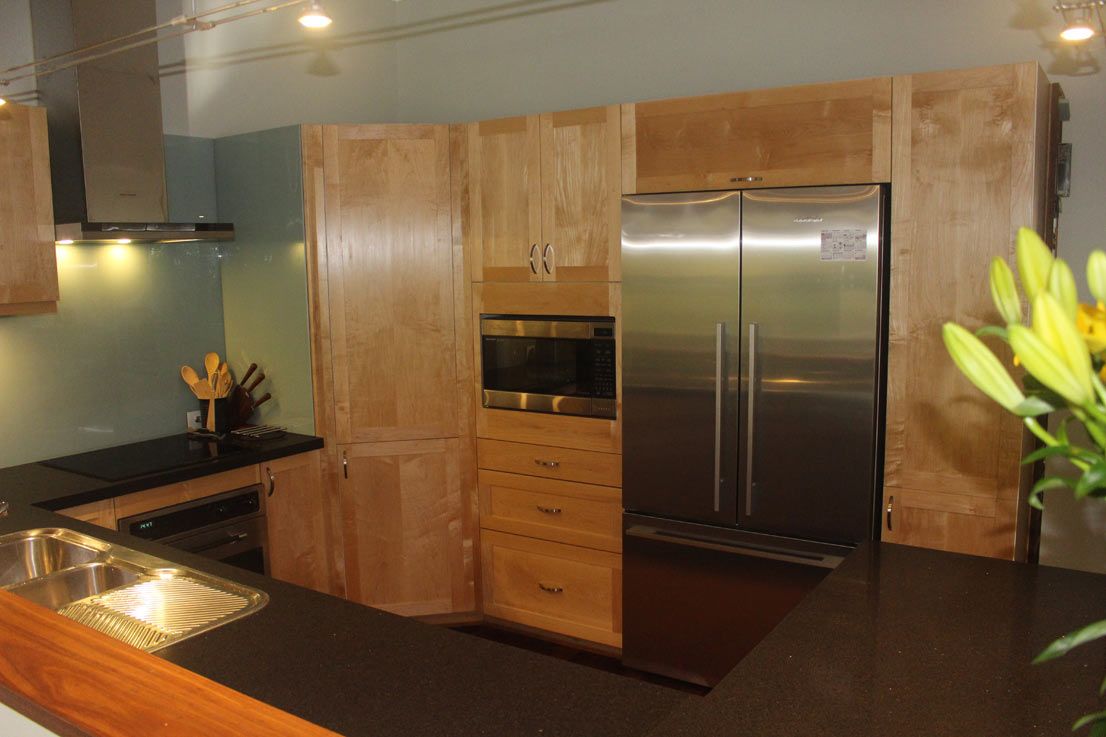
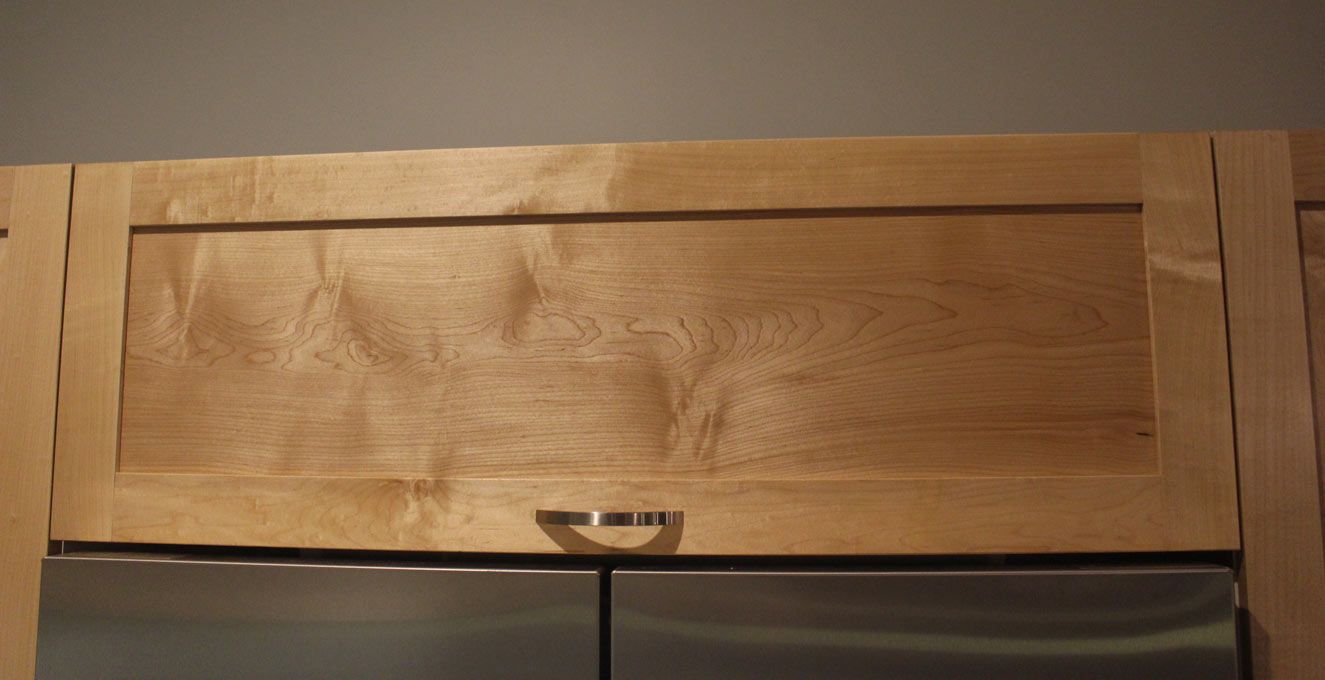
The new (bloody ... mutter .. mutter ..) fridge ...
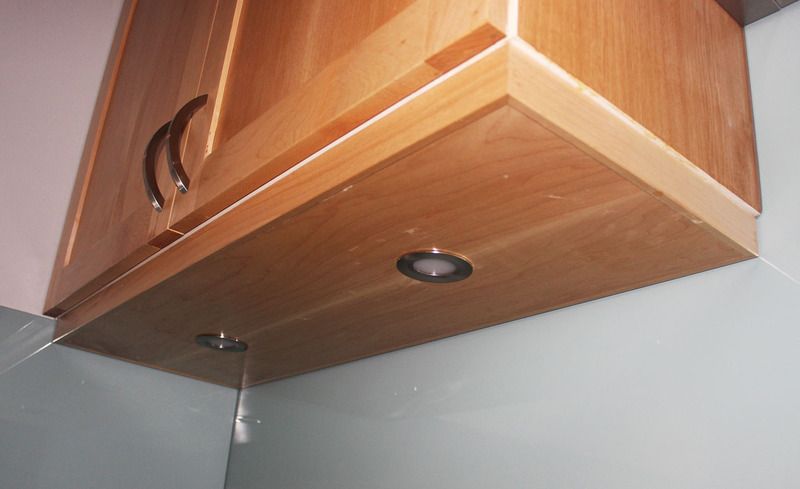
LED lighting fitted under one cabinet ...
A few doors close up ...
Last picture ...
Regards from Perth
DerekVisit www.inthewoodshop.com for tutorials on constructing handtools, handtool reviews, and my trials and tribulations with furniture builds.
-
16th May 2017 02:44 AM # ADSGoogle Adsense Advertisement
- Join Date
- Always
- Location
- Advertising world
- Posts
- Many
-
16th May 2017, 06:22 AM #2
.
- Join Date
- Dec 2013
- Location
- San Antonio, Texas, USA
- Posts
- 3,070
Great work Derek,
I've never seen single piece glass backsplash before, how is it stuck to the walls?
Regards,
RobInnovations are those useful things that, by dint of chance, manage to survive the stupidity and destructive tendencies inherent in human nature.
-
16th May 2017, 08:48 AM #3
 GOLD MEMBER
- Join Date
- May 2012
- Location
- Woodstock (Cowra)
- Age
- 74
- Posts
- 3,383
Great job
 but I'm curious why the odd drawer front on the bottom of the utility drawers?
The person who never made a mistake never made anything
but I'm curious why the odd drawer front on the bottom of the utility drawers?
The person who never made a mistake never made anything
Cheers
Ray
-
16th May 2017, 10:19 AM #4
 SENIOR MEMBER
- Join Date
- Jul 2014
- Location
- Brisbane
- Posts
- 942
Love the look of the maple against that dark counter top. And the reveals around the doors look absolutely spot on.
Out of curiosity, did you ever consider having a wooden counter top?
-
16th May 2017, 11:27 AM #5
Deceased 18/12/2020
- Join Date
- Aug 2007
- Location
- Melbourne
- Posts
- 2,178
Lovely work, Derek. I can see why the Domino was so necessary!
Regards,
Rob
-
16th May 2017, 12:26 PM #6
Intermediate Member
- Join Date
- Feb 2016
- Location
- Melbourne
- Age
- 37
- Posts
- 38
Looks great.
You may be surprised but those bar stools would be considered in fashion at the moment. Everything goes in circles I guess.
-
16th May 2017, 01:41 PM #7
Be inspired. Be creative. Be bold.
- Join Date
- Apr 2001
- Location
- Perth
- Posts
- 10,832
I was waiting for someone to notice! Originally Posted by rwbuild


It would have been nice to frame-and-panel all the drawers, but some were too narrow. These became solid fronts. The deeper drawers received a frame-and-panel. I completed the unit with the microwave first. When installing the new fronts, I noticed that I had not turned the frame around ... the mindset was still the same as with the doors. I was going to remake them when it occurred to me that the flow was still there. It did not bother me - or Lynndy (importantly) - and I made a note to wonder whether anyone on the forum would notice!
Regards from Perth
DerekVisit www.inthewoodshop.com for tutorials on constructing handtools, handtool reviews, and my trials and tribulations with furniture builds.
-
16th May 2017, 01:50 PM #8
Be inspired. Be creative. Be bold.
- Join Date
- Apr 2001
- Location
- Perth
- Posts
- 10,832
Originally Posted by rob streeper
Hi Rob
The glass is cut in three sections: one piece for the far wall, and two sections for the low, narrow splash back on the side - that one would have been too delicate to have in one piece. The company that did this took really careful measurements! Damn, they were good.
The glass is 6mm thick. The glue is spread thinly, but like for tiles as the walls are not perfectly flush (in spite of my efforts at repairing them where I removed tiles).
The effect of the glass walls along with the granite top and ceramic hob (which is the same colour) is to make it all look sleeker and less broken up, and this seems to make the kitchen feel larger.
Regards from Perth
DerekVisit www.inthewoodshop.com for tutorials on constructing handtools, handtool reviews, and my trials and tribulations with furniture builds.
-
16th May 2017, 01:53 PM #9
Be inspired. Be creative. Be bold.
- Join Date
- Apr 2001
- Location
- Perth
- Posts
- 10,832
Wooden top? No. Firstly, we have so much wood in the house .... Jarrah floors and wooden cabinets (now in Hard Maple), that another wooden surface would have been too much. Secondly, while I love the look and feel of wood, I don't think it is as practical for kitchen bench tops, as it may delaminate, need refinishing, become more easily damaged, etc. Originally Posted by Alkahestic
Regards from Perth
DerekVisit www.inthewoodshop.com for tutorials on constructing handtools, handtool reviews, and my trials and tribulations with furniture builds.
-
16th May 2017, 01:59 PM #10
Be inspired. Be creative. Be bold.
- Join Date
- Apr 2001
- Location
- Perth
- Posts
- 10,832
Thanks Rob. Originally Posted by LGS
Yeah, this was definitely a time for the assistance of a Domino! Having used it, I think that it is a wonderful machine. However I shall not use it in the furniture I build - partly because I like the idea of traditional joinery, and partly as I find a haunched mortice-and-tenon a stringer joint with less likelihood of twisting. No doubt I shall find use for the Domino in the future.
Regards from Perth
DerekVisit www.inthewoodshop.com for tutorials on constructing handtools, handtool reviews, and my trials and tribulations with furniture builds.
-
16th May 2017, 02:01 PM #11
Retired Member
- Join Date
- Nov 2006
- Location
- Bendigo Victoria
- Age
- 80
- Posts
- 16,560
I was hoping someone would ask about that Originally Posted by derekcohen

I found that oddly jarring and assumed it wasn't finished.
Had you thought about making a whole door and sawing it up for the drawer fronts?
Great job on the kitchen though, looks very professional.
-
16th May 2017, 03:53 PM #12
Be inspired. Be creative. Be bold.
- Join Date
- Apr 2001
- Location
- Perth
- Posts
- 10,832
Hi Fred
Here's a picture of the drawers below the microwave (taken with my phone but should have enough detail) ...
I thought there was enough "link" with the solid drawer to not get fussed about the orientation of the frame. If it had jarred, I would have rebuilt these. Having done these this way, I simply continued the pattern on the framed drawer on the other unit.
Regards from Perth
DerekVisit www.inthewoodshop.com for tutorials on constructing handtools, handtool reviews, and my trials and tribulations with furniture builds.
-
16th May 2017, 04:13 PM #13
SENIOR MEMBER
- Join Date
- Feb 2016
- Location
- Perth WA Australia
- Posts
- 830
Looks great!
I've always fancied tackling the kitchen and getting rid of the dated melamine construction that is currently occupies most of the kitchen.
Great move on the granite, and choice of colors. Agree that you can definitely have too much wood in the house.
-
16th May 2017, 04:21 PM #14
GOLD MEMBER
- Join Date
- Feb 2003
- Location
- back in Alberta for a while
- Age
- 68
- Posts
- 12,006
I too noticed, but was reticent to comment. Originally Posted by derekcohen
As you have done such a professional job.
But
Our kitchen back in Sydney had a similar detail on the lower two drawers in the drawer bank and similar shaker style cabinet doors.
In retrospect, we should have kept all the drawers as plain panels.regards from Alberta, Canada
ian
-
16th May 2017, 09:08 PM #15
Novice
- Join Date
- Sep 2010
- Location
- Perth
- Posts
- 17
Looks really nice mate!


 Reply With Quote


Similar Threads
-
Finished (mostly) my DIY plywood kitchen
By scottbr in forum FURNITURE, JOINERY, CABINETMAKING - formerly BIG STUFFReplies: 12Last Post: 20th January 2012, 05:16 PM -
2 Pac Kitchen - Finished at last!
By mag in forum WOODWORK PICSReplies: 6Last Post: 30th April 2006, 10:53 PM -
Finished No 10 !!
By ptc in forum BANDSAWN BOXESReplies: 7Last Post: 30th March 2006, 09:23 AM -
Add your kitchen site for free - Kitchen Directory
By renomart in forum Links to: WEB SITESReplies: 0Last Post: 18th February 2006, 06:30 PM
