

 Thanks: 0
 Likes:
  Needs Pictures: 0
 Picture(s) thanks:
Results 1 to 15 of 16
-
19th January 2023, 02:18 AM #1
 Be inspired. Be creative. Be bold.


- Join Date
- Apr 2001
- Location
- Perth
- Posts
- 10,831
 Laminating curved slats for a headboard
It was a bitter-sweet task to pull apart the old headboard ...
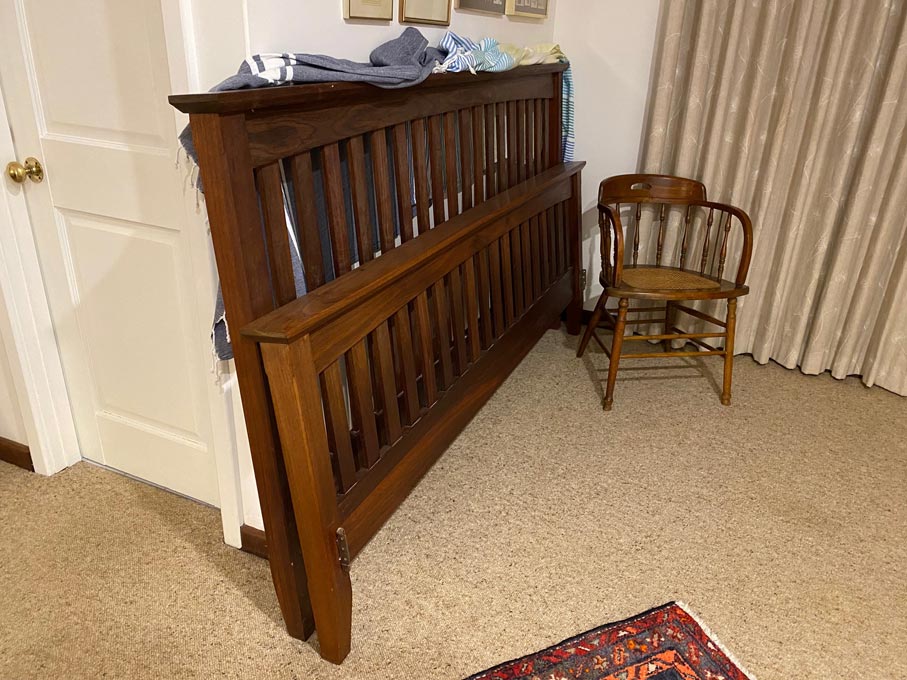
I recall making this, 25 years ago, in the 10 days my wife was away visiting her mother. I wanted it to be a surprise on her return. I got it done the night before her return ... sweating and swearing as I struggled to fit the slats into their mortices, align all, and pull together the glued mortice-and-tenon joints in this impossibly-heavy-for-one-person Jarrah beast. But there is no point in keeping it, and a lot of good Jarrah to re-use.
There are 13 x 12mm thick and 50mm wide slats ..
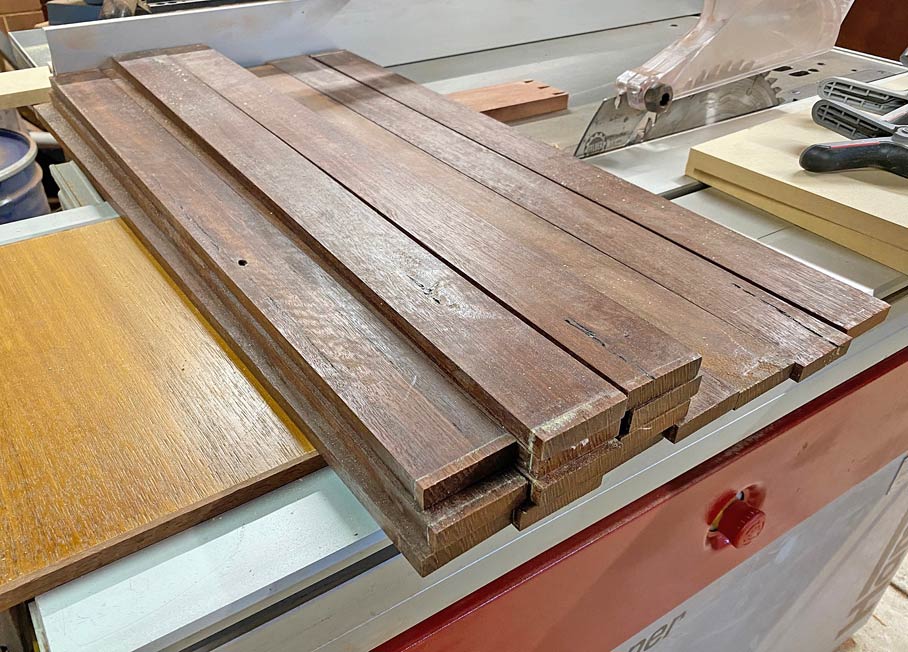
The plan was to re-saw them into three equal slices and then laminate them into a curve for the headboard ..
Each slice came out at a smidgeon over 3mm. This should end up about 9.5mm or 3/8".
The headboard is to be attached to the wall. It will have a mortice-and-tenon frame, with curved vertical slats. Where previously the slats were 50mm wide (for a Mission-style bed), these will each be re-sawn into two, making them around 24mm wide. There will be 26 slats in all, with the thinner slats now offering a more modern look.
The frame will be cut from the 100x100mm bed posts. The profile from the side is something like this (will be tweaked) ...
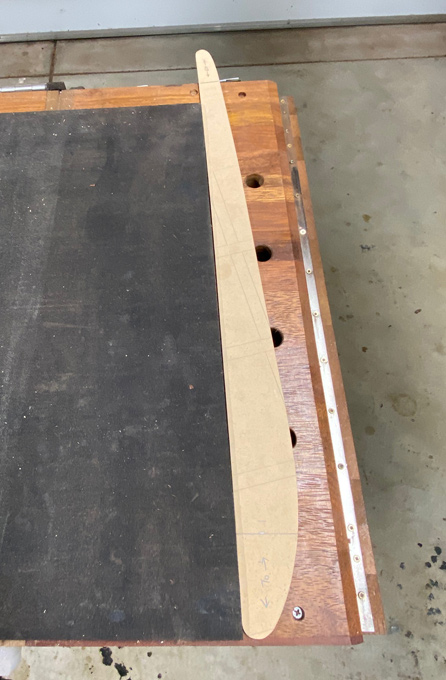
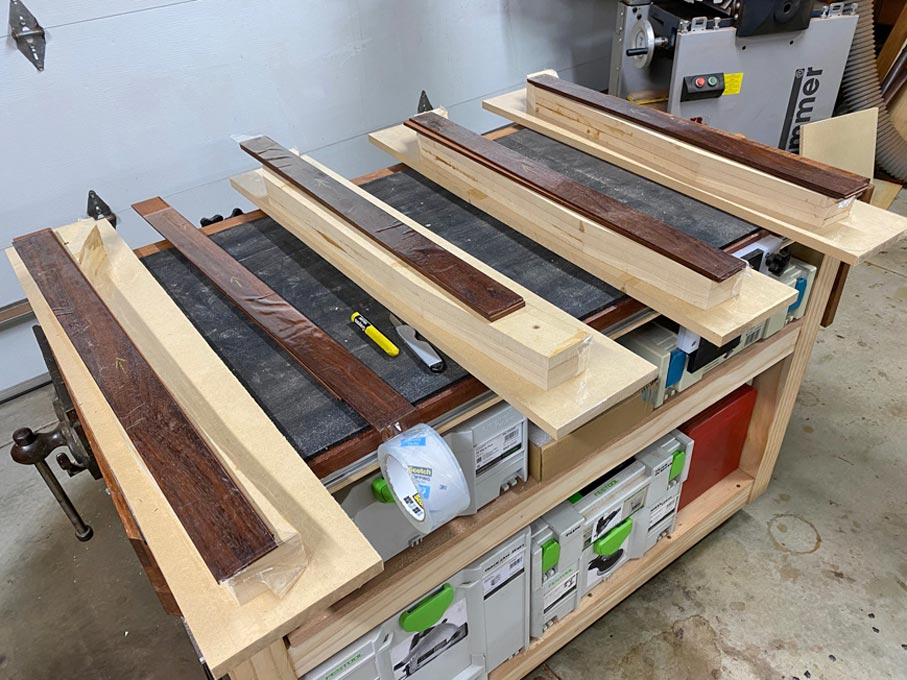
Making templates for bending ...
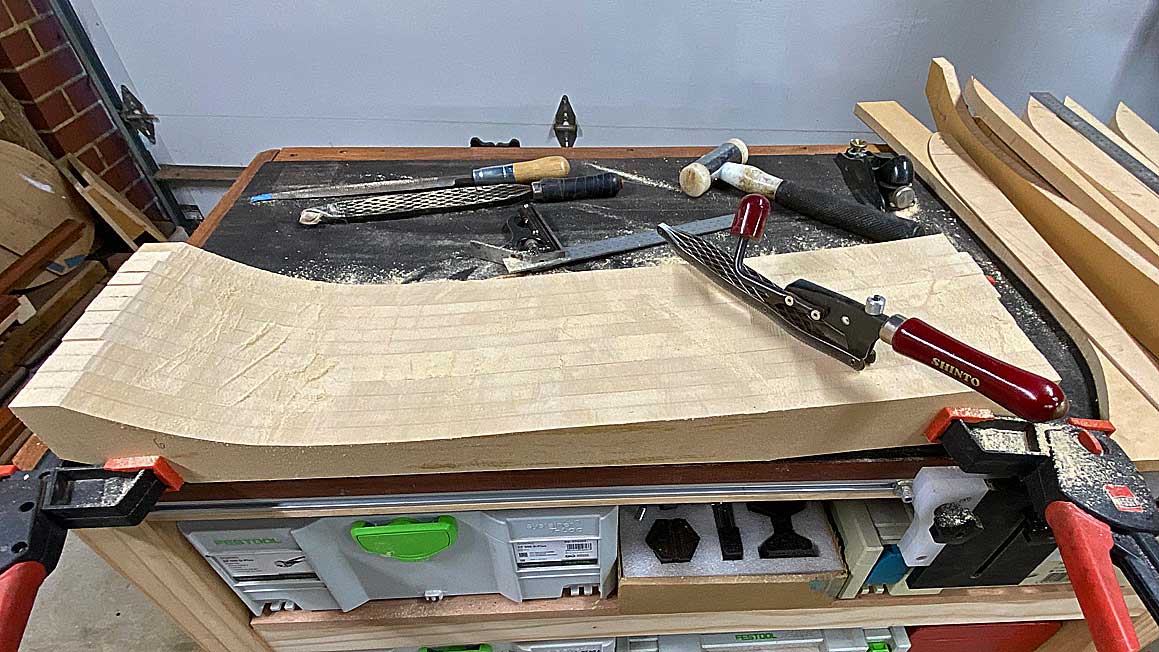
Each of the templates - there are 6 in all - are covered in packing tape for release, and screwed to a backing board to keep all square ...

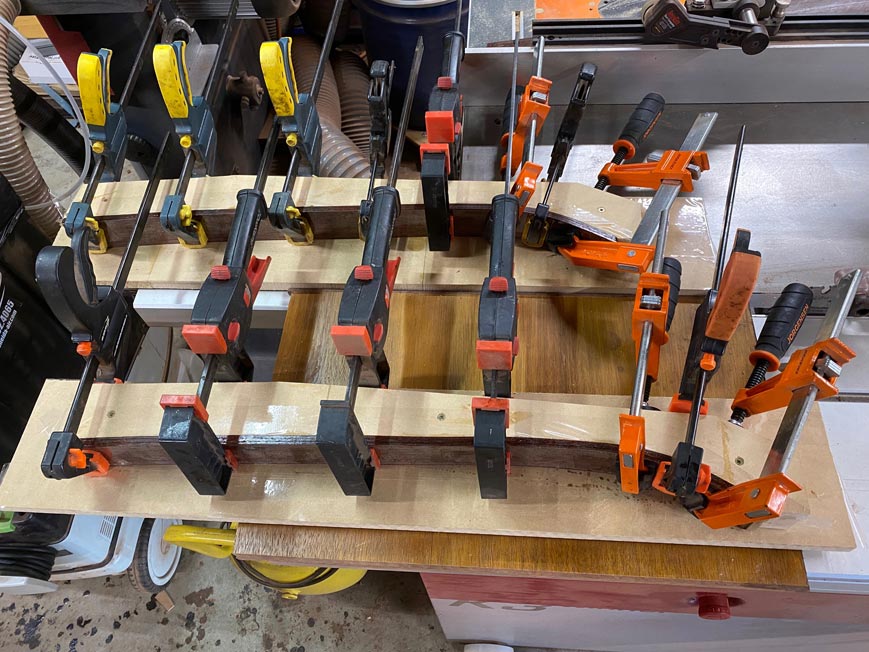
Even with 3mm sections, the combination is pretty stiff, but responds to clamping ...
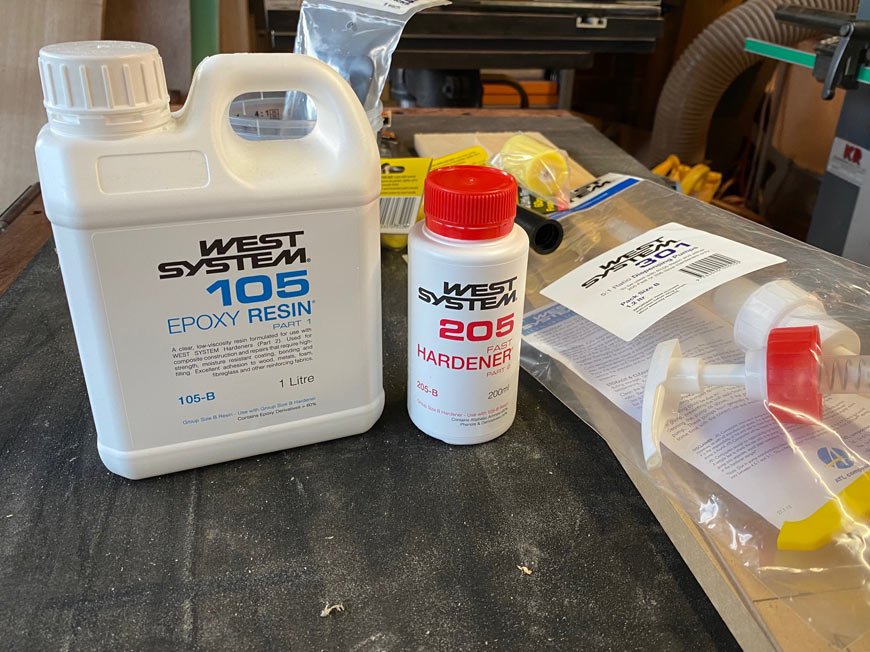
The plan is to glue using two-part West Systems epoxy. I think that epoxy is a better choice here than a glue such as Titebond as it will create a rigid setting, one with minimal springback. I am using the fast setting (8 hour) hardener as I have no desire to be doing this all for many days on end.
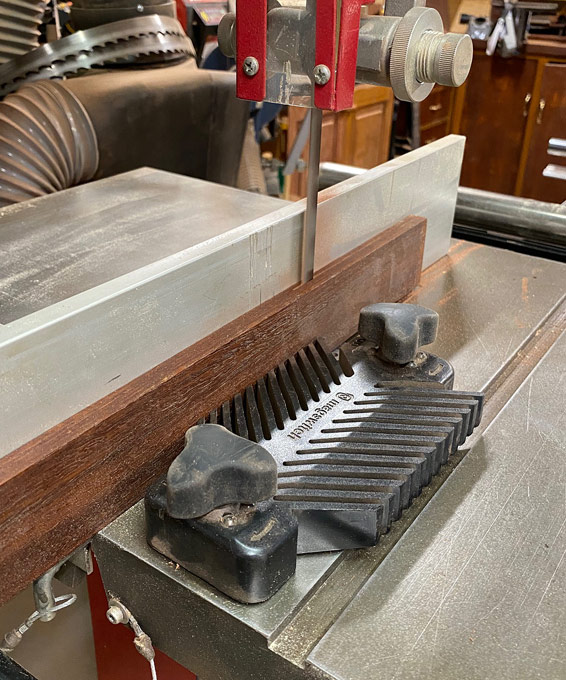
Now a question I have is in regard to the re-sawn slats: these are straight off the bandsaw and have not been planed or sanded. The leaves are too thin to send through a thickness-planer, and I do not have a thickness sander. The finish I have is decent insofar as the leaves are even in thickness and all appears straight. My plan is to add a dark brown tint to the epoxy, which should hide anything showing at the edges ...
Your thoughts on this? Is the tinted epoxy going to create a good finished section, or must the leaves be sanded?
Ready to go tomorrow ..
Regards from Perth
DerekVisit www.inthewoodshop.com for tutorials on constructing handtools, handtool reviews, and my trials and tribulations with furniture builds.
-
19th January 2023 02:18 AM # ADSGoogle Adsense Advertisement
- Join Date
- Always
- Location
- Advertising world
- Posts
- Many
-
19th January 2023, 06:42 AM #2
GOLD MEMBER
- Join Date
- Dec 2007
- Location
- Sydney
- Posts
- 2,211
Are you adding microfibre filler to the epoxy ?
If so the Jarrah shouldn�t need sanding.
Not sure I�d be adding any colour to the glue it might make the joint line more visible.
Epoxy makes things really slippery you might need end stops to keep it under control.
If you have excess stuff prepared I�d be expecting the first one to be experimental re colour, joint lines etc.
H.Jimcracks for the rich and/or wealthy. (aka GKB '88)
-
19th January 2023, 12:46 PM #3
Be inspired. Be creative. Be bold.
- Join Date
- Apr 2001
- Location
- Perth
- Posts
- 10,831
Thanks for the reminder of epoxy being slippery. It is 15 years since I laminated curves with it, and I recall now the �fun�.
The tinting is to disguise any serrations from the bandsaw. Now I think that the serrations will also help a little in preventing movement. Plus, the tint is colouring used for cement, which I have used forever. It has a little gritty feel, although is a fine powder, and this may help as well.
Regards from Perth
DerekVisit www.inthewoodshop.com for tutorials on constructing handtools, handtool reviews, and my trials and tribulations with furniture builds.
-
20th January 2023, 01:06 AM #4
Be inspired. Be creative. Be bold.
- Join Date
- Apr 2001
- Location
- Perth
- Posts
- 10,831
There were some concerned comments (on another forum) when I planned to laminate 6 of the slats without a test run. I reasoned that the slats had already been re-sawn (into three leaves, and at 3mm was the thinnest I was prepared to go), and this would either work, or not. If it did not - too much springback - then I would just start again.
There was also concern that I chosen the 205 "fast" hardener but, as I mentioned to Keith and William (below), I was after a faster cure time. I felt that I could work with the pot life time.
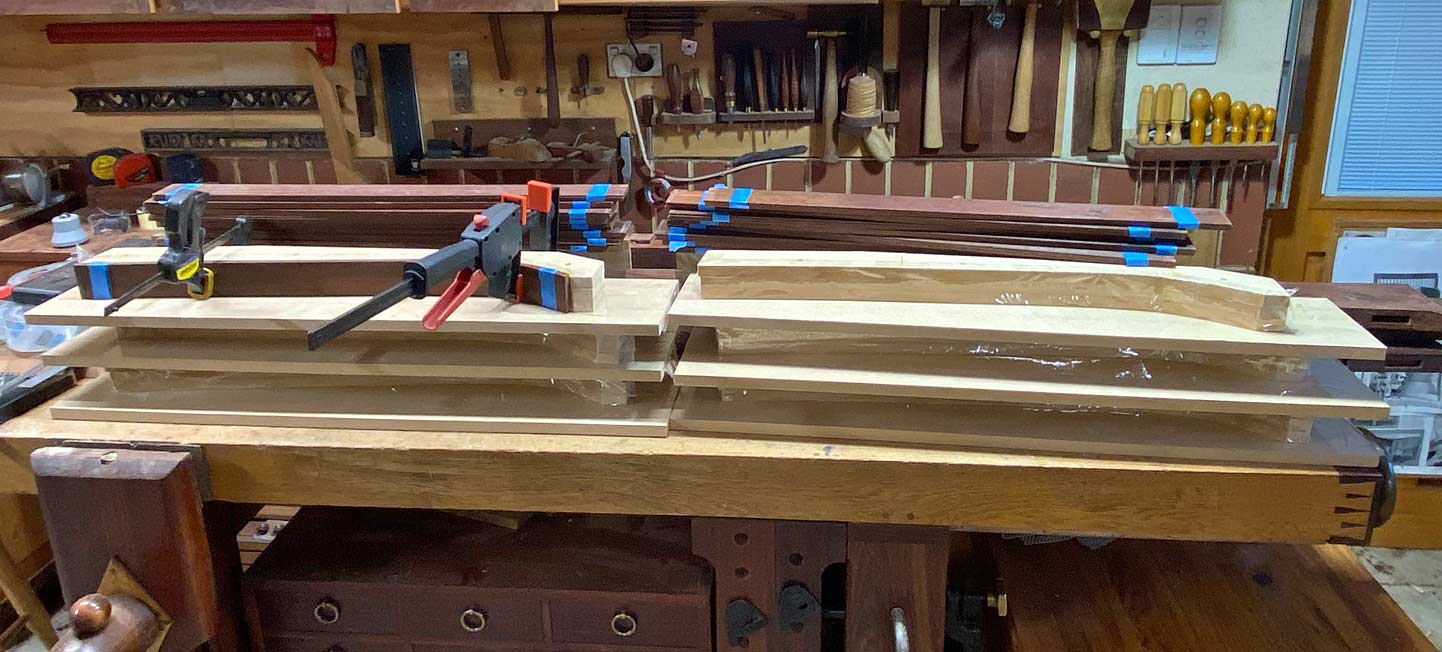
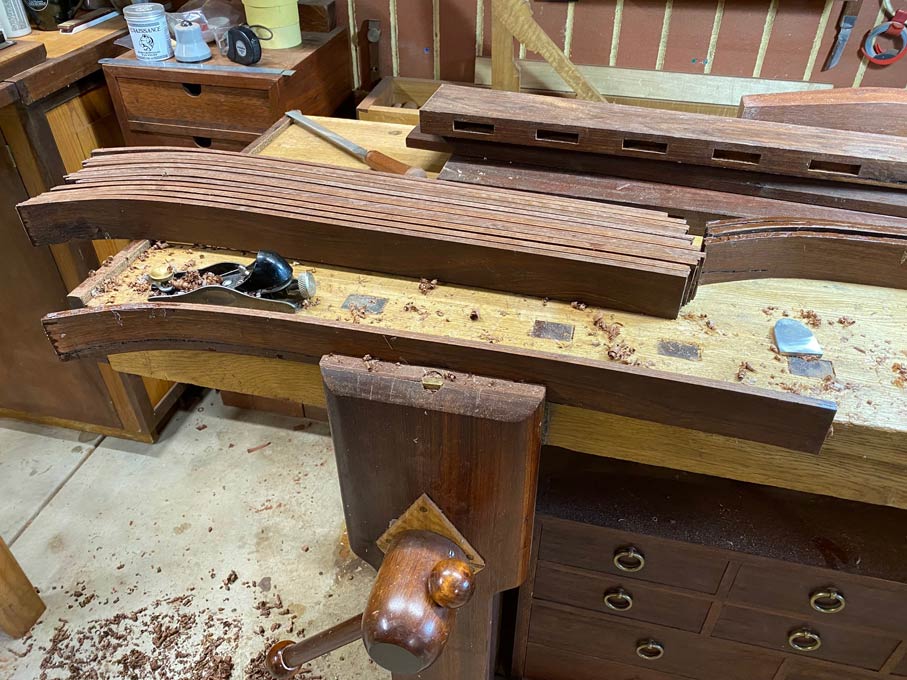
There were a few preparations, such as creating the formers, getting all the small clamps together, and readying the epoxy. One last tactic was to add packing tape to the front and back of the slats ...
The pump is useful for small amounts, and it went smoothly. After a thorough mixing, I added a tiny amount of brown oxide to colour the mixture. The epoxy was rolled on thinly to all inner surfaces. The work area ...

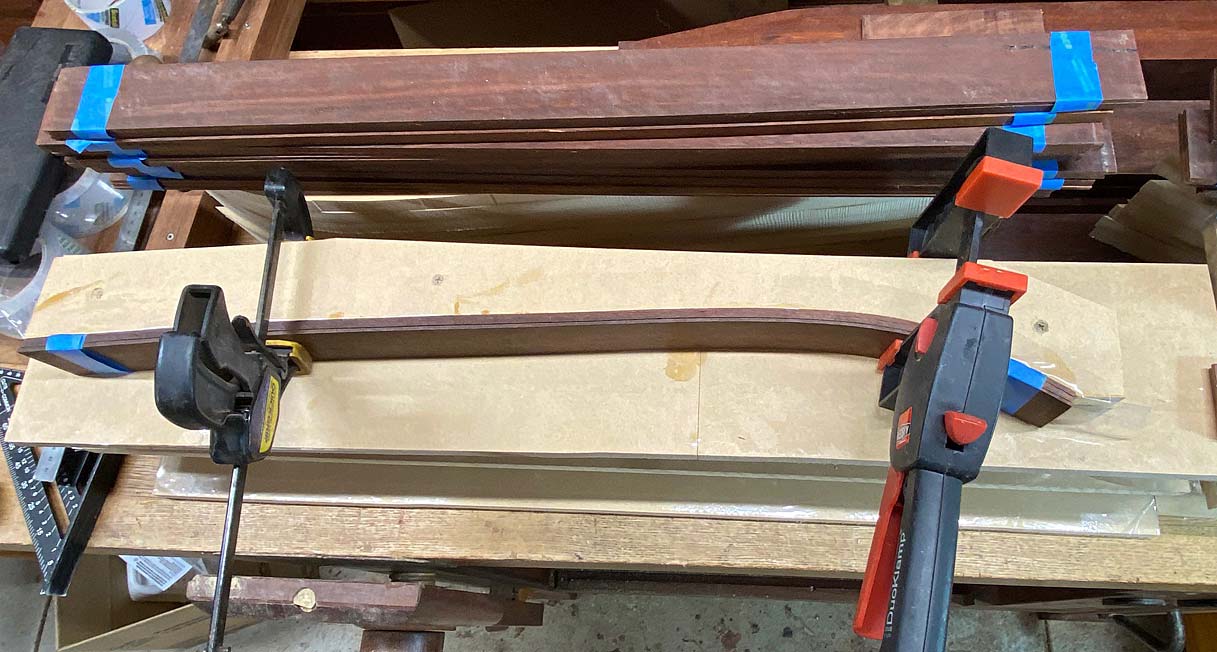
Originally, the plan called for cauls, but in the end I found that they did not exert sufficient even pressure, and wound up using many small clamps ...

Six was the maximum it was possible to laminate as I ran out of work surfaces ...

I began mid-morning (I am still on leave), and by late afternoon I decided to remove 4 of the slats as the epoxy was hard. The first two ...
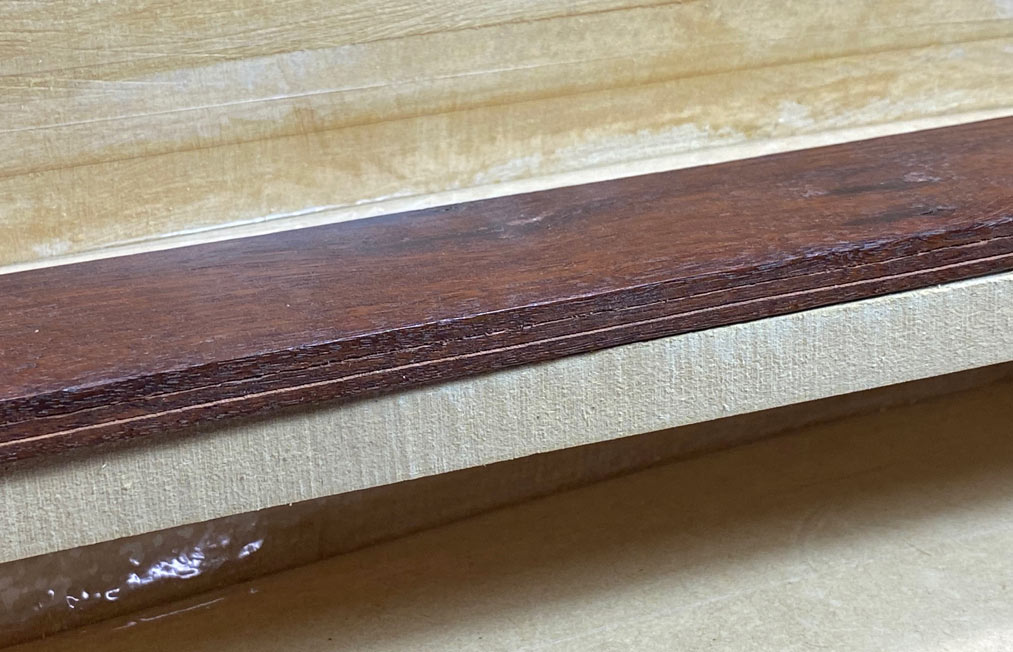
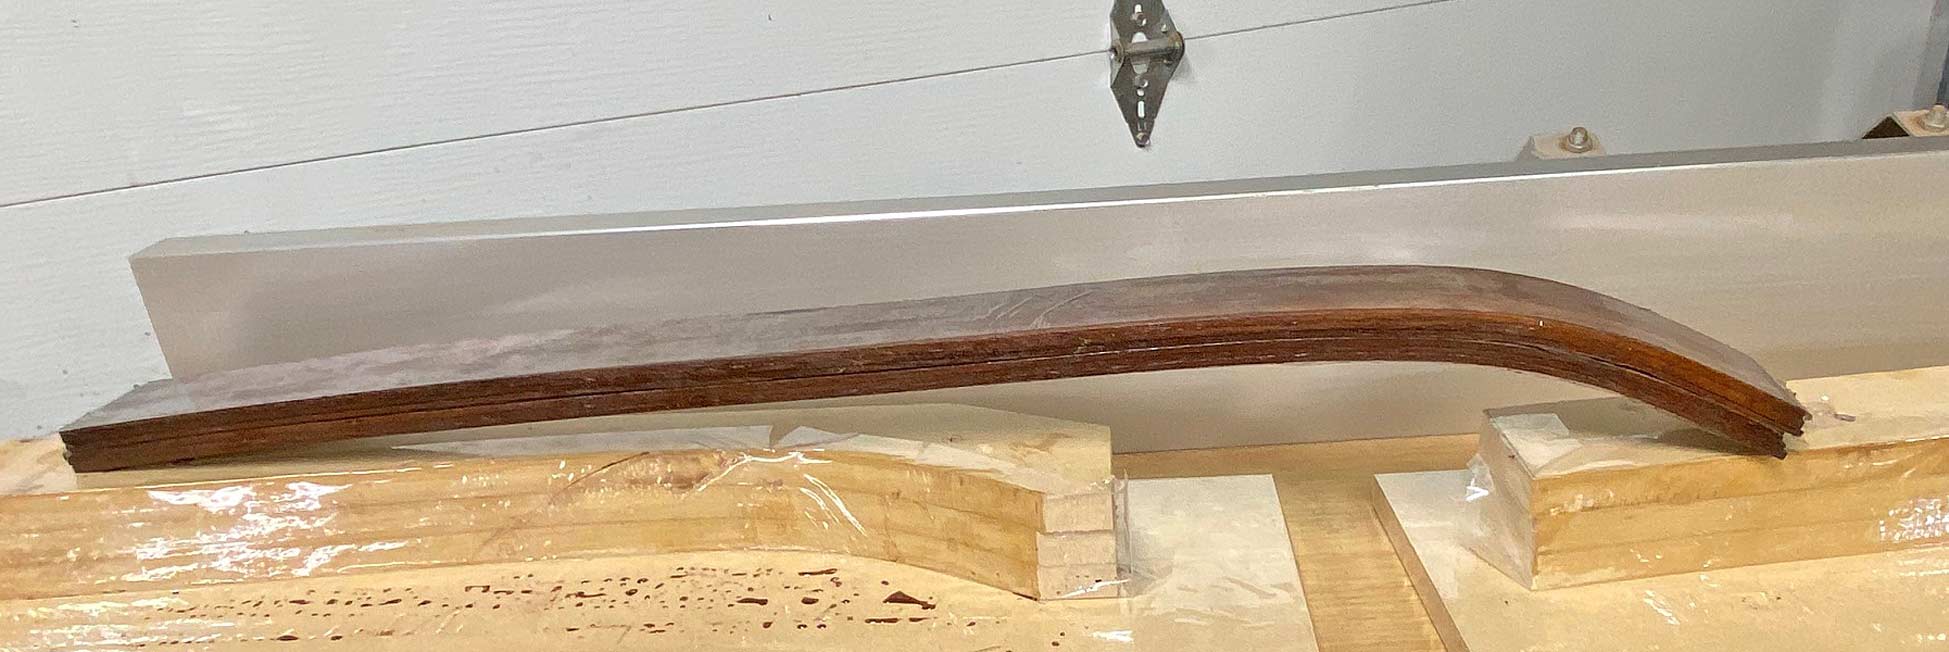
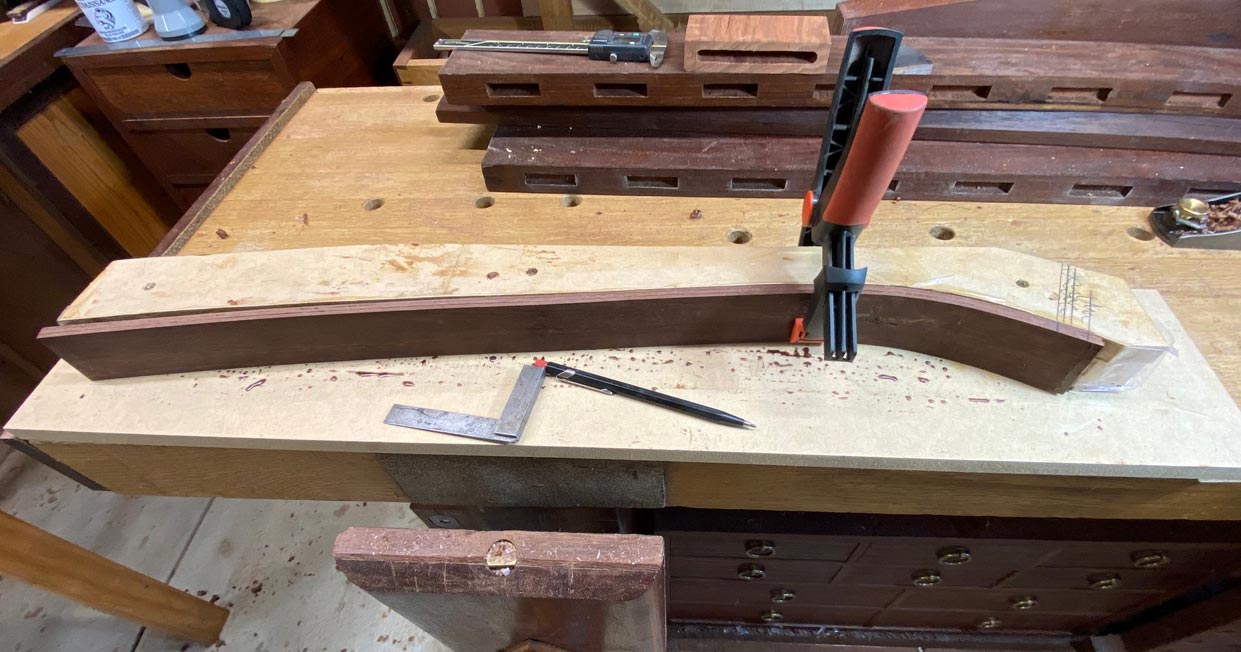
There was 1mm, at the very most 2mm springback at the tightest section of the curve. Very happy with this.
Here are two slats on top of one another ...
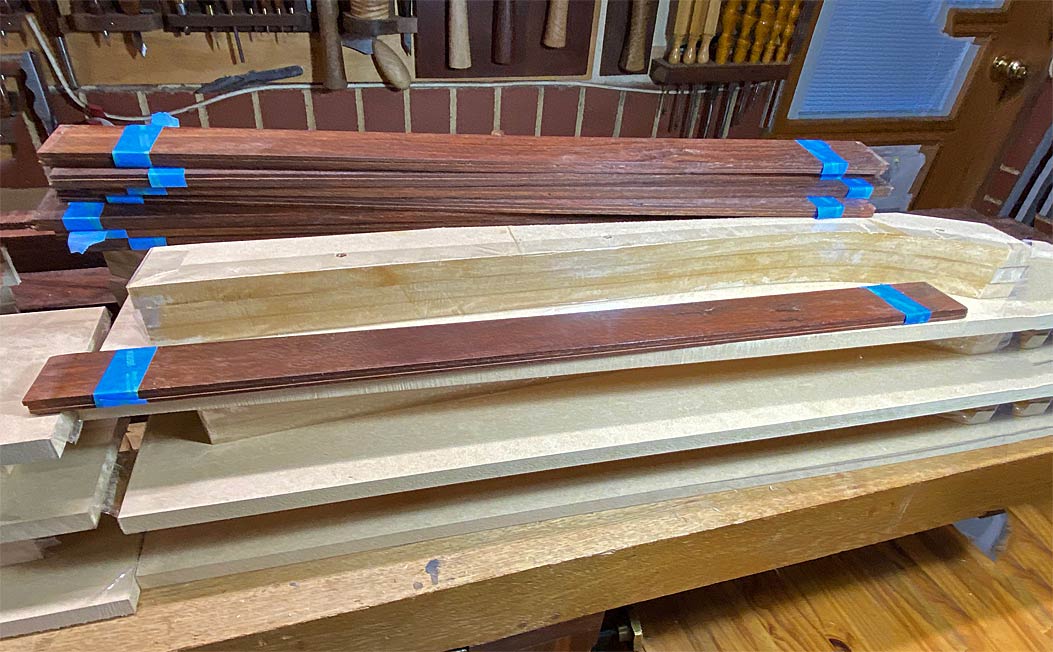
All went in square and has come out square ...
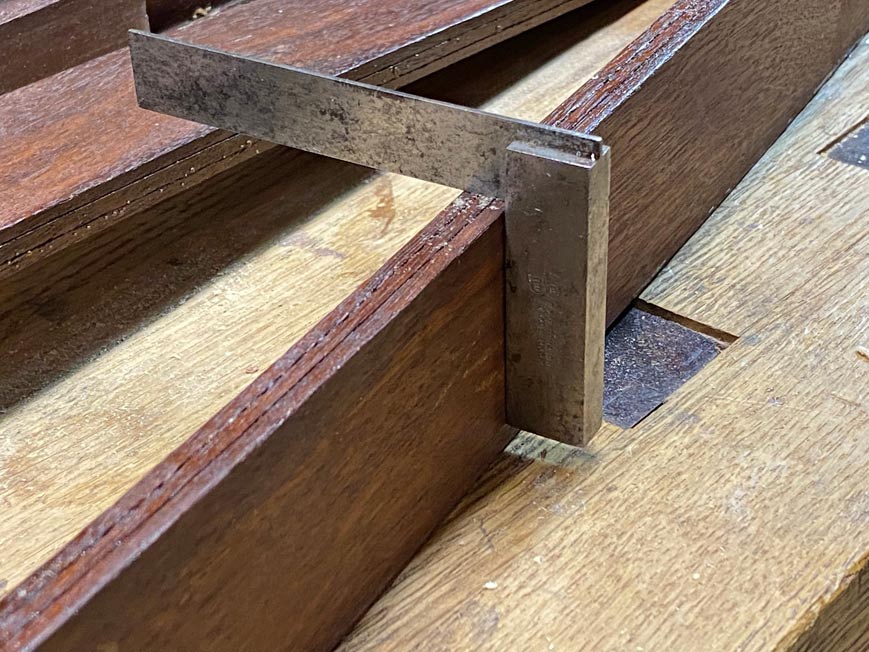
Four slats alongside each other. Any variation is likely due to the sections being set in the formers slightly differently ...
There are 4 more slats to add to these, and 5 left to lay up.
Regards from Perth
DerekVisit www.inthewoodshop.com for tutorials on constructing handtools, handtool reviews, and my trials and tribulations with furniture builds.
-
20th January 2023, 07:31 AM #5
SENIOR MEMBER
- Join Date
- Jun 2007
- Location
- Blue Mountains
- Posts
- 817
Are you intending to add a round over to the edges? If you make it 3mm radius, it will meet at the glueline. I�ve seen this done to disguise the join before. That�s a largish roundover for pieces that thickness and may not be the look you�re going for, but it could work.
I am enjoying seeing the remodel of a much loved piece, giving it new life.
cheers,
ajw
-
20th January 2023, 04:06 PM #6
 GOLD MEMBER
- Join Date
- Apr 2006
- Location
- Hobart
- Posts
- 5,140
I was going to post, Derek, but you got stuck into it too quickly � sorry. I have done a bit of laminating, not with jarrah, and my technique would have been a little different from yours.
Laminated Joint.JPG Laminated celery top pine - lap joint.
A tight glue joint is essentially invisible, so you don�t need anything in the glue to camouflage the joint and you do not want anything that will make it more visible. In the above example, both my stile and rail are laminated from 3 mm CTP. In your case I would have done it as follows:
Thicknessing. A 0.3 mm variance in 3 mm laminates is 10% and that is visible to you and I, but not others, and any other irregularities will open the glue line and make it more visible. I would thickness those laminates on sled. The stop must be thinner than the laminates and no screws; you can stabilise 6 laminates on the sled with a couple of pieces of two sided tape cross-wise.
Vacuum Bag. I use a Ezivac kitchen vacuum � commonly used for freezing stuff and kid�s lunches.
Ezivac - Quality Italian made Vacuum Packing System | Nature's Wonderland � and it really keeps laminates together and corrals squeeze out = no mess.
Glue Up. I like WEST System but prefer their slower #206 hardener � reduces time pressure. Enemy of epoxy is dry joints. I put an even coat of epoxy on each surface, wait 5 minutes for it to soak in, then roll a third coat onto one surface and join together and align carefully. Then put them in the vacuum bag, finger align again, and ensure bag not creased and laminates stay aligned as vacuum builds. Then seal.
Molding Form. I get best results bending from the most curvaceous end, progressively clamping. Often only three clamps needed with light pressure � both ends and just past the widest point. The vacuum bag holds the laminates together rather than the clamps. Leave overnight � a little spring back will occur.
-
20th January 2023, 04:47 PM #7
Be inspired. Be creative. Be bold.
- Join Date
- Apr 2001
- Location
- Perth
- Posts
- 10,831
Thanks Graeme. And that's a beautiful job. I'd like to see more of your chair(s).
The reason for my adding colour to the epoxy is that this is to try and hide any serrations from the bandsaw. The leaves are straight off the bandsaw and not planed or sanded. This is due to working with the existing Jarrah slats, which are very dry and brittle. The leaves are 3mm and liable to explode. I would have treated this differently with different wood. We shall see how it turns out. The worst that can happen is that I re-do it all.
It is obvious, I assume, that I am not set up for laminating wood, although I do have quite a bit of past experience with epoxy resin (embalming ex-wives for posterity ... no, repairing windsurfers and surfboards).
Regards from Perth
DerekVisit www.inthewoodshop.com for tutorials on constructing handtools, handtool reviews, and my trials and tribulations with furniture builds.
-
20th January 2023, 05:33 PM #8
Be inspired. Be creative. Be bold.
- Join Date
- Apr 2001
- Location
- Perth
- Posts
- 10,831
 Originally Posted by ajw

Thanks AJW
It did cross my mind, particularly as there was a chance I could use a Domino to make the mortices. However, I plan to keep the sides square, partly for the design and partly as the laminations will be less likely to be seen.
Regards from Perth
DerekVisit www.inthewoodshop.com for tutorials on constructing handtools, handtool reviews, and my trials and tribulations with furniture builds.
-
20th January 2023, 09:19 PM #9
GOLD MEMBER
- Join Date
- Apr 2006
- Location
- Hobart
- Posts
- 5,140
Thank you, Derek. I find it hard to show off my work - I never like a piece when finished as I know all the bits that others cannot see although I usually soften after 6-9 months. The section in the photo was actually a detail from a book stand - joint is arrowed. My wife, a retired academic who reads incessantly, now has medical issues and cannot hold the weight of a book for very long. The book stand holds a book in a comfortable reading position while she is seated in her favourite arm chair. Originally Posted by derekcohen
IMG_0994 - 2.jpg Angela's Book Stand - Laminated Celery Top Pine
I was careful to qualify that I had never worked with Jarrah, and I do appreciate the difficulties with brittle salvaged timbers. However, my inclination would have been to make the joints invisible rather than to camoflage them. Thicknessing out, then block plane or even sanding those pesky kerf lines. But I was not on site!
PS: If you have not tried a kitchen vacuum machine ..... they are even more useful in the workshop than the kitchen - and inexpensive.
-
21st January 2023, 11:18 AM #10
Class Clown
- Join Date
- Nov 2005
- Location
- Darkest NSW
- Posts
- 3,209
I've seen people soaking the strips, clamping all of them together in the form, and allowing to dry - then proceeding with the gluing steps? Apparently this lets the strips take up some of the final shape before you glue up? Might be beneficial for particularly tight curves?
I've always used a drum sander to get strips down to about 2mm thick and smoother surfaces, but your bandsaw does a better job than mine so further surface prep may not be justified.
West System with the slow curing hardener for me, every time.
-
21st January 2023, 03:31 PM #11
Be inspired. Be creative. Be bold.
- Join Date
- Apr 2001
- Location
- Perth
- Posts
- 10,831
Graeme, don't be shy to show off your work. That is incredibly complex - well beyond me.
Regards from Perth
DerekVisit www.inthewoodshop.com for tutorials on constructing handtools, handtool reviews, and my trials and tribulations with furniture builds.
-
21st January 2023, 03:34 PM #12
Be inspired. Be creative. Be bold.
- Join Date
- Apr 2001
- Location
- Perth
- Posts
- 10,831
Some will pre-bend strips, especially hard woods. Originally Posted by Mr Brush
As I mentioned, I am not set up for laminating, and am surprised/gratified that it has turned out well. I'll post photos a little later. A drum sander would have been nice!
Regards from Perth
DerekVisit www.inthewoodshop.com for tutorials on constructing handtools, handtool reviews, and my trials and tribulations with furniture builds.
-
21st January 2023, 04:37 PM #13
GOLD MEMBER
- Join Date
- Apr 2006
- Location
- Hobart
- Posts
- 5,140
I have tried this and have also tried steam bending. The difficulty is that you have to allow the battens to dry thoroughly before using epoxy and then you have to re-align the curves precisely - a tiny misalignment causes the laminates to spring apart a little. Frustrating! Originally Posted by Mr Brush
A far easier solution is to make the laminates thinner. Then they will take a sharper curve.
-
22nd January 2023, 03:42 AM #14
Be inspired. Be creative. Be bold.
- Join Date
- Apr 2001
- Location
- Perth
- Posts
- 10,831
How did the slats turn out?
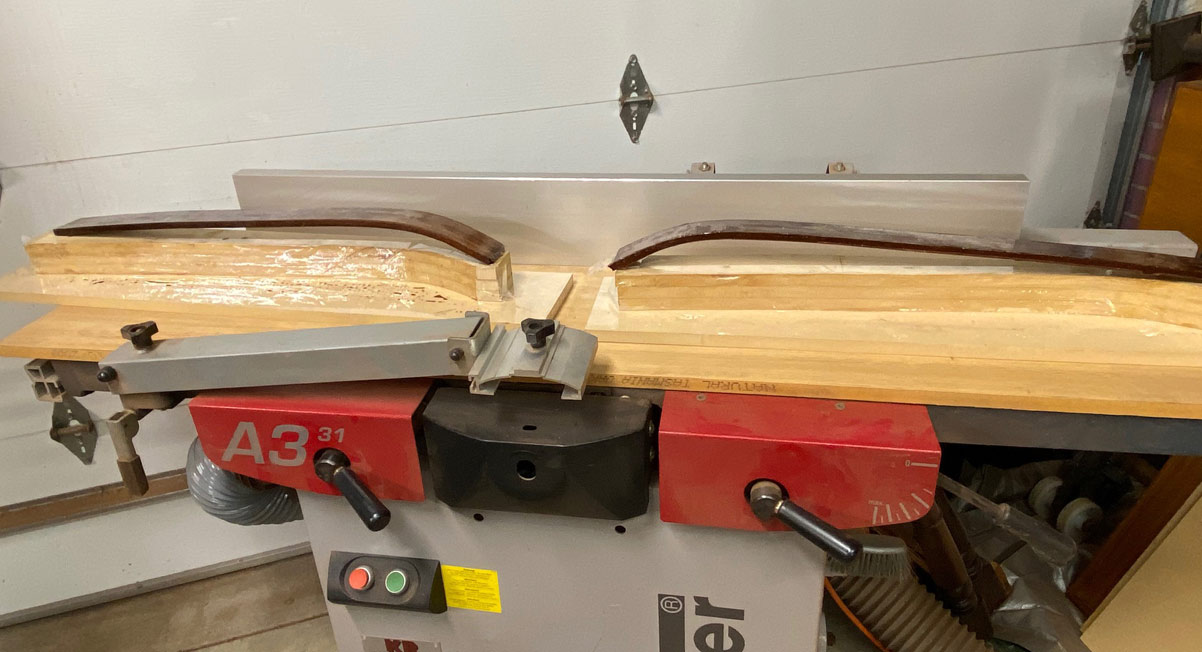
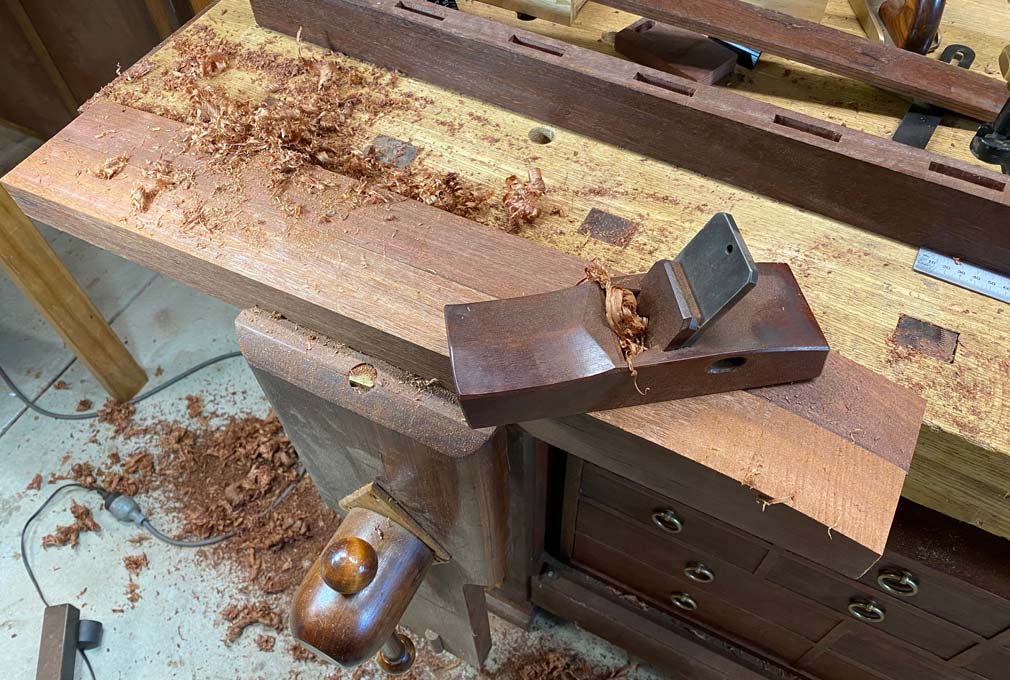
Out of the formers, the edges are planed with a block plane to remove the excess epoxy ...
The edges were then jointed and thicknessed. The resulting edges show few signs of laminations and are straight and square edged.
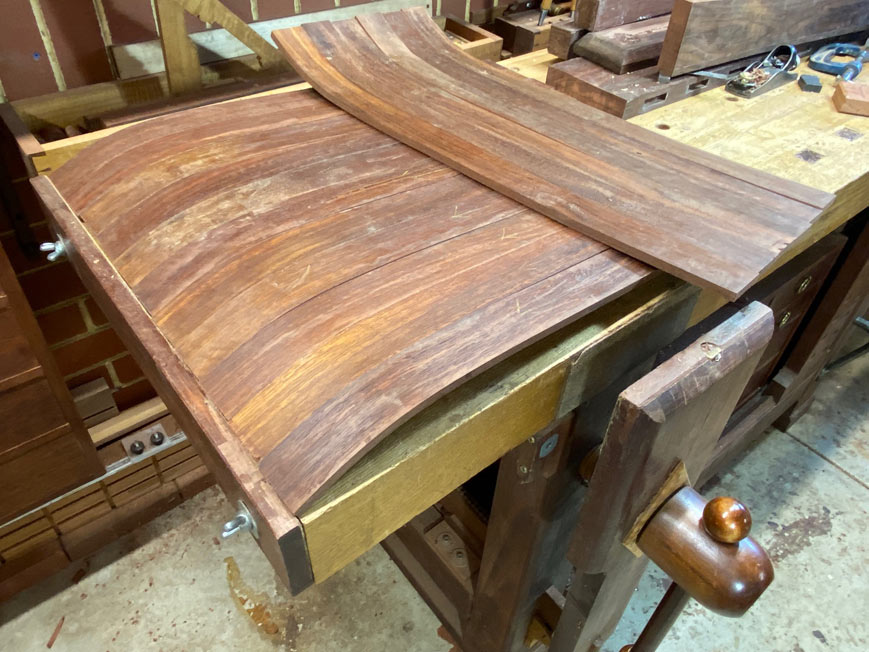
Then returned to the former to mark off the dimensions ...
The aim here was to centralise around the deepest part of the bend. What is important .. vital ... is that the curve of each slat matches up.
The ends are cut off ..

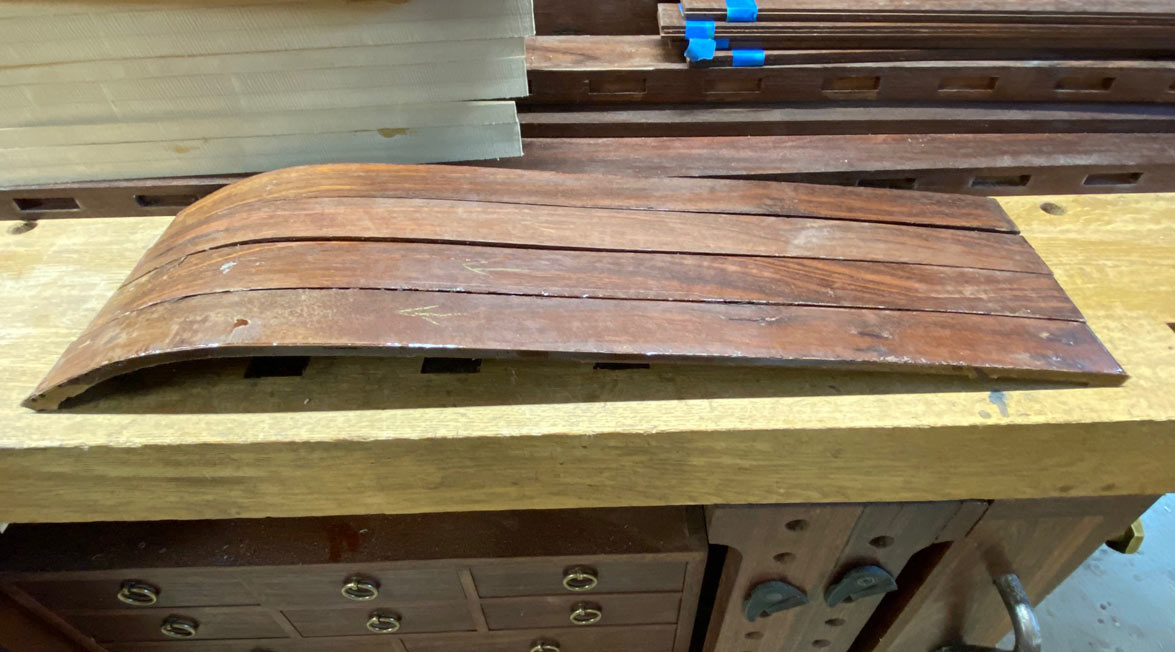
I thought I would try and line them up vertically to check whether the curves matched ...
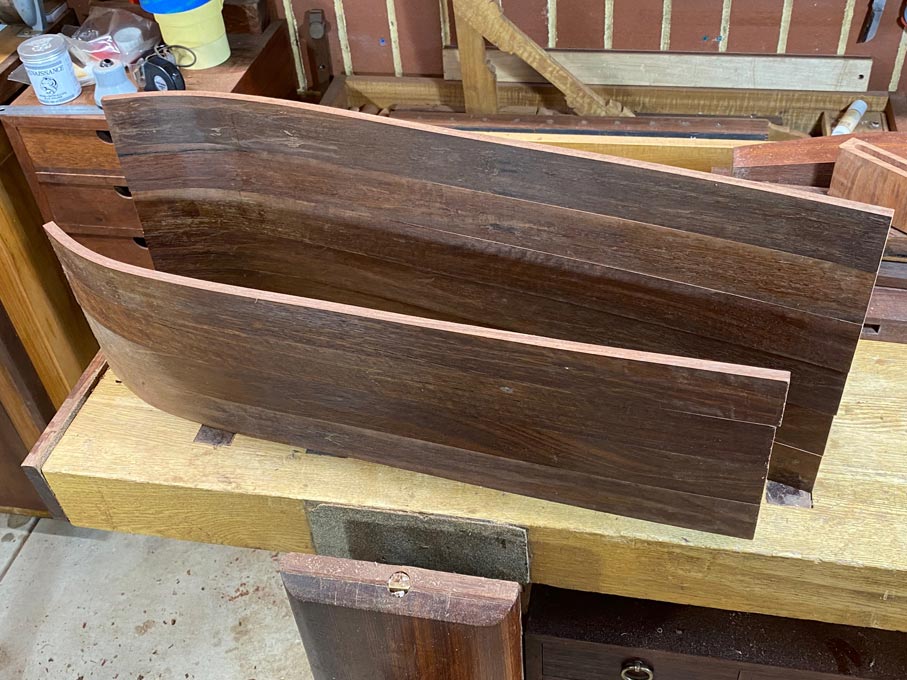
But this kept falling over. So here they are lying down (where they cannot fall over) ...
Good enough?
Regards from Perth
DerekVisit www.inthewoodshop.com for tutorials on constructing handtools, handtool reviews, and my trials and tribulations with furniture builds.
-
24th January 2023, 01:16 AM #15
Be inspired. Be creative. Be bold.
- Join Date
- Apr 2001
- Location
- Perth
- Posts
- 10,831
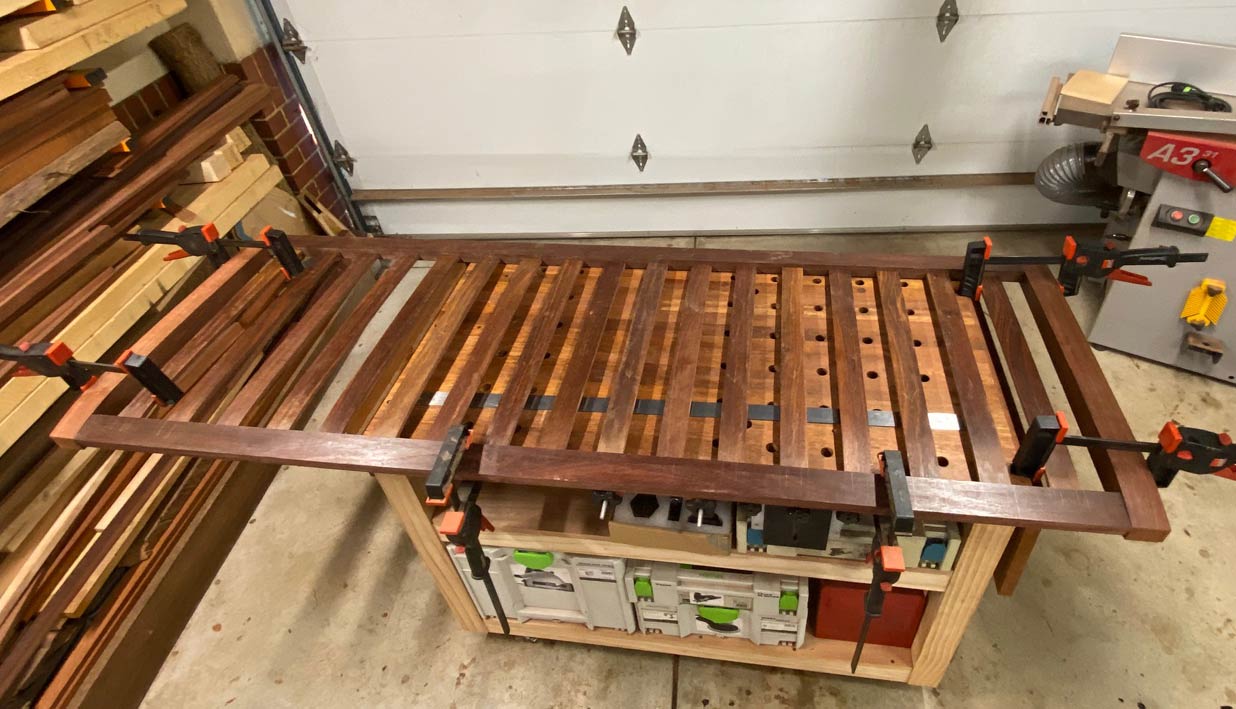
It's beginning to look like a headboard!
We left off with 17 curved slats for the headboard build ..
The goal is to build a kingsize headboard, which will be attached to the wall. I shall come back to this at the end.
The Jarrah is salvaged from the previous headboard, and two side posts (55x55mm) and and an upper- and lower rails (55x30mm) have been cut to size. The rails are to be morticed to fit the curved slats.
The Gods were smiling on me as the laminated slats come in at as close to dammit to 10mm in thickness. This makes it possible to use the Domino as a morticer once again .... which is a win as this Jarrah is particularly hard stuff.
I decided to work on my bench, rather than the MFT, as the light was better to see the fine joinery lines.
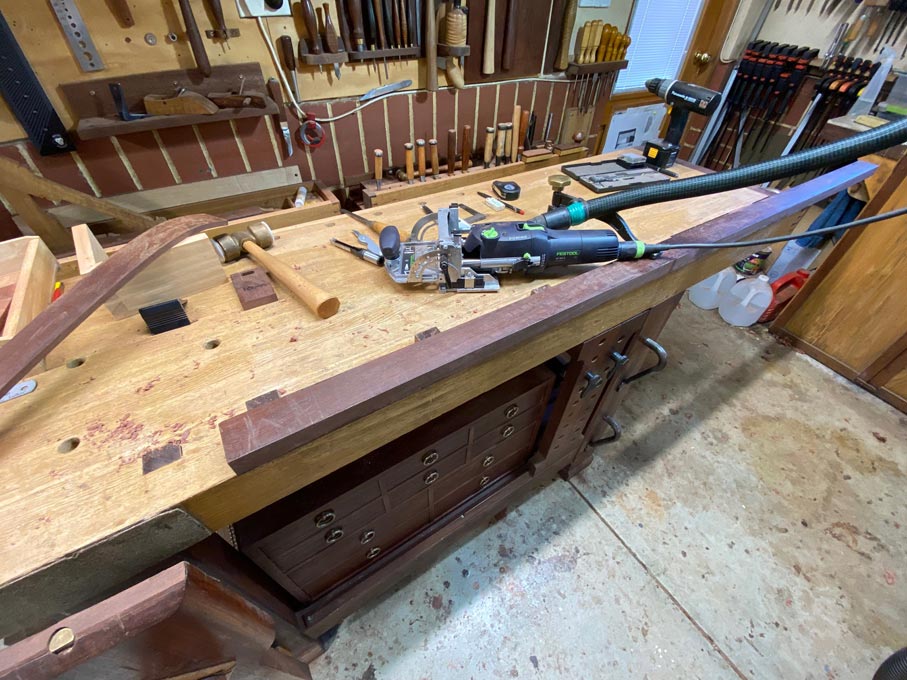
I have hooks attached to the ceiling to keep hoses and cords out of the way ...

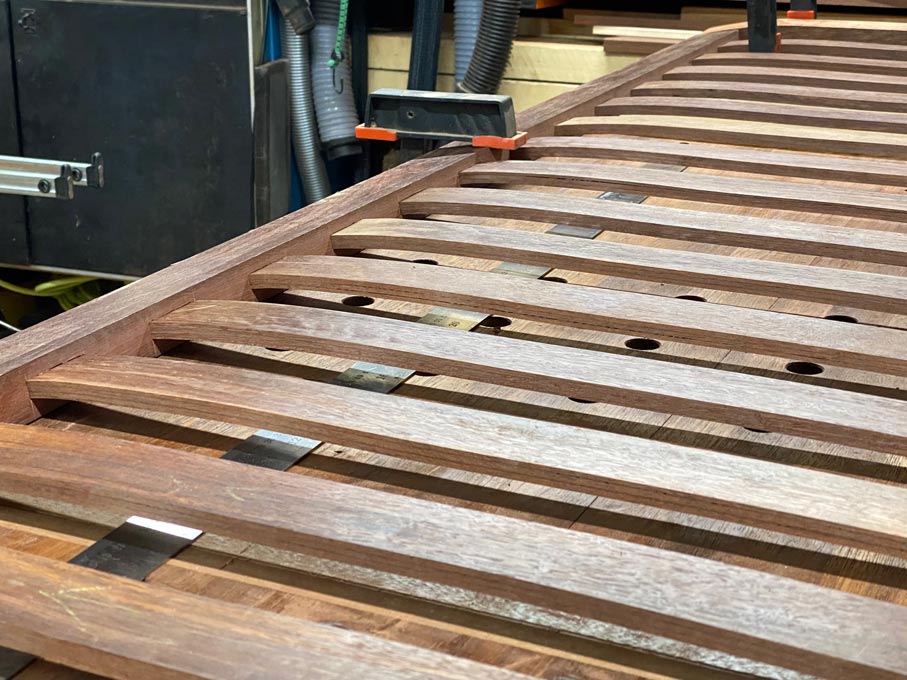
Careful marking out creates 17 x 50mm wide mortices on each rail ...
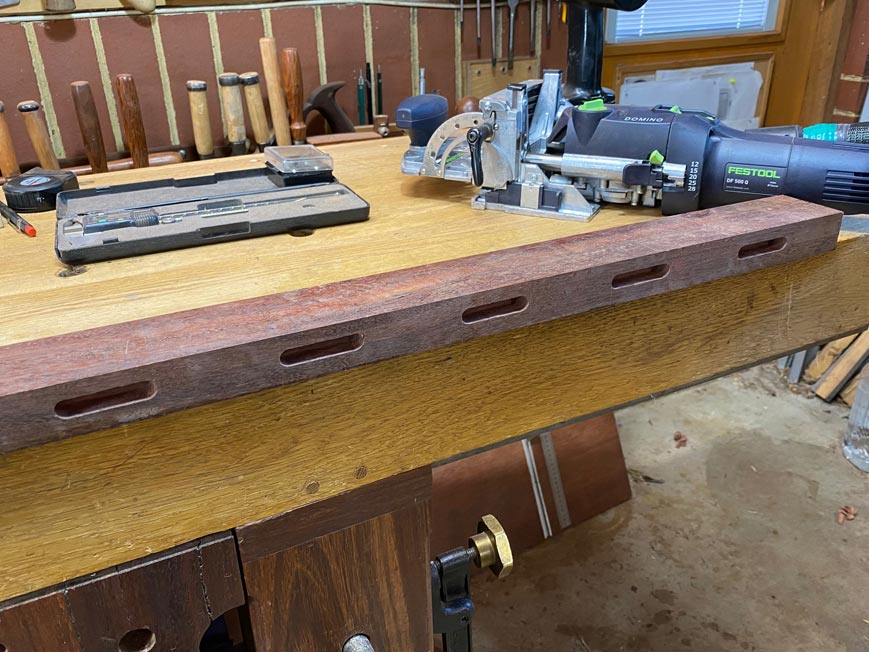
A close up of one mortice. Note that the scribed outline is important. Also is the morticing just inside these lines ...
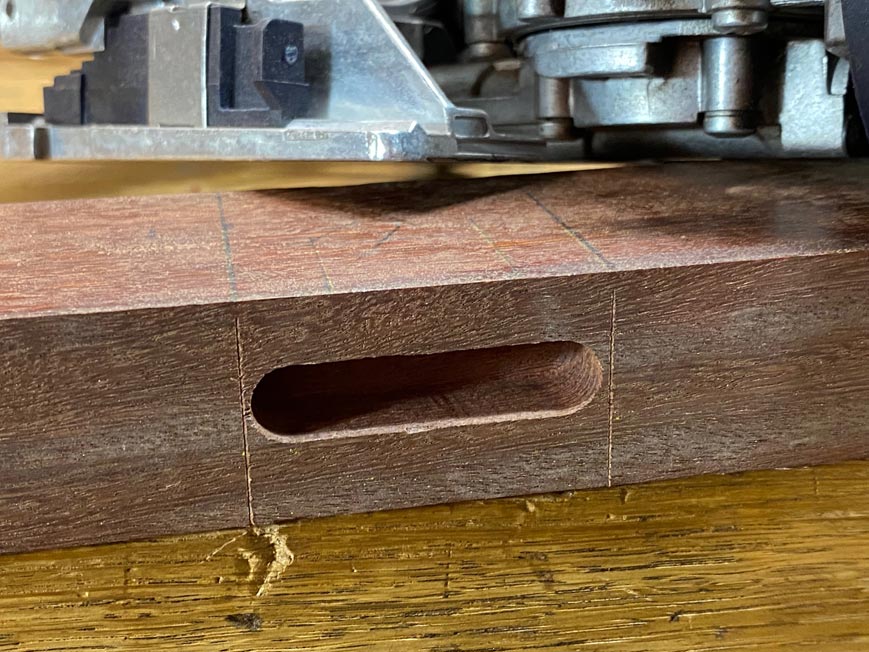
I purchased cheap hollow mortice chisels in different sizes. This one is 10mm, a perfect match for the 10mm Domino-made mortice ...

The side posts are shaped to match the profile of the slats. First cut out on the bandsaw, then shaped with a handplane ...
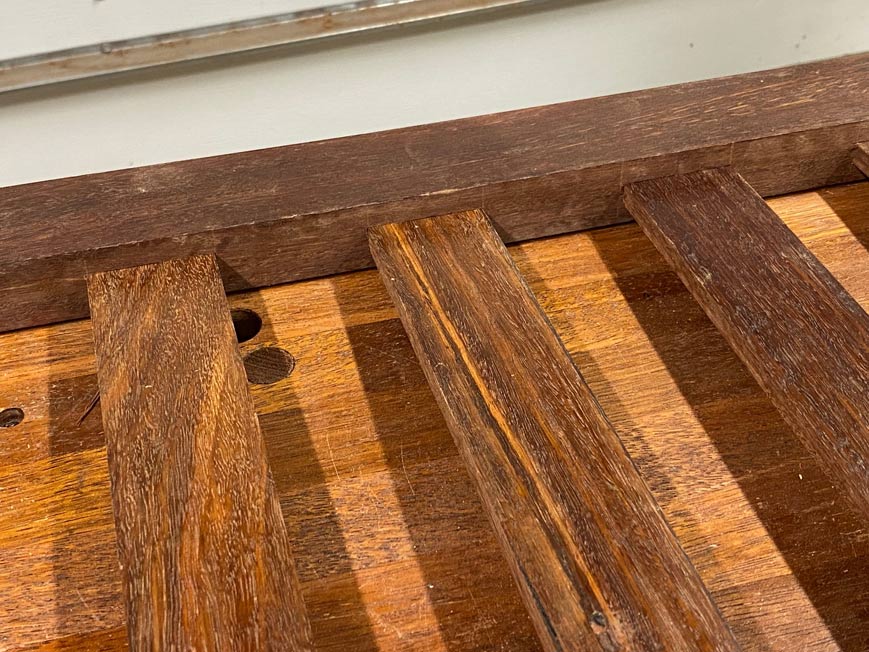
A dry fit of the slats into the rails ...
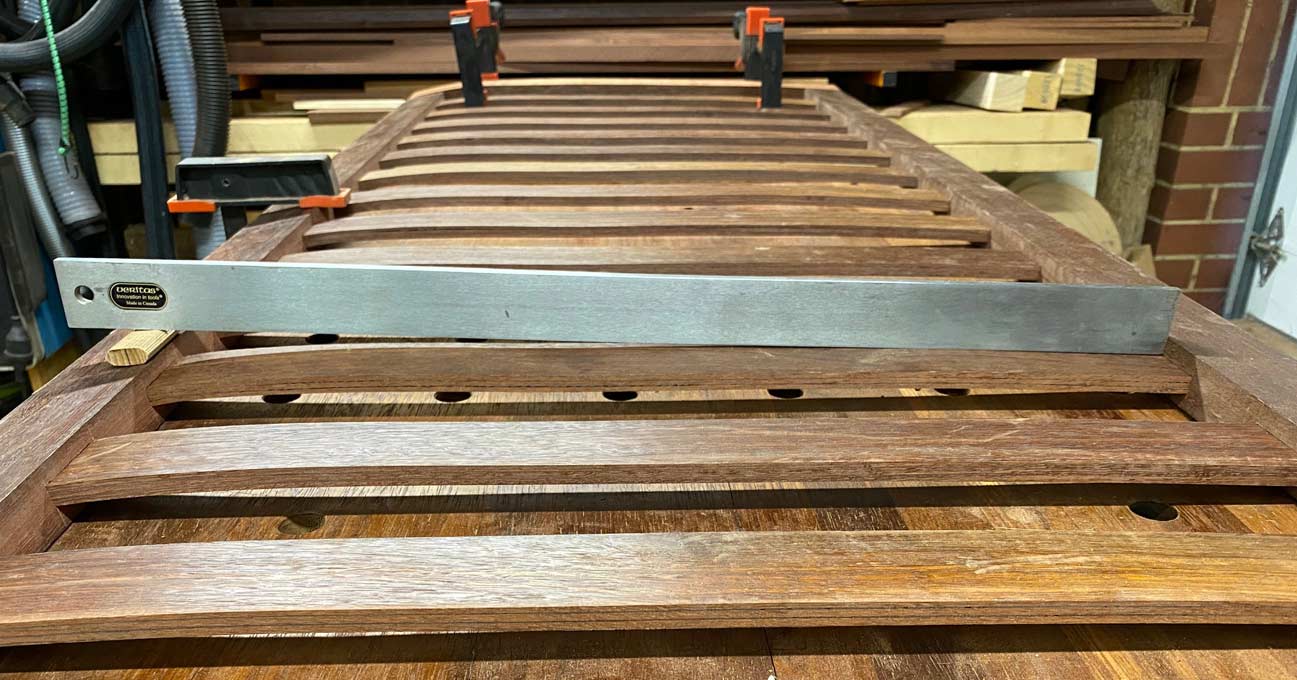
Now I decided that the curve at the lower end of the rails was too extreme, and shortened the slats at that end. This created a more gentle curve. See the profile of the post below ...

This is the amount of curve now ...
Back to work tomorrow, so the remainder will get done on the weekend: morticing the rails into the posts, and blending the profiles with hand planes. Then planing slight chamfers, breaking edges, and adding a finish.
Question for all: how to attach the headboard to the wall? Would you use a french cleat, or key holes? Or something else?
Regards from Perth
DerekVisit www.inthewoodshop.com for tutorials on constructing handtools, handtool reviews, and my trials and tribulations with furniture builds.


 Reply With Quote

Similar Threads
-
I need some curved bed slats
By Arron in forum WOODWORK - GENERALReplies: 17Last Post: 24th November 2022, 08:33 AM -
Headboard
By fozzy767 in forum WOODWORK PICSReplies: 3Last Post: 1st October 2014, 08:58 AM -
How to flatten curved bed slats
By Dengue in forum WOODWORK - GENERALReplies: 17Last Post: 20th April 2012, 11:10 AM -
Laminating curved arch
By Tav in forum FURNITURE, JOINERY, CABINETMAKING - formerly BIG STUFFReplies: 4Last Post: 20th March 2011, 03:46 PM -
how would I carve a curved hole into a curved piece of wood?
By ane in forum WOODWORK - GENERALReplies: 1Last Post: 22nd February 2010, 07:30 PM
